Chrome tips not lost after all!
#1
 05-19-2012, 12:21 AM

I had some time to kill so I decided to see if I could save my exhaust tips.
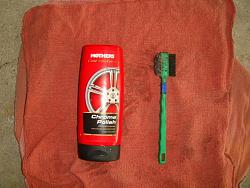
Tools used -
Several shop towels
Mothers Chrome Polish
Small Wire Brush
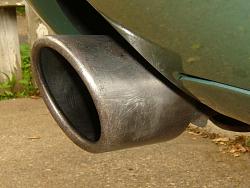
This is what they looked like before I started.
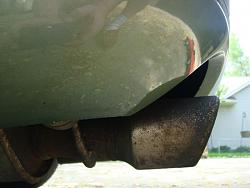
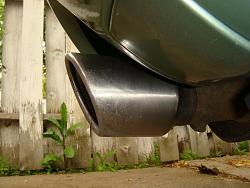
First I used the wire brush to remove much of the burnt on crust.
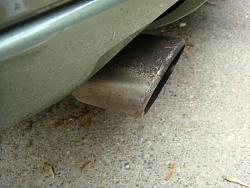
Then I started with the chrome polish. A few minutes later this is what I had.
More polishing and about 20 minutes later it was looking good.
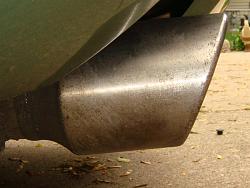
I kept going for another 15-20 minutes and I'm getting close.
A little while later and I'm done for now.
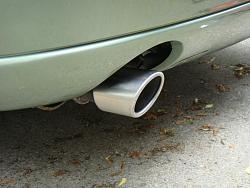
I'll keep polishing from time to time until I get them looking like mirrors.
Tools used -
Several shop towels
Mothers Chrome Polish
Small Wire Brush

This is what they looked like before I started.

First I used the wire brush to remove much of the burnt on crust.

Then I started with the chrome polish. A few minutes later this is what I had.

More polishing and about 20 minutes later it was looking good.

I kept going for another 15-20 minutes and I'm getting close.

A little while later and I'm done for now.

I'll keep polishing from time to time until I get them looking like mirrors.

#4
05-21-2012, 03:42 AM
Veteran Member
Join Date: Nov 2006
Location: Glasgow, Scotland UK
Posts: 47,302
Received 9,006 Likes
on
4,113 Posts

The following users liked this post:
2000JagLvr (05-21-2012)

#6
06-12-2013, 07:24 AM

I just did mine, with great results.
I found that the first stage is to remove all the baked on tar and gunk. To do this I used Autoglym intensive tar remover soaked into some kitchen towel and left wrapped around the exhaust tip with a plastic bag holding it on and preventing it evaporating.
After 10 minutes the tar had all dissolved and any stubborn spots simply wiped off. The kitchen towel wrap could then be used on the other exhaust tip
Next stage was Autosol metal polish and wire wool. A few minutes scrubbing with this and all the baked on carbon deposits were gone.
Finally a polish with Autosol and the job was complete.

Thread
Thread Starter
Forum
Replies
Last Post
mikiep
XK8 / XKR ( X100 )
14
12-20-2019 07:37 PM
Currently Active Users Viewing This Thread: 1 (0 members and 1 guests)