Paint Correction Using DA from the Totally Green Novice Perspective
#1
 06-24-2011, 12:32 AM

Right. True confessions up front....I think the last time I waxed a car was in the '80's (and I don't mean deg F, here) using Turtle Wax from a green bottle and worn out washcloths, socks, and T-shirts for application and buffing. However, as this board has some addicting qualities, I'd find myself passing by the detailing section from time-to-time when there was a lull in interesting mechanical issues. David's several posts about cars that "looked good from far...but..." began to haunt me until I finally admitted to myself...I am "THAT Guy" and although my XJ6 turns heads like they are on swivels everywhere I take it when it is cleaned up...as I washed it I'd see the kokopelli's (sp?) and noticeable marring along both front fenders, a li'l clear-coat failure "birthmark" on the bootlid, little vertical witness marks along both sides left by my less-than-careful colleagues parking alongside at work......it dawned on me that my big Cat may soon be looking as pedestrian as the GMDS it replaced in the daily driver slot. And after several years in a car my wife and eldest daughter deemed "social suicide"...I've come to appreciate the style, grace and presence of the big, black Cat...so what to do?
Hey! it's Father's Day on the way and I see an obvious need for tools.
I ordered the following from http://www.detailedimage.com/wax.php?id=19246&url=detailedimage.com :
Last Friday evening I performed a normal wash and then parked it in the shady-side of the shop in anticipation of the work lasting well into Saturday afternoon when the sun beats down relentlessly through the open door in it's normal parking place. I didn't roll out until Wed. evening (after a jump-start) but more on that later.
I actually managed to get up and get started with the clay process at an earlier-than-welfare-recipient wake-up time. However, a couple of the kids needed to be shuttled to and fro, the lads and I had to haul a Nordic-trac elliptical to the re-Sale shop, notwithstanding I had to grill some grub for lunch. Even so, I managed to snap the post-clay pic's about 1 pm and then got further distracted by domestic duties. By mid-afternoon, all but my 11 yr old son had deserted me. I certainly didn't want to take a chance on making my XJ not even look good from far....so we elected to test things out on the black Excursion (GMDS is white and paint too far oxidized to be useful as a functional test) Our test plan called for correction compound only and that limited to the two right-side doors which were exhibiting some healthy scratches. Now, as you can see, our results are not flawless, but remember it is our first time, and we are not performing both steps of the two-step process!
We completed the Excursion Compounding test about 4:30 Saturday afternoon. Total compounding time on the Excursion test was on the order of about 45 - 60 mins, with the wash/dry /tape evolution consuming a like amount.
After we washed and clayed the test specimen:


And then again, after what truly seemed only a few minutes of compounding:

The door is closed behind it cutting down on cooling airflow but shielding us from a brutal afternoon sun:


So a few scratches and some marring still present, but a considerable improvement for 3 horizontal strokes alternated with 3 vertical strokes and a quick buff with a MF towel. Remember, just a sanity test so no "step 2" finishing product, here.
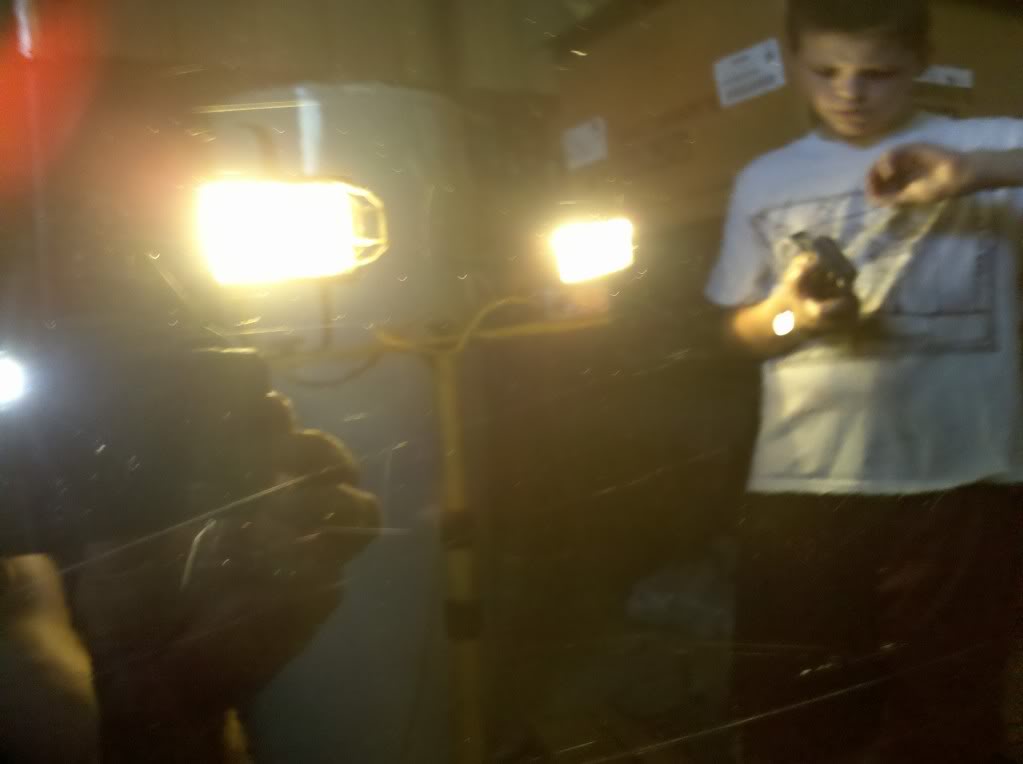
And finally, out in the sunshine the way it will be seen..away from the harsh glare of the 500W Inquisition: (Until we get `round to actually doing that one...but all 3 jags and the pickup preceed it in the queue!)

Our testing validated the concept and persuaded us that we could soldier-on sans fear of ruining the finish...at least, 2 doors of the Exc were now up to looking good from far......
Baseline pics - post-wash but pre-clay
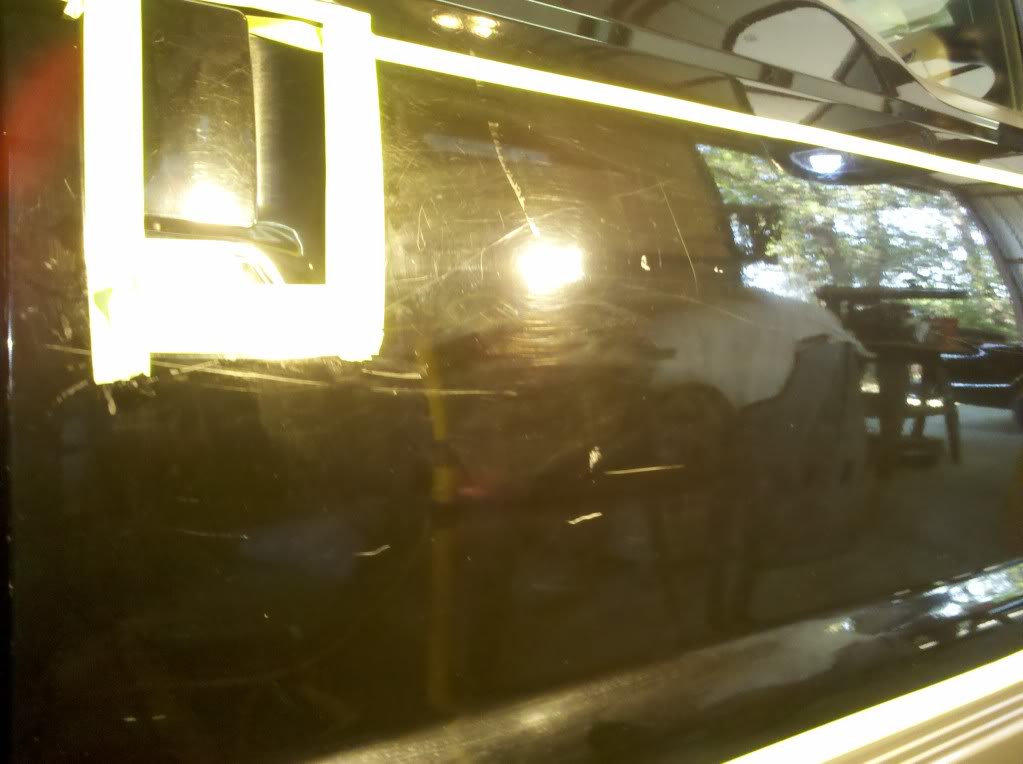
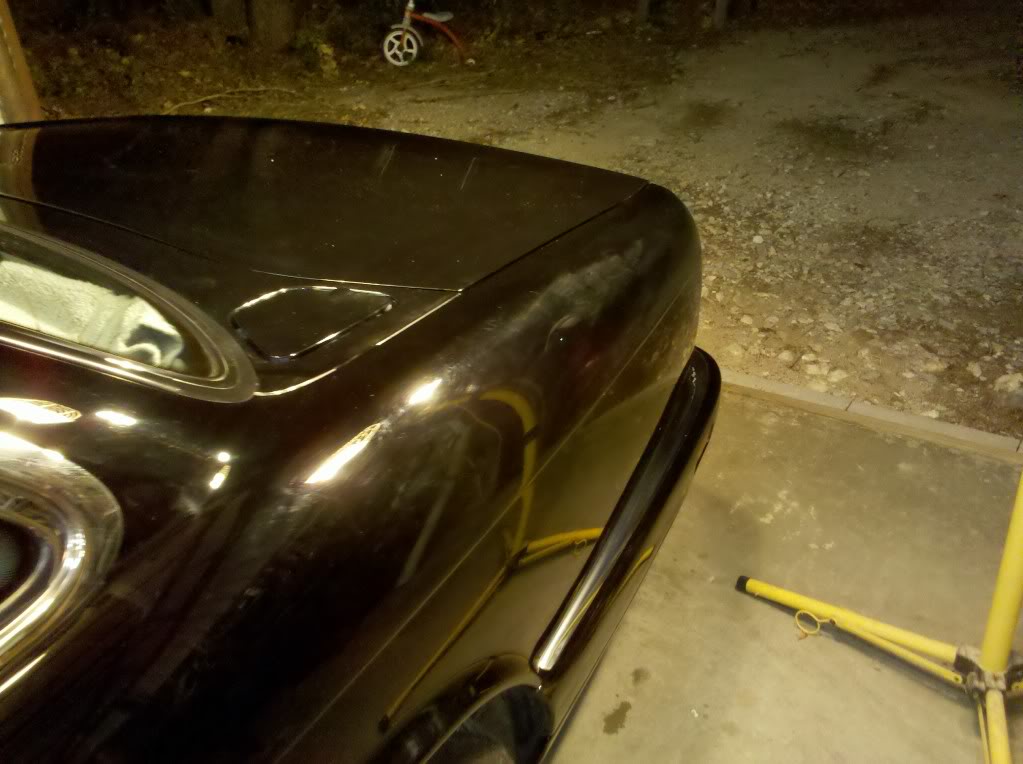
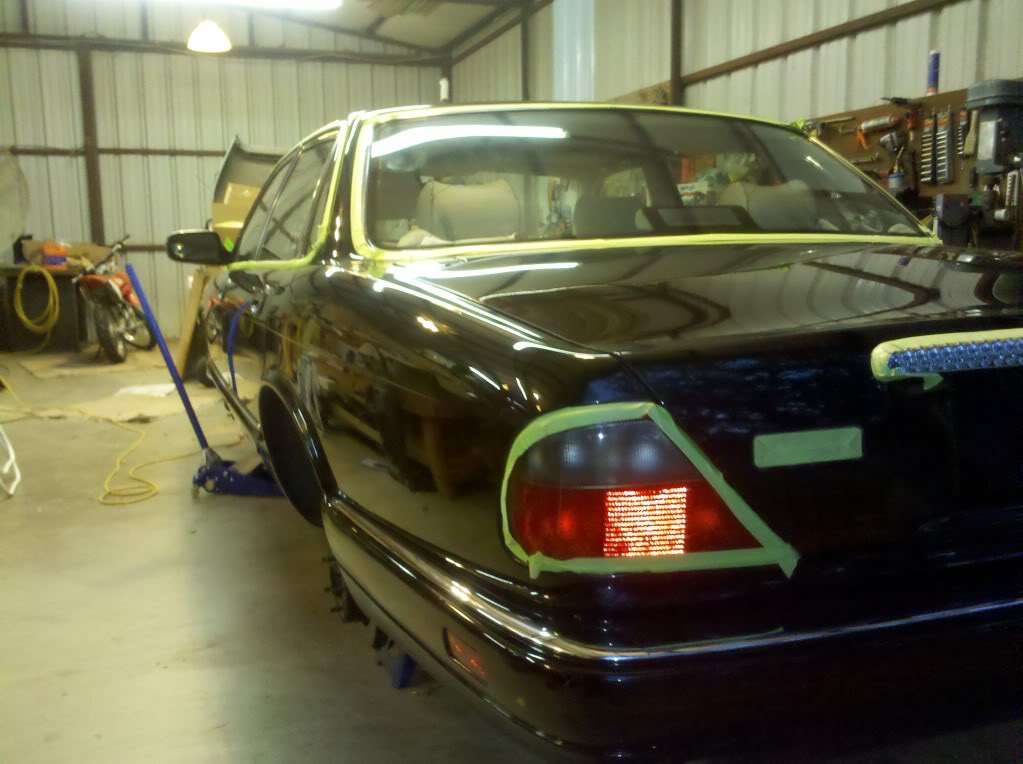
The boot lid: Translator said a skating event had just taken place here!

I believe this to be clear-coat failure, about dime-sized, on boot lid: That's a 300W incandescent bulb at about 10' altitude

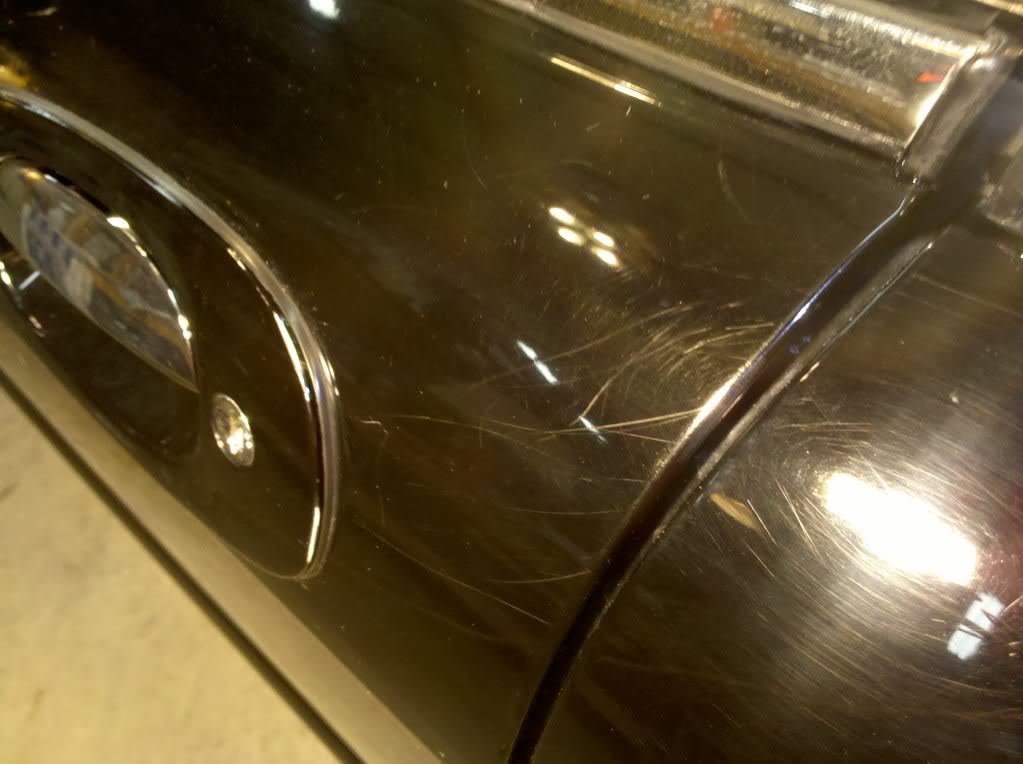
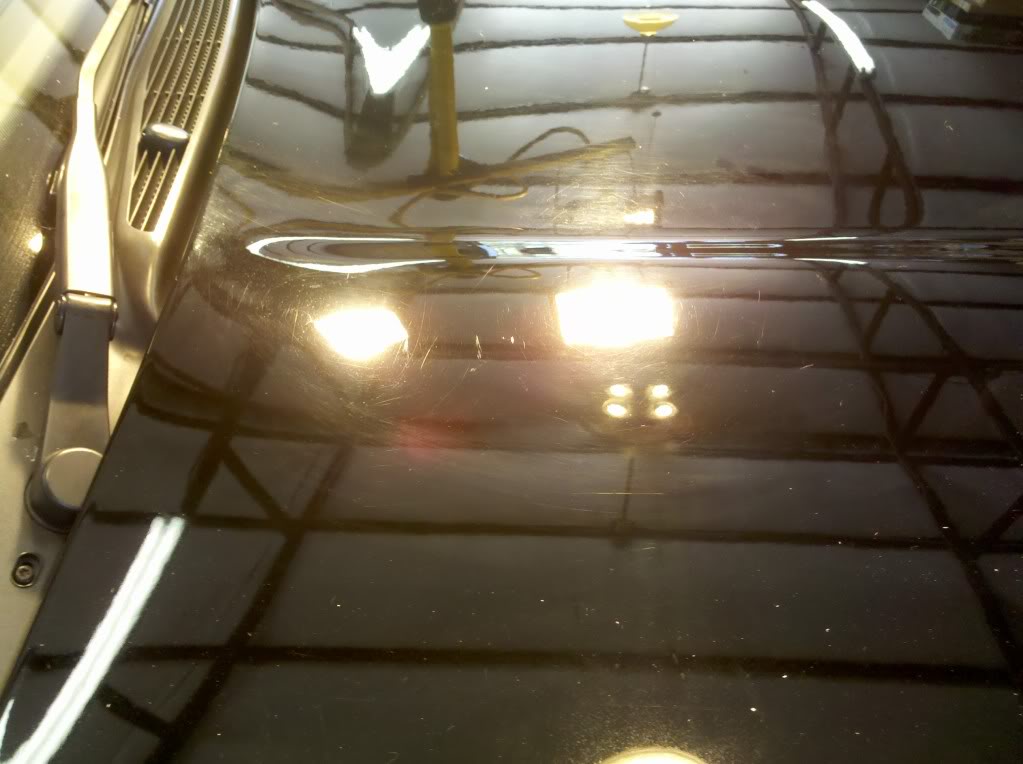
Top Scratch - One of my favorites! I went to look at a well-kept '95 XJS for my son some months ago and when I returned from test-driving it, the owner was slumped over the top of my VDP wearing a jacket with buttons and drug his arms across the top as he straightened up leaving this one behind!

Clawing to get in:
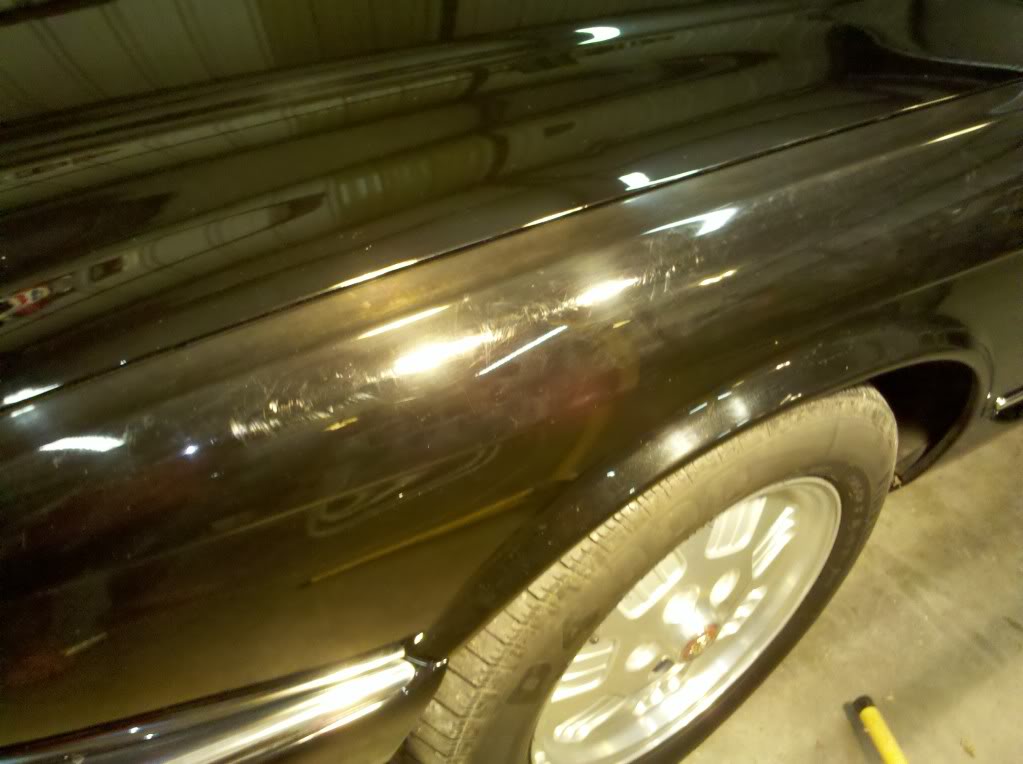
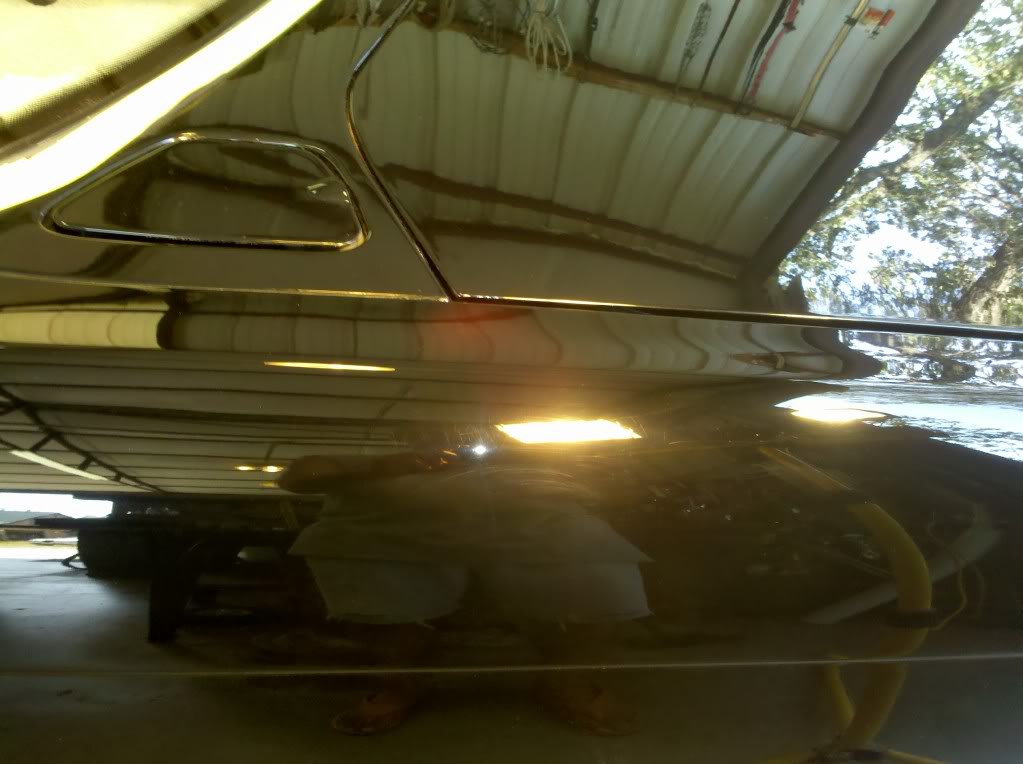
Front wing:
Rear wing:
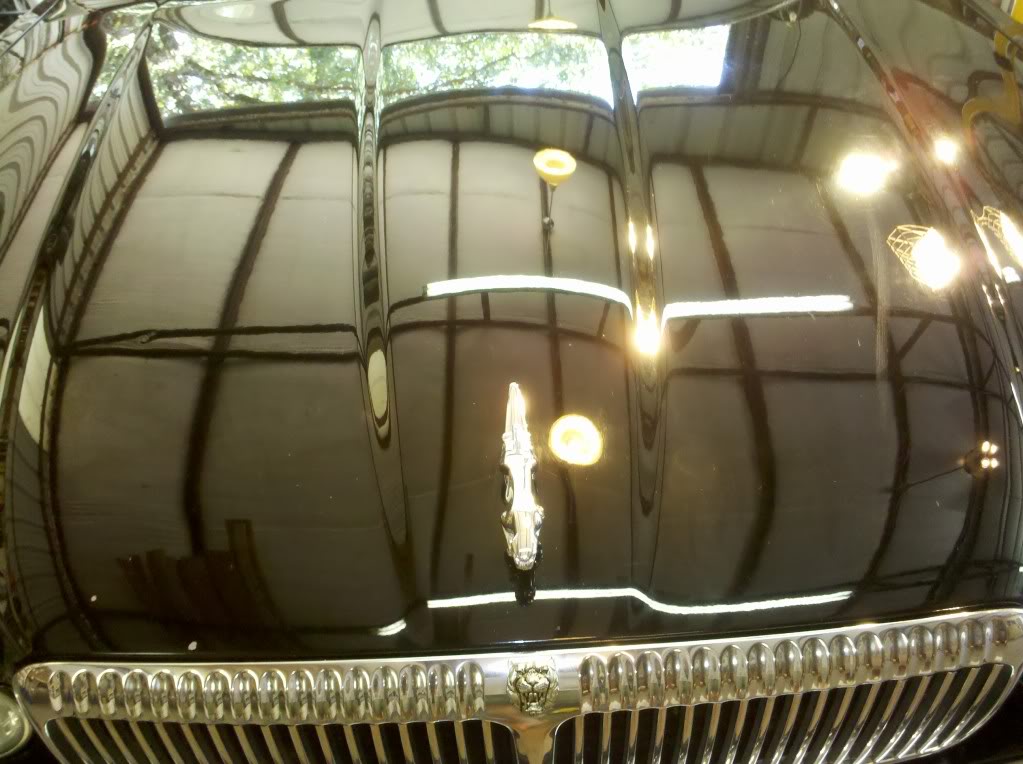
Hood:

And after clay? I was surprised that I didn't feel more roughness/get more FOD with the clay than I did:
Boot lid:


Hood:
Bottom line is I didn't start compounding the VDP until Sunday, and I began at the top in case I failed to keep the PC's cord over my shoulder and behind me as I've noted in David's videos. Then I moved on to the boot lid, followed by the bonnet. At this point, the timeline gets a bit fuzzy....I know I had an appointment at Discount Tire the following day for some price-matching on a set of Michelin Primacy 225-60X16's and at some point it became clear that I wouldn't complete prior so I stopped to put it up on jackstands and place the tire/wheel assy's to my pickup for further transfer to DT. I took some post-compounding pics of the horizontal surfaces at 5 pm and some more sans tires at 8 pm, but the entire day was interspersed with other stuff like cooking dinner, and settling down with the family to watch a movie (with 3 of 5 being teenagers and still willing...I'm not skipping THAT!!!) I do recall taking note that all the surfaces below the rub-rails would be a bit easier without the tires because it was sitting about 6-8 inches higher on the jackstands. Limited opportunity Monday night due to one of the kid's basketball leagues, but as best I recall, I completed all the compounding by late Monday night.
Boot lid:


Hood:


"XJS" scratch on roof:

Clearcoat failure on boot lid:

Rear wing:
What really didn't seem to show in any of the pics; when I powered up the lights on Tuesday evening, particularly along the fenders and doors, but somewhat on the horizontal surfaces -it looked like someone had slathered a cow with SPF-30, or grease, then let her rub against the car like a fencepost. I suppose this is the "hazing" alluded to in some of the professional detailer reviews of the Meg's D/A product. They say with some soft paints the compound finishes to a haze and even the finishing product may haze a bit depending on how soft the paint is. Of course I grabbed a MF towel and rubbed on it like it was a lamp a genie may pop out of but to no avail. I'd call it "smudging" based on the appearance but I suppose hazing works and that seems to be the technical term in Detail-speak. I prayed the finishing compound would deliver me, and fortunately, did not need the genie. When I get to the Exc for real, the hood and one fender have been re-finished due to an unfortunate collision event, and these are supposed to be the most difficult challenge for this product. We'll see. For now, I'll say perhaps the '95 Jag Black is a mildly soft paint?
This one shows it faintly:

I did manage to allocate most of the evening after work on Tuesday to complete the finishing step but inasmuch as the severe thunderstorms of Monday and Tuesday nights weren't projected to fully depart the area until Wednesday, I was in no hurry to remount the new tires and get out in that the following morning at 0:darkthirty having never seen the fruit of my labor save in artificial lighting.
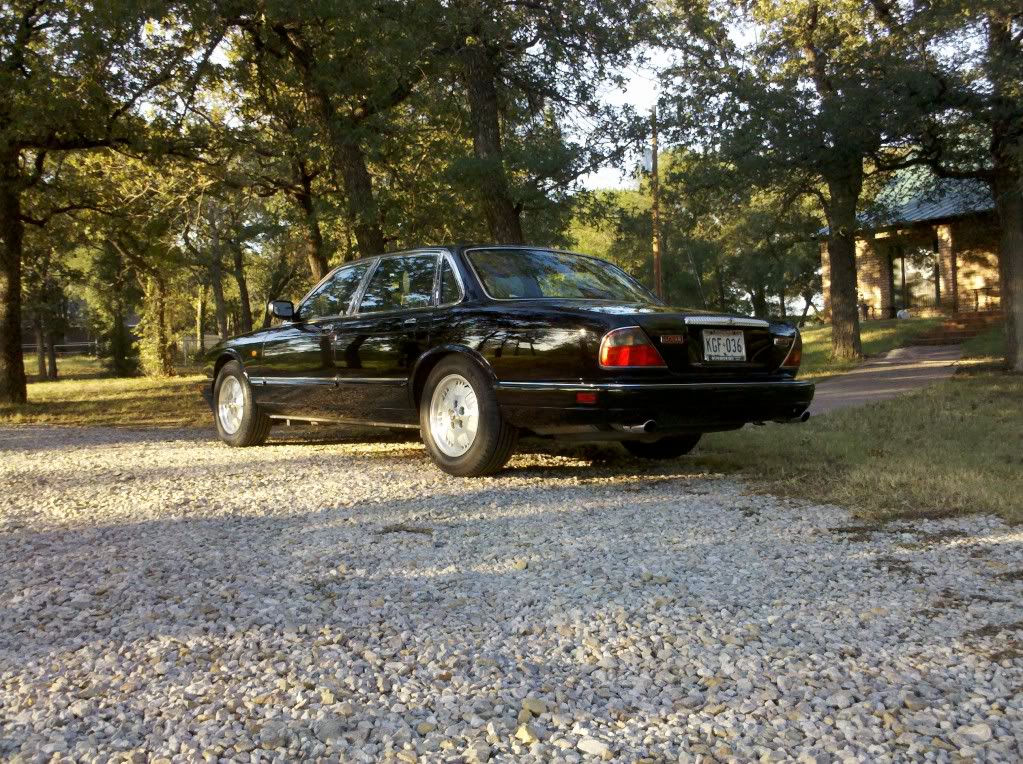
(by now you are no-doubt muttering to yourself if not to another, "Will this ever end?!? When will this Ahol wrap it up???) Believe me, I was feeling the same way by Wednesday evening after dinner. I mounted the tires, brought it down off the stands, and re-checked lug torques. It was a gorgeous evening outside..and with the recent rains the weeds around the house were actually a nice green rather than TX-brown....let's get some Pics! Now the car has been sitting in place since Friday evening, locked up except 10 mins with the boot open to remove and stash the rear lic. plate and about 5-min key-on to record mileage Sun. night prior to Tire-buy. Yes, as a matter-of-fact, one of my Battery-Tenders WAS lying dormant on the shelf right next to the car, why do you ask?
You guessed it....click, click...click... no crank, no start. Ah...well...alrighty then...S-Typers who may still be with me here will know I pre-emptively replaced my wife's 6-yr old orig. battery recently even though it had caused no problems...and it is sitting across the shop, constantly maintained by my other Battery-Tender. So a bit of hump-n-carry and I get a light-off and a minor modification to the photo-shoot plan (leave car running whilst shooting to avoid schlepping that spare battery all the way down to in front of the house!!!) Then down the highway to check out the new tires...."smooooooothe" I like 'em lots..and quiet, too! Maybe 15 mins run-time and back in the shop to shutdown - restart is 4.0. I put the battery minder on it overnight, checked records, battery is Interstate MPT93 installed 12/2009 at 64k mi or so. It should handle parked for 5 days.....
Sorry no shop/worklight pics after the finish but both Tue and Wed evenings I had a swarm of bugs (Looked like termites to me) to the point on Tue to complete the finishing step I was blowing them off the car with the air hose and then rushing to bring the DA to bear in short spurts to avoid buffing bugs into the finish. So a nice smooth finish with bugs crawling all over it wouldn't have been a pic of much use.
Overall, my best-guess is that it consumed 12-14 hours of actual labor, and probably could have been done in half that, or nearly so, had I not been proceeding so gingerly. Still...the result makes it all worth it. I like the Meg's kit. Feel like it would be hard to do damage with it.


Well, I'm back on the road...but here are my "takeaways:"
Hey! it's Father's Day on the way and I see an obvious need for tools.
I ordered the following from http://www.detailedimage.com/wax.php?id=19246&url=detailedimage.com :
Qty Product Total Cost
Chemical Guys Citrus Wash & Gloss - 16 oz | Detailed Image
Lake Country Blue Grout Sponge | Detailed Image
DI Packages Porter Cable 7424XP & Meguiar's DA Microfiber Correction Starter Kit 5" Free Bonus | Detailed Image
DI Packages DI Ultra Fine Clay Bar 200g & Clay Lube | Detailed ImageChemical Guys Citrus Wash & Gloss - 16 oz | Detailed Image
Lake Country Blue Grout Sponge | Detailed Image
DI Packages Porter Cable 7424XP & Meguiar's DA Microfiber Correction Starter Kit 5" Free Bonus | Detailed Image
Last Friday evening I performed a normal wash and then parked it in the shady-side of the shop in anticipation of the work lasting well into Saturday afternoon when the sun beats down relentlessly through the open door in it's normal parking place. I didn't roll out until Wed. evening (after a jump-start) but more on that later.
I actually managed to get up and get started with the clay process at an earlier-than-welfare-recipient wake-up time. However, a couple of the kids needed to be shuttled to and fro, the lads and I had to haul a Nordic-trac elliptical to the re-Sale shop, notwithstanding I had to grill some grub for lunch. Even so, I managed to snap the post-clay pic's about 1 pm and then got further distracted by domestic duties. By mid-afternoon, all but my 11 yr old son had deserted me. I certainly didn't want to take a chance on making my XJ not even look good from far....so we elected to test things out on the black Excursion (GMDS is white and paint too far oxidized to be useful as a functional test) Our test plan called for correction compound only and that limited to the two right-side doors which were exhibiting some healthy scratches. Now, as you can see, our results are not flawless, but remember it is our first time, and we are not performing both steps of the two-step process!
We completed the Excursion Compounding test about 4:30 Saturday afternoon. Total compounding time on the Excursion test was on the order of about 45 - 60 mins, with the wash/dry /tape evolution consuming a like amount.
After we washed and clayed the test specimen:
And then again, after what truly seemed only a few minutes of compounding:
The door is closed behind it cutting down on cooling airflow but shielding us from a brutal afternoon sun:
So a few scratches and some marring still present, but a considerable improvement for 3 horizontal strokes alternated with 3 vertical strokes and a quick buff with a MF towel. Remember, just a sanity test so no "step 2" finishing product, here.
And finally, out in the sunshine the way it will be seen..away from the harsh glare of the 500W Inquisition: (Until we get `round to actually doing that one...but all 3 jags and the pickup preceed it in the queue!)
Our testing validated the concept and persuaded us that we could soldier-on sans fear of ruining the finish...at least, 2 doors of the Exc were now up to looking good from far......
Baseline pics - post-wash but pre-clay
The boot lid: Translator said a skating event had just taken place here!
I believe this to be clear-coat failure, about dime-sized, on boot lid: That's a 300W incandescent bulb at about 10' altitude
Top Scratch - One of my favorites! I went to look at a well-kept '95 XJS for my son some months ago and when I returned from test-driving it, the owner was slumped over the top of my VDP wearing a jacket with buttons and drug his arms across the top as he straightened up leaving this one behind!
Clawing to get in:
Front wing:
Rear wing:
Hood:
And after clay? I was surprised that I didn't feel more roughness/get more FOD with the clay than I did:
Boot lid:
Hood:
Bottom line is I didn't start compounding the VDP until Sunday, and I began at the top in case I failed to keep the PC's cord over my shoulder and behind me as I've noted in David's videos. Then I moved on to the boot lid, followed by the bonnet. At this point, the timeline gets a bit fuzzy....I know I had an appointment at Discount Tire the following day for some price-matching on a set of Michelin Primacy 225-60X16's and at some point it became clear that I wouldn't complete prior so I stopped to put it up on jackstands and place the tire/wheel assy's to my pickup for further transfer to DT. I took some post-compounding pics of the horizontal surfaces at 5 pm and some more sans tires at 8 pm, but the entire day was interspersed with other stuff like cooking dinner, and settling down with the family to watch a movie (with 3 of 5 being teenagers and still willing...I'm not skipping THAT!!!) I do recall taking note that all the surfaces below the rub-rails would be a bit easier without the tires because it was sitting about 6-8 inches higher on the jackstands. Limited opportunity Monday night due to one of the kid's basketball leagues, but as best I recall, I completed all the compounding by late Monday night.
Boot lid:
Hood:
"XJS" scratch on roof:
Clearcoat failure on boot lid:
Rear wing:
What really didn't seem to show in any of the pics; when I powered up the lights on Tuesday evening, particularly along the fenders and doors, but somewhat on the horizontal surfaces -it looked like someone had slathered a cow with SPF-30, or grease, then let her rub against the car like a fencepost. I suppose this is the "hazing" alluded to in some of the professional detailer reviews of the Meg's D/A product. They say with some soft paints the compound finishes to a haze and even the finishing product may haze a bit depending on how soft the paint is. Of course I grabbed a MF towel and rubbed on it like it was a lamp a genie may pop out of but to no avail. I'd call it "smudging" based on the appearance but I suppose hazing works and that seems to be the technical term in Detail-speak. I prayed the finishing compound would deliver me, and fortunately, did not need the genie. When I get to the Exc for real, the hood and one fender have been re-finished due to an unfortunate collision event, and these are supposed to be the most difficult challenge for this product. We'll see. For now, I'll say perhaps the '95 Jag Black is a mildly soft paint?
This one shows it faintly:
I did manage to allocate most of the evening after work on Tuesday to complete the finishing step but inasmuch as the severe thunderstorms of Monday and Tuesday nights weren't projected to fully depart the area until Wednesday, I was in no hurry to remount the new tires and get out in that the following morning at 0:darkthirty having never seen the fruit of my labor save in artificial lighting.
(by now you are no-doubt muttering to yourself if not to another, "Will this ever end?!? When will this Ahol wrap it up???) Believe me, I was feeling the same way by Wednesday evening after dinner. I mounted the tires, brought it down off the stands, and re-checked lug torques. It was a gorgeous evening outside..and with the recent rains the weeds around the house were actually a nice green rather than TX-brown....let's get some Pics! Now the car has been sitting in place since Friday evening, locked up except 10 mins with the boot open to remove and stash the rear lic. plate and about 5-min key-on to record mileage Sun. night prior to Tire-buy. Yes, as a matter-of-fact, one of my Battery-Tenders WAS lying dormant on the shelf right next to the car, why do you ask?
You guessed it....click, click...click... no crank, no start. Ah...well...alrighty then...S-Typers who may still be with me here will know I pre-emptively replaced my wife's 6-yr old orig. battery recently even though it had caused no problems...and it is sitting across the shop, constantly maintained by my other Battery-Tender. So a bit of hump-n-carry and I get a light-off and a minor modification to the photo-shoot plan (leave car running whilst shooting to avoid schlepping that spare battery all the way down to in front of the house!!!) Then down the highway to check out the new tires...."smooooooothe" I like 'em lots..and quiet, too! Maybe 15 mins run-time and back in the shop to shutdown - restart is 4.0. I put the battery minder on it overnight, checked records, battery is Interstate MPT93 installed 12/2009 at 64k mi or so. It should handle parked for 5 days.....
Sorry no shop/worklight pics after the finish but both Tue and Wed evenings I had a swarm of bugs (Looked like termites to me) to the point on Tue to complete the finishing step I was blowing them off the car with the air hose and then rushing to bring the DA to bear in short spurts to avoid buffing bugs into the finish. So a nice smooth finish with bugs crawling all over it wouldn't have been a pic of much use.
Overall, my best-guess is that it consumed 12-14 hours of actual labor, and probably could have been done in half that, or nearly so, had I not been proceeding so gingerly. Still...the result makes it all worth it. I like the Meg's kit. Feel like it would be hard to do damage with it.
Well, I'm back on the road...but here are my "takeaways:"
- If I did this for a living, I'd starve.
- However, it would be ok, my back would hurt too much to eat anyway
- Masking was an unnecessary waste of time (recently reconsidered: Ex had a pinstripe - it was nec & proper; XJ was all just chrome trim which was fine for the Meg's D/A sys.)
- Kids think it is really neat...and even fun...
- The novelty wears off quickly: within 15 minutes of my two youngest fighting over which one was going to buff with the MF towel, the "chosen one" was down at the house asking the other if he wanted to "trade?"
- Meguiar's MF D/A Paint Correction system really does allow the stupid and inept to achieve near-professional results with relatively little effort (in spite of my whining about backache's above)
- DetailedImage.com shipped promptly and freely (Father's Day special) and were first-rate professionals all the way.
Last edited by aholbro1; 08-15-2011 at 12:14 AM. Reason: Revised Takeaways (Masking)
The following 3 users liked this post by aholbro1:
#2
06-24-2011, 03:00 AM
Veteran Member
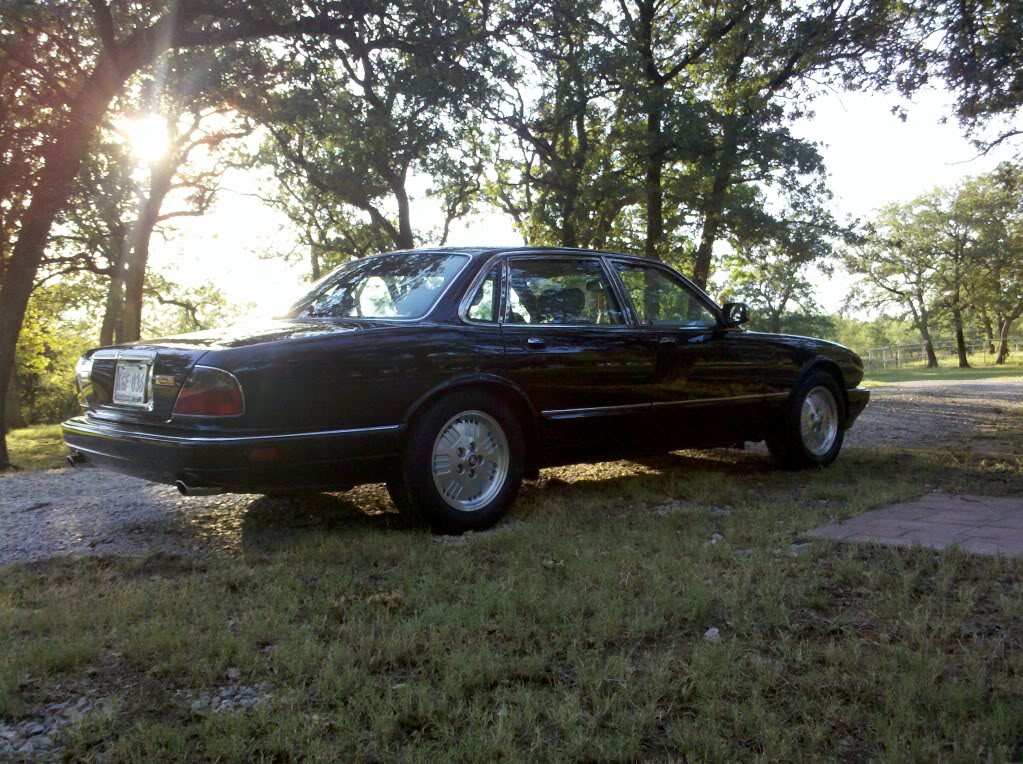
A worthwhile project, but I'm only seeing what I guess to be a 'before' pic showing the Olympic Figure skating venue
(you need to upload the pics one by one, using CTRL and multiple selection doesn't work)
Wow, figure skating has been banished. Hard work has paid off, you have brought the car back to life, it looks great.
Now, just 2 more Jags, the Excursion and the white one to go.... You should be done by around Autumn!
(PS, great looking property/location you have there)
Last edited by Translator; 06-25-2011 at 02:04 AM. Reason: added content
The following users liked this post:
aholbro1 (06-25-2011)
#5
06-25-2011, 05:38 AM

Veteran Member
The following users liked this post:
aholbro1 (06-25-2011)
#6
06-25-2011, 07:41 AM
Richard! So sorry, I missed your new comments awhile ago! I saw you'd wiped out my follow-up as promised but didn't catch that you'd edited your own post. Thank you so much for the help in getting it straightened out. Also for your complimentary comments. Re: the property, thanks too. I do love it here - wish I didn't have to spend so much time in FTW and driving to/fro, but that pays the bills. Here's the key: My house is about 5 miles North of Paradise (TX) and 1500 miles South of Hell (MI). "Whitey" goes to charity as soon as my 16 yr old is home at the same time as me long enough for the initial familiarization drive to convince me he won't take out 17 trees with my better cars during his further training....
Thanks! I have no "ID." Maybe David of Innovative Detailing or another detailer will happen along and tell us both what I did? I thought all manufacturers have been using clear-coat paints since the mid-80's, but that may not be the same as a clear top coat? The X300 series has a bit of a reputation for the clear-coat failing on skyward-facing surfaces.
Thanks for the compliment but your trust in my courage is undeserved. I take it God has chosen for me to drive black despite my fears and trepidations. Much like Moses objecting that he was a poor public speaker and unfit to lead, both my black ones were obtained while searching for a similar model in white! However, when one is committed to the "pre-owned" market, one can increase one's cost and search-time exponentially by "marrying" a particular color. Just happened to find the model and value I was looking for in black ones - and they DO look great for the 63 seconds they stay clean!
Thank you, Rick! The post would've been near impossible without your photobucket instructions! In all fairness, my 11 yr old hung in there pretty well, but his 9 yr old sister rapidly became bored. Teenagers had xBox up and I guess the cars on there never have swirl-problems....
Thank you, Rick! The post would've been near impossible without your photobucket instructions! In all fairness, my 11 yr old hung in there pretty well, but his 9 yr old sister rapidly became bored. Teenagers had xBox up and I guess the cars on there never have swirl-problems....
Last edited by aholbro1; 07-04-2011 at 11:04 PM. Reason: Left out someone!
#7
07-01-2011, 03:15 AM
Senior Member
Join Date: Sep 2009
Location: Orange County, California. USA
Posts: 573
Received 86 Likes
on
66 Posts
Zanel,
Thanks for the email and the kind wishes.....
I must say......Awesome before and afters.....congrats on your tremendous success in correcting that hacked up Jag.....I was extemely impressed with your results....Now you know what a day is like in my shoes!!!
Glad my recomendations helped you out....your son someday will appreciate this time spent together detailing the Jag with dad....
Last edited by Innovative Detailing; 07-01-2011 at 03:18 AM.
The following users liked this post:
aholbro1 (07-01-2011)
Trending Topics
#8
07-01-2011, 07:50 AM
Senior Member
Wow--excellent effort. I picked up the same package of products including the PC 7424xp. I was a little nervous since I've never used a machine, always elbow grease in the past. I'm actually going to practice on my daughter's car while she's away at college this fall---figured I'd rather practice on a Pontiac and then move on to the Jag. Thanks again for posting the pics and info.
The following users liked this post:
aholbro1 (07-01-2011)
#9
07-01-2011, 06:03 PM
David, Mike,
Thanks for the kind comments, guys.
David, also thanks for your response to my inquiry via IM concerning this project. Did you see this question posed above?
"Quote: Direng
Originally Posted by direng
Good work - looks great.
Are you cutting the 'paint' or do Jaguars have a clear top coat?
I wasn't sure what I was doing..but it made it look better.
I also have a follow-up for you: Am I done? Seems like a wax or sealer may be in order now. I noticed you mentioned Meg's M21 in another thread? Or something else?
Would it be ok to apply that with the MF D/A finishing pad? If not, what do I need? LC Black? If so, is that compatible with the Meg's MF/DA backing plate? Or do I need make further investment?
In other words, would you recommend stopping after Meg's D300/301? or a further step or steps?
Mike,
It is not to be feared! As you can see, I felt better with a test-bed, too. If you got the 16 oz. bottles as I did I'd say you have more than enough for two cars. I have about 3/4 left of each product. Best to set-aside a few hours' block to do all the compounding or all the finishing at once as the "Prime the pad" part is where you use the product...very little usage after that, but if you just do a panel or two at a time, clean your pad out and come back to it later and have to re-prime, you would go through a bottle pretty quickly.
If I may paraphrase Rick,
Happy Polishing....
Zane
Last edited by aholbro1; 07-01-2011 at 06:14 PM.
#10
07-01-2011, 08:30 PM
Veteran Member
Join Date: Nov 2006
Location: Glasgow, Scotland UK
Posts: 47,302
Received 9,006 Likes
on
4,113 Posts

Really nice job and a great write up too........just about the right length and thanks for sharing.
Dave, obviously has been doing it professionally and probably for many years and makes it look soo easy, but I know it's not. It's nice to know an absolute beginner can even make such a huge difference.
Kudos to you

The following users liked this post:
aholbro1 (07-01-2011)
#11
07-02-2011, 06:23 AM

[Are you cutting the 'paint' or do Jaguars have a clear top coat? ]
Paint Systems
Most modern auto paint is a base coat, clear coat (BC_CC) system, although there are certain mfg and / or paint colours that are still single stage paint (namely White, Black and Red) see Paint Test for details
Single stage paint system - until 1970 most cars were painted with solid colour paint as the only top coat layerThe problem with single stage paints is oxidation. Clear coat paint was first used on production cars in the US in the early ‘80s. While initially these coatings were based on alkyd resins and were not very durable, later they came to be based on thermoplastic acrylic enamels, which had slightly better outdoor durability.
At the same time, aluminium pigments were used to give a metallic effect, but its durability was not sufficient, which then led to the introduction of base coat–clear. It proved difficult to get the metallic to lay evenly and get decent gloss with minimum orange peel. Since most of the metallic floats close to the surface sanding and polishing can cause problems with single stage metallic. Some OEM vehicles still use single stage paint (notably; White, Red and Black) and rarely other colours
Base Coat Clear Coat – two stage paint; base (colour) coat and clear coat were adopted as an automotive industry standard in 19982, clear coat paint was originally used to protect metallic paints and provide depth of colour. BCCC paint systems do not oxidize in the same way as single stage paint does, but they are subject to clear coat failure. They are applied over the primer surfacer and covered by the clear coat layer to protect it from the environment. There exist three main base coat systems in the paint shops of the automotive industry worldwide: medium solids (MS) high Solids (HS) Water-based (waterborne) (WB).North America predominantly uses HS, whereas water-based clear coat is the preferred technology in Europe
Paint Test-using a cleaner wax and a clean micro fibre towel on a clean paint surface, lightly abrade the surface, if the towel shows the paint colour it’s single stage paint, if not it’s a base coat-clear coat paint
Last edited by Togwt; 07-02-2011 at 06:26 AM.
The following users liked this post:
aholbro1 (07-04-2011)
#13
07-03-2011, 04:03 AM
Senior Member
Join Date: Sep 2009
Location: Orange County, California. USA
Posts: 573
Received 86 Likes
on
66 Posts
David, Mike,
Thanks for the kind comments, guys.
David, also thanks for your response to my inquiry via IM concerning this project. Did you see this question posed above?
"Quote: Direng
Originally Posted by direng
Good work - looks great.
Are you cutting the 'paint' or do Jaguars have a clear top coat?
I wasn't sure what I was doing..but it made it look better.
I also have a follow-up for you: Am I done? Seems like a wax or sealer may be in order now. I noticed you mentioned Meg's M21 in another thread? Or something else?
Would it be ok to apply that with the MF D/A finishing pad? If not, what do I need? LC Black? If so, is that compatible with the Meg's MF/DA backing plate? Or do I need make further investment?
In other words, would you recommend stopping after Meg's D300/301? or a further step or steps?
Mike,
It is not to be feared! As you can see, I felt better with a test-bed, too. If you got the 16 oz. bottles as I did I'd say you have more than enough for two cars. I have about 3/4 left of each product. Best to set-aside a few hours' block to do all the compounding or all the finishing at once as the "Prime the pad" part is where you use the product...very little usage after that, but if you just do a panel or two at a time, clean your pad out and come back to it later and have to re-prime, you would go through a bottle pretty quickly.
If I may paraphrase Rick,
Happy Polishing....
Zane
Thanks for the kind comments, guys.
David, also thanks for your response to my inquiry via IM concerning this project. Did you see this question posed above?
"Quote: Direng
Originally Posted by direng
Good work - looks great.
Are you cutting the 'paint' or do Jaguars have a clear top coat?
I wasn't sure what I was doing..but it made it look better.
I also have a follow-up for you: Am I done? Seems like a wax or sealer may be in order now. I noticed you mentioned Meg's M21 in another thread? Or something else?
Would it be ok to apply that with the MF D/A finishing pad? If not, what do I need? LC Black? If so, is that compatible with the Meg's MF/DA backing plate? Or do I need make further investment?
In other words, would you recommend stopping after Meg's D300/301? or a further step or steps?
Mike,
It is not to be feared! As you can see, I felt better with a test-bed, too. If you got the 16 oz. bottles as I did I'd say you have more than enough for two cars. I have about 3/4 left of each product. Best to set-aside a few hours' block to do all the compounding or all the finishing at once as the "Prime the pad" part is where you use the product...very little usage after that, but if you just do a panel or two at a time, clean your pad out and come back to it later and have to re-prime, you would go through a bottle pretty quickly.
If I may paraphrase Rick,
Happy Polishing....
Zane
You are very welcome, anytime, its my pleasure to help you guys out!
Regarding a final LSP, Last Step Protectant.....I would recommend a final coat of M21 with a Meguairs D/A finishing pad, that would be perfect!! and a 5.5 inch pad would be completely compatable with the MF backing plate. You may also choose to use either the crimson or black LC 5.5 pad which will also work with that backing plate. Any more love you put into the paint will only show in the ultimate reflection that you will achieve, and its durability. And to totally blow you away.....give the vehicle a quick spritz of Meguiar's new M156 Xpress Spray Wax when your finished for a mind boggling shine!....its an awesome new product!
Again Zane, great job on the Jag!
The following 2 users liked this post by Innovative Detailing:
aholbro1 (07-04-2011),
BigBossRadio (04-26-2014)

Thread
Thread Starter
Forum
Replies
Last Post
WinterJag
XJ XJ6 / XJ8 / XJR ( X350 & X358 )
16
10-09-2015 07:49 PM
Jaguar Forums Editor
Jaguar Press release
0
09-10-2015 05:08 PM
FS[Western US]: XJS Wiper Motor Upgrade- 76-88 - Electrolux Style
XJsc-guy
PRIVATE For Sale / Trade or Buy Classifieds
0
09-02-2015 11:43 AM
Currently Active Users Viewing This Thread: 2 (0 members and 2 guests)