When you click on links to various merchants on this site and make a purchase, this can result in this site earning a commission. Affiliate programs and affiliations include, but are not limited to, the eBay Partner Network.
Series-1 polished cam cover restoration with a twist! Engine turning
As I write this, I am about 15 hours into reworking just ONE cam cover and it is still not done.
Included with the king cab pickup truck load of parts that came with our 1968 series 1.5 2+2, was a set of cam covers from an early model E-type. Well, they were a little worse for wear, so I was thinking about just cleaning them up and selling them....THANKFULLY I DIDN'T. Good lord new polished ones are expensive O_0
It has been quite hot out lately, so I haven't been spending much time in the shop. I desired a project that I could plug away at while sitting in front of the air conditioning That project was the cam covers.
I started by hand sanding off all the casting skin, years of oxidation, and fallout from the surface. I also needed to reshape several bolt hole locations, as at some time it seemed a guerrilla owned them. I started with 180 grit paper, and ended by block sanding the outer face, and sides. I then used a 1 foot block to sand down the head mating surface flat and true, by hand. The entire part then got hit in the same fashion again with 320 grit, then 600 grit. At this point the bolt holes were shaped nicely, and they only needed a through scouring with a brass wire brush.
Notice here the difference between the untouched cover, and the one after sanding with 180 grit in just the first stage.
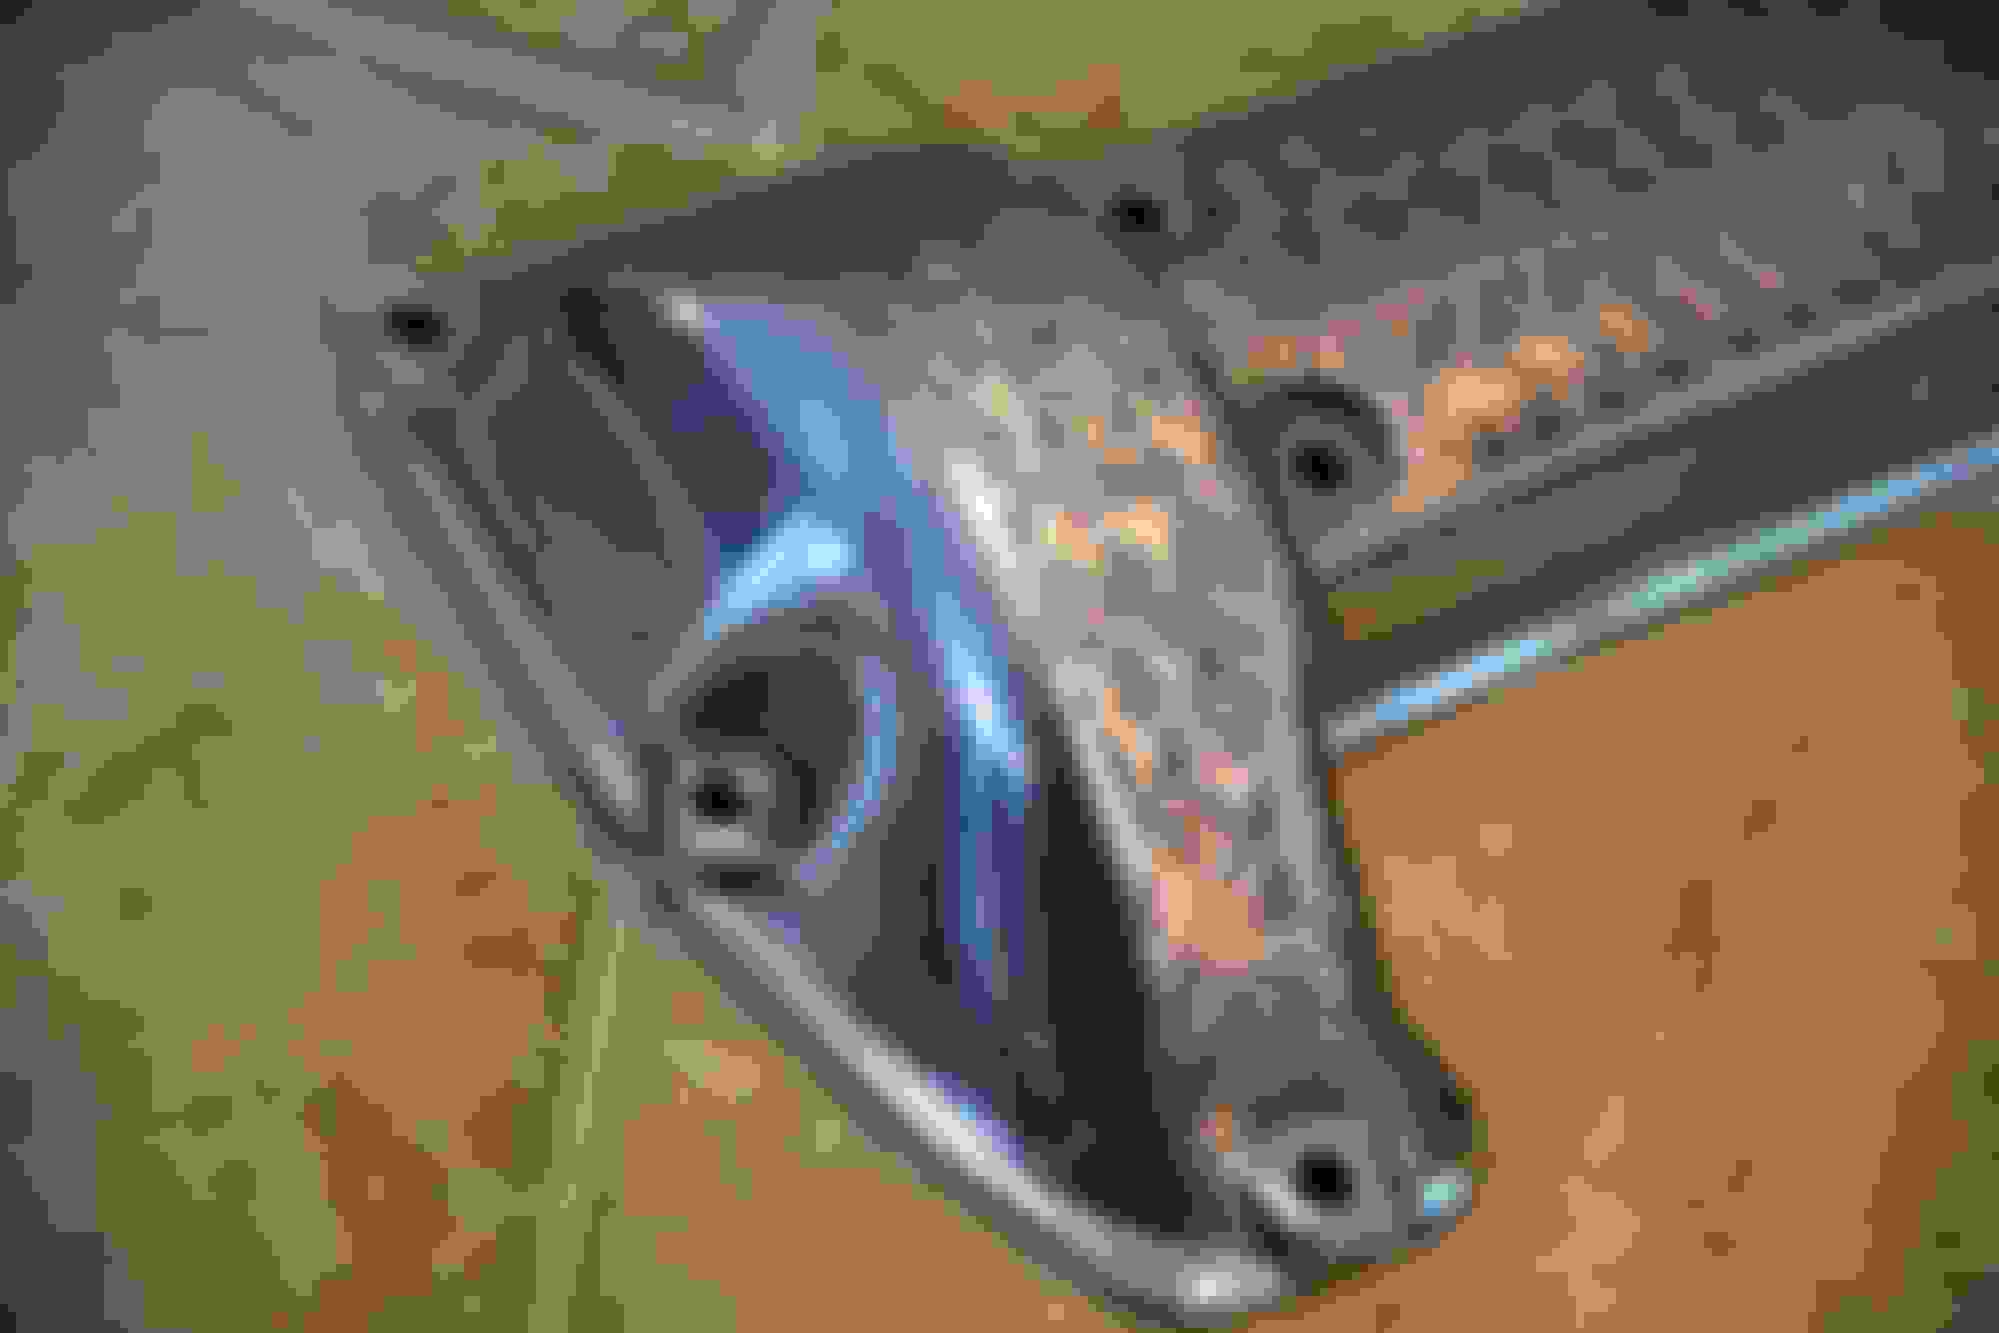
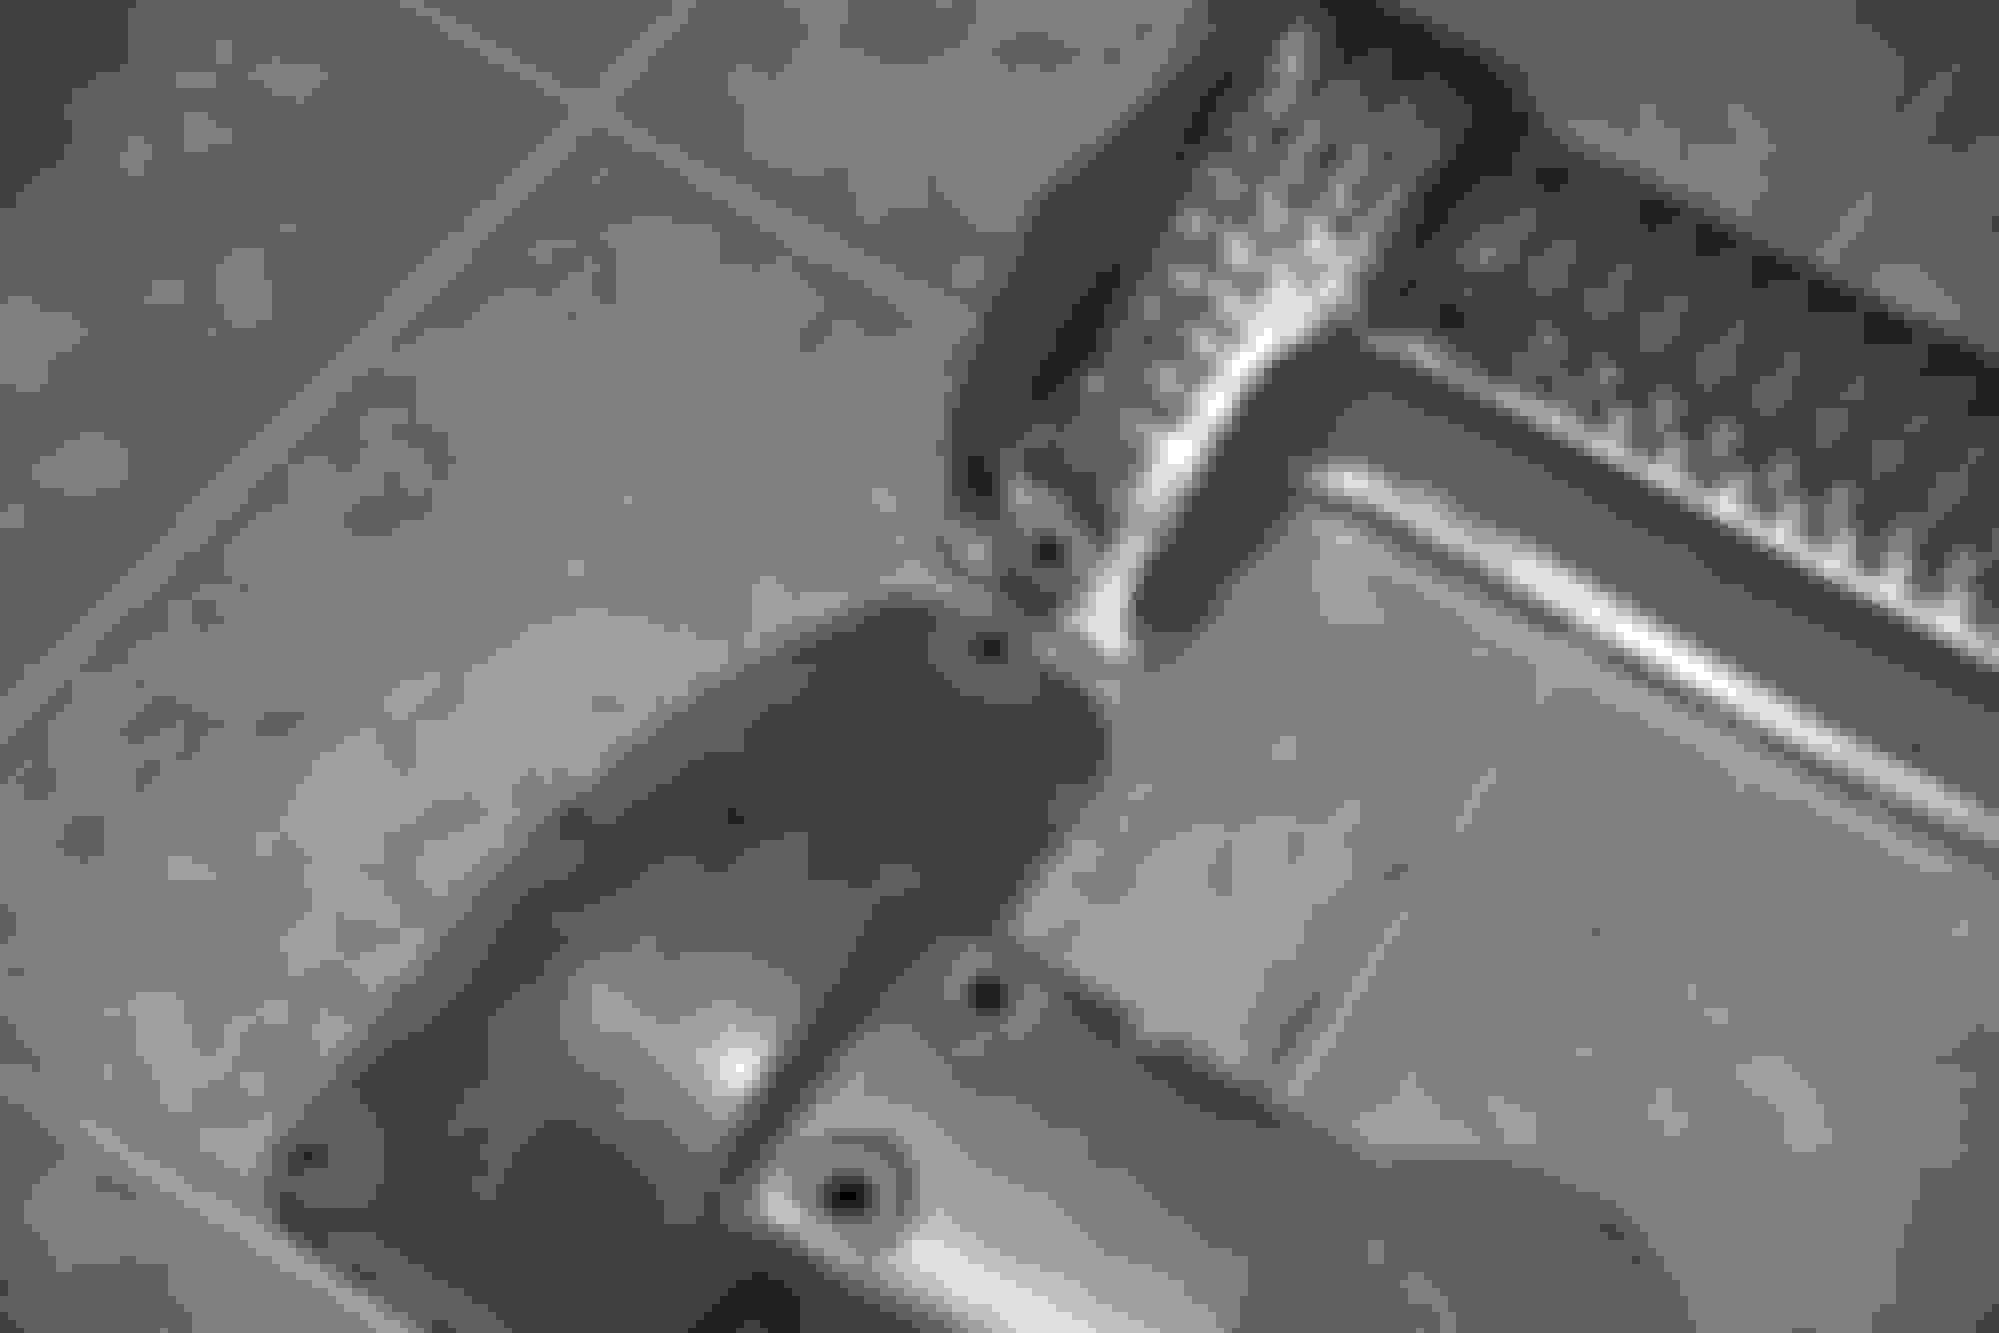
Here you can see the before picture of a set of bolt holes that got reshaped, and the finished product.
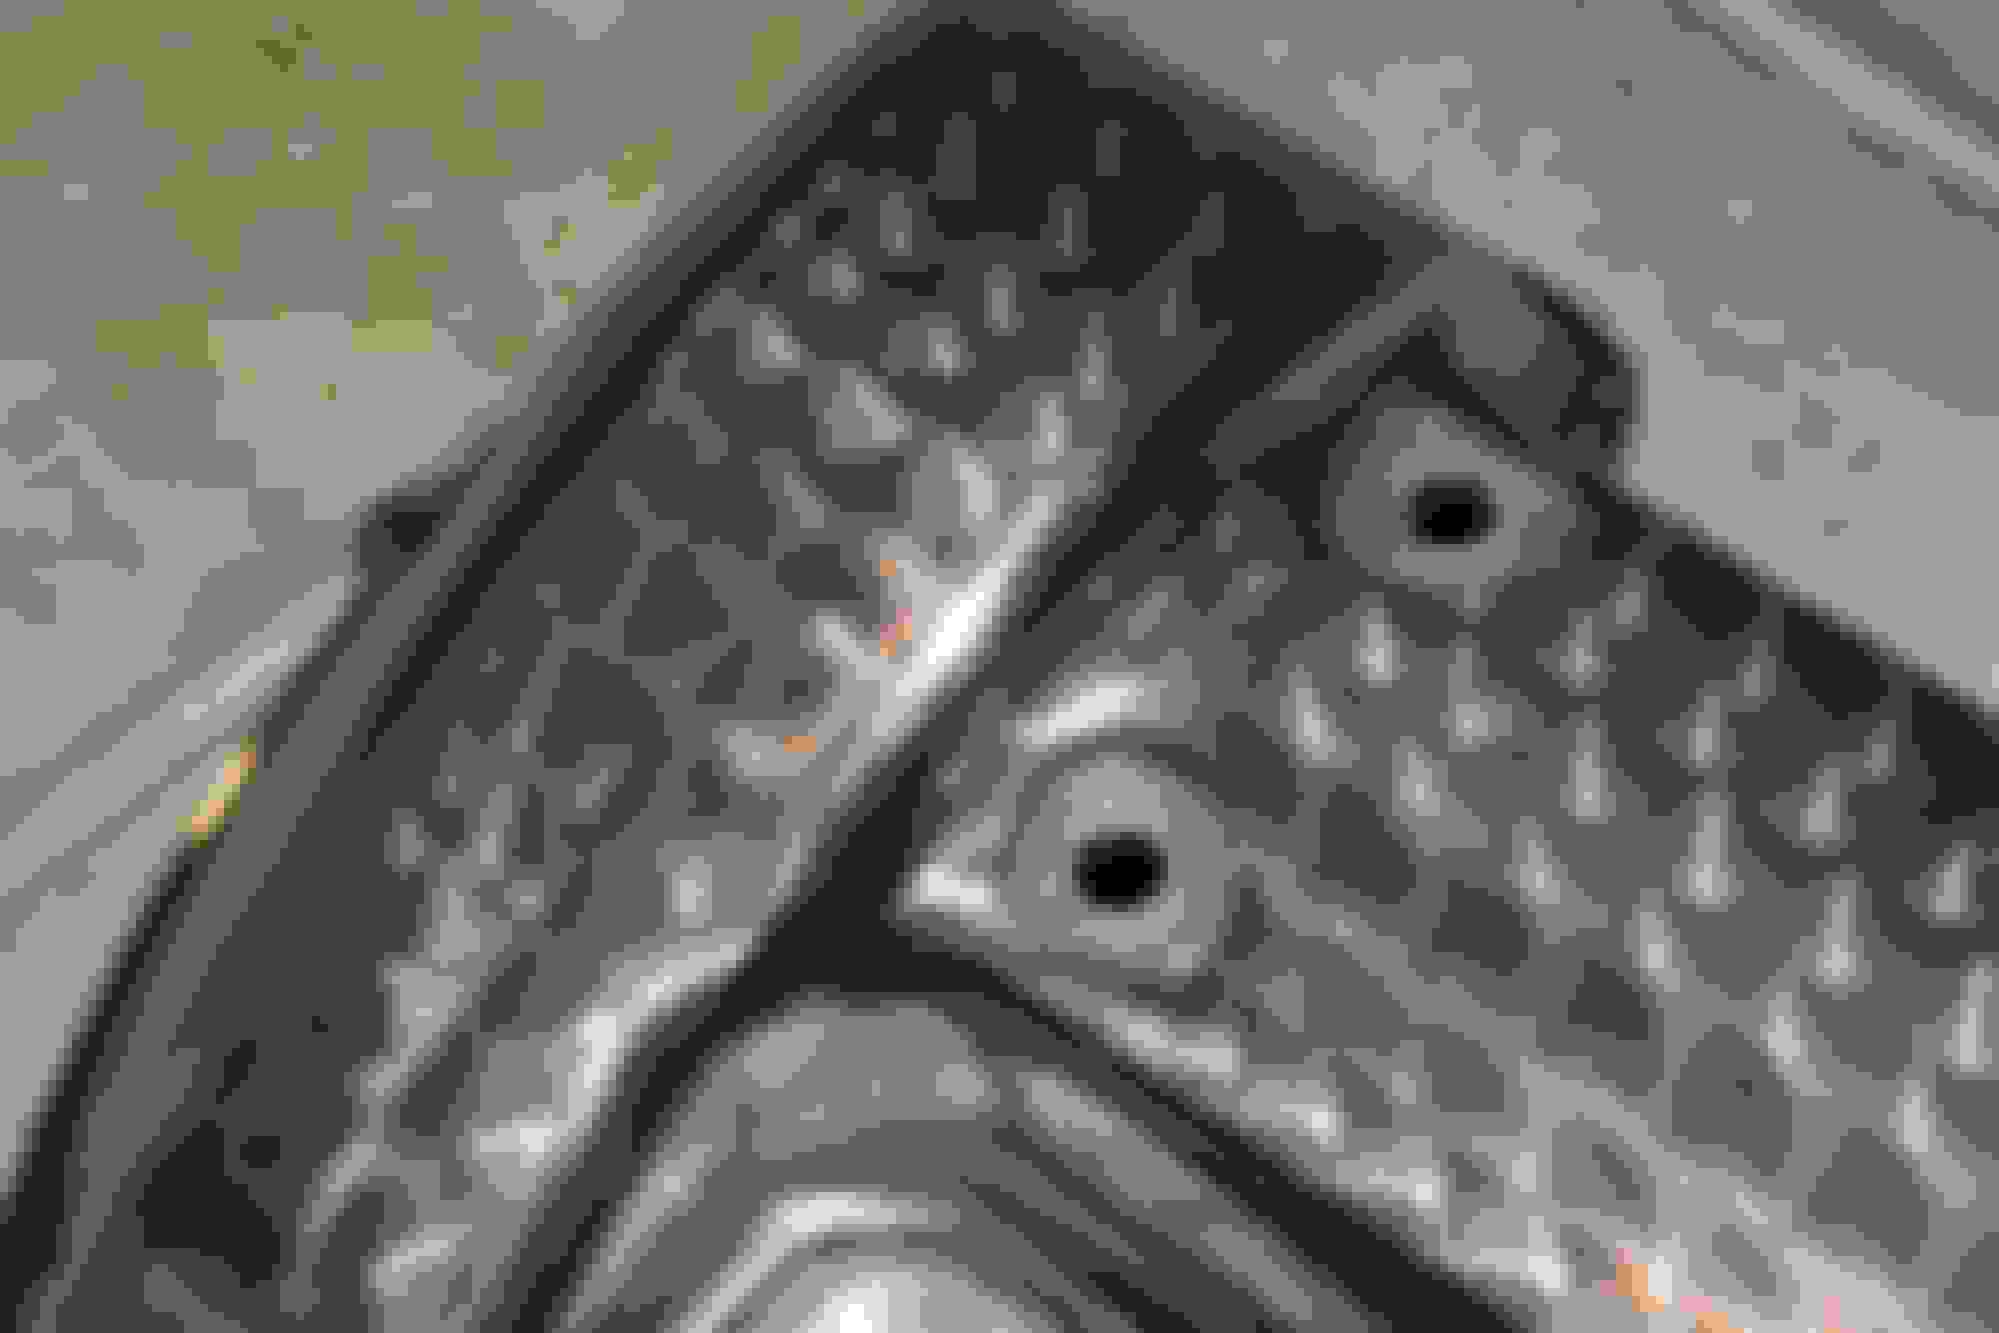
And this is how each hole looks after scouring them out with a wire brush.
At this point in the day, it had cooled down in the evening just in time for me to need the polisher. I set myself up a nice work space out the back door of the house, and went to town on the thing with tripoli and rouge!
My workspace for the evening.
My polisher is really just a bench grinder with two polishing mops. One side for the Tripoli, which has an abrasive in it, and is the more aggressive material, and the other side for the rouge, which is a polishing/dressing compound.
I started at one side, and ended at an arbitrary spot to give the rouge a go (I like to see what the finished product will look like. It always drives me forward). This is where j stopped for the night, exhausted!
Notice the sanded side VS the polished side. The finish quality is so much nicer with machinery
The old man and I have been talking a lot lately about the trajectory of this project. To that end we have agreed that it will NOT be a period correct restoration. So we're gonna make this thing exactly what WE want it to be, keeping as many big original parts as possible (numbers matching engine, and trans, etc), but splurging where we want (going with a 123ignition distributor, and probably ordering an entire Jenvey FI setup), and refinishing things how we see fit (probably gonna paint the head gold, and put a big valve S3 head on it, etc). The first thing we talked about after we got that all panned out, was engine turning the cam covers.
I was already elbow deep into one of them, it wouldn't be much work to knock it out, and if we didn't like it then it can just be sanded out and polished again. I convinced the old man that this is what we needed as a cherry on top, haha! The next morning I spent 5 hours in front the milling machine in the machine shop applying the finish you see here
I still have to polish out the sides. I'm only turning the outter face, including the sprocket cover. Since the face of the part is convex, I had to chuck up the part at a different angle for each new line of rosettes, being mindful of the pressure, and time I spent on each spot, or the pattern would be uneven (not the first time I've done this), and the sprocket cover was even more complex than that; did that part by hand. Very labor intensive work.
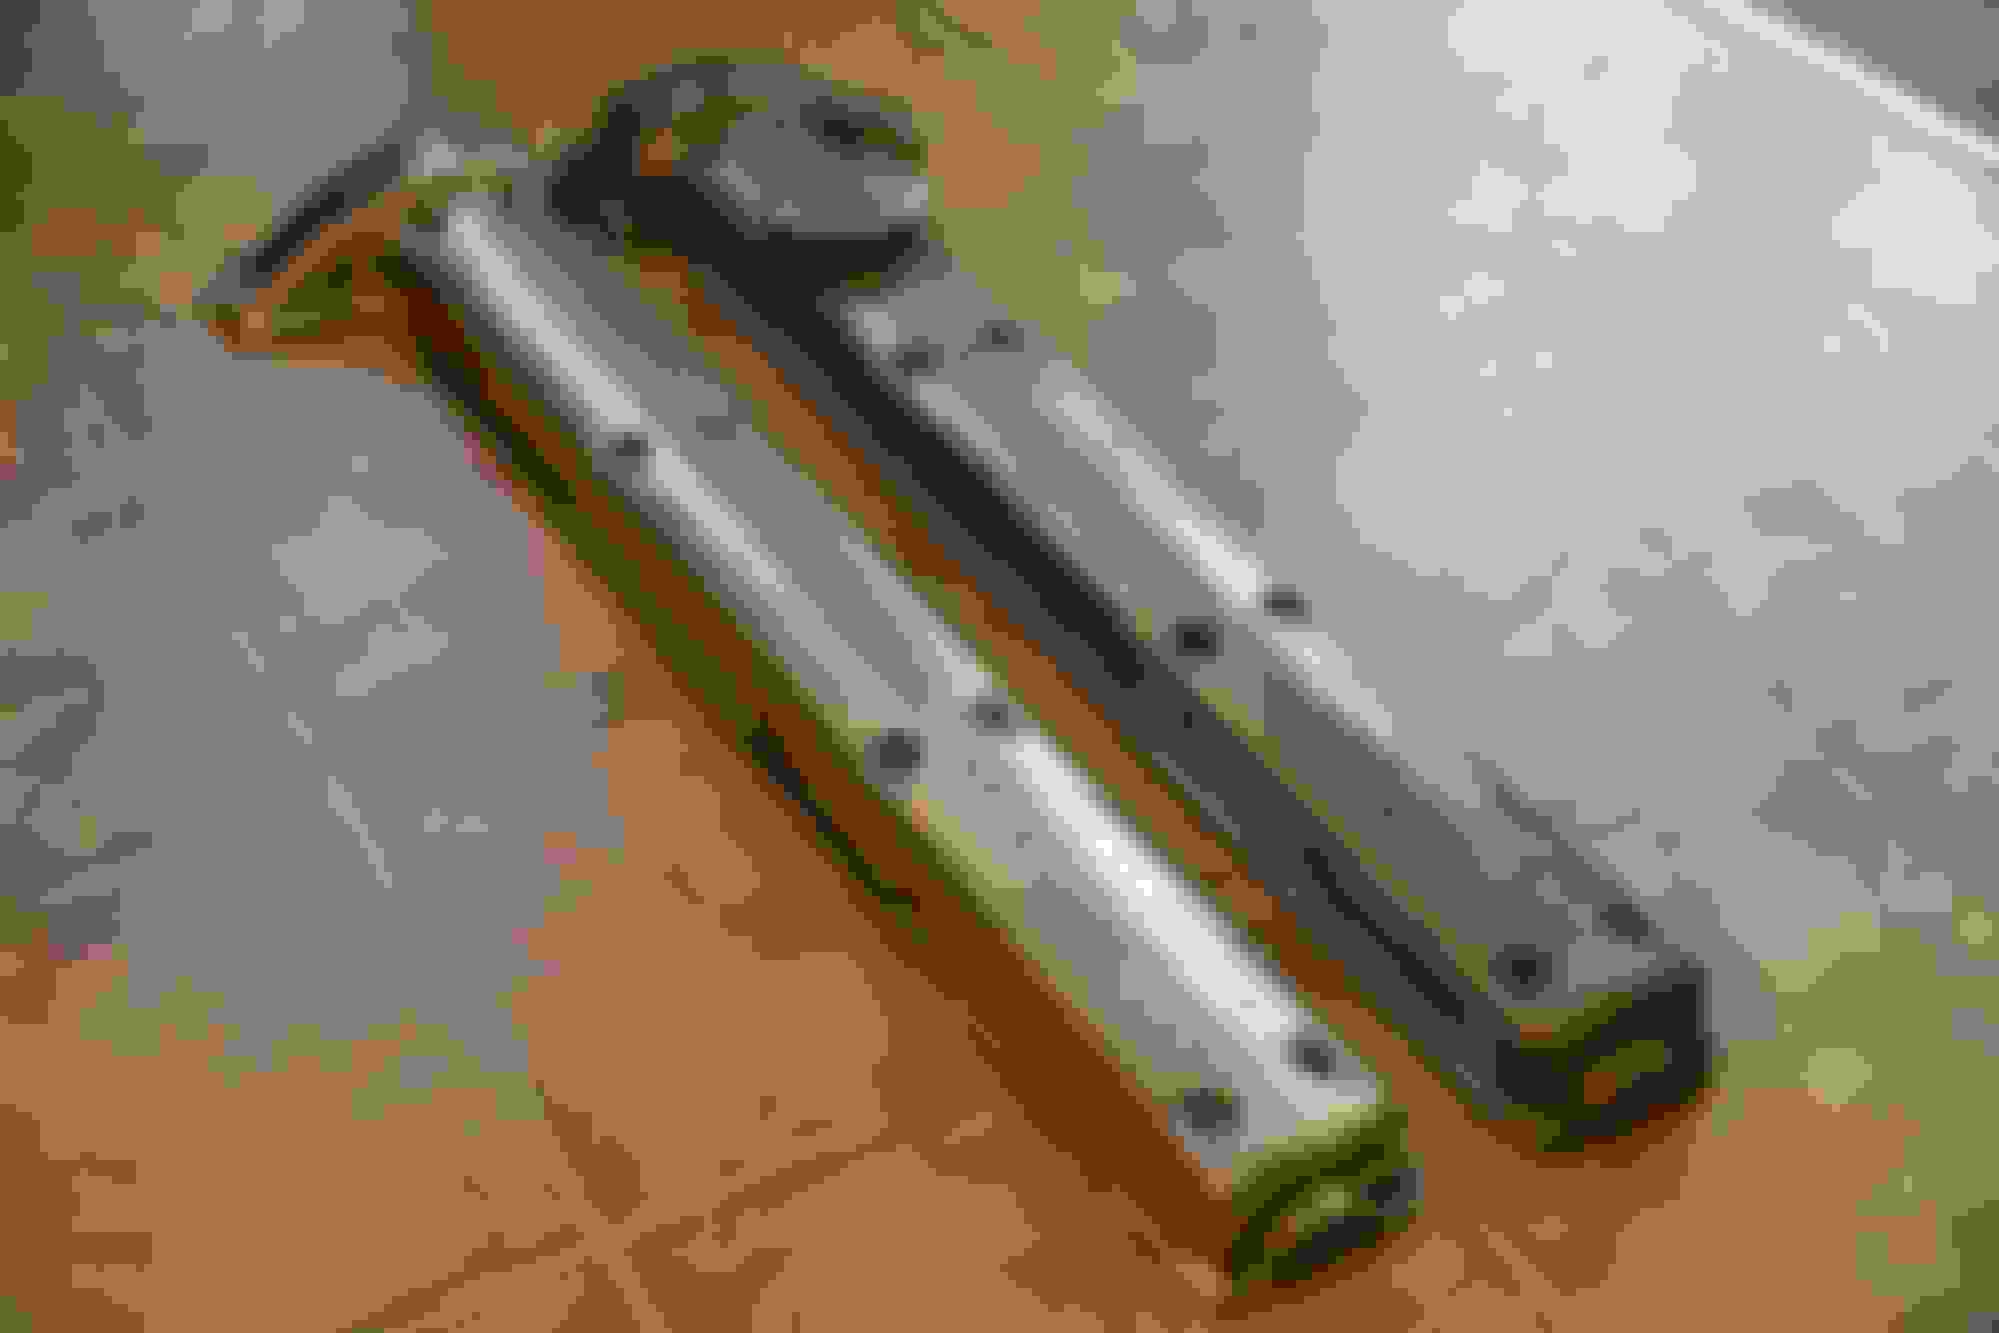
In these pictures you can see the difference between the reworked cover, and the untouched one side by side in different lighting.
Now, I have seen this done on some number of 20's Buggati's, but not so much in the Jag world. Maybe I'm the first to do this to a set of cam covers? Well the proof is in the pudding; the finish came out spectacular! Even better than I expected. Might even do this to the steering wheel too
Erik,
Wow!!! That looks great. I have often thought that engine turning the cam covers would look good, but I have never taken the plunge to having them done.
Now I am convinced, engine turned cam covers look great. I am sure that it will dress up the engine and engine compartment beautifully.
Are you going to turn anything else? Carb bolls maybe?
Great work and congratulations. Make sure you post photos when you are done and of the assembled engine.
Bill.
Hi Erik,
Just wanted to add my 2 cents. I think the cam cover top surface looks great with the engine turning, but I would not do the sides. I think it may be too much. Just an opinion.
Good work man.
Bill.
A good point, one I came upon myself as I was working them I plan on just turning the outter face of the camshaft area, and the sprocket cover as seen above. I will then mask off the turned areas, and hit the rest of it with the polisher using tripoli and rouge.
I started the other cam cover yesterday... it is more of a task than the first one :{ had to start with 50 grit paper O_O I might just polish that one out completely, and then turn the surface afterwards for that one.
Hi Erik,
I have a few questions regarding your engine turning work.
What pattern do you follow? Do you start in the middle? do you start at the edges and work in towards the center???
Are you going to engine turn the oil filler cap? Pattern straight across or work it in a circle from the outside towards the center?
Please, definitely post photos of the finished job.
stay safe.
Bill.
Hi Erik,
I have a few questions regarding your engine turning work.
What pattern do you follow?
My own. Given the size of the part, I decided a half inch pattern would be just fine. I used a teal Twistlok Scotchbrite pad for the cutting face, and added oil conservatively, just to keep the aluminum filings from building up on the surface of the abrasive and changing the pattern over time. Some people will draw a grid pattern on their parts, but part of the beauty of this finish traditionally is because it was applied by hand, and like a jewel quality diamond, it has small imperfections. This is why I prefer to do it by eye/hand/manually.
Do you start in the middle? Or do you start at the edges and work in towards the center???
I started in the middle and worked out. I found true center, and machined an entire center row down the spine of the part to start, then I chucked up the part at a different angle, and started adding rows of rosette's in a 50% overlapping pattern until I was just over the lip of the face. This way there is no unfinished part down the middle of the part where the rows meet.
Are you going to engine turn the oil filler cap? Pattern straight across or work it in a circle from the outside towards the center?
I was planning on doing the cap, yes, and I have some thoughts on that for you. The problem with machining a straight pattern on a part like an oil cap, is that eventually the base material will wear, or the rubber seal with shrink, and all of a sudden it starts rotating more to close tight, and the pattern gets more and more crooked over time. The answer to that is machining a different pattern, one that is still elegant regardless of the angle. So yes, you had it right, I intend to machine a round pattern, but am not sure yet if I want to do a spiral, or just layers of rows.
Please, definitely post photos of the finished job.
Other than being an E-type enthusiast, I am also a freelance photographer, so expect to see MANY high quality pictures from me.
stay safe.
Bill.
I plan on doing a lot here, and documenting everything
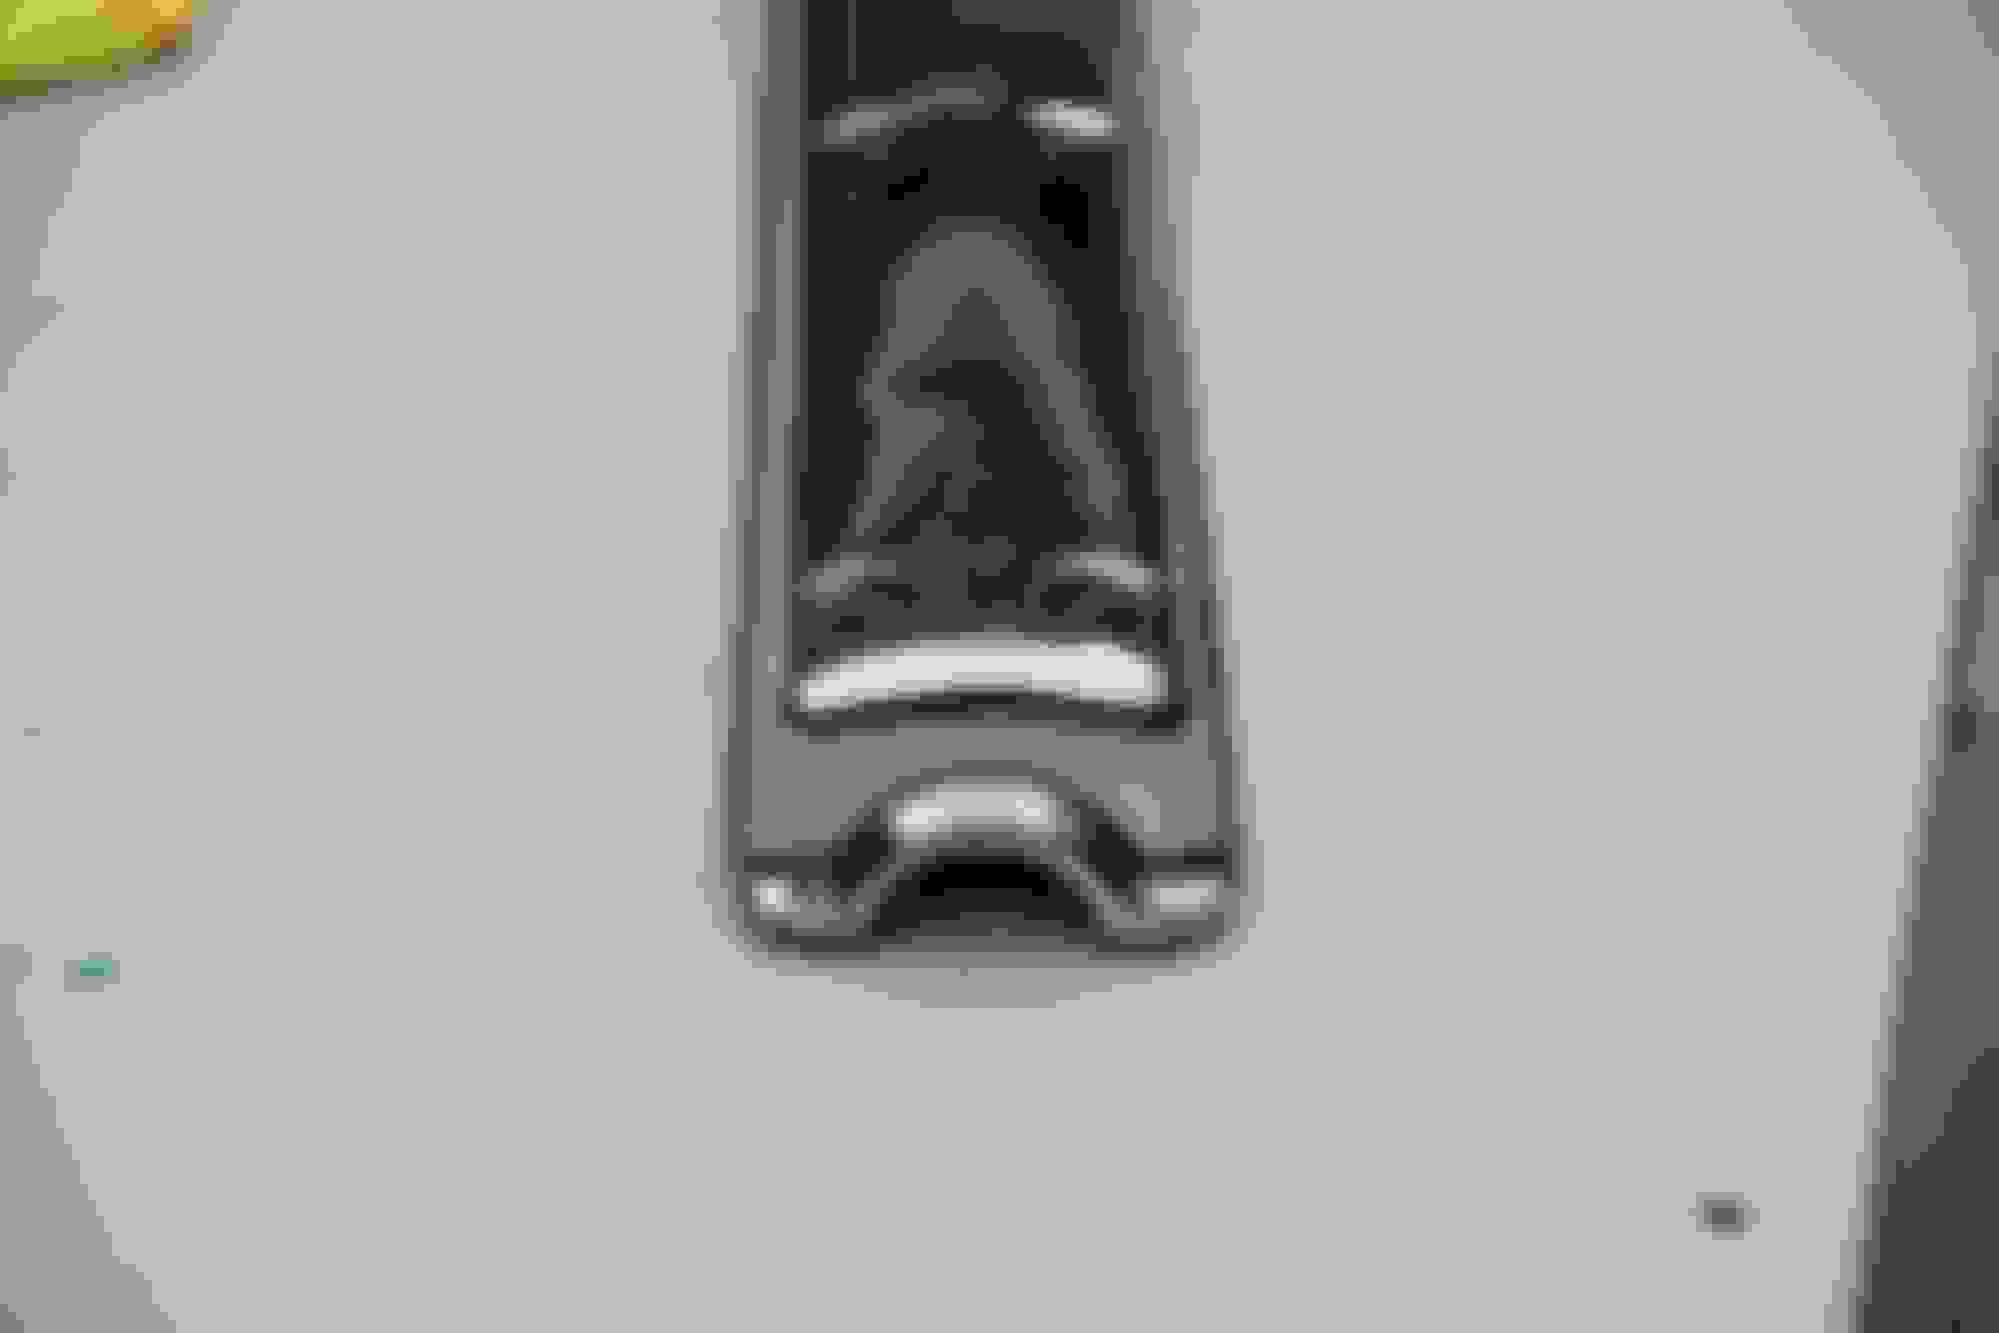
Pretty much finished with the first cam cover. I spent 2 hours today applying tripoli and rouge to polish out the rest for the part on the bench grinder. I masked off the turned surface with teflon based (plastic) tape, and went at it in 2 stages. I still need to get a ball chuck for my drill to do the corners by the sprocket, but it's effectively finished. Came out with a mirror finish
The other cover is MUCH worse off, unfortunately :/ It had been caved in in 2 spots between bolt holes, where someone had way over-torqued the nuts. That, and it had significantly deeper casting skin, and surface knicks. This one definitely won't be as pretty as the first. I started with 180 grit on the first one, and 50 grit on the second one! The second one I will finish off by hand with an angle grinder and twistlok scotchbrite pads. It needs an aggressive 2 stage sanding to reduce the 50 grit gouges before it can be polished successfully. I think I will polish the second one completely before turning.
Hi Erik,
The cam cover came out beautiful. Can't wait to see how they look installed on an engine. When you consider how good a dressed XK engine looks with all the polished cam covers, intake and carbs, the engine turning you did will add a visual texture/contrast to the engine that I predict will look spectacular.
Many years ago (12 or 15) I saw an XK150 with engine turned cam covers, but they were also turned on the sides, but in my opinion I thought it was too much because it lost the visual reference between the face of the cover and the side. It was an odd optical illusion.
Keep on brother, the engine will look great with those covers installed.
Bill.
Those covers are absolutely spectacular! As an owner of an S2, you have to ask yourself, Do I want everything factory correct, or do I want it as I if I ordered such options? Turned covers? What a terrific option that would have been. I, too, wanted the S1 polished covers for my S2. Too expensive new. Risky, if used. So I choose another option for my 1969 FHC: I had the original black crinkle finished polished off the finned covers. The top of the motor is gold. Looks unique & fantastic.
Take care. You sure are skilled at turning those heads. If you charged to do it for others, you might make $ .29 cents and hour for your labor! Ha!
Pretty much finished with the first cam cover. I spent 2 hours today applying tripoli and rouge to polish out the rest for the part on the bench grinder. I masked off the turned surface with teflon based (plastic) tape, and went at it in 2 stages. I still need to get a ball chuck for my drill to do the corners by the sprocket, but it's effectively finished. Came out with a mirror finish
The other cover is MUCH worse off, unfortunately :/ It had been caved in in 2 spots between bolt holes, where someone had way over-torqued the nuts. That, and it had significantly deeper casting skin, and surface knicks. This one definitely won't be as pretty as the first. I started with 180 grit on the first one, and 50 grit on the second one! The second one I will finish off by hand with an angle grinder and twistlok scotchbrite pads. It needs an aggressive 2 stage sanding to reduce the 50 grit gouges before it can be polished successfully. I think I will polish the second one completely before turning.
And now, quality pictures
Hi E-Type Erik,
To keep your cam covers looking shiny you may want to use ACF-50 on them, it should keep them looking shiny up to 2 years.
 07-26-2020, 11:23 PM

 and it is still not done.
  That project was the cam covers.


 I plan on just turning the outter face of the camshaft area, and the sprocket cover as seen above. I will then mask off the turned areas, and hit the rest of it with the polisher using tripoli and rouge.