When you click on links to various merchants on this site and make a purchase, this can result in this site earning a commission. Affiliate programs and affiliations include, but are not limited to, the eBay Partner Network.
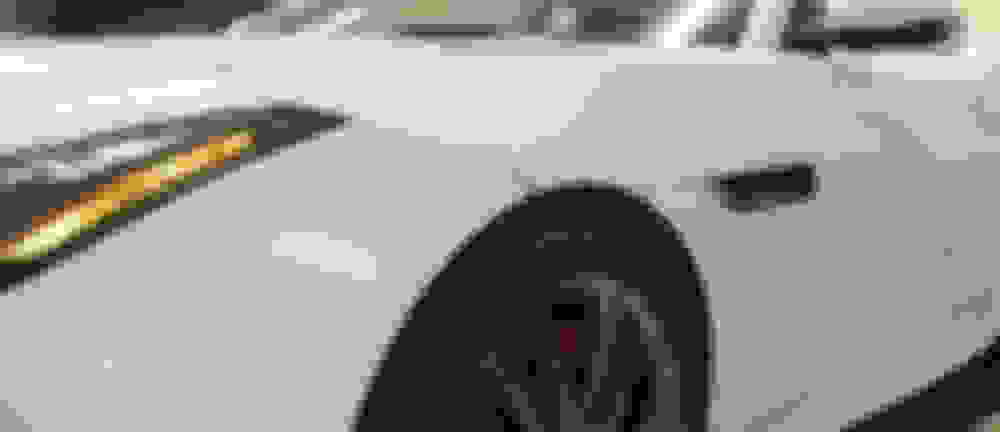
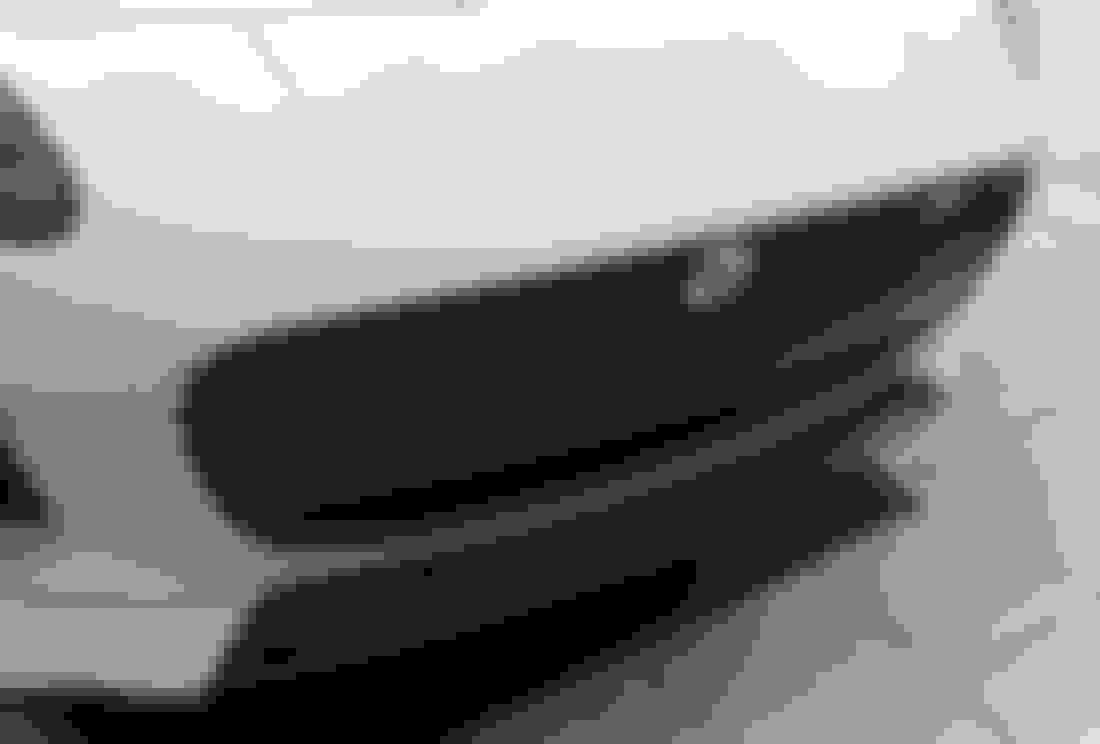
Staying in with the COVID19 makes me try all sorts of stuff! Last thing I did was some wraps of the side vents....Started with original Chrome...Then tried White color match (like those that Black out the Black cars, was going to
White it out ), Carbon Fiber, and Gloss Black.
Examples below. I decided I liked the Gloss Black the best...So sticking with that for now. Good thing with the wrap is, if I decide I do not like it, I peel it off and go with another flavor. It took me about 30 minutes
each to wrap, and about 2 minutes each to peel off.
it might be more pleasing if the colour matches other parts/ attachments to the car. Match the hood vents? Front or rear grills?
That being said, I have the gun metal grey for the side vents and grills but colour coded and chrome for the hood vents. Granted, different car...
Wonder how gunmetal gray would look. Or Firesand...
Yes...I am sure it would look fine. Problem is simply getting vinyl that matches the color of the car. Black is pretty easy, but as you can see, even all whites are not the same....
it might be more pleasing if the colour matches other parts/ attachments to the car. Match the hood vents? Front or rear grills?
That being said, I have the gun metal grey for the side vents and grills but colour coded and chrome for the hood vents. Granted, different car...
Agree...My hood vents are white with black inserts, given it is an AWD R post 2016...So best I could do to match them. Also have a black Maxton lip/wing, and the black grill, lower mirrors, lower mid-front spoiler, so black
is looking pretty good. May black out the window trim too? And grille surround. Or leave the mix of black, white, and chrome.
My opinion is that you should go for all black, like the black pack. Think it will look great with your white paint.
I retrofitted the black pack on my previous Firesand F-Type R, and had it on my (also previous) Italian Racing Red F-Type R. Now I just bought a black V6 base manual, that doesn't have the black pack, and I am really thinking of wrapping all the chrome bits ("chrome delete").
It would be fantastic if you could upload a video to Youtube showing how you're doing it if you choose to wrap window surrounds and grille surround as well!
Thanks for the post. I agree with you 100% (others may have differing opinions, so no worries). I actually started doing just as you suggested. I had a tiny mistake on the long piece, and peeled off my first attempt, so now ran out of material. More on order. Unfortunately I did not video any of it, but have a couple of good ones on YouTube below, and a few tips.
Use masking tape to relieve tension/adhesion (makes it easier to lift and tuck the vinyl)
Always snap a new blade when cutting (needs to be super sharp)...And lightly drag the blade using hand as quide...Don't press hard
Buy 3M, VVivid, or Avery wrap. You would not believe the difference between these and the cheap no-brands.
Pull the vinyl to edges and stretch a bit over edges BEFORE HEATING...Then heat it a bit and it wraps itself and gets really tight
Get some wrap tools to help smooth and with the edges and tucking. Also a wrap glove makes a ton of difference when smoothing (hand has too much friction).
TAKE YOUR TIME...CUT SLOW...PLENTY OF LIGHT!
I plan on removing the front bumper and grille surround to wrap it properly next (when my material comes in). And I am thinking of de-badging too. Maybe just a black Leaper on the rear Decklid/Spoiler??
More to come...Here are a few pics to date as I continue to wrap, and 1 comparison photo...
Looks great! Watched the first video, looks like quite a bit of work though...
Did you remove the side mirror when wrapping the window surrounds?
Thanks! No, I did not remove the mirrors. I thought about it, but it was easy enough to do without it. Just have to be careful...and a little more patient....and use 2 pieces (small piece in front of mirror about 3 inches long).
Mirror gone would be easier no doubt...Different strokes!
Would agree it is a bit of work to do, but happy with the look afterwards.
Got the Front assembly off and the grille surround out to wrap black also. The clips that hold the grilles to the center piece are a B^%! to get loose.
Thanks! Yes, they do add some whine sounds....noticeable, but not crazy. Works similar to the Eventuri, but not Carbon Fiber, and cost about $1Million less
Car breathes a bit better now, and since that are located out of the engine bay...They are truly COLD Air intake. You will note I positioned the factory air ducts so the air blows right
into them. Also have DryJet covers to prevent water, and I just washed the car prior to lifting and pulling the cover, and there was NO water on or near them.
Bruce, here is their web sales page: https://www.ywmotorsports.com/produc...12805428281387
I'm looking at getting one of these kits, only problem is the V6 version has been "sold out" for the last few months which is a bummer coz both you and I have V6s.
If you toggle to V8 they are available, and I understand the only difference is the adaptor/connector tubing for the V8 is a bit bigger diameter than the V6 version.
I think someone around here has modified the V8 kit to fit his V6 by using different tubing.
Edit - I think it was justanurse per this post: https://www.jaguarforums.com/forum/f...8/#post2178804
I�m doing the P7 grille sway shortly, do you have any lessons learned from taking off the front clip? Looks like the lower chin spoiler is off so I assume the belly pan comes off and then the screws at the top and bottom? Thanks.
I�m doing the P7 grille sway shortly, do you have any lessons learned from taking off the front clip? Looks like the lower chin spoiler is off so I assume the belly pan comes off and then the screws at the top and bottom? Thanks.
Yes, belly pan first. Bolts at the front of the inner fender will need to be removed, but the inner fender remains in place. Very easy, but time consuming because of all the bolts. Be certain to note where the each come from. The threads are all the same but there are 2 or 3 different types of heads depending on location. You�ll want to get them back in the right place.
Well. Patience is not a strong competency for me.....So while I had the front end apart, I decided to prep and paint the grille surround instead. I tested a few scrap pieces of wrap, and felt painting may be a better option?? Also if I screw it up, I can always buy a new one, or go with the P7 style...Or even strip it and wrap it!
So I sanded the chrome finish with 320, then 400 grit sand sponge. Wiped down with degreaser, the alcohol and let dry. Then sprayed 2 coats of black metal primer (etching), let dry and lightly sanded with 600 grit sandpaper. Then wiped again with alcohol (always with rubber gloves on to avoid getting oil on the surface).
Then I shot one medium coat of flat black professional(for bond and durability) Rustoleum paint, let dry, and then two medium/heavy coats of gloss black, and put in front of an electric heater and fan overnight to help cure. While I was at it, I decided the "R" badge might look good white, to match my (self made) White LED Growler badge. Got up early the AM and re-assembled, and happy with results so far. Still have some pieces to put on, but almost done.
I discovered you need to spend a little time ensuring bumper cover alignment, but I got it perfect with about 4 adjustments. A tip on taking that center grill out, is to heat it a little (the tabs), and i pops right out!
Pics below. Now when my vinyl arrives, I will finish the window trim and all done!
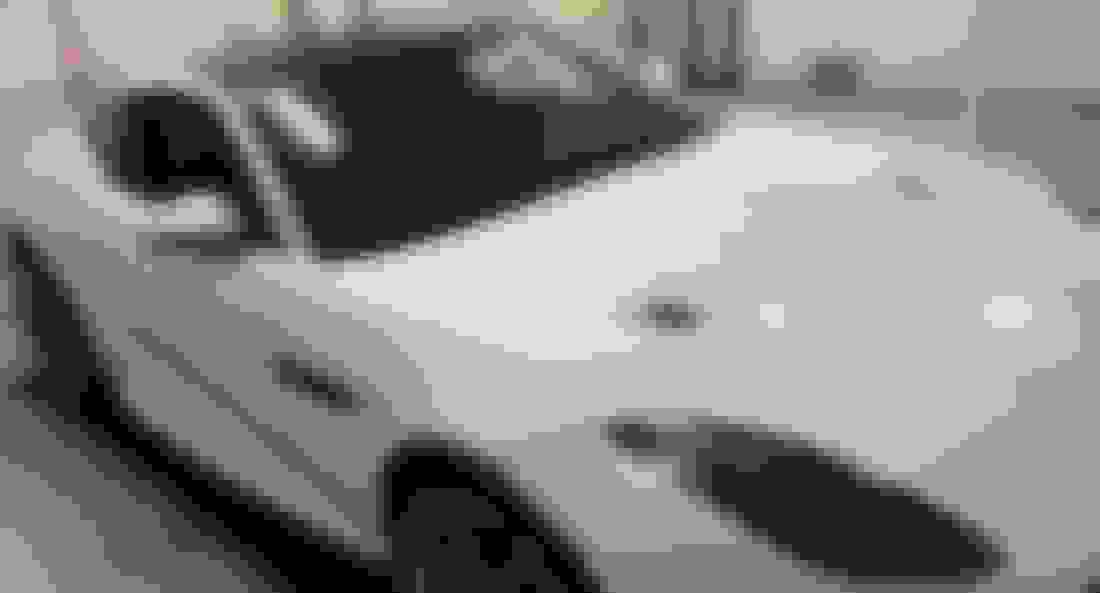
After Sanding Chrome Primed - two coats Finished with White R painted Re-installed My painted and LED installed Growler...Still lights up! Before and After Grille surround, White Growler(LED light eyes), White "R" badge (Painted)
Vinyl came in today so I could finish it all up! So all done for now.....I ended up doing the following:
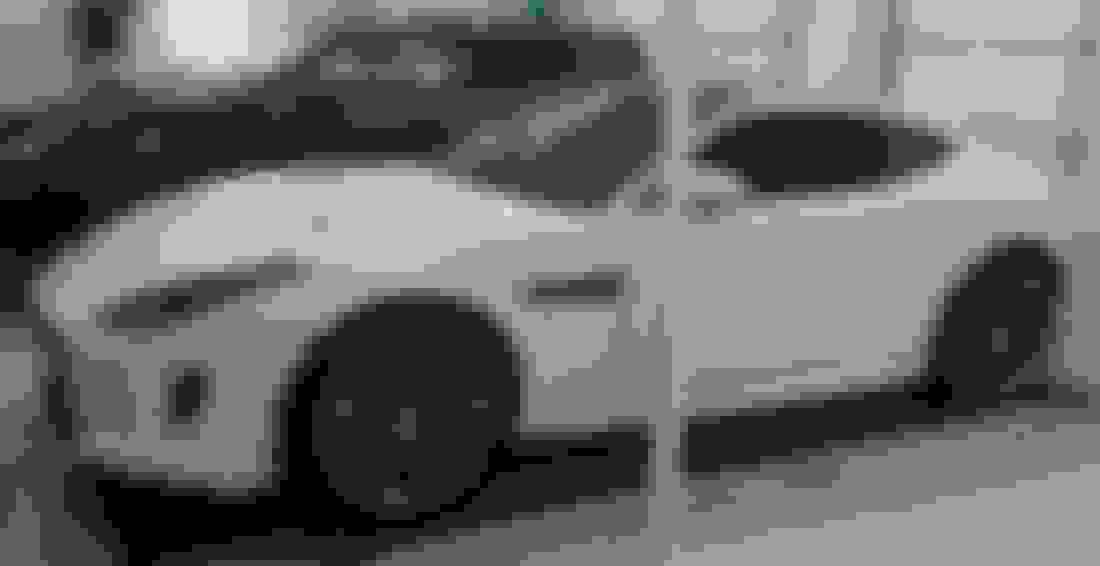
Wrapped side vents with gloss black 3M vinyl
Wrapped all window trim with gloss black 3M vinyl
Wrapped rear bumper lower lenses with blackout tint
Painted front Grille Surround gloss black
Painted front "R" emblem Polaris White
Very happy with the look! I also ordered some dark Charcoal tint to do the windows next I think, and then likely remove the rear badges and just put a Black Leaper, and maybe an "R" on the rear?
At any rate...Here are the finished pics. Learned quite a bit about wrapping etc. while doing this. One note...The design of the F-Type window trim is one of the more difficult to wrap. I ended up using
a plastic business card to guide the razor along the edges, and did mess up a couple of times and had to redo it...Because I am ****.
Front arch extensions installed Grille surround painted black - R painted Polaris White Passenger side vent and trim done Driver side vent and trim done Grill surround black and white R, with Growler LED's on! Blackout Tint on rear bumper lenses
 03-23-2020, 04:39 PM

 Last thing I did was some wraps of the side vents....Started with original Chrome...Then tried White color match (like those that Black out the Black cars, was going to