When you click on links to various merchants on this site and make a purchase, this can result in this site earning a commission. Affiliate programs and affiliations include, but are not limited to, the eBay Partner Network.
That's pretty awesome of you - unexpectedly my light kit has shipped and will arrive tomorrow. I wonder how these direct connects will work.
Np. I finished the pigtail conversion and everything works great. Its easy enough, but takes about an hour vs plug and play. Tonight I'll post a brightness comparison, it is impossible to tell during the day.
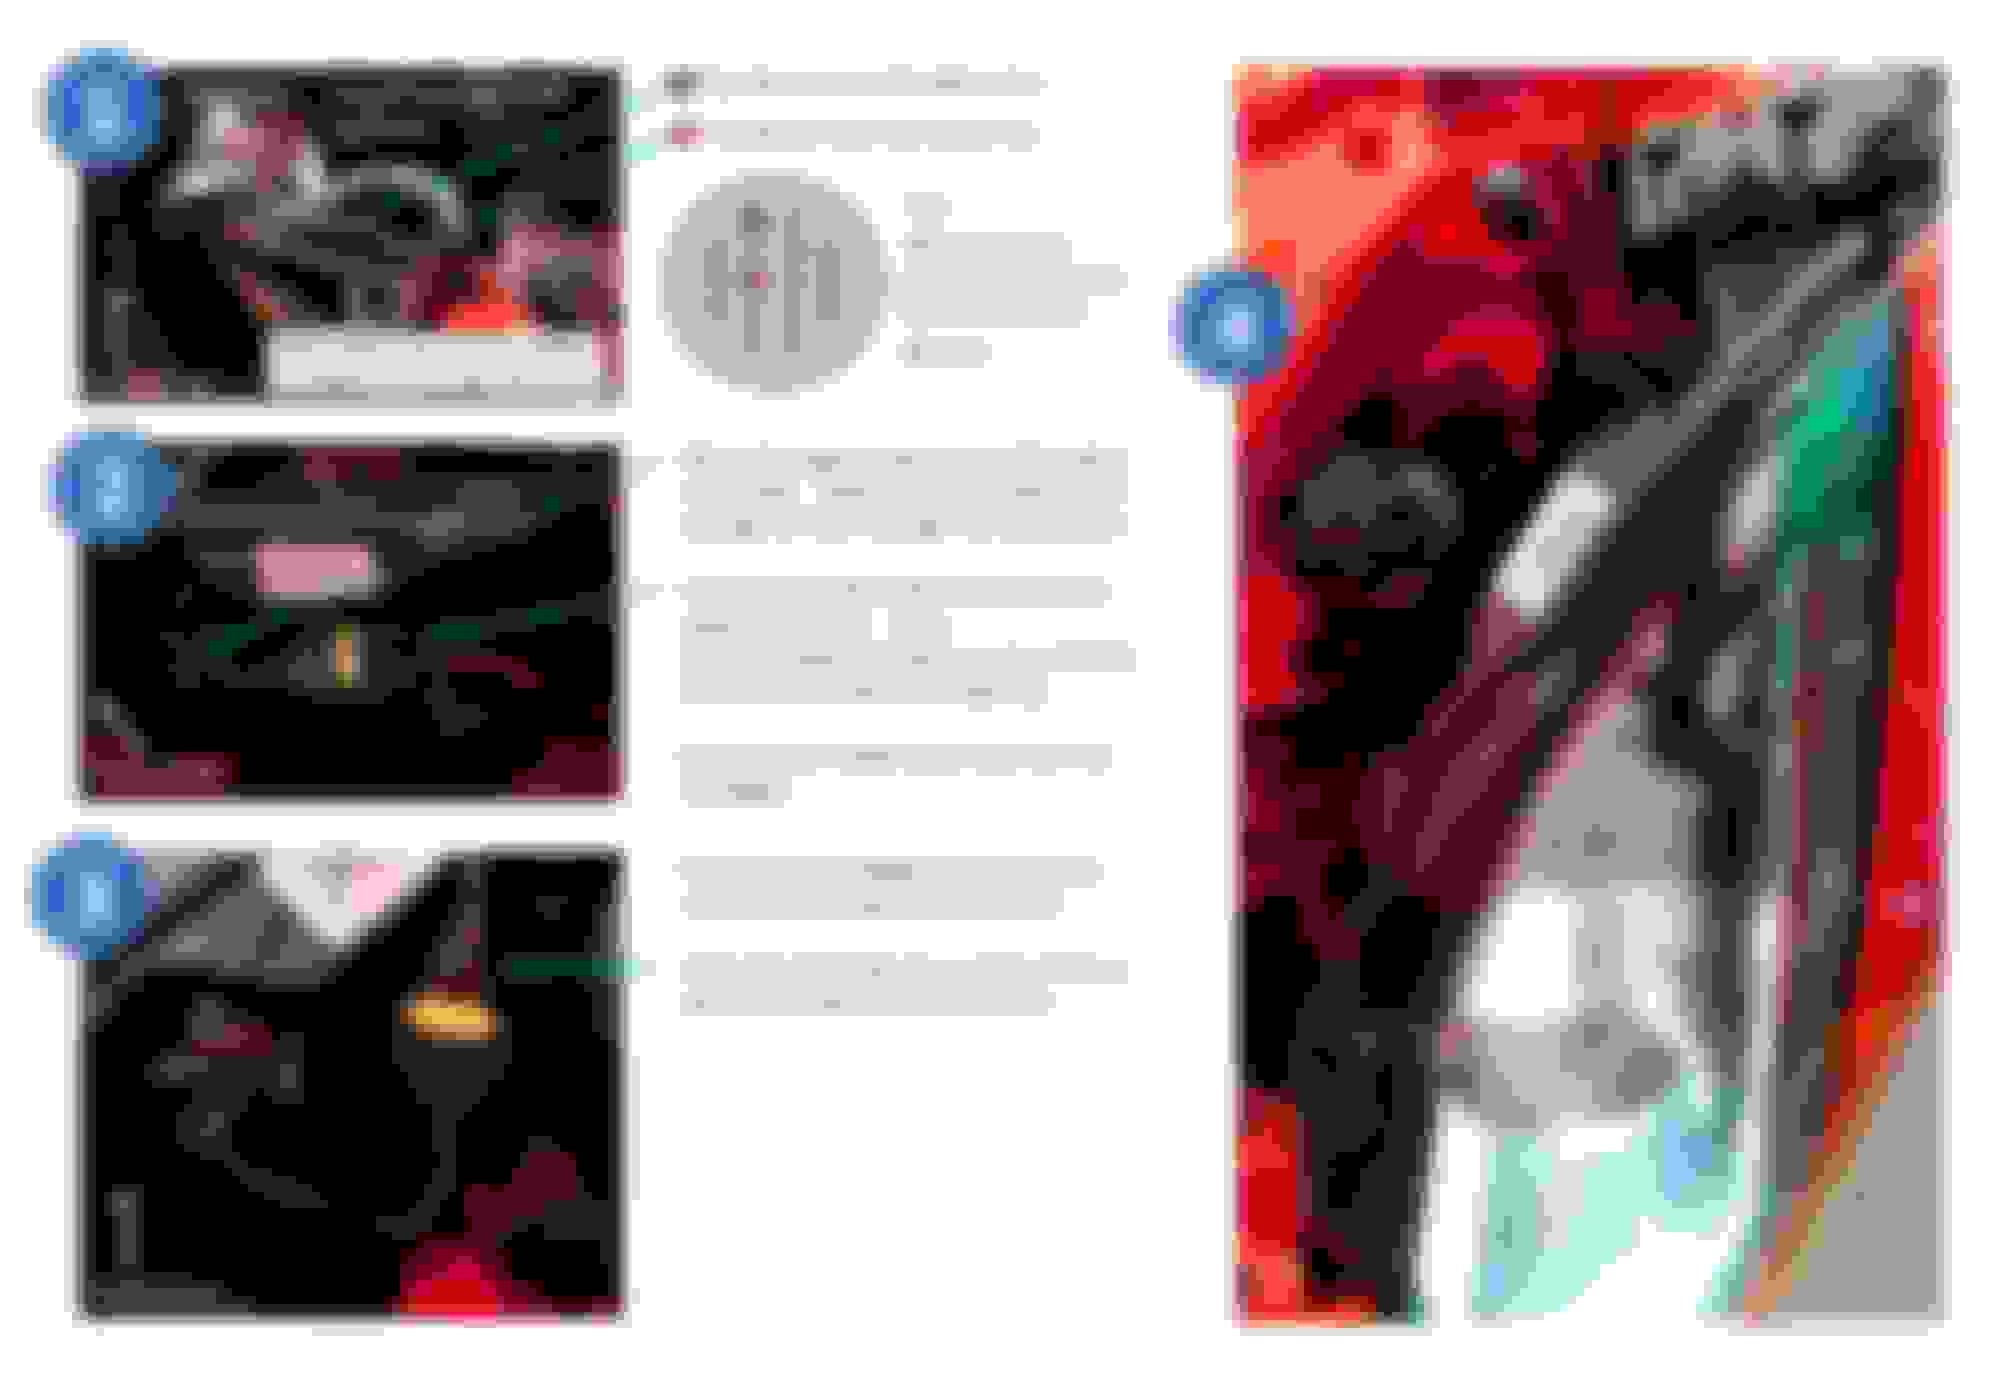
A variation on Conversion Method 2 is to actually follow the LED bulbs directions by removing the factory HID Ballast, then inserting the LED bulb's two power pins into the 12V source where it energizes the ballast when you turn on the headlights. To do that with our car you have to remove the headlight unit and remove the OEM HD ballast
Apply painters tape to the headlight top glass to protect it.
Remove the rear wiring harness by squeezing the release tab on the side.
Remove the headlight by taking out three 10mm attachment bolts. Two are obvious, one bolt at the rear of the head light unit and one bolt under the hood hinge. The third bolt requires removing the two bolts that attach the bumper right above the front tire. You can also loosen the T30 bolt inside the wheel well to create more play, that one is at about 10 o'clock as you view the left front tire. Gently pull the bumper away from the outside edge of the headlight. Stuff a microfiber cloth in the gap to hold it open. Use a 12" ratchet extension w/10mm socket and a magnet to reach in and take out the bolt behind the bumper, its roughly next to the projector lens. It sounds harder then it is.
Wiggle the headlight unit back, lift the back end up, sink the front end down into the hole, and carefully remove.
Flip the headlight upsidedown
The HID ballast is the rear most metal box as the headlight sits in the car.
Remove the two T20 screws to remove the HID ballast.
Insert the LED bulbs universal pins as shown below
Wrap with electrical tape to secure the pins and waterproof the HD Ballast connector.
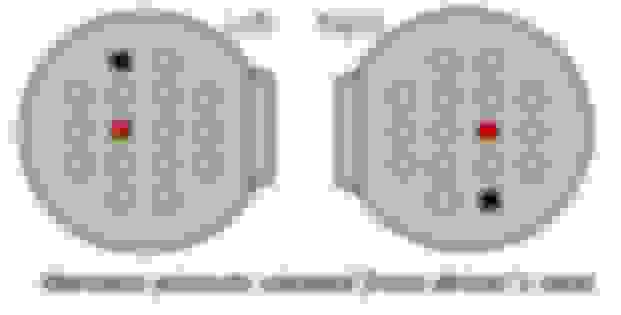
Note that the post #42 wiring harness pinout orientation is oriented for the left headlight as seen from the driver's seat. The right headlight's pinout is the same with respect to the push tab on the connector, but it the connector is flipped upside down so the push tab faces the engine.
Note that the post #42 wiring harness pinout orientation is oriented for the left headlight as seen from the driver's seat. The right headlight's pinout is the same with respect to the push tab on the connector, but it the connector is flipped upside down so the push tab faces the engine.
Wow. Total admiration. Damn fine job. I was enthralled in making dinner and running errands! Boom! Mind blown with your dedication. And folks are worried about oil change intervals and such...
I know they are not plug and play but the DZGs are the way to go. They are the brightest and whitest, have the most even lighting and throw more light to the sides and the brights are excellent.
Having installed quite a few 35W (our OEM) and 55W HID conversion kits, I think their advertised 50W equivalent LED rating is about right.
Any updates on the car rover LEDs? My left headlight just went out and I am considering an LED conversion but I'm looking for a plug and play solution 👌
 02-14-2020, 12:10 PM