When you click on links to various merchants on this site and make a purchase, this can result in this site earning a commission. Affiliate programs and affiliations include, but are not limited to, the eBay Partner Network.
I was not happy with the light output or the color temperature of the bulbs in my car, so I bought and installed some LED bulbs. The bulbs fit perfectly, and my vision pack extras all work, and no dash lights.
Had a lot of positive reviews on Amazon. It was an VERY well packaged kit, it even includes gloves so you don't touch the bulbs (I didn't use them). A nice cardboard box with a foam interior to keep the bulbs well protected during shipment.
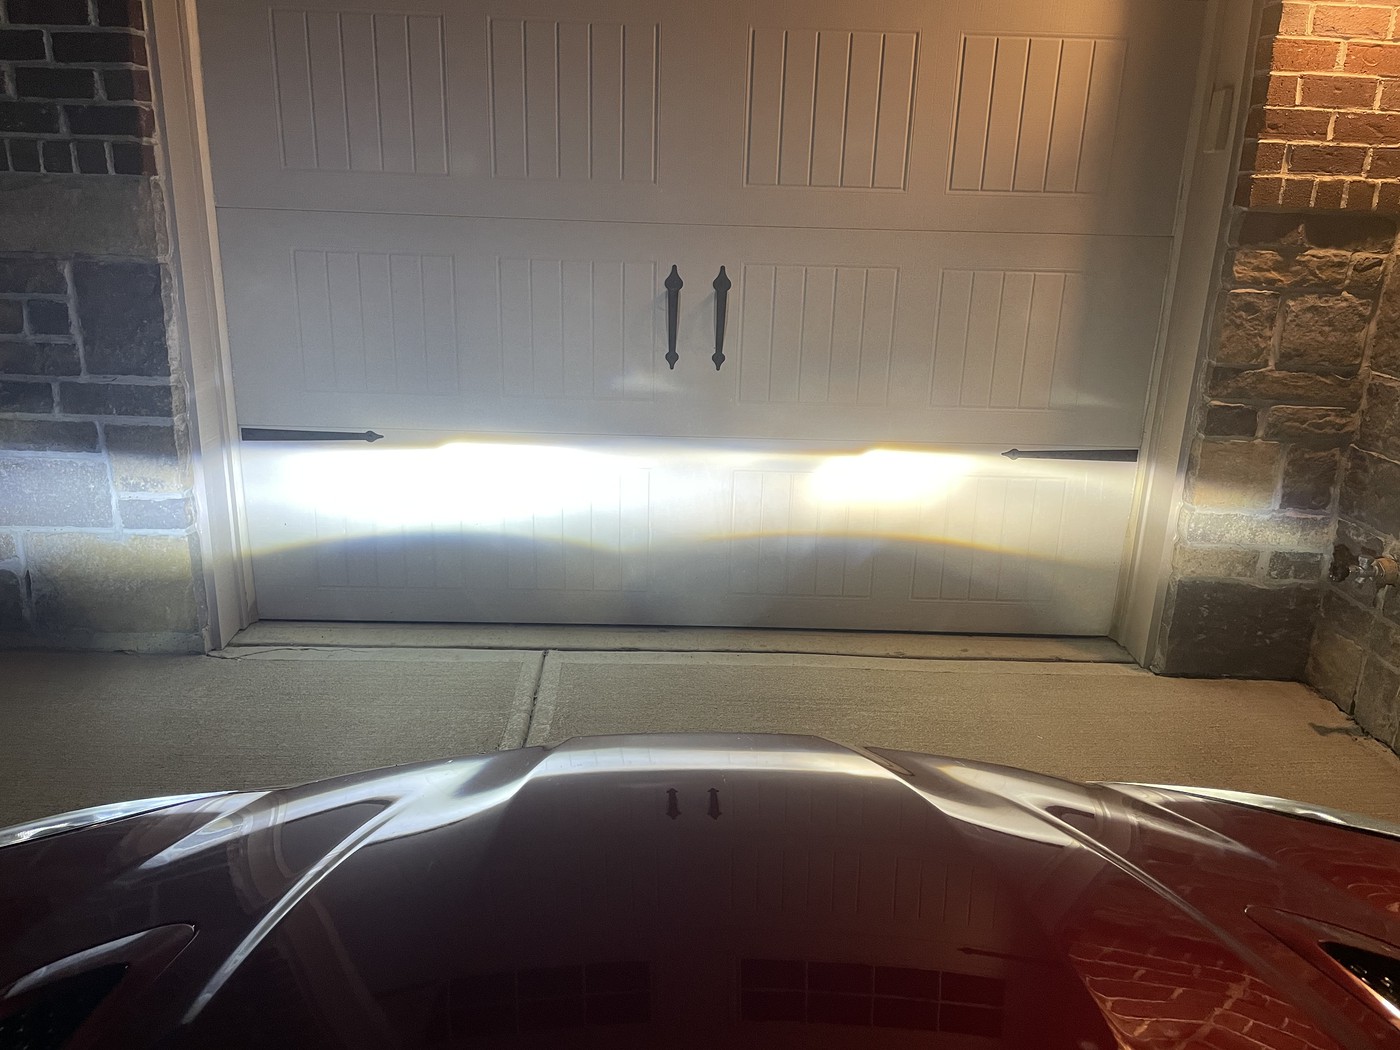
Here is the LED on the left, and the OEM HID on the right (lowbeams):
Here is Highbeam LED:
And Highbeam OEM:
It's harder to see in the photos, but the LED's are MUCH more white and the light is even. The OEM bulbs are yellow and have hot and cold spots in the light field. I really like the new bulbs, but would have preferred 5000k over the 6000k I got, but I could not find any in 5000k in LED.
Here is the replacment procedure. On the left side it is quite simple. Remove the rubber boot over the back of the headlight. Remove the electrical connector on the bulb. Reach in and rotate the "lock ring" on the bulb about 45 degrees counterclockwise (there are two tabs you will feel on the side of the blub to undo the lock ring. Then pull the bulb out. It was easier for me to "bend" the bulb down and get it started out, and them pull it out. The left side bulb came out easer than the right side. There are a bunch of tabs/fingers holding the bulb in, so just be carful and pull that puppy out! Installation is a breeze. Push the bulb in place, connect the electrical connection, lock the lock ring, and put the rubber boot back on.
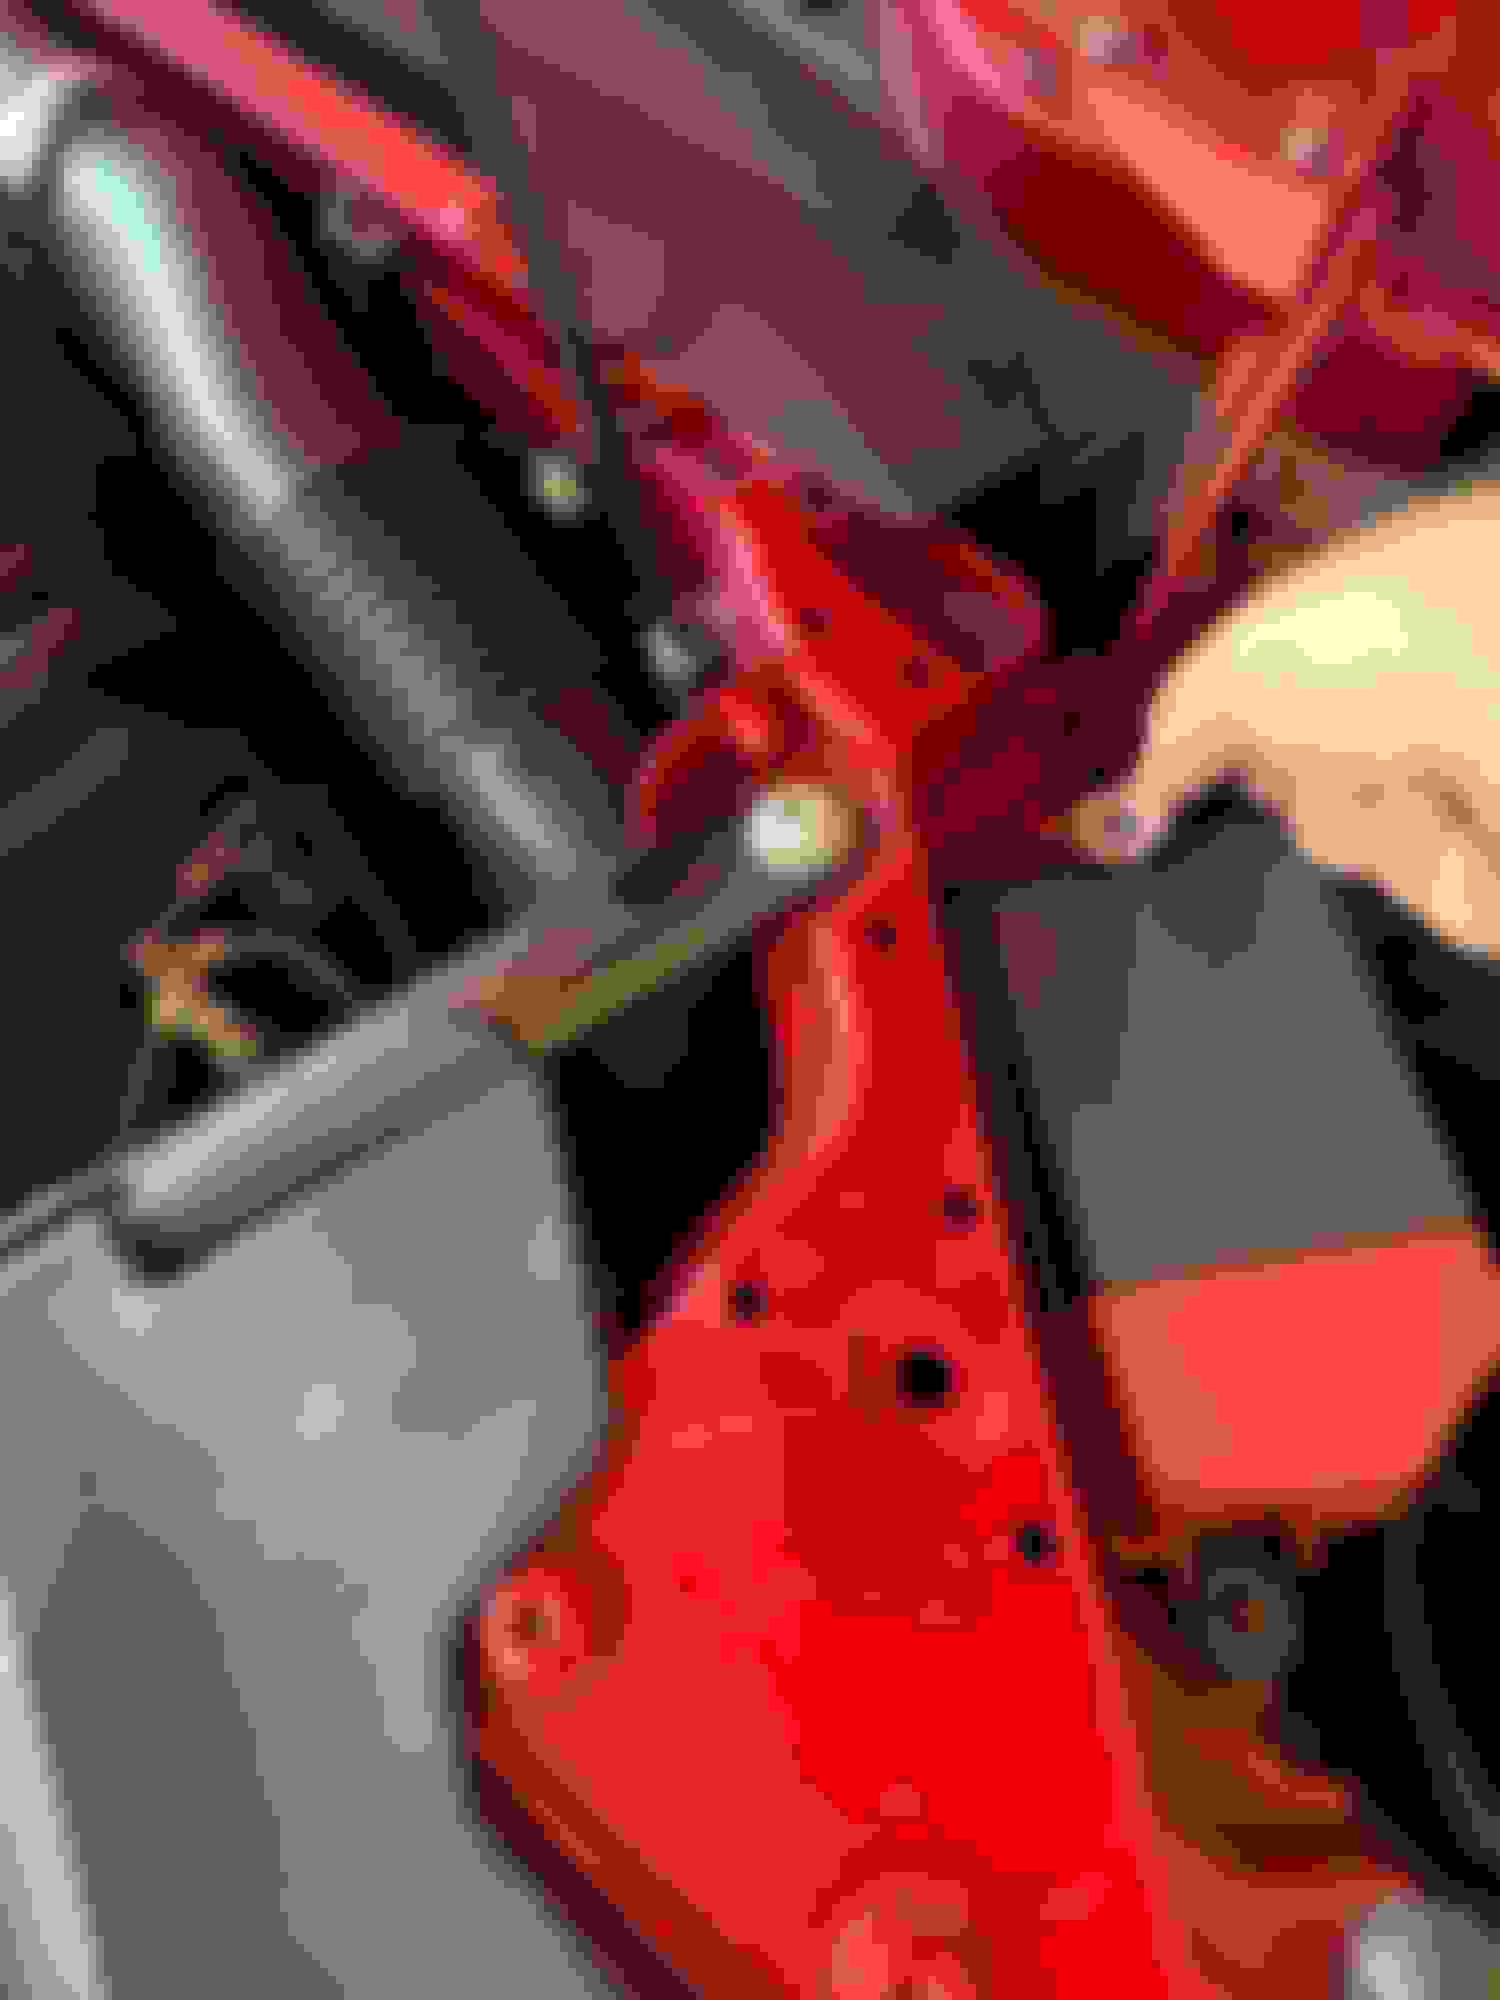
On the right side, you have to move the fusebox out of the way (what a waste of space for 2 relays and 2 tiny fuses!). That means loosening 2 12mm hex bolts. One towards the rear of the car:
And one towards the front of the car:
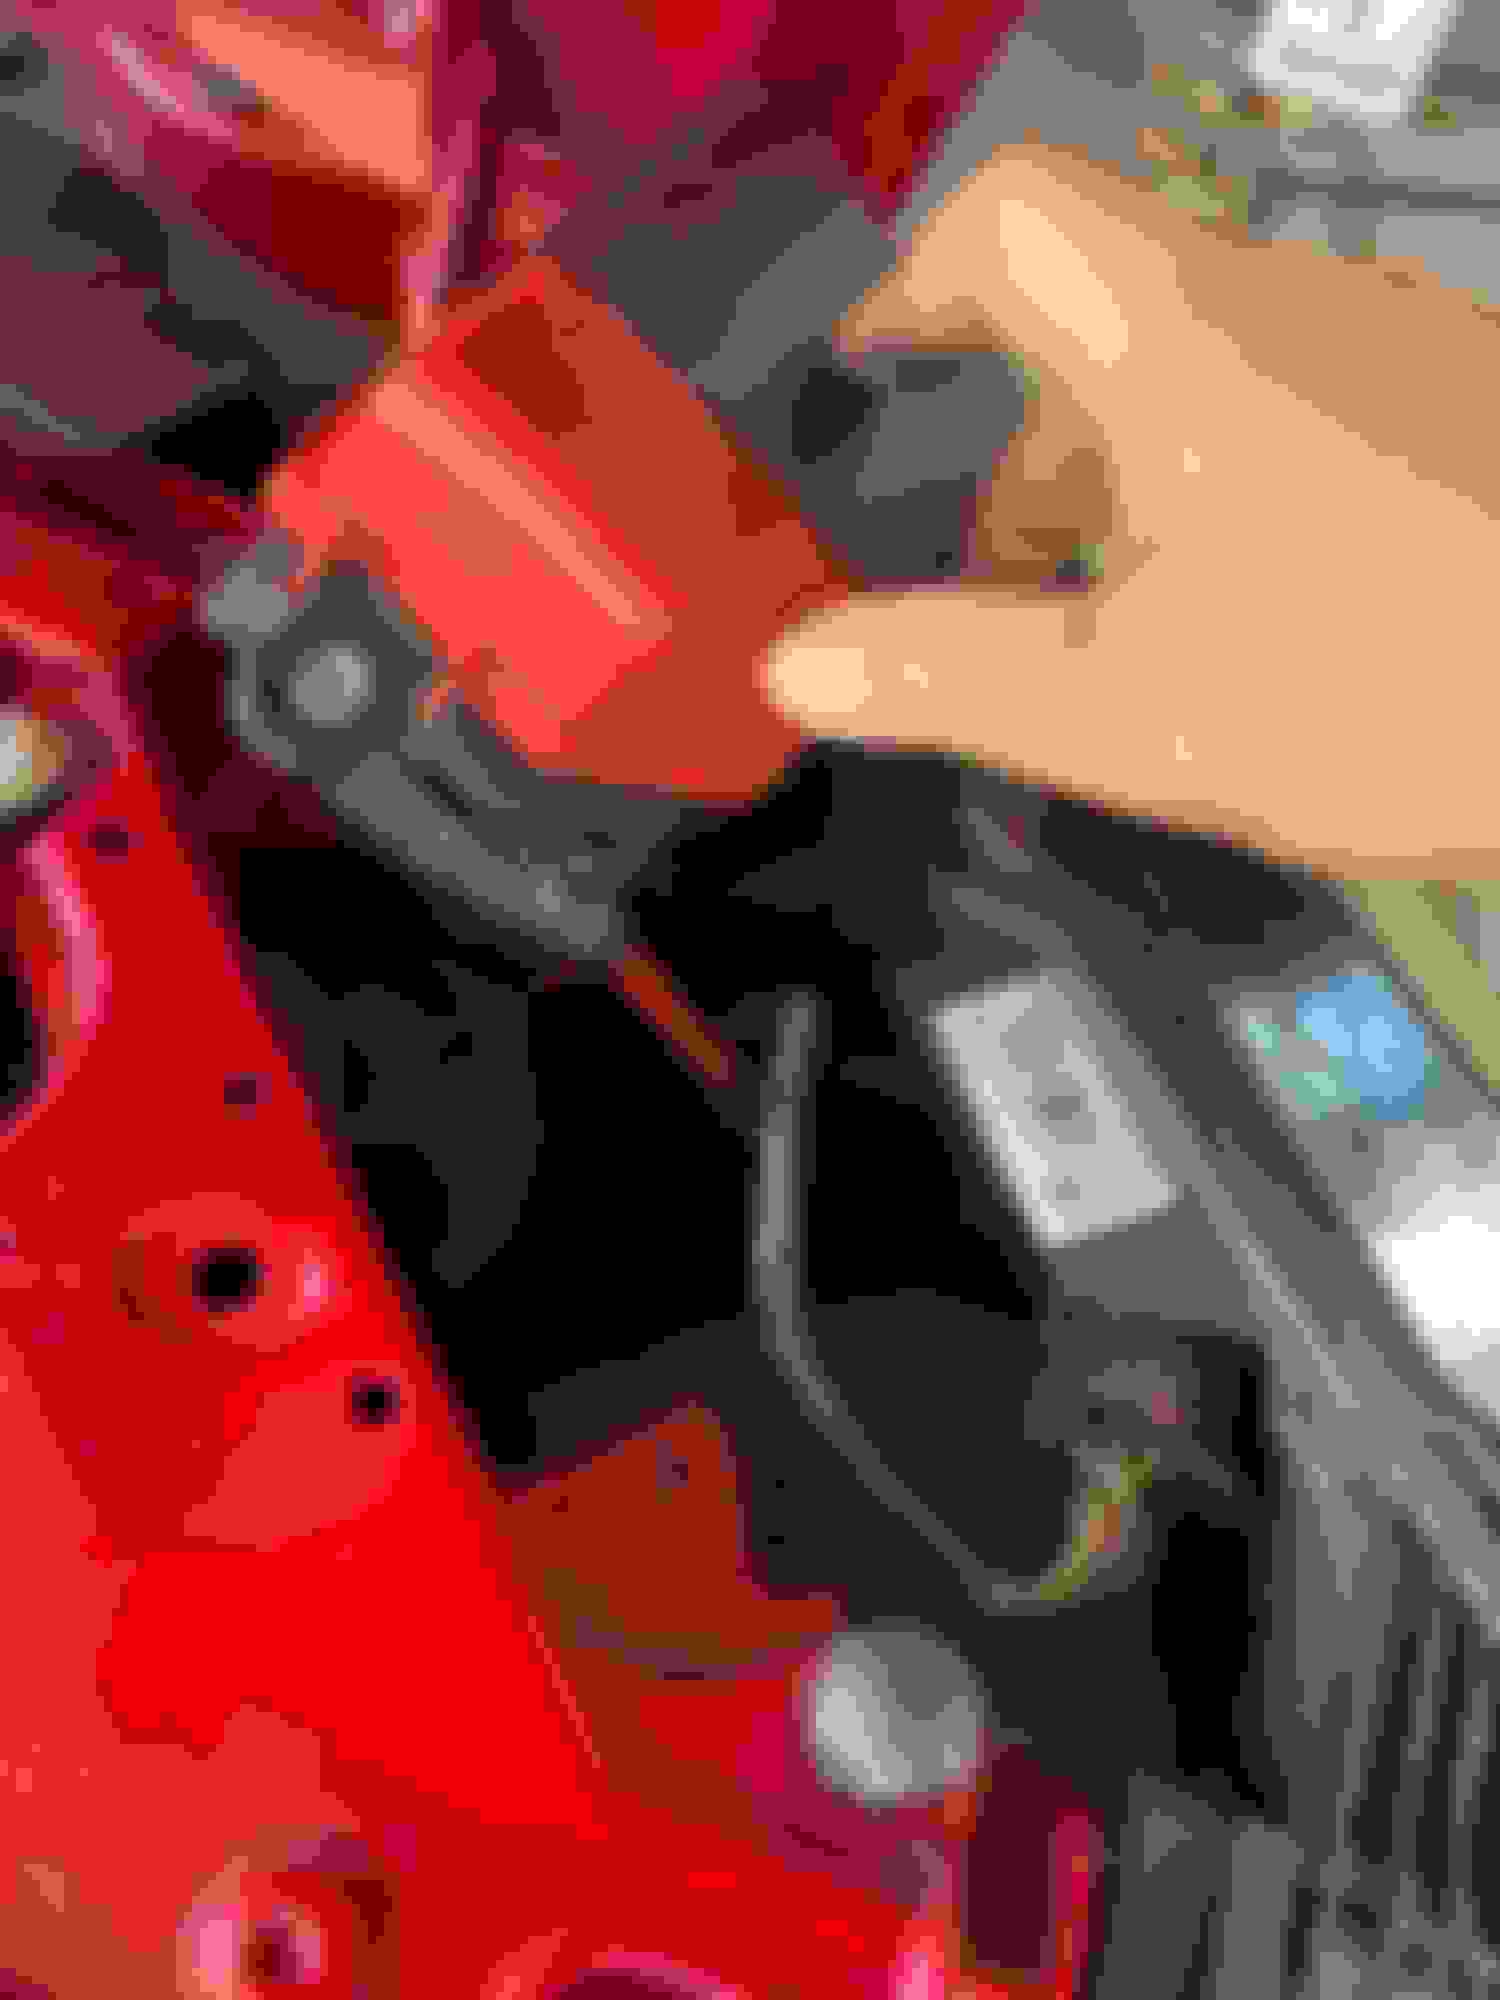
You have to snip one zip-tie and separate a bit of wiring loom from the fusebox. Then you can move the box out of the way enough to get your hands in there:
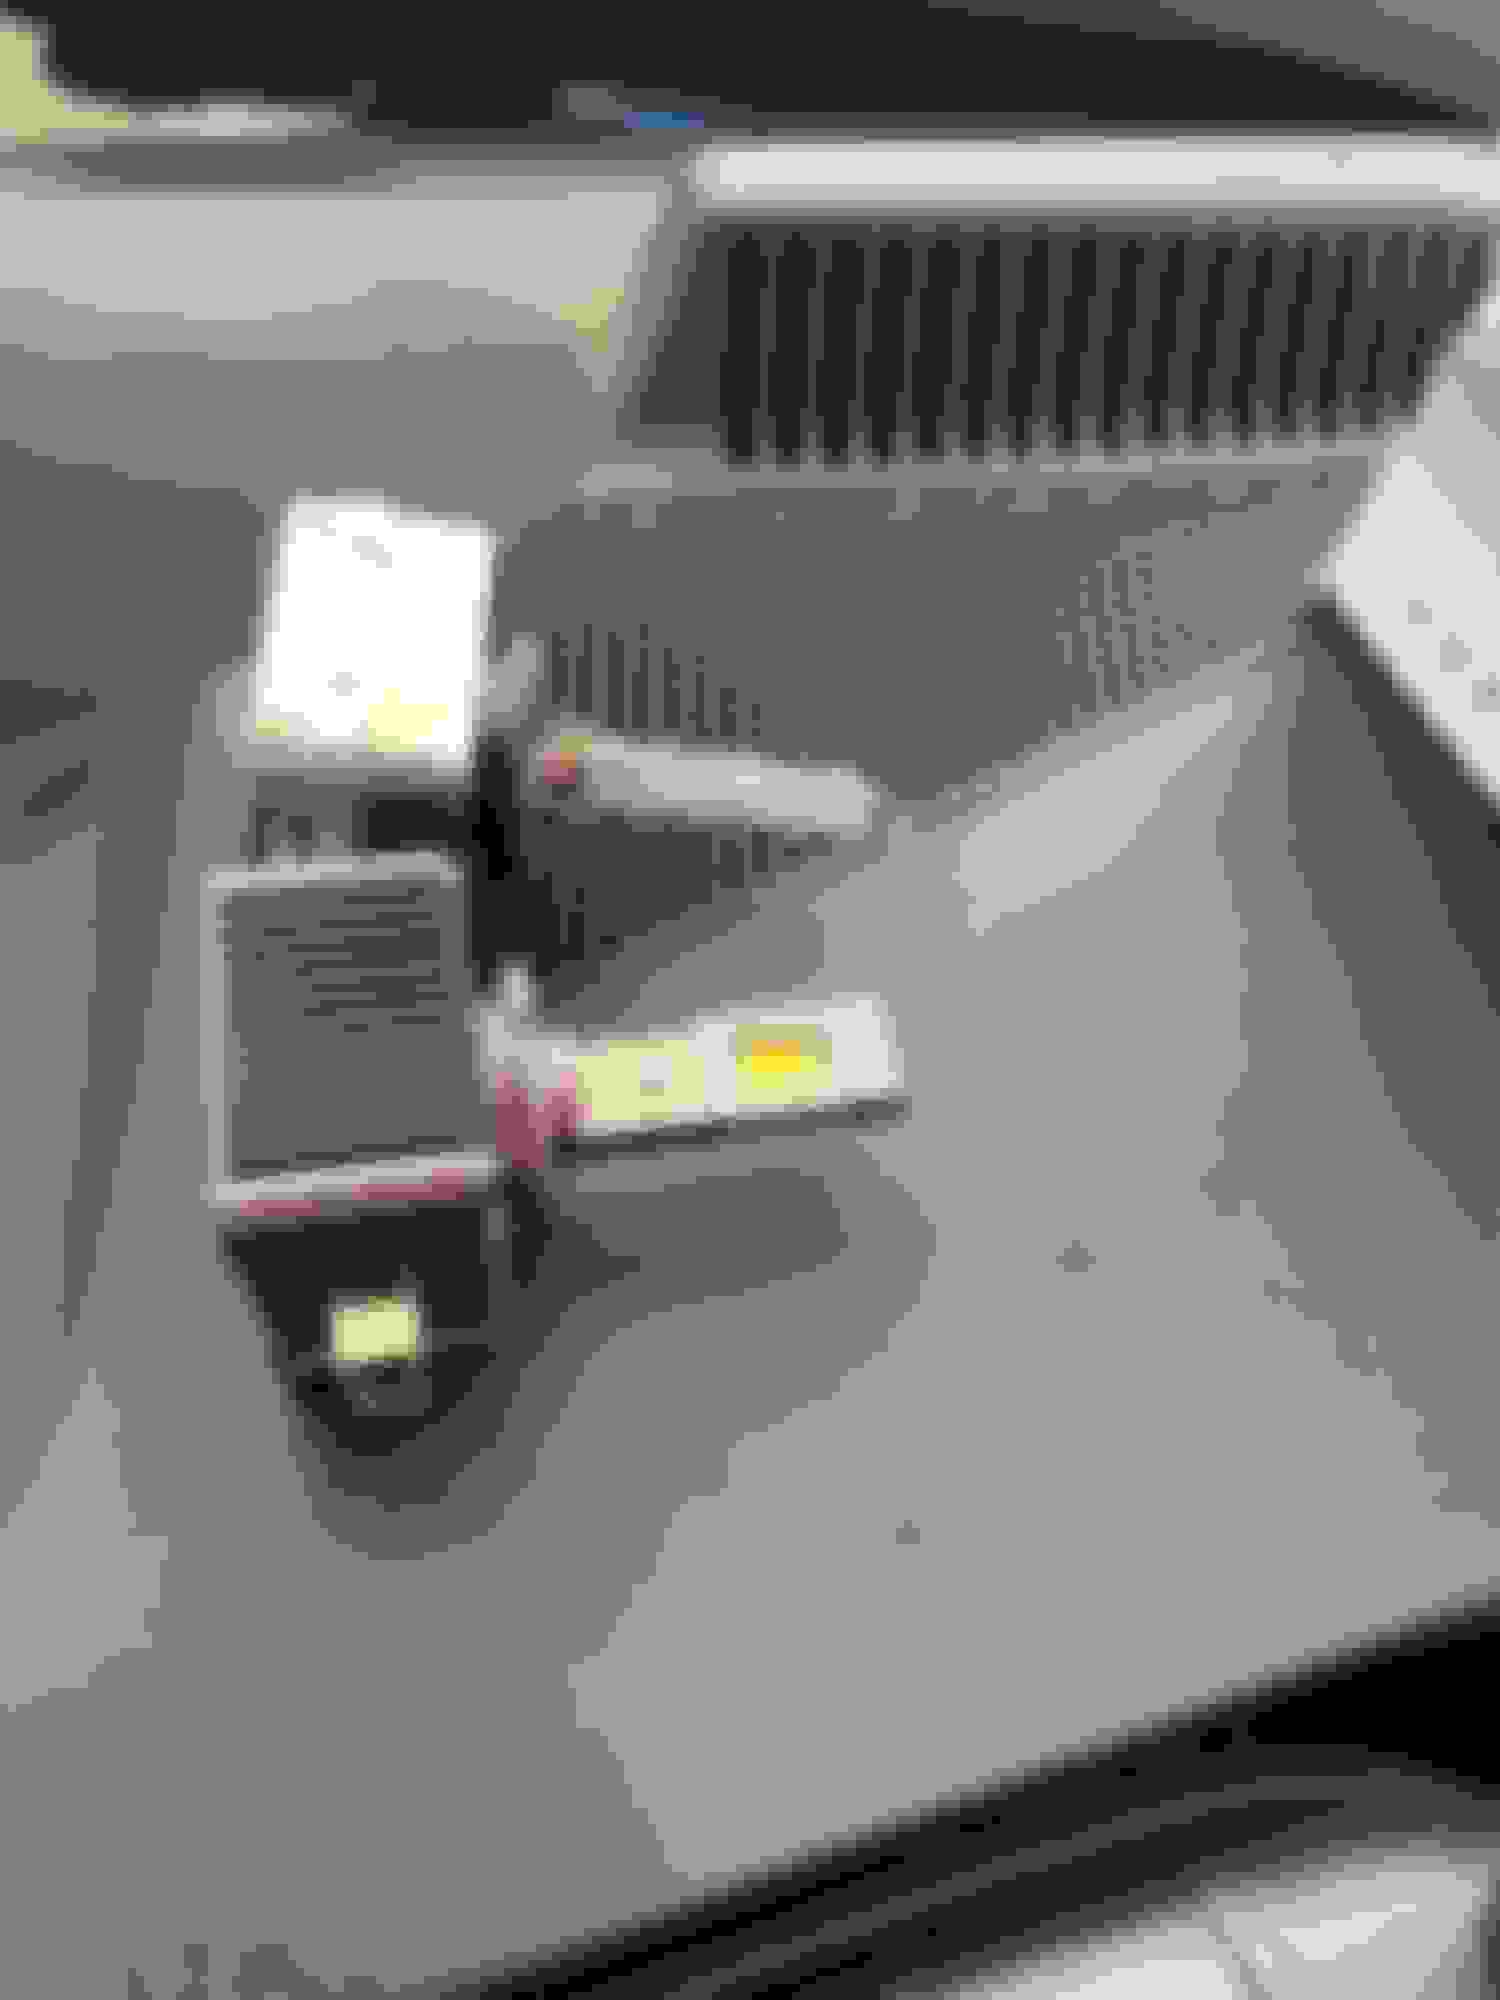
I have big hands and had a bit of issue with space, so someone with smaller hands would have no problem at all. With the rubber boot removed, here is what you will see:
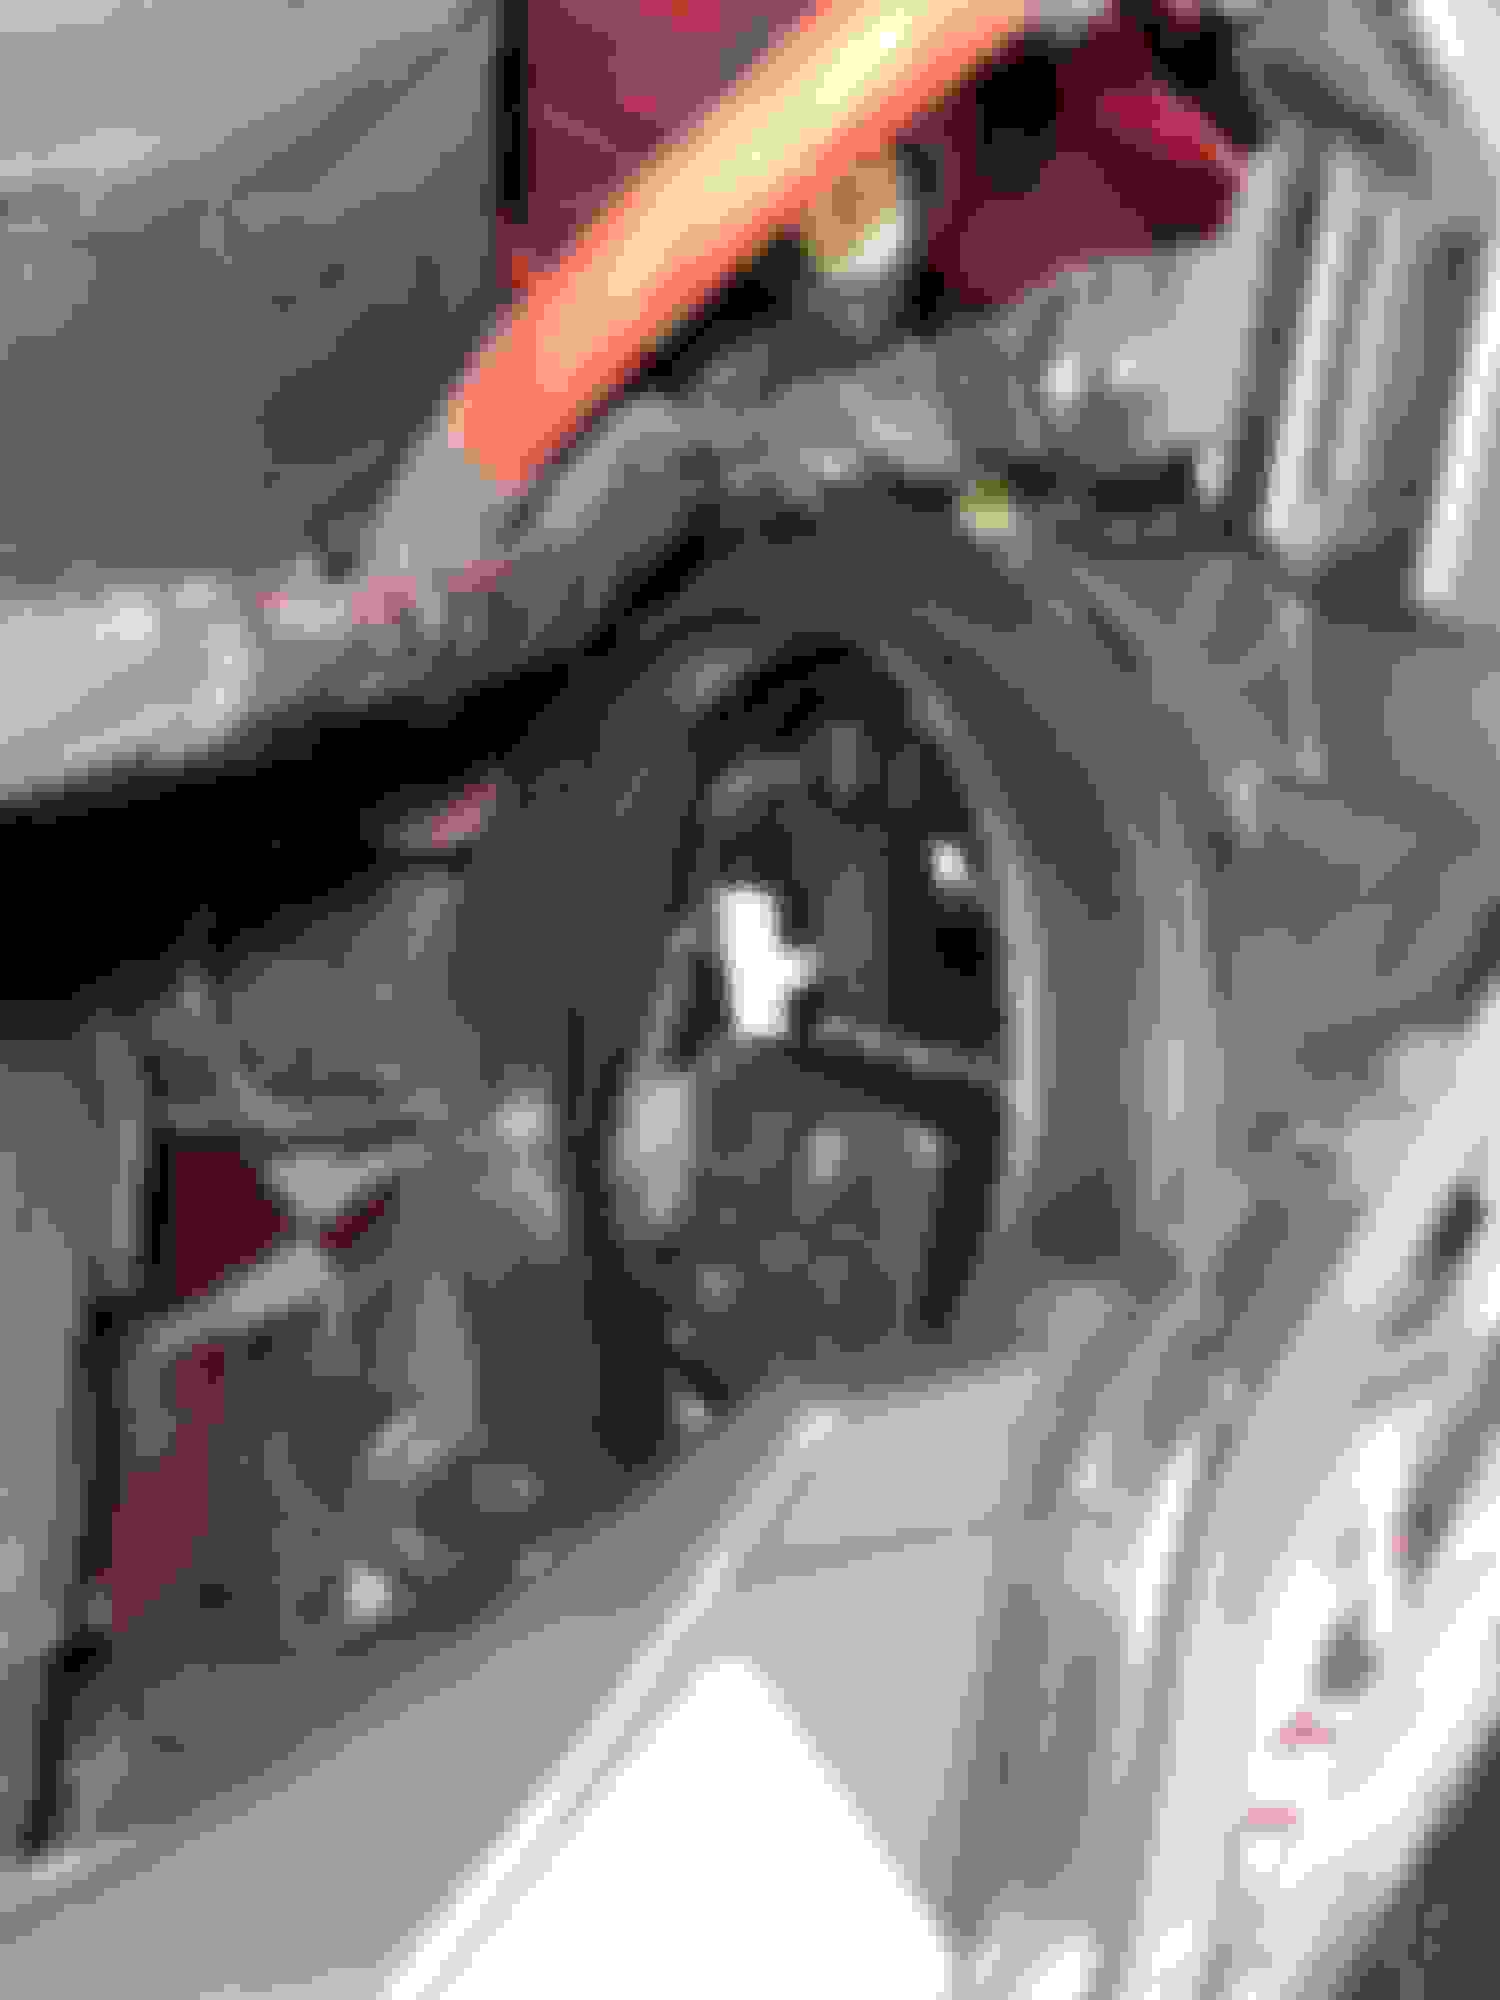
With the bulb out, you can see the many fingers that grab the bulb housing, as well as one of the locking ring tabs (at about 8 O'clock in this photo):
And here is a side-by-side of the bulbs. The LED is no larger than a normal DS3 bulb, no extra heat sinks or anything:
Two things, keeping in mind that I've never used them:
1. I read that they (cheap import LEDs) are not reliable. If they're an assembly of many separate LEDs, expect light output to drop off gradually, not all at once.
2. I read that often, mfgs often do a poor job of masking/deflecting the beam, such that users report being flashed by other drivers, them thinking that the high beams are on all the time.
This impression is from several years ago, so maybe things have improved... or not.
Two things, keeping in mind that I've never used them:
1. I read that they (cheap import LEDs) are not reliable and that you can expect early failure. Since they're an assembly of many separate LEDs, expect light output to drop off gradually, not all at once.
2. I read that often, the mfg does a terrible job of masking/deflecting the light beam, with the result that people who use them report being flashed by other drivers, them thinking that the high beams are on all the time.
This impression is from several years ago, so maybe things have improved... or not.
1. These were well rated on Amazon, so I am trusting their sales volume. They didn't cost a fortune, so if they last 2 years and I need to buy again, no big deal.
2. Beam deflection is all handled by the Jaguar optical path. You can see the beam formation in the photos, cutoff is like it was with the OEM bulb.
Looks like a great upgrade, thanks for posting. One question though, does your car have the Adaptive Front Lighting and Intelligent High Beam? Seems like changing bulbs should not affect those functions, but does anyone know from experience that this is compatible? Thanks.
Looks like a great upgrade, thanks for posting. One question though, does your car have the Adaptive Front Lighting and Intelligent High Beam? Seems like changing bulbs should not affect those functions, but does anyone know from experience that this is compatible? Thanks.
I do have all those options, and they are fully functional with the new bulbs. I was concerned that the bulbs may be bigger than original and potentially have issues with adaptive movement, but that is not the case. As you can see in the photos, the bulbs are the same size as the originals.
@mcphill: I was also not happy with the stock light’s temperature (especially when driving it back to back with newer cars with LEDs) and purchased a set of lights from Amazon. Using your write up, I was able to switch them out last night in about 15 minutes. Thank you!
The difference in brightness is huge, and it just make the car befitting of its price point. I’m no longer hesitant to take the f-type out at night on some dark country roads.
I’ll likely purchase another set to keep around in case these don’t last long.
Thanks mcphill, based on your original post and recommendation I bought a set of these, the exact same ones you bought, and just finished fitting them. I haven't been for a night drive yet to check how well they work but I have tested that they do work!
When I replaced the HID globes a few years ago with upgraded HIDs I used the same method as you with one added twist/complication - on an older F-Type like mine with hydraulic power steering the fluid reservoir sits right behind the LHS headlight so that needs to be unbolted from it's mounting bracket and wiggled back and away a bit.
I struggled to see and feel what I was doing then and it was a real chore but I got there in the end so this time I decided to try a different approach - removing the headlight assemblies from the car. A bit time consuming and a few bolts to undo and refit but it went without a hitch and made it waaaay easier to remove the old bulbs and fit the new ones with my dodgy eyesight and hands/fingers.
Step by step:
Remove the front wheels to gain easy access to the covers in the wheel wells for the third headlight mounting bolts.
Remove those covers and swear profusely at those effing stupid scrivets, one holding each cover on.
Remove those two "bottom" headlight mounting bolts, both 10 mm, in fact all bolts removed and refitted are 10 mm.
Open the hood/bonnet.
Remove the two top side headlight mounting bolts, one at the front and one at the rear of each headlight assembly.
Unclip the headlight wiring plugs.
Remove the two bolts each side holding the top edges/sides of the front bumper.
Remove all six bolts across the top edge of the bumper (under the hood).
Then remove each headlight assembly, by gently pulling away the bumper in the places you have unbolted it and with lots of wiggling. It may be possible to remove the headlight assemblies without removing all those bumper bolts but I did not want to risk damaging or breaking something.
Take each headlight assembly to your workbench, remove the dust covers, pull the old bulbs out and fit the new ones following your instructions. Top tip - a flat blade screwdriver helps to remove the wiring lead from the old bulb with a gentle pry and then to fit the lead to the new bulb with a gentle push/lever.
Then reverse all the previous steps to refit the headlight assemblies.
Take care when refitting the six bolts across the top of the bumper to make sure it is correctly aligned with the front edge of the hood, you may need to shut the hood once or twice to check then adjust those bolts, I did that years ago to correct a misalignment and make the gap nice and even.
I know this sounds like an overly long and involved process but having done it both ways now I prefer the latter method, and I recommend it for anyone of advanced age and decrepitude with crap eyesight and crap hand/fingers like me!
 08-26-2022, 11:30 AM