When you click on links to various merchants on this site and make a purchase, this can result in this site earning a commission. Affiliate programs and affiliations include, but are not limited to, the eBay Partner Network.
Mina Gallery upper intake 3/4" bung - how to attach?
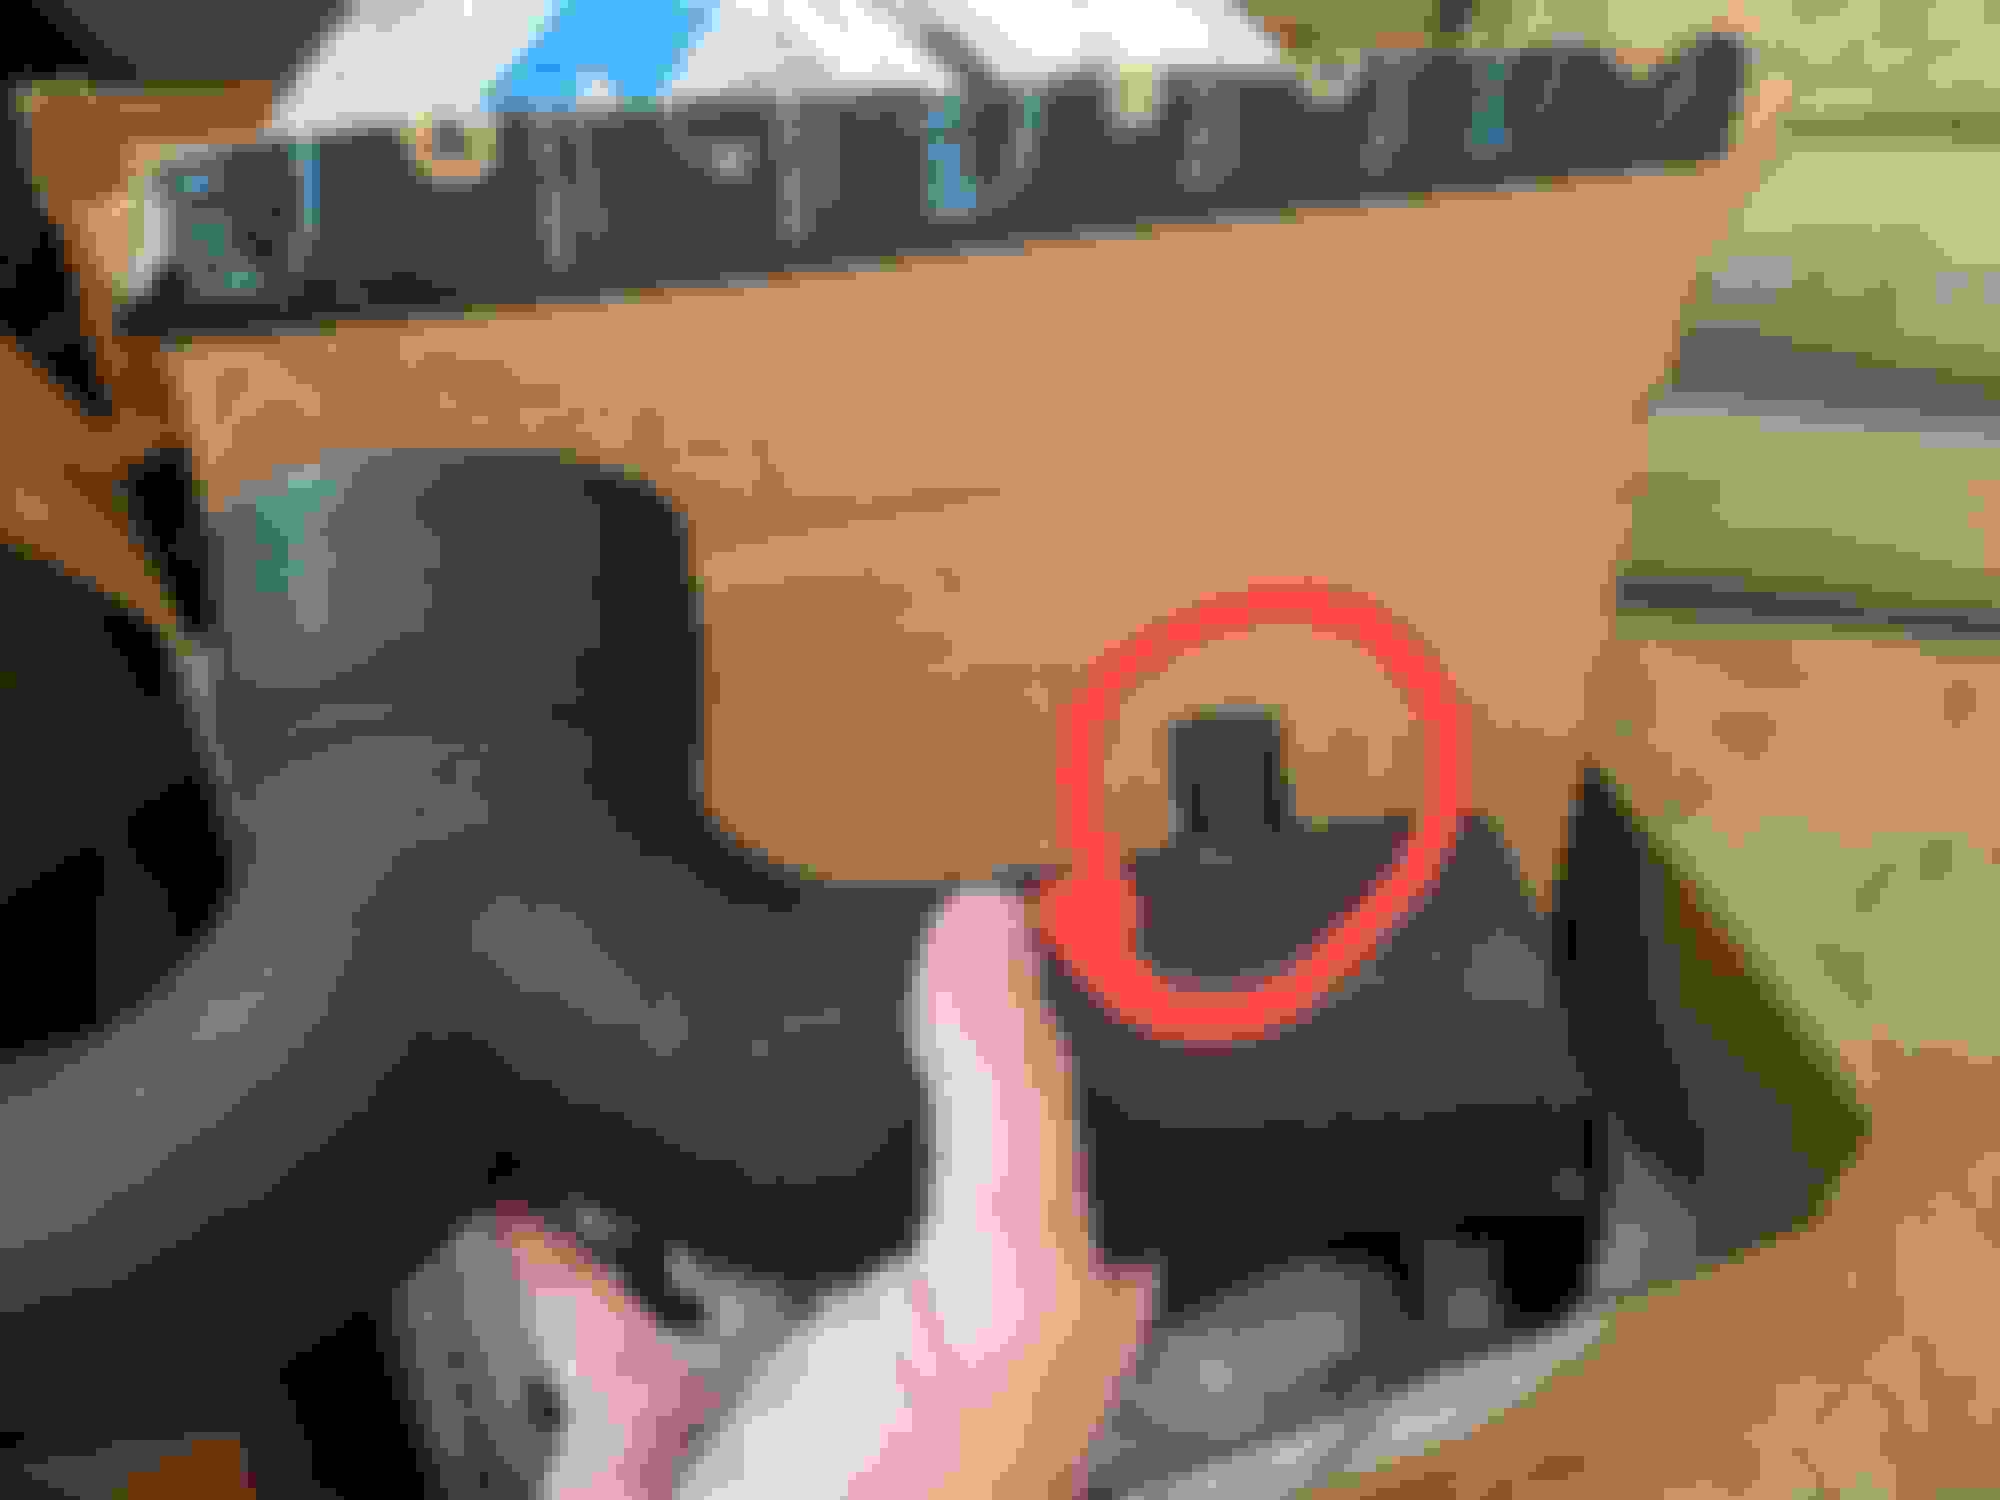
So I'm going to be installing my Mina Gallery full intake in a bit, and I'm going through install writeups on here and the weird sort-of-install-manual that Mina includes with the kit, and I've run into something that I can't find any advice on, even on writeup threads. The OE Y-pipe that goes into the SC inlet has a small 3/4" or so wide maybe 2" long barbed nipple that sticks out on the left/US drivers side of the Y-pipe that inserts into a clip connection next to the SC intake. The Mina Gallery Y-pipe only has a plain non-barbed nipple. I've seen this connected in pictures, but nothing close enough to actually see how this was solved for. Any advice?
That's great, thanks for the picture! I've been looking for one of your writeups on this but haven't found it yet, did you make one?
No issues with unfiltered air sneaking in there, it keeps a good seal just going under the clamp and being pressed against the bung on the SC/hose side? It's hard for me to wrap my head around it... haha
Yes...It seals fine. As I said, I did use a larger black Zip Tie around the ring and tightened up really well. I did not do a write-up/DIY on this item, because Unhingd did a good job with pictures on the other Mina Gallery thread. Not sure if you saw that one? They are pretty straight forward to install.
Yes...It seals fine. As I said, I did use a larger black Zip Tie around the ring and tightened up really well. I did not do a write-up/DIY on this item, because Unhingd did a good job with pictures on the other Mina Gallery thread. Not sure if you saw that one? They are pretty straight forward to install.
Good luck,
DC
I did see it, yeah. This one nipple was the only thing that I couldn't figure out. Thanks!
What method did you use to install/remove the stock air box? I am going to install mine this weekend and now there is access by removing some trim under the nose of the car but also thought I ready access from the inner fender.
What method did you use to install/remove the stock airbag? I am going to install mine this weekend and now there is access by removing some trim under the nose of the car but also thought I ready access from the inner fender.
Steve
No need to remove any airbags, at least not in the US, we don't have the pedestrian impact bags that the UK guys do. My replacement filters will be here on Sunday, so I'll probably do the install sometime maybe next weekend, but I'm planning on pulling the whole front bumper because there's a few other things I want to do with the bumper off anyway, and it'll make the filter install easier. I've heard you can do the install by just turning the wheels out of the way and releasing a few of the fasteners on the wheel well to pull it out of the way, but even if I wasn't already planning on pulling the bumper I'd rather at least take a few extra minutes and remove the wheels and under panels and make my life a lot easier.
No need to remove any airbags, at least not in the US, we don't have the pedestrian impact bags that the UK guys do. My replacement filters will be here on Sunday, so I'll probably do the install sometime maybe next weekend, but I'm planning on pulling the whole front bumper because there's a few other things I want to do with the bumper off anyway, and it'll make the filter install easier. I've heard you can do the install by just turning the wheels out of the way and releasing a few of the fasteners on the wheel well to pull it out of the way, but even if I wasn't already planning on pulling the bumper I'd rather at least take a few extra minutes and remove the wheels and under panels and make my life a lot easier.
Either my coffee didn't kick in or my type was auto corrected. It was intended to say stock air box(s). I had heard or read that as well that it can be accessed by turning the wheel. The new filters will arrive on Sunday so I may tackle this before you. Appreciate the information on the cone filters.
Either my coffee didn't kick in or my type was auto corrected. It was intended to say stock air box(s). I had heard or read that as well that it can be accessed by turning the wheel. The new filters will arrive on Sunday so I may tackle this before you. Appreciate the information on the cone filters.
Lots of ways to get at it, but to save yourself some grief, I would at least remove the wheel apron/liner (probably wheel too, though not absolutely necessary), and drop the pan below, then it is so much easier. It can be done without doing that, but it is just so easy by giving yourself access. Bunch of pictures for you below to help...You can see how much room you get when you remove a few things My lower was a Yellow Wolf...But you get the idea...
 03-31-2021, 01:52 PM


 My lower was a Yellow Wolf...But you get the idea...


