When you click on links to various merchants on this site and make a purchase, this can result in this site earning a commission. Affiliate programs and affiliations include, but are not limited to, the eBay Partner Network.
So people,
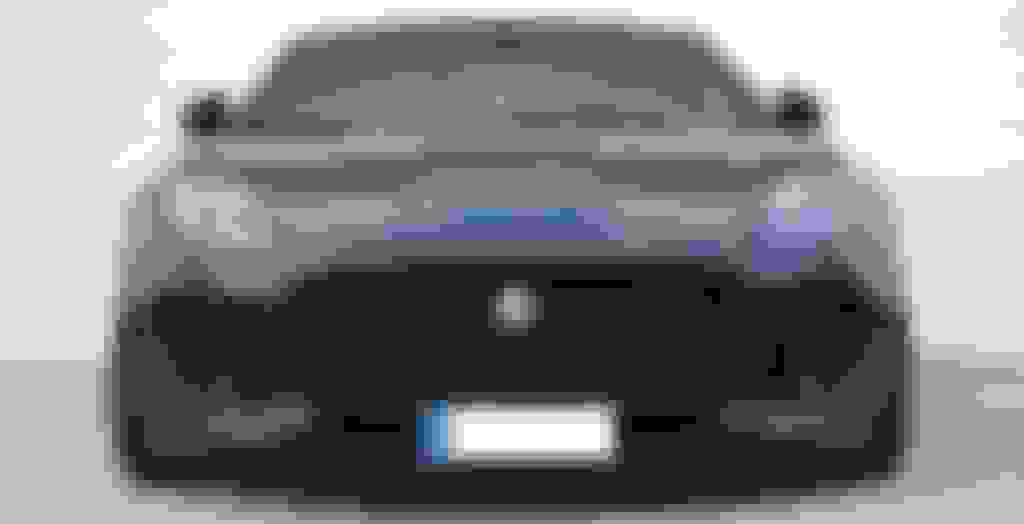
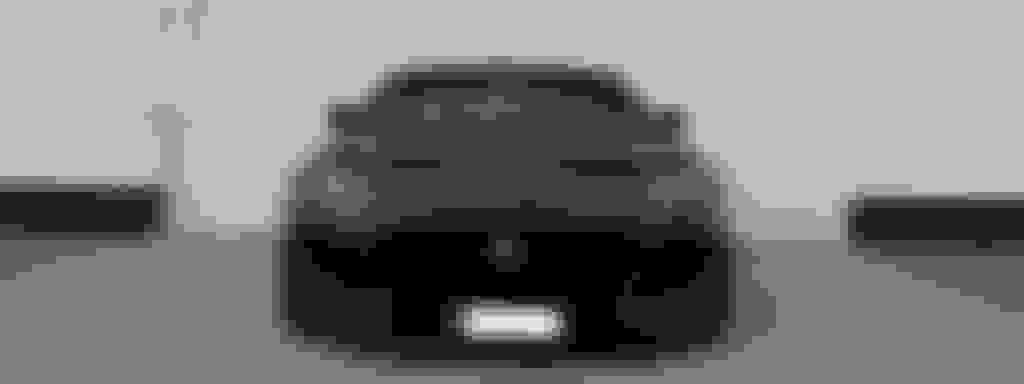
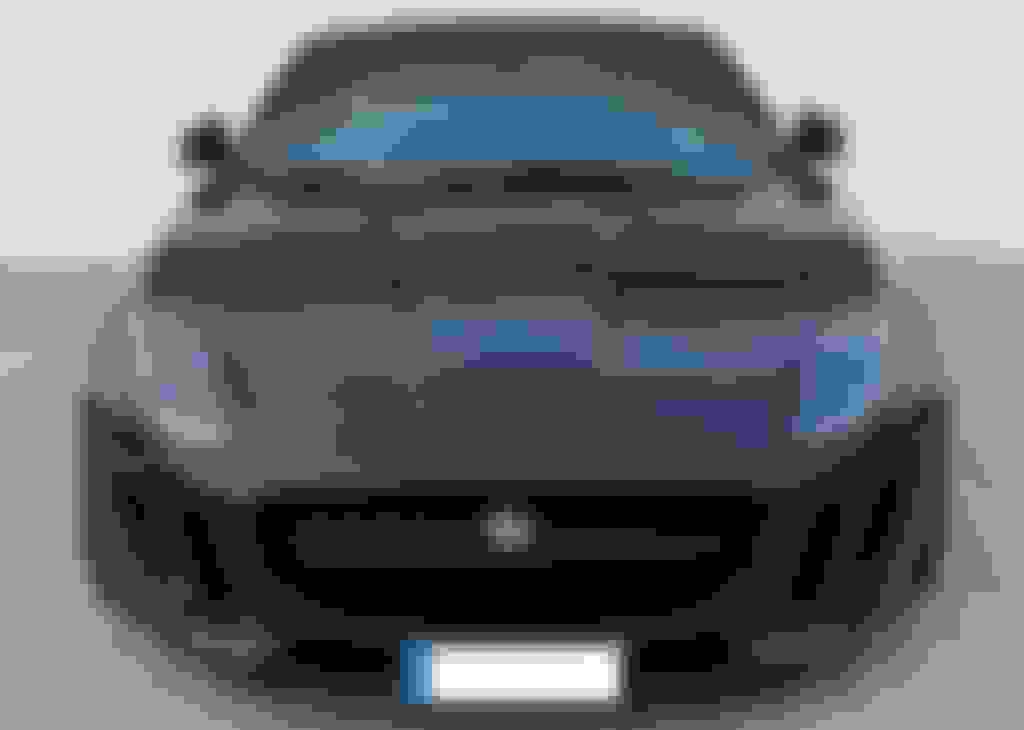
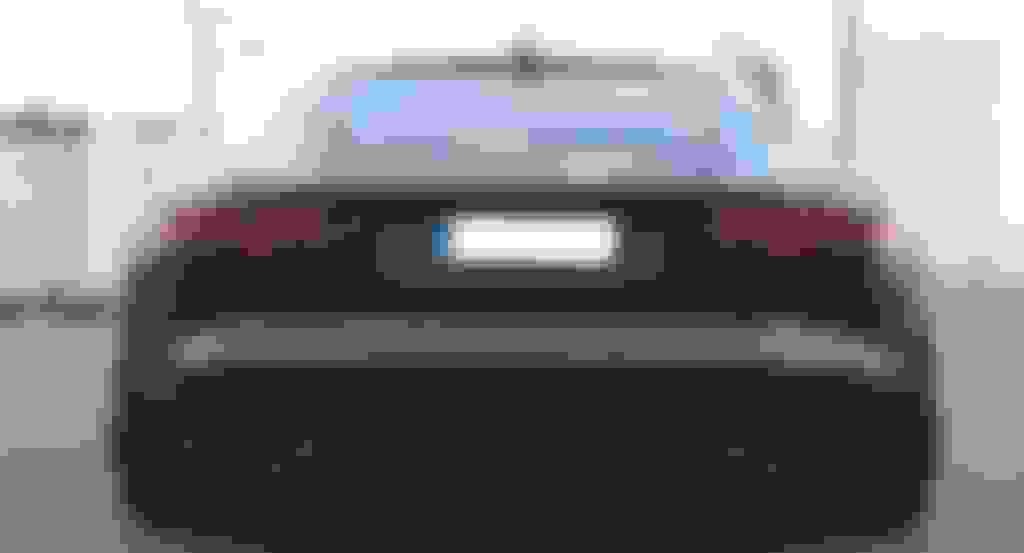
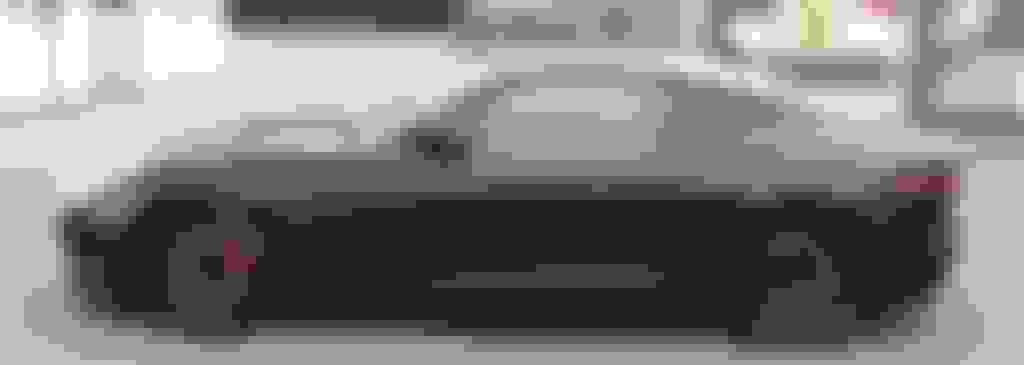
It is now completed and in the appendix the result with a few pictures more.
Here is a short assembly feedback:
The conversion was somewhat tricky, but the Jaguar dealer has done everything to my satisfaction.
Manual:
Dismantling the previous front bumper
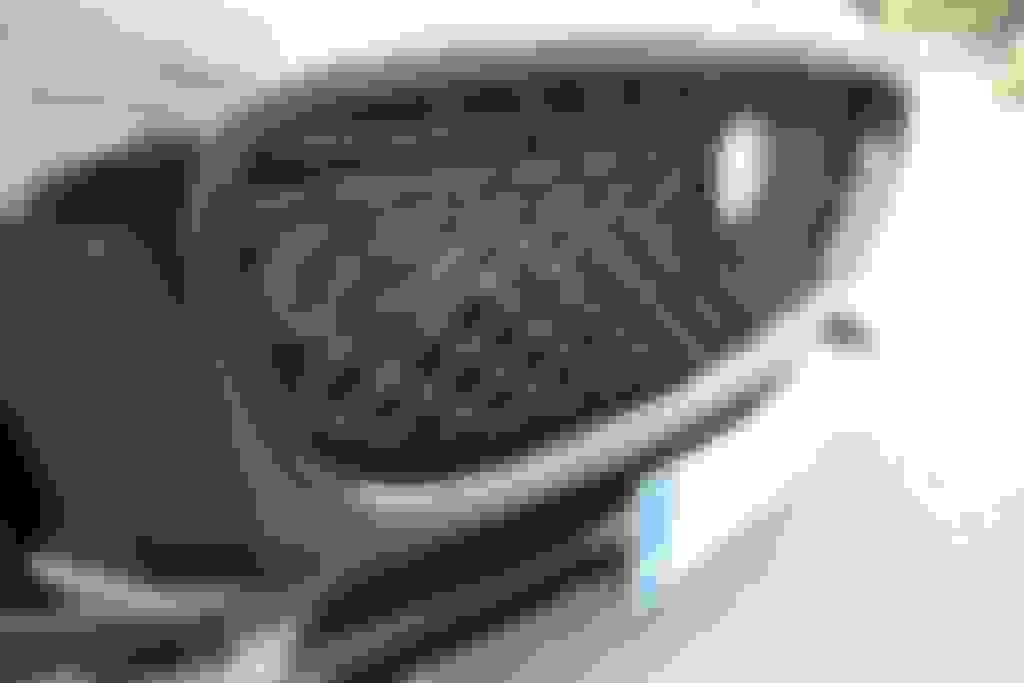
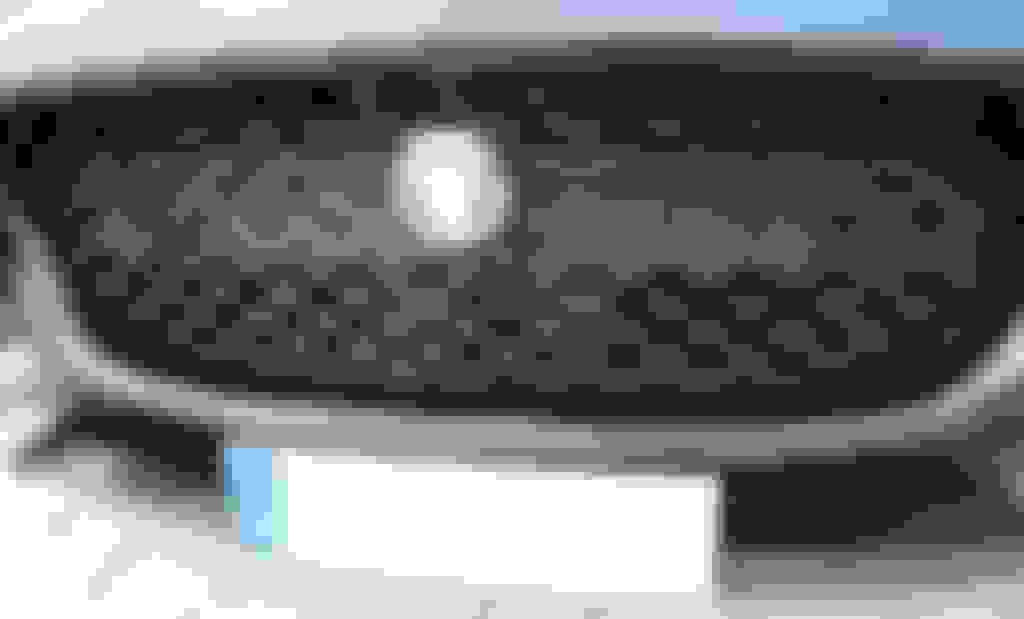
Expansion of the previous grill
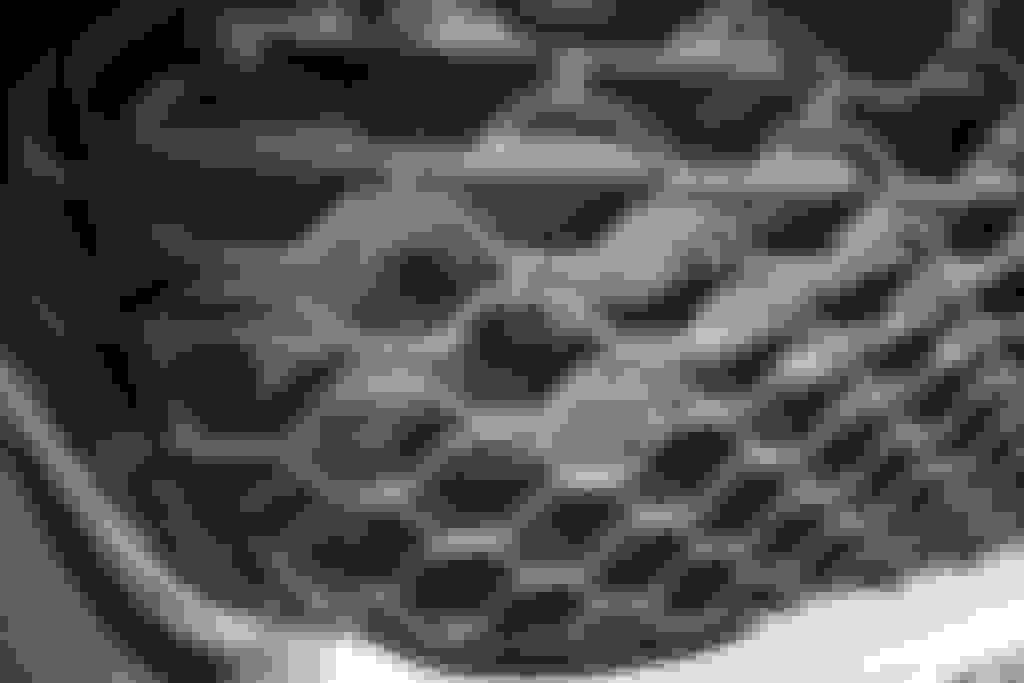
Clipping of the parking sensor adapter into the honeycombs (5th honeycomb from the center)
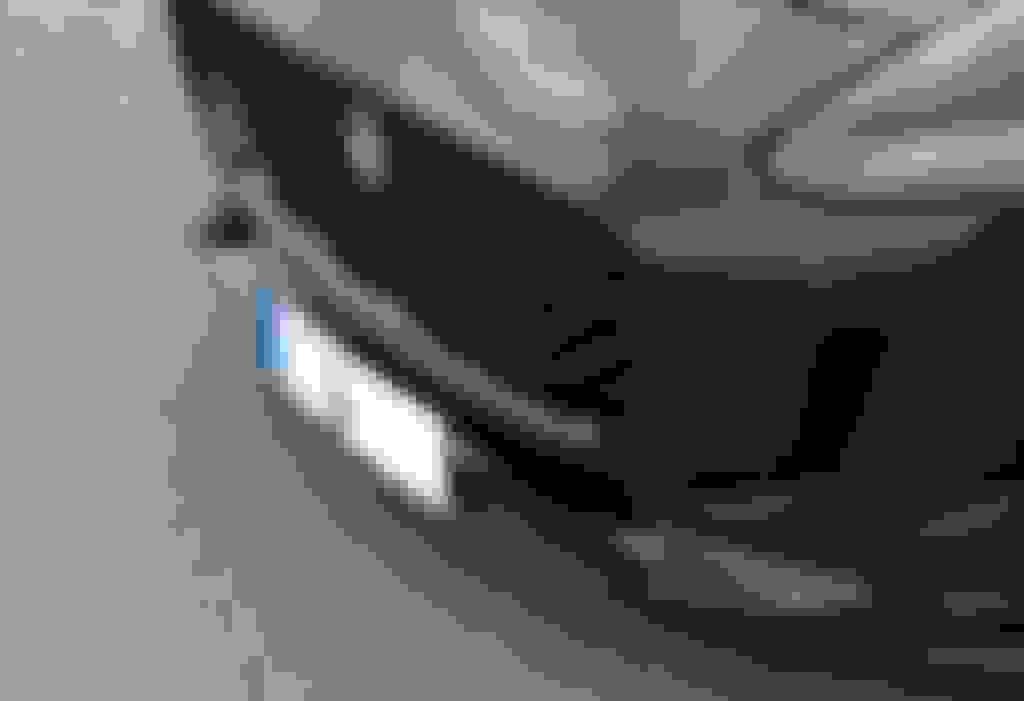
Mounting the Straight Park Sensors (The straight sensors are invisible from the front)
Removing the Styropor behind the old grill
Paint the crossbar and the cooler behind the old grill in matt black
Disconnect the cables from the old parking sensors
Extend the cables of the parking sensors
Lay the cables of the parking sensors towards the grill edge on the back of the honeycombs with 2K glue
Installation of the new grill and installation of the front bumper
Adjustment and alignment of the new parking sensors
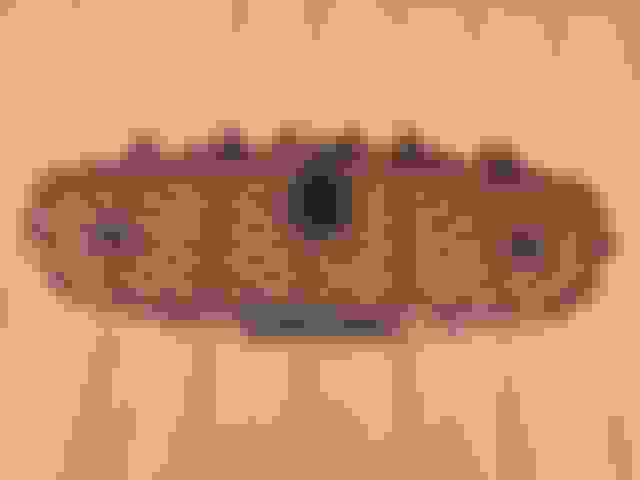
Attach my own Stoh n sho license plate
Costs:
P7 Grill and Surround approx 320 �
Painting the surround 60 �
2 3D adapter 40 �
2 Straight parking sensors 26 �
Cable 2 �
Paint Blackmatt 5 �
Installation and set-up of park sensors 470 �
License plate: free of a friend
Total: 923 �
For a front grille quite a bit, but I find the result very great!
A good news still for those interested in the 3D adapter. These are now ready and I have this with me. More about pm.
Following some pictures:
Last edited by Meister_Kajo; 06-26-2017 at 03:05 AM.
Fabulous job, you should be very pleased a really professional job!
The registration plate looks really good, definitely the best position.
I have just sent you a PM with confirmation
Agreed, there must be a simple and relatively cheap way to hide that bar a bit better. Maybe it could be wrapped in gloss black, or as a ghetto fix maybe even apply two long strips of black duct tape, or better still one strip of extra wide tape if such a thing exists.
Edit - plenty of 6" wide or even wider black duct tape out there on eBay, but I reckon 6" wide would do the trick nicely. Maybe wrap it around the back of the bar and superglue it down across the back?
Looks awesome. I think maybe the crash bar is more noticeable in the pictures because you are looking straight at it. From an angle it wouldnt be so prominent due to the depth of the grille. The only way to really hide it would be to have deeper mesh on the grille then you'd only see it looking dead on, from like 2 feet off the ground.
I'd have it as is on my car in a flash, but I'm not very handy.
You are correct, the bumper bar is not as noticeable, actually hardly noticeable, unless standing almost directly in front, in bright daylight, at less than 10 paces. Stand back 20 ft. or more, or more than 30 degrees to either side, and the bar is far less obvious than the above pictures might lead you to believe.
People need to keep in mind that this look, with the bumper bar entirely behind the grille, is a hundred times cleaner than the protruding OEM bumper bar that previously bisected the grille opening.
For those really bothered by the appearance of back bumper bar, another way to obscure this further would be to add a finer mesh screen, also painted matte black, behind the P7 grille. This technique is more common than you might think...
IronMike is right. You can see the rear crossbar only when the sun is directly on the grill and if you stand directly at the same height.If you are two to three meters away you can hardly see it. Or if it is not sunny ...Perhaps make other users the crossbar invisible when they start their own project ...
I would also suspect that painting the bumper bar with a black zolatone type textured paint first, then follow that with solid matte black... that the granular texture of the finish would make the bar even loss noticeable, because of the way the textured surface refracts light.
I noticed the crash bar and the sensor mounts when I first installed my grille, but probably because I was looking for them. Now I seldom notice them at all.
Meister_Kajo definitely has the perfect solution for the sensor mounts. The sensor, with its rubber grommet, is a squeeze fit into the adaptor, and the adaptor is a snap fit into the grille. Just for safety I will use just a drop (to allow later disassembly) of silicon to secure the respective parts.
Has anybody determined which style of sensor is best for connecting and running the wires?
Also, is anybody else having to sand the Interior Diameter of the adapter to get the sensor with rubber grommet to fit.
Also noting that the sensor does not fit flush to the front of the adapter before the flange on the backside bottoms out on the back of the adapter. Apparently need to sand or shave about 2mm off the thickness of the adapter to get a flush fit. I have tools to accomplish this... just wondering if I'm the only one having to make these manipulations.


 06-25-2017, 03:31 AM