When you click on links to various merchants on this site and make a purchase, this can result in this site earning a commission. Affiliate programs and affiliations include, but are not limited to, the eBay Partner Network.
Thanks guys. Appreciate it. Below is a before and after that I tried to take in the same spot, so it is easy to compare. It flattens out the rake a bit too....which I like.
Of course lots of other mods since the first photo (I wrapped the chrome trim and vents, Put on a new rear Fixed Wing, Changed Center Caps, Sprayed Black Exhaust tips...etc. )
Doing this install tomorrow. Anyone have a guide for clearing the trunk trim handy? Trying to save on labor, so I plan on leaving the trunk trim removed and in the garage. Thank you!
Doing this install tomorrow. Anyone have a guide for clearing the trunk trim handy? Trying to save on labor, so I plan on leaving the trunk trim removed and in the garage. Thank you!
I have some info I will send add before tomorrow if I can get it together. Going to do a DIY, but have not had time for rear yet....
Awesome! I've been going over the 20k page manual for a V6S you had posted in another thread, but no luck yet. I'll take page #'s if you have them. Much appreciated!!!!
Awesome! I've been going over the 20k page manual for a V6S you had posted in another thread, but no luck yet. I'll take page #'s if you have them. Much appreciated!!!!
Hopefully this will get you started and help a bit...More to come.
Awesome! I've been going over the 20k page manual for a V6S you had posted in another thread, but no luck yet. I'll take page #'s if you have them. Much appreciated!!!!
I didn't fit my VAP springs myself, I took the car to a suspension shop instead.
But for the rear springs I removed some of the trim panels in the rear hatch and pulled back a couple of others to allow access to the top strut mounting nuts (four each side, 14 mm IIRC). This saved the installer a heap of time and me a heap of money.
Going purely from memory here so forgive me if I miss a step or two or get one wrong. For the coupe:
1. Open the hatch and remove the two cover panels over rear end (the larger central one covering the cubby and the smaller one to the left covering the battery).
2. Lift out the cubby box.
3. Remove two or three Christmas tree clips holding the bottom edge of the front trim (behind the seats).
4. Remove two (maybe three) Christmas tree clips each side which hold the bottoms of the main side trims in place.
5. Gently pull the top edges of those side trims out from where they are tucked under (near the hatch pivots).
6. Carefully lift and fold back the side trims (towards the sides). Don't worry, they are fairly flexible.
7. You should now have enough room to reach in under those side trims and feel the edges and tops of the black polystyrene pieces which cover the strut top mounts and nuts. They are fairly large pieces with holes on the underside which fit snug over and around the nuts. The RHS piece is twice the length of the LHS piece.
8. Now comes the hard part - while holding the trim piece up as high as you can, lift the poly cover piece as high as you can to clear the strut nuts and pull it out.
The LHS one was easy for me but I couldn't get the RHS one off without snapping it into two pieces, it's fairly fragile. Not to worry, when I put everything in the hatch back together again it looked like new and you can't see the crack/join in the poly piece as it's way under the trim. I suspect if you had a helper, especially a small nimble one, you could get the pesky RHS poly cover off and then back on without breaking it.
9. You or your fitter can now easily access the strut top mounting nuts just by holding the side trim pieces "up and away".
This is the Ghetto method of gaining access to the rear strut top mounting nuts, the Workshop Manual calls for complete removal of several more trim pieces especially those side trims which cover the poly pieces. I didn't go that way as I was scared I would break mounting clips and/or never get everything back together nice and neat and squeak free.
Edit - as you can see from Rock's PDF the Manual calls for masses of parts to be removed!
@Therock88 Amazing! Got the car back today after some complications with LCA bolts being so rusty they almost broke off at the head when we removed them. Thank you for the quick guide scramble, the install was a complete success. I will be back as soon as they settle and I snap a scenic pic. Many many thanks once again! I love this community.
@Therock88 Amazing! Got the car back today after some complications with LCA bolts being so rusty they almost broke off at the head when we removed them. Thank you for the quick guide scramble, the install was a complete success. I will be back as soon as they settle and I snap a scenic pic. Many many thanks once again! I love this community.
Great! You are welcome....Glad you got it done. Looking forward to seeing your pictures.
I'm having this same problem... Bought the same springs about 5 weeks ago and put them on the weekend before last. The front dropped from 28" to 26.5" and the back dropped from 28.5 to 27.5". I sent an email yesterday morning and am waiting for a reply.
UPDATE - VAP has emailed back and offered 2wd front springs to see if it will correct the problem. From what I'm reading here it appears it could... It just sucks that I have to spend more time and money to fix this. This is the second F-Type R I've lowered with their springs. The first time went flawless. However, this definitely makes me question buying future products.
You should blame Jaguar, not VAP if the "wrong" springs work.
I don't disagree with you... However if you know there's a problem with JLM, maybe put a disclaimer that the springs could potentially lower your car past the specified amount depending on what JLM installed. Then the buyer could make an informed decision before spending money on something not knowing that may need to be installed twice.
UPDATE - VAP is sending out replacement springs that should correct the problem. As everyone else has said, they do offer excellent customer service and will make things right.
Yep...had the exact issue and it was the wrong springs from factory. The RWD springs you will get from VAP will work perfect. It does suck to have to redo it...I had to do it several times due to starting with Eibachs
Sits perfect with VAP springs when they send the RWD springs.
Yep...had the exact issue and it was the wrong springs from factory. The RWD springs you will get from VAP will work perfect. It does suck to have to redo it...I had to do it several times due to starting with Eibachs
Sits perfect with VAP springs when they send the RWD springs.
Good luck.
DC
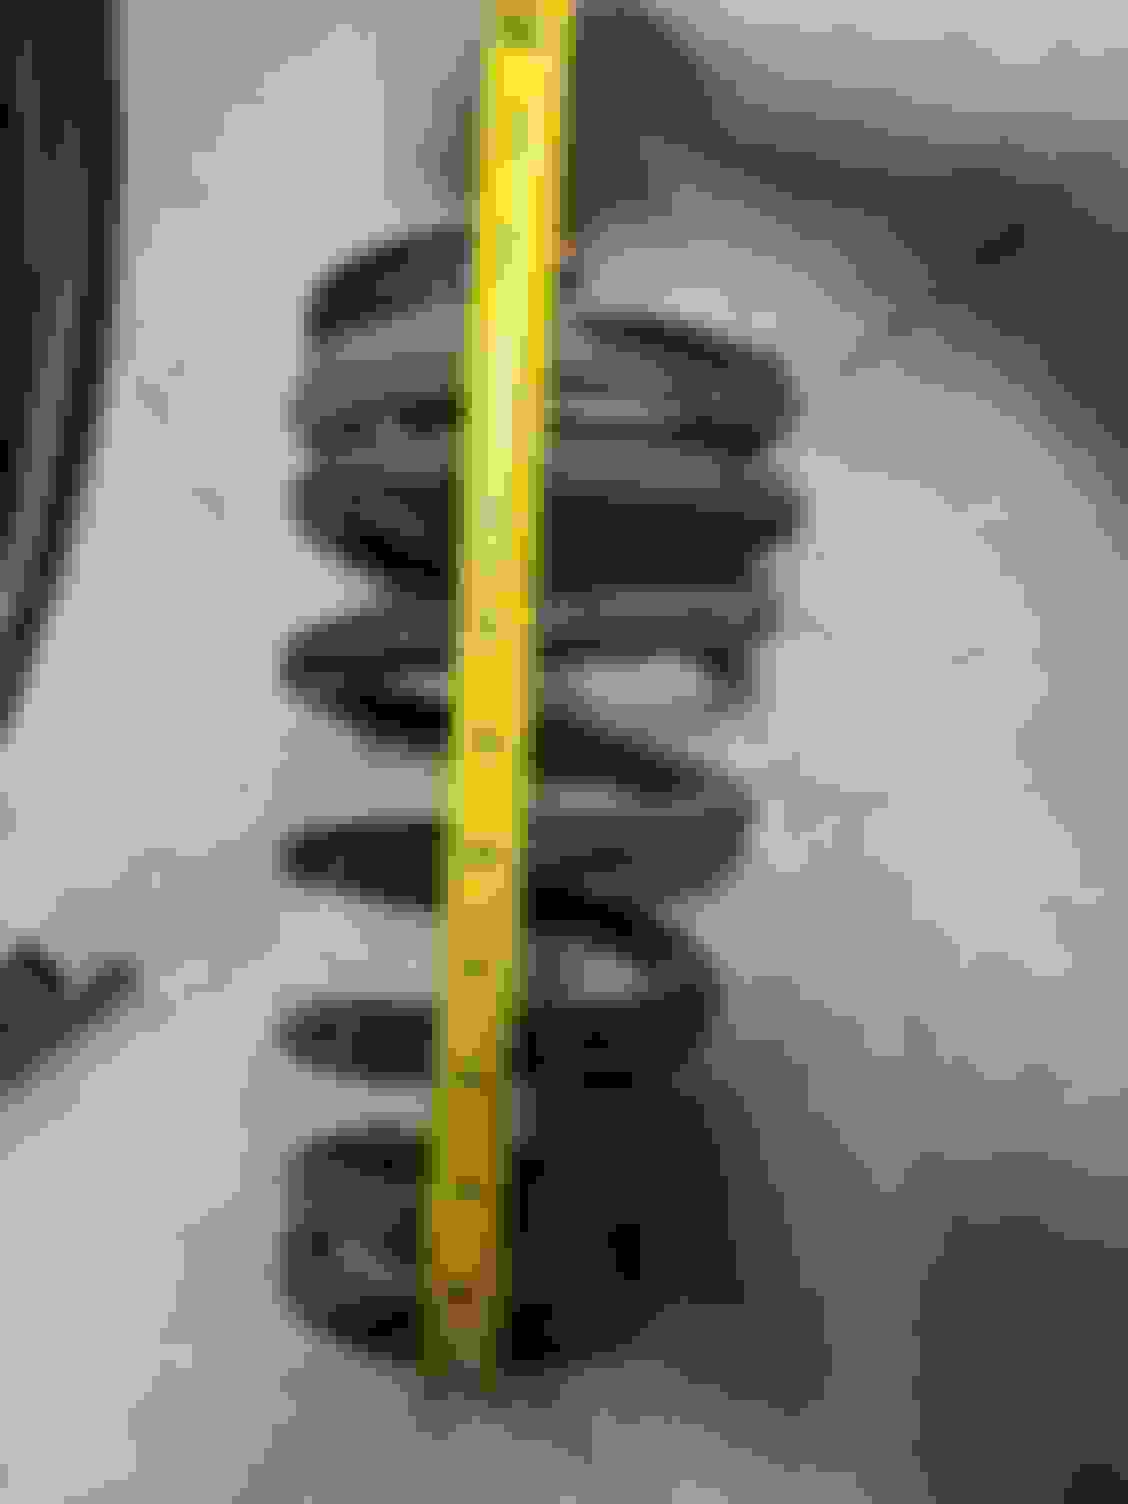
Not sure if it�s the shadow or color combination, but it looks like you have a bit more wheel gap in the front - not in a bad way; I think m front is a bit lower (Of course I realize that not all will be the same). I was actually wondering if I could get like a 3mm ring to put on the strut perch under the coil to raise mine slightly. Since you took yours apart, what do think about the possibility of doing that or something else (maybe a hard rubber washer etc.) thanks.
Not sure if it’s the shadow or color combination, but it looks like you have a bit more wheel gap in the front - not in a bad way; I think m front is a bit lower (Of course I realize that not all will be the same). I was actually wondering if I could get like a 3mm ring to put on the strut perch under the coil to raise mine slightly. Since you took yours apart, what do think about the possibility of doing that or something else (maybe a hard rubber washer etc.) thanks.
Yes...That might work fine, although it is not flat. Or even a thicker washer (or several on the top of the strut shaft where the cap rests. Should work with no issues. A hard rubber, or Polyurethane sleeve would likely work too. Would not need much. And would want to make certain the top nut went all the way (far enough) on the threads...Not sure how much extra thread there is?
AWD 2020 R and the diameter of the VAP front springs is too narrow to seat properly on the perch. But the rear springs oddly fit perfectly. No idea what's happening, but they've spoke to Stuart and sent him pictures. Car is up on the lift disassembled, so hopefully the right pair of front springs can be shipped overnight for a Monday install.
AWD 2020 R and the diameter of the VAP front springs is too narrow to seat properly on the perch. But the rear springs oddly fit perfectly. No idea what's happening, but they've spoke to Stuart and sent him pictures. Car is up on the lift disassembled, so hopefully the right pair of front springs can be shipped overnight for a Monday install.
I spoke to your installer. Looks like everything is fine.

 06-15-2020, 02:23 PM

 )
)