
2007 XK Dash for refurb
For SaleInterior/Upholstery
11-27-2021, 09:42 AM | Replies: 7 | Views: 908

Member
Join Date: Aug 2017
Posts: 64

-
Price
$500• OBO
- Location Waterford, MI, 48327, USA
- Condition Used
- Compatibility
| Make | Model | Year |
|---|---|---|
| Jaguar | XK | 2007 - 2008 |
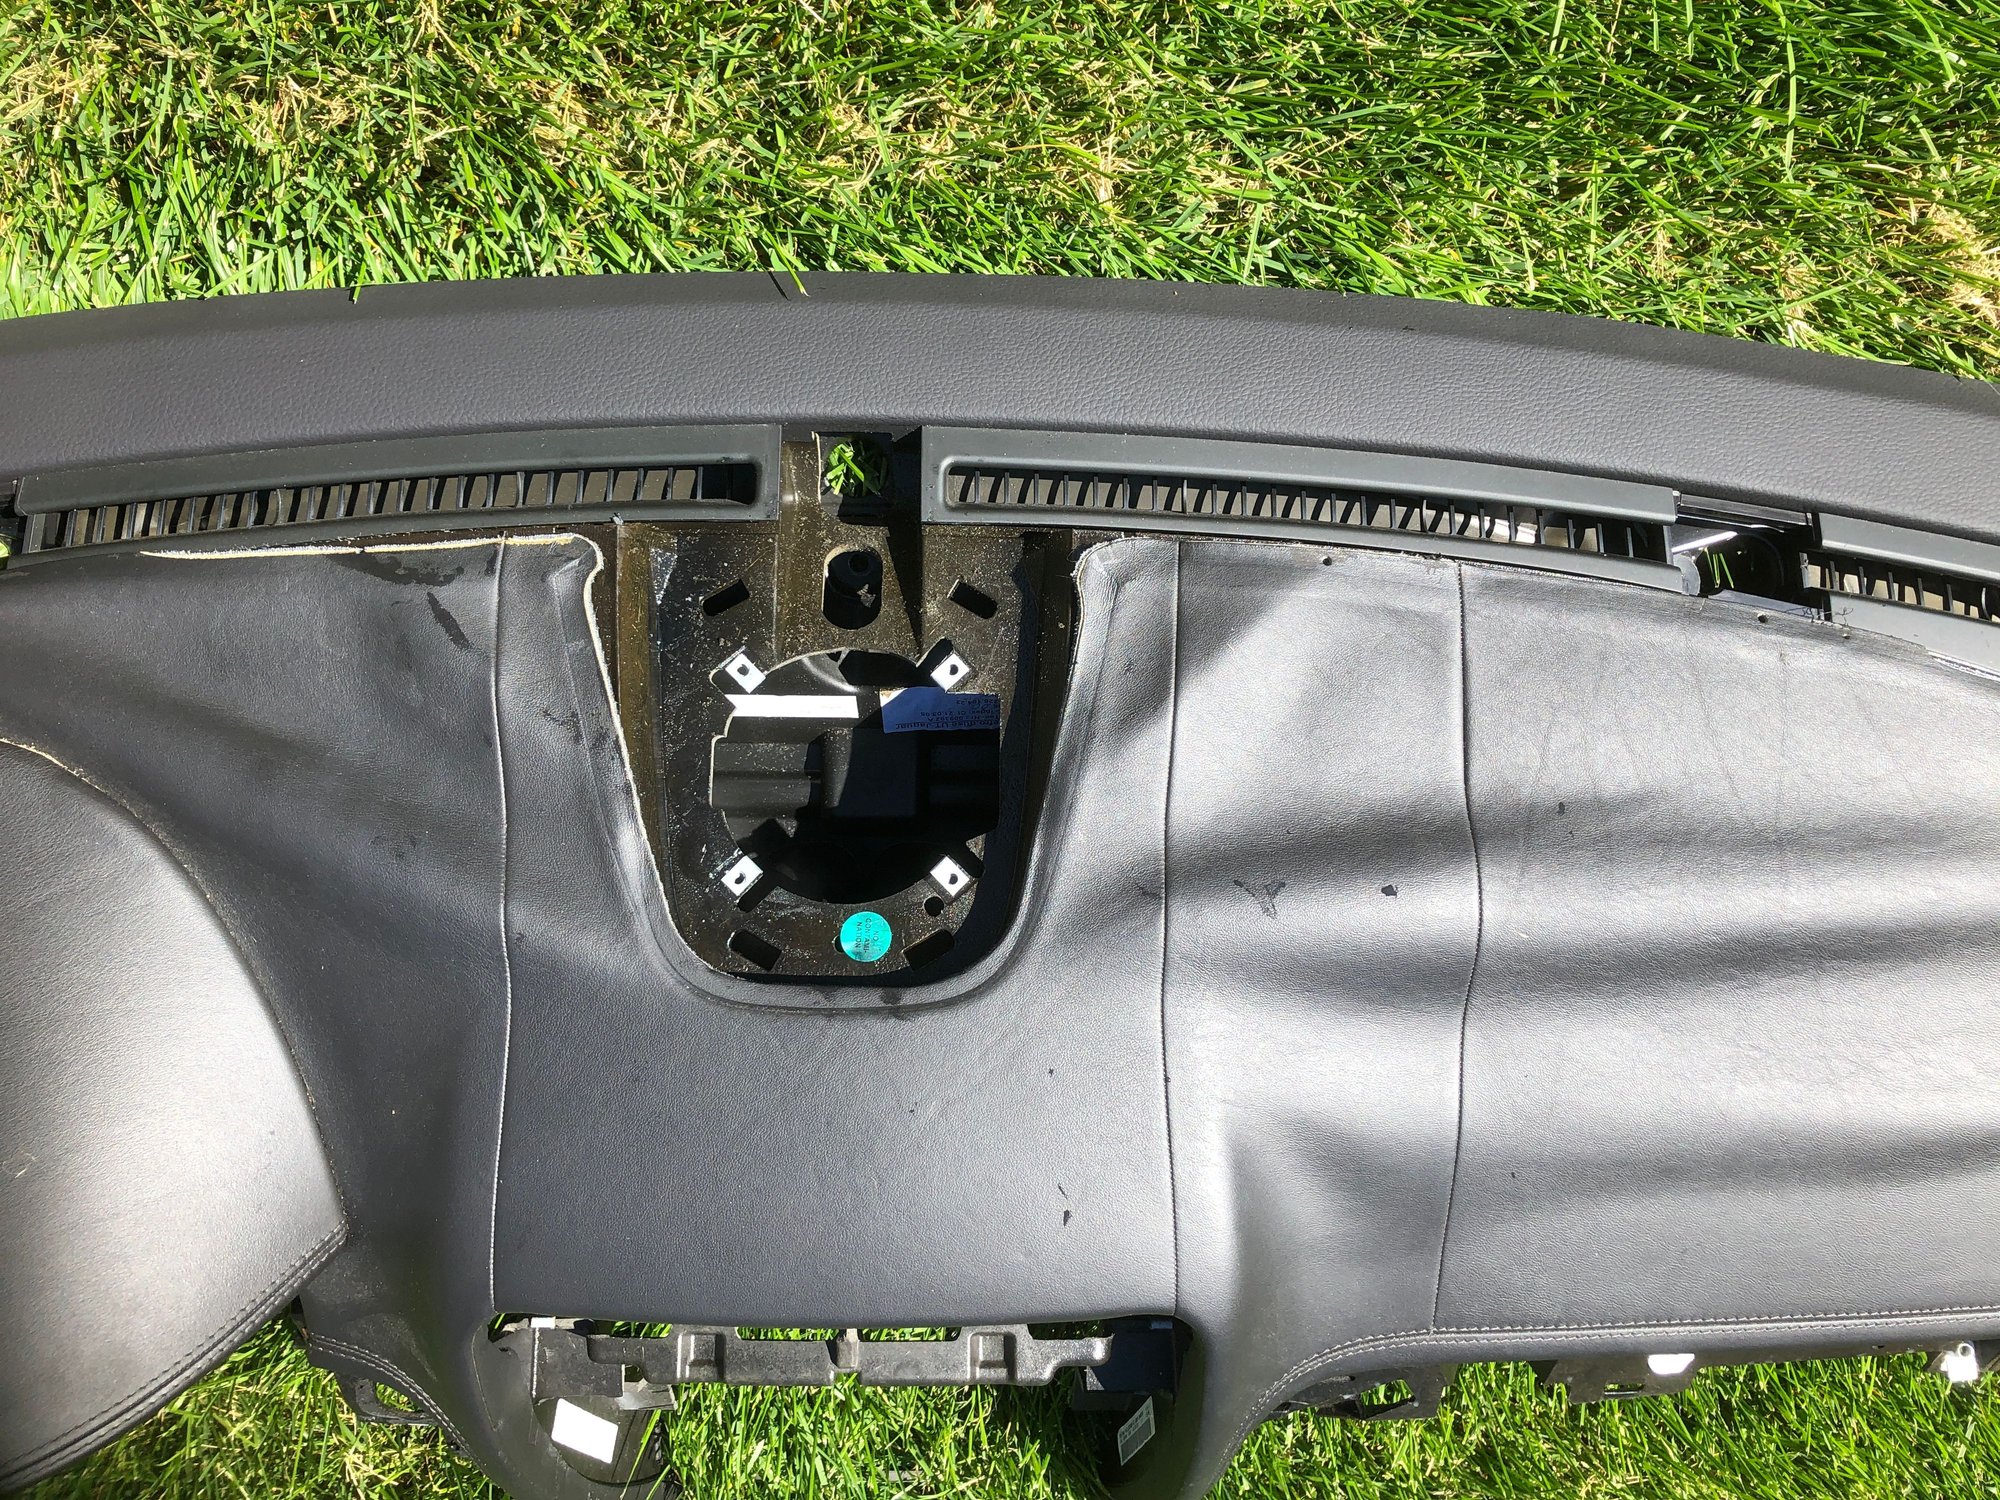
Description:
I have a dash with the usually peeled leather topper. Instead of waiting for the shop to repair it, I bought a good one and bolted it straight back in - saves time and keeps "what goes where" fresh in your mind. Time to sell the old one for repair/refurb/refinish (Alcantara?)
Offers in region of $500 - shipping at cost.
#2
 11-28-2021, 03:54 AM
Junior Member
Join Date: Nov 2021
Location: Los Angeles California
Posts: 6
Likes: 0
Received 0 Likes
on
0 Posts
#3
11-28-2021, 07:16 AM
I bought one from a guy who was parting out a car. It had a small part of the dash lifting so it was easy to stick it down before fitting.
The dash is, IMHO pretty straightforward to disassemble, if you work carefully and methodically. It's all screws and there's really only 3 or 4 types - don't forget that in an assembly plant, operators only get a few minutes to fit it. I am creating a guide in photographs and one is already posted but it missed some key points.
PM me with an email address and I'll send you my photos of the job I did.
#5
12-11-2021, 06:40 AM
Junior Member
Join Date: Nov 2021
Location: Los Angeles California
Posts: 6
Likes: 0
Received 0 Likes
on
0 Posts
Again thanks for the very thorough photos. A lot of them are difficult to visualize exactly what you're looking at because I'm seeing them out of context. I assume that once I start the process it will make more sense. I have to say though that this is WAY more complicated than I had anticipated. I had seen the back side of the dash wood which is held on with spring clips and concluded the dash pad was probably held on the same way. Obviously this is a whole different animal. Don't get me wrong My business is restoring the Mercedes 600's that were manufactured in the 60's and 70's which are still officially the most complex cars ever built. On the Jag, with all the the fasteners it almost looks like they think the dash pad is the main structural member in the vehicle.After all, it's just a piece of leather on some kind of backing! On the other hand, I've had 5 other Jags and as much as I like driving them, the company does do some pretty screwy things at times.
BTW, it was very nice of you to offer to let me call you. I want to give you my number so you won't think your getting some spammer if I do call: 310 877-2935. Also, I've converted your Mac file(.key) to a PowerPoint(.ppt) in case somebody else wants this information. I'll send it to you if you like.
Last thing, You've already done more than most people would bother to do but I think a few pictures from the back of the pad would be very helpful in visualizing where all the fastening points are. All the best, Jeff
#6
12-11-2021, 12:31 PM
There's a few things to know/remember. The dash is fitted to the cross-car beam with just a few dull-plated torkx screws. These are at the top of the dash either side in the vents (remove the "filler" carefully) and one in the middle, under the center dash speaker.
The vast majority of the fasteners - mainly chrome plated Torch are for attaching trim to the dash. Don't mix them with the dull plated ones!
After setting the seats back as far back and low as you can be, drop the steering down and out as far too. Set the shifter in neutral. Wind down windows if you can afford to do it inside, too. Disconnect battery etc.
Start with the center speaker being very careful of the grille because it'll be fragile (I did mine on a very hot mid-western summers day. Mine cracked but I repaired it! See picts of screws and connectors.
With trim tools, remove the various bits of wood or whatever trim - they are help in with simple plastic tabs and clips - can be repaired if needed. I did dash, then center console. Take your own pictures! Most electrical connectors are pretty obvious.
The center stack comes out on just a few screws - if you look carefully you can see the difference between the assembly screws holding it into the dash vs the sub-assembly screws of the actual center audio unit. The plastics around the bronze speed nuts is very fragile. I had to repair a few with JB Weld plastic glue.
The worst connector is the one for the cabin a/c which is buried down by the steering column, on the cross car beam - it's white. But, it can be parted with a long screw driver, pushing on the clip and 'flicking" it apart.
I dropped the whole glove box - careful of the soft close mechanism! The passenger airbag connectors are a faff but fairly straight forward with a mirror and patience. The "A" pillar trim needs a bit of care after pricing away the rubber door seal, but no big deal if you go carefully. Look at the pics to see how the clips are orientated.
The dash comes out with just one person, but try 2, out the passenger side is best. Beware of the routing of the center speaker wiring - especially when refitting. I put the cross car beams screws in first to hold it and get everything lined up. Then worked systematically in kind of reverse order.
Does that help?
#7
12-11-2021, 12:37 PM


Veteran Member
@Catalyst Just a couple of suggestions as this is the marketplace forum. First, consider removing you phone number to protect your own privacy and send the seller a PM instead (your call).
Second, there is a DIY section for our cars and you can find a step by step guide on dash removal here that should help you:
https://www.jaguarforums.com/forum/x...sh-how-172398/
Second, there is a DIY section for our cars and you can find a step by step guide on dash removal here that should help you:
https://www.jaguarforums.com/forum/x...sh-how-172398/
Last edited by Sean W; 12-11-2021 at 03:07 PM.
The following users liked this post:
Andy W Nichols (12-11-2021)