When you click on links to various merchants on this site and make a purchase, this can result in this site earning a commission. Affiliate programs and affiliations include, but are not limited to, the eBay Partner Network.
Hi all, some advice regarding the iffy fitment of the rear bumper on my 240 would be appreciated.
The (original?) rear bumper rubber was perished and needed to be replaced. Thinking this would be a straight forward job, I took the rear bumper off and replaced the rubber with a new one. The issues became apparent once the bumper was somewhat back-on.
As you can see in the photos, there is still a notable gap present above the bumper (could�ve been there for some time - but unnoticed due to the missing/deteriorated rubber?), meaning the new rubber doesn�t fit properly. More importantly, although both of the larger nuts went back on fine, only 3 out of 4 of the bolts went back in. The last photo shows that part of the bumper mounting is obscuring the thread for the offside outermost bolt.
As a side note - Looking carefully back over some photos, the (left) nearside cylindrical mount looks to be drooping slightly (first photo)?
Thanks for reading - I'm happy to take some more photos and answer relevant questions if it'll help.
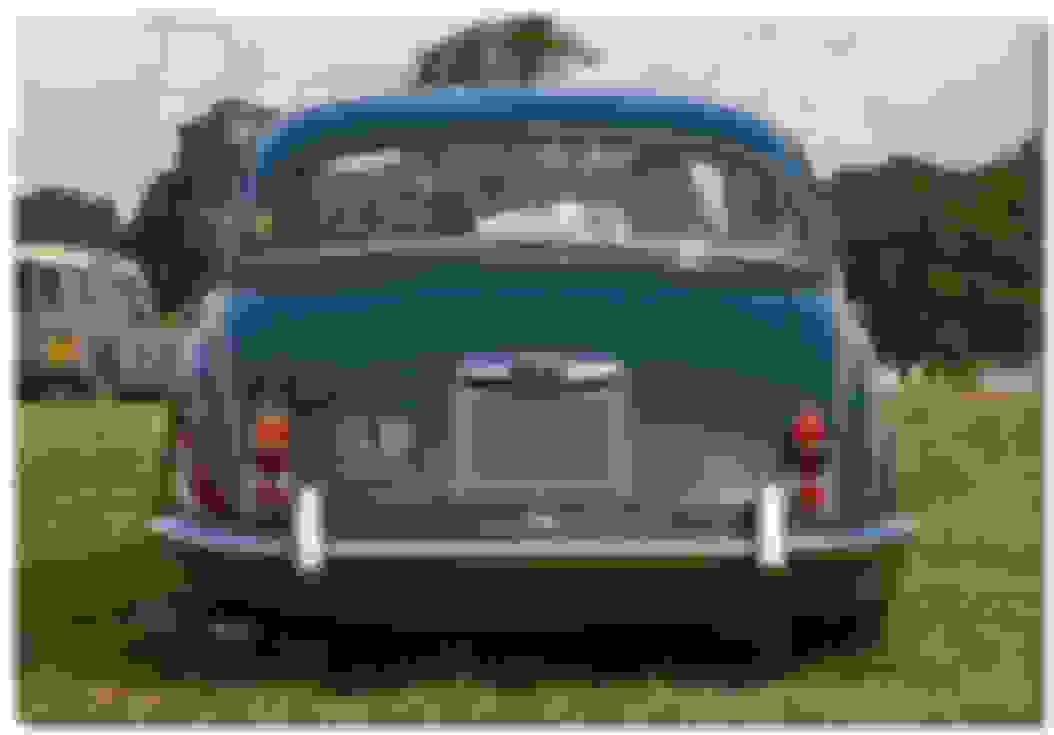
Shows the rear with the bumper removed.
Shows the large gap between the bumper rubber and body - indicating the bumper is sitting a little low? The rubber fits better towards the right-hand / offside. This is a bad photo of the area the bolt couldn't fit back in to - due to the mount slightly obstructing it. This is the outermost right-hand / offside bolt. Oddly, the offside bumper and rubber fit better than the nearside despite not being able to fit the bolt in properly?
Your bumper mounts don't look right, they're too long, thus causing your gap. However, my car I rebuilt was a Mark 2, so there could be differences with the 240 and its narrower bumpers. The mounts on my 2.4 Mark 2 looked very similar to the engine mounts. Secured to the body shell with two studs and nuts, and bumper secured with one bolt to each mount.
I found a photo on ebAY : - https://www.ebay.co.uk/itm/372777390...AAAOxyTjNSji3M
As you can see, these have much less depth than the fittings on your car, which I suspect is a spatchcock by Charlie Allthumbs in the dim and distant past.
Certainly, the mounts on your 240 look different from those on my Mk2. But, they have to be different as the bolts attaching the mount to the car body look to be in the same position as on the Mk2, while the bolt to the bumper is higher to line up with the horizontal midline of the narrower bumper. Is there a picture in the 240 parts book?
Other than early ARMCO bumper 340's that got into the US & maybe some other markets..
The rear panel/valance of a genuine 240/340 is quite different to a Mk2 to accommodate the unique narrow rear bumper. Fraser is right. They used a version of the engine mounting at the rear (not sides IIRC like S Type). Both Jaguar badge positions were used. Excuse tow bar studs in second pic.
Front bumper is S Type. Unique rear bumper used S Type overiders.
Last edited by Glyn M Ruck; 08-02-2022 at 06:33 PM.
My Spares book lists parts for the 340. It doesn't have any pictures for the rear bumper assembly. However, the components are all different from the Mk2 with different parts numbers. In contrast to the Mk2, the list uses the word brackets rather than rubber mounts. Hopefully someone with experience of the 240 or 340 can provide a picture or a description of the bumper attachment.
I can only talk for SA 340's. We dropped the 2.4 engine in '64 as underpowered at altitude. Our Mounts were the same shape as an engine mounting but partially hollowed out on the inside. i.e. much softer. The center bolt then mounted to a bracket in the bumper.
Sorry! had an internet break just up ~ Our local content programme was up to Phase 2 by this time i.e. 55% by weight & we would have pressed that back bumper and there might be differences on SA cars e.g. We were pressing full bodies for the Chrysler Valiant V100 & 200, Chevs etc. etc. ~ Changes on local cars over their overseas models were inevitable. We even made the Valiant Barracuda rear glass locally and that was quite a beast.
Thank you all for the helpful replies. After spending a few more hours in the garage (despite the Haynes Manual not showing the rear bumper in any great detail), I've managed to improvise a solution for the ill-fitting rubber. I do plan to have the car seen to by a specialist at some point within the next couple of years; where the bodywork and paint will be sorted. Since the bumper seems to be secure, I will leave it to the specialists to solve the slight unevenness as and when they see it.
240ShadesOfBlue
While you are doing your thing with this bumper I note that you have some rust developing in the inside of the bumper (and most likely in the over riders.)
Might I suggest you take some action now to stop that rust by attacking it with at least a wire brush or similar abrasive to get rid of the worst of the rust.
Then treat it with some sort of rust neutraliser (typically based on phosphoric acid.)
Then paint it with a specific metal paint such as red oxide or rich zinc based paint.
I have seen some over riders and the odd bumper bar badly eaten out with rust in the 6 MK2s and 5 MK1s I have restored/resurrected over the last 40 years .
Our local electroplating/ restoration business advises customers to paint the insides of newly finished bars and over riders to avoid rust
Cheers
I support Bill in this. I used straight Phosphoric acid as a converter (It's a mild acid but just the thing for rust conversion). I then gave the inside of my bumpers & overiders a coat of Hammerite Silver.
Agree with Bill and Glyn. Phosphoric acid works well, is easy to use and costs very little. It leaves a good surface for paint adhesion. I give a coat of Hammerite No.1 primer before the gloss. And after the gloss, some suitable coat of anti-rust wax. I don't know what works best as 'gloss' - I've used Hammerite and various zinc rich paints. Old time Hammerite was very good; it seemed to form a strong impervious layer. I'm told the more modern versions are less effective. For zinc rich, unless they are close to pure zinc, they can't be impervious or the zinc will not be available to sacrifice itself. So I assume that it's wise to apply some sort of isolating layer on top of them. I appreciate the possibility of cathodic protection; zinc anodes work extremely well under water on offshore steel structures. However, zinc in paint is not so clear to me; I'm no chemist.
Yes you can go the Tectyl route after the Hammerite. More important on brackets & bolts/studs that rust like hell & frequently need to be cut off. Hammerite still holds up on outdoor light fittings etc. where I live overlooking the sea so it works darn well. Otherwise 316 Stainless fittings. I'm used to living in a corrosive environment & know the tricks. I even run a dehumidifier in my garage. Brushes attempt to seal the bottoms of the electrified tip up doors.
Last edited by Glyn M Ruck; 08-06-2022 at 09:42 AM.
 08-02-2022, 09:13 AM