De-amber my STR with Nite Shades...
#1
 08-07-2010, 02:50 PM

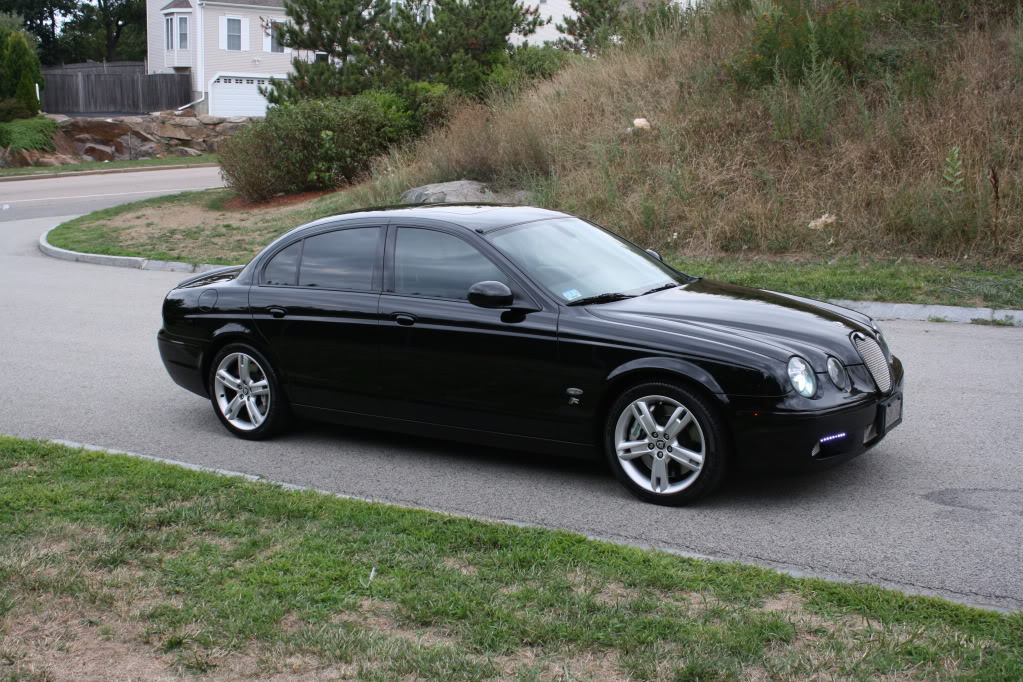
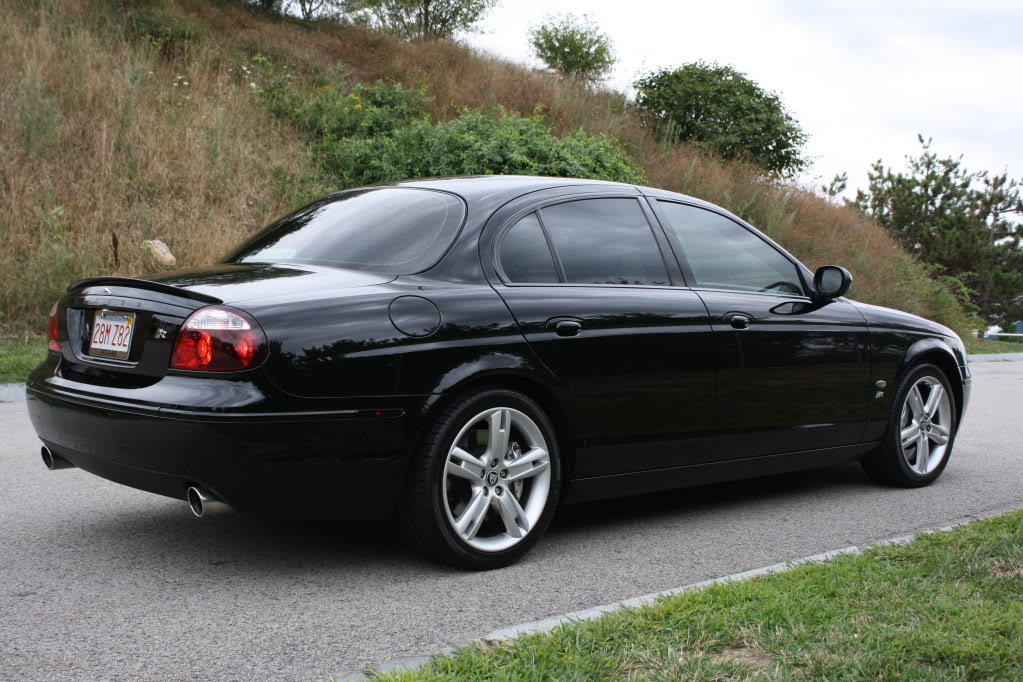
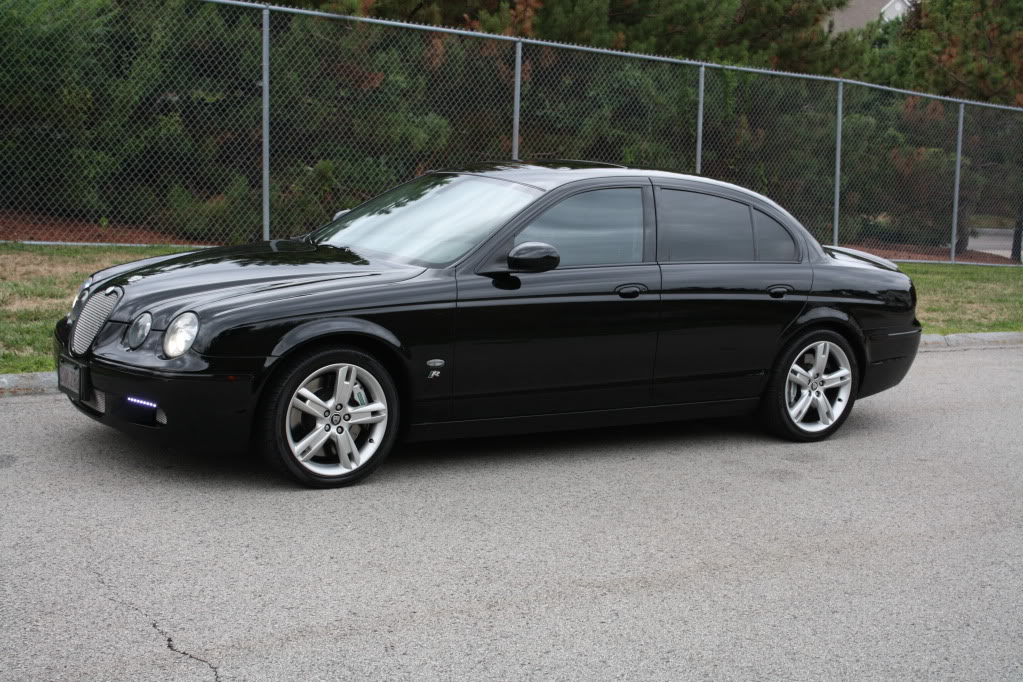
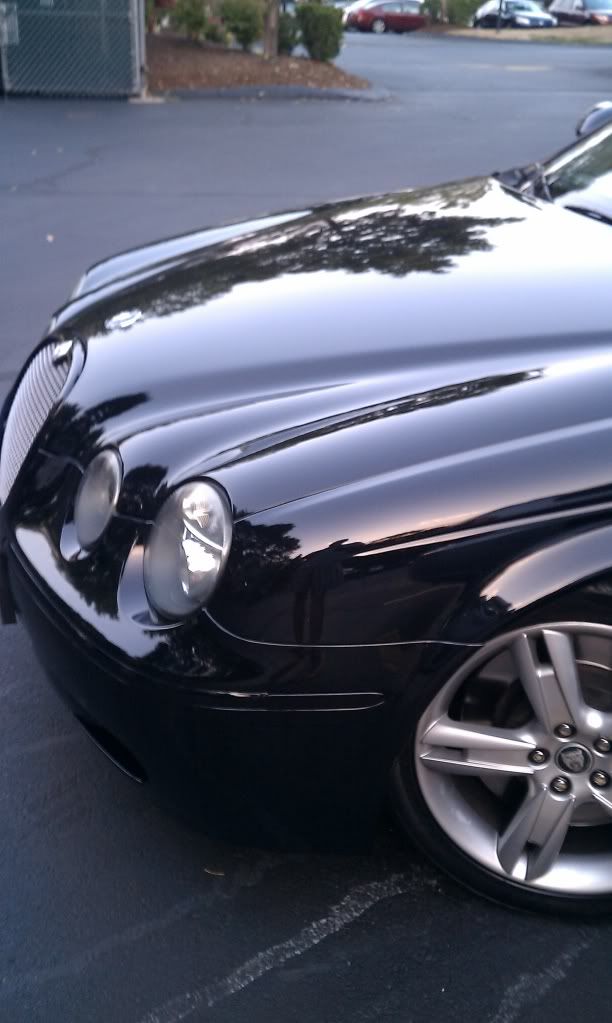
Well I wanted the de-ambered look and seeing how all I could find was smoked side markers I decided to try using VHT Nite shades. For those of you that dont know what that is its a translucent black paint that you paint lights with so the light still shines through. Well did it last weekend on the bumper markers and the side markers and it actually doesnt look too bad. I wish it looked more smoked which I'm sure with less coats it might look that way. I also wish it was more glossy. But overall I am satified. If anyone is looking to do this make sure you follow the directions and put no more then 3 coats cause I only put 3 on and they are dark. Later tonight I'll get a pic of the lights on so you can see how they still let some light through.
I do think the de-ambered look makes it look more sleek. My wife even said when she came out after I was done, she wanted to know if I had lowered it some.


I do think the de-ambered look makes it look more sleek. My wife even said when she came out after I was done, she wanted to know if I had lowered it some.
Last edited by H20boy; 08-07-2010 at 04:16 PM. Reason: big pics from your thumbs (right click thumb, 'copy link location', insert image icon, CTRL+V to paste into popup...done!
#2
08-07-2010, 05:27 PM

Veteran Member
#3
08-07-2010, 07:03 PM
http://shop.advanceautoparts.com/web...%7CGRP2050____
Anyone interested you can type in your zip and see if your local has it in stock. Not too bad 12.99 was definitly worth the finished product. Had some sandpaper laying around so didnt have to buy any of that.
#4
08-08-2010, 06:16 PM
#5
08-08-2010, 06:49 PM
I removed them and sprayed them away from the car. I did sand them I used 800 grit then moved to 1000 then I washed them so there was no dust on them. Let them dry and then sprayed 3 coats giving drying time between coats. I sprayed some clear on after but it wasnt glossing like I wanted so only has about 2 coats of clear on top of it.
#7
08-09-2010, 07:39 AM
Trending Topics
#8
08-09-2010, 07:46 AM
Do those front and rear reflectors pop out similar to the side markers? How are they looking at night, does it dim the light significantly? Is it still emiting amber and red through the black? Gonna give this a whirl, may go a tad lighter (less coats) if it significantly inhibits the light output.
#9
08-09-2010, 08:08 AM
Veteran Member

#11
08-09-2010, 08:20 AM
here you go bull https://www.jaguarforums.com/forum/s...ad.php?t=28786 look at post #2
#12
08-09-2010, 08:30 PM
here you go bull https://www.jaguarforums.com/forum/s...ad.php?t=28786 look at post #2
Iluvmy05STR= I have no idea about inspections, I'm moving to FL in Dec so hopefully they dont have inspections or say anything if they do.
Here are some pics of it at night. It is alot dimmer during dusk hours but it is still very effective at night and still illuminates through good enough.


#13
08-10-2010, 11:33 AM
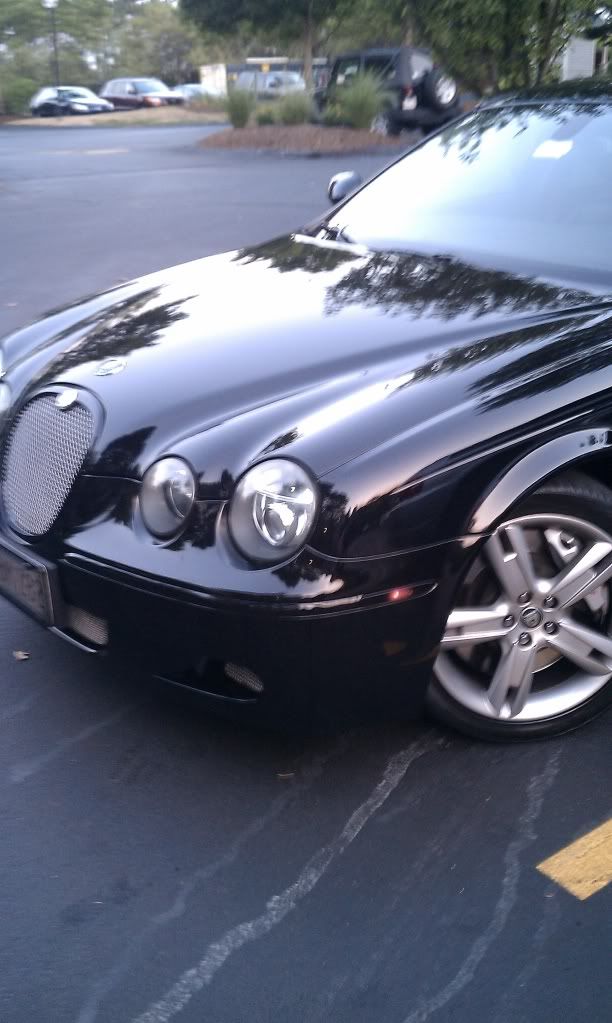
Got the paint today from Advanced, sanded it down with 800 grit, sprayed a couple coats, then relented and sprayed the 3rd. Where the "Hella" and "Jaguar" raised letters are just wasnt looking right. So mine are now black like yours, not "smoked" as I was hoping. Also got a can of clearcoat, so I am applying that now. Hopefully that will do the trick with the gloss and some extra protection against weather and scratching, obviously hard plastic isnt the best material for spray paint to adhere to.
Only got the rears done, going out to try and get the fronts off, need a torx to get that wheel well cover off. Looks like a b*tch.
Only got the rears done, going out to try and get the fronts off, need a torx to get that wheel well cover off. Looks like a b*tch.
#15
08-10-2010, 04:19 PM
Yea I couldnt get the smoked look either but I still think it looks better then the red and amber look. Post up some pics when you are done. I would of sanded those hella and Jaguar raised lettering. I kinda went lightly over them so it didnt sand off like sections of it. Later on I'm gonna take them off and sand the raised stuff off and respray it. I was just experimenting so I left the raised lettering. I definitly like the look the more I look at it. Cant wait to see what it looks like on black.
#16
08-10-2010, 09:14 PM
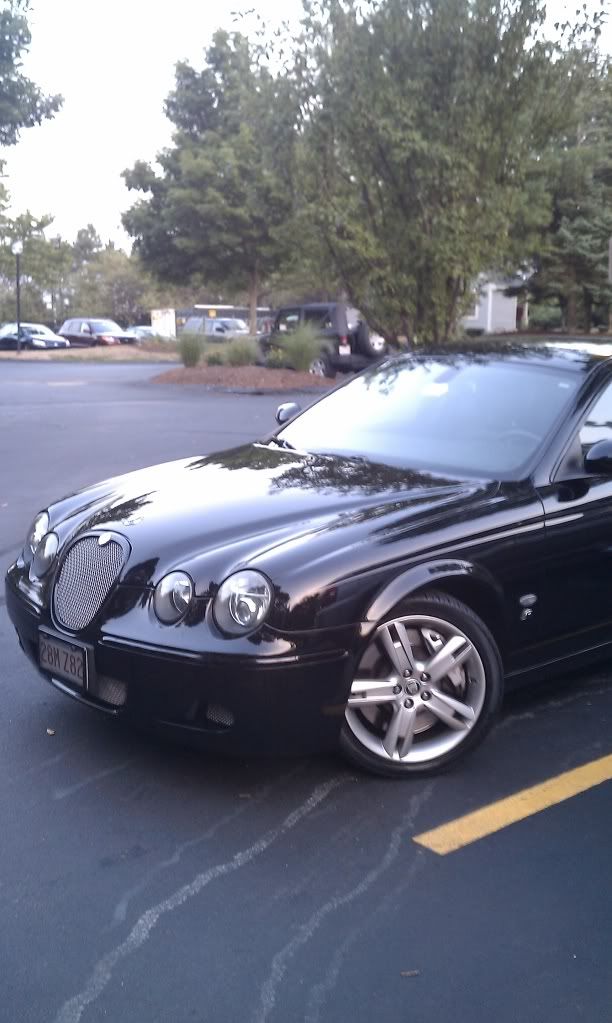
Ok its done, I became super **** while doing this and I kept sanding them down and re-painting. I only have pictures of the fronts, the rears were drying. Couple tips/observations that I had noticed.
1) If you can get away with it, only use 2 coats. My front orange lights pretty much look red when lit. Is it legal, no idea, are the cops gonna bust my nards because of it, we shall see.
2) If you have any imperfections such as rock chips or indents, sand them down as much as possible. This paint is almost like a laquer enamal and it will show. That is why I ended up putting on so may coats, too many in my opinion.
3) DONT USE CLEARCOAT. Does not dry well on top of this paint, another reason why I sanded them down and re-painted.
4) Dont break the tabs taking them out, all were in tact except for two top ones that snapped on one of my rears. That suprised me seeing as I somehow squeezed both sides and didnt "yank" them out.
5) It looks awesome during the day.
6) If you end up re-painting/re-sanding, take the time and use a high grit sandpaper, dont go down to lets say 100ish just to get the paint off quicker. Will take more pics when I have the rears on.
#17
08-11-2010, 04:11 PM
Ok its done, I became super **** while doing this and I kept sanding them down and re-painting. I only have pictures of the fronts, the rears were drying. Couple tips/observations that I had noticed.
1) If you can get away with it, only use 2 coats. My front orange lights pretty much look red when lit. Is it legal, no idea, are the cops gonna bust my nards because of it, we shall see. I noticed this but it doesnt seem to red when I look at the side and the rears are lit. But it does seem more red then yellow.
2) If you have any imperfections such as rock chips or indents, sand them down as much as possible. This paint is almost like a laquer enamal and it will show. That is why I ended up putting on so may coats, too many in my opinion.
3) DONT USE CLEARCOAT. Does not dry well on top of this paint, another reason why I sanded them down and re-painted. Totally agree after doing mine it just doesnt seem like the clear even does anything.
4) Dont break the tabs taking them out, all were in tact except for two top ones that snapped on one of my rears. That suprised me seeing as I somehow squeezed both sides and didnt "yank" them out. You got to be very careful with them mine actually had some that were already broken. Dont sweat if you break a tab they will still snap in just dont break them all.
5) It looks awesome during the day.
6) If you end up re-painting/re-sanding, take the time and use a high grit sandpaper, dont go down to lets say 100ish just to get the paint off quicker. Will take more pics when I have the rears on. Totally agree your way better off taking the time with the higher grit its easier to just take more time sanding then to have to sand out huge gouges from low grit paper.
Looks awesome. Love the black with the black. Looks like they arent even there with the day shot. Great tips also.
#19
08-12-2010, 02:30 PM