

DIY S-Type 4.0 Remove and Replace ~ Coolant Reservoir Tank FAQ
#1
 11-25-2010 | 07:03 PM
Thread Starter
|
Senior Member
Joined: Nov 2010
Posts: 103
Likes: 63
From: So-Cal
Hey team,
It’s just me Tdc again with another one of my How I did it threads, just incase anyone wants to know.
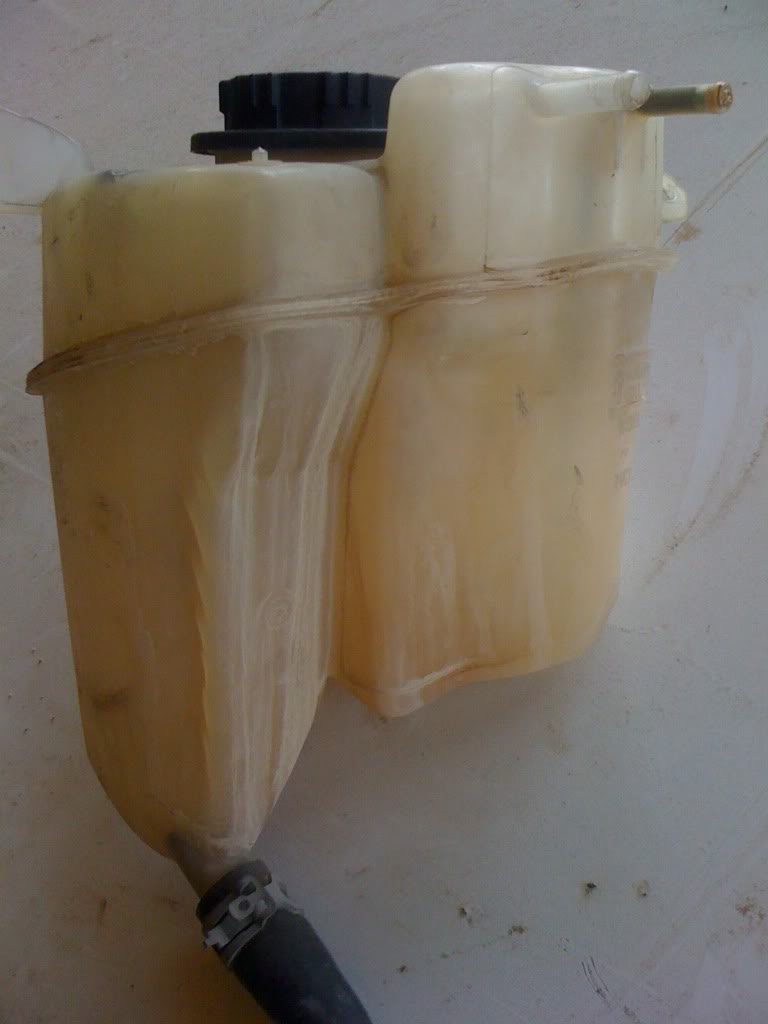
I was leaking coolant from the engine compartment, rear – on the driver side and determined it to be my coolant over flow tank. I ordered one up a new one and well here’s how it went, via pic’s..
Removed the windshield wipers, then I remove the plastic covers, then remove the hex screws.

Now, I removed the cross bar

Now with everything out of the way, I was free to remove the (3) hoses and the unit itself.


Here are all of the parts that were removed for this project

Here we have the side by side view

Ok the new one is going back in, the only problem here is fitting the bottom hose under and connecting it up.. small hands are deffetnly required, as I had my son (14) actually perform the final hookup.. With dad’s observation and approval of course.. hahahaa..


Here we go team, everything is back together and we have no leaks..

The total cost for this project was $86.00 for the reservoir tank.
The total length of time spent on this project was 90 minutes
Thank you all for your time and have a great one everybody..
Tdc..
It’s just me Tdc again with another one of my How I did it threads, just incase anyone wants to know.
I was leaking coolant from the engine compartment, rear – on the driver side and determined it to be my coolant over flow tank. I ordered one up a new one and well here’s how it went, via pic’s..
Removed the windshield wipers, then I remove the plastic covers, then remove the hex screws.
Now, I removed the cross bar
Now with everything out of the way, I was free to remove the (3) hoses and the unit itself.
Here are all of the parts that were removed for this project
Here we have the side by side view
Ok the new one is going back in, the only problem here is fitting the bottom hose under and connecting it up.. small hands are deffetnly required, as I had my son (14) actually perform the final hookup.. With dad’s observation and approval of course.. hahahaa..
Here we go team, everything is back together and we have no leaks..
The total cost for this project was $86.00 for the reservoir tank.
The total length of time spent on this project was 90 minutes
Thank you all for your time and have a great one everybody..
Tdc..
The following 6 users liked this post by tdc:
a100steaksauce (11-25-2010),
Cadillac (11-26-2010),
joycesjag (11-26-2010),
mizdereon (04-02-2014),
scampy (04-21-2013),
and 1 others liked this post.


#7
11-27-2010 | 11:13 AM

Senior Member
Joined: Mar 2009
Posts: 552
Likes: 61
From: Texas
Trending Topics
#8
11-28-2010 | 12:07 AM
Thread Starter
|
Senior Member
Joined: Nov 2010
Posts: 103
Likes: 63
From: So-Cal
Hey tdc, thats a nice write up on the coolant reservoir change, thanks for sharing.
It'll be a nice add on to the FAQ section. One of the mods will no doubt sort this shortly.[/quote]
Thank you Jim.. I know I’m just the new guy here, but I’ve got a lot of work to do on my car and as long you guys allow me I’ll keep posting them up..
Thank you again for the honor of allowing this so-Cal, single dad a place to come and be with… well other adults.. LOL..
Hey best of luck to you Sir.. It wasn’t really a hard job at all.. The only problem I had was connecting the bottom hose, big hands..
Wishing you the best..
Cool.. I'm happy to hear it's worthy.
Thank you for the honor..
Hahahaa.. That’s soooo funny you mentioned your light... LOL.. I'm just now (right now) trying to think how and the poop I'm going to change my passenger side front light.. I bought the bulb and removed the rear cover from the headlight assembly, but I think I’m SOL... ie I might have to remove the hole front clip??? IDK --- TBD..
If you’ve got some advise I’m listening.. and thanking you ahead of time..
Thank you sir.. I'm glad you and others liked it.. ever since I bit the bullet on the timing project, I'm going to try to be my own mechanic for a while and see how it works out.. Hahahaa. Wish me luck with that one.. lol..
#9
11-28-2010 | 12:42 PM

Junior Member
Joined: Oct 2010
Posts: 2
Likes: 0
From: Mexico City
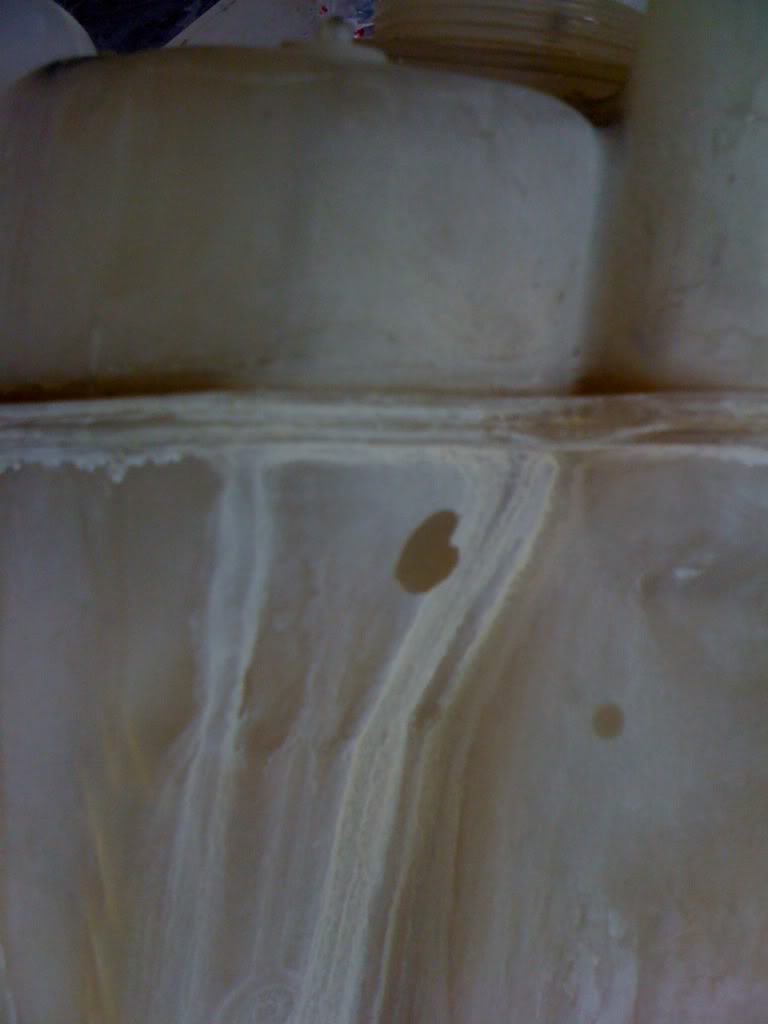
Thanks TDC, I just did mine, here are some pictures of the faulty one, look how many cracks it does have, and mine was leaking from between the plastic unions.
My wipers were the most time consuming parts to remove due to old dirt, even with W40, finally the trick was to use standard "locking plyers", one side on top of the screw and the other on the bottom of the wiper and just push a little to create a locking pressure.
My wipers were the most time consuming parts to remove due to old dirt, even with W40, finally the trick was to use standard "locking plyers", one side on top of the screw and the other on the bottom of the wiper and just push a little to create a locking pressure.
Last edited by raulrs; 11-29-2010 at 08:13 PM.
#10
01-10-2019 | 10:48 AM

Junior Member
Joined: Jan 2019
Posts: 6
Likes: 1
From: NC
#11
01-10-2019 | 12:40 PM

Joined: Jan 2012
Posts: 5,680
Likes: 2,695
From: Newport Beach, California
In my reply to your thread, I mentioned how to remove the lower hose from the heater pipe. Use a tool for removing the constant tension clamp and move it up the hose, then use a hose tool or pliers to loosen the hose and remove it along with the tank.
Replace the tank as it's most likely cracked like the ones shown in this thread.

Thread
Thread Starter
Forum
Replies
Last Post
stanjag
S-Type / S type R Supercharged V8 ( X200 )
2
08-30-2015 10:35 AM
innzane
X-Type ( X400 )
7
08-27-2015 07:58 PM
Currently Active Users Viewing This Thread: 1 (0 members and 1 guests)