
2002 S Type sagging headliner removal HOW TO
#21
 05-05-2018, 11:32 AM


Veteran Member
#22
09-23-2018, 09:09 PM
#23
09-23-2018, 09:30 PM
Veteran Member
#24
09-24-2018, 06:05 PM


#26
04-09-2020, 12:12 AM

Bloody brilliant mate. One of the best (if not the best) tutorials in the forum. Only trouble I had was the fastener in the middle of the back edge but that is a technique thing nothing you can teach. Saved me heaps and only cost AUD$220 for the new lining. Hope you are all ok in the UK; you seem to be having it much worse than here downunder. Wishing you all a safe easter; remember keep to yourselves and stay in doors, it's working here.
#27
04-09-2020, 09:31 AM
#29
04-10-2020, 04:48 AM
Bloody brilliant mate. One of the best (if not the best) tutorials in the forum. Only trouble I had was the fastener in the middle of the back edge but that is a technique thing nothing you can teach. Saved me heaps and only cost AUD$220 for the new lining. Hope you are all ok in the UK; you seem to be having it much worse than here downunder. Wishing you all a safe easter; remember keep to yourselves and stay in doors, it's working here.
#30
04-10-2020, 12:08 PM
This is a great thread. I plan on completing it soon. As we are in lockdown here in Concord, CA. At the same time I'll rebuild the sunroof tracks. Be sure to do this while at it. The tracks fall apart from the heat and crack. Then the sunroof does not go up and down and get stuck somewhere in between. I have purchased the new track kit and plan on transferring the motor to the assembly. My understanding is that this is all done on a bench. We still have only 55k miles on her. a 2001 S type still in great shape. I have done the timing chain replacement 2 years ago. And yes all the plastic pieces were cracking up.
#31
04-13-2020, 04:38 PM

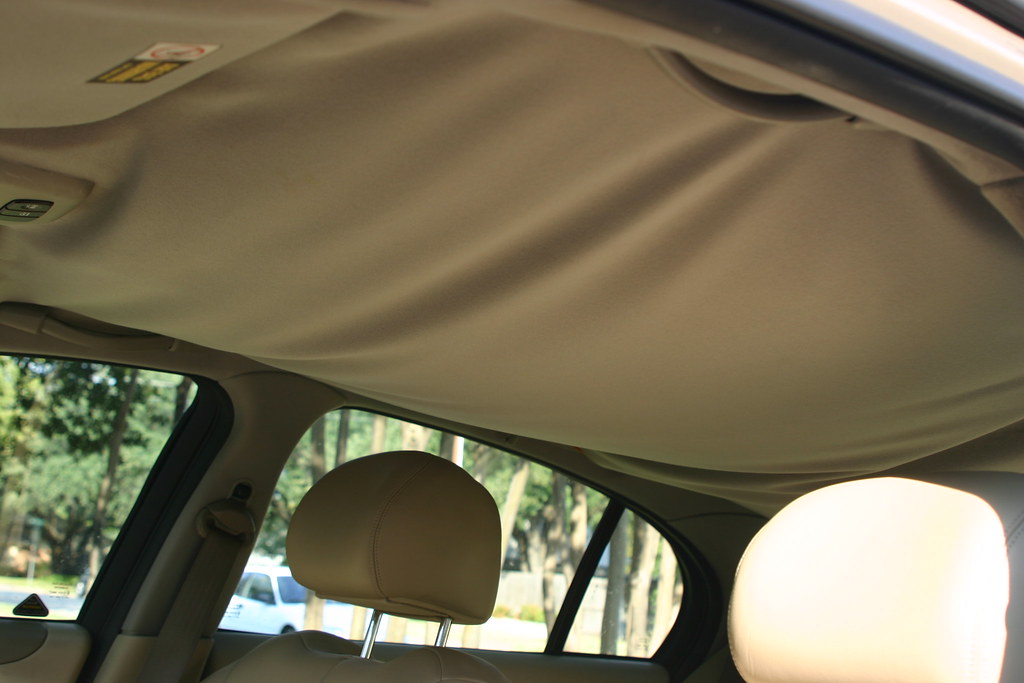
I started with this:
Using some cheap panel tools from Northern Tool, started removing various pieces.
The A pillar covers
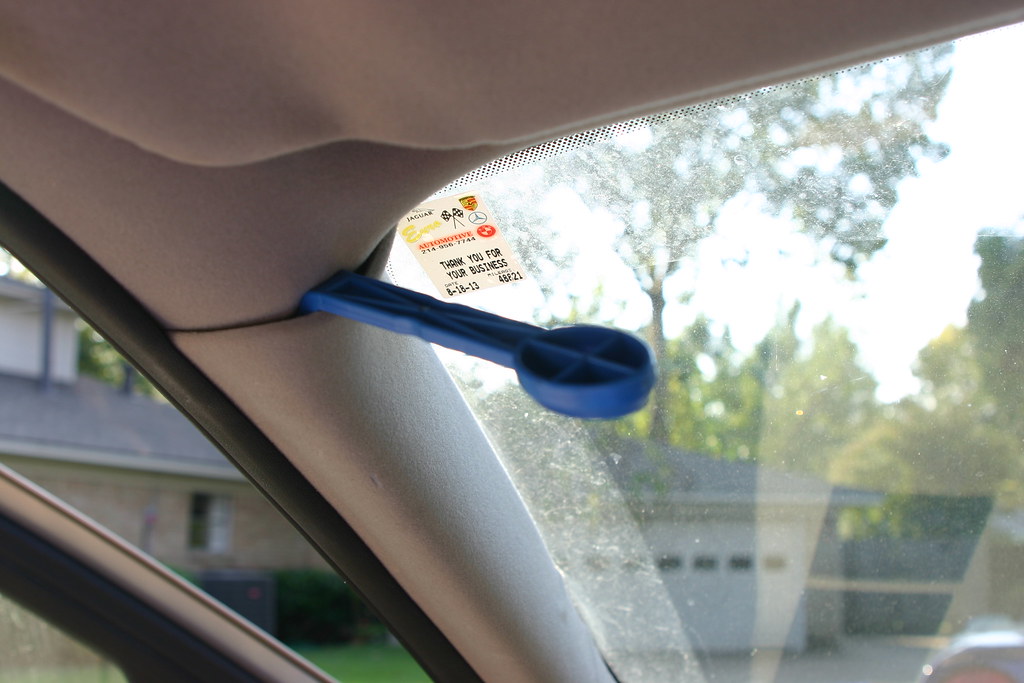

Then the visor clips using a 7/64" hex wrench. I'll need to buy the metric versions I guess.
Then the visor itself, which had to be left hanging by the electrical wires. Used same hex wrench.

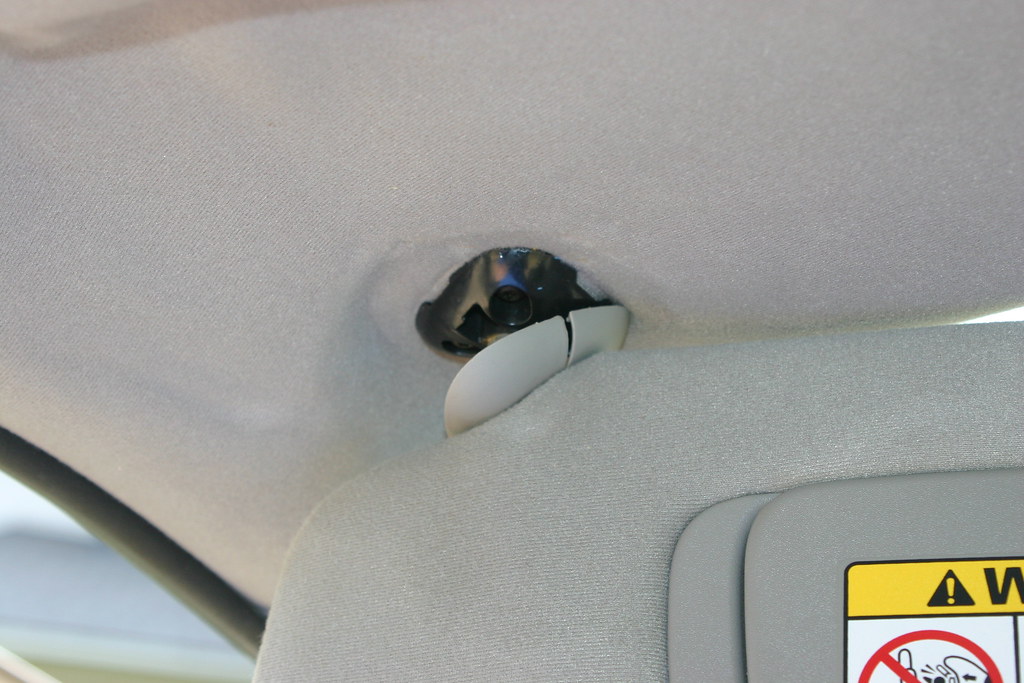
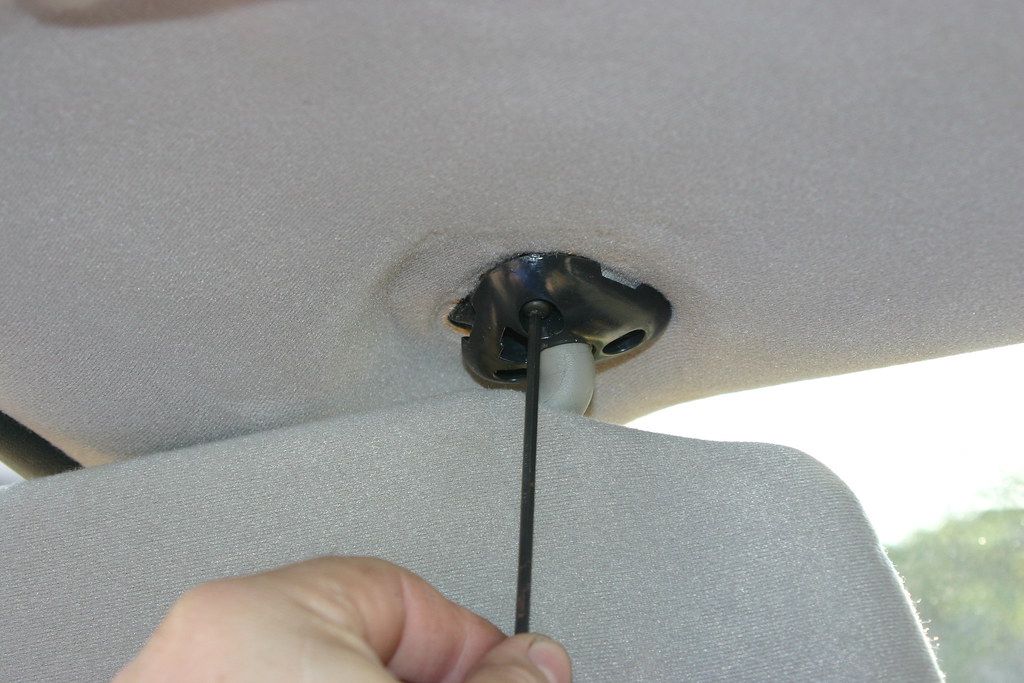
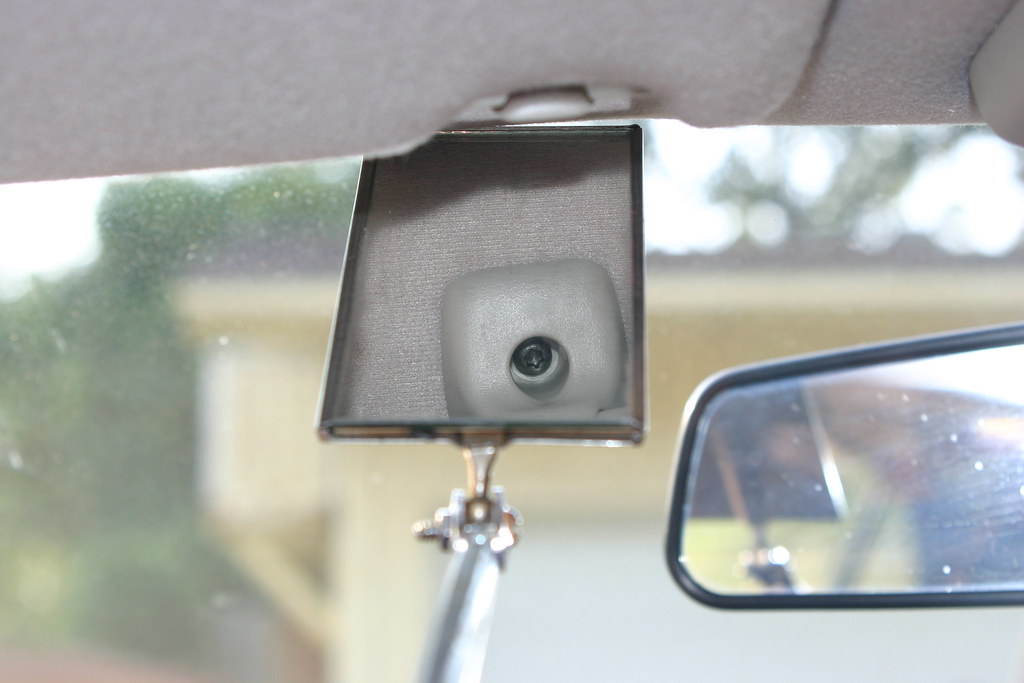
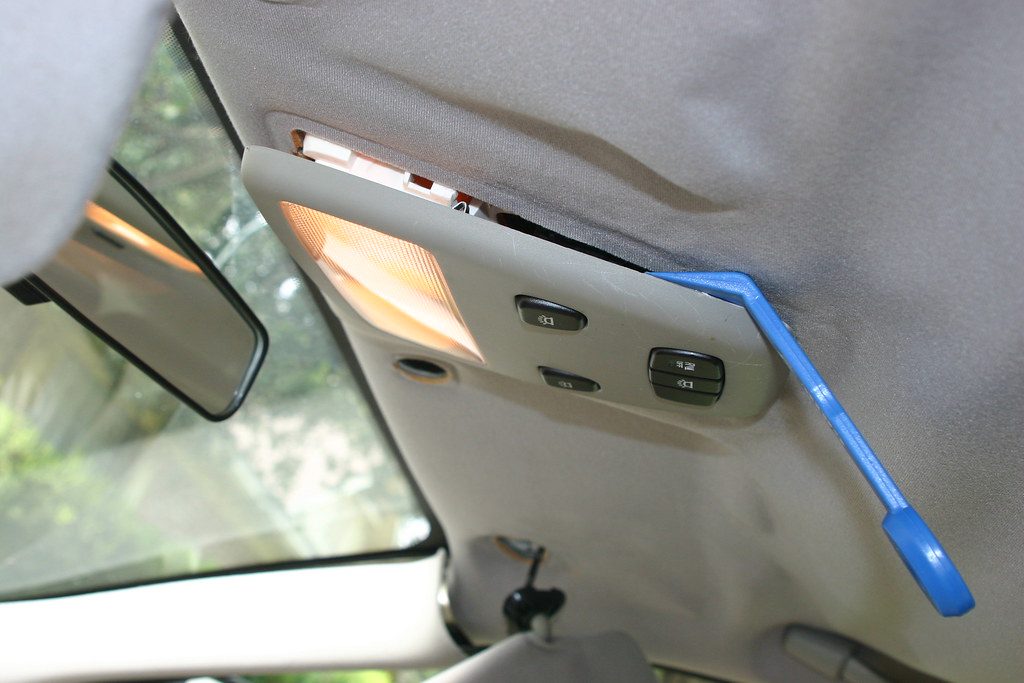
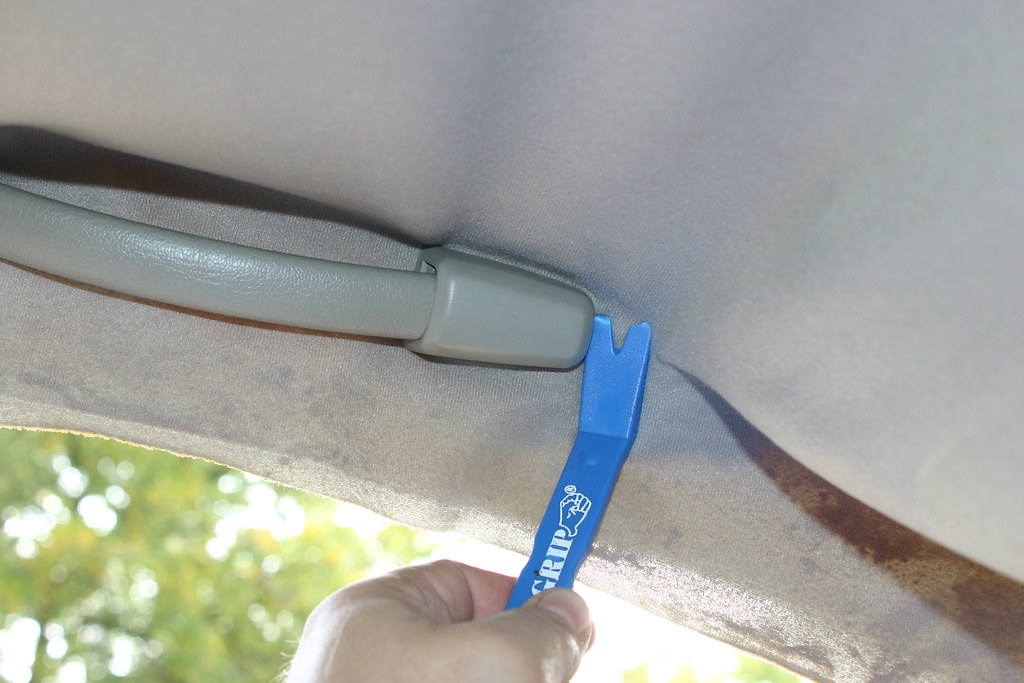
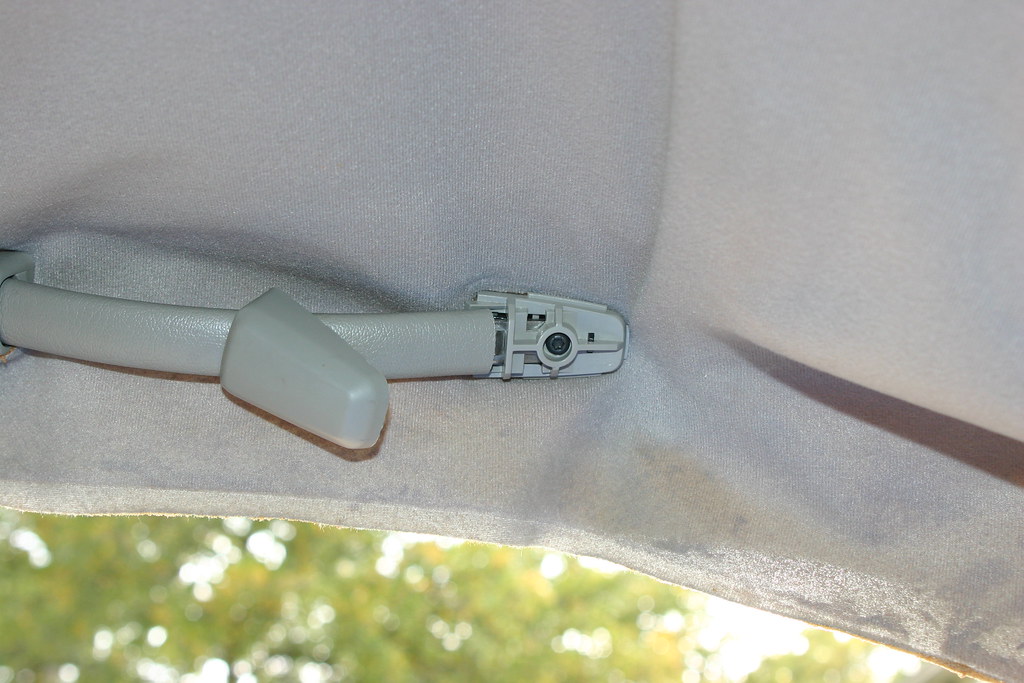
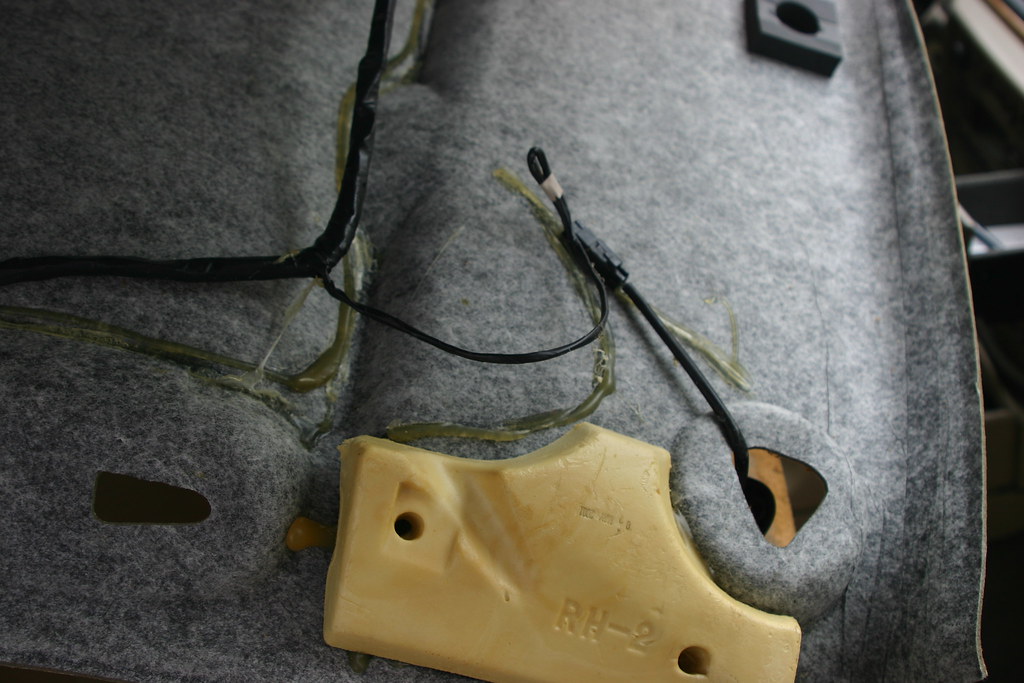
Then the overhead console. Note it should be popped out closed to the windshield then working your way back. The back does not pop out. The unit slides towards the windshield. See clip in second picture.
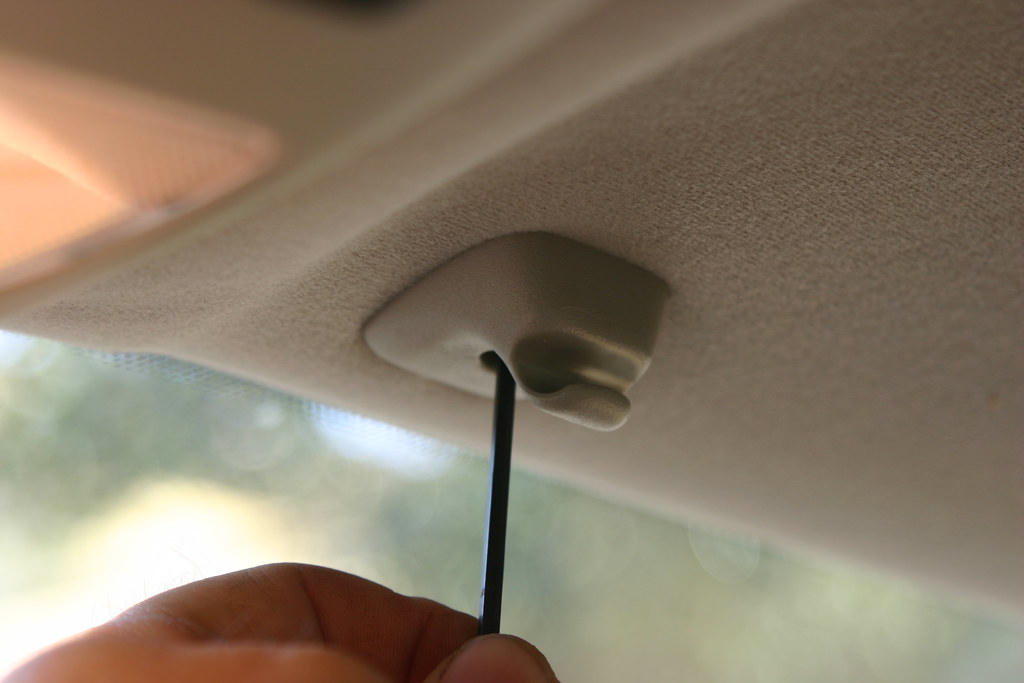
Then the grab handles using same hex wrench.
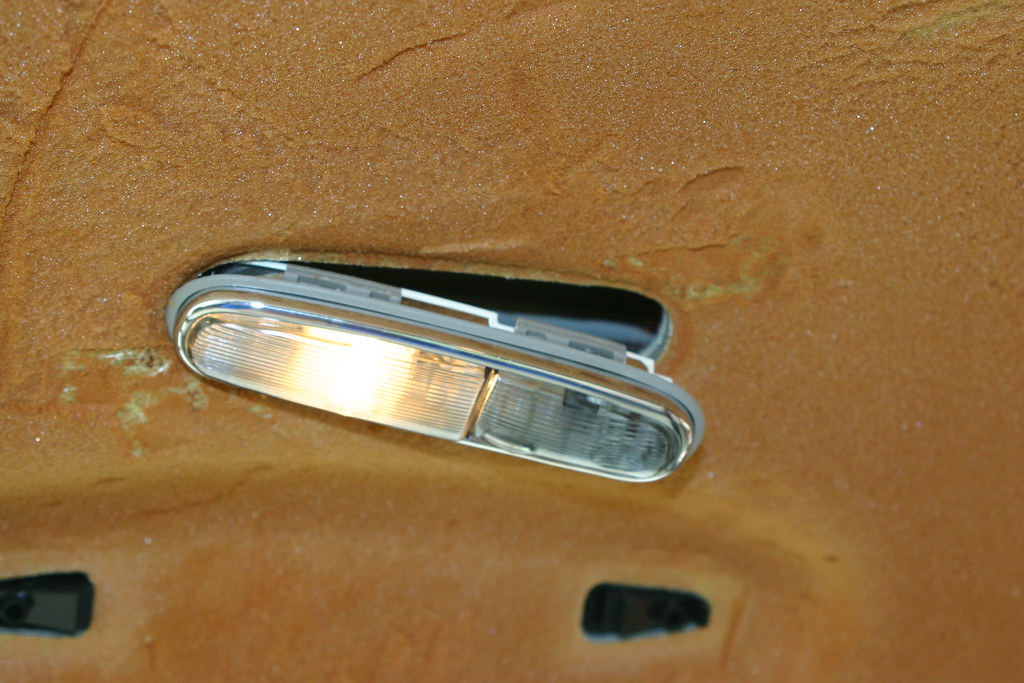
Then the rear interior lights and then turned and pushed them back up through the headliner.

Then I pulled the C pillar cover down but didn't remove, like the A pillar.
The B pillar cover was pulled down but didn't get removed, but had to use a 17mm socket to remove the seat belt retaining nut. Sorry no pictures.
Removed the front passenger seat. Moved seat all the way forward and removed covers at the back and used a 15mm socket to remove the bolt on each side.
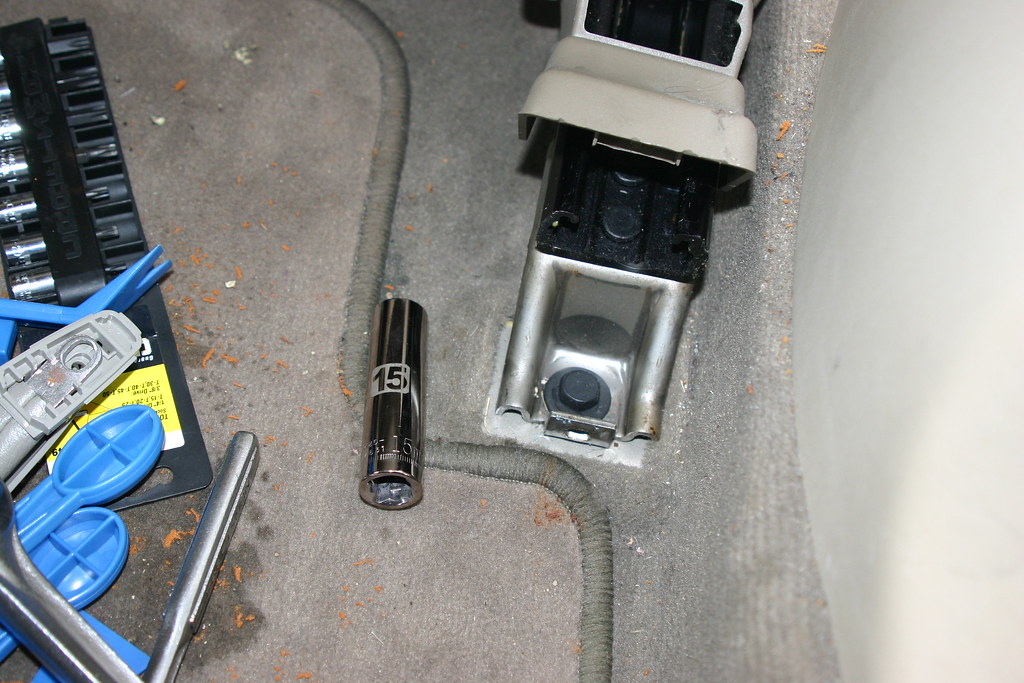
Then moved the seat all the way back and removed the front retaining bolts. The front two are hidden under the carpet, but it was cut to allow easy access.
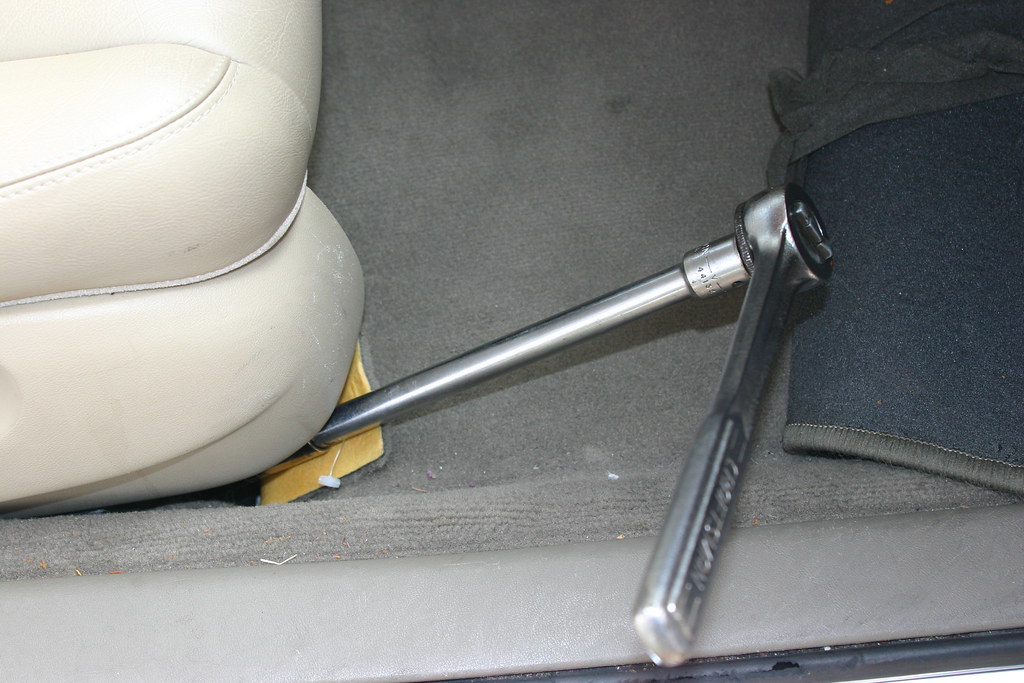
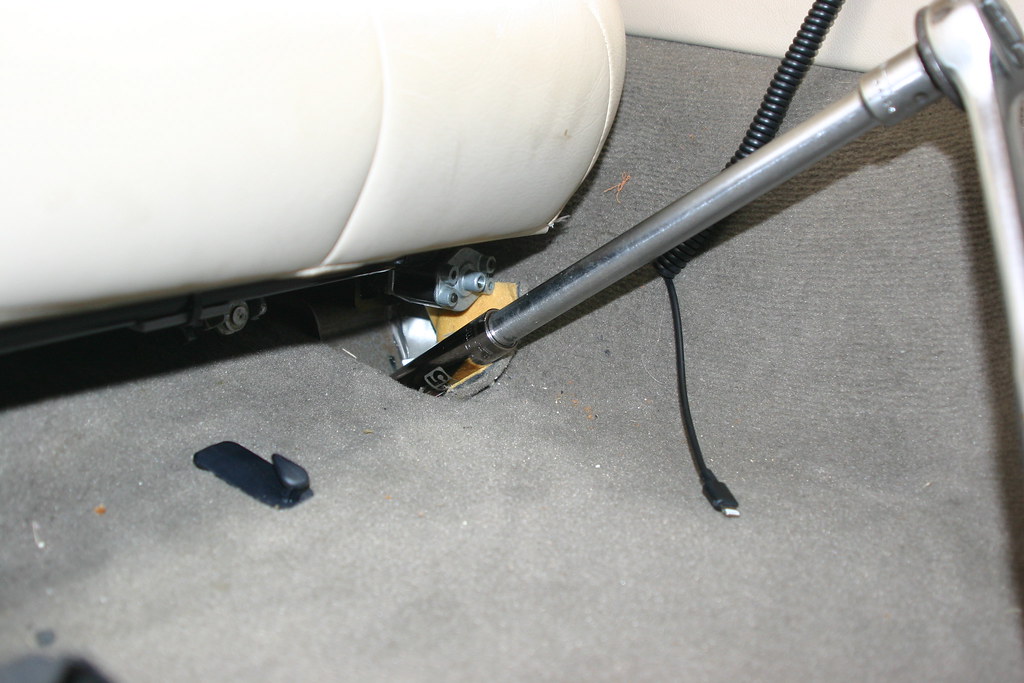
At this point I disconnected the battery negative cable and had lunch. I'd read to disconnect the battery for at least 2 minutes before removing the cables going to the bottom of the seat. Had to remove the nut holding the end of the seat belt to the seat. The cables were disconnected and the seat pulled out through the door.

Then carefully working all the away around, I gently pulled the headliner "board" out of the weather seal.
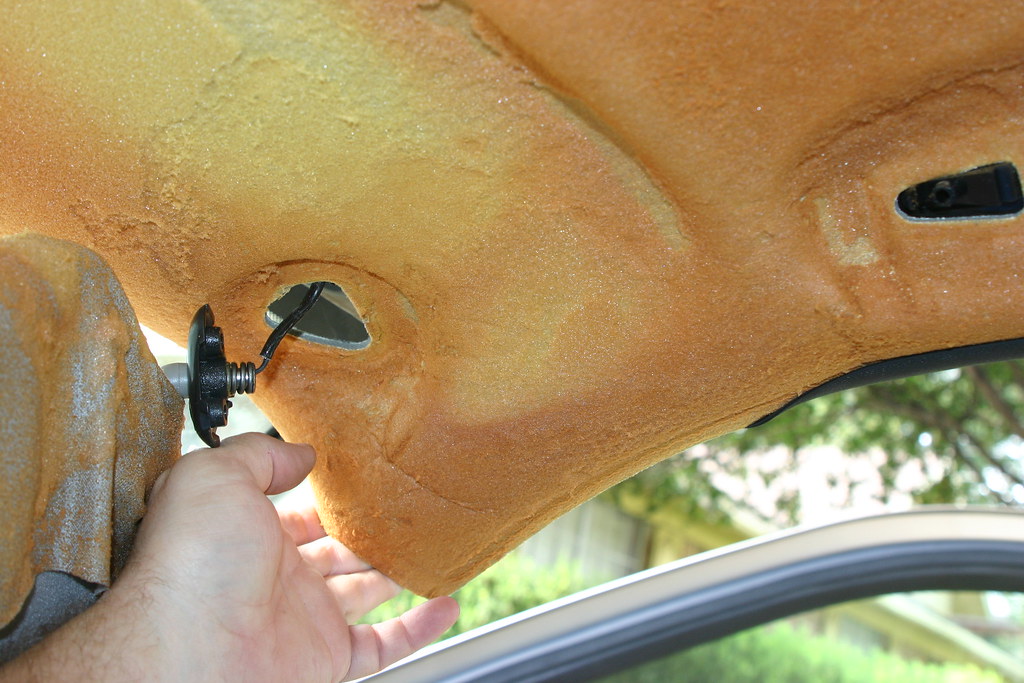
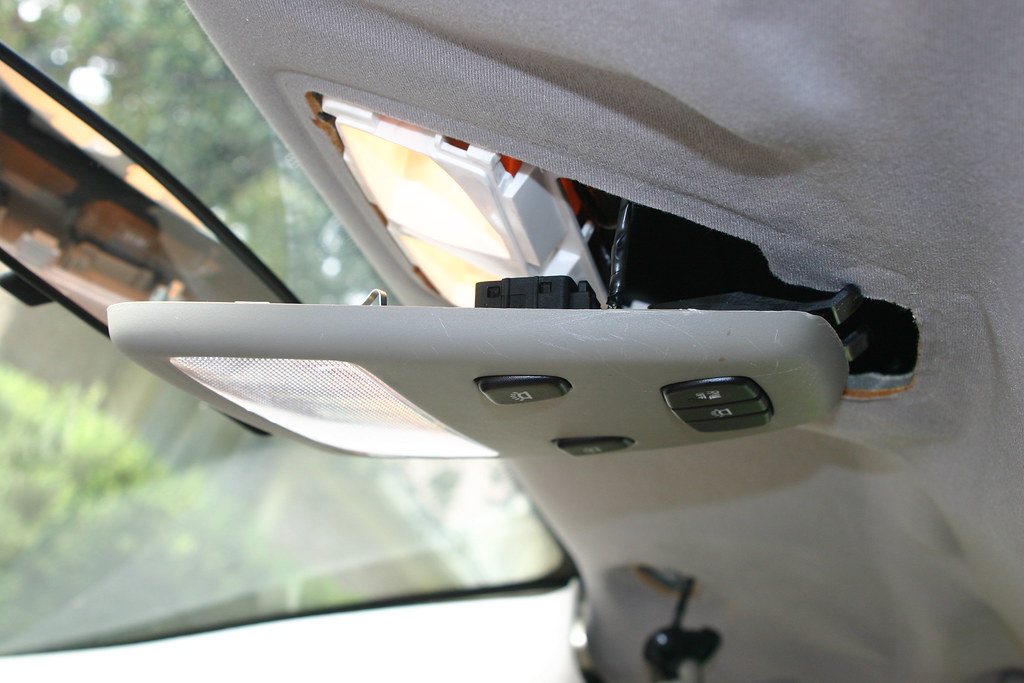
Finally the visor electrical connections were exposed and then disconnected.
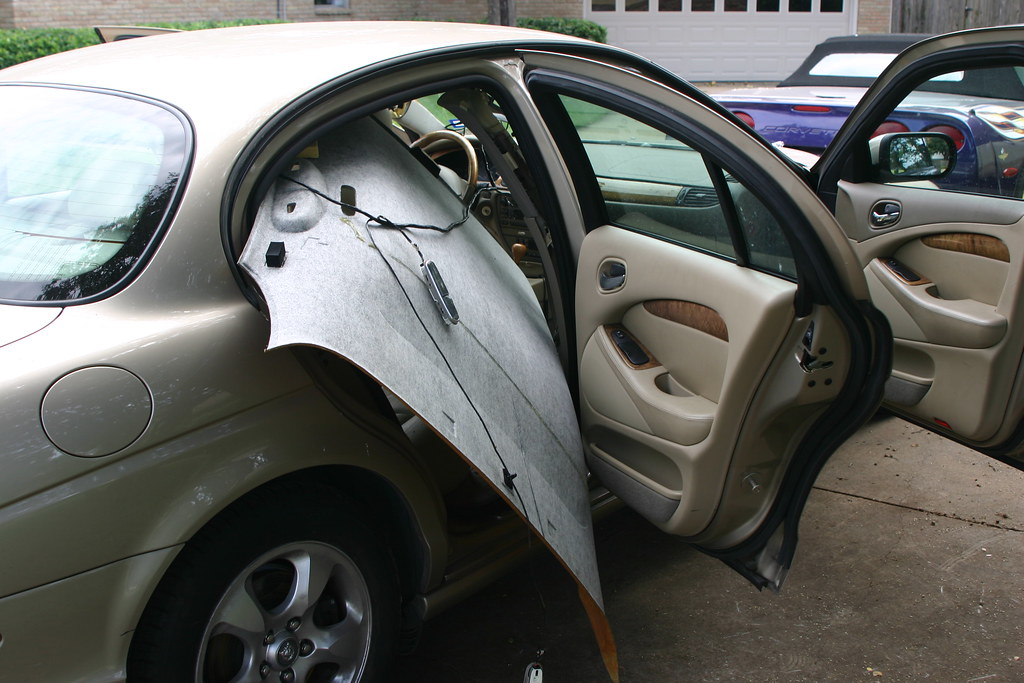
Then I dropped the headliner down into the space where the front passenger seat was and angled the back towards the rear passenger door.
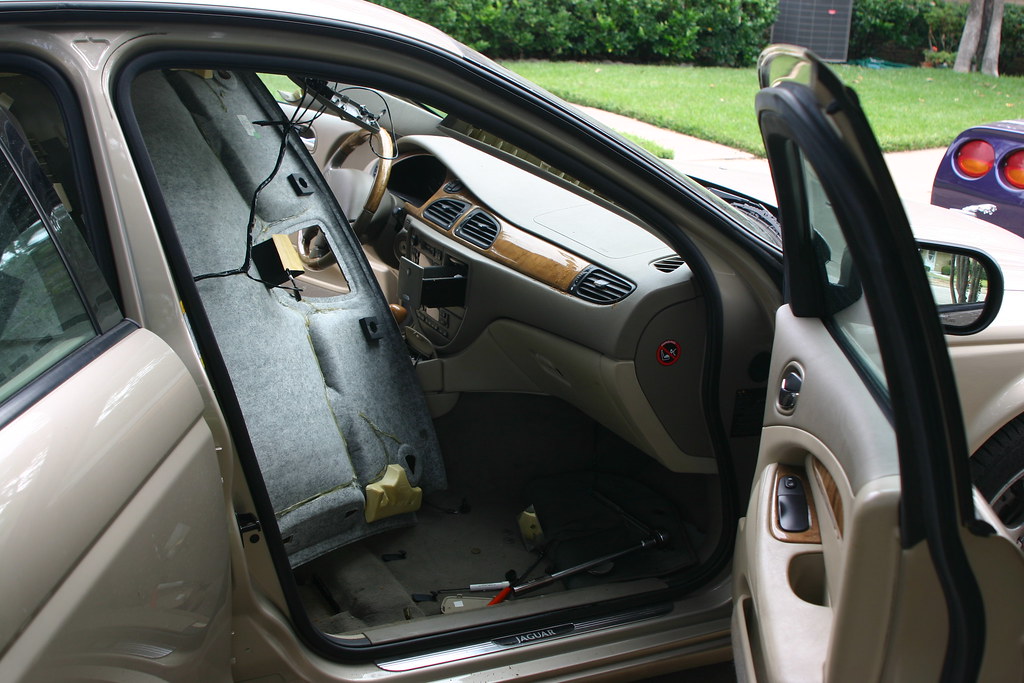
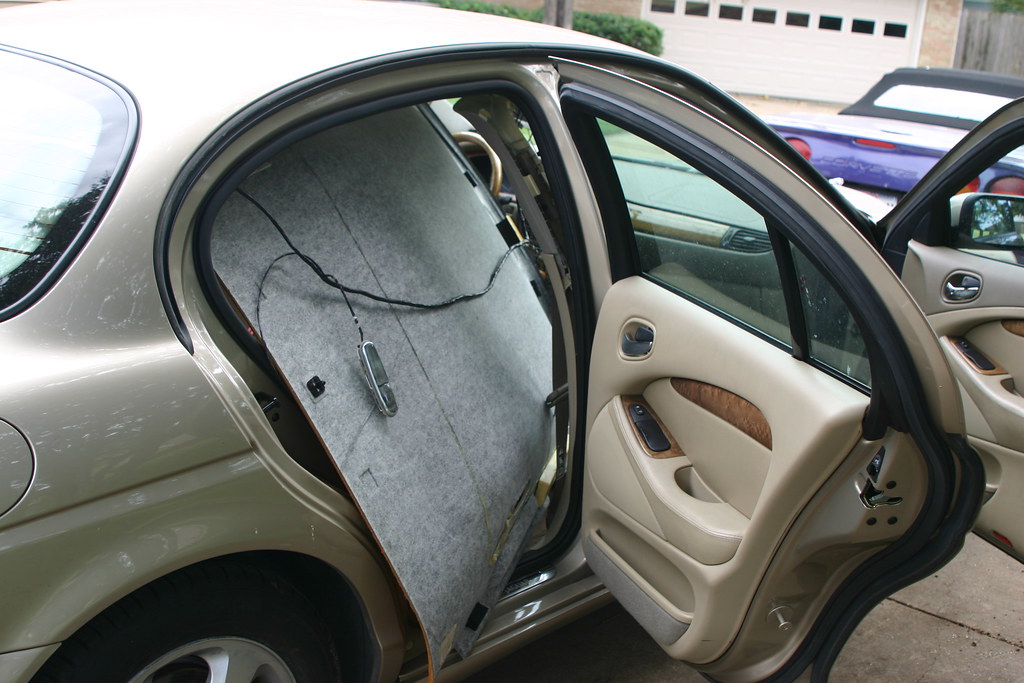
Then I lifted the corner on the floor in the front passenger section and pushed it us some. Then in the rear door area, bowed the board enough to clear what would be the back driver side passenger corner. Then it was a simple matter of sliding it on out.
Then I put the seat back and zip tied the loose wiring up and out of the way. Also reinstalled the visors.
Now to figure out how to clean the board, replace the headliner material and reinstall.
Brett
Using some cheap panel tools from Northern Tool, started removing various pieces.
The A pillar covers
Then the visor clips using a 7/64" hex wrench. I'll need to buy the metric versions I guess.
Then the visor itself, which had to be left hanging by the electrical wires. Used same hex wrench.
Then the overhead console. Note it should be popped out closed to the windshield then working your way back. The back does not pop out. The unit slides towards the windshield. See clip in second picture.
Then the grab handles using same hex wrench.
Then the rear interior lights and then turned and pushed them back up through the headliner.
Then I pulled the C pillar cover down but didn't remove, like the A pillar.
The B pillar cover was pulled down but didn't get removed, but had to use a 17mm socket to remove the seat belt retaining nut. Sorry no pictures.
Removed the front passenger seat. Moved seat all the way forward and removed covers at the back and used a 15mm socket to remove the bolt on each side.
Then moved the seat all the way back and removed the front retaining bolts. The front two are hidden under the carpet, but it was cut to allow easy access.
At this point I disconnected the battery negative cable and had lunch. I'd read to disconnect the battery for at least 2 minutes before removing the cables going to the bottom of the seat. Had to remove the nut holding the end of the seat belt to the seat. The cables were disconnected and the seat pulled out through the door.
Then carefully working all the away around, I gently pulled the headliner "board" out of the weather seal.
Finally the visor electrical connections were exposed and then disconnected.
Then I dropped the headliner down into the space where the front passenger seat was and angled the back towards the rear passenger door.
Then I lifted the corner on the floor in the front passenger section and pushed it us some. Then in the rear door area, bowed the board enough to clear what would be the back driver side passenger corner. Then it was a simple matter of sliding it on out.
Then I put the seat back and zip tied the loose wiring up and out of the way. Also reinstalled the visors.
Now to figure out how to clean the board, replace the headliner material and reinstall.
Brett
That's about it. Thanks again for the removal instructions. Tomorrow it's head liner and sun roof repair here in my shop/crib. M.L.
The following users liked this post:
solidaxel (04-14-2020)
#32
12-31-2022, 04:35 PM

Same problem as everyone with the ceiling of my 2002 S-type. However, I took out the ceiling in another way. We took it out through the trunk after flipping the backrests and removing the side-cushions. It needs a bit bending, but is very doable. Don't know if it's easier than through the door, but removing the passenger chair seems not so easy to me.
Now the removal of the foam and refitting the fabric. Anyone reused/reglued the old lining?
Now the removal of the foam and refitting the fabric. Anyone reused/reglued the old lining?
The following users liked this post:
kr98664 (12-31-2022)
#33
12-31-2022, 05:11 PM


Veteran Member
Yes. Don�t do it!
Wasn't a Jag, but most headliners are similar. The foam backer sheds a very thin layer and the fabric falls down. If unaware, you�d think only the glue has failed. Looks like the existing fabric could be rebonded to the existing foam.
It will look great for maybe a week or so. Then the foam continues to disintegrate and sheds yet another thin layer, taking the fabric with it.
The only fix is to strip off all the foam and start fresh. New headliner fabric comes with its own foam. The headliner I repaired was relatively flat and easy to recover. The Jag headliner is much more complex, probably best left to an automotive upholstery shop with the experience and special tools.
The following 2 users liked this post by kr98664:
S-Type Owner (01-01-2023),
Staatsof (11-02-2023)
#34
12-31-2022, 07:28 PM

Yes. Don�t do it!
Wasn't a Jag, but most headliners are similar. The foam backer sheds a very thin layer and the fabric falls down. If unaware, you�d think only the glue has failed. Looks like the existing fabric could be rebonded to the existing foam.
It will look great for maybe a week or so. Then the foam continues to disintegrate and sheds yet another thin layer, taking the fabric with it.
The only fix is to strip off all the foam and start fresh. New headliner fabric comes with its own foam. The headliner I repaired was relatively flat and easy to recover. The Jag headliner is much more complex, probably best left to an automotive upholstery shop with the experience and special tools.
Wasn't a Jag, but most headliners are similar. The foam backer sheds a very thin layer and the fabric falls down. If unaware, you�d think only the glue has failed. Looks like the existing fabric could be rebonded to the existing foam.
It will look great for maybe a week or so. Then the foam continues to disintegrate and sheds yet another thin layer, taking the fabric with it.
The only fix is to strip off all the foam and start fresh. New headliner fabric comes with its own foam. The headliner I repaired was relatively flat and easy to recover. The Jag headliner is much more complex, probably best left to an automotive upholstery shop with the experience and special tools.
The following users liked this post:
kr98664 (12-31-2022)
#35
01-01-2023, 10:00 AM
Veteran Member
Yes I have done at least 6 or 7 head liners in everything from classic cars to a monster Grand Cherokee Jeep. As posted above the key is to remove ALL of the old foam and head liner material. It's rotten and won't hold up. Try not to gouge the backer board when cleaning the old stuff off as the headliner material is so thin everything will show thru to the finished side.
Really like your trunk idea too! Good thinking on that.
Yes I was also was going to suggest getting a quote from a shop. Where I live it's hot so head liner replacement is very common and very competitive in price. Nothing wrong with deciding to let a pro do it either!
If you do it yourself spend the money and buy professional quality glue. Yes it will be $25 a can or more but heat is the enemy here and make sure it's listed as heat resistant glue. Only spray the glue any other way will leave lumps that will show thru. It's not a hard job but details matter and if you don't do this everyday there are a lot of tricks of the trade so to speak!
But man what a difference a new headliner makes especially if you waited and yours has all fallen down and droopy.
.
.
.
The following users liked this post:
kr98664 (01-01-2023)
#36
01-01-2023, 11:24 AM
Senior Member
Yes. Don�t do it!
Wasn't a Jag, but most headliners are similar. The foam backer sheds a very thin layer and the fabric falls down. If unaware, you�d think only the glue has failed. Looks like the existing fabric could be rebonded to the existing foam.
It will look great for maybe a week or so. Then the foam continues to disintegrate and sheds yet another thin layer, taking the fabric with it.
The only fix is to strip off all the foam and start fresh. New headliner fabric comes with its own foam. The headliner I repaired was relatively flat and easy to recover. The Jag headliner is much more complex, probably best left to an automotive upholstery shop with the experience and special tools.
Wasn't a Jag, but most headliners are similar. The foam backer sheds a very thin layer and the fabric falls down. If unaware, you�d think only the glue has failed. Looks like the existing fabric could be rebonded to the existing foam.
It will look great for maybe a week or so. Then the foam continues to disintegrate and sheds yet another thin layer, taking the fabric with it.
The only fix is to strip off all the foam and start fresh. New headliner fabric comes with its own foam. The headliner I repaired was relatively flat and easy to recover. The Jag headliner is much more complex, probably best left to an automotive upholstery shop with the experience and special tools.
must be a thing of luck and also maybe if the bond was done on a wider surface, the foam might actually be strong enough to support the weight of the fabric.
i did short puffs of glue through a seringe needle, i waited a minute and only then i pushed the fabric.
the glue might also be an important factor.
i used k2 fabric spray, some soray made in poland apoarently.
If it was just luck, let it be then

#37
01-01-2023, 11:44 AM
A note: I too have had and dealt with the headliner issue. A few comments if you don't mind.
Re: removal from the passenger side after taking out the seat. Really not that involved or difficult, actually quite simple and strait forward, well for me anyway. Not worth bonking up the headliner 'pan/tray' pick a word.
Re: using existing material. In my professional (as a paid 'Craftsman') I personally think that's a poor decision. Why? well it's the foam backing that has deteriorated and failed not the exterior fabric. The headliner fabric is very, very inexpensive especially when compared to a factory look vs a potential DIY look. And you can, I, never rely on 'used' (potentially compromised) materials. The work is the same so use the very best 'Materials' you can. It's well worth the extra bucks and you'll never have to 'hold your breath' wondering if it's going to LAST OR NOT.
Once you get the old foam scrubbed off the headliner pan, wire brush and a torch when needed, and prepped use a/the professional High Heat Resistant spray glue used just for headliners. I just looked in my supply cabinet and see I've 'tossed' my last supply I still have a 1 gallon can that I would put in a spray gun but found the spray cans to be A. very much easier to deal with, clean up after, and B. you just don't need a 1 gallon can as several spray cans will do.
WELDWOOD is the name of the product and they make a spray can specifically for HEADLINER INSTILATION.
Hope this helps you produce the job you're looking for. It has for me.
M.L.
The following 2 users liked this post by m.w.l.:
kr98664 (01-01-2023),
S-Type Owner (01-01-2023)
#38
01-01-2023, 02:05 PM
This is an awesome write up.
I want to do this, but haven’t worked up the courage. Thankfully I only have one small corner coming loose….which I know will slowly continue (I drive with the moonroof open all the time). I live in a small apartment, which means very limited workspace.
I have read not to cheat and re-glue it on your own; apparently doing that leaves residue on the surface which has to be sanded off if you ever plan to take the headliner out and do it the right way.
I’m tempted to just pay someone. If anyone is in the LA area and has spare time, I’d happily make it worth your while.
#39
01-01-2023, 02:34 PM
Senior Member
sorry for the reply, but this is important: i forgot to mention that i washed the fabric of a sunshield in the washing machine at 20 celsius (cold so it doesnt shrink) came out beautifully clean and without the orange glue/foam. try it out on the roof fabric as its the same material... that if you might want to use the same fabric (color and crop reasons)
Last edited by elDariusVargas; 01-01-2023 at 02:52 PM.
#40
01-01-2023, 02:39 PM
sorry for the reply, but this is important: i forgot so mmention that i washed the fabric of a sunshield in the washing machine 20 celisus (cold so it doesnt shrink) came out beautifully clean and without the organge glue/foam. try it ouf if you might want to use the same fabric (color and crop reasons)