When you click on links to various merchants on this site and make a purchase, this can result in this site earning a commission. Affiliate programs and affiliations include, but are not limited to, the eBay Partner Network.
LLLA.....had to smile, only because I know exactly how you're feeling. Daunting task to undertake! well after so many others.....not so much. Here's another word of advice. I figured your headliner was coming down like mine was, looking like an inverted Umbrella. If you're only having one corner or so letting loose my advice to you is pickup one can of spray glue and just tack it back up. Save the 'full Monte' for another time. Btw...I'm in Orange county and you're welcome to ring or text me for a more detailed response. Also the/a 'professionally' installed (correct) replacement, well in my area anyway (Costa Mesa) is $450.00 to $550.00 and takes one day. Feel free to shoot me a person message or call if you'd like. I completely understand. Mark L. seven one 4 five 4 five 0 five two 1. Your problem is just not a bid deal in the long run. Save the 'BIG DEAL' for another day! Happy New Year! Over and Out.....M.L.
The seat removal is a 4 min job. 1 min for each allen head bolt and it gives room to work in there. $400 for a professional new headlining is a no brainer.
There is another way that avoids removing the degraded foam. Remove the headliner and cloth, turn it upside down and roll it with a liberal coat of diluted waterproof PVA. Make sure the diluted PVA has thoroughly soaked in. Leave to dry for 24hrs. Use spray impact adhesive to glue new cloth back on.
This method worked very well for me in the past on my old estate Peugeot.
Just what I was looking for. Can�t the headliner be folded and removed without taking out the passenger seat?
I'm afraid not. The headliner will not fold, but break. You can bent it a little but definitely not fold it.
Btw, I used 1mm thick grey felt to replace the original fabric / foam combination. Looks great, though not exactly the same color.
Ended up using some of these $20 on amazon. We'll see how long they hold up. Which torx screwdriver is it ? Don't want to take the whole thing out tbh. Maybe I'll drop the back half where its drooping and apply some more glue.
Look at the beginning of this thread on how to remove the entire head liner intact.
Here is a picture of how it's done. Yes you can carefully roll the head liner a bit to get it in and out.
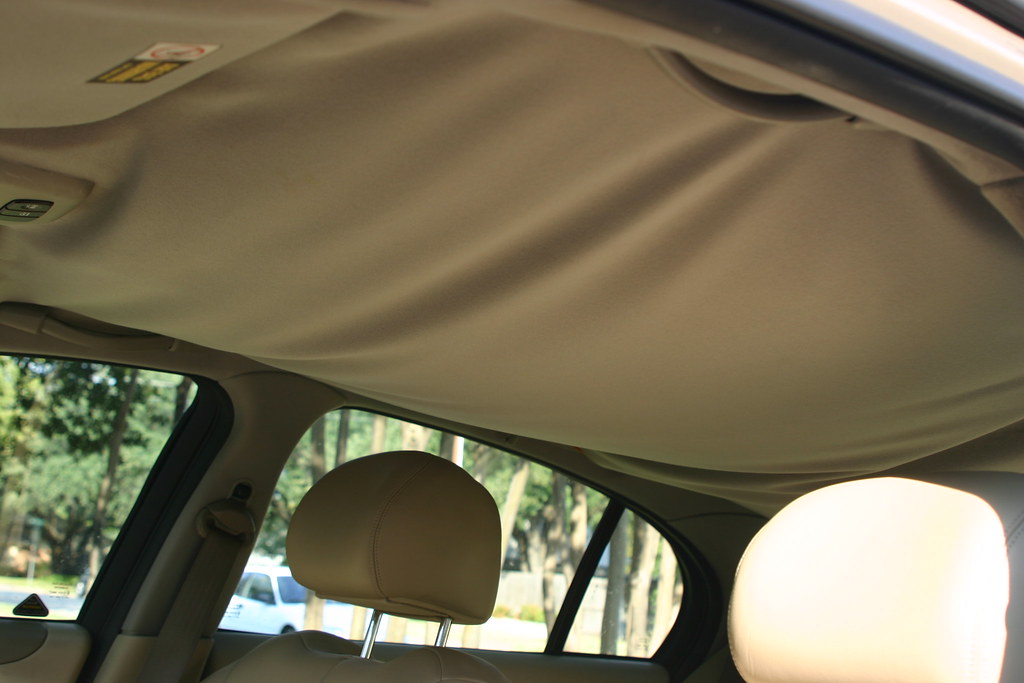
DO NOT leave ANY of the deteriorated foam and do not spray anything over it! You must remove all the foam otherwise it will show thru and look bad. That is a hack repair.
.
.
.
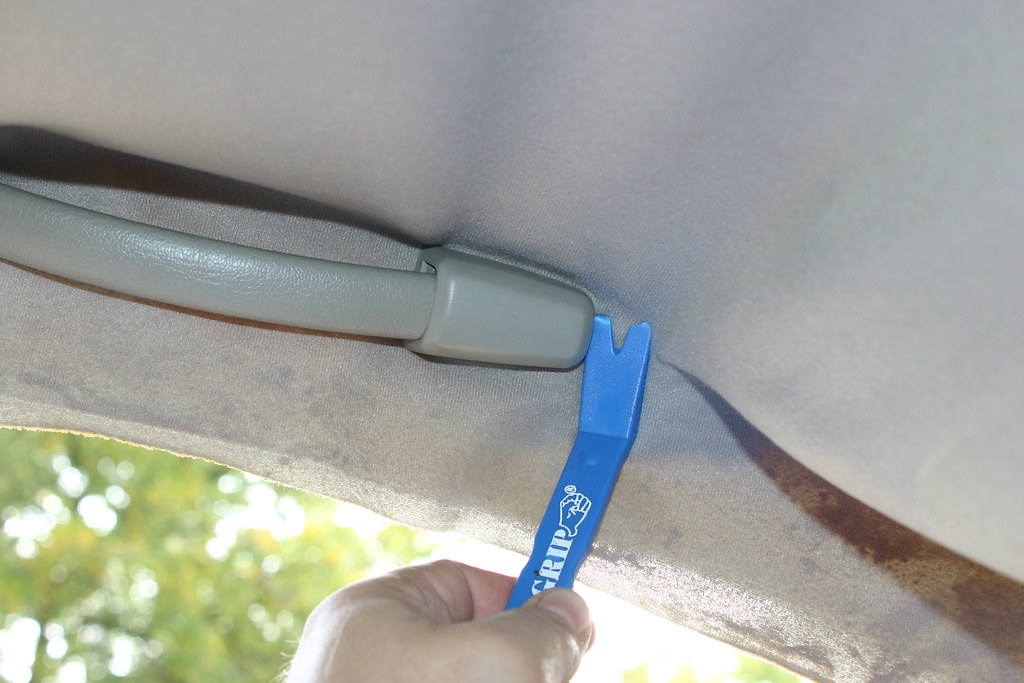
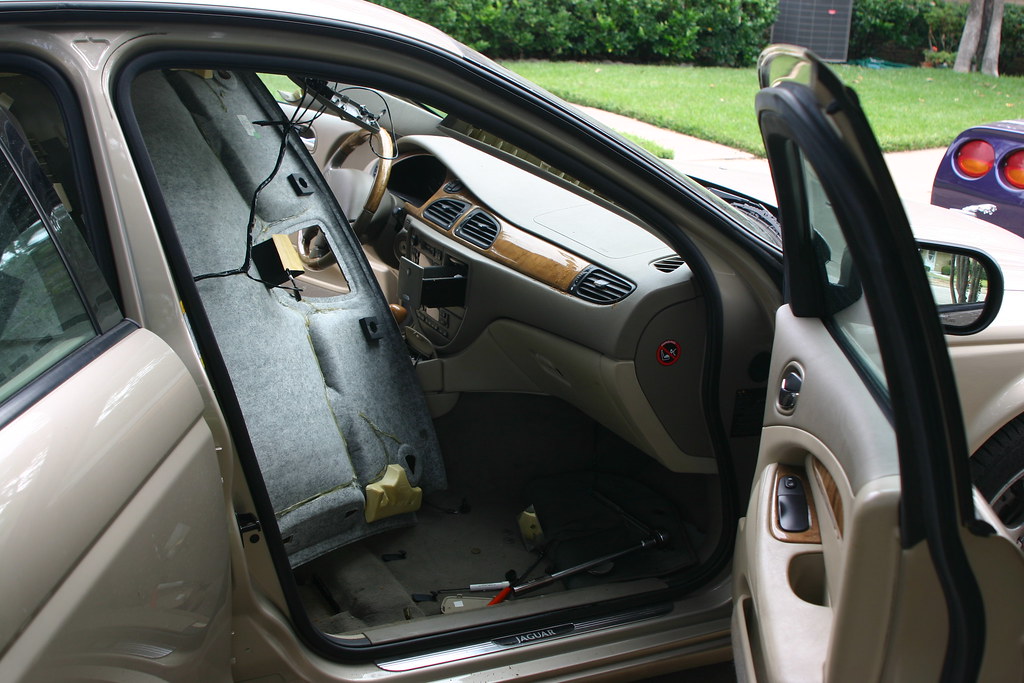
Using some cheap panel tools from Northern Tool, started removing various pieces.
The A pillar covers
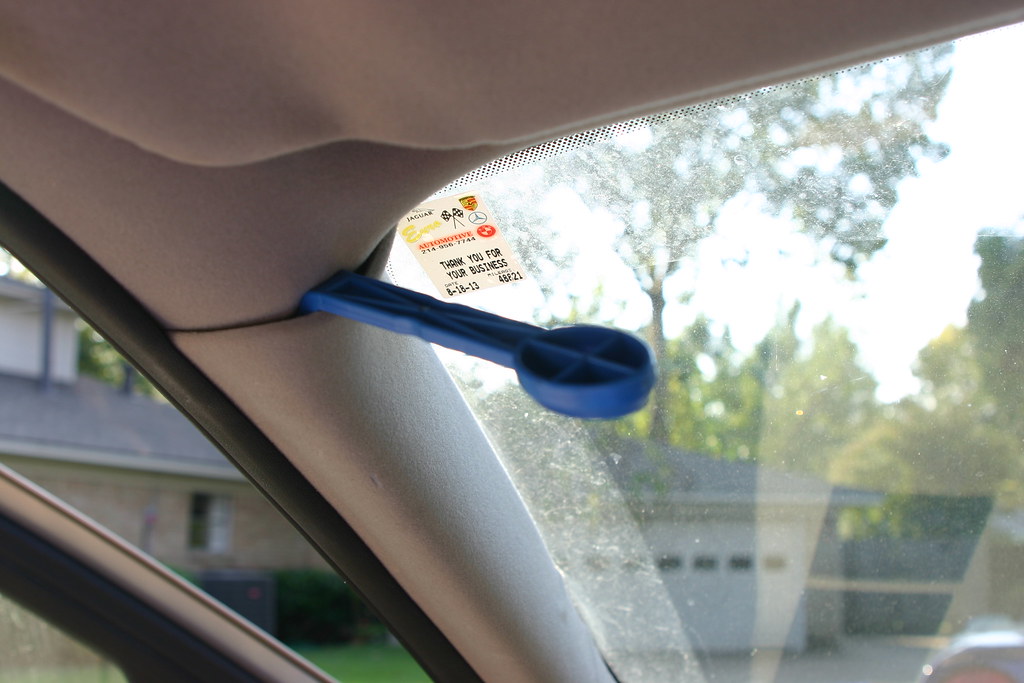
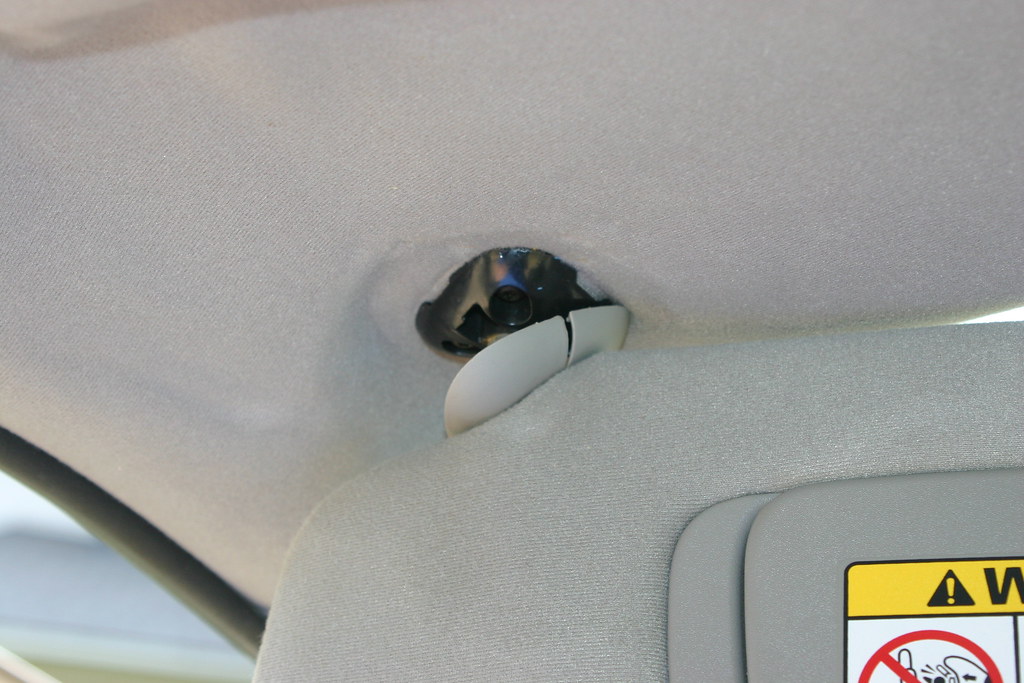
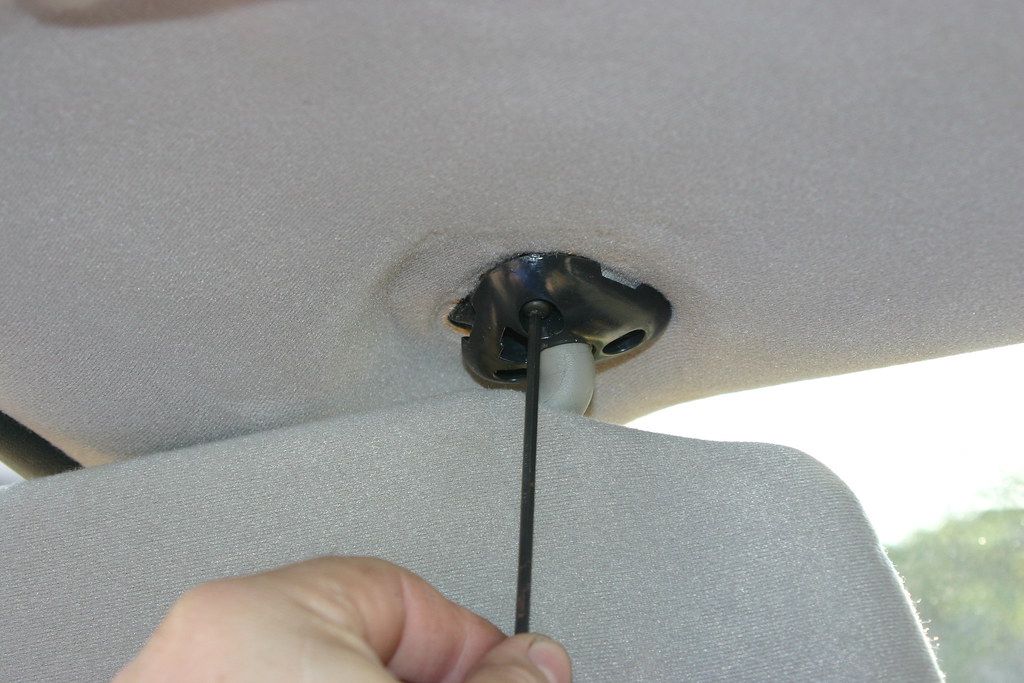
Then the visor clips using a 7/64" hex wrench. I'll need to buy the metric versions I guess.
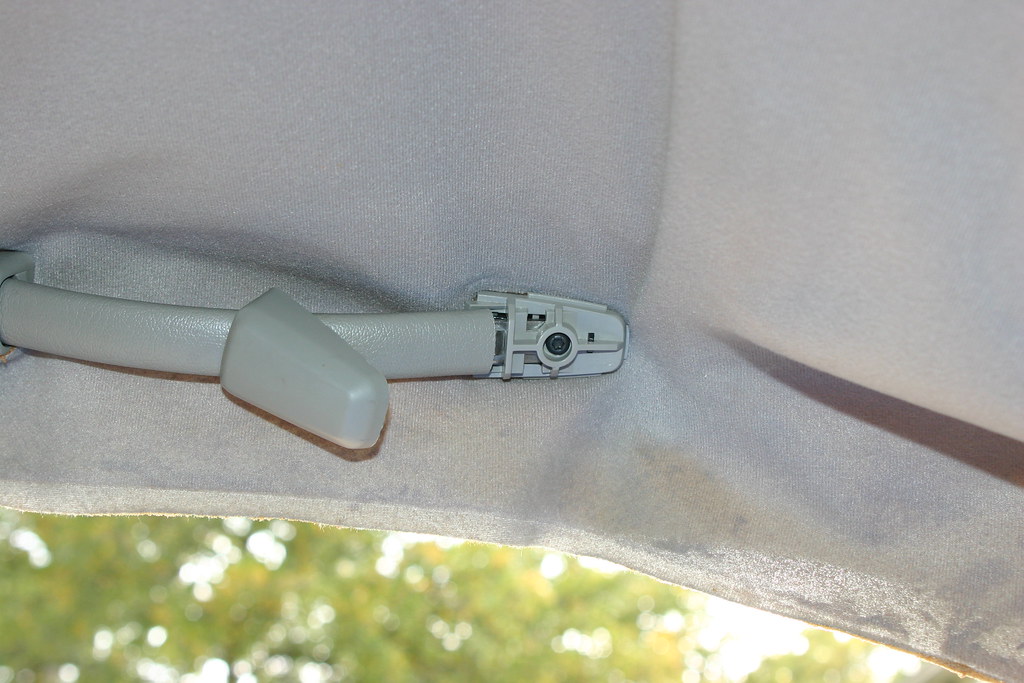
Then the visor itself, which had to be left hanging by the electrical wires. Used same hex wrench.
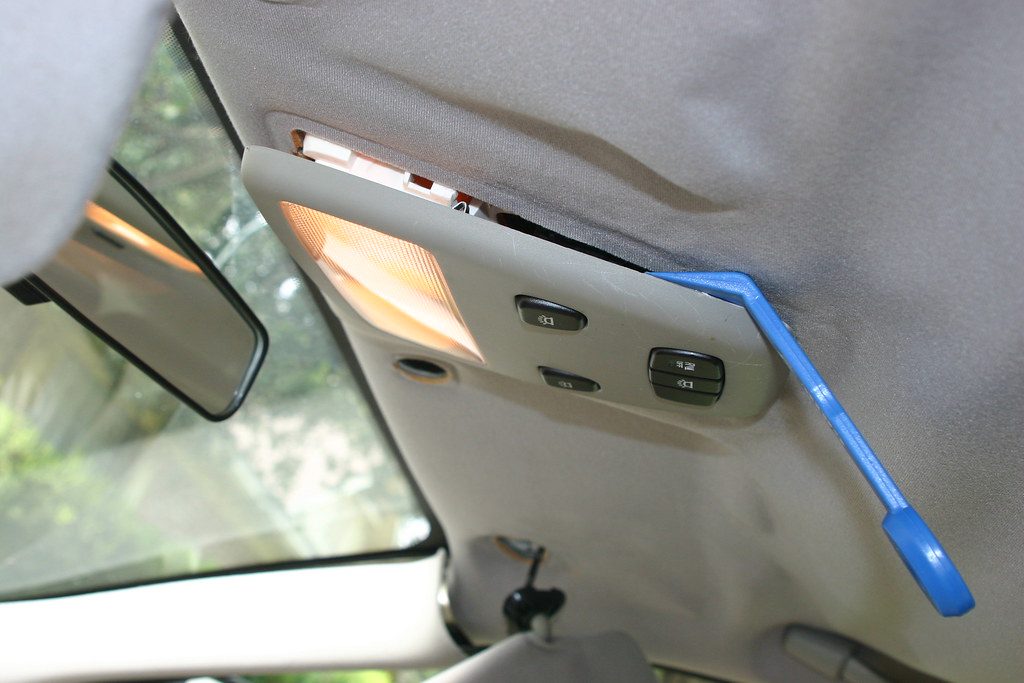
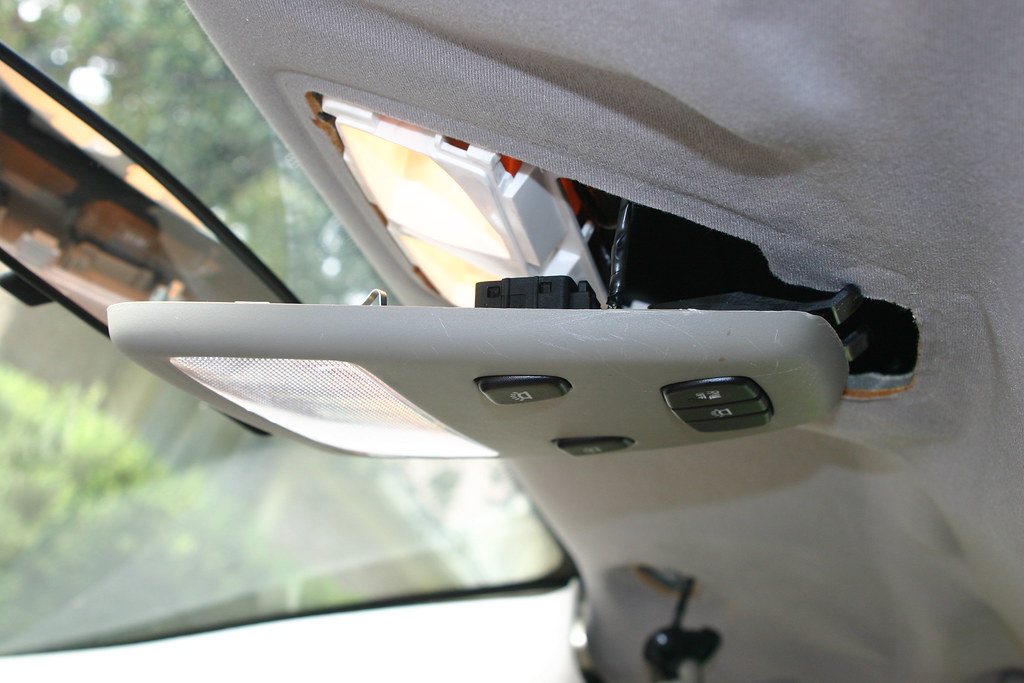
Then the overhead console. Note it should be popped out closed to the windshield then working your way back. The back does not pop out. The unit slides towards the windshield. See clip in second picture.
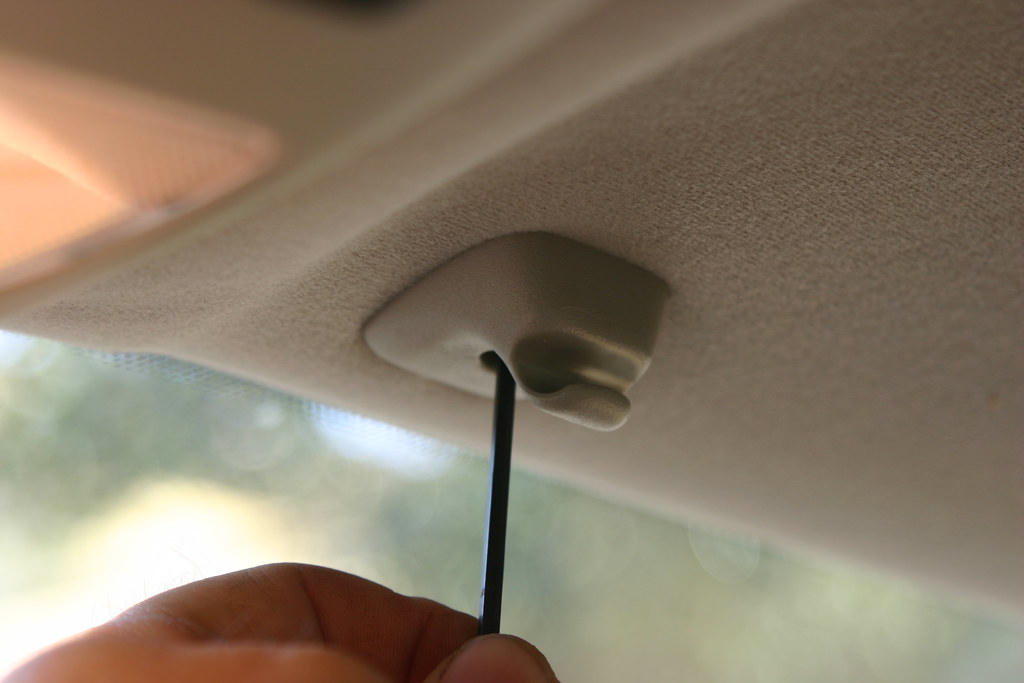
Then the grab handles using same hex wrench.
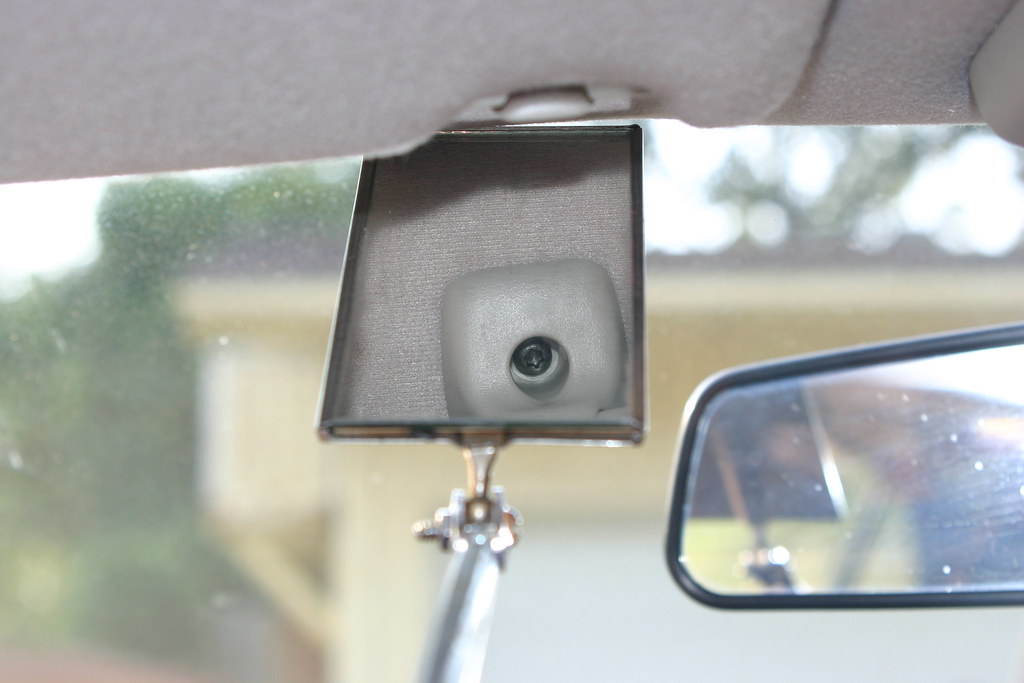
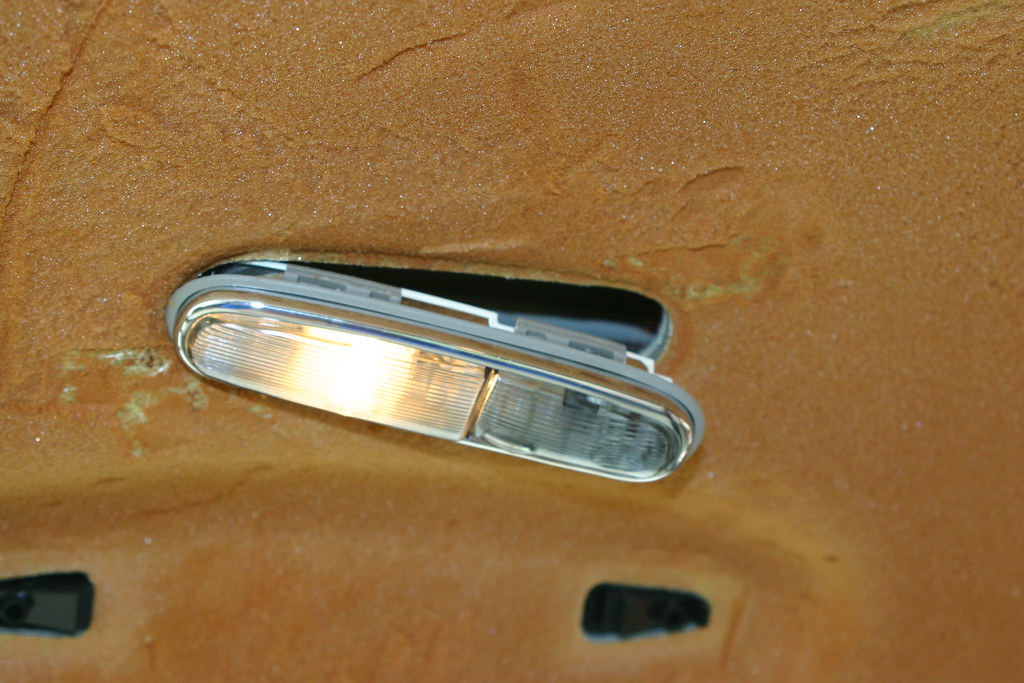
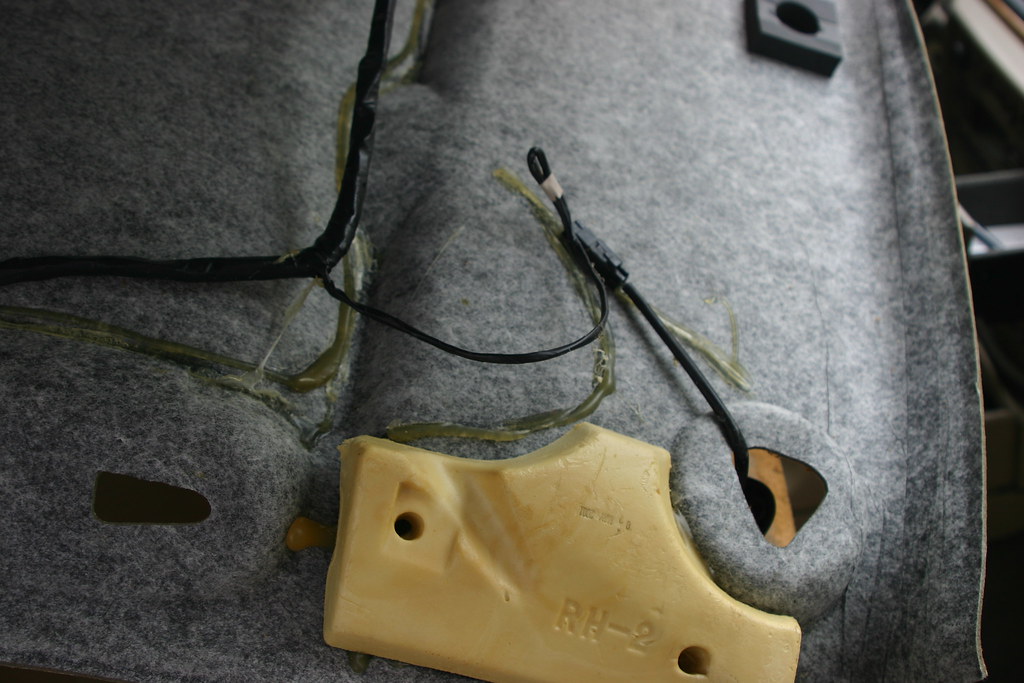
Then the rear interior lights and then turned and pushed them back up through the headliner.
Then I pulled the C pillar cover down but didn't remove, like the A pillar.
The B pillar cover was pulled down but didn't get removed, but had to use a 17mm socket to remove the seat belt retaining nut. Sorry no pictures.
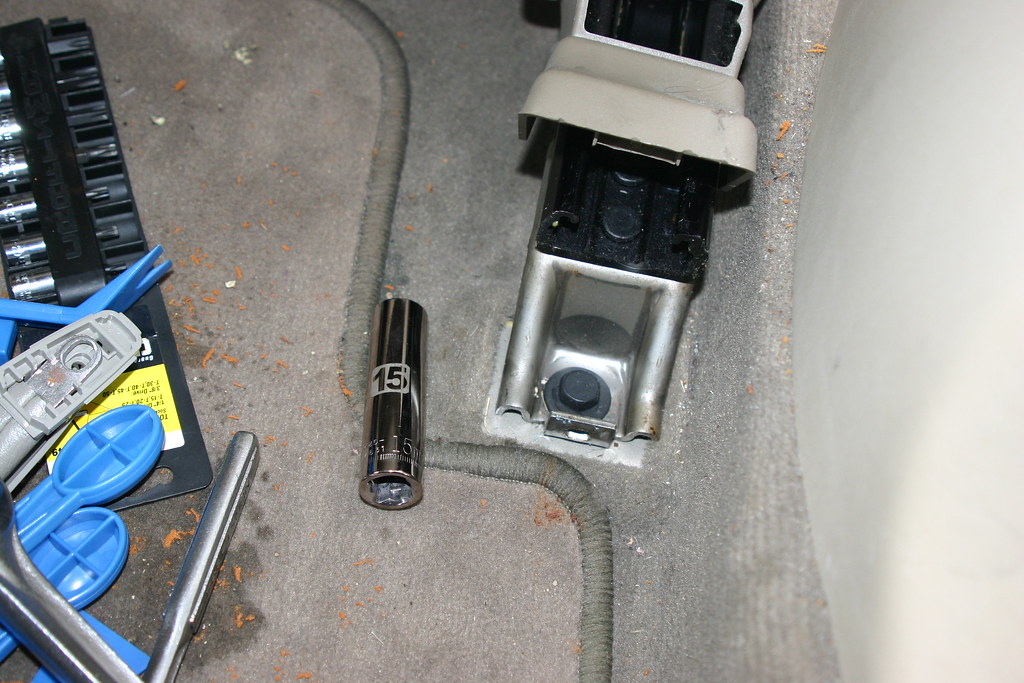
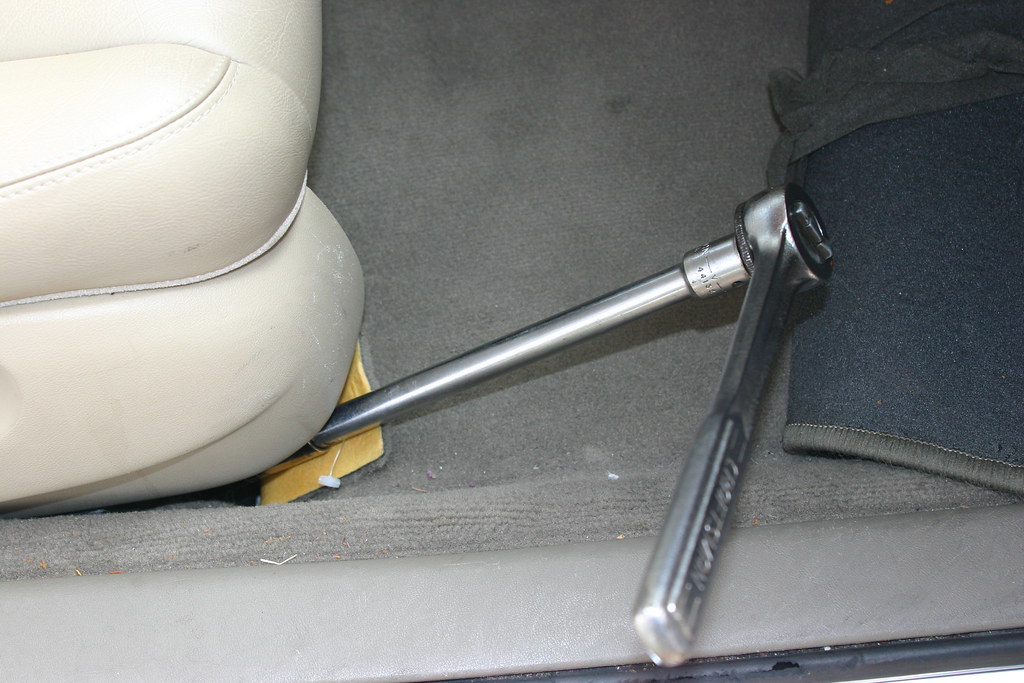
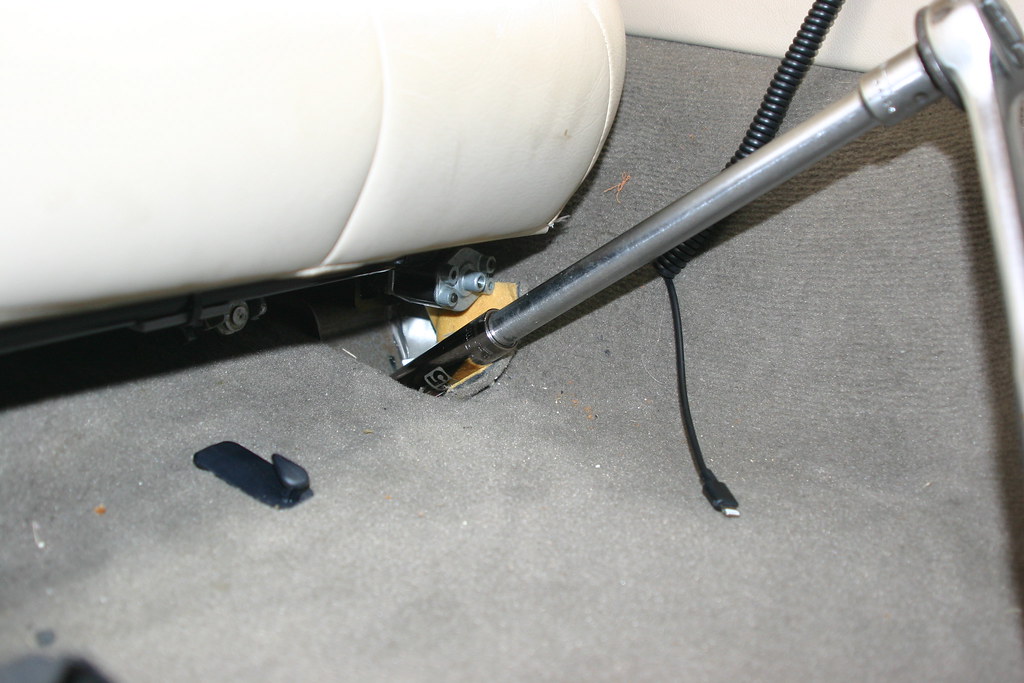
Removed the front passenger seat. Moved seat all the way forward and removed covers at the back and used a 15mm socket to remove the bolt on each side.
Then moved the seat all the way back and removed the front retaining bolts. The front two are hidden under the carpet, but it was cut to allow easy access.
At this point I disconnected the battery negative cable and had lunch. I'd read to disconnect the battery for at least 2 minutes before removing the cables going to the bottom of the seat. Had to remove the nut holding the end of the seat belt to the seat. The cables were disconnected and the seat pulled out through the door.
Then carefully working all the away around, I gently pulled the headliner "board" out of the weather seal.
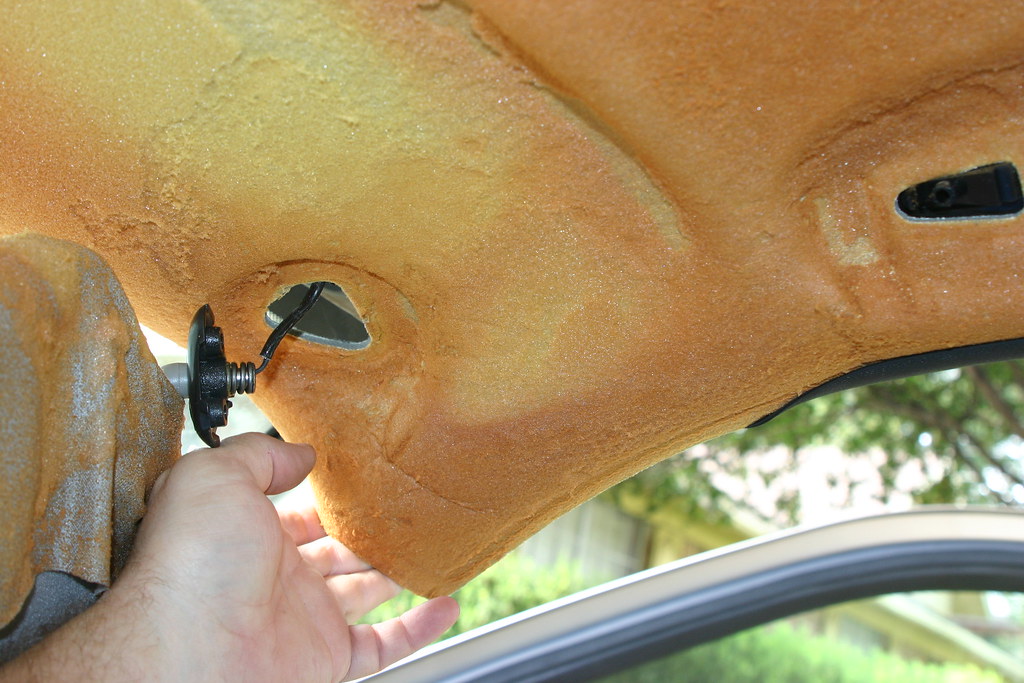
Finally the visor electrical connections were exposed and then disconnected.
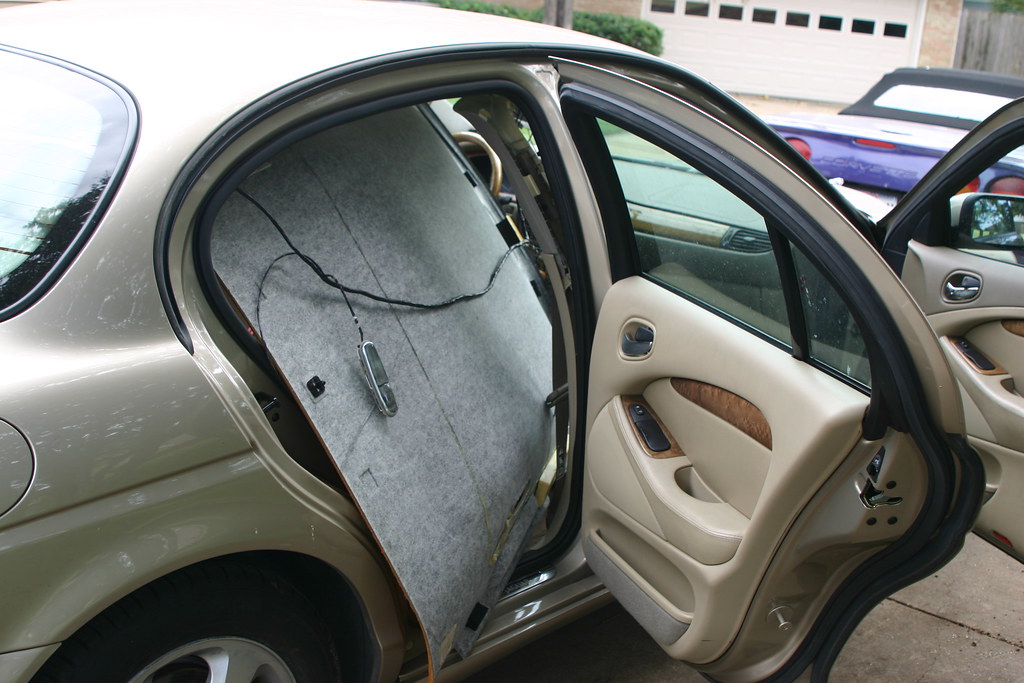
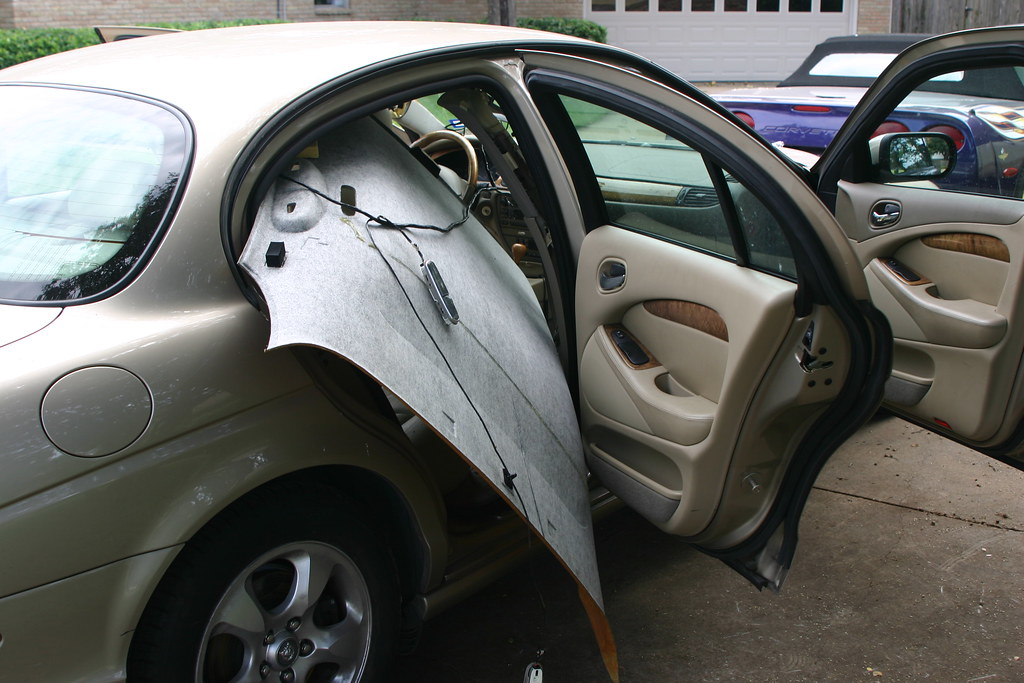
Then I dropped the headliner down into the space where the front passenger seat was and angled the back towards the rear passenger door.
Then I lifted the corner on the floor in the front passenger section and pushed it us some. Then in the rear door area, bowed the board enough to clear what would be the back driver side passenger corner. Then it was a simple matter of sliding it on out.
Then I put the seat back and zip tied the loose wiring up and out of the way. Also reinstalled the visors.
Now to figure out how to clean the board, replace the headliner material and reinstall.
Brett
10k thanks for this tip - my head might have exploded trying to get it out otherwise. Have tried several times..
Mine did have several more electric lines, many of which you had to get in between to look at on the upper side of the ceiling. Turns out some of the quick connectors were glued to the ceiling both sides(!), so no wonder it was impossible to just stick the hand in, and try to clip them open. Only tried som hours before figuring that out

 01-01-2023, 04:32 PM