When you click on links to various merchants on this site and make a purchase, this can result in this site earning a commission. Affiliate programs and affiliations include, but are not limited to, the eBay Partner Network.
After fitting some rather nice xenon brilliant white headlight bulbs to the car, they were a bit lost due to the poor condition of the headlight lenses.
I looked at the cost of replacing the lenses with OEM and then had to a long sit down with a cuppa sweet tea !
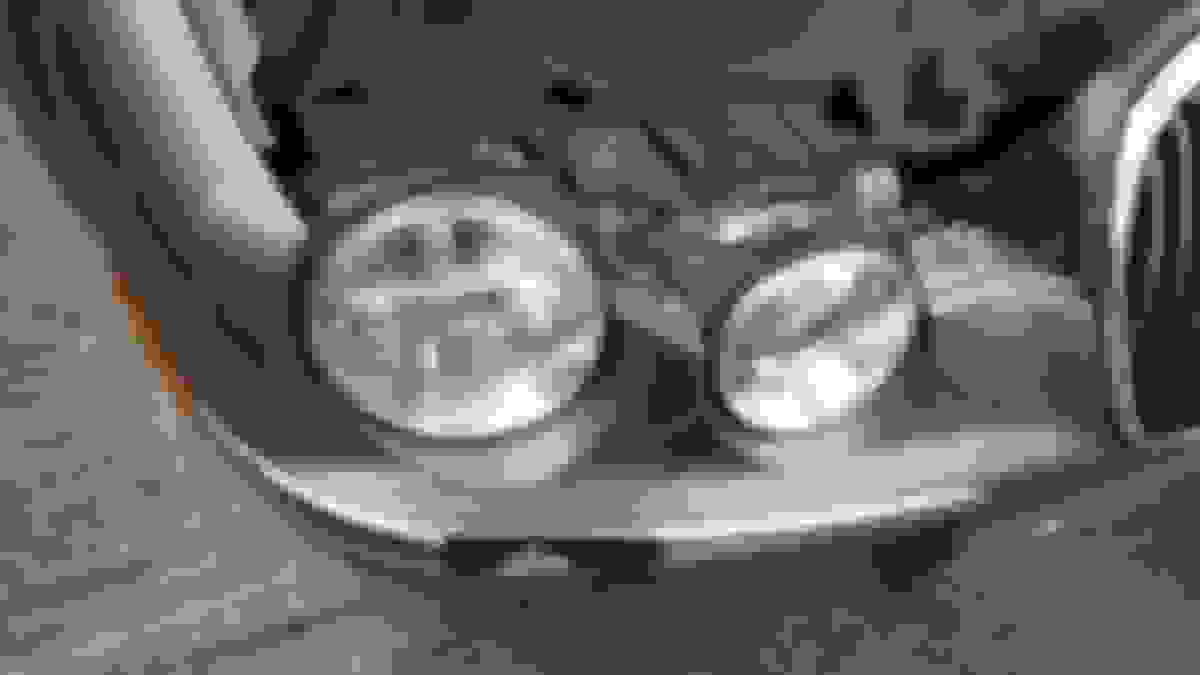
These are the passenger headlights in the "before" condition. They look pretty nasty don't they? Pitted and yellowed and feel rough not smooth.
The question is how to clean them up? There are loads of video's on YouTube on how to clean up the plastic lenses on a whole host of different cars with loads of different products and methods. They all, swear there's is the best method/product don't they? But there was one way that struck a chord with me....... the toothpaste method ! OK sounds naff maybe? But the evidence speaks for itself.
With a bucket of cold water and a new washing up sponge purloined from the kitchen cupboard, a tube of Colgate whitening normal style of toothpase for the bargain price of �1 from a local bargain shop and some clean cloth (I use the normal roll of stockinette cut to the size I need), I went out to give it a go !
This is what I did:
Washed the lense with clear water usingt the sponge (Not the scourer face!).
Put some toothpast on the clean cloth and polish away.
Up down, side to side and round and round. Easy stuff with plenty of elbow grease !
A bit of water on the cloth doesn't hurt and keep applying toothpaste to the cloth and just polish. Make sure you keep turning the cloth and use fresh areas of cloth. Don't get any grit in it !
After about 15 minutes I rinsed off the lense and the surrounding area with the clean water and kitchen sponge. (Not the scouring face !!)
After that I had a close look at the lense and could quite easily see which bits were coming up well and which areas of the lense needed some more work. You can run your finger across the lense to feel the smooth and the rough bits. Then back on with the toothpaste and polish away focsuing more on the bits that still looked cloudy and stained.
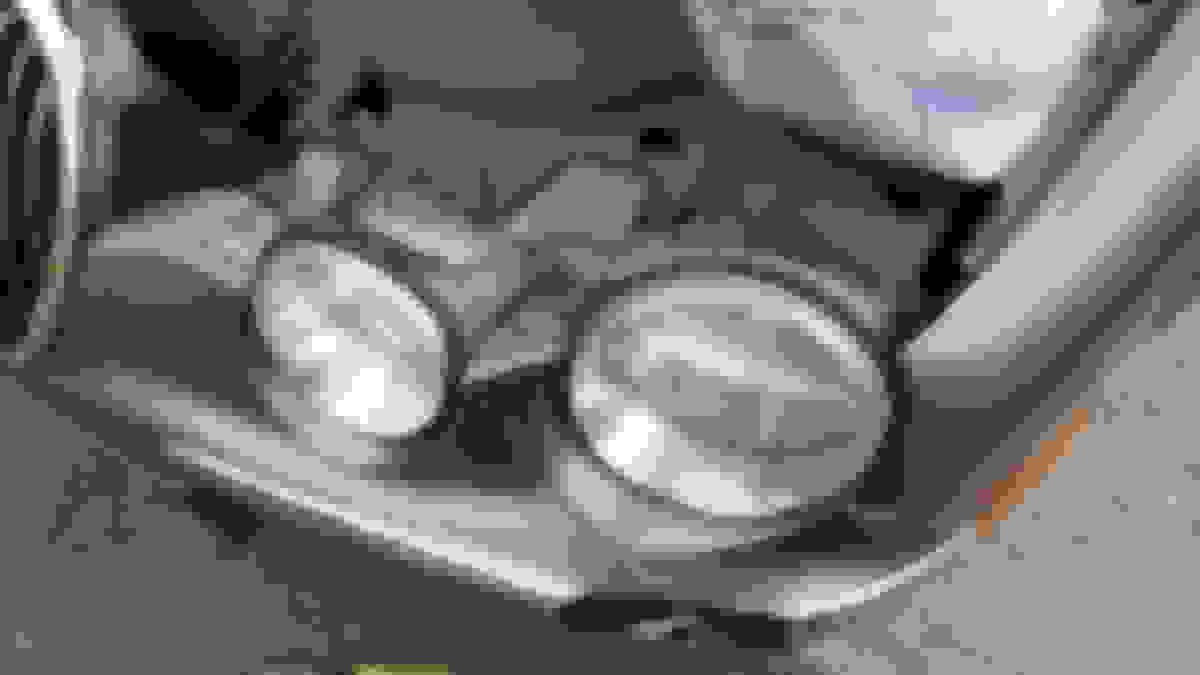
So another 15 minutes later I cleaned off the lenses with clean water again and felt happy enough with what I had acheived.
I took about 1/2 an hour with each lense to bring it up to this level of finish. I will defenitely repeat this procedure when I have some more time.
I only used half a tube of toothpaste today.
One other item to consider is applying a protective coating to the lenses once the desired clarity has been achieved.
A clear-coat to the lenses can help reduce the 'yellowing' effect of UV and road grime. Use the search function as others on this forum have had good results with different epoxies and sealants.
Nice job! They definitely look better. I recently bought a 2000 S-Type and despite the fact the car was 16-years old, the headlight lenses were very much the worst part of the car... much worse than yours.
I watched the videos... tried many of the suggestions. The improvements were slight. I tried a couple of commercial chemical products that are promoted as "wipe on, wipe off" to attain clarity. The end results were not much better than the homemade offerings in the videos.
The product that finally did the trick for me was the 3M Restoration Kit. It uses abrasion via sanding discs and a couple of 3M-provided chemicals. It still took a couple of hours of tedious sanding and rubbing, but I finally achieved the crystal-clear results I wanted. Had a remarkable effect on making my old Jag look very new.
After trying many so-called headlight cleaners sold at the auto stores - the best professional job is done by what jimbov8 and NBCat mentioned - first wetsand with 1000/2000 grit for any harsh spots, then use a polisher tool with a mild compound and finally seal it with a clearcoat. The orbital polisher is a must, without that all the manual elbow grease and you still have some level of cloudiness. The polisher makes the lens sparkle like new - just make sure to mask off any areas so you don't accidentally polish away some paint.
By the time I've done them for a second time, they will look almost new.
The whole point of this job was to prove it can be done quite simply using toothpaste and a little bit of time.
If people want to got to the trouble of masking off and doing multiple levels of paper and polishing and masking and clear coat thats fine.
I doubt all of that would take muchless time and effort.
As I said in my first post there are loads of different ways using various products which are all far better than the rest.
But thanks to the two guys who actually gave some positive feedback.
Appreciated.
Just for kicks I tried the toothpaste on my 04 XJ8 lights. Really didn't do much. I did have the 3M kit I used on my 00 S Type.
The 3M kit has 500 & 800 grit discs..
The results were better but far from perfect. I agree, 1,000 - 2,000 wet sand, orbital & compound...
By the time I've done them for a second time, they will look almost new.
The whole point of this job was to prove it can be done quite simply using toothpaste and a little bit of time.
If people want to got to the trouble of masking off and doing multiple levels of paper and polishing and masking and clear coat thats fine.
I doubt all of that would take muchless time and effort.
As I said in my first post there are loads of different ways using various products which are all far better than the rest.
But thanks to the two guys who actually gave some positive feedback.
Appreciated.
Depending on how badly the lenses are yellowed/clouded, toothpaste and a brush won't do much no matter how long you keep at it.
I needed and used the 3M kit and it worked perfectly. I re-polish the lenses once a year using the lightest polishing compound and a rotary foam pad.
I never got the desired results until I actually removed the lenses from the car and cleaned them inside and out. I guess the inside surface had become oxidized as well. Sandpaper, polish, rinse, repeat. Then I sprayed the Meguiars Perfect Clarity clear coating over them and they've been brand-new crystal clear ever since.
I never got the desired results until I actually removed the lenses from the car and cleaned them inside and out. I guess the inside surface had become oxidized as well. Sandpaper, polish, rinse, repeat. Then I sprayed the Meguiars Perfect Clarity clear coating over them and they've been brand-new crystal clear ever since.
How long has it been since you applied the Meguiars?
I tried toothpaste more out of a sense of fun and my car is 14 years old and its never going to be a show car.
The toothpaste acts just like a fine cutting compound so with a bit more time on it they will look even better.
Certainly a vast improvement for 50p worth of toothpaste.
As I said earlier there is a large range of commercial products claiming to provide the best solution. But each product will only be as good as the person who actually does the job.
I'm pricing up a pattern radiator atm .
Will post up details of best UK prices soon.
I use autosol .. the metal polish... tho next time I need to do the lenses will try toothpaste.
I had a "pro" with polishers and stuff to do the job , looked good for 3 months but then yellowed and went dull..autosol polish works better Autosol.com
After fitting some rather nice xenon brilliant white headlight bulbs to the car, they were a bit lost due to the poor condition of the headlight lenses.
I looked at the cost of replacing the lenses with OEM and then had to a long sit down with a cuppa sweet tea !
These are the passenger headlights in the "before" condition. They look pretty nasty don't they? Pitted and yellowed and feel rough not smooth.
The question is how to clean them up? There are loads of video's on YouTube on how to clean up the plastic lenses on a whole host of different cars with loads of different products and methods. They all, swear there's is the best method/product don't they? But there was one way that struck a chord with me....... the toothpaste method ! OK sounds naff maybe? But the evidence speaks for itself.
With a bucket of cold water and a new washing up sponge purloined from the kitchen cupboard, a tube of Colgate whitening normal style of toothpase for the bargain price of �1 from a local bargain shop and some clean cloth (I use the normal roll of stockinette cut to the size I need), I went out to give it a go !
This is what I did:
Washed the lense with clear water usingt the sponge (Not the scourer face!).
Put some toothpast on the clean cloth and polish away.
Up down, side to side and round and round. Easy stuff with plenty of elbow grease !
A bit of water on the cloth doesn't hurt and keep applying toothpaste to the cloth and just polish. Make sure you keep turning the cloth and use fresh areas of cloth. Don't get any grit in it !
After about 15 minutes I rinsed off the lense and the surrounding area with the clean water and kitchen sponge. (Not the scouring face !!)
After that I had a close look at the lense and could quite easily see which bits were coming up well and which areas of the lense needed some more work. You can run your finger across the lense to feel the smooth and the rough bits. Then back on with the toothpaste and polish away focsuing more on the bits that still looked cloudy and stained.
So another 15 minutes later I cleaned off the lenses with clean water again and felt happy enough with what I had acheived.
I took about 1/2 an hour with each lense to bring it up to this level of finish. I will defenitely repeat this procedure when I have some more time.
I only used half a tube of toothpaste today.

 05-20-2016, 12:33 PM


 OK sounds naff maybe? But the evidence speaks for itself.