Removing the wooden dash panel - Pre-Facelift Models
#1
Greetings All,
It looks like it's time for me to do the odometer repair as detailed here:
https://www.jaguarforums.com/forum/s...ype-faq-45129/
I've started a new thread as my main concern is how to remove the wood veneer trim panel from the face of the dash, so I can remove the instrument cluster. Per post #8 in that thread:
"First, disconnect the negative terminal from the car battery. All I remember was that I needed to remove the wood veneer part that stretches from side to side on the dashboard. To do this you need to remove the center air vents (and I believe the driver's side air vent), the trip computer/emergency flasher switch panel (pull out, and disconnect wiring harness - might have to do this through the now open vent opening, don't remember). Once the wood veneer part is free, push it toward the driver's side to unlatch it, then remove it. After this just remove the screws holding the instrument panel in place and disconnect the wiring harness without pulling the instrument panel to far out."
Sounds easy enough, but I have a propensity towards breaking little clips and overlooking hidden fasteners the first time I disassemble anything. Then you see the little hidden details and say to yourself, "Oh, that's how I should have done it..."
Does anybody have any tips to share for how to remove the wood panel? Do the vent grills just slide out? Would plastic pry tools (I got the 20 piece special kit from HF, don't judge me...) be sufficient, or do I have to snake something thin in there around the edges to release a hidden retainer? Same with the hazard button panel. Does that just slide out?
From there, I understand once the vents and button panel are removed, the whole piece needs to slide to the left (on a LHD model) to release it.
I've looked on eBay at some used pieces for sale, which has been a big help to understand what I will encounter. I just want to make sure I'm doing things correctly to avoid any breakage. Once I do get the IC removed, I'll post up some pics at the other thread and link there from here. But in the meantime, I'd appreciate any help with my battle plan.
Last edited by kr98664; 06-03-2021 at 02:41 PM.
#3
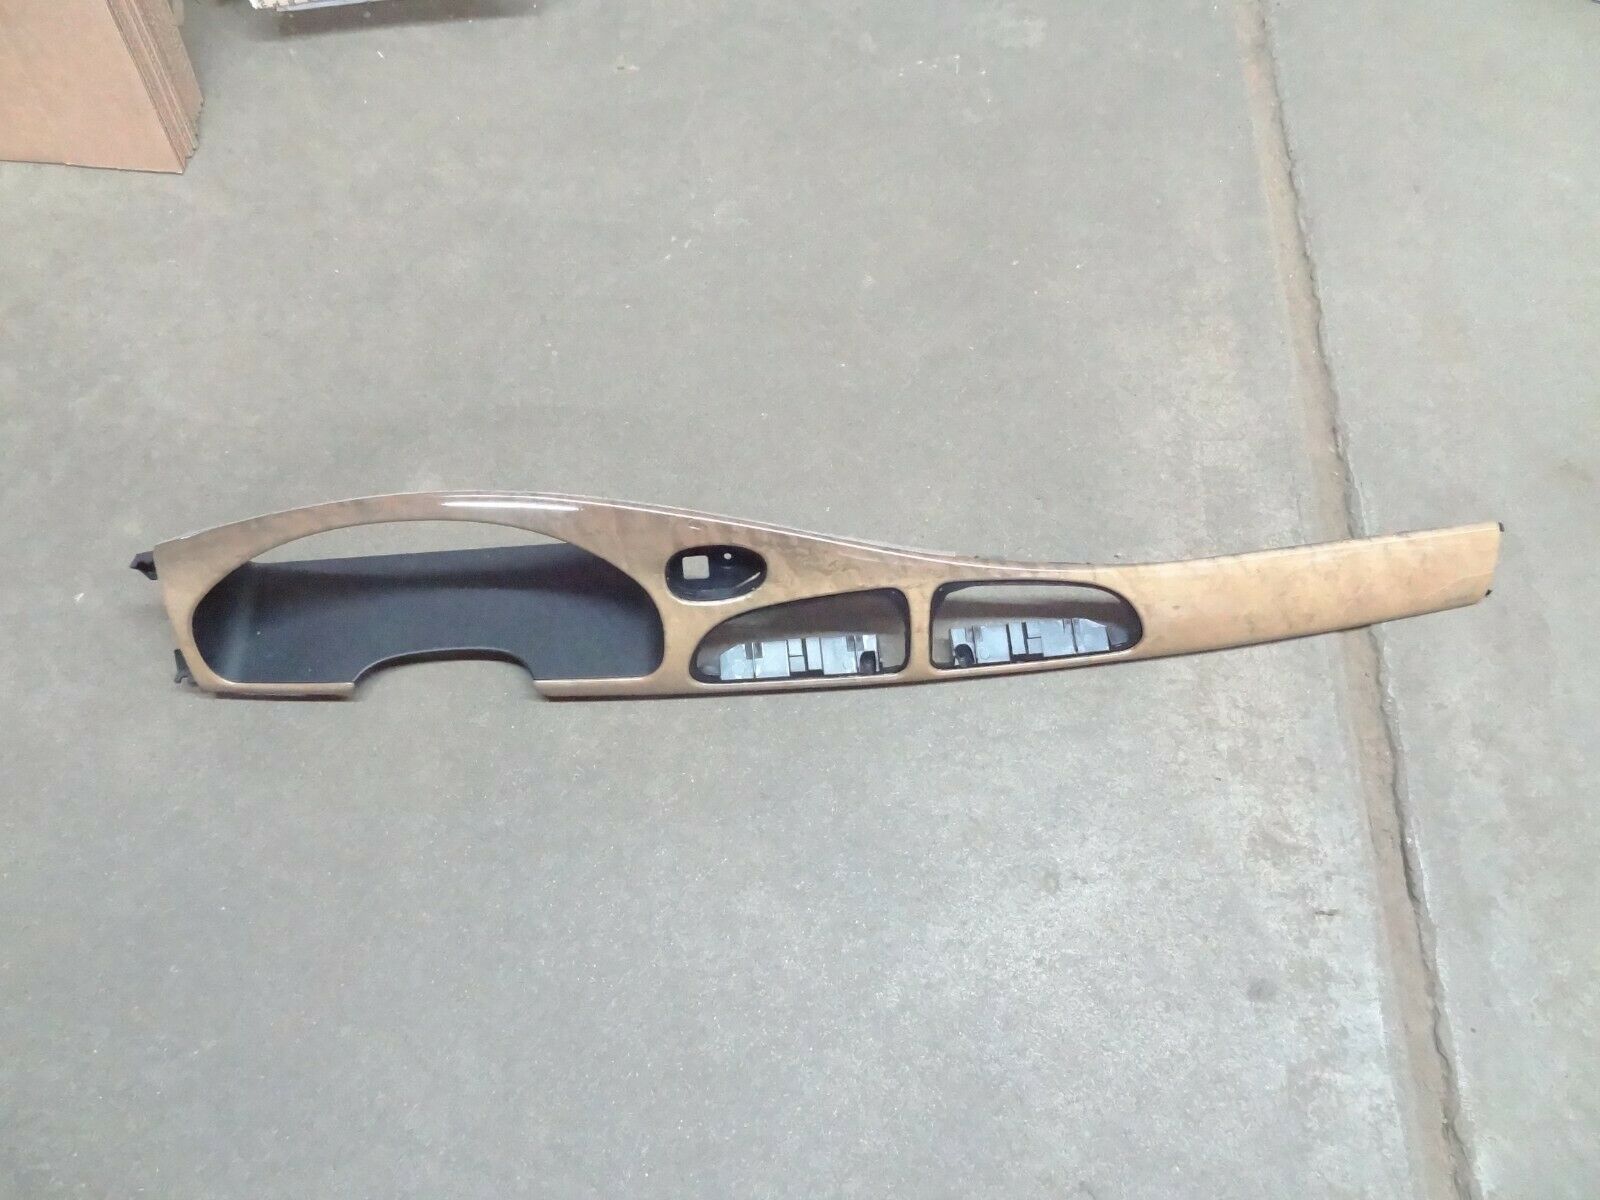
Check out eBay #265108758151 for some good views of the pre-facelift wood trim. Note how it's quite narrow on the passenger side:
https://www.ebay.com/itm/26510875815...8AAOSwoN9gZfsx
Front view:

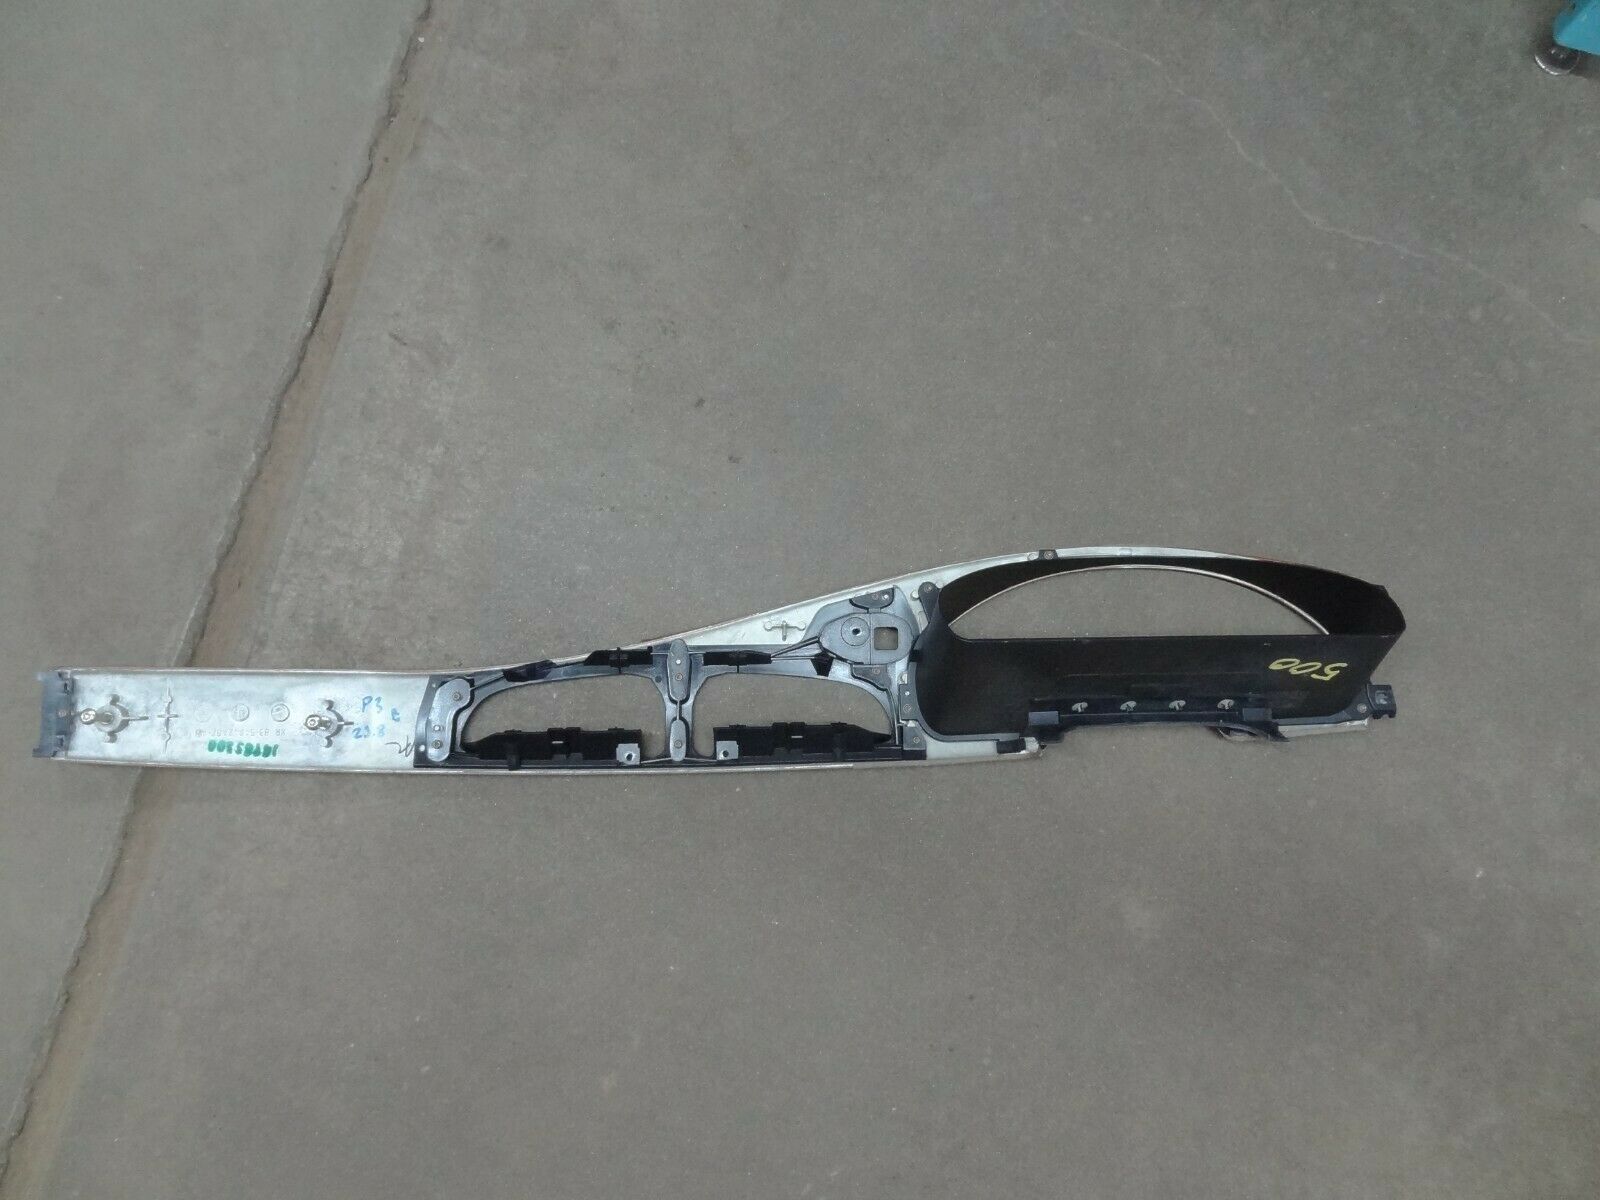
The back side. Note the two protruding fasteners on the passenger side, which I believe slide sideways into a pair of slots:

I should also mention the panel on my car has a crack across the surface. I hope to be very gentle with the panel to keep it from growing.
#4
I removed many veneer panels for warranty repair back when these were new cars.
I remember the slotted pegs you noted and they have a slide fastener that must be moved (pulled?) from the passenger side somehow.
It's been almost 20 years since I did this on a daily or weekly basis.
I have the INTRO to the X200 booklet that I got during the INTRO Training classes.
It does have the interior and soft trim removal but it is a paper document and I would need to find it in the plastic tubs I have all that stored in.
The JTIS should have that info if you can access it in .pdf.
The following users liked this post:
kr98664 (06-03-2021)
#5
Several days may elapse before so I can tear into this, so that should give you plenty of time.

#6

As you suggested, I finally did find the procedure in JTIS, but goodness it was hidden. There's one big section for interior trim, but no mention of this panel. I finally did find it, almost by accident, in the electrical section. It was lumped in with the procedure to remove the instrument cluster. Unfortunately, not a lot of detail about this (sliding?) tab, and the illustration wasn't very clear.
Once I do get this panel and the IC removed, I plan to add lots of pics to help the next guy, but for now am just fumbling my way through the process.
The following users liked this post:
NBCat (06-04-2021)
#7
Trending Topics
#8
Hi Karl
I did this a few years ago.
First you remove the vent on the passenger side (refer below removing the vents). It gives access to the facia area and the place where you pull on it (mine is right hand drive but should be the same as a mirror image).
Then push in on the wood facia (pressing towards the windscreen at the same time) and then pull the facia toward the passenger door. Pressing forward on the facia will loosen it from the pins slots. It doesn't feel like it will move. but it will. I think it will move about 1/2 an inch and this lets it off the pins as there is a lockng area that gets wider on the pins as you pull it across. Then it will move toward you and off the dash.
However from memory you need to have the steering wheel at its lowest tilt and there will be the buttons on the facia that you pop out as the wiring behind will hinder the compete removal of the facia panel. The biggest problem (in my case) comes with the vents. On a 20 year old car they are brttle and can break. Also the trick is the unlocking of these vents need to be done inside the vent itself. I used small flat blade screw drivers to lever the 2 locking plastic tabs down and at the same time pulled them out. If you look inside the vent (with a torch) you can see tabs (I think they are top and bottom inside the vent). Press them flush with the outer plastic and they will move off the tabs and wll pull forward (it feels like you need 3 hands to do this. It is easy to break these vents. The small vent on the driver's side is difficult as you need to take out the covering vent on the top to get at the vent in the front. I had a parts car and a lot of the mstakes I made were made on this car. I am sure there are other pitfalls but I can't fully remember the job and I believe I've got the main problems covered above.
There is another link on the forum that has information on facia removal. This quote below is from post 13 by Glen. Link to it here:
https://www.jaguarforums.com/forum/s...e1515103247555
I used the help given in this link quoted here
“The wood is glued to an aluminum frame which form 1 assembly.
You have to remove the air vents which will expose screws (if I recall correctly).
Removing those vents is a PITA, you need a small pick to pry the tiny locking tangs out of their slots through the vent louvers. (use a bright flashlight to locate them, good luck with that)
But very important, under the far right vent, stick your fingers inside, and to your left.
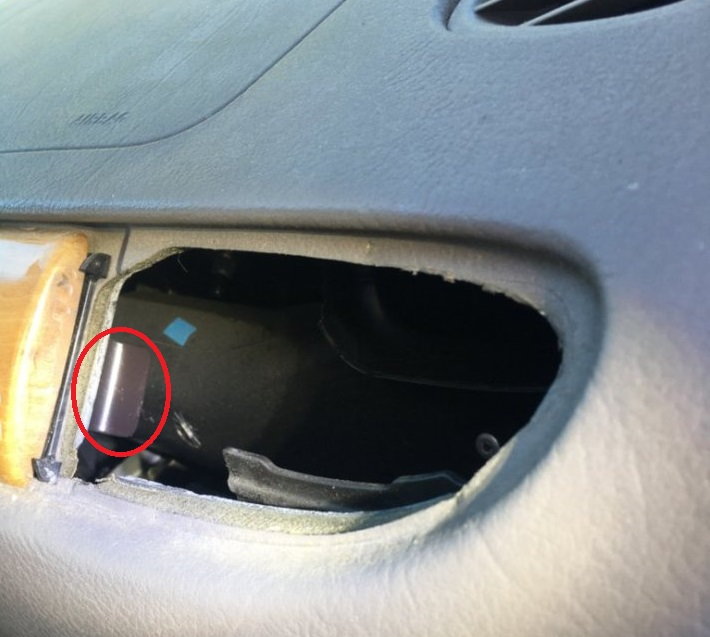
You will feel a metal tang, pull it toward the opening that you're sticking your fingers through. Its a sliding metal "lock" device which has 2 elongated holes that engage 2 "rivet" like posts to lock that end in and down.
Best of luck, be brave
Also, of course, you have to pry the trip-meter switch assembly up, and out of the panel assembly.”
The main thing is to take your time with the vents and use a gentle touch. My reason for the removal was to replace the cracked facia and 2 vents that were broken.
Last edited by Paul792; 06-10-2021 at 03:48 PM.
#9
Ooh, a thousand pardons, please. I pulled a Steve by forgetting to wrap up a thread I started.  I wrestled the trim panel free and took a bunch of pictures. I added the pics and verbose dialogue to this thread (post #24), trying to keep all the information in one place:
https://www.jaguarforums.com/forum/s...2/#post2402006
Based on your comments, I will add the suggestion to push in on the vents while releasing the locks. This is an excellent idea and would help remove tension from the locks as you try to retract them. Same goes for pushing on the trim panel when trying to slide that keyhole lockplate to the side.
 I wrestled the trim panel free and took a bunch of pictures. I added the pics and verbose dialogue to this thread (post #24), trying to keep all the information in one place:
https://www.jaguarforums.com/forum/s...2/#post2402006
Based on your comments, I will add the suggestion to push in on the vents while releasing the locks. This is an excellent idea and would help remove tension from the locks as you try to retract them. Same goes for pushing on the trim panel when trying to slide that keyhole lockplate to the side.
The following users liked this post:
motorcarman (06-12-2021)
Thread
Thread Starter
Forum
Replies
Last Post
Siebert22
S-Type / S type R Supercharged V8 ( X200 )
4
06-02-2018 03:04 AM
Currently Active Users Viewing This Thread: 1 (0 members and 1 guests)


