When you click on links to various merchants on this site and make a purchase, this can result in this site earning a commission. Affiliate programs and affiliations include, but are not limited to, the eBay Partner Network.
You have not mentioned removing the EGR valve and pipe . This stumps a lot of people.
You need a super snug fitting six sided hex socket . These bolts are the same as the TB bolts and round off very easily . So be super cautious!!! If you round them off you are in for a massive job.. though it seems right hand drive is a lot easier than the left-hand drive model.
Once you get the EGR removed ,
I found it easier to remove The entire throttle body elbow from the rear of the supercharger ,
rather than reaching under to undo the single rear supercharger bolt.
Today I'll try and clear some of the pipes and wiring out of the way and maybe see if I can slacken off the EGR exhaust pipe to exhaust manifold 13mm bolts. I have 6 point sockets and several extensions, UJs and wobbles.
My biggest fear is getting it all back together again! Bad enough removing bolts that are not visible, but replacing them? especially the bottom elbow to blower bolts! Here she is in one piece!
Lovely looking car!
Not that difficult to do if you have the patience of a surgeon LoL!
Moving slowly is the key, it's a fairly low mileage car and if it hasn't been *******ised everything will come off and go on back properly.
Make sure you print out and follow the steps in the workshop manual and make a few notes on the pages and take plenty of photos as you're removing things.
Some bolts will test you.
Maybe also a smart idea to replace the cam cover gaskets while you're there if they haven't already been done. Will lengthen the task but worth doing.
For me there were too many hoses to change so I had a very close visual inspection of the ones that felt soft; there were only two, the small thermostat elbow hose and I think the long one connected to the expansion tank and the DCCV.
Even though it sounded okay, I paid $200 to have the supercharger and its rear inlet elbow professionally bench tested, cleaned and its oil changed.
I only changed the EGR valve base to exhaust manifold gasket, all the rest were reused.
Maybe upload some photos and many will guide you along the way.
Good luck.
I wish you all the best luck with this. Mine has been sitting stuck for over a year now with that damn EDR being the problem. In maybe a month or so I'll try to pick up where I left off in December. It's had 2.5 ft of snow all over it until a day ago when we finally go some rain and warmer weather to melt all of that. But I was able to get the the two bolts that retain the solenoid to the valve body of the EGR off so we'll see if that will let me seperate the two halves. in the spring. I just ran out good enough weather.
But this repair alone should be enough to dissuade one from buying one of these cars with the idea that they'll be able to fix it themselves WO a lot of effort. It's a real SOB and I knew about it but bought the car anyway. My fault This isn't the only annoying repairs associated with this car. Cooling system parts being one of the biggest. HID headlamps are a MFer and the suspension bushings don't hold up well either where I live. Adjustable pedals brak almost right away. Funny that the pedals on my 2001 Mercury Sable wagon never had any problems as both are Ford parts. The turn signal stalk had to be replaced. The speedo had to be sent out for a repair. At least that was only $100. There there's all the leaky oil cooler, tranny and PS hoses.
My Chevy mechanic who never gets near this car, his shop is too messy, fixes a lot of BMW, Audis and others that have seen better days ... he says these issues are now common with modern cars. All a PITA to service and all break things like this way before they should. My belief is that the overly crowded engine compartments and the level of equipment on cars today, especially with 4WD, is the culprit. Design layout and specification is computer assisted so they make the craziest looking parts which don't necessarily include longevity or ease of service in the specification. The oil and Tranyy cooling hoses are a perfect example of this on this car. When you get to those look up the solution threads on herer. There's some excellent alternatives to replacements.
Update. In addition to crossover pipe being removed so the front is clear, I have now managed the following. Removed both breather pipes from the elbow. released the wiring at the rear to give more room to maneuver then removed the bottom bolt holding elbow to blower and 10mm bolt holding elbow to bracket. Thats on the right as you look at the engine from the front. On the left Ive hooked the cables out of the way by releasing all the coil packs etc, and unplugging everything in sight. One of the 13mm EGR exhaust pipe nuts is off. Sadly I forgot to remove the engine tray before I started and have dropped a 13mm 1/4" socket down into the depths of oblivion. Tomorrow afternoon I plan to remove the other EGR exhaust bolt and 8mm EGR bolts somehow! Goodness knows how its all going to back together!!! Ive made notes and taken photo of each part Ive removed so I dont forget something when re-building. Time for a beer One nut to go. Need to move wiring again for proper access.
Question. The wiring harness at the back of the engine is in plastic trunking. Is there a knack to releasing the trunking to give better access?
Someone has been in there before by the looks of it as the harness that came from the ECU was squashed behind the trunking then was folded over forward into the trunking. I managed to gently but firmly pull it out and correctly locate it which gave more room,,
Sorry for the link i gave you that is for lhd. I missed your first post of being rhd. You are on the right path of taking things out of the way for as much room as possible
Another few hours in the garage this afternoon.
The most satisfying part was removing the two 8mm bolts holding the EGR to the elbow. That was a right pain ensuring that the bolts were not rounded off.
The dilemma now is that I can�t get a socket onto the remaining EGR to exhaust manifold bolt at the right angle because the EGR valve is in the way.
I can�t remove the last elbow to blower bolt because the EGR is in the way and it�s in the way of the elbow bracket bolt.
Unfortunately the EGR exhaust stud without the nut is now stuck in manifold as the top Male torx broke off.
Anyway, it�s a great learning curve, and there�s always tomorrow.
Any advice is welcome.
Time for a beer.
PS Which bolt is the 10mm ratchet pivot head spanner recommended above for?
Getting there Neville.
You won't be able to go further mate unless, to quote the Workshop Manual's Step 25, you 'Remove the exhaust manifold to EGR valve tube retaining nuts'.
Try a few socket and extension combos on that rear nut. The exhaust studs stay put, they don't come off. The EGR valve lifts over these studs.
I don't think I needed to use a pivot head spanner.
Finally cracked it!
After a lot of fiddling with socket sets, UJs, extensions and wobble ends, pushing and shoving and carful application of power to the tools all the bolts finally yeilded.
The blower is finally on the bench together with the EGR valve and some parts have been ordered. Not many though as I had a bag of parts in readiness for this job which have been on the boot for over a year now.
I have just ordered 2 stainless steel 50mm M6 bolts to replace those dodgy 8mm bolts that looked a bit rusty, 2 EGR gaskets and the two studs that go into the exhaust manifold plus 2 stainless steel flanged nuts for them. Those are from my local Jaguar parts department.
Whilst the blower is off, although it sounds fine when spun by hand and even though it is quiet in operation, now it has done 67k miles I have ordered a new spring coupler for it at �90 in preference to the solid plastic ones as I intend keeping this car for a long time. I changed the oil in it only 6k miles ago so I'll just drain and refill unless it looks bad (I have spare oil).
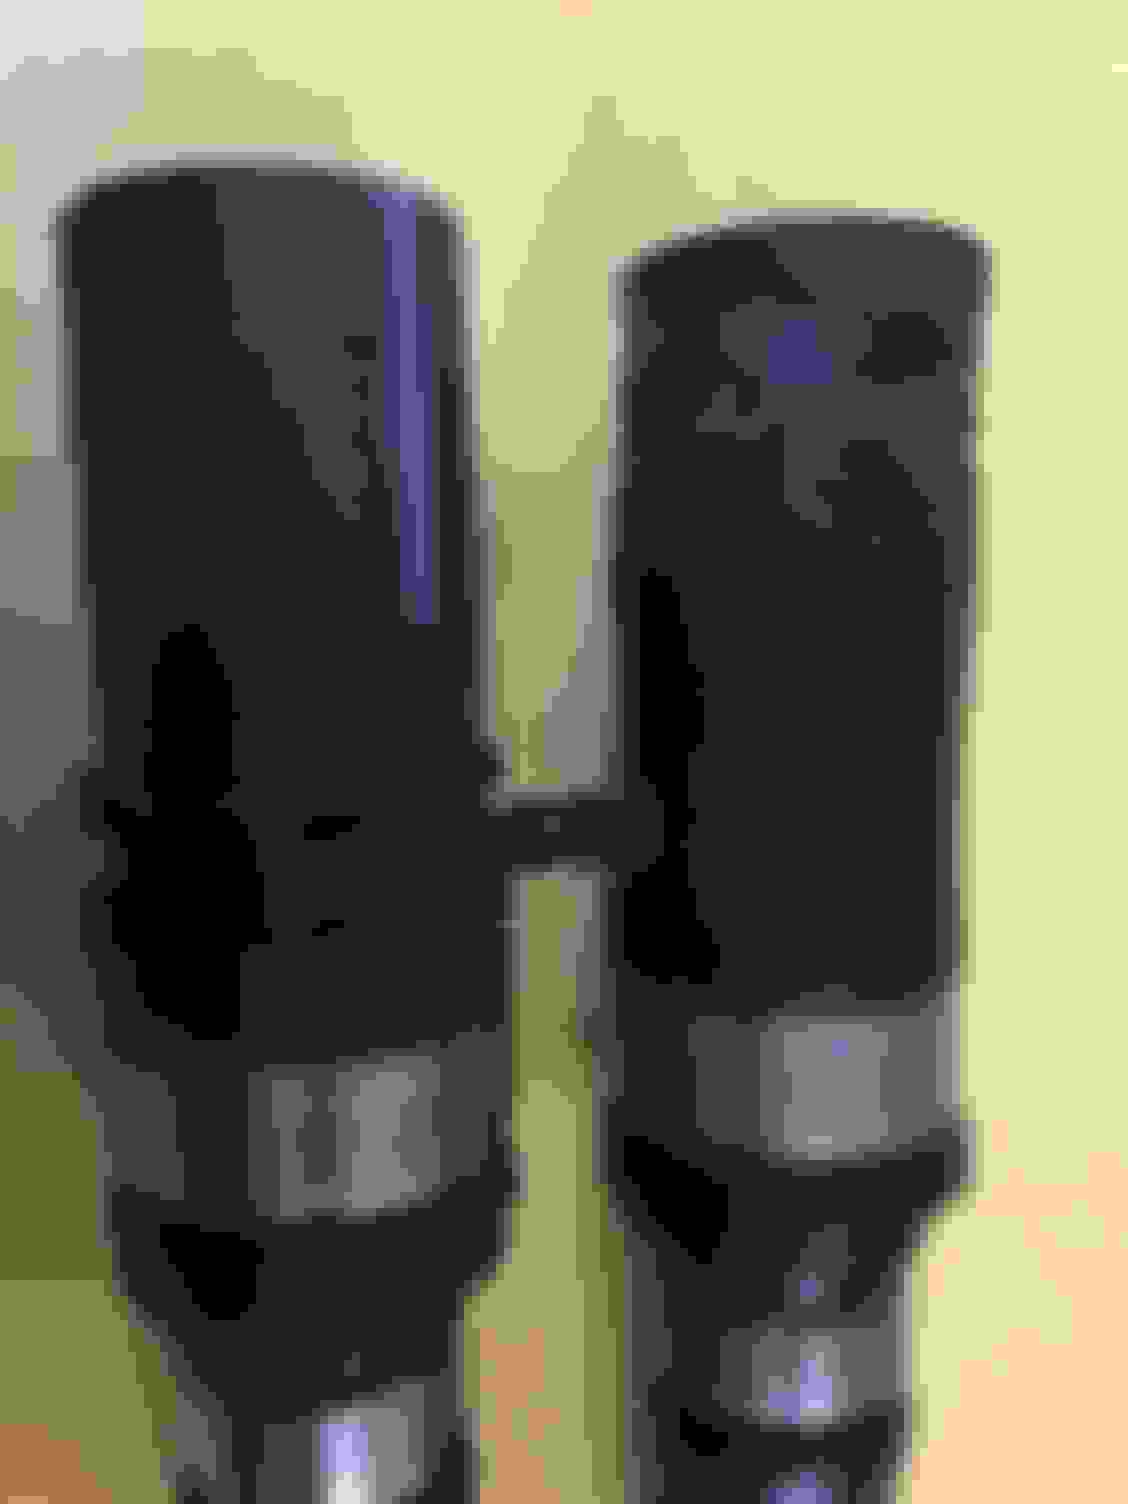
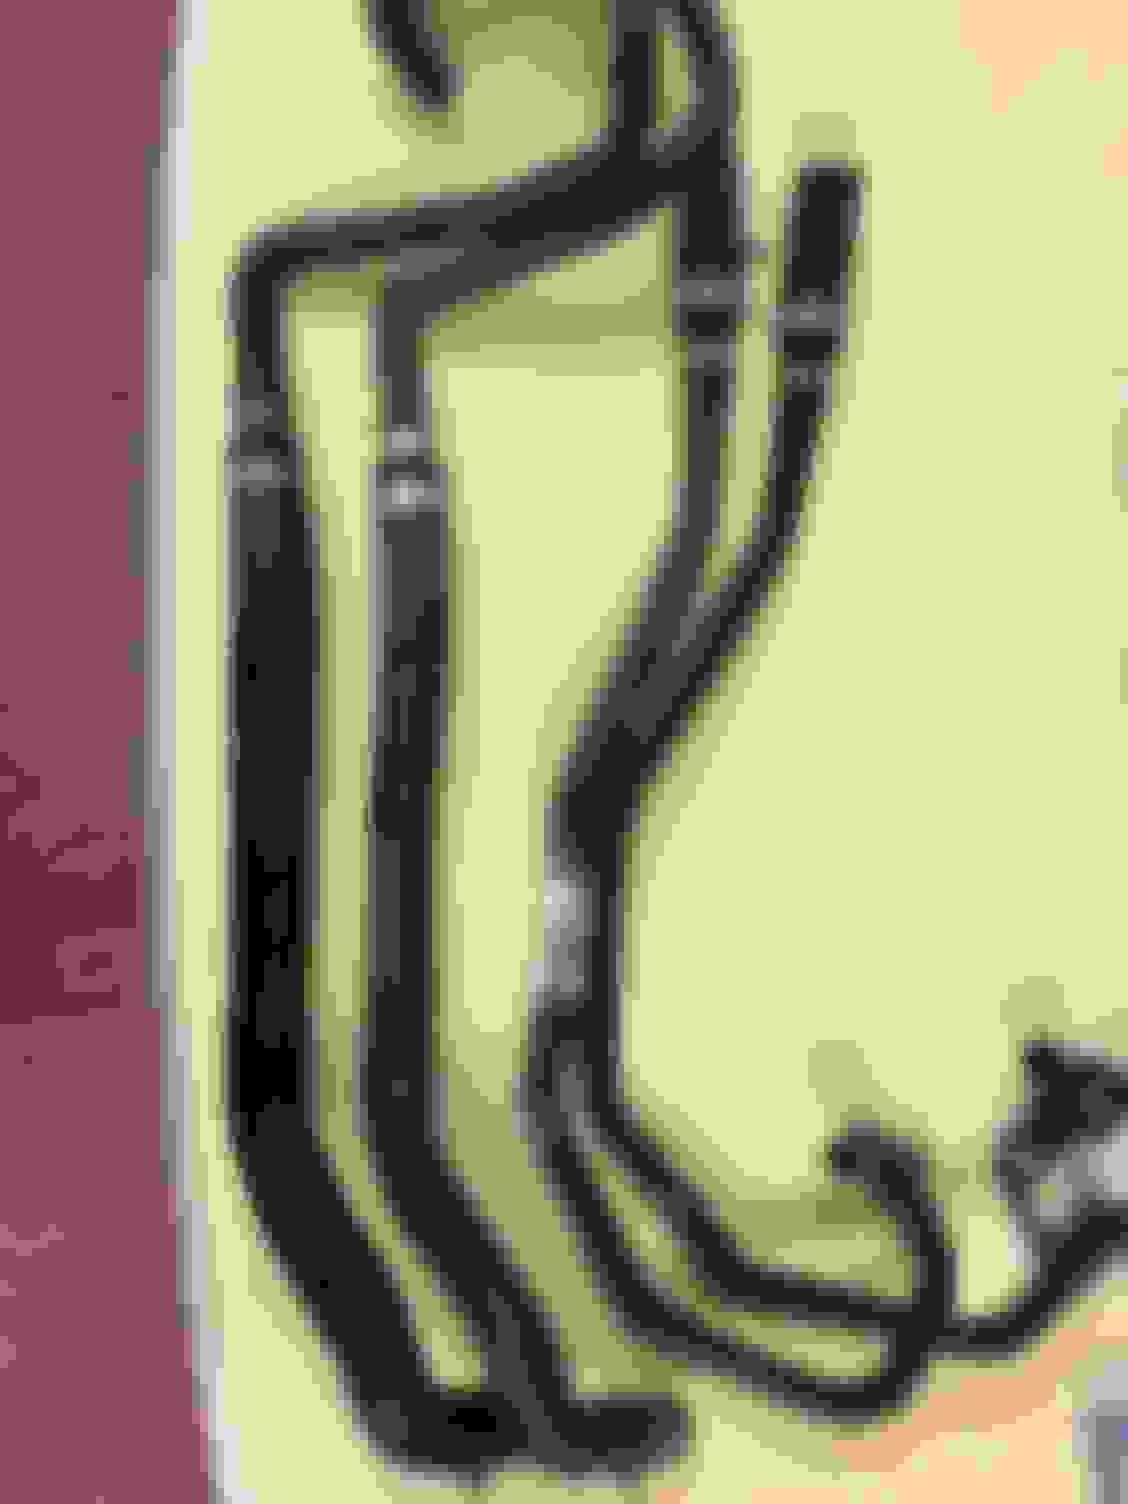
The main reason for removing the blower was to replace the 15 year old valley pipes which have been worrying me as its a known fact that these pipes do not last long. I was pleased to see that the larger of the two pipes has expanded in width whilst the main culprit, the 3" part on the other pipe looked reasonably OK. I'm fitting two new pipes, one with a 3" blue silicon end piece which should last for years.
I still have no idea what the stubby 10mm tool was invaluable for, or how anyone can possibly take the elbow out without removing the EGR valve. Perhaps someone will enlighten me. I'm just hoping that all the notes and photos I have taken will enable me to put it all back together again next week.
A big thank you to all the guys who have posted lots of useful photos and given lots of free advice without whom, this job would have been much more difficult.
Time to go and clean all the parts and have another beer. New on left. Old swollen pipe on left. Old swollen pipe on left with rubbing marks. New on right.
Same here, I found following the workshop manual steps to be reasonably correct. Couldn't see any shortcuts or quirky tools required.
Not much bulging in that 3" hose for all those years.
My X202 only had the one hose under the supercharger and the one above that sits on the RHS of the supercharger was just a one piece and didn't look like yours in the photo.
I know the base of the EGR valve where it meets the exhaust is different as well.
One of these will greatly ease the pain in removing the rear horizontal bolts that thread into the bosses at the back of the elbow. Gearwrench part number 9551 - 10mm stubby flex ratcheting wrench. I had them out in a few minutes after removing the EGR valve. Amazon has it:
I bought one of these as recommended but didn't use it. Once the EGR is out of the way a 10mm 1/4" drive socket on the end of a long extension had the bracket bolt out easily. Same on the other side too. The hardest job was removing the two nuts or studs that hold the EGR exhaust onto the exhaust manifold, especially the rear bolt as the pipe fouls the socket extension. The wiring loom needed to be moved as far back as possible to get the socket extension at the right angle.
I think the models after the X202 had more loom to move out of the way which may be the reason you had some trouble with the rear nut. The rear nut wasn't too easy but I found reasonable room.
For me on my X202 the hardest jobs were - removing the small convoluted plastic pipe from the 'intake elbow' without smashing it, the 'air intake elbow' lower LH 'retaining bolt' as I had to feel my way to grip it and I think removing the LH bolt on the bracket under the intake elbow.
If you read my posts, the biggest problem I had was hurting my back in the process!
Can't remember if I posted this before or not? This is a massive thread!
But after changing those hoses on my old 2005 STR I caused a vacuum leak which required the SC to come off AGAIN!
So you might consider fixing the P/B vacuum connection on the SC elbow. It's a bad design that rotates with an internal O-ring that gets cooked and hard with heat and time. I found a solution using a 90 degree brass fitting which will solve it permanently. Cost about $6! SC Elbow Vacuum Leak
Also suggest slotting the rear SC mounting tab for easier reinstallation.
I did this the 2nd time I removed the SC..
.
.
.
After refitting a new o ring and plastic collar with the SC in situ (disconnecting the TB but leaving coolant hoses intact)
When I dig into the engine to replace the hose under the SC this spring (preventative maintenance) I'm definitely opting for this permanent fix.
The old hose had play in and out of the plastic collar and caused a P0171 and LTFT's +20% to 25% when I sprayed it the STFT's went to 0 then -20 then back to positive terrority...
It is another wonderful Jaguar "**** poor" design.
The plastic collar and o ring disintegrate over time.
It was like doing engine surgery with my endoscope w/ hook. O ring was a beast to get out and even worse to get the new one in by "feel" with my fingers.
Had to seat it to the back of the brass bushing with a small socket as I could not get the new plastic collet to seat.
Here you can see the short blue Silicone pipe I added. Its more robust that the OEM. What's under the diamond shaped plastic part? Drugs?
Well, I am glad that job is over. It was interesting, but not particularly enjoyable. A few points that might be useful to anyone else doing this job.
The horizontal 10mm bolts holding the elbow to the bracket can be easily removed using a long 1/4" socket extension. It is possible to find a "hole" in the wiring and plumbing to allow access. Mind you, the EGR has to be removed for access to the left hand bolt.
EGR exhaust nuts are accessible using a long 3/8" socket extension with UJ.
EGR to elbow 8mm bolts came out using 1/4" drive socket with a T handle with a ring spanner for leverage.
I changed the 3" problem" hose for a piece of blue high temp silicon hose.
I changed the EGR studs and nuts to Stainless Steel and the EGR bolts (50mm)
Fitted a new brass brake servo fitting to the elbow (tapped out the old one with a 1/4" socket extension)
Changed the top large hose to the crossover.
Left the Knock sensors alone as only 67k on the clock.
Changed O rings in both Elbow breather pipe ends.
Fitted a new air filter.
Fitted a new blower Coupler but the original one was fine as it runs in oil unlike the 5 litre which runs dry and wears out!
Bought a pair of hose clip pliers which arrived after job was finished!!! I could have done with those earlier!
Here is a list of parts I used:Parts list for Valley Pipe replacement. 2006 STR
AJ8 11767 1 Valley Hose
AJ8 8548 1 EGR to Throttle Body gasket.
AJ8 9746 1 Throttle body coolant return pipe
C2C 11477101 2 Crossover pipe water seals.
AJ8 11638 1 Short fat Hose to Crossover pipe.
AJ8 3445 1 Throttle body to elbow gasket.
AJ8 3292 1 Supercharger to throttle body gasket.
AJ88495 2 EGR to exhaust manifold stud (M8 x1.25 35mm)
AJ88560 1 Metal gasket EGR to TB
AJ82340 1 Metal gasket EGR exhaust to manifold.
C2S15816 1 Throttle Elbow to brake servo brass fitting.
O rings 2 14 x 2.5 Viton Rubber Vacuum pipe from Elbow to crankcase breather
O rings 2 8 x 1.75 Viton Rubber Vacuum pipe from Elbow to fuel tank.
SS Flanged nuts 2 M8 for EGR studs.
SS bolts 2 SS Flanged 10mm hexagon M6 50mm EGR to TB.
Sealant 1 518 Anaerobic gasket sealant for Blower. �16! Only need a blob the size of a pea!
Coupler 1 Powerhouse supplied for M112 blower. �90!
Changed brass brake servo fitting. I have read people struggle to remove the black pipe from this fitting. Just hold the plastic ring close to the brass part and the pipe slides out, just like a plastic push fit plumbing part. EGR needs to be removed to access the 10mm bolt holding the elbow to the bracket. Cleaned and painted the EGR and used new SS bolts. No-one will ever see it though!
Last edited by Neville Hobbs; 03-14-2021 at 12:11 PM.
After refitting a new o ring and plastic collar with the SC in situ (disconnecting the TB but leaving coolant hoses intact)
When I dig into the engine to replace the hose under the SC this spring (preventative maintenance) I'm definitely opting for this permanent fix.
The old hose had play in and out of the plastic collar and caused a P0171 and LTFT's +20% to 25% when I sprayed it the STFT's went to 0 then -20 then back to positive terrority...
It is another wonderful Jaguar "**** poor" design.
The plastic collar and o ring disintegrate over time.
It was like doing engine surgery with my endoscope w/ hook. O ring was a beast to get out and even worse to get the new one in by "feel" with my fingers.
Had to seat it to the back of the brass bushing with a small socket as I could not get the new plastic collet to seat.
My vacuum leak resolved thankfully.
That was tricky, I know, because I thought that I had misrouted the plumbing and decided to remove the plastic pipe from the elbow, holding the plastic part tight to the brass part and slide the pipe out. It slid out easily on the bench but there was not enough room for the pipe to slide clear of the now fitted EGR!! Fortunately I managed to jiggle the plumbing around instead.
One of these will greatly ease the pain in removing the rear horizontal bolts that thread into the bosses at the back of the elbow. Gearwrench part number 9551 - 10mm stubby flex ratcheting wrench. I had them out in a few minutes after removing the EGR valve. Amazon has it:


 03-03-2021, 03:10 AM