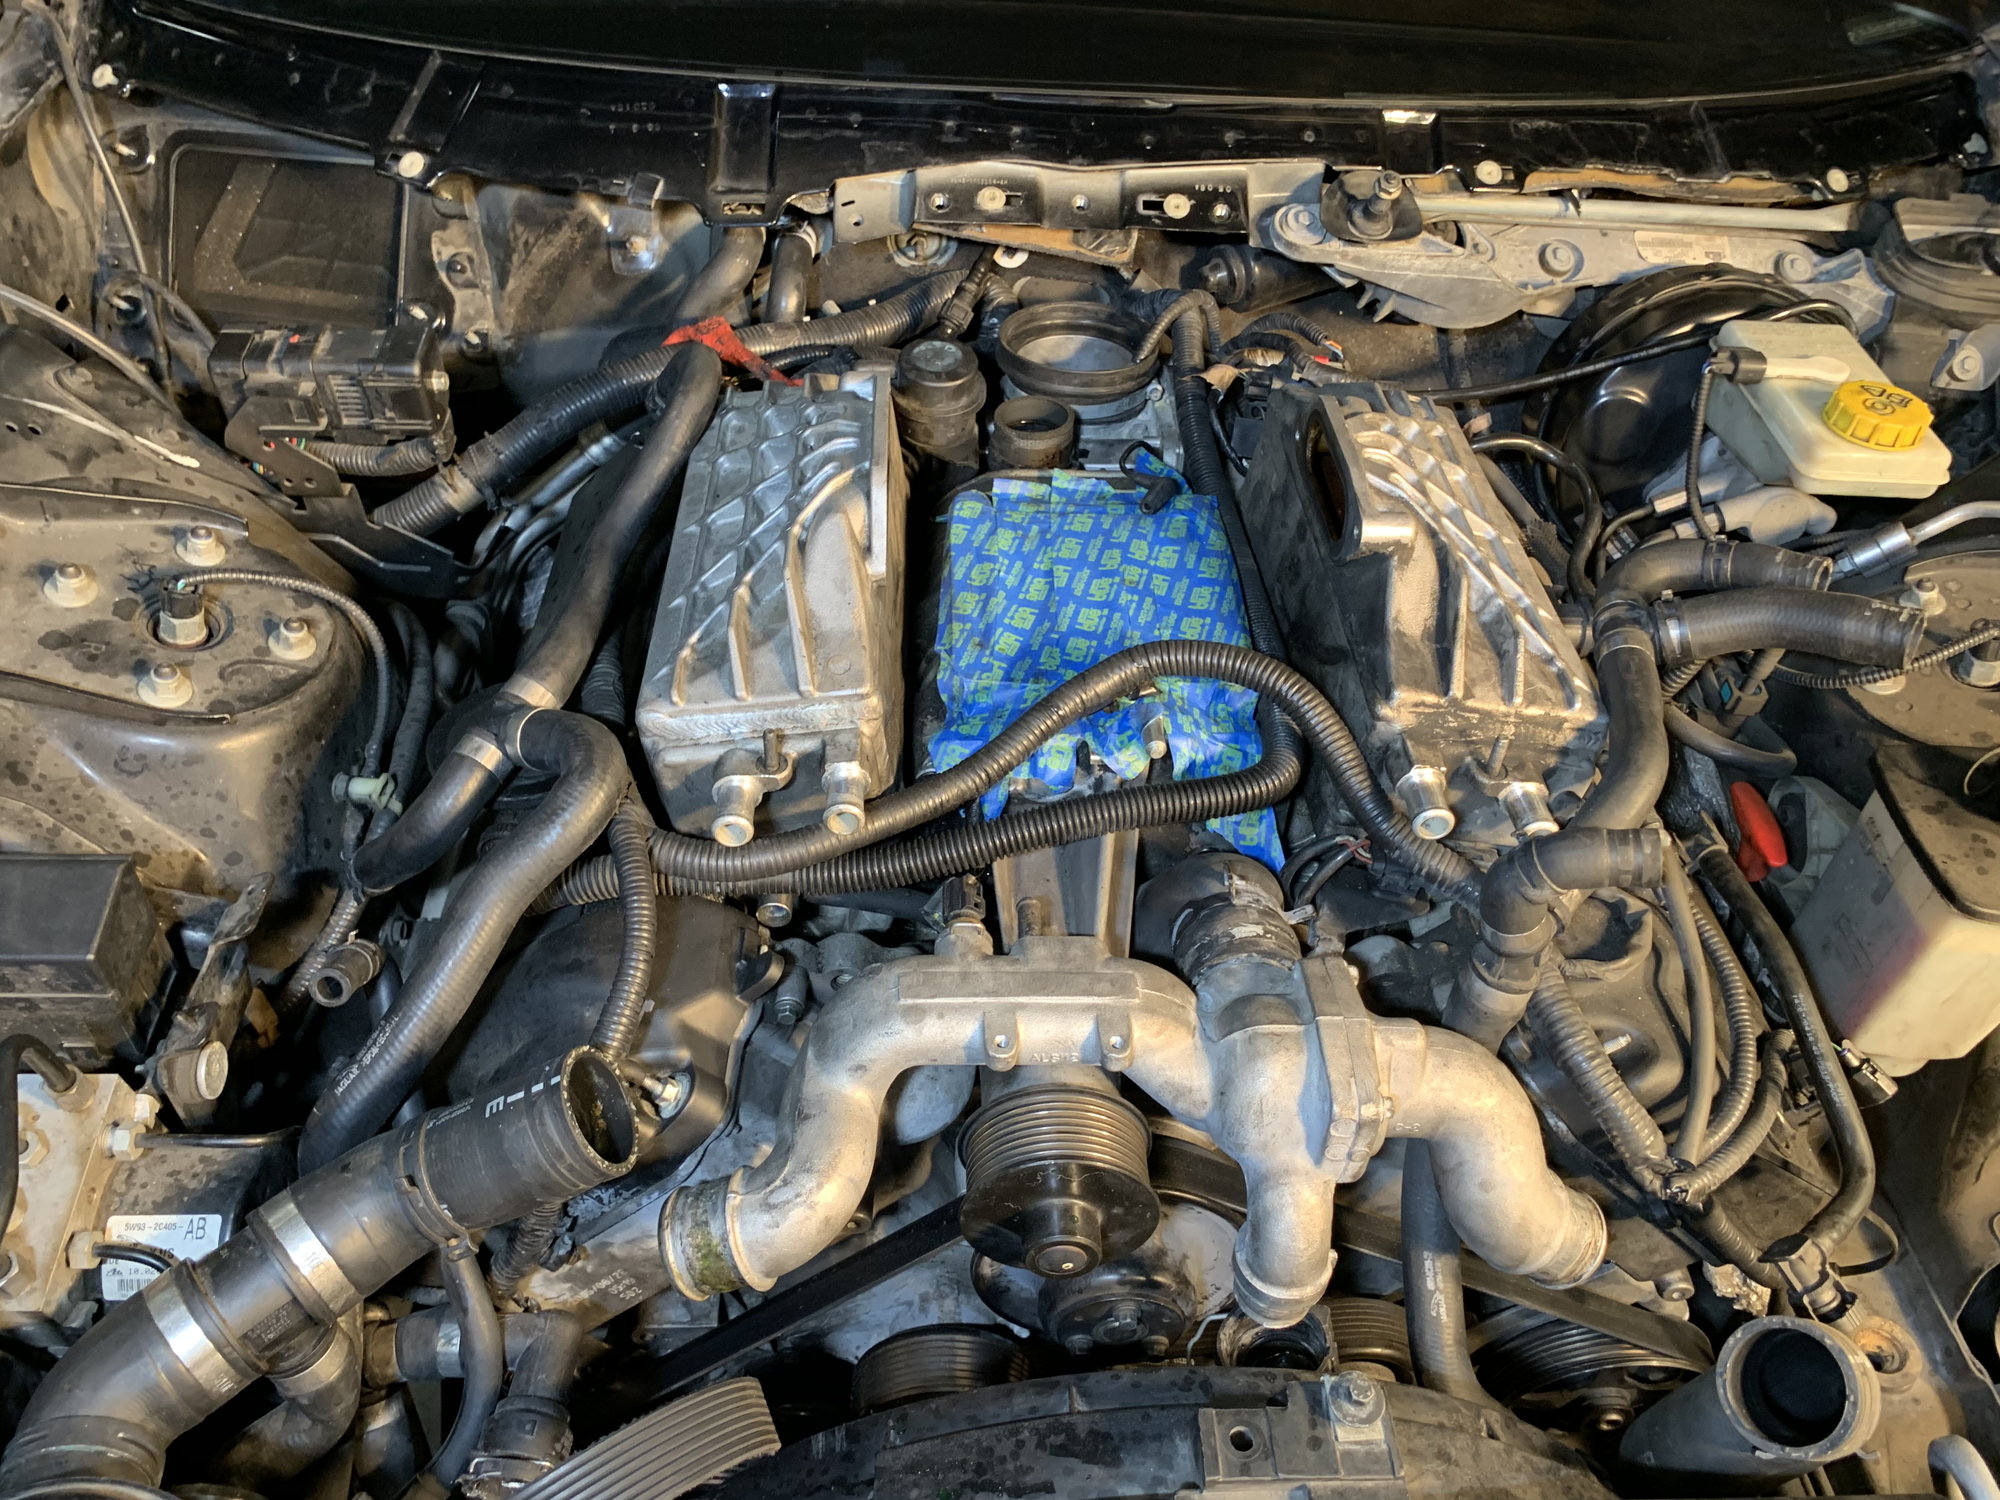
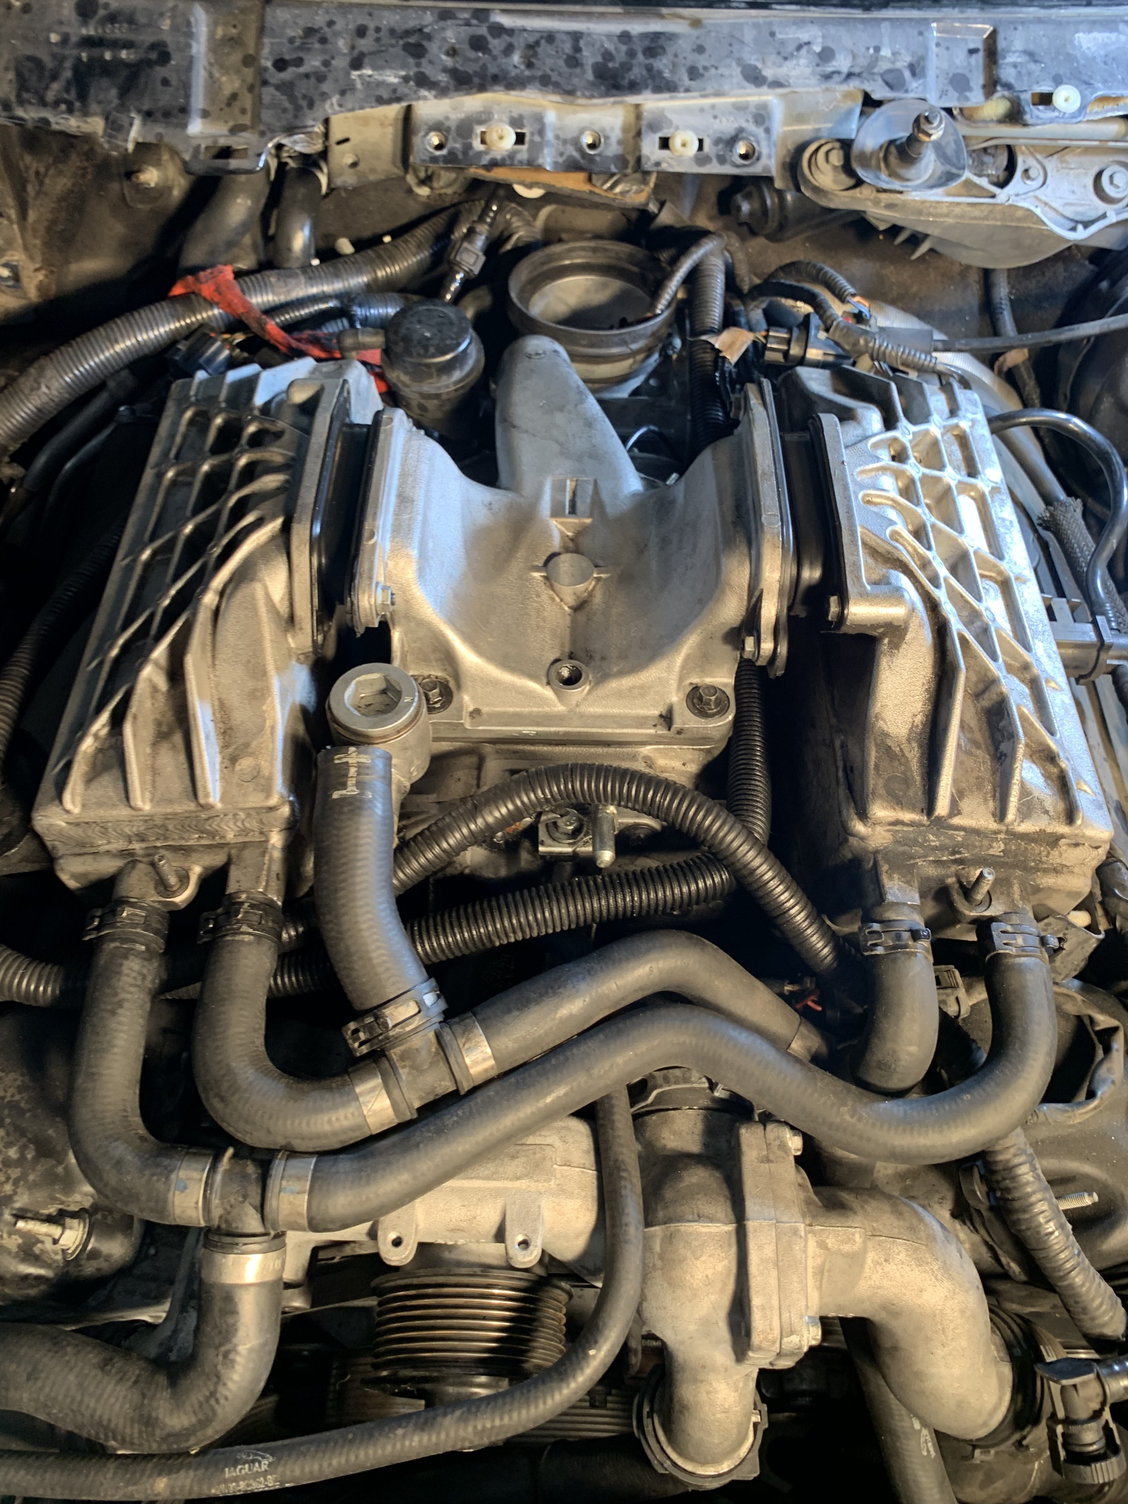
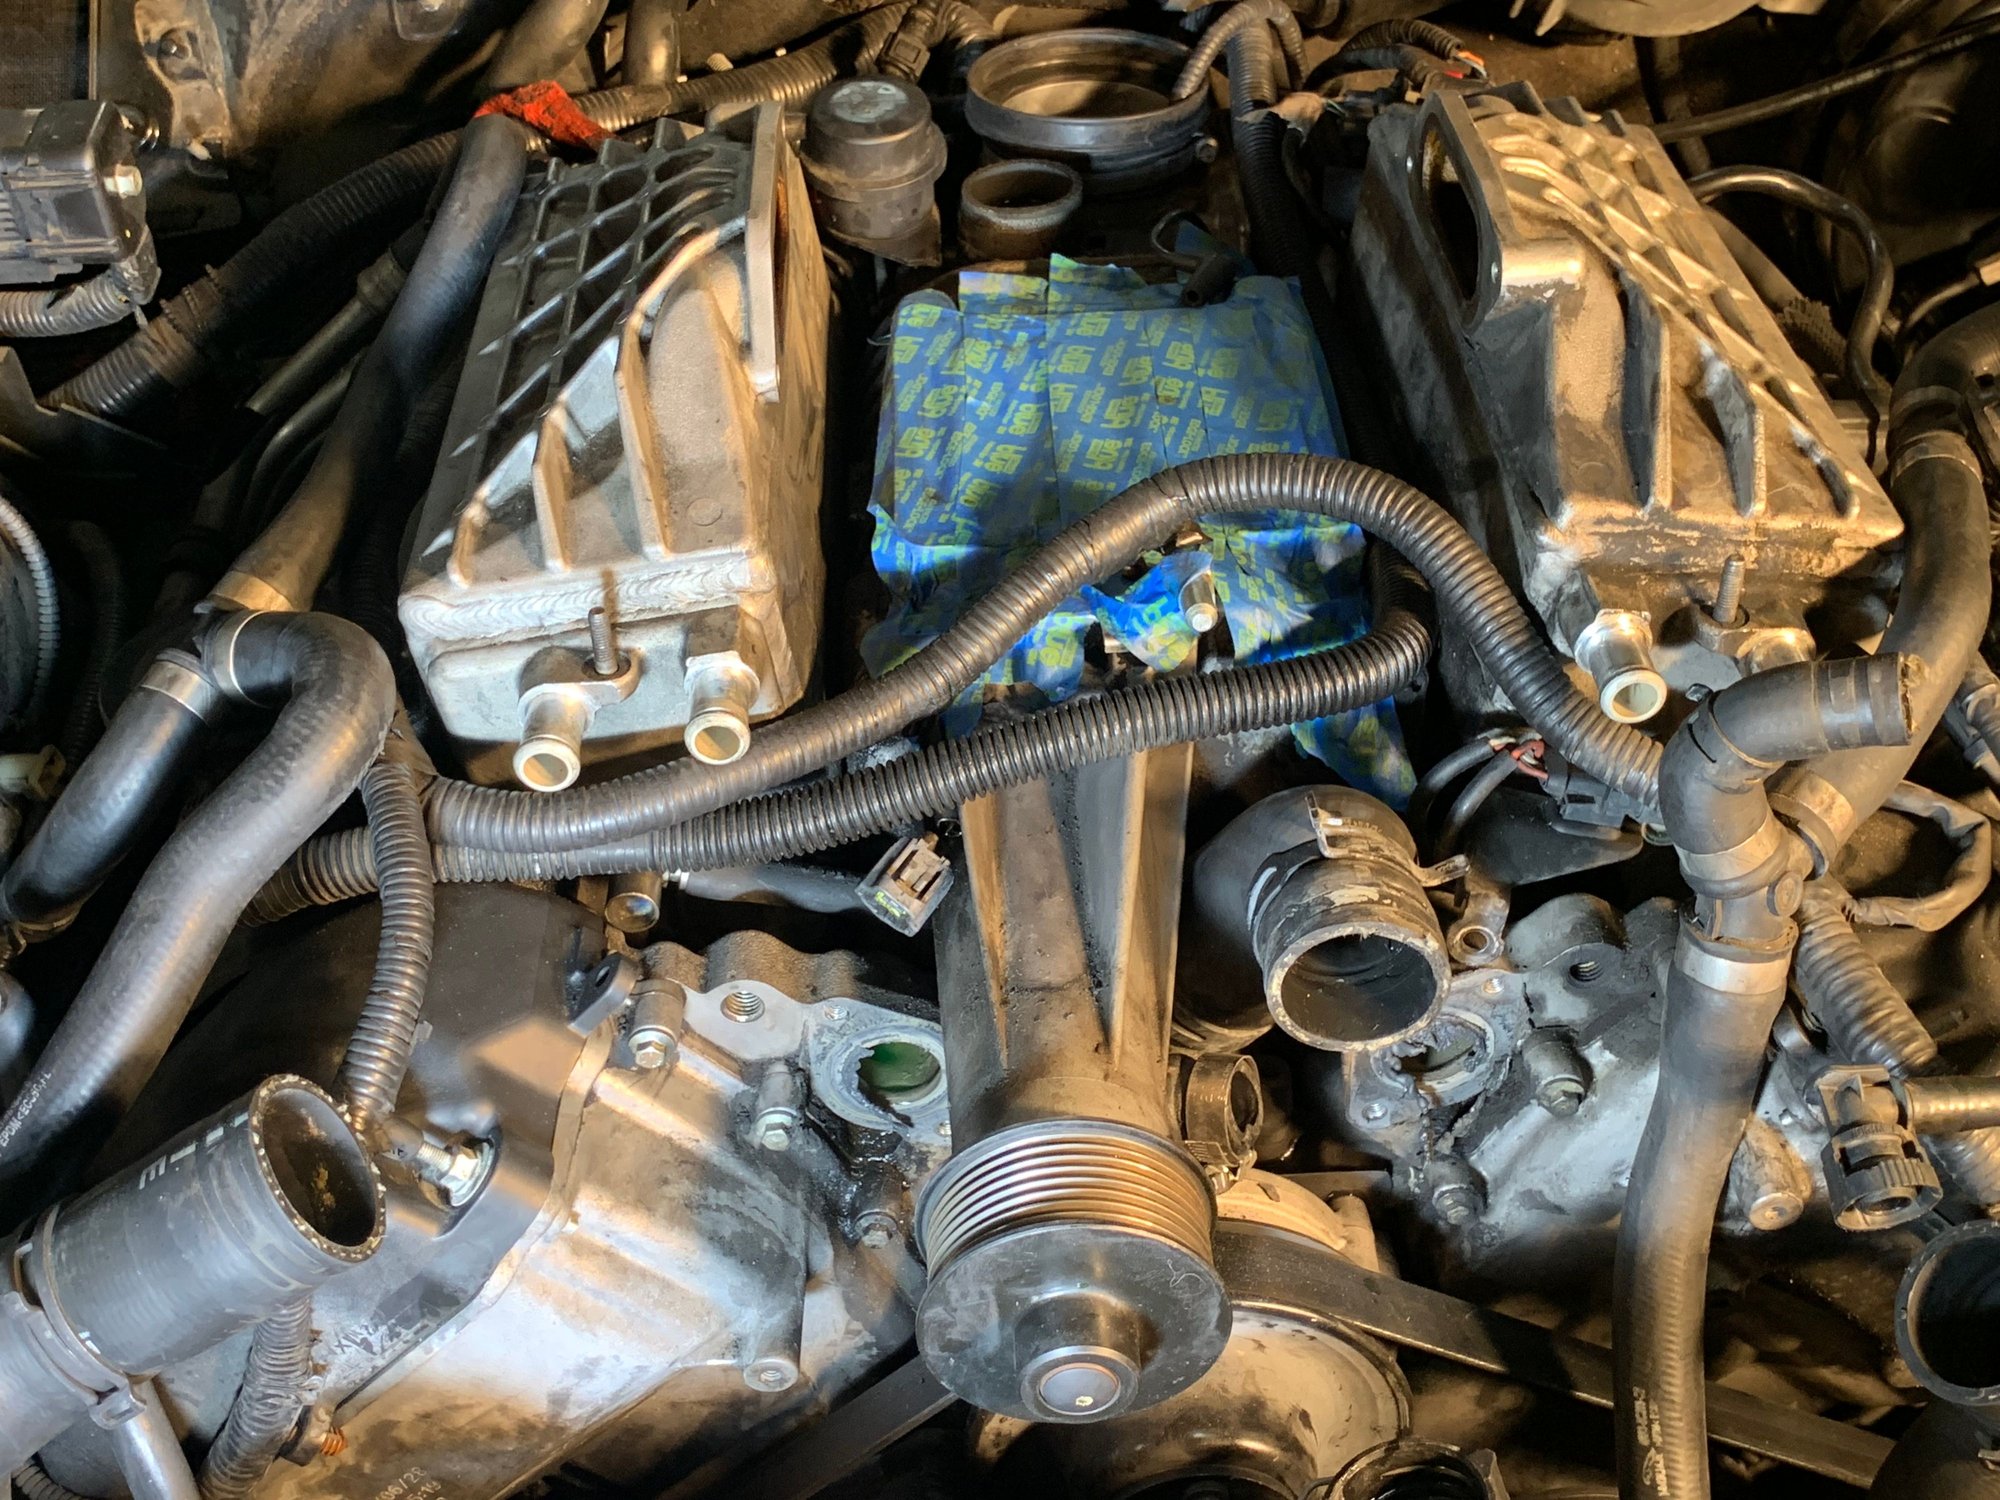
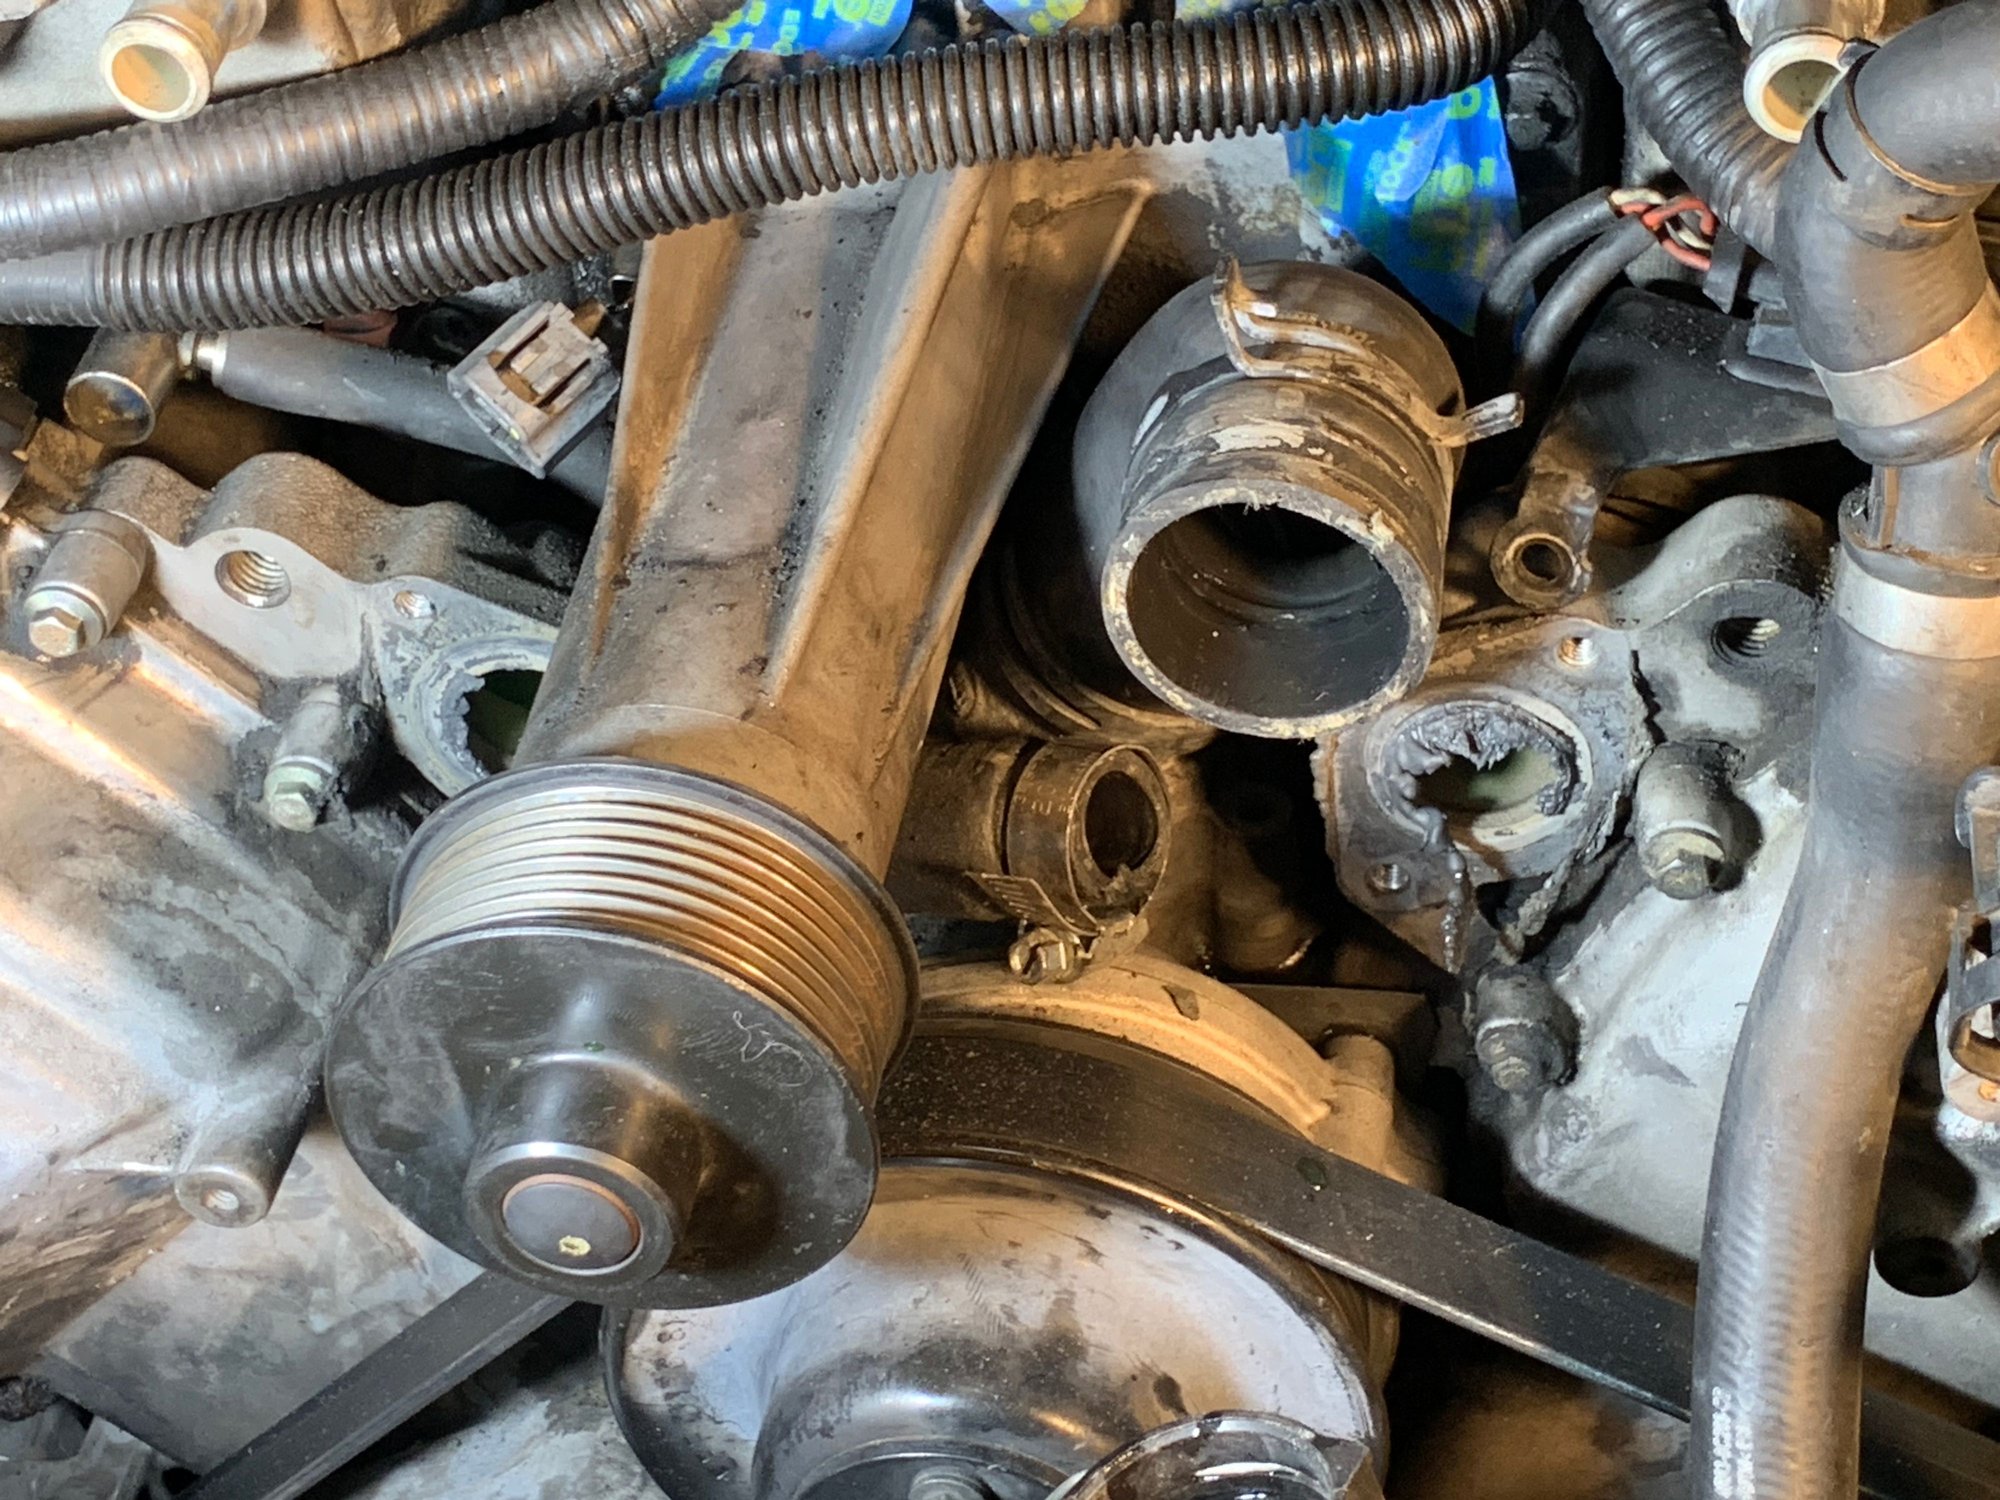
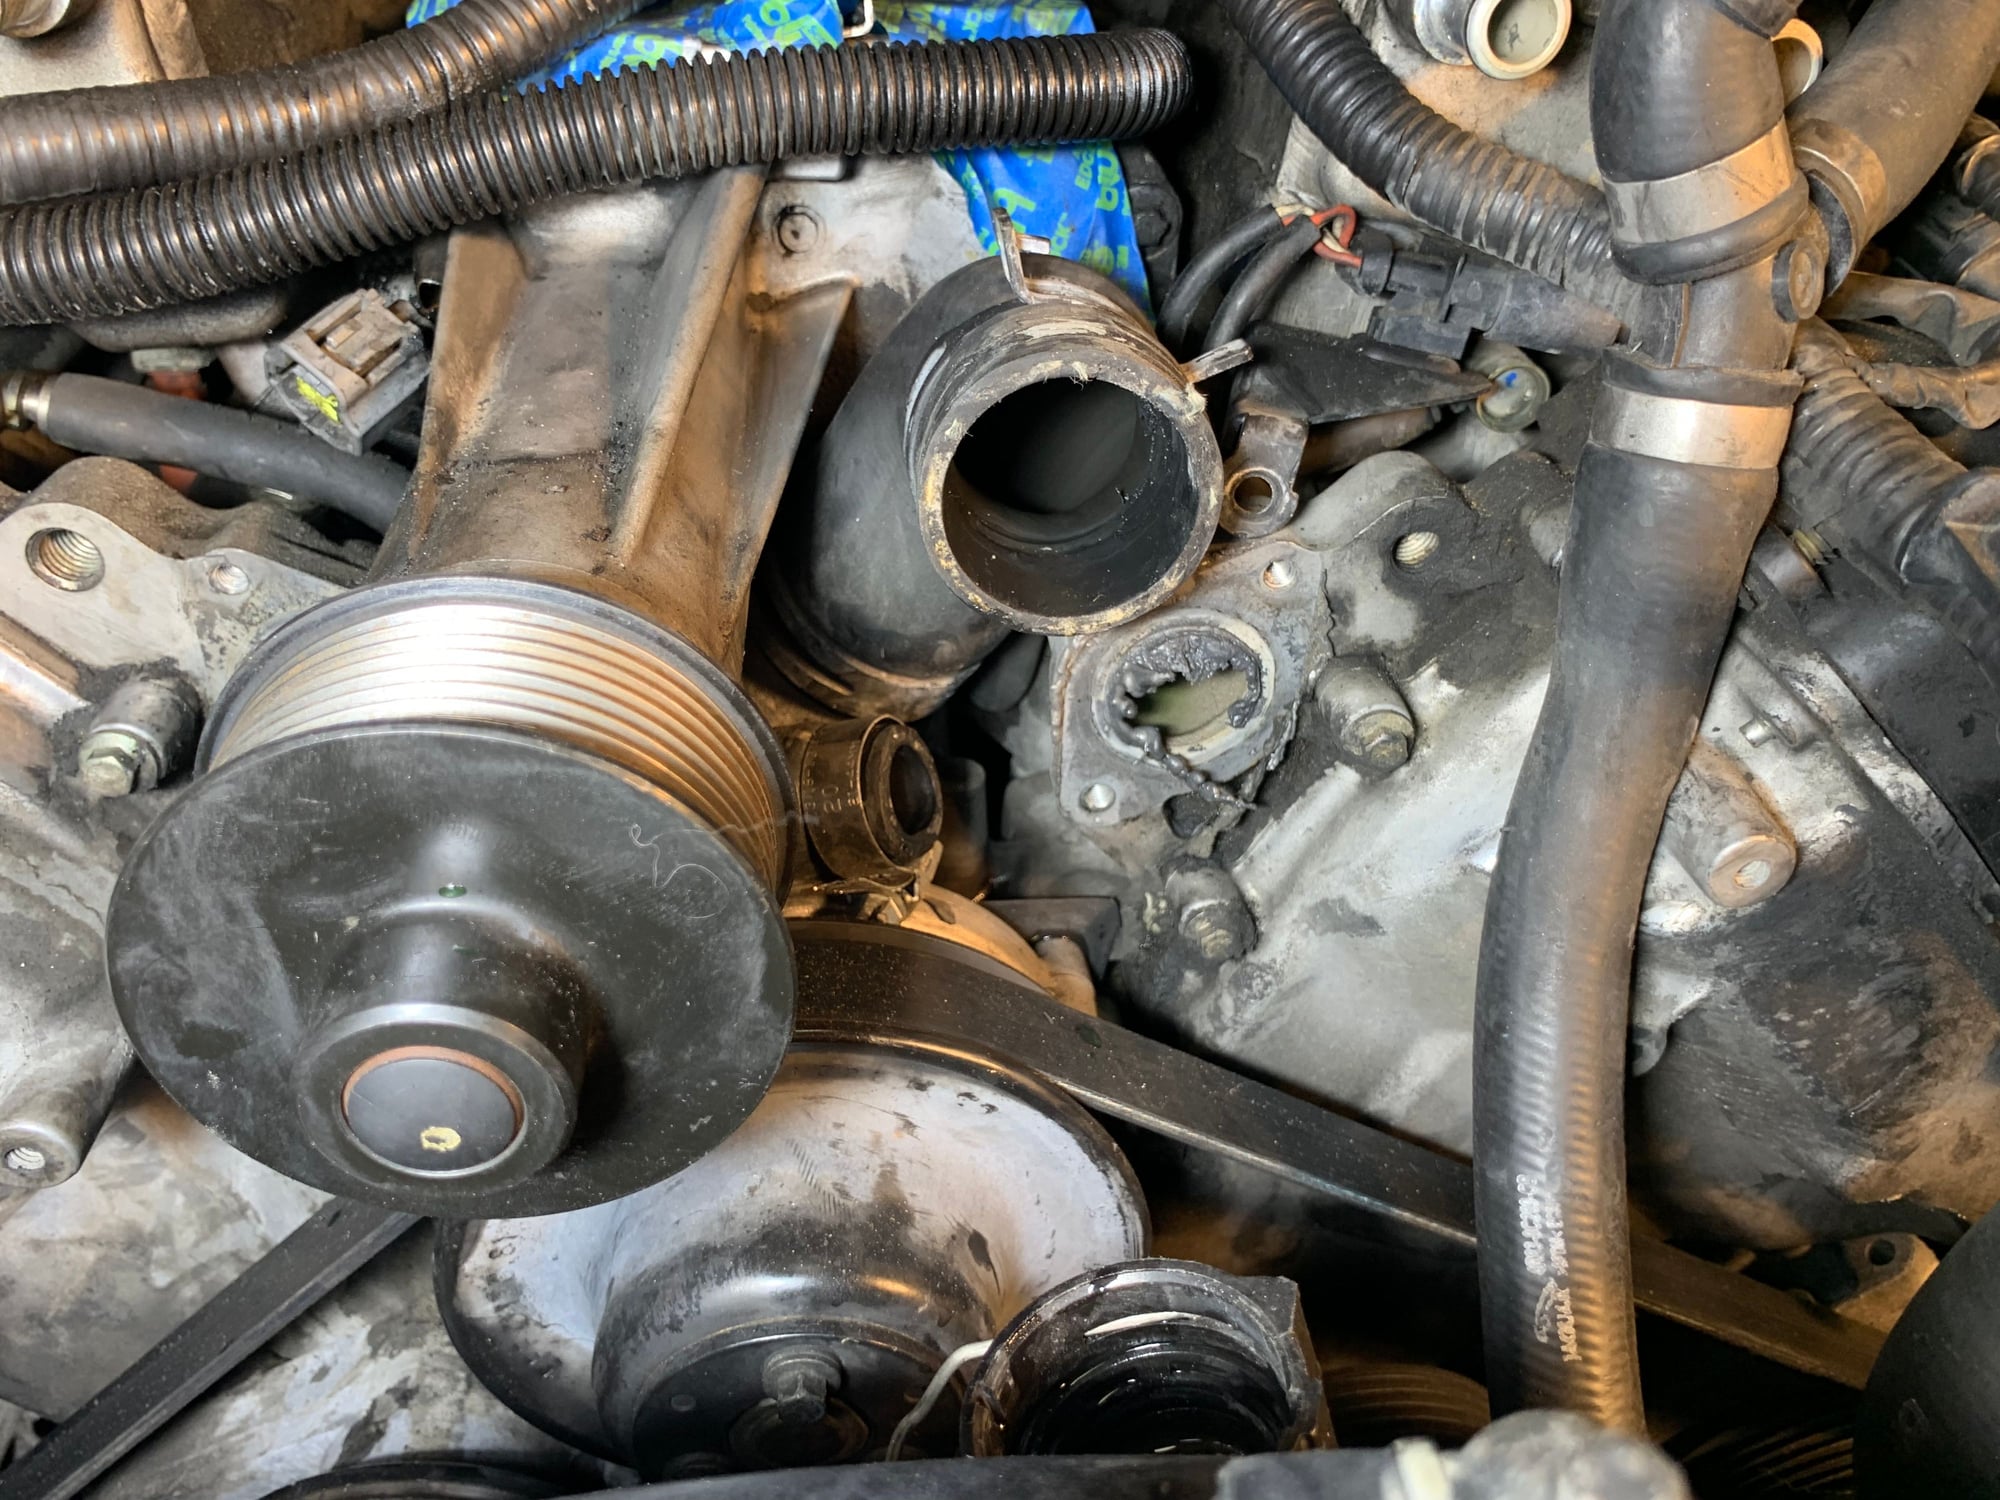
S-type supercharger removal (with pics)
#41
The 10mm stubby is the way to go, but for those who have not done this, be sure to remove the air box filter housing so you can maneuver around before you disconnect EGR. Makes for easier (because non of this is easy) work. Long sleeves helps keep your arms from getting chewed up from sharp plastic edge. Be sure to face straight open wrench side with opening at 1 o'clock, pull for passenger side and push for driver. Also grab a 19 mm long wrench and use box end to slip over open wrench side of stubby to pull up or push down on to turn stubby. Once it gets moving use a shorter, 14 or 15 until bolts are out. All this to get the rear SC bolt, WTFrig Jaguar?
#42
After doing it once, its really not that bad. Having said that it probably would have taken me twice as long without the writeup.
I did the removal and install over the course of 3 days, couple hours on a monday, all day tuesday, and about 4 hours on the Wednesday, overall probably 12-14 hours of actual work, but that was with 4-5 trips to the autoparts store, cleaning everything, and servicing the SC.
Im confident now I could do it in half that time after I know what im doing. I bought a standard length set of ratcheting wrenches from harbor freight for $25, and they were worth every penny. The standard size fit fine on the back SC bolt.
The main problem I had, was the fact that so many of the vacuum hoses/electrical connectors just crumbled trying to remove them, then chasing vacuum leaks after everything was put back together.
I think the only tip I would give someone other than the ratcheting wrenches, would be to swap the corroded bolts from the EGR valve with two bolts from the throttle body that way there are nice fresh bolts back there, with less fear of stripping them going back in, or back out in the future. (May have been mentioned earlier)
#43
Sooooo the title says it all I took a supercharger out (doesn;t happen every day customer's don't like spending that kinda money) and I took pics along the way, specially because the only thread I found similar to this one kinda had limited pics (great info though) but you can't never have too much info and too many pics.
Here is the link: jaghelp.com: 2006 S-type supercharger removal
Any comments to improve the article will be appreciated. I will be putting it back together hopefully on Monday (if I get the parts) and posting the pics of putting it back together. I worked hard on this so moderators pls faq
Here is the link: jaghelp.com: 2006 S-type supercharger removal
Any comments to improve the article will be appreciated. I will be putting it back together hopefully on Monday (if I get the parts) and posting the pics of putting it back together. I worked hard on this so moderators pls faq

Looking at a lot of threads and documents, not finished yet but ...
Is it really necessary to remove the front bumper cover?
Is it really necessary to remove the windshield wipers and cowl cover?
#44
#46
I think that post just may do it for me on this car. It's OK now but to have to do do this again for a probable AC fix up.
#47
Join Date: Jan 2012
Location: Newport Beach, California
Posts: 5,658
Received 2,662 Likes
on
1,827 Posts
#48
I'm having a very hard time justifying all of this work, including all the "while I'm at it hose replacements" along with whatever I break. So if there's something else not so far off on the horizon ...
It's got 70+K miles. That's pretty low compared with my other cars and how they did. But it's also 14 years old and I can already see that lots of these hoses are getting harder to find. It's also a hard engine compartment to work ion. Twice I've had the cooling system fail on me while on a trip. Both times I WAS able to nurse it along but I was always less than 150 miles from home. It has a well earned reputation as fragile, maintenance needy car in our household.
Still researching and pondering ... No I'm not going to open up the AC system now just because it might fail. Getting the R134a recovered would be nigh impossible given the car's state of non operation so I'd just vent it to the atmosphere. So if the AC fails in a way that requires pulling off all of this equipment again it just gets sold.
#49
#50
A car 14 years old will possibly have a compressor front seal leak, a leaking rubber hose, a bad Schrader valve in fill connectors, or a leak in the evaporator. It's not likely an o-ring. Best bet is to pressurize the system and use a freon sniffer or Big Blu leak detector to find the leak before taking things apart. It's worth spraying it all down with $10 of bubble snot instead of causing yourself a lot of grief. You may cause a secondary leak before you find the primary leak. It's not unusual to have to fill a car over that period of time if never filled off. If it's totally out of freon, vacuum the system and see how long it takes to lose vacuum. That will give you a starting point. A hold in evap won't take very long to go-to zero. Schrader won't lose any, so you need to disco each connector and see if either hold vacuum. Hose and compressor will leak very slow, if even noticable.
#51
I'm currently suffering no issues with the AC. I just bought a UV flashlight for the cooling system leak detection effort which wasn't needed but I couldn't see anything when I used it anyway. I used the leak detector made for DEX-Cool by GM which is what's in the car so I dunno ... ? Anyway I might be able to use that If I were to inject some dye into the AC system but ...
I'm not in the mood to go looking for every potential problem on this car unless it's explicitly related to having to pull so much all apart again. Knock detectors being an example. Those aren't hard to do now and not crazy expensive.
I'm not in the mood to go looking for every potential problem on this car unless it's explicitly related to having to pull so much all apart again. Knock detectors being an example. Those aren't hard to do now and not crazy expensive.
A car 14 years old will possibly have a compressor front seal leak, a leaking rubber hose, a bad Schrader valve in fill connectors, or a leak in the evaporator. It's not likely an o-ring. Best bet is to pressurize the system and use a freon sniffer or Big Blu leak detector to find the leak before taking things apart. It's worth spraying it all down with $10 of bubble snot instead of causing yourself a lot of grief. You may cause a secondary leak before you find the primary leak. It's not unusual to have to fill a car over that period of time if never filled off. If it's totally out of freon, vacuum the system and see how long it takes to lose vacuum. That will give you a starting point. A hold in evap won't take very long to go-to zero. Schrader won't lose any, so you need to disco each connector and see if either hold vacuum. Hose and compressor will leak very slow, if even noticable.
#52
So here's what I've learned WO any attempts at it so far.
A lot of stuff has to come off.
Possibly some of the more delicate plastic bits will become victims.
The EGR is a PITA. I saw some of the tips and it does look like lots of penetrant, the proper wrenches and patience will prevail. I've had much worse but also when I was a lot younger and more eager.
BUT the big take away is that there are plenty of other critical service parts that require this removal such as knock sensors and this is the biggest one the fuel injectors and I suppose everything associated with that.
That's really a huge deal. I'm not going to replace them as a while I'm at it precaution. But perhaps having them cleaned and new gaskets/seals?
Anyone done that?
I really am put off about the future of this aging car because the "quality" of some of the pieces and level of work required to get at stuff.
One last thing I have observed is that the OP didn't mention draining the cooling and SC circuit first though I assume that he did. That's best done with the car up in the air which mine is, on jacks stands in the front.
My car is also sitting in my driveway and a lot of up & down isn't practical right now.
So is it better to have the car up on jack stands? I foresee difficulty getting to the back that way?
#53
#54
Sort of ... read the threads as there are a couple of lists but it's also a matter of how much you want to replace at the same time because it's easier now as well as what you end up breaking in the process.
#55
Started in earnest this morning. If I can get it apart I'll fix it if not off to the scrap yard it goes.
With that as guiding principle I've run into snag already.
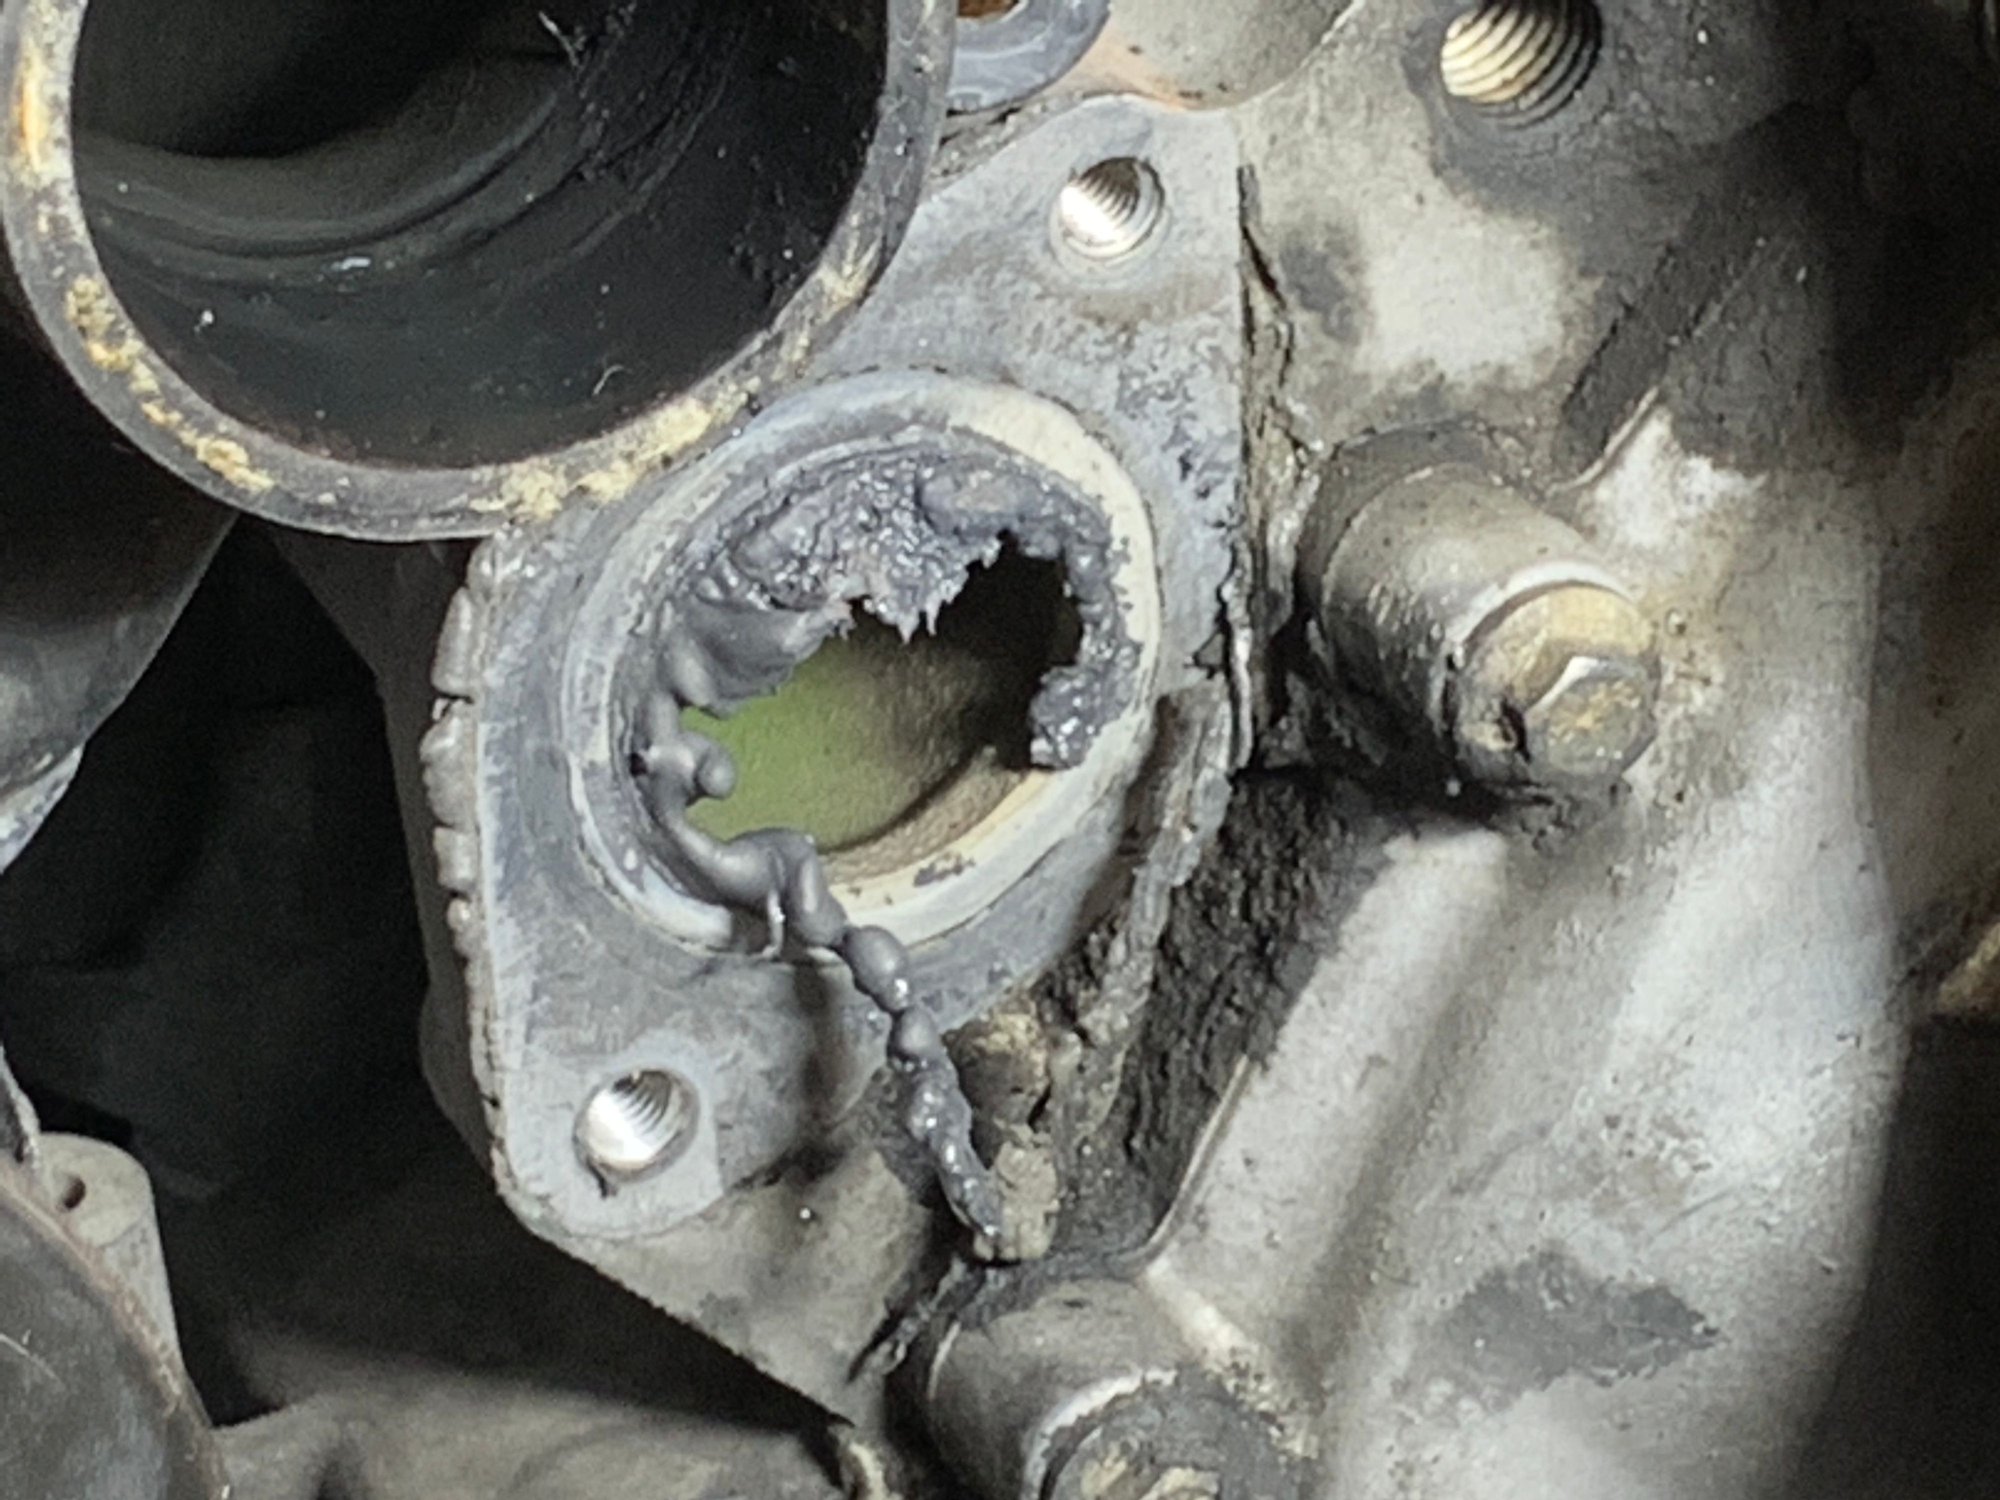
I can't get at the bottom thermostat housing T130 bolt.
What a dumbass choice for a bolt in that spot where the crook in the neck of the housing blocks access.
I've moved everything out of the way that I can but neither the 3/8 or 1/4 drive will fit using a socket wrench.
The 3/8" bit won't even fit WO a wrench on it.
So my next choice will be a very long handled 1/4" ratcheting box wrench working the T130 bit's 1/.4" drive and hope it comes out.
The upper two bolts require a long handle and they went snap when they loosened up.
I'll be changing the style of head on this one going back in if I get that far.
My next step would be to use a sawzall and cut the neck off of the housing so that I can get at the bolt then buy a new neck. Hopefully not ... It is available!
I can't get a good grip on the bolt head and not enough of a long levered wrench handle on it as is.
Ideas.
Last edited by Staatsof; 07-11-2019 at 10:39 AM.
#56
#57
https://www.lowes.com/pd/Kobalt-35-P...ol-Set/3387640
It's very thin so it doesn't get obstructed by the corner of the head.
Even so it's just so short but I put a slip over piece of pipe on it. A 10" or 12" length handle would have been much better but this toll holds the bits nicely and it magnetic so I'll find other uses.
The trouble is that you're pushing so much torque an inch out from that tiny, little bit that it's very hard to keep it straight and pushed in so as not to get stripped. It wants to go out of alignment right away.
If these were a hex head bolts, which they will be (6mm x 25mm x 1.0 plus some spacing washers so the heads of the new bolts clear the casting and wrench can get on them) then it's easy peasy to make strong contact and apply enough torque to break the loctite.
But WO that terribly inadequate tool no way jose that one was going to come out.
I was ready to cut the head off and gave it 4th last try and fortunately I felt it move though I thought I had stripped the head. I'll post a couple photos. The head IS torn up a bit.
Why does this piece have to come off anyway?
#58
#59
#60
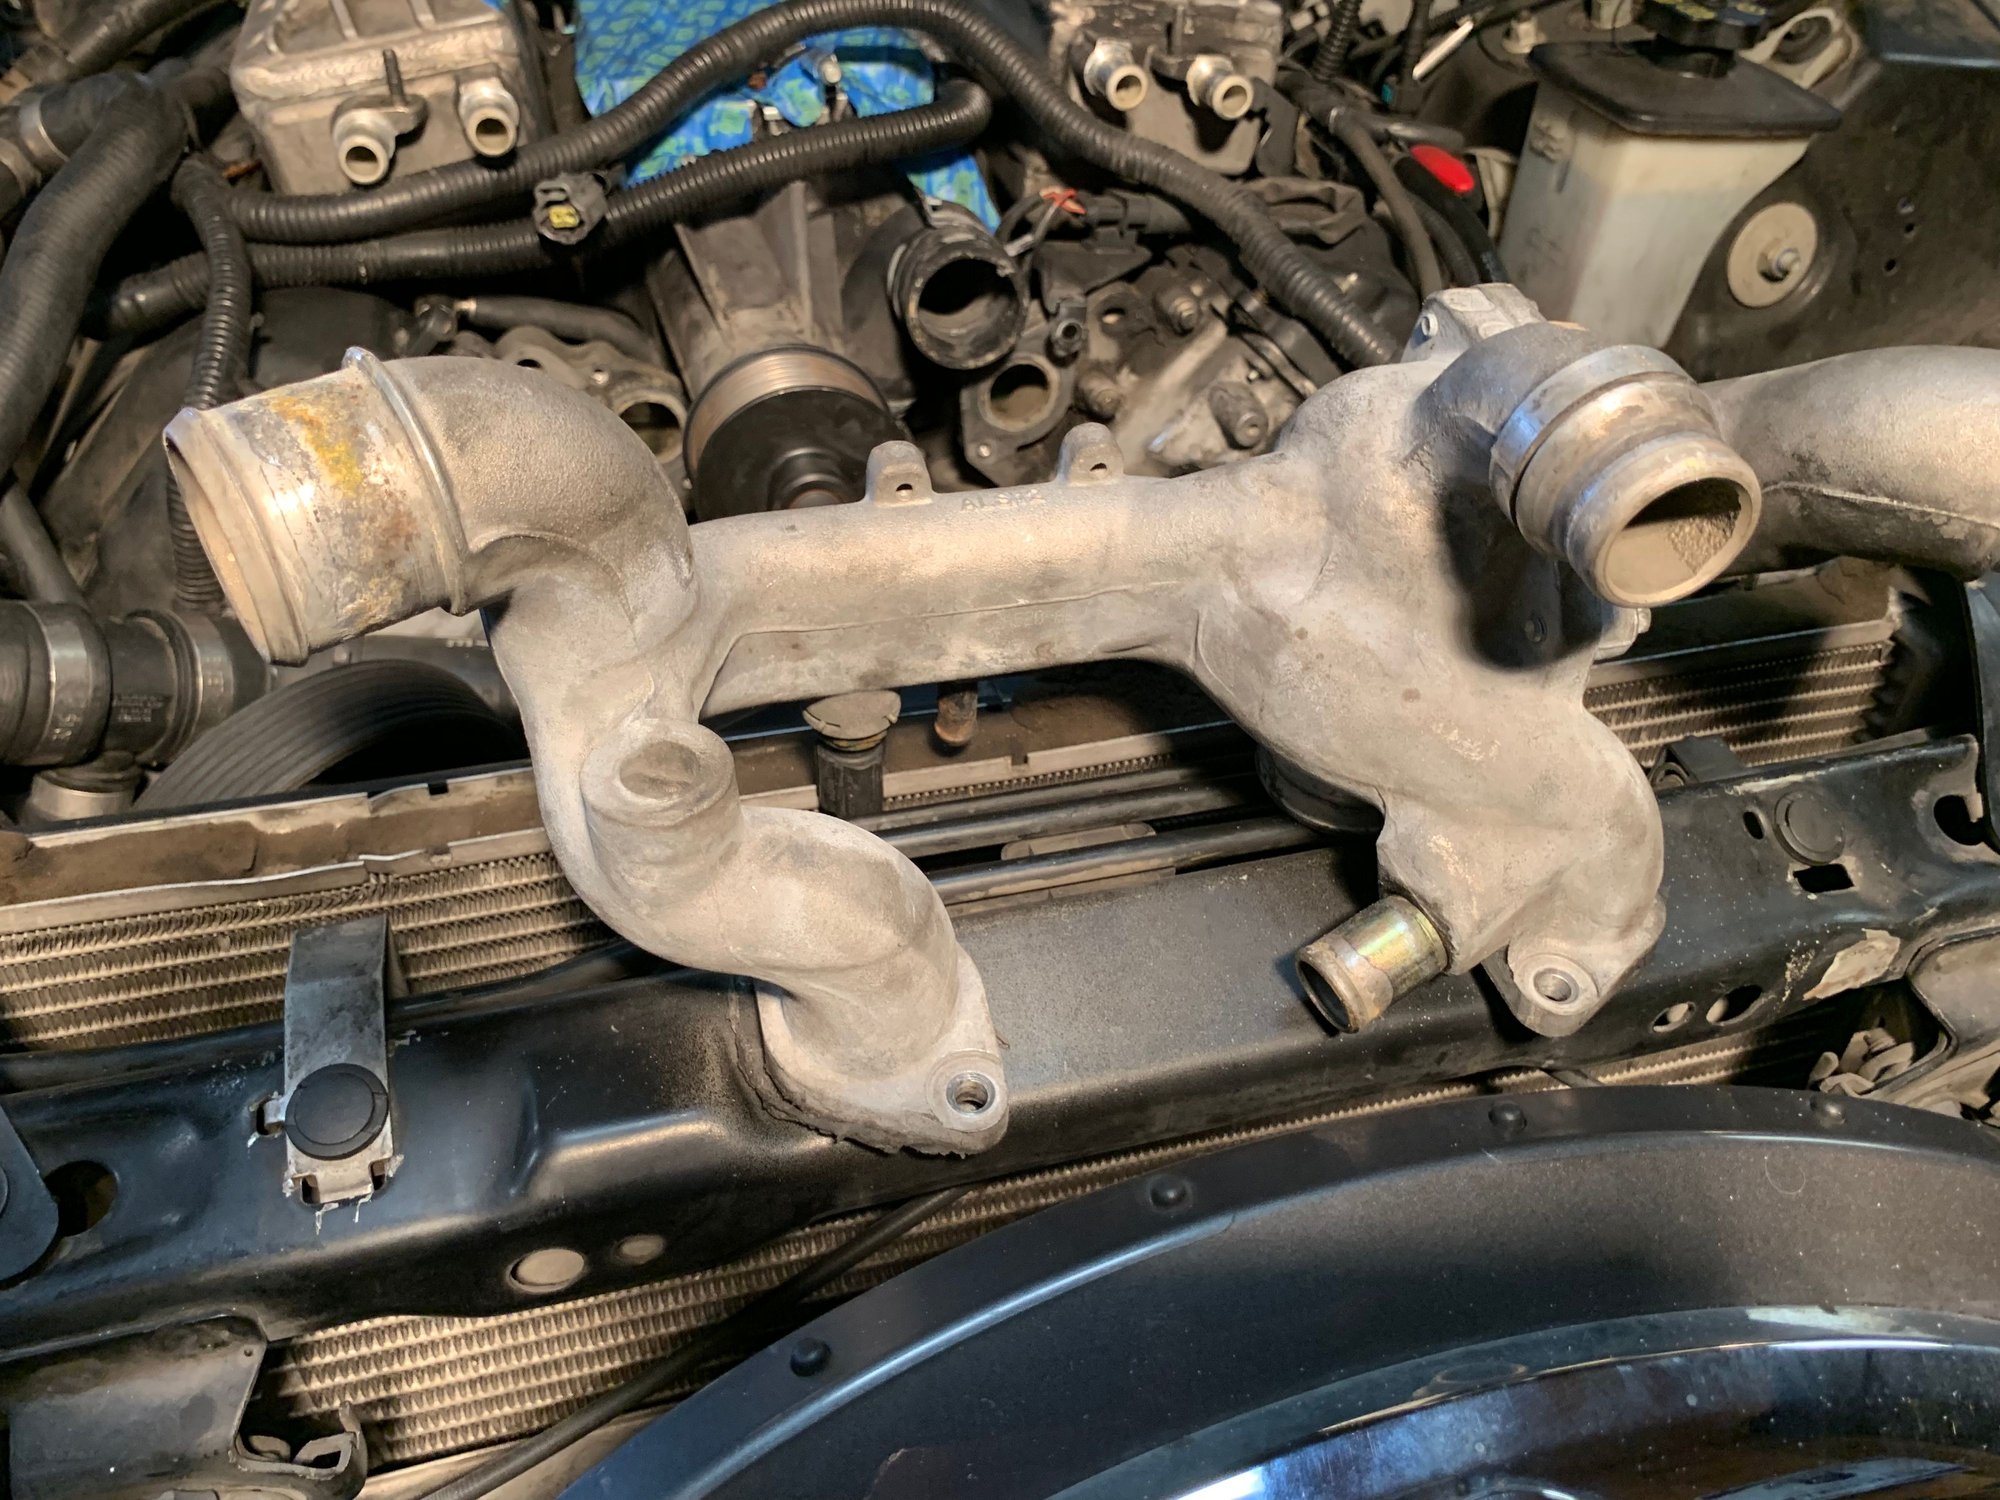
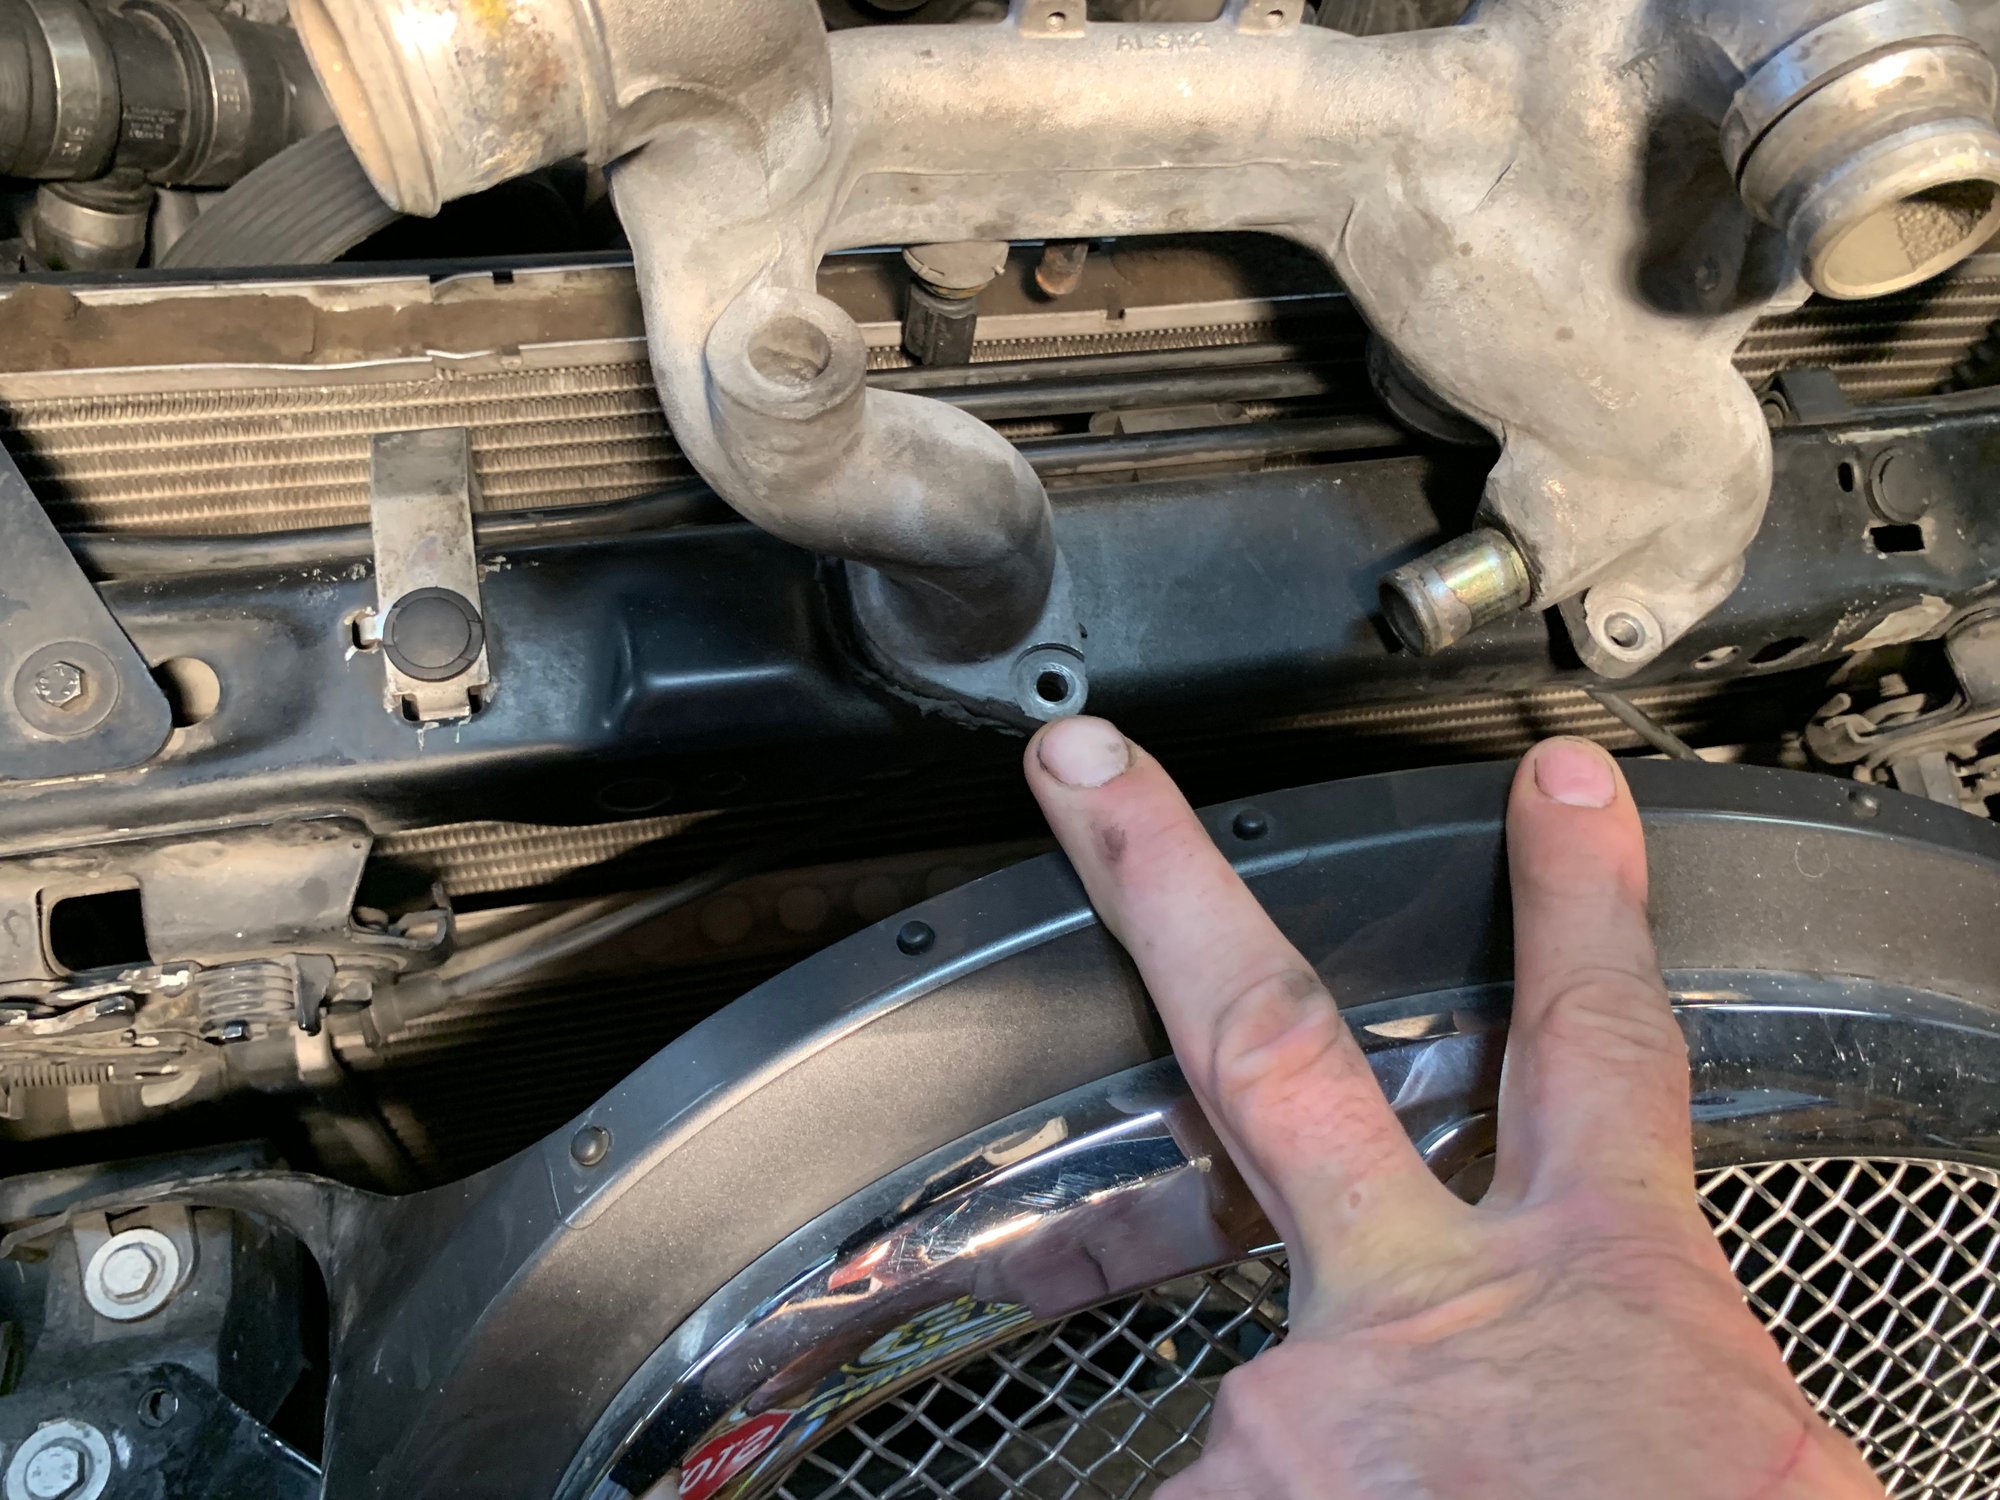
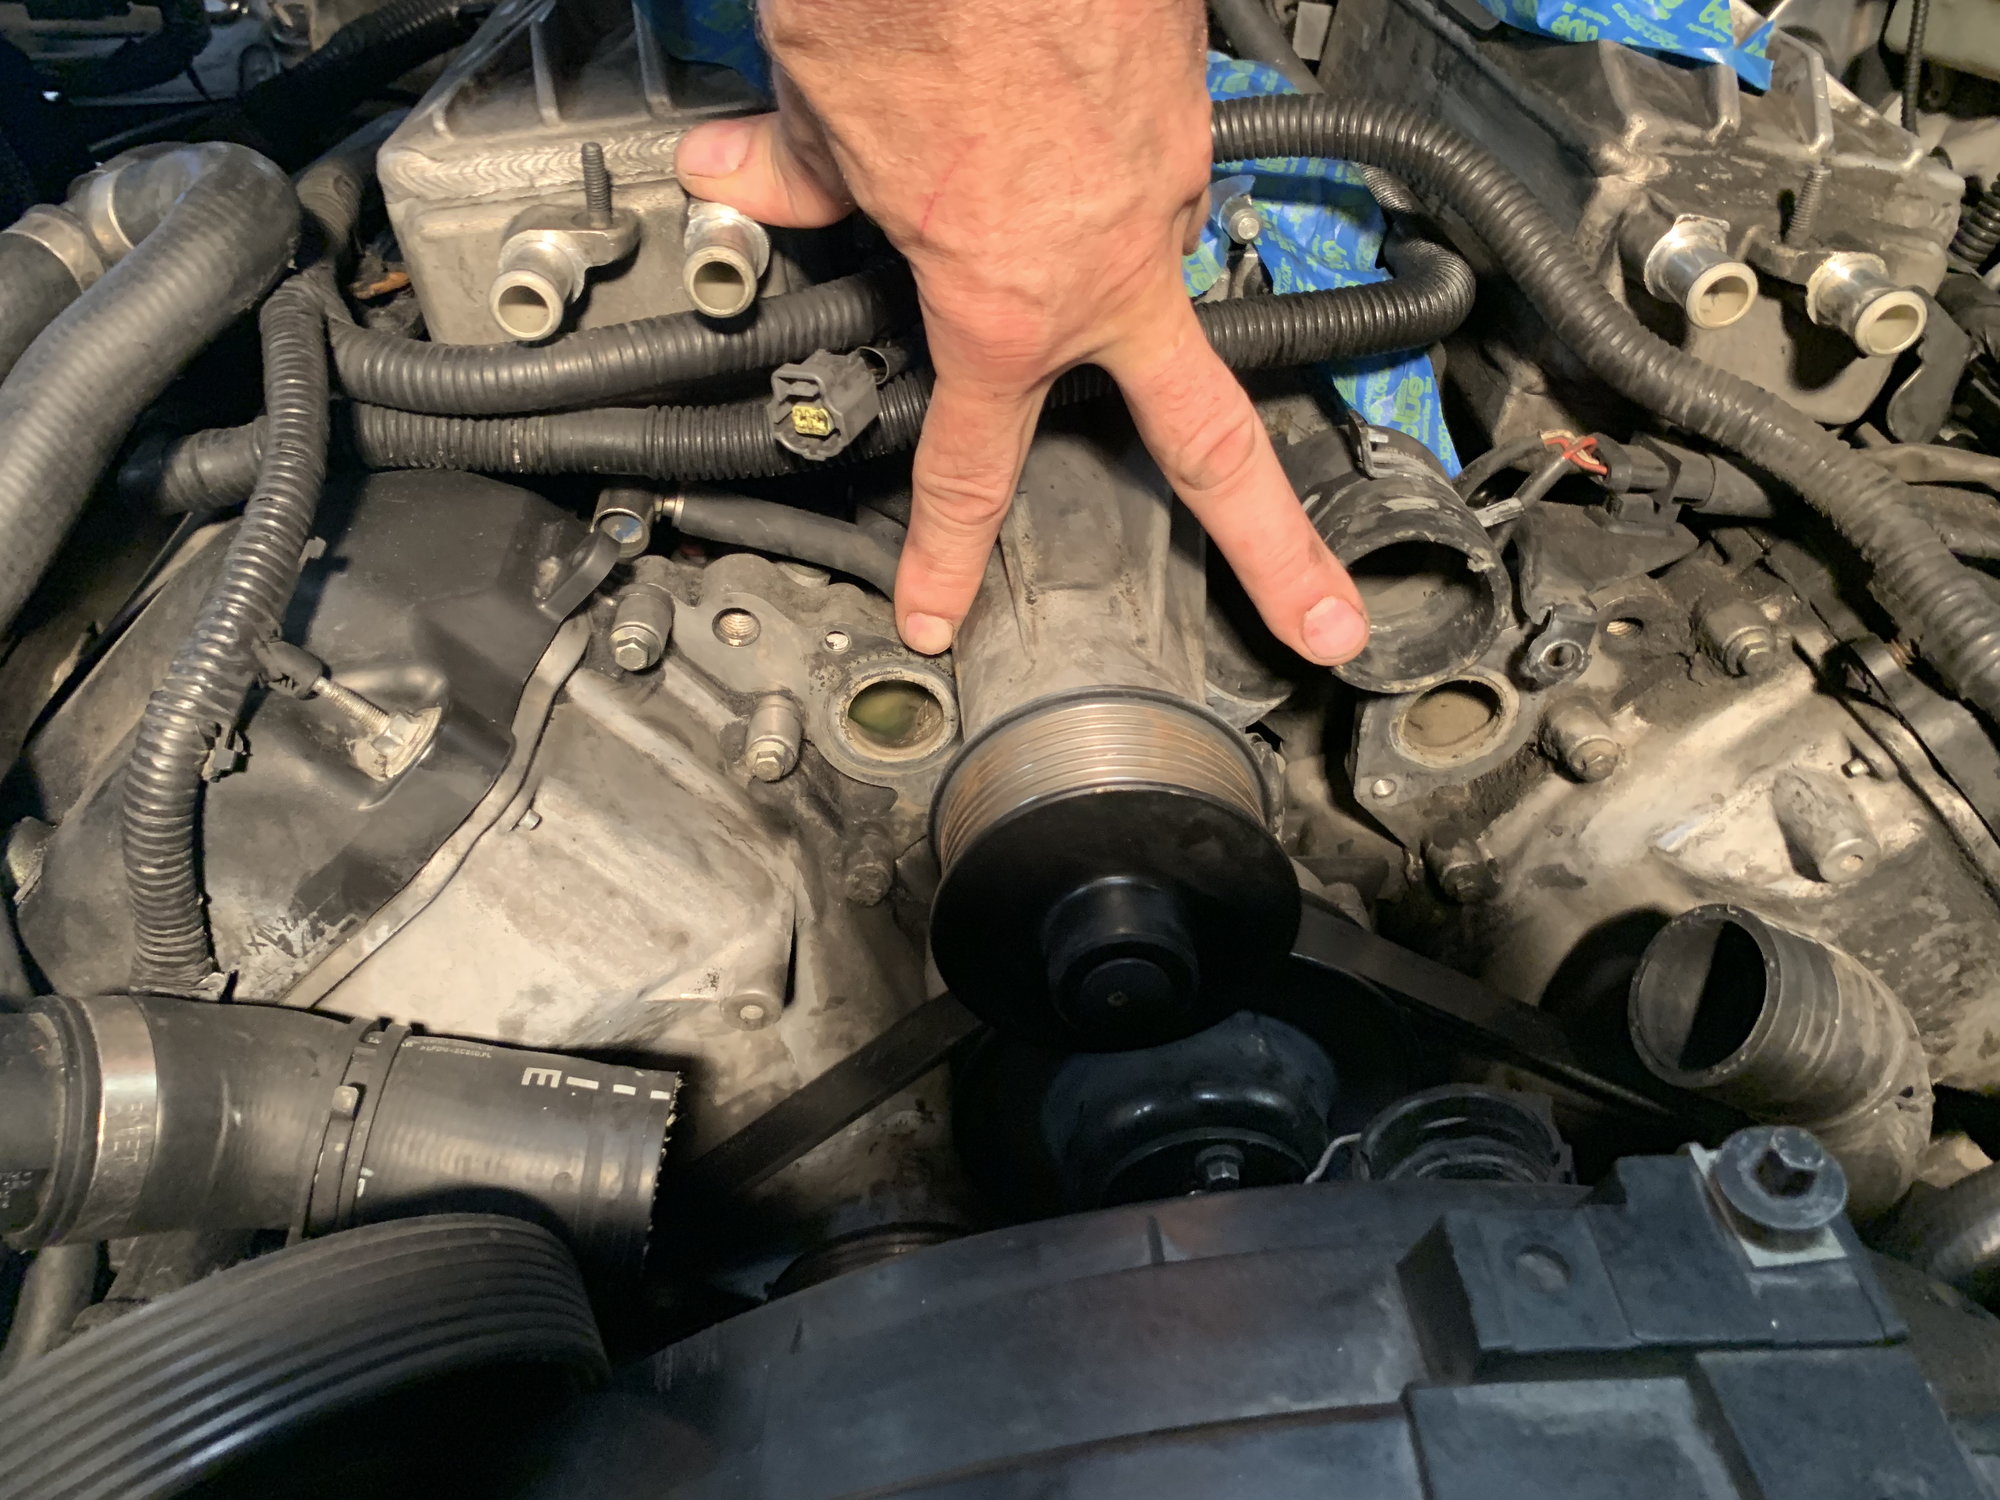
. The last shows where those t30 bolts go
Last edited by Aarcuda; 07-11-2019 at 05:24 PM.


