
Tinted My Side Markers
#1
 02-09-2012, 09:31 PM


A few weeks ago I decided it was time to finally tint my side markers. I followed the guide which is linked below:
HOW TO: VHT Headlights and Tail lights - MustangForums.com
To remove your side markers, simply press down, relatively hard and then wiggle them out. Remove the bulb enclosure by twisting it off. Its straight forward and takes 2 minutes.
The guide is about 90% awesome, but I have a few pieces of advice. First, build yourself a mini painting booth like I did below. Take a show box, or two, and cut them wide open. Insert two coat hangers through the box about 4 inches apart so you can lay the side markers easily on top. This allows your spray can to reach the edges as well as provide full maneuverability when spraying. I did it on top of my trash cans since I dont care about my trash cans and its at a good height.


I did about 6*2 light coats, meaning I sprayed one side really fast and then sprayed the other side fast again, doing it for a total of 6 times. I'd almost do it 7 times if I could do it over again as some color shows through on a few markers.
Be sure to get the edges!!! Thats why the show box paint booth is imperative.
Once you get to the end during the wet sand, I found that wet sanding for around 1.5-2 minutes is all you need to remove the air bubbles. After that, wax for about 1.5 to 2 minutes by hand and it should come out almost perfect. I made the mistake of using a buffer on the first one and almost ripped the VHT coat right off.
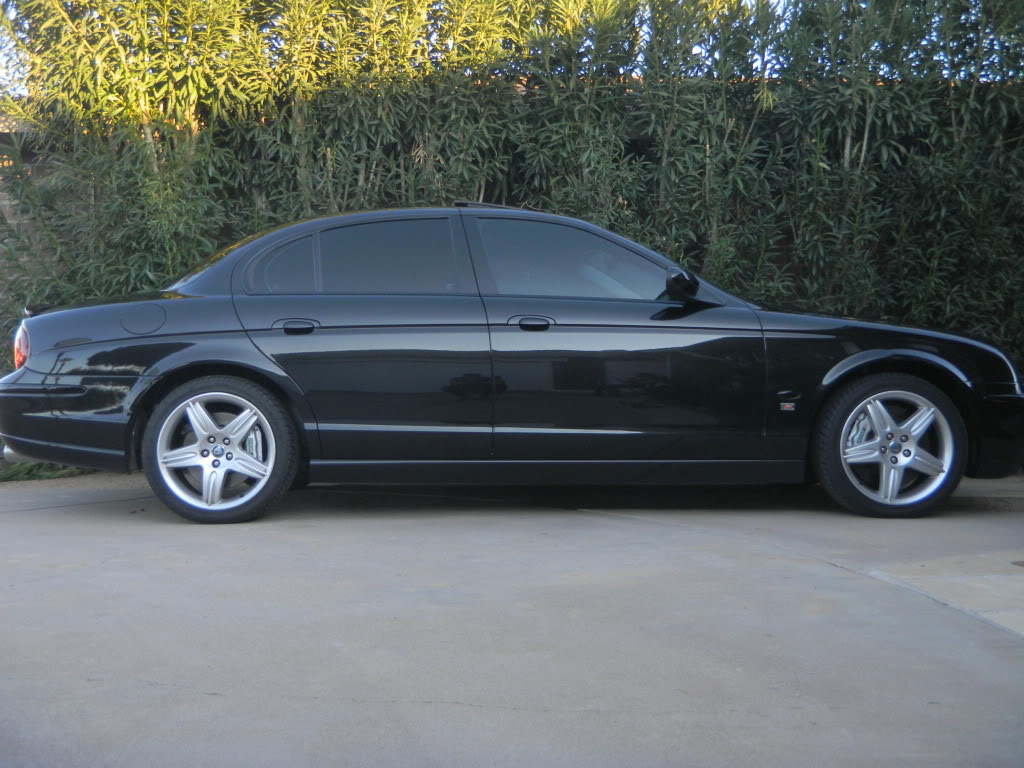
Here are the final results below. Keep in mind I did this because the jag light set up is quite unique. Most cars have wrap around tail and headlamps but the jags are completely flat front and back, forcing the US spec to add ridiculous side markers. Especially on a black car these needed to be tinted out to match the whole car. At night or dusk, the internal bulbs shine through with no issue. Theres no safety issue at all with doing this mod. If you are worried about getting hit because your side markers arent reflecting during the day, you should ride the bus .
.
My final recommendation is to set aside 2 days to do this. With your whole first day spraying, and your last day( hour) buffing. Definitely start on Saturday and end on Sunday. Enjoy! And you'll notice that this is the way the car should have come stock, very stealth and following the lines/color of the car.


HOW TO: VHT Headlights and Tail lights - MustangForums.com
To remove your side markers, simply press down, relatively hard and then wiggle them out. Remove the bulb enclosure by twisting it off. Its straight forward and takes 2 minutes.
The guide is about 90% awesome, but I have a few pieces of advice. First, build yourself a mini painting booth like I did below. Take a show box, or two, and cut them wide open. Insert two coat hangers through the box about 4 inches apart so you can lay the side markers easily on top. This allows your spray can to reach the edges as well as provide full maneuverability when spraying. I did it on top of my trash cans since I dont care about my trash cans and its at a good height.
I did about 6*2 light coats, meaning I sprayed one side really fast and then sprayed the other side fast again, doing it for a total of 6 times. I'd almost do it 7 times if I could do it over again as some color shows through on a few markers.
Be sure to get the edges!!! Thats why the show box paint booth is imperative.
Once you get to the end during the wet sand, I found that wet sanding for around 1.5-2 minutes is all you need to remove the air bubbles. After that, wax for about 1.5 to 2 minutes by hand and it should come out almost perfect. I made the mistake of using a buffer on the first one and almost ripped the VHT coat right off.
Here are the final results below. Keep in mind I did this because the jag light set up is quite unique. Most cars have wrap around tail and headlamps but the jags are completely flat front and back, forcing the US spec to add ridiculous side markers. Especially on a black car these needed to be tinted out to match the whole car. At night or dusk, the internal bulbs shine through with no issue. Theres no safety issue at all with doing this mod. If you are worried about getting hit because your side markers arent reflecting during the day, you should ride the bus
My final recommendation is to set aside 2 days to do this. With your whole first day spraying, and your last day( hour) buffing. Definitely start on Saturday and end on Sunday. Enjoy! And you'll notice that this is the way the car should have come stock, very stealth and following the lines/color of the car.
The following 5 users liked this post by rasputin:
Bacardi 151 (06-07-2012),
dlnga (09-27-2014),
joycesjag (02-10-2012),
Michael Star (02-10-2012),
Norri (02-10-2012)

#3
02-10-2012, 12:09 AM
Veteran Member
#4
02-10-2012, 09:09 AM

Veteran Member
#5
02-10-2012, 09:40 AM


Join Date: Oct 2007
Location: PHX some of the time
Posts: 117,257
Received 6,307 Likes
on
5,495 Posts
#6
02-10-2012, 12:08 PM
Veteran Member
Looks great. I did mine last fall on my Midnite Metallic STR. I used a cardboard box and punched holes in the top so the side marker bulb holders acted like a stand. This allowed me to get all around the lens. I kept is somewhat light, 3 coats. Wet sanded with 1000 grit between coats and then 2 coats of clear on top. No problems seeing them lit at night and they still have a little tiny bit of amber tinge to them in the direct sunlight during the day.
Took me about 4 hours with drying time, total.
Cheap, easy DIY and great bang for the buck.
Took me about 4 hours with drying time, total.
Cheap, easy DIY and great bang for the buck.
#7
02-10-2012, 04:51 PM
Trending Topics


#10
06-07-2012, 08:57 PM
#12
06-08-2012, 06:03 PM

Thread
Thread Starter
Forum
Replies
Last Post
Andrew Fanshawe
New Member Area - Intro a MUST
7
09-14-2015 07:40 PM
1964Daimler
MKI / MKII S type 240 340 & Daimler
0
09-09-2015 11:28 AM
Currently Active Users Viewing This Thread: 1 (0 members and 1 guests)