When you click on links to various merchants on this site and make a purchase, this can result in this site earning a commission. Affiliate programs and affiliations include, but are not limited to, the eBay Partner Network.
well, my simply immaculate 2007 xk has had its first issue. only 14k miles on the clock and the glove compartment has sprung an apparent leak. clearly it is an issue related to the a/c condenser...but the condensate came out like a cup of water was dumped. fortunately I had the weatherech mats so the carpet was not harmed.
what am I looking at here folks? is this a dealer only repair or are there better options? have any of you had similar issues? is this fixable or a quirk I must live with as a condition of the car being so pretty? thank you all for any help.
I found this but frankly...it is not tremendously helpful and seems the jury is still out.
I do not want my dash removed as I can imagine the eventual rattles that would likely manifest themselves. I won't be comfy if that is the only real option.
I need this fixed. 208 looks at this thread and not a single word of guidance. this does not bode well
Dash removal not necessary. After a couple days of monkeying around, doing searches, buying a camera etc.... I fixed mine in about an hour (without the camera). Having photo issue's so I will explain best I can. Yours is an XK not an XKR so this will be even easier as you have more room. Back of the engine, top of the transmission tunnel is the drain almost centered back about 5 to 6 inches from the firewall. It is a round tube about an 1.25 to 1.5" in diameter that houses the rubber duckbill. You will feel the pipe but not the rubber duckbill tube unless you have long fingers as it is up inside. Standing on passenger side stick your right hand palm up between the transmission and tunnel. You will locate this housing tube with your middle finger. Now you know where it is. I had to remove intake runners to make enough room to get my hand down there, not sure how the XK is set up. Now get a piece of flat stock steel 1/2" wide x 10" long x 1/8" thick. Bend at 1.5" to 90 degrees. Get a xacto knife blade and rivet it to the flat stock. I had to use a finishing nail cut down as a rivet due to the hole size in the blade and it worked good. The total length with blade should be about 2". Slide the blade up into the pipe housing the duckbill and go JACK THE RIPPER ON IT. It took about 5 seconds for me to hear the water hitting the floor. I continued slashing for about a minute until I was certain I had sliced an diced enough. When I looked under the car the water had already made it's way to the drain. Success for less than 5 dollars outlay. Now my kitty pees outside not inside... good kitty. Look under your weather techs as mine did not catch all the water. Sorry for no photo's but it is an easy fix.
thank you all for the help. I appreciate all the research that has been done by the group and the been there done that experience. I am going to give this a go this weekend.
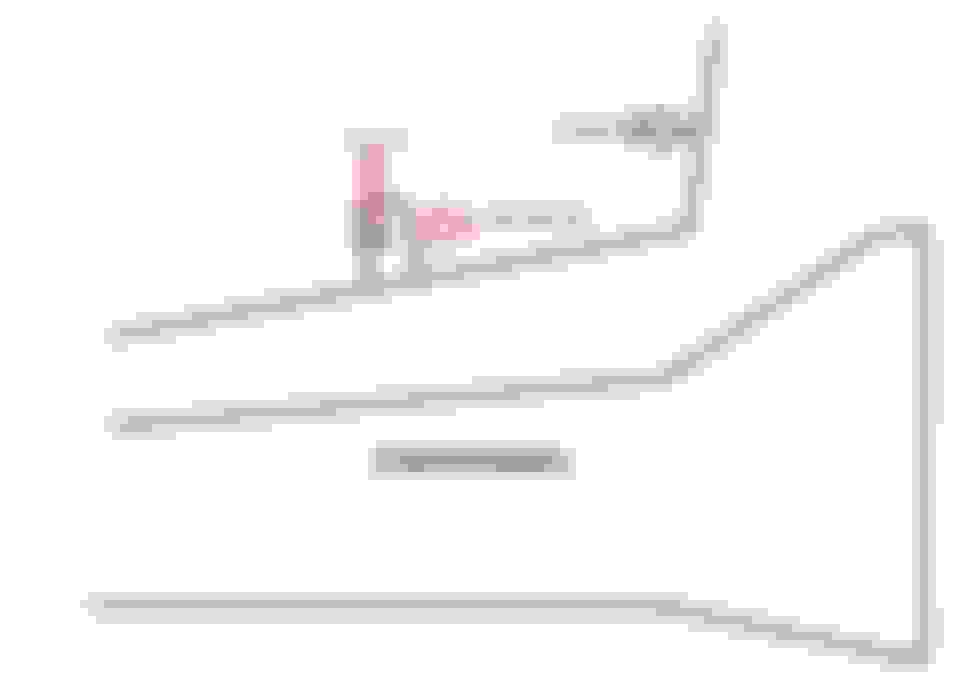
so just to be clear, the duckbill does not face down toward the floor but instead it is coming into the circular space vertically and from the side of the glove box or passenger side? also, is the cut best made at the yellowish colored line you drew in the diagram?
last, do you make the cut from underneath the car or do you try from the engine compartment? thank you!
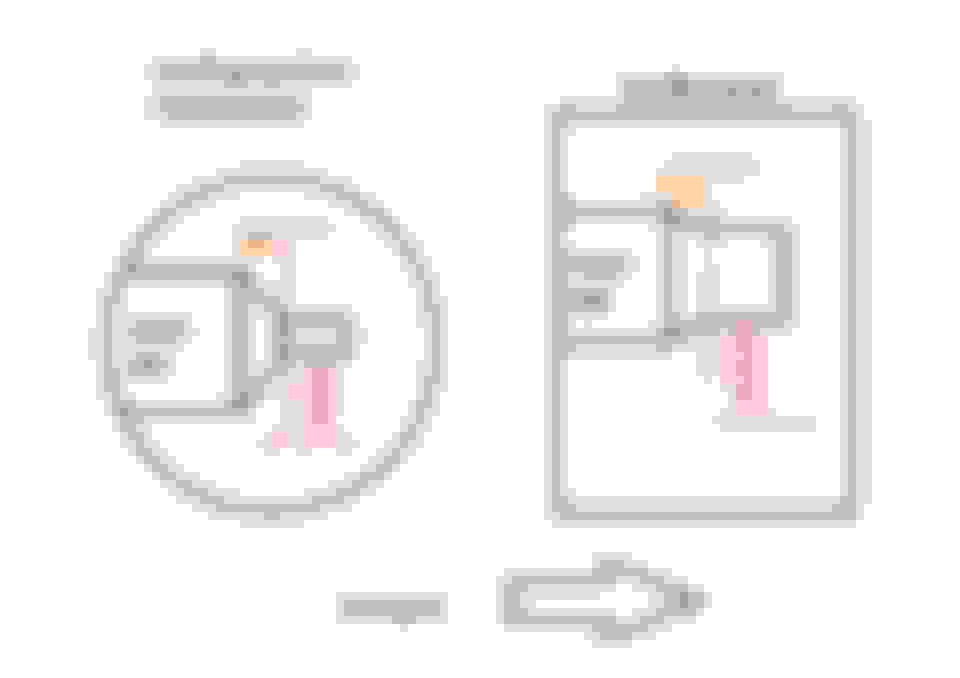
1. The duckbill comes in horizontally, as in that second figure (picture yourself lying on top the transmission, looking upward into the hole).
2. It is almost centered, in the middle of the car, coming from the passenger compartment, below the dash.
3. Cut anywhere to the left of that yellow line. The section to the right of the line (toward the front of the car) are the lips of the duckbill, and are what stick together, so you want to cut the lips off the duck.
4. You get at the duckbill from the engine compartment. I found it easier from the right hand side of the car, fewer obstacles.
yes...horizontally is what I meant. thank you for fixing that for me. now...what direction is the duckbill facing or pointing toward? is it pointing to the driver side of the car or pointing in the direction of the front bumper? and when you say the right side of the car, assume you mean the right side of the car if one was siting in the car?
sorry for the dumb need for clarifications and thanks for your patience for providing.
assume you mean the right side of the car if one was siting in the car?
Yes, that is correct.
From the left side, there is a 'wire' or small 'tube' that runs along the top of the transmission (a few inches to the left of center, when facing forward) that slightly obstructs the work space (which is already narrow), so I just found it easier to work from the right hand side of the car (passenger side of a LHD car).
See post #35 in the above thread for pictures of my tool.
very helpful. is there anything you would do to enhance the design? would you let me buy the tool from you? I would also pay for the next day air shipping. understand if you chose to keep it for future use!
is there anything you would do to enhance the design?
Since I didn't get the duckbill cut off, just slit its throat, I was going to do 2 things and try again:
1. Trim the metal shaft width, to be closer to the width of the blade, to make sure I'm not getting hooked on something, and it should also make it easier to maneuver into the hole.
2. I'll try making the shaft part that holds the blade a bit longer (flatten out the bend, and then rebend to make that part longer), by maybe .25 to .5 inches, so it should reach all the way across the duckbill, to cut it off. Hopefully I can still get it back into the hole.
Originally Posted by ferraripete
would you let me buy the tool from you? I would also pay for the next day air shipping. understand if you chose to keep it for future use!
Tell you what, if I can get the duckbill cut off completely, I'll no longer have a use for the tool, and you can have it.
The wife will be out of the house Friday night, so I'll have some time to try it then. I'll let you know how it goes.
Sorry for seeming a little dense about this but I want to get it right. I want to clarify the orientation of the duck bill. My understanding is that it enters from the right side of the vehicle (orientation from inside the car) and that the duck bill is facing to the left side.
If that's the case, I guess I don't understand the xacto widget because the blade will be facing the left or right side of the car, unless you twist the bar 90 degrees.
If the duck bill faces toward the front of the car, then the widget will cut across the bill as intended.

 08-22-2016, 12:34 AM


 good luck on the surgery!!!