When you click on links to various merchants on this site and make a purchase, this can result in this site earning a commission. Affiliate programs and affiliations include, but are not limited to, the eBay Partner Network.
Help with electrical connectors and a couple of other issues.....
I am replacing the knock sensor and the part that was supposed to be easy is not and the part that was supposed to be hard turned out to be easy.
While lifting the intake manifold, my helper did not realize there was one connector left to remove and the wires snapped as per attached picture. I think I might be able to salvage but it might be better to get one with piggy tail that I can splice.
What sensor is that connector attached to? is that the MAF sensor? The orange wire obviously goes to pin #4 but I need to know to which pins the the brown, yellow and black wires connect. Does anyone have a part number?
Removing the knock sensor turned out to be pretty easy by just prying the elbow just a little bit; however, removing the connector turned out o be a lot more difficult, particularly since I do not want to force it and end up needing a second connector. I have attached a couple of pictures of the connector. I would appreciate it if someone can point out how i take the connector off.
The upper gaskets had been replaced a few years ago and look brand new but the lower ones seem to in pretty poor shape. I will be replacing all of the m anyway.
Last, look like I might have a coolant leak in the vicinity of the knock sensor in the are marked in yellow. any ideas or suggestions how to fix the leak? is there a gasket under that elbow with the 2 bolts that I can replace?
Any hep you can provide will be much appreciated.
Replace all the seals and gaskets for the cooling system parts. Any plastic cooling system parts can only withstand a finite number of cold to hot to cold cycles before failing.
Thank you for the information. What does the broken connector connects to? is that the MAF sensor?
There sure seems to be a whole lot of connectors, any idea of the pinout for the broken connector?
Thanks,
Than you for the information. The connector goes indeed to the throttle position sensor and from the wiring schematics the color orde is just like Dell Galley indicated. The connector is an AMP 10711 and I can get it at Amazon...
...but delivery is August 10; I will see if one of the local auto parts stores or dealerships has it in stock locally.
Hopefully tomorrow, I will figure out how to disconnect the knock sensor connector and should be downhill the rest of the way.
Follow up....
I contacted my local Jaguar dealership about getting the connector and they indicate that Jaguar does not sell connectors and I would have to buy the entire loom which is probably more expensive than what the car is worth. the suggested going to junkyard and pulling the connector....REALLY???
With the part number from Toyota, I contacted the local Toyota dealer. They can get the part in a couple of days but the cost of the shell is $20+ but the cost of each wire with an attached connector is $33+ or over $130 for just the wires for the connector...seriously, what is wrong with car dealerships?
I was able to find the identical part at Ballenger Motorsports for $5.99 for the connector, pins and dust seals (4 plus and extra one) and $6.99 for the connector with pigtails. Connectors are on the way already via Priority Mail.
Here is a link in case anyone ever need this connector... Home � Shop � Connectors / Harnesses � Tyco / AMP � 4 Way SSC Sensor Plug Connector Kit Toyota # 90980-10711 (bmotorsports.com)
One additional question...while trying to connect the 2 pin connector under the flexible air duct (see photo), the outside of the connector was very brittle and basically disintegrated but the connector portion itself appear to be good. The issue is how to determine how the plug goes into the connector since the guides are gone, there are two wires, one red and one green. Can anyone tell me which connector is this (so I can try to find the part) and more importantly which wire goes at the too, the red or the green, so I can temporarily connect it until I get the new connector? I have look at several videos on repairs on adjacent parts and looks like maybe the red goes at he top and the green at the bottom? Any help will be much appreciated.
Connector location showing red and green wires
Looks like the plug could go either way and without the shell guides, I cannot tell which side is up and I don't want to force it the wrong way...
Thank you so much for the information, Dell. Since it was not the throttle position connector, which I have already addressed, I did not think about using that term in the search. The thread has the information I need; I can temporarily use the broken connector and tape it together until I get a new one. Unfortunately, the EBay link is pretty old an no longer works and when I search for the old description, nothing shows. I will contact Ballenger Motorsporst and hopefully they will have the connector.
I have not verified if the wpt-1269 is the correct plug. I will also check with the the supplier where I goth other connector and hopefully will be a lot cheaper that what I have seen for the wpt-1269 connector at Ford dealerships.
UPDATE...
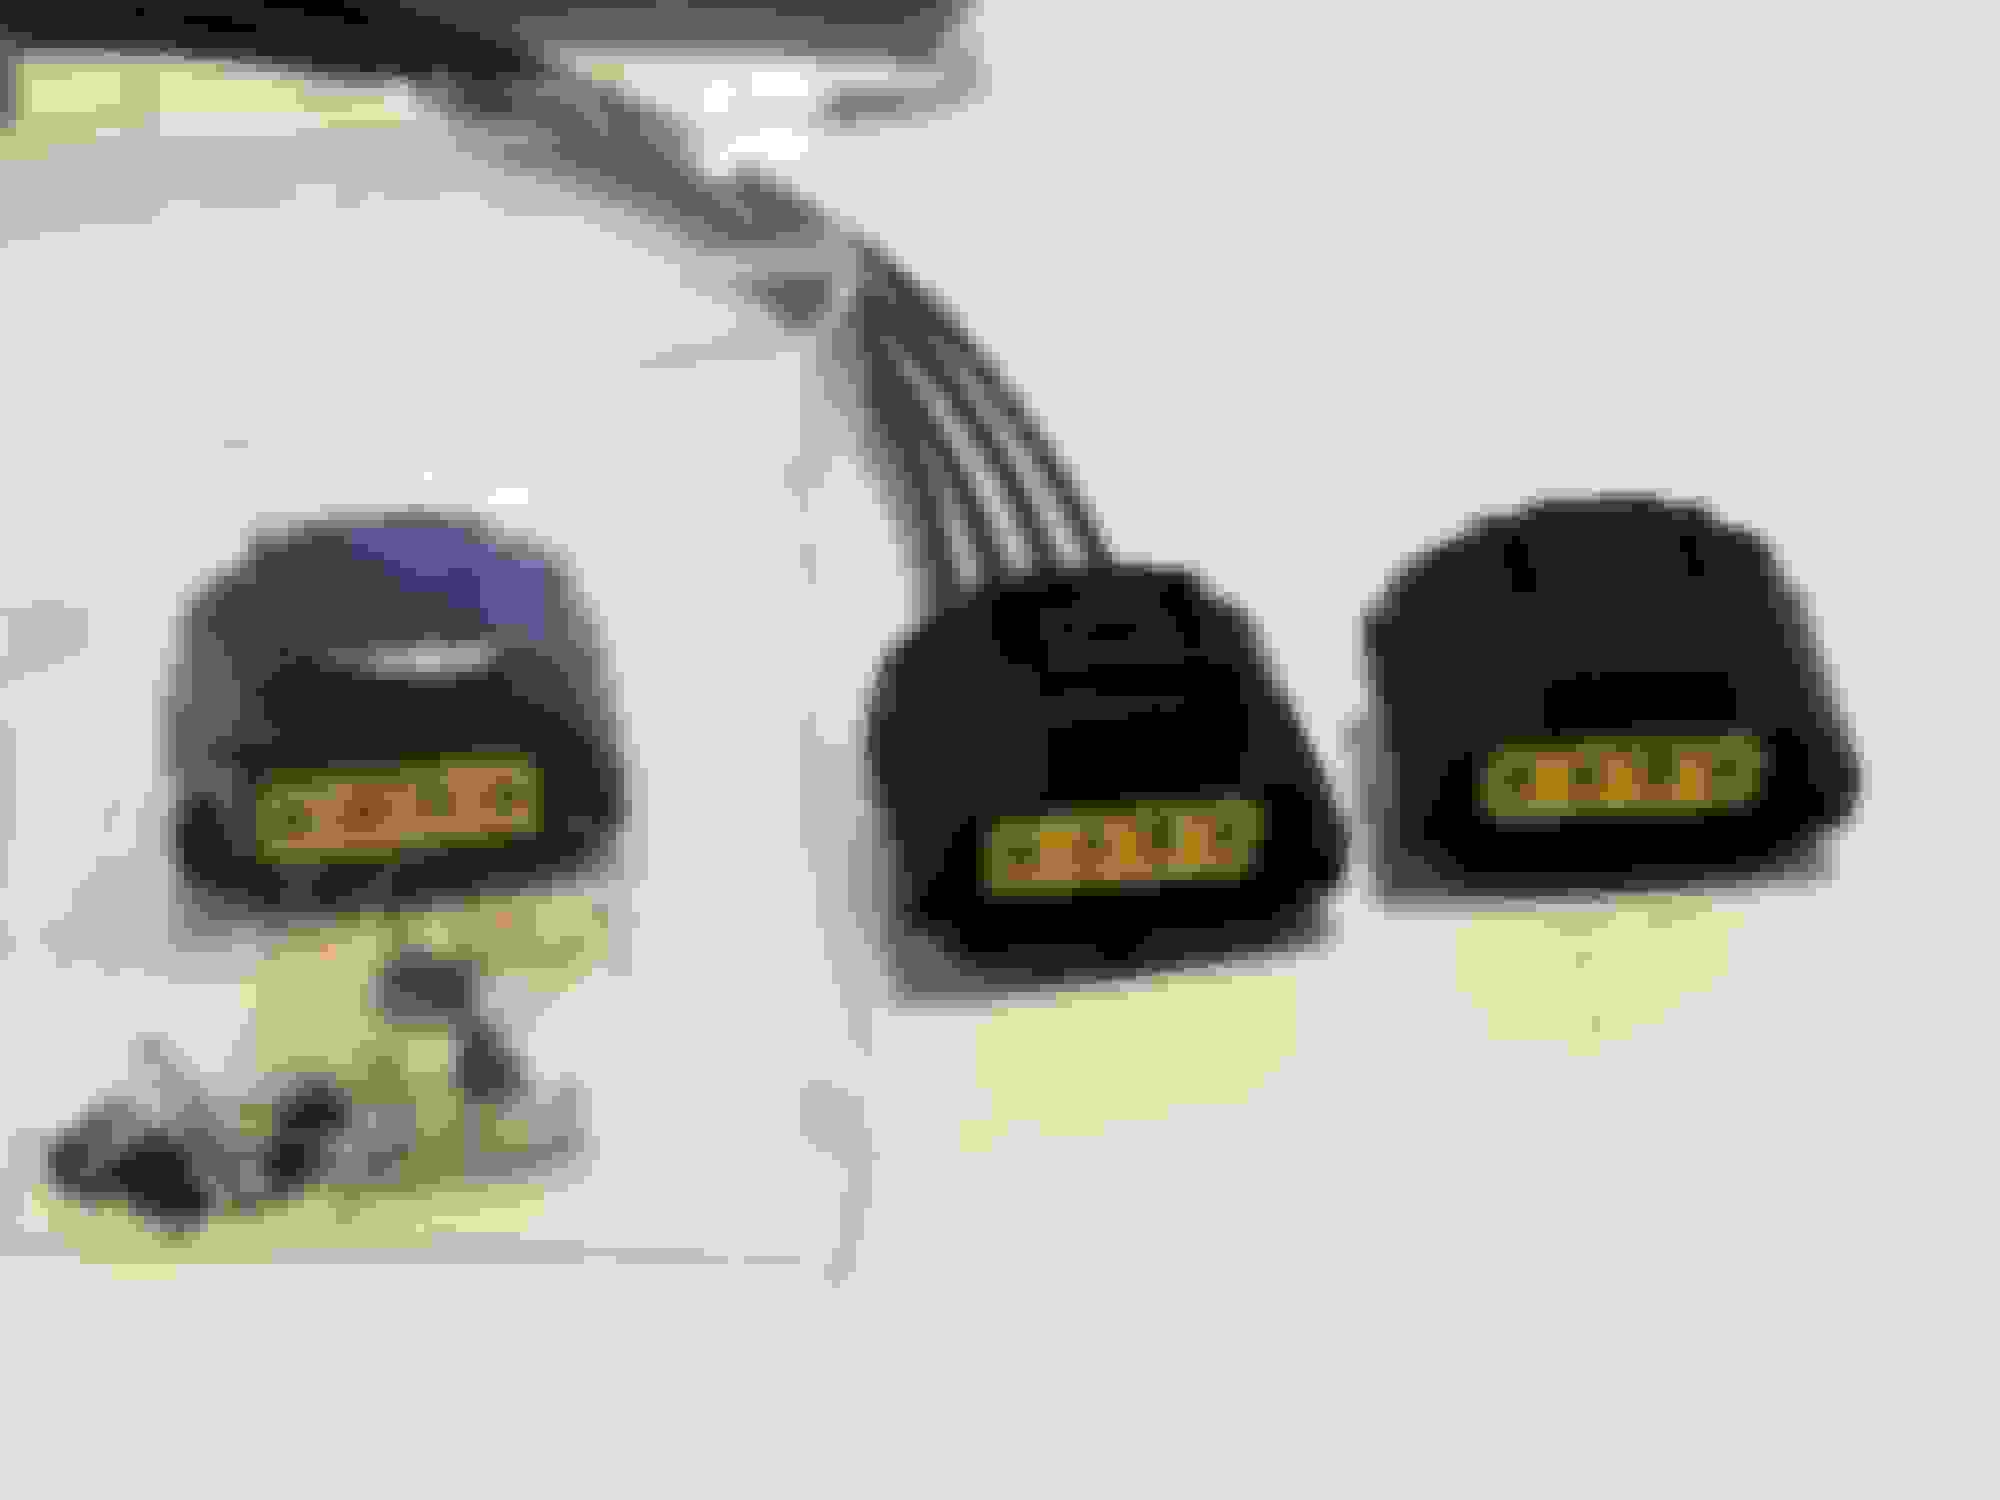
Here are the connectors I received from Ballenger. I order the connectors late Thursday and they were here Monday; the picture shows the new connector kit, the connector with pigtails and the original connector. The connectors were $13 and Priority Mail was under $10. Considerably cheaper that the local dealers wanted for it. Ballenger is a great source for connectors.
The link for the various options is: Ballenger Motorsports - High Performance Electronics (bmotorsports.com)


 08-04-2021, 06:00 PM