
my x-type projects and installs


#82
 05-31-2009, 10:22 PM


Dennis nice mods. Trying the same type of dvd setup(jensen vm9022 HU). Got nexxia harness adapter hooked up but no sound!! What wires didn't you use? Everything else works.
'02 X-type 3.0
'02 X-type 3.0
#83
06-01-2009, 09:55 PM

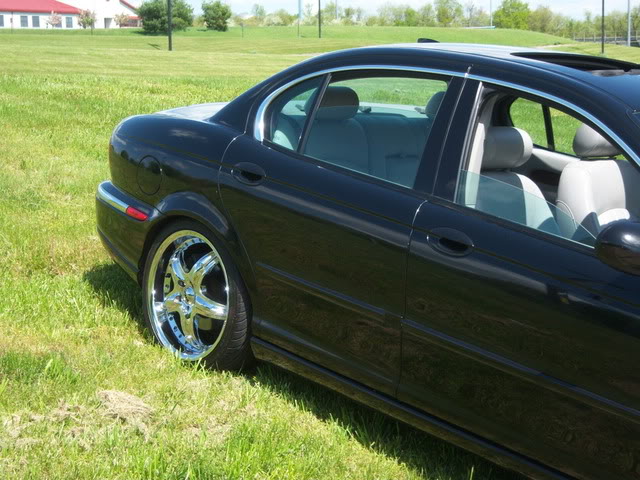
if the deck powers up it not the hot wire....did you connect the grey and white wires for the speakers? or did you use rca's

is this the adapter
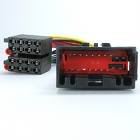
is your wiring like this

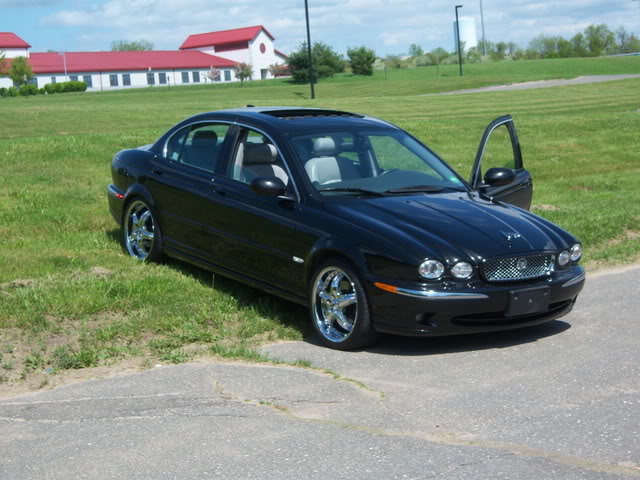
is this the adapter
is your wiring like this
Last edited by dennis black; 06-01-2009 at 10:10 PM.
#88
06-11-2009, 12:54 PM
Guest
Posts: n/a
Another easy way to clean oxidized and yellowed head lights is the Turtle Wax light kit, picked it up for $9 at advanced auto. It comes with 3-4 wet sanding pads and lube as well as a polishing compound. It worked very well, and took about 5 min per headlight.
#90
06-14-2009, 09:12 PM
if when you put your wipers in auto so it has a delay ...it just goes in one mode or stop half way on your windshield! heres the fix..so i can save you guys some money and diy
1..first you will need a a gear puller ...13mm socket

2..on your windshield wipers you will see a plastic cover flip it up with your finger ..so it can expose the 13mm nut you are going to take of

3..then after taking nut off, put your pulley on it and remove both wipers

4..now we have to remove the cowl ,there are about 6 plug fasteners use a screw driver and pop then out..now remove cowl

5..now you have removed that, while were at it change your pollen filter

6..now remove the 3 13mm nuts and pop the whole assembly out
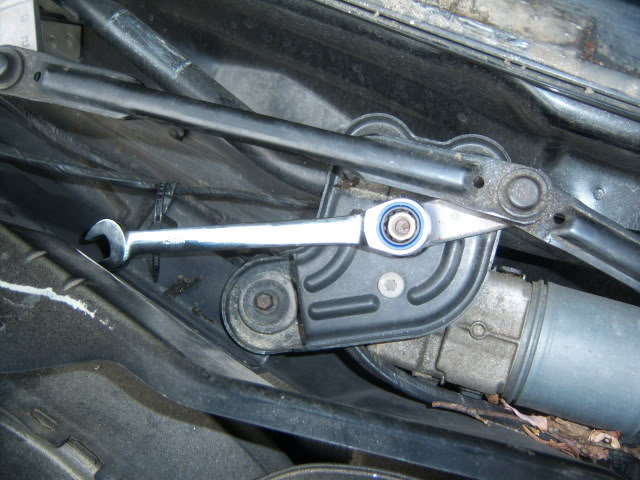
7..now these are all the items you should have removed
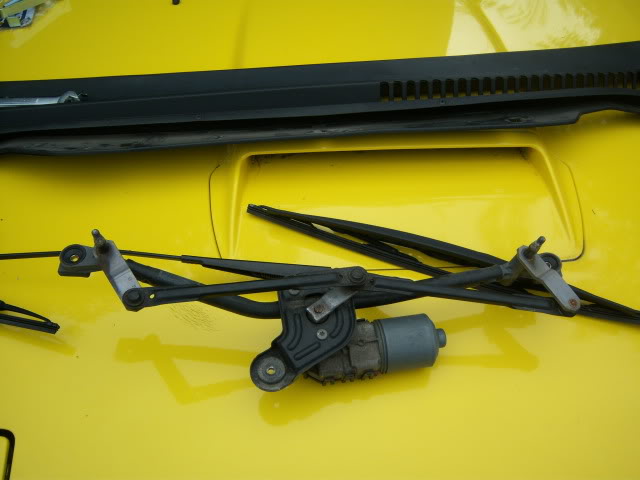
8..now transfer the knew motor to the wiper assembly
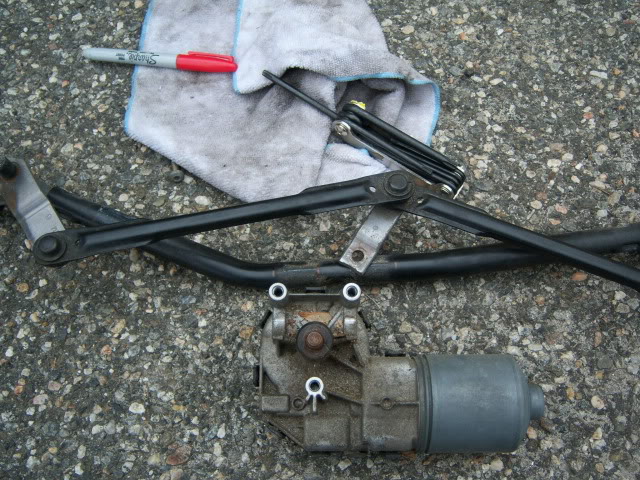
9..button it all up your done


1..first you will need a a gear puller ...13mm socket
2..on your windshield wipers you will see a plastic cover flip it up with your finger ..so it can expose the 13mm nut you are going to take of
3..then after taking nut off, put your pulley on it and remove both wipers
4..now we have to remove the cowl ,there are about 6 plug fasteners use a screw driver and pop then out..now remove cowl
5..now you have removed that, while were at it change your pollen filter
6..now remove the 3 13mm nuts and pop the whole assembly out
7..now these are all the items you should have removed
8..now transfer the knew motor to the wiper assembly
9..button it all up your done
Last edited by dennis black; 06-14-2009 at 10:14 PM.
#91
06-15-2009, 09:21 AM

Senior Member
LOL, Denis, you're the man! I have a friend just like you when it comes to car stereo diy work. Clean work that looks factory. Good stuff.
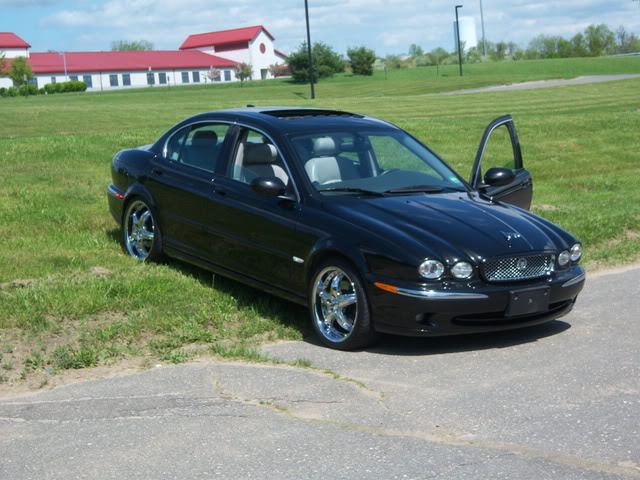
I like the new grill so much that I ordered one from adamesh. It came today too! Already painted. Cant wait to install it later.
I like the RX7 pic too. I used to drive a MKIII Supra Turbo. Here are pics of my Supra and my current X.
I like the new grill so much that I ordered one from adamesh. It came today too! Already painted. Cant wait to install it later.
I like the RX7 pic too. I used to drive a MKIII Supra Turbo. Here are pics of my Supra and my current X.
#92
06-15-2009, 08:15 PM
im here to help ...youll love your knew grille your supra looks really nice i would of kept that

my rx7 turbo
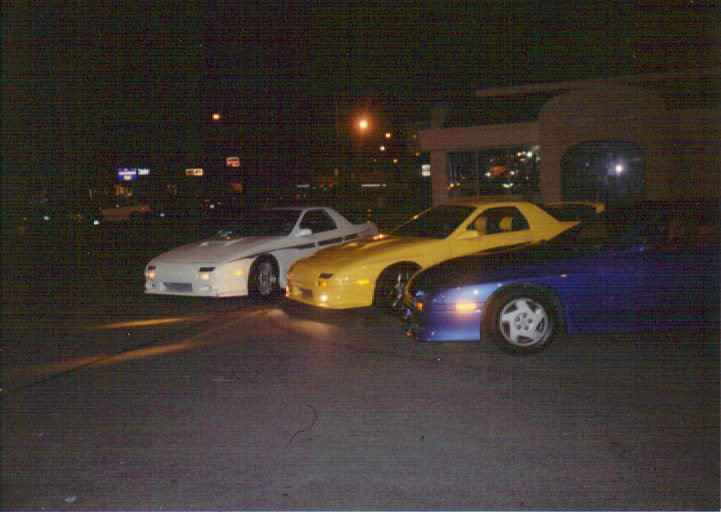
my rx7 turbo
#94
06-16-2009, 10:24 PM
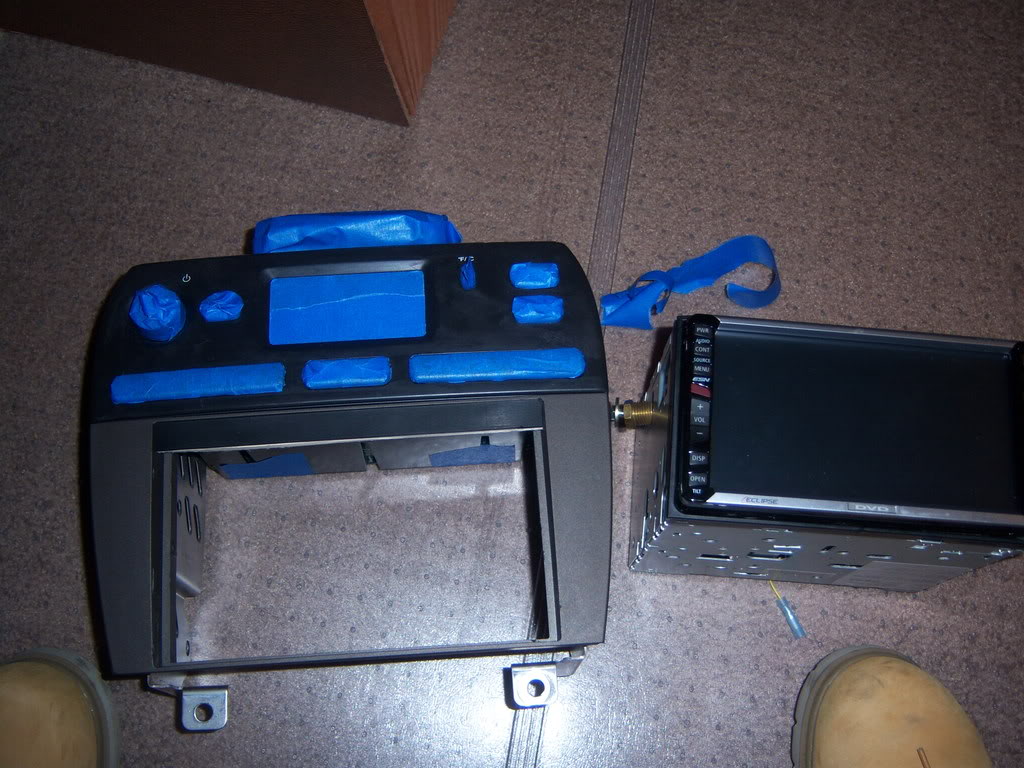
no problem ,go to ebay type in eclipse double din ...you want the avn series theres quite a few up there they all fit ...thats were i got mine from ....if you have any problems ill take mine out and give more details on the install ...you cant go wrong with the avn series,,i have a garmin nuvi navi and my avn5500 navi is better than my portable...when you set your destination on the avn5500 you just get up and go ..on the garmin nuvi you have to wait for the satalite that can take 5mins...i recommend the avn series they cant be beet for navigation dvd quality
#97
06-24-2009, 03:38 PM
Senior Member
yeah, you give them the paint code from inside the door. I didnt do a price comparison with mina because I liked the convenience of having it already painted.
#98
06-24-2009, 06:51 PM
SHAGUARNYC YOUR GRILLE LOOKS GOOD
WRITE UP
1-difficulty = easy
2-parts = 5/16 allen wrench
3-fluids = 2quarts redline mt90 transmission oil
4-pump = you can get one from advance auto for $5

6- first jack up the left side of your x

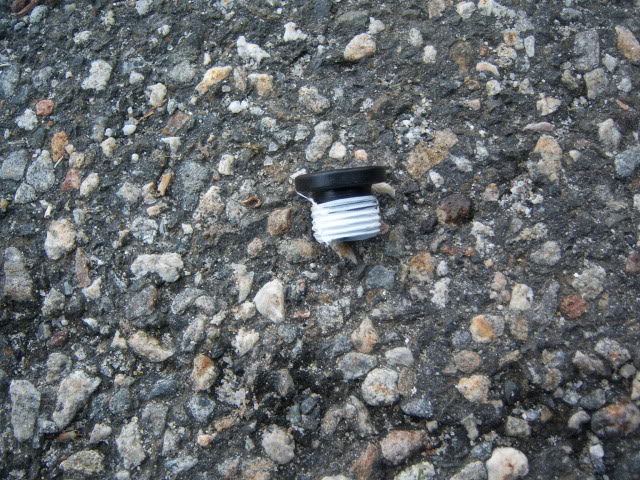
7-look to the rear of your transmision and locate the 5/16 plug
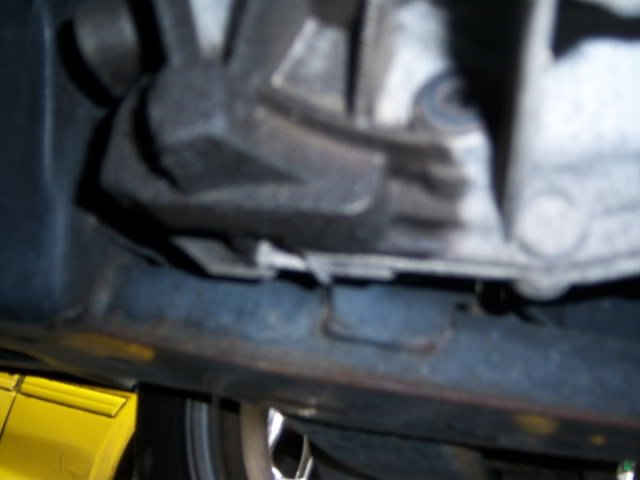
8-let the fluid drain 1.5 quarts came out of mine..then lock it up

9-now move to the front of the car and loosen the 5/16 plug in the front

10-insert the pump with the redline transmission oli in it and pump

11-put tape on the threads on the plug and button here up your done


MY NEXT PROJECT WILL BE THE TRANSFER CASE
WRITE UP
1-difficulty = easy
2-parts = 5/16 allen wrench
3-fluids = 2quarts redline mt90 transmission oil
4-pump = you can get one from advance auto for $5
6- first jack up the left side of your x
7-look to the rear of your transmision and locate the 5/16 plug
8-let the fluid drain 1.5 quarts came out of mine..then lock it up
9-now move to the front of the car and loosen the 5/16 plug in the front
10-insert the pump with the redline transmission oli in it and pump
11-put tape on the threads on the plug and button here up your done
MY NEXT PROJECT WILL BE THE TRANSFER CASE
#99
06-25-2009, 03:10 PM
Senior Member
This is a pic of my extensive upgrade project, LOL. I'm not mechanically inclined like Dennis, but thankfully the grill job is only remove and replace!