Blacked out grille - Plastidip DIY How To with Pics
#41
 02-28-2014, 09:24 AM


If you are going the route of spray paint keep in mind you are going to want to be MUCH more careful with taping and masking off the rest of your car. I would add 1.5-2x the prep to make sure you aren't getting paint where you don't want it.
The benefit to plastidip is that you purposely overspray your edges so that it can be peeled back to a perfect threshold...and if it gets somewhere you don't want it you can peel or clay bar it off. You don't always have that luxury with paint. Paint will also generally see more damage from rock chips especially on a grille whereas a thick coat of plastidip will protect it. Just something to keep in mind when you are choosing which route to go.
The benefit to plastidip is that you purposely overspray your edges so that it can be peeled back to a perfect threshold...and if it gets somewhere you don't want it you can peel or clay bar it off. You don't always have that luxury with paint. Paint will also generally see more damage from rock chips especially on a grille whereas a thick coat of plastidip will protect it. Just something to keep in mind when you are choosing which route to go.
#42
02-28-2014, 03:26 PM
First thanks WRX for sharing your experience with plastidip.
I think it's useful to people considering the blackout grill and from the follow up I assume there are a lot.
Plastidip, when proper applied, is not likely to chip off easily.
In my opinion Blackening out the car makes the it look more tough and mean, as opposed to the elegance of a chrome grille chrome trim.
And here is why I love plastidip for this job, the textured finish of plastidip makes the whole look more tough and durable.
I don't think plastidip makes the car look cheap. Nor does gold plate make a car look expensive. It's more about how good your mod is matched to the rest of your car.
I'm not convinced of the expression that an expensive car needs an expensive job. however I can imagine that some shops will do this same job for 500 bucks.
Finally I wouldn't be too concerned about overspray clogging up your radiator. Flies, dust and dirt is likely to do more harm to the cooling capacity than the minimal overspray. In warm weather or a cabinet the overspray dries before it reaches the radiator.
However if you are concerned about warranty issues it's very doable to cover the radiator. Not a five minute job but doable.
The following 2 users liked this post by member:
Thor82 (11-07-2014),
WRXtranceformed (02-28-2014)
#43
02-28-2014, 04:17 PM
Not a problem! I am sorry nobody has been able to answer your question yet. You might want to try calling your local Jag dealer's service center and see if they can tell you how to access the radiator.
#44
02-28-2014, 04:25 PM

#45
03-01-2014, 03:48 PM

#46
05-12-2014, 05:24 PM
Update 4 months later for the haters: Not a single bit of cooling issues from the tiny bit of overspray on the radiator, in fact it looks like most of it just burned / melted off. It's been 90+ the past few days and the car runs like a raped ape 
Also not a single rock chip and a lot of positive comments still
Also not a single rock chip and a lot of positive comments still
#48
05-13-2014, 08:55 AM
It was actually on the car from the previous owner...except he had placed it on the ACC module for some reason. I relocated it with some 3M double sided automotive tape to the grille. I believe I have seen some for sale on ebay and a few British sites. Good luck tracking one down!
#49
05-18-2014, 06:44 PM
Junior Member
#50
05-19-2014, 05:37 PM

Veteran Member
I got one on ebay a while back. Haven't gotten around to putting it on yet but it was about $10-12 for the badge itself. The reason I've been slow to put it on is I want to put an anchor into/behind the grill and then two sided tape it to the plastic that's anchored as was described on another post.
#51
11-05-2014, 10:44 PM
#52
11-06-2014, 06:52 AM
Thanks for the bump, dip is still holding strong unlike most of the painted grilles I've heard about!
#53
11-06-2014, 06:55 AM
Junior Member
#54
11-06-2014, 12:52 PM
I have done my grill as well. It has held up great so far, but the Wisconsin winter will be the true test. I also did my emblems and window trim as I am not really a chrome fan. With my last car, which was a STS-V I painted the grill, but it didn't hold up very well at all. PlastiDip works so much better against rock chips and protects the surface.
My last project was to do my wheels. I wanted to try something different so I just did the recesses of my stock Volans to give it a little meaner look. I may go full black at some point, but I kind of like this for now.
My last project was to do my wheels. I wanted to try something different so I just did the recesses of my stock Volans to give it a little meaner look. I may go full black at some point, but I kind of like this for now.
#55
11-06-2014, 06:06 PM
Junior Member
What you will need:
Bumper removal:
•Torx Key set (I do not recall what sizes – my apologies)
•A friend
•Patience
Grille Painting:
•Bucket
•Car wash soap
•Brush
•Flat head screwdriver
•Double sided tape
•Automotive plastic spray paint
•Cutting tool
R Badge install:
•Torx Key set (I do not recall what sizes – my apologies) – These parts cost me $119. The screw provided (one of the parts listed below) did NOT fit. Don’t bother buying it. My apologies – I do not recall which part number it was. I used a screw I had.
•Jag OEM C2P22603
•Jag OEM C2Z 1327
•Jag OEM C2Z18830
•Jag OEM C2Z18831
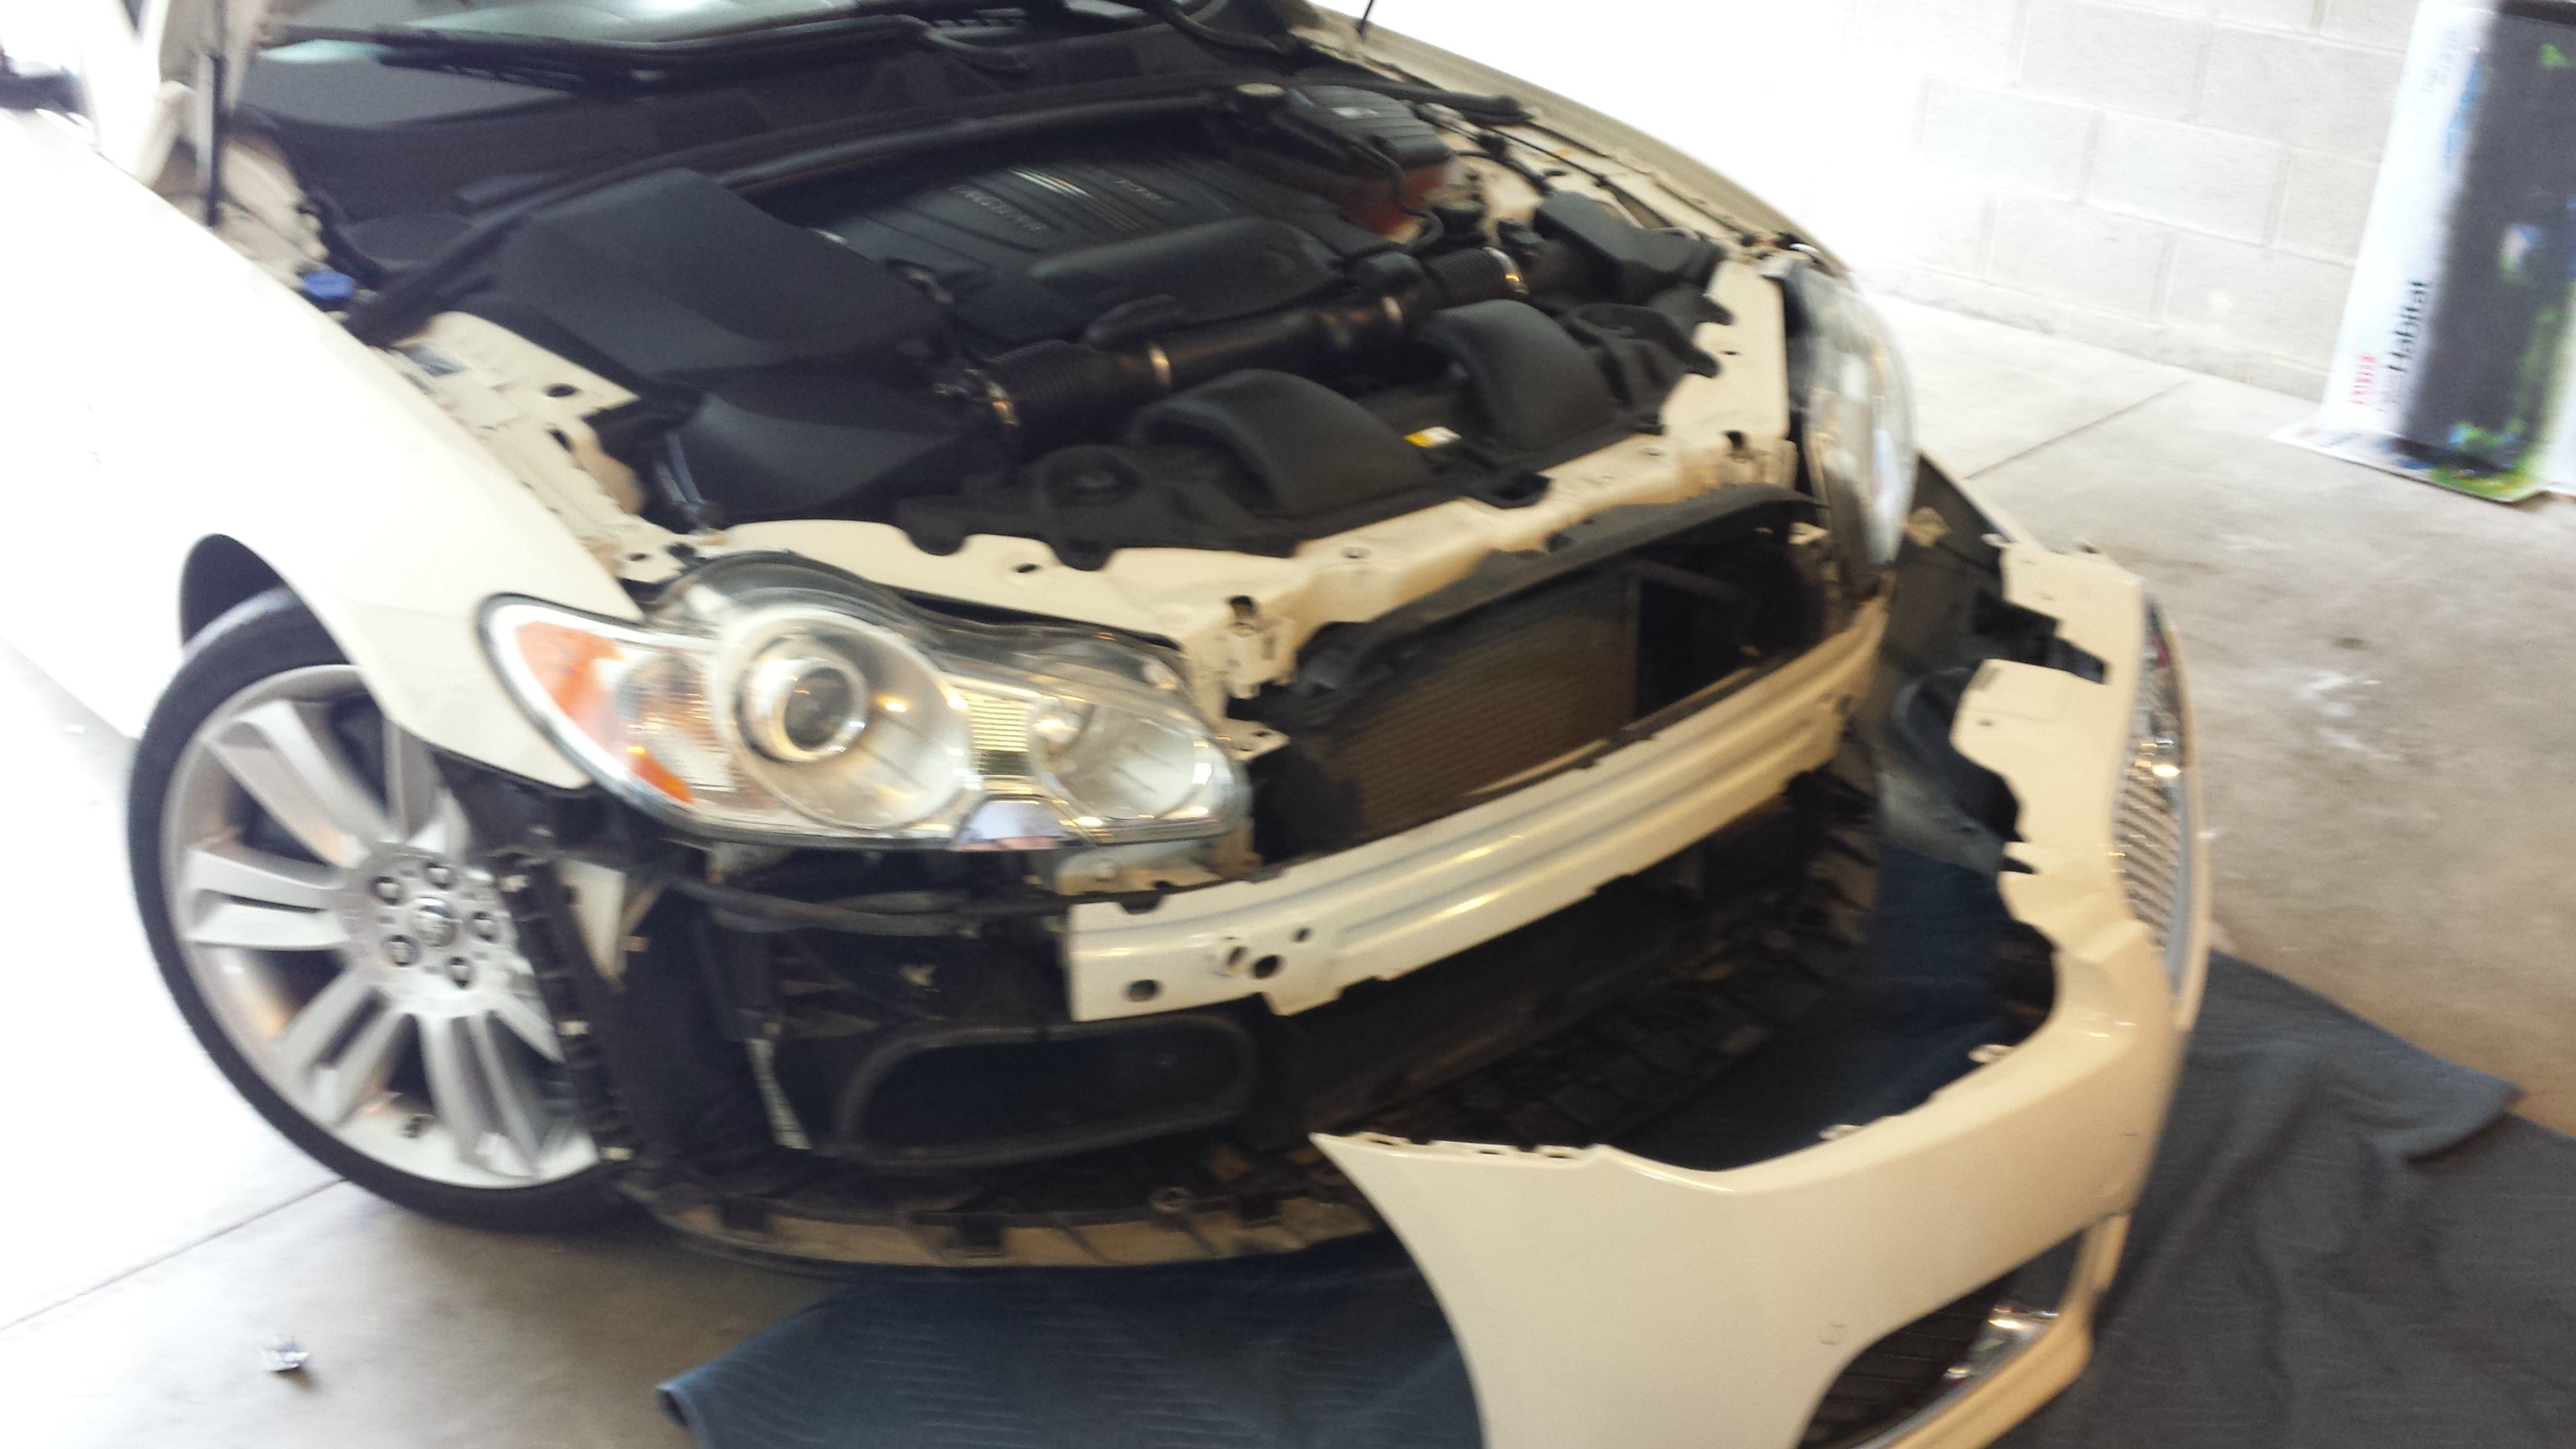
1. Remove a dozen or so screws from the bottom lip. These will be visible as well as recessed. You will also need to turn the wheels completely to the left – or – right to
access three more screws in each wheel well. There will also be 2 screws and one plastic Philips clip above the grille, under the hood.
2. Now you are *almost* ready to remove your bumper. There are three bolts connecting a brace on the driver’s side. Removing this brace will make it much easier to disconnect the proximity sensor connection.
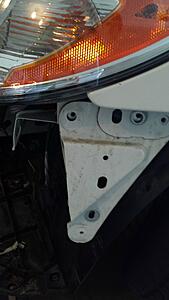
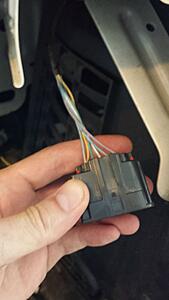
You will notice that the connector which belongs to the sensors is closer to the wheel & the connector which goes to the car is closer to the bumper. While the two are
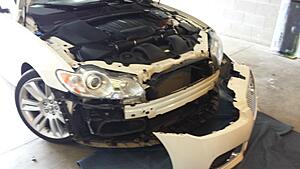
connected, you can slide this connector off of its mount by sliding it towards the wheel or pulling down. I pulled mine down and it reconnected just fine. You will also have to disconnect the wire from a plastic brace for additional slack. This will give you some additional slack. I’d recommend having a friend around to hold the bumper as you pull it off. Knowing the proximity sensor is on the driver’s side (USA) I removed the bumper starting with the passenger side first. A light tug is all it took to free the bumper from the car. Do not rotate the bumper as much as shown until both sides are free as pictured.
There will be very little slack for the proximity sensor harness. Once I freed these connectors from the harness connected to the car, there was much more slack. Here is what holds the connectors to the car:
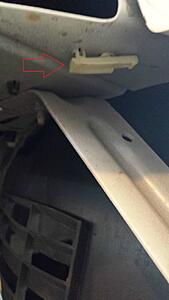
And the connector:
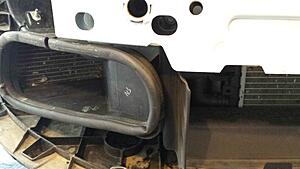
3. If you wish to remove the 3 bottom grilles, there will be six screws for each of the side grilles & some clips for the center grille. I removed these so I could paint them
the same gloss black as the upper grille.
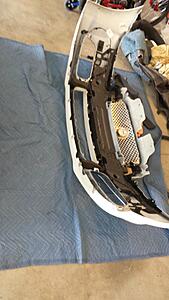

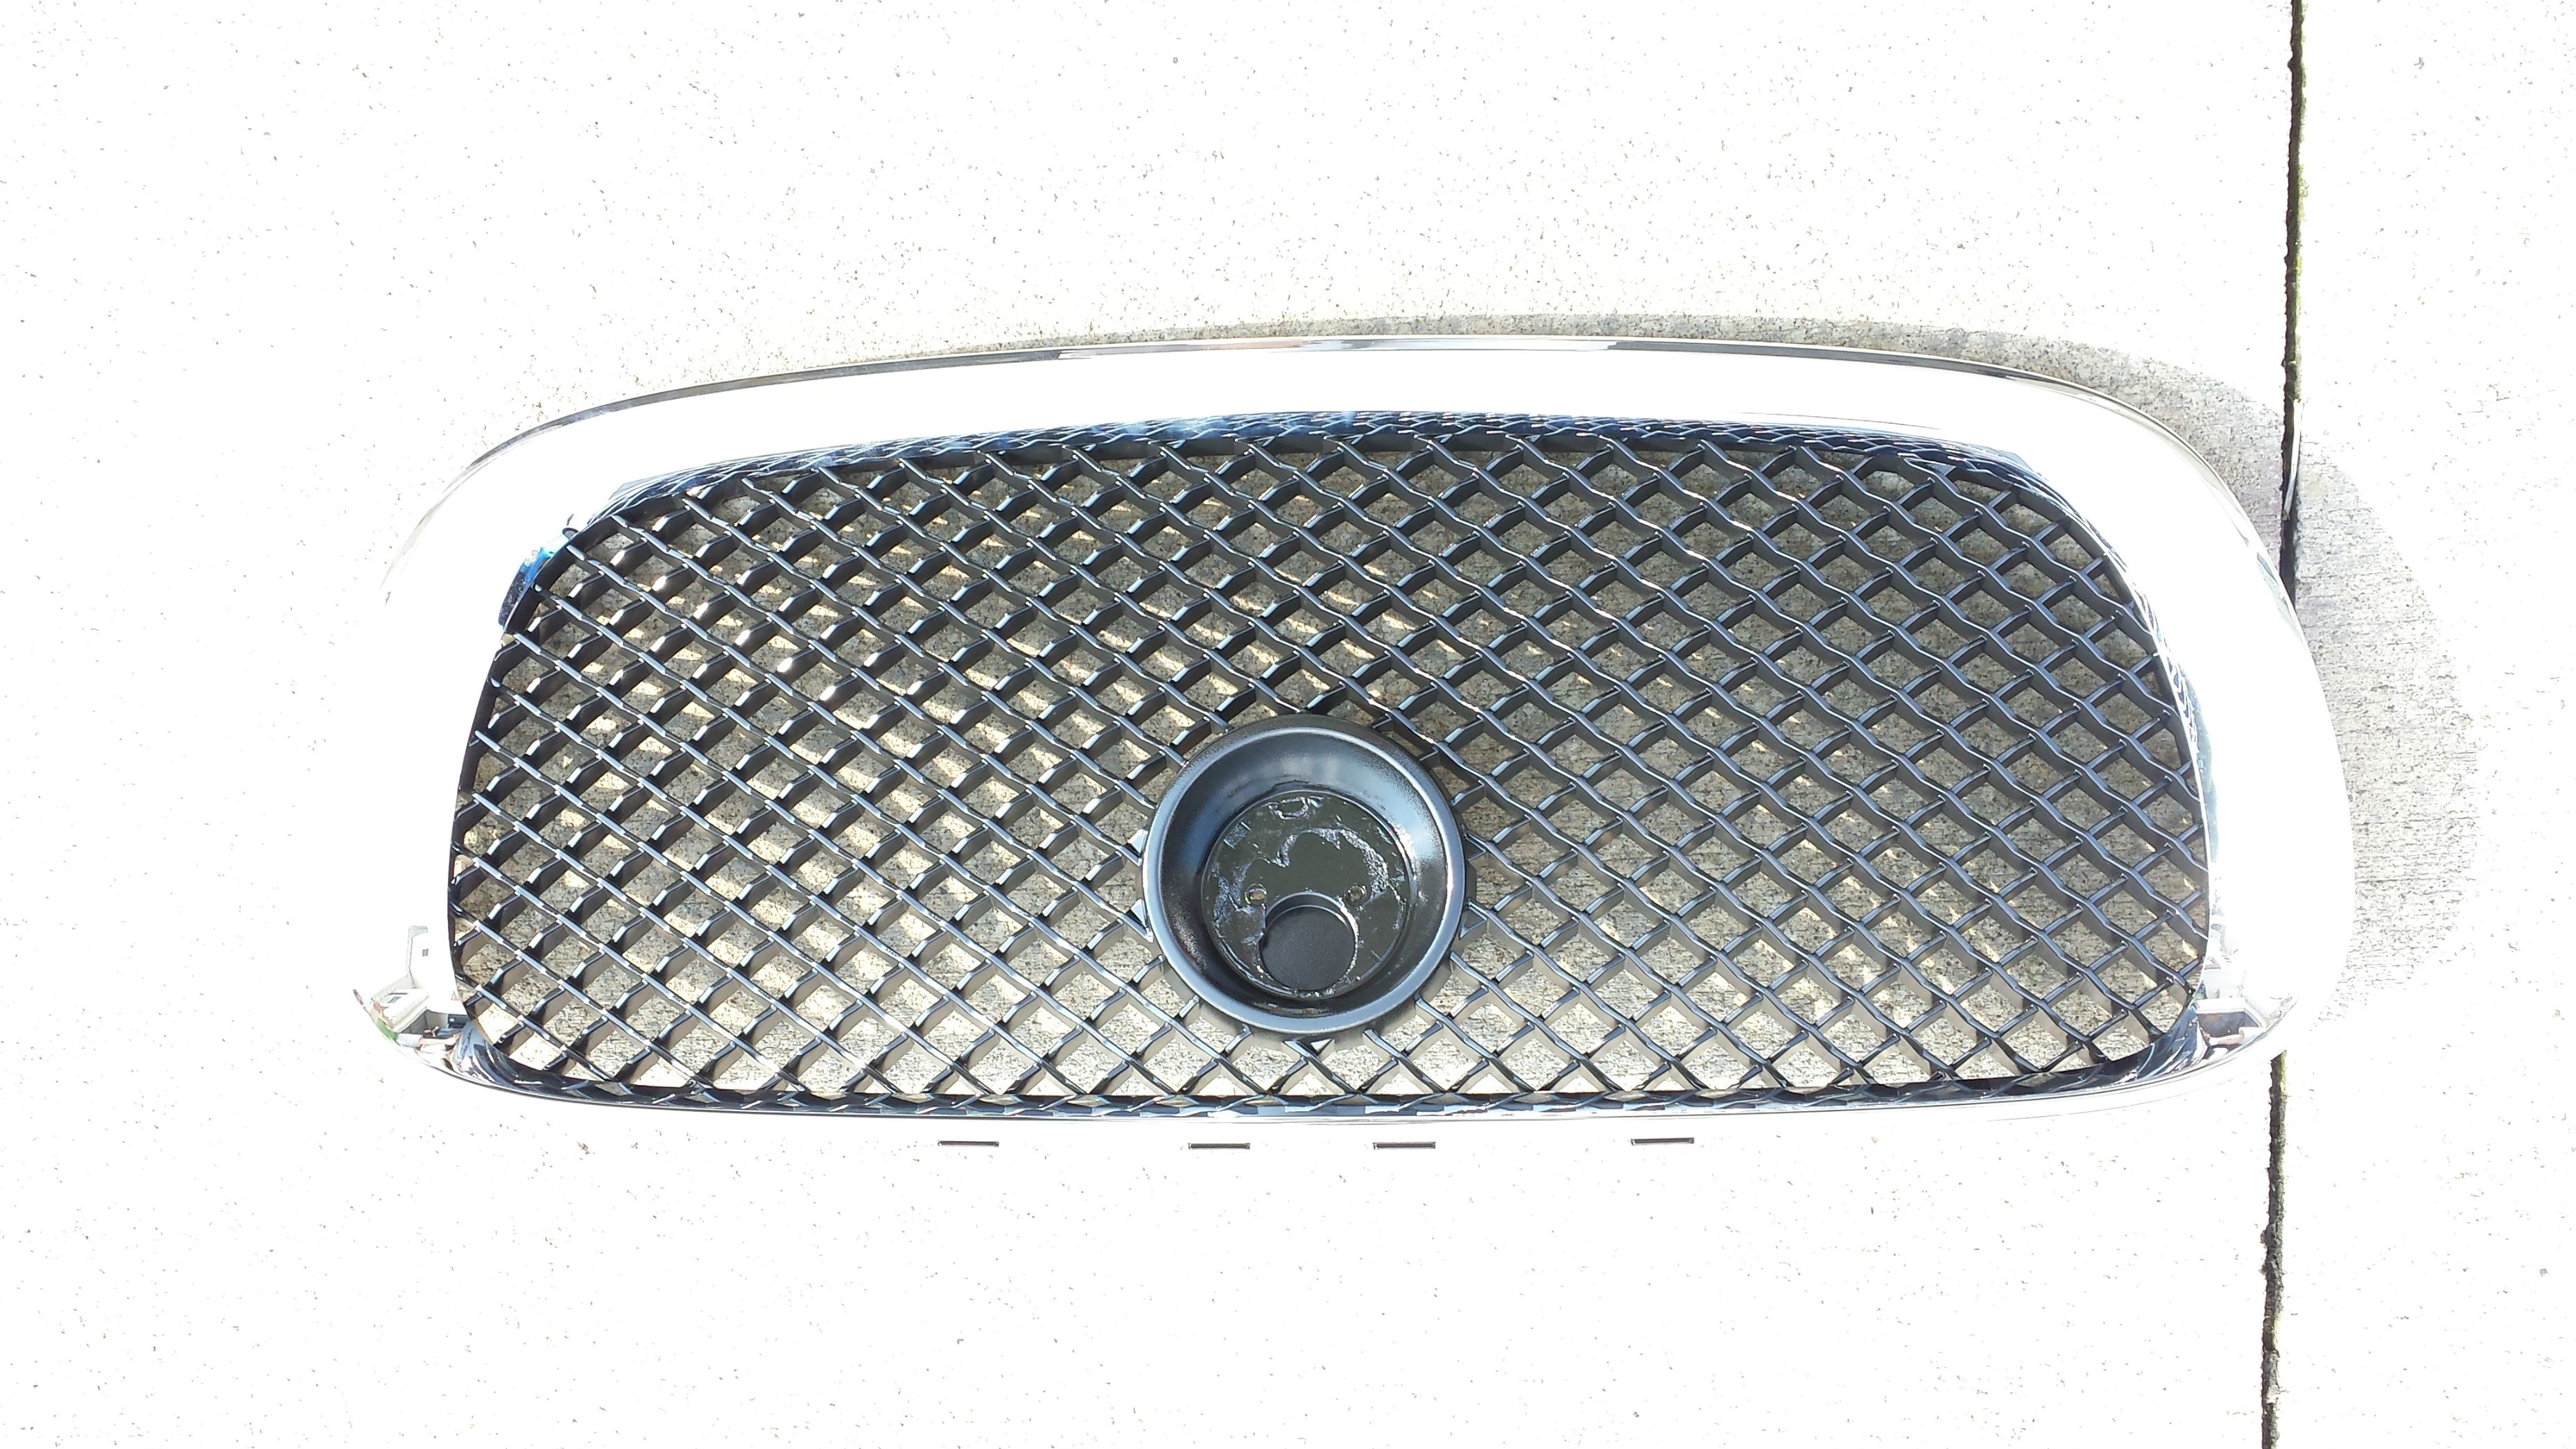
4. The upper grille will require the removal of the foam piece in the bumper as well as two screws and some clips. I then separated the chrome ring from the upper grille. To do this, I had to cut small plastic pieces from under the clips that were blocking the two from separating. The chrome ring is still very snug & the assembly is held together by the 2 screws removed earlier. All of the clips have remained clipped without the small amount of plastic I removed to separate the two.
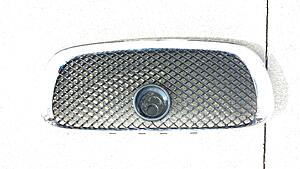
I removed the Growler with a small flat head. I used a cloth to guard the outer ring in the upper grille so I could use it for leverage with the flat head screwdriver. No
damage resulted.
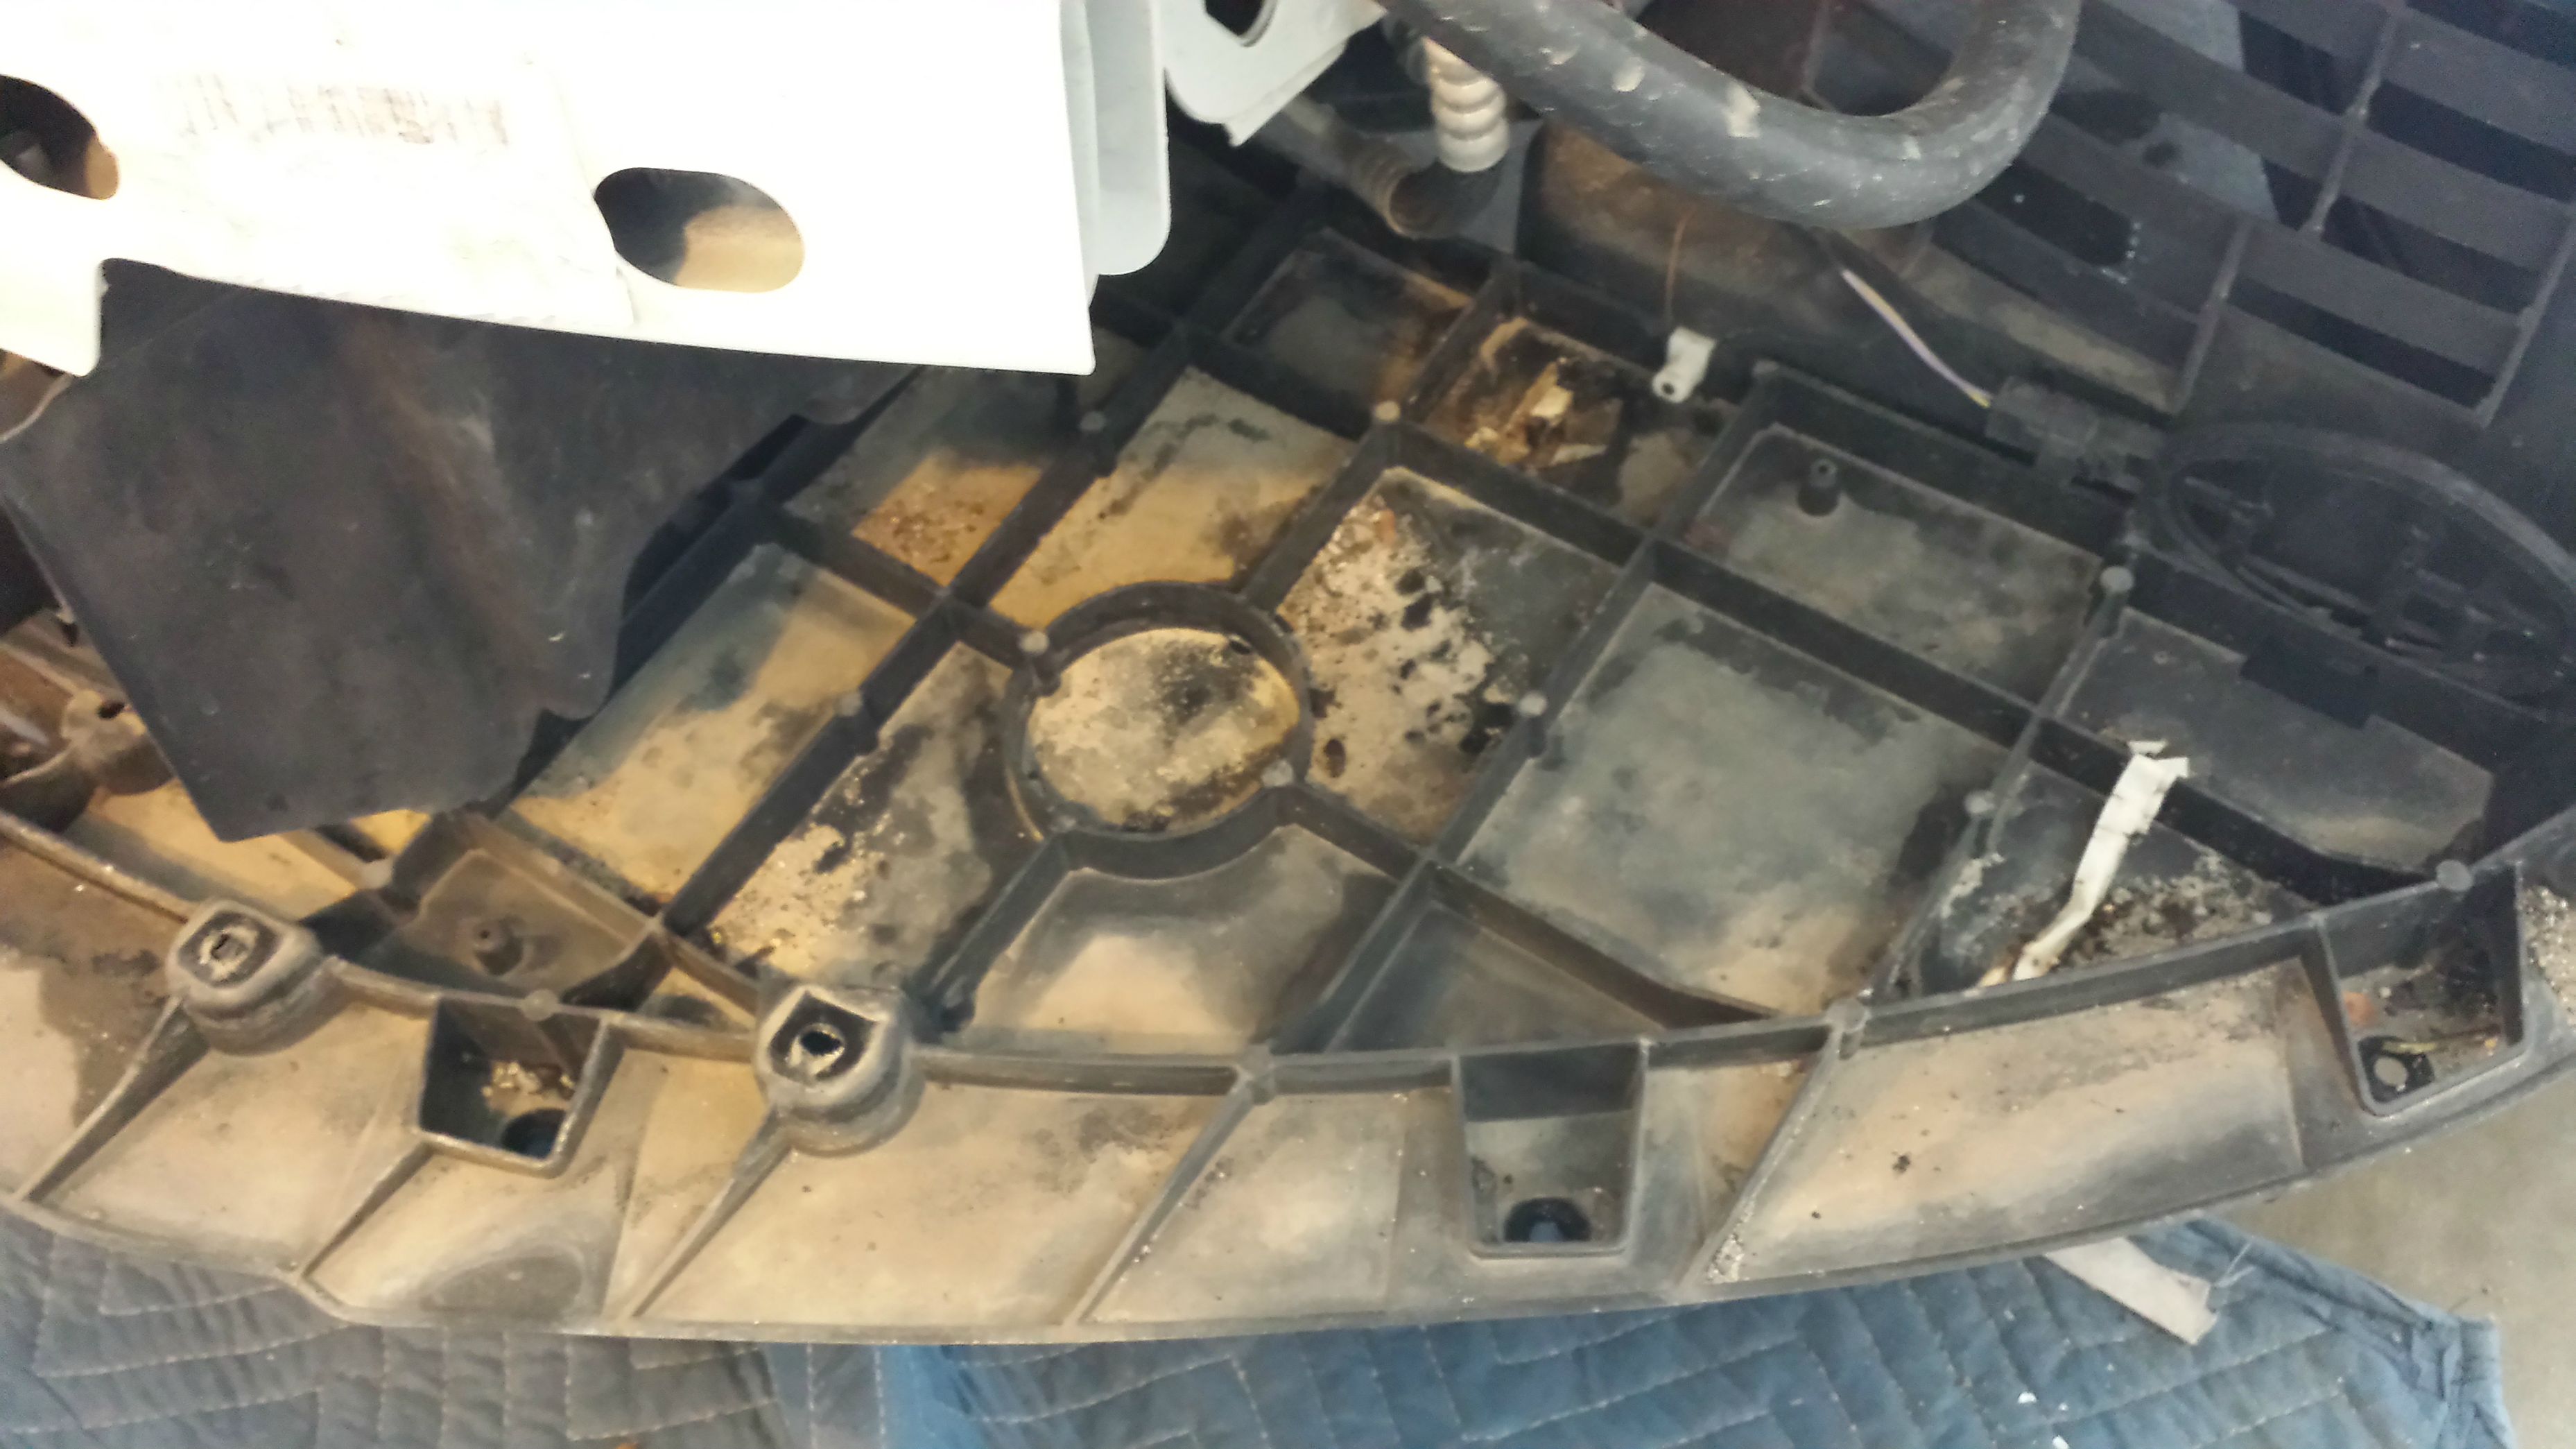
5. This is a great opportunity to clean up what your scrape guard has collected as what has accumulated in the passenger side (USA) lower grille.

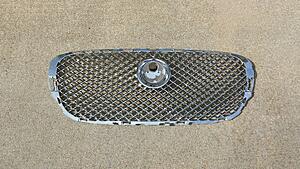
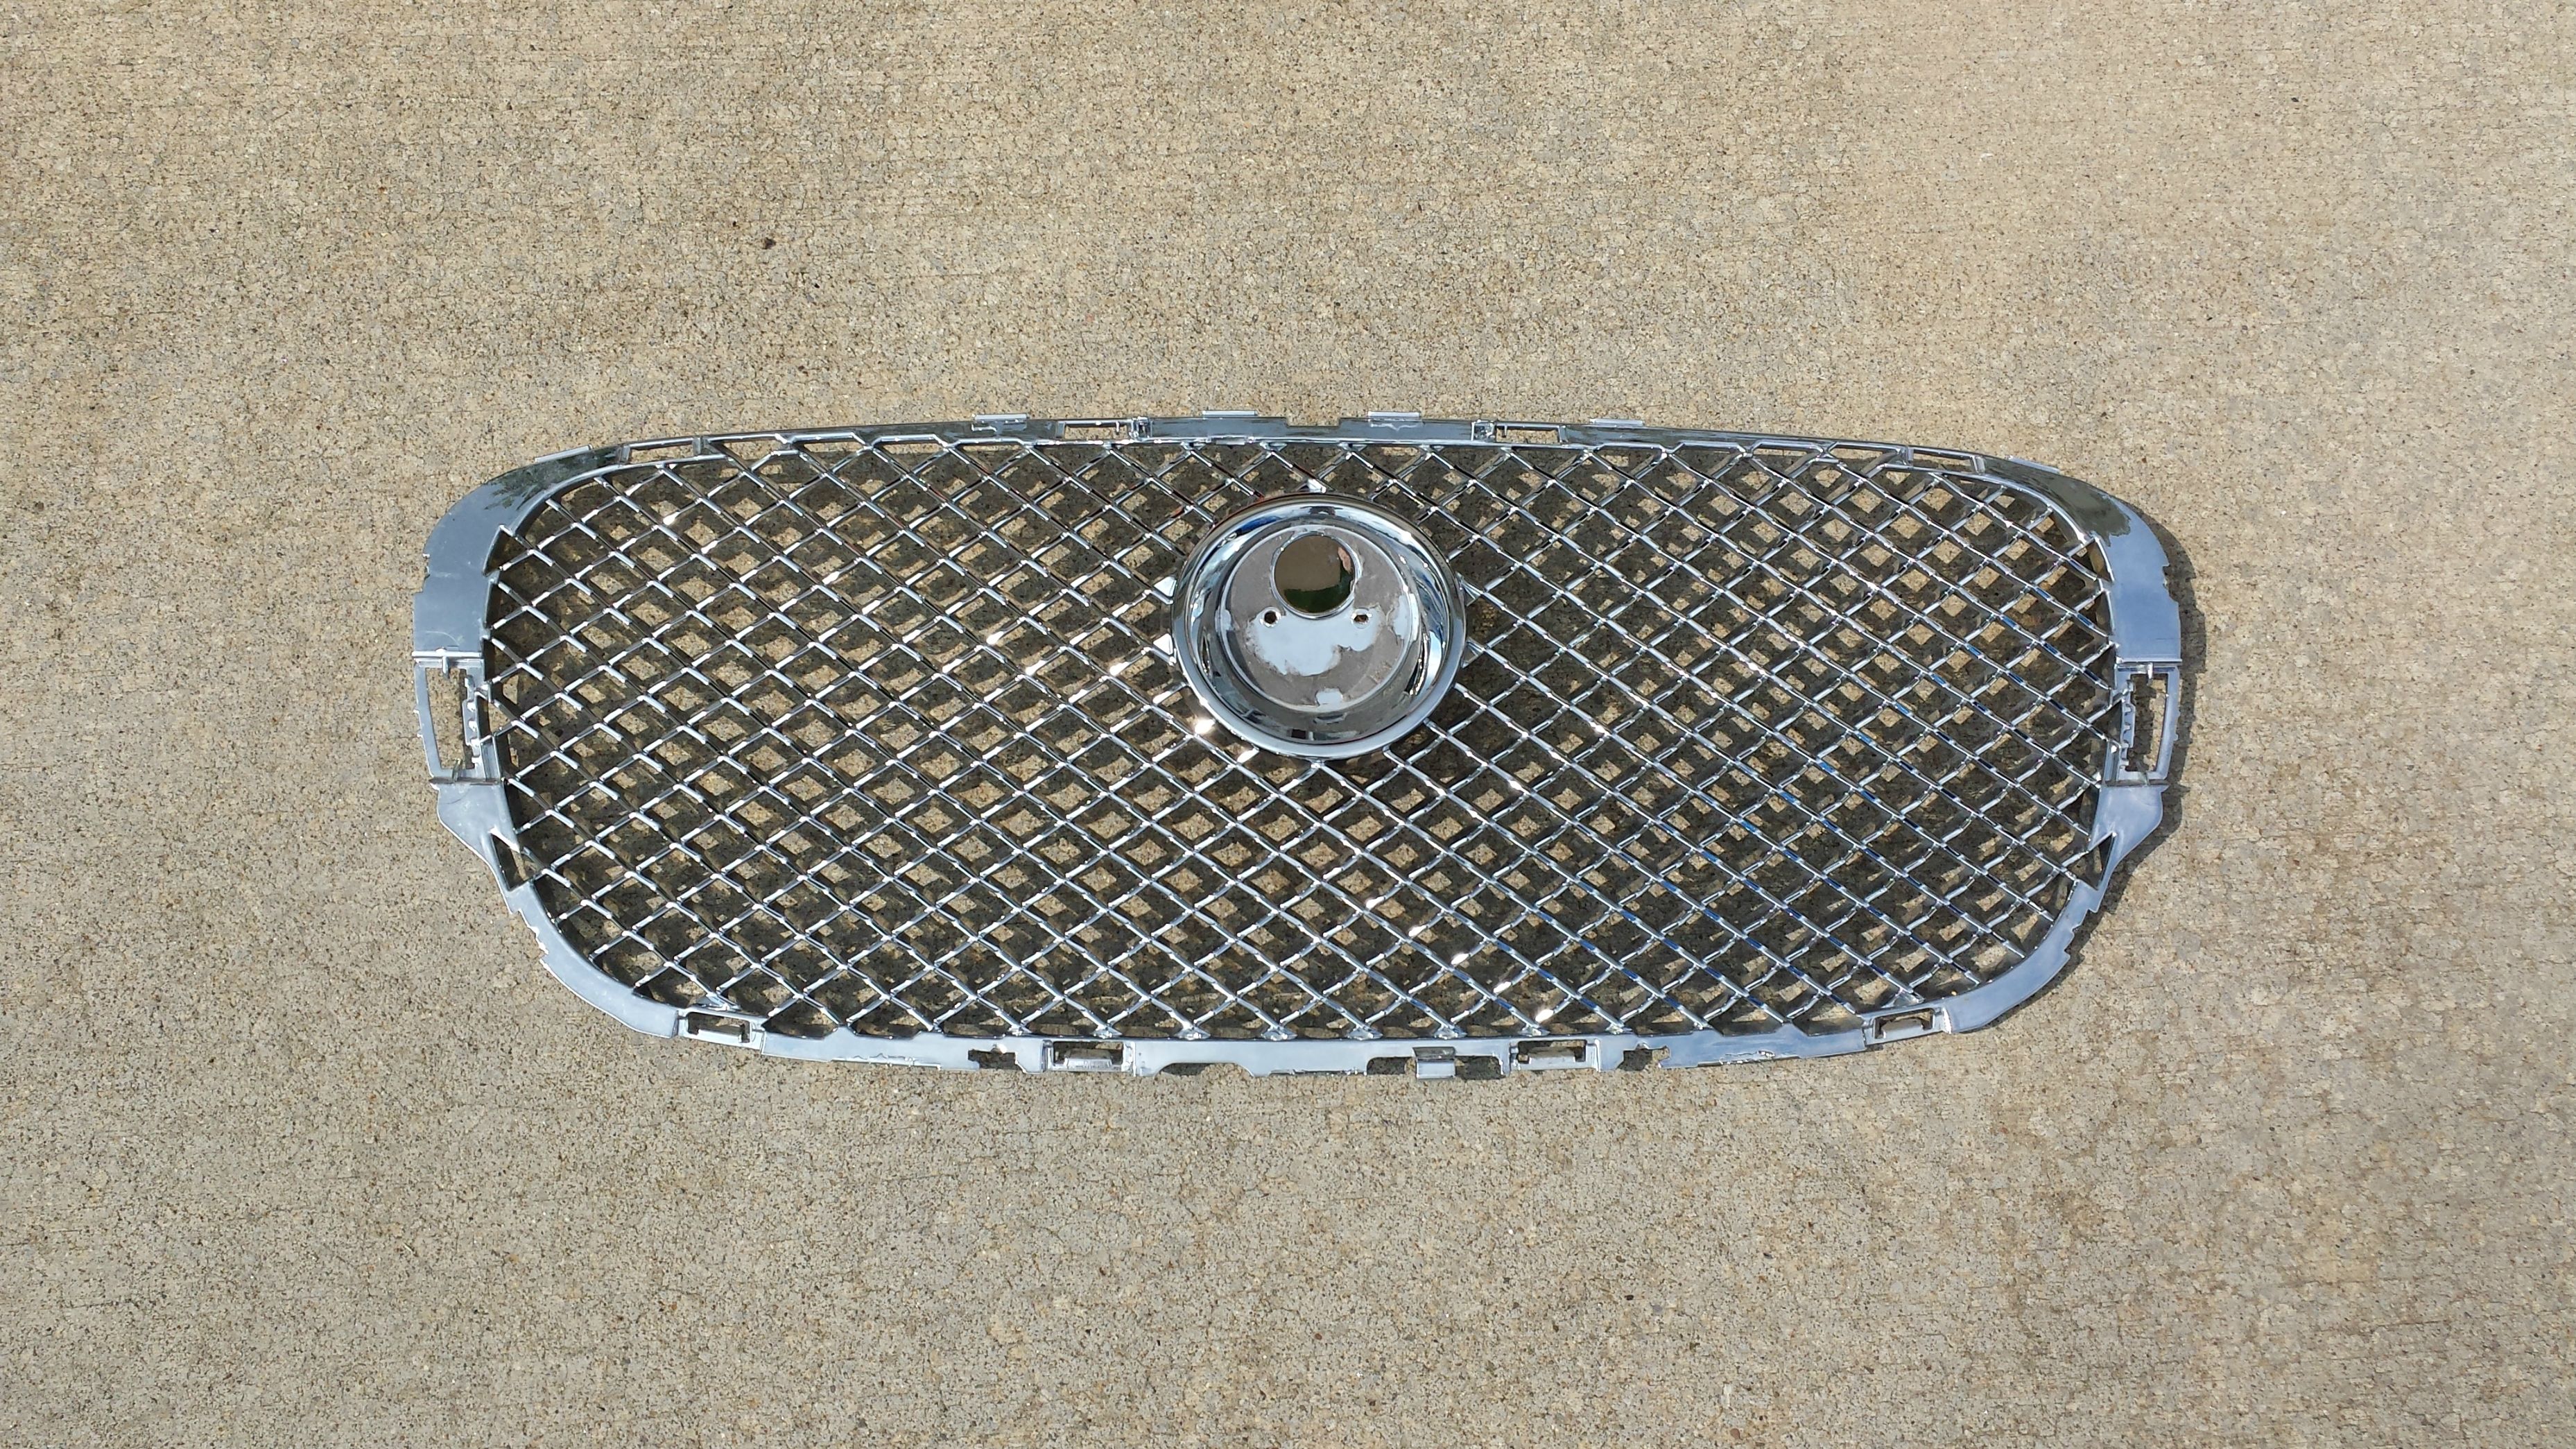
6. Next, wash your grilles thoroughly if you wish to paint! I used a scrub brush to get into all the crevasses and let them dry in the sun. I gave 2 or 3 additional passes
with an air compressor at low PSI as water likes to hide anywhere it can. Be sure to get all angles for an even finish.
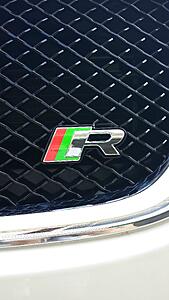
7. The R Badge is more or less self-explanatory. The brace goes behind the grille, the mount goes in front & the screw holds them together. As mentioned, the Jag screw I was given did *NOT* fit and was damaging the mount when threaded. I’d recommend putting the badge assembly together prior to attempting install. I used a screw I had on hand. I may have been given an incorrect part.
8. Put it all back together! I removed the dried paint from behind the growler to ensure good adhesion from the 3M double sided tape I used to replace the Jaguar double sided tape. I picked this up at AutoZone & have used it for many other applications in the past. It is strong and will not let you down. The tape appears red due to the backing.
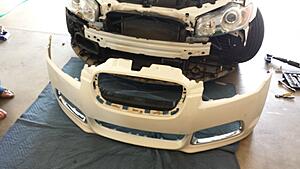
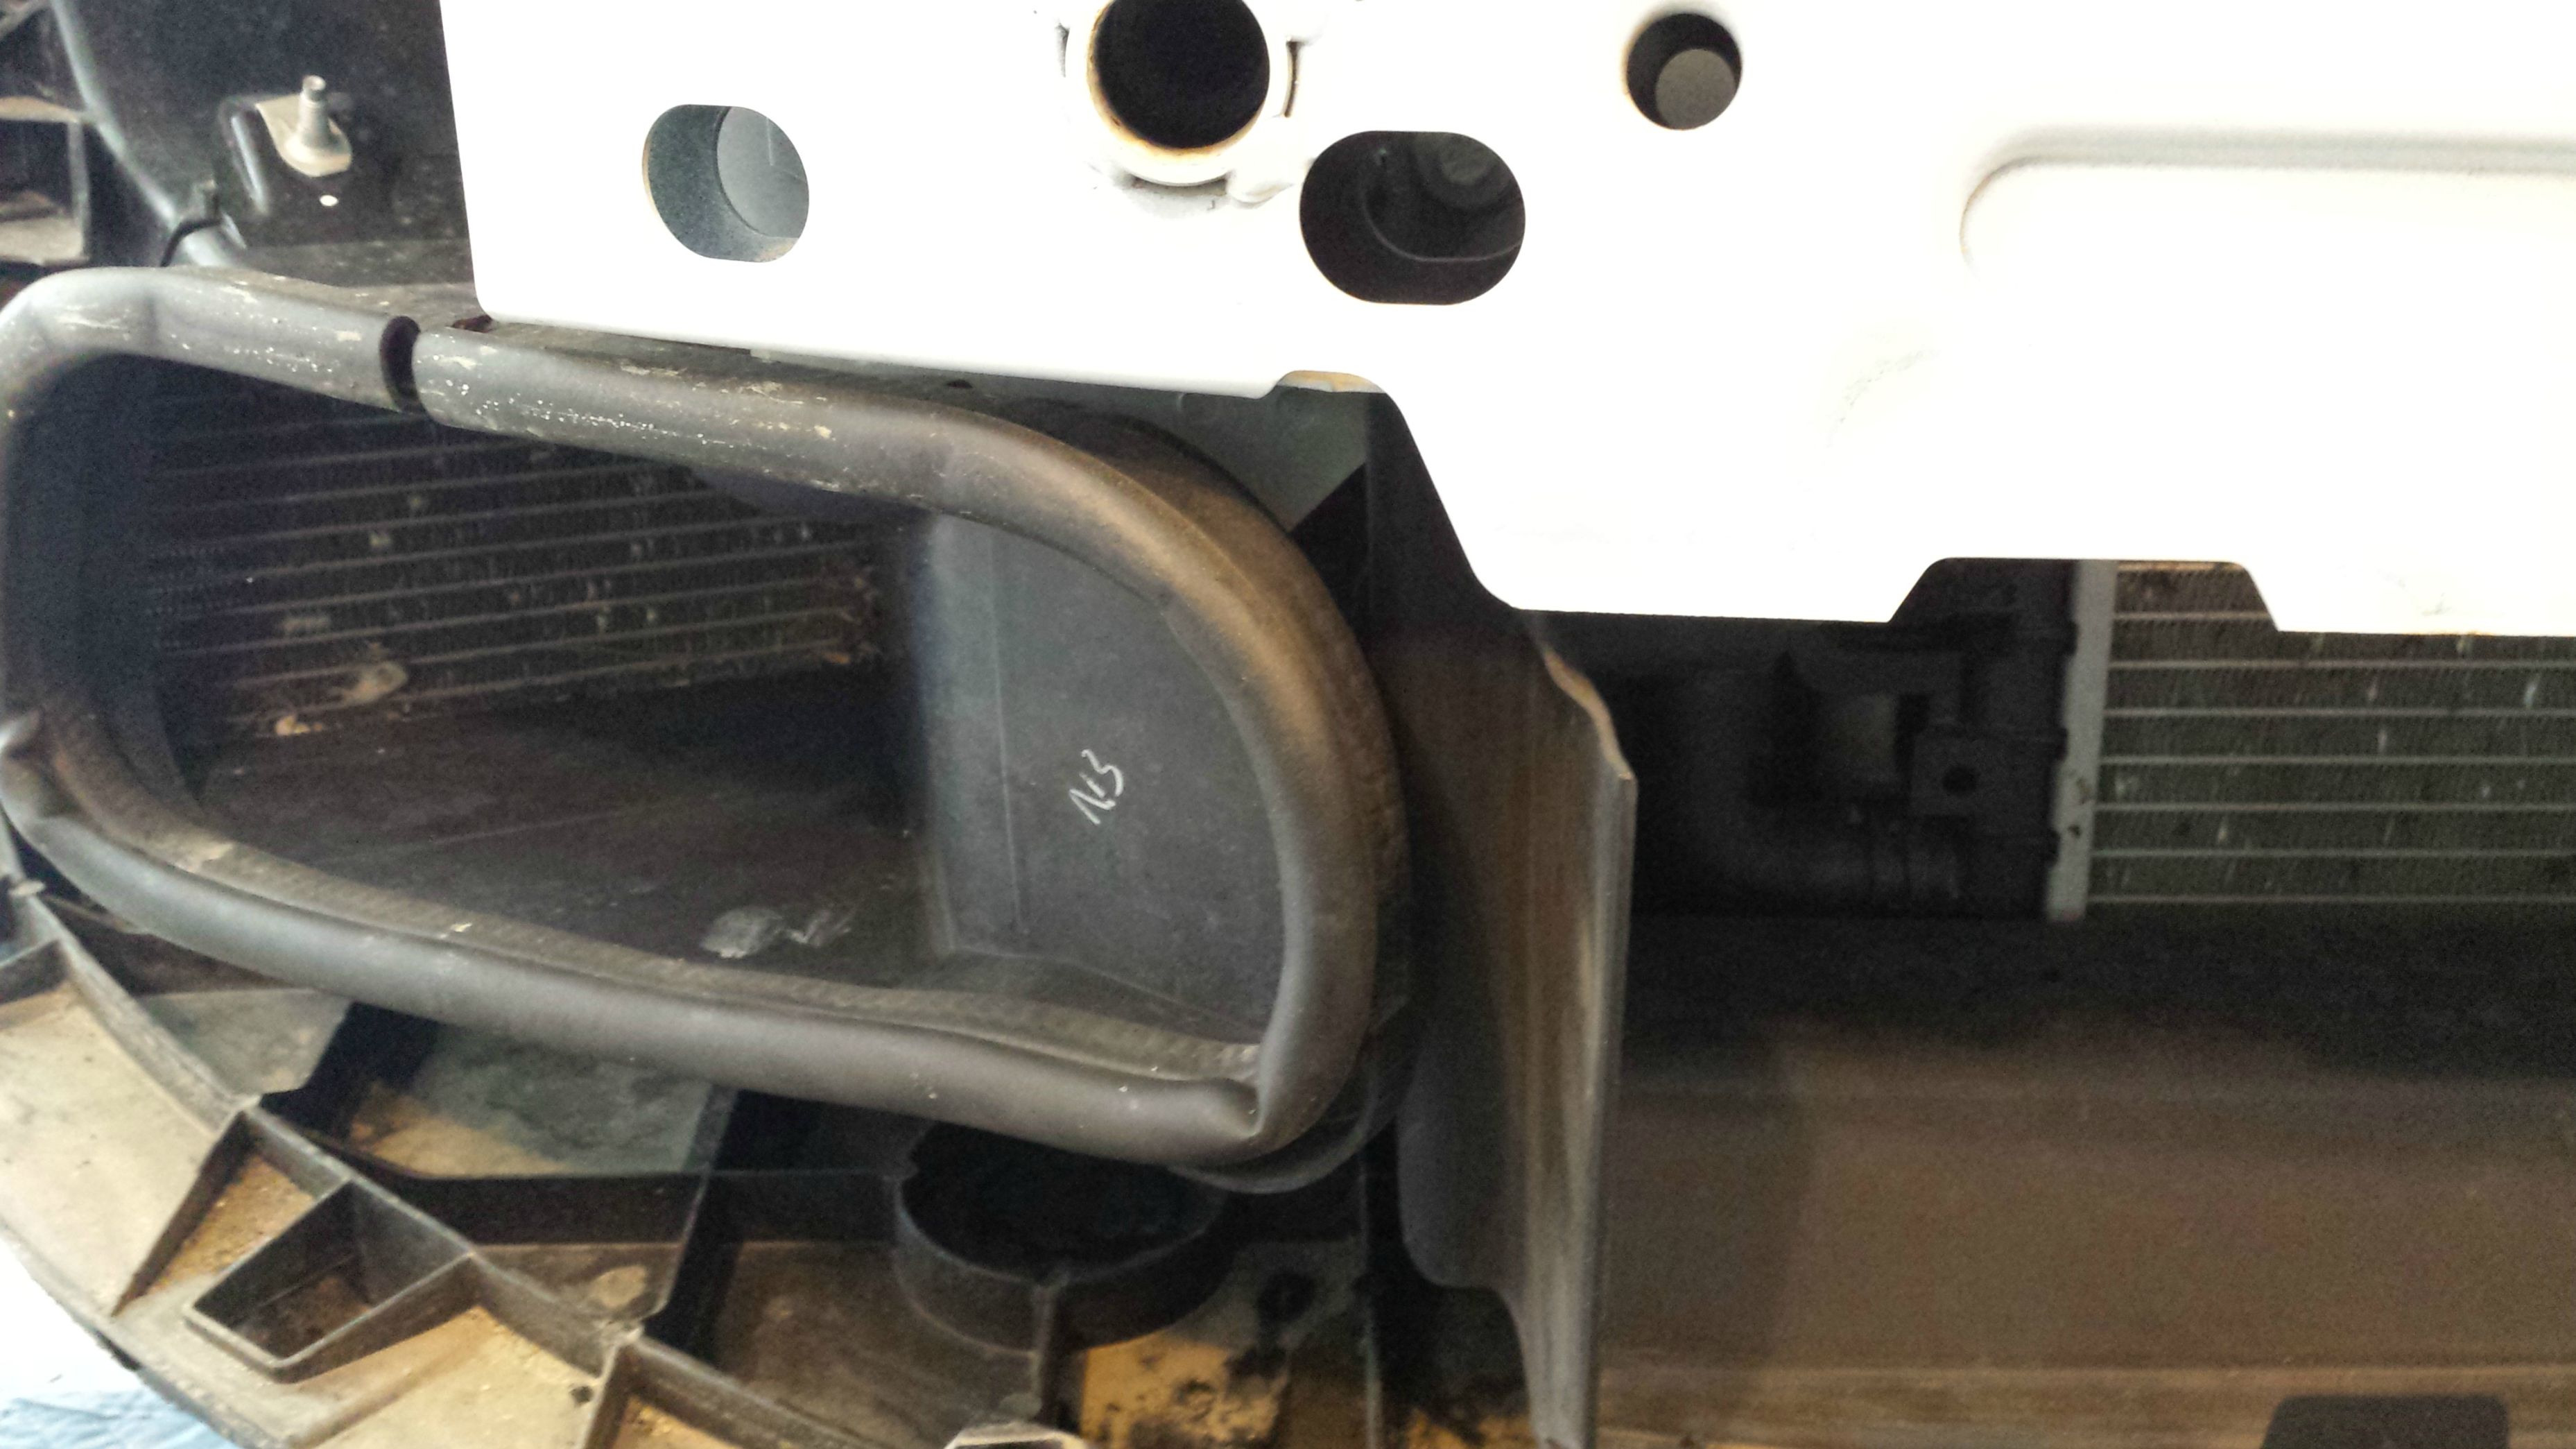
9. Be sure the duct for the passenger side lower intake is aligned with the bumper. Please see last picture.
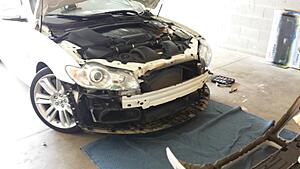
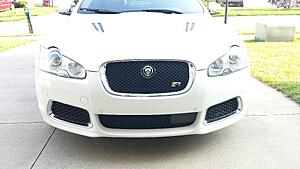
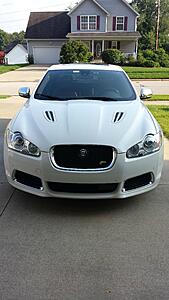
Before:
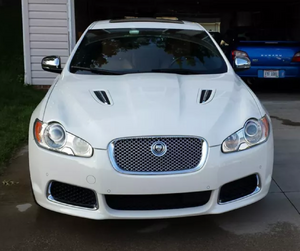
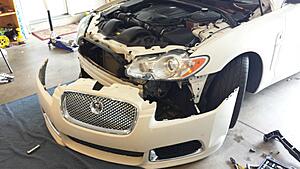
After:
Bumper removal:
•Torx Key set (I do not recall what sizes – my apologies)
•A friend
•Patience
Grille Painting:
•Bucket
•Car wash soap
•Brush
•Flat head screwdriver
•Double sided tape
•Automotive plastic spray paint
•Cutting tool
R Badge install:
•Torx Key set (I do not recall what sizes – my apologies) – These parts cost me $119. The screw provided (one of the parts listed below) did NOT fit. Don’t bother buying it. My apologies – I do not recall which part number it was. I used a screw I had.
•Jag OEM C2P22603
•Jag OEM C2Z 1327
•Jag OEM C2Z18830
•Jag OEM C2Z18831
1. Remove a dozen or so screws from the bottom lip. These will be visible as well as recessed. You will also need to turn the wheels completely to the left – or – right to
access three more screws in each wheel well. There will also be 2 screws and one plastic Philips clip above the grille, under the hood.
2. Now you are *almost* ready to remove your bumper. There are three bolts connecting a brace on the driver’s side. Removing this brace will make it much easier to disconnect the proximity sensor connection.

You will notice that the connector which belongs to the sensors is closer to the wheel & the connector which goes to the car is closer to the bumper. While the two are
connected, you can slide this connector off of its mount by sliding it towards the wheel or pulling down. I pulled mine down and it reconnected just fine. You will also have to disconnect the wire from a plastic brace for additional slack. This will give you some additional slack. I’d recommend having a friend around to hold the bumper as you pull it off. Knowing the proximity sensor is on the driver’s side (USA) I removed the bumper starting with the passenger side first. A light tug is all it took to free the bumper from the car. Do not rotate the bumper as much as shown until both sides are free as pictured.

There will be very little slack for the proximity sensor harness. Once I freed these connectors from the harness connected to the car, there was much more slack. Here is what holds the connectors to the car:

And the connector:

3. If you wish to remove the 3 bottom grilles, there will be six screws for each of the side grilles & some clips for the center grille. I removed these so I could paint them
the same gloss black as the upper grille.


4. The upper grille will require the removal of the foam piece in the bumper as well as two screws and some clips. I then separated the chrome ring from the upper grille. To do this, I had to cut small plastic pieces from under the clips that were blocking the two from separating. The chrome ring is still very snug & the assembly is held together by the 2 screws removed earlier. All of the clips have remained clipped without the small amount of plastic I removed to separate the two.

I removed the Growler with a small flat head. I used a cloth to guard the outer ring in the upper grille so I could use it for leverage with the flat head screwdriver. No
damage resulted.
5. This is a great opportunity to clean up what your scrape guard has collected as what has accumulated in the passenger side (USA) lower grille.
6. Next, wash your grilles thoroughly if you wish to paint! I used a scrub brush to get into all the crevasses and let them dry in the sun. I gave 2 or 3 additional passes
with an air compressor at low PSI as water likes to hide anywhere it can. Be sure to get all angles for an even finish.
7. The R Badge is more or less self-explanatory. The brace goes behind the grille, the mount goes in front & the screw holds them together. As mentioned, the Jag screw I was given did *NOT* fit and was damaging the mount when threaded. I’d recommend putting the badge assembly together prior to attempting install. I used a screw I had on hand. I may have been given an incorrect part.
8. Put it all back together! I removed the dried paint from behind the growler to ensure good adhesion from the 3M double sided tape I used to replace the Jaguar double sided tape. I picked this up at AutoZone & have used it for many other applications in the past. It is strong and will not let you down. The tape appears red due to the backing.
9. Be sure the duct for the passenger side lower intake is aligned with the bumper. Please see last picture.
Before:

After:


#56
11-06-2014, 07:03 PM
WRX Transformed. The black-out grill looks great as it is more consistent with the overall paint and trim theme of the car and adds a touch of custom appearance. Elegant, not gaudy.
For future paint projects; it may be very easy to remove the grill. I suggest that approach. Paint goes on and sticks best with a clean and prepared surface, and in a warm temperature.
Wash the grill with a brush and soapy water many times to remove all oil or grease residue. Tape the chrome, and rough up the surface with a "ScotchBrite" pad being careful not to scratch the chromed parts. Wash again, let it dry thoroughly, and paint it in a warm temperature. Paint will go on much easier, smoother, and stick much better.
Good luck with future projects. Mikeb, Hong Kong
#57
01-08-2020, 12:46 PM

Senior Member
Nice first post! 
There are plenty of true "botch jobs on your side of the Atlantic." Didn't I just see an episode of Wheeler Dealers where they saved a blue Range Rover on blue 24"s with blue leather interior?
I have already gotten several compliments in less than 12 hours on this side of the pond so it's a good thing that opinions are like ***holes right? Everyone's got one.
The mods have started to weed out the negativity on this forum so a bit of advice: It's cool to have your own opinion and to voice it but it helps to be more diplomatic about it Enjoy the rest of your weekend!
There are plenty of true "botch jobs on your side of the Atlantic." Didn't I just see an episode of Wheeler Dealers where they saved a blue Range Rover on blue 24"s with blue leather interior?
I have already gotten several compliments in less than 12 hours on this side of the pond so it's a good thing that opinions are like ***holes right? Everyone's got one.
The mods have started to weed out the negativity on this forum so a bit of advice: It's cool to have your own opinion and to voice it but it helps to be more diplomatic about it
Enjoy the rest of your weekend!
Thread
Thread Starter
Forum
Replies
Last Post
doctordeuce
F-Type ( X152 )
1
09-12-2015 08:30 AM
Currently Active Users Viewing This Thread: 2 (0 members and 2 guests)