
Chrome Blade Removal
#1
 02-06-2014, 11:21 AM


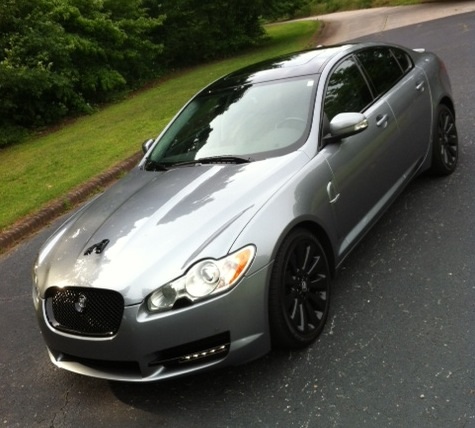
Does anyone have information on how to remove the chrome blade (bumper molding) on an 09 xf lux prem? I know you can remove the entire thing (blade and faux mesh) by removing the bumper but was just trying to see if there was a quick way to remove only the chrome piece for measuring purposes. I've been searching and searching for the blade with the DRLs for sometime now and no one seems to be making them anymore. I found this set on ebay: http://pages.ebay.com/motors/link/?n...d=111186638657 but also found a local plastic supply company that can cut an opening in my existing blade so that I can install a set of DRLs myself. I've done all the exterior measurments and believe the Philips DRL Daylight8's will fit but need to know how much area I have to play with behind the actual chrome pieces between the front of the blade and the black faux mesh. If I'm able to do this I can save a good $300 bucks so would like to explore this option before ordering the ones on eBay.
#2
02-06-2014, 01:26 PM

Hi RodTee - I'm very interested in the DRL upgrade too, so please let us know how you get on! Unfortuantely my understanding is that they are removed from behind the bumper so you have to drop the bumper off to get to the blade.
If anyone on the Forum has bought that DRL setup from China on eBay I'd love to hear what you think of fit, quality, whether they work etc. They are expensive - but want to get a sense of whether they are good quality...
If anyone on the Forum has bought that DRL setup from China on eBay I'd love to hear what you think of fit, quality, whether they work etc. They are expensive - but want to get a sense of whether they are good quality...
#3
02-06-2014, 01:55 PM
BritCars, my thoughts exactly. $450 is a lot to spend for something that may not be of great quality, and might not fit correctly thats why I think I'd rather take the chance of having a plastic supply co cut the existing blade and I fit my own good quality LED than to take that chance. The guy at the Plastic Co quoted me about $50 to cut them so another $100-$150 for good name brand LEDs sounds a lot better than $450 to me. Just keeping my fingers crossed on if the spcae between the blade and the mesh has enough depth. The Philips state 1.25" which from the outside appear they will fit but not knowing what is behind there is the kicker. I've seen from the diagram (see pics) they are definitely two different pieces and looking at the replacement mesh piece you can see the blade clips into it. I don't have an issue with removing the bumper to do the final install (run electrical etc) but I'd hate to have to pull the bumper just to take a measurement that doesn't work but hey if its what i have to do its what i have to do...
#4
02-06-2014, 01:59 PM

#6
02-07-2014, 01:36 PM
Preciate it MiamiJag! I was gon give it a try this weekend but will definitely do it now that I have confirmation that it won't be a wasted effort.
#7
02-07-2014, 04:20 PM

Rod,
I can't speak on the Chinese version of these lights, but I have the ones that were produced by a UK company fitted to my 09 SC. Bumper removal was required because on the SC there is functioning ductwork attached to the blade grills. Miamijag could be correct about only having to remove the bottom pan. It's been awhile so my memory escapes me. The ones I purchased a few years ago were almost twice the cost of the ones on ebay and they are made with Philips led bulbs. Vestatec Automotive Engineering - Vestatec Group
I can't speak on the Chinese version of these lights, but I have the ones that were produced by a UK company fitted to my 09 SC. Bumper removal was required because on the SC there is functioning ductwork attached to the blade grills. Miamijag could be correct about only having to remove the bottom pan. It's been awhile so my memory escapes me. The ones I purchased a few years ago were almost twice the cost of the ones on ebay and they are made with Philips led bulbs. Vestatec Automotive Engineering - Vestatec Group
Trending Topics
#8
02-08-2014, 07:26 AM
Yea, I've checked out your post time and time again ttboonie...lol. I've been trying to do this mode for a while but wasn't able to find them. I'm serious about it now so I've found a set of Philips I'm gonna order and found a plastic shop that will cut my existing blade to fit them. I was doing some investigating last night and found out you can reach the blade from the top by removing the passenger side headlight but the headlight washer was attached and I didn't remember how to remove it. In looking I did see that you can see directly to the pan at the bottom on the passenger side, not sure about the driver side so I'll probably go out to the shop and remove it this morning so I can get the measurement I need.
#9
02-09-2014, 06:05 PM
Great news NA owners! I was able to get to the chrome blades by removing only the under panel and not the entire bumper. All it took was putting the car on a couple jack stands, ratchet, couple star sockets (T20 & T30), 10mm socket, 5/16 ratchet wrench and a phillips head screwdriver to realign any of the clips that might shift when you put the panel back on.
Once the panel is removed the pieces come apart from the bumper clips with a little force. Upon taking measurements the Philips DRL8s will fit. The chrome piece backs directly up to the mesh but the form of the mesh is open so the ~1.25" depth needed is definitely there. (Pics below). It looks like I'm going to pull them and cut the mesh portion myself but will send the chrome piece to the plastic co to be cut to make sure the edges are clean and if not make them responsible for replacing them.
Once the panel is removed the pieces come apart from the bumper clips with a little force. Upon taking measurements the Philips DRL8s will fit. The chrome piece backs directly up to the mesh but the form of the mesh is open so the ~1.25" depth needed is definitely there. (Pics below). It looks like I'm going to pull them and cut the mesh portion myself but will send the chrome piece to the plastic co to be cut to make sure the edges are clean and if not make them responsible for replacing them.
The following users liked this post:
*Phoenix* (03-14-2014)
#10
02-16-2014, 11:48 AM
So I set out on this project yesterday and 12 hrs later, a few brakes in between (to eat and watch NBA All Star festivities) and I finally got the Philips DRL 8s installed into my chrome bumper blades. The majority of my time was spent with a rotary tool in my hand cutting the openings in both the black faux mesh and the chrome blade. After cutting the faux mesh and measuring to cut the blades there was a brief moment when I second guessed my decision but once I began cutting the blade there was no turning back. Due to the cuts and the way the faux mesh is contoured the clips that the leds fasten into don't make a flush connection so we had to make a modification in order to screw the clip into the plastic. I initially cut them so that the lip on the lights would creating a "stopping point" so the blades couldn't be pushed into the opening but after the initial cuts and test fit the blades stuck out too much so I had to do some trimming to recess them more. The cuts came out pretty good and rather clean however due to the shape of the blade (not flat) there was quite a bit of eyeing that had to be made to create straight lines and "exact" dimensions. Because of the eyeing there was a bit of over cutting on the 2nd blade. I plan on taking some chrome wrap and rewrapping the blades to close the small gaps. Here are the few pics I took at breaking points, I would've taken more but I was focused on getting this job done. I will post more pics when I install them back on the vehicle and get them all wired up after church.
The following users liked this post:
BritCars (02-17-2014)
#11
02-16-2014, 08:18 PM
The following 2 users liked this post by RodTee XF:
*Phoenix* (03-14-2014),
aliensporez (05-24-2014)
#12
02-16-2014, 09:40 PM
#13
02-17-2014, 08:35 AM
The amount of work it took to do these, I'm not sure I would do it again...lol. I might consider it for the right amount of money but as for the electrics, there's a spare ignition switched fuse in the fuse box. There's also a bolt post right outside the fuse box that I grounded it too. Then just as in the instructions I used a one touch connector and connected the switch to the parking lights so the leds are bright when on alone and dim when the lights are switched on. I will post a pic of the wiring shortly.
I will say that I saved about $350 doing this mod myself based on the ones being offered on eBay from China, which after doing this I don't believe the eBay ones will just swap out like the ones previously offered by Adamesh. The China ones from what I can tell would require modifying the faux mesh also, again just based on what I can gather from their pics and performing this mod.
I will say that I saved about $350 doing this mod myself based on the ones being offered on eBay from China, which after doing this I don't believe the eBay ones will just swap out like the ones previously offered by Adamesh. The China ones from what I can tell would require modifying the faux mesh also, again just based on what I can gather from their pics and performing this mod.
The following users liked this post:
BritCars (02-17-2014)
#14
02-18-2014, 09:10 AM
#15
03-14-2014, 09:02 AM

#16
03-15-2014, 04:36 AM
They're regular T10 (194) Canbus white LEDs. There are literally thousands on eBay. These are the ones I purchased, http://pages.ebay.com/motors/link/?n...d=301021050608 ,which I redid all my interior lights, puddle lights and accent parking lights with. I had to use small T5 LEDs for the vanity mirrors.
#17
03-19-2014, 05:12 PM
#18
03-19-2014, 10:30 PM
Typically if they don't work one way you just have to flip the led the other way. Apparently there's a true positive/negative connection so flipping it the other way should work. Hopefully that fixes your issue. I didn't have any issues with mine other than having to flip the led to get it to work when it didn't at first.
Thanks man, I greatly appreciate it. I purchased the LEDs from the link u sent me but for some reason, the right and left map lights in the front and rear lights do not work with the LEDs. I have no idea what to do.. Do u have any ideas? U didnt have issues installing these lights?
#19
03-20-2014, 05:55 AM
Veteran Member
Rod,
I can't speak on the Chinese version of these lights, but I have the ones that were produced by a UK company fitted to my 09 SC. Bumper removal was required because on the SC there is functioning ductwork attached to the blade grills. Miamijag could be correct about only having to remove the bottom pan. It's been awhile so my memory escapes me. The ones I purchased a few years ago were almost twice the cost of the ones on ebay and they are made with Philips led bulbs. Vestatec Automotive Engineering - Vestatec Group
I can't speak on the Chinese version of these lights, but I have the ones that were produced by a UK company fitted to my 09 SC. Bumper removal was required because on the SC there is functioning ductwork attached to the blade grills. Miamijag could be correct about only having to remove the bottom pan. It's been awhile so my memory escapes me. The ones I purchased a few years ago were almost twice the cost of the ones on ebay and they are made with Philips led bulbs. Vestatec Automotive Engineering - Vestatec Group
There was a dealer in UK still selling them with a discount for members.
#20
03-24-2014, 02:52 PM