When you click on links to various merchants on this site and make a purchase, this can result in this site earning a commission. Affiliate programs and affiliations include, but are not limited to, the eBay Partner Network.
I am new to this forum, I have 2010 jaguar xf 5.0l naturally aspirated. Whenever I push hard on accelerator, it shows transmission fault and car stops shifting. Then I have to stop and restart the car, everything is fine after that. I was thinking to change the valve body seals and see if that makes a difference but I could not find those seals anywhere neither with dealer nor online. this would be a great help if someone can send me a link.
So while I rebuild my engine and the gearbox is out of the car I figured it made sense to at the very least replace the seals which are common failure points on this gearbox, and of course suffering "While I'm here" scope creep, decided to fit a Sonnax Zip Kit and new solenoids. I drew the line at disassembling anything further in the gearbox and fitting Stage 2 Exedy clutches, for example, as that requires knowledge and equipment that I don't quite have yet. But if my engine ends up developing more power in the future, there may well be a part 2 of this thread
All my pics are with the gearbox out of the car but to be honest it'd be just as easy to do this with the car on a lift and I've seen plenty of people do it with little more than jack stands on their driveway.
You will need
T27 Torx Bit/Driver
T40 Torx Bit/Driver
Small Flatblade Screwdriver
Needle-Nose pliers
New Connector Sleeve
New Valvebody Seals
New Oil Pan/Gasket/Bolts
If you're disassembling the valvebody to a Zip Kit, you'll also need a new separator plate. These are identified by numbers on them, mine was marked A065/B065.
WARNING
There are a couple of things to be aware of here: There is a danger of Electrostatic Discharge damaging the mechatronic computer attached to the valvebody. At the very least do not touch any electrical pins/contacts anywhere on the valvebody - this includes the circular wiring connector that goes to the outside of the gearbox, and the solenoid contacts, preferably get yourself an anti-static wrist strap. Also the valvebody itself contains very small parts that are super easy to lose. Make sure you have a reasonably large, clean area to work on it.
First step is to remove the oil pan bolts (T40). Regardless of how much oil you think you drained out the plug, more will come out now, so be prepared. You can see that I wasn't very, and so my cleanup wasn't great either.
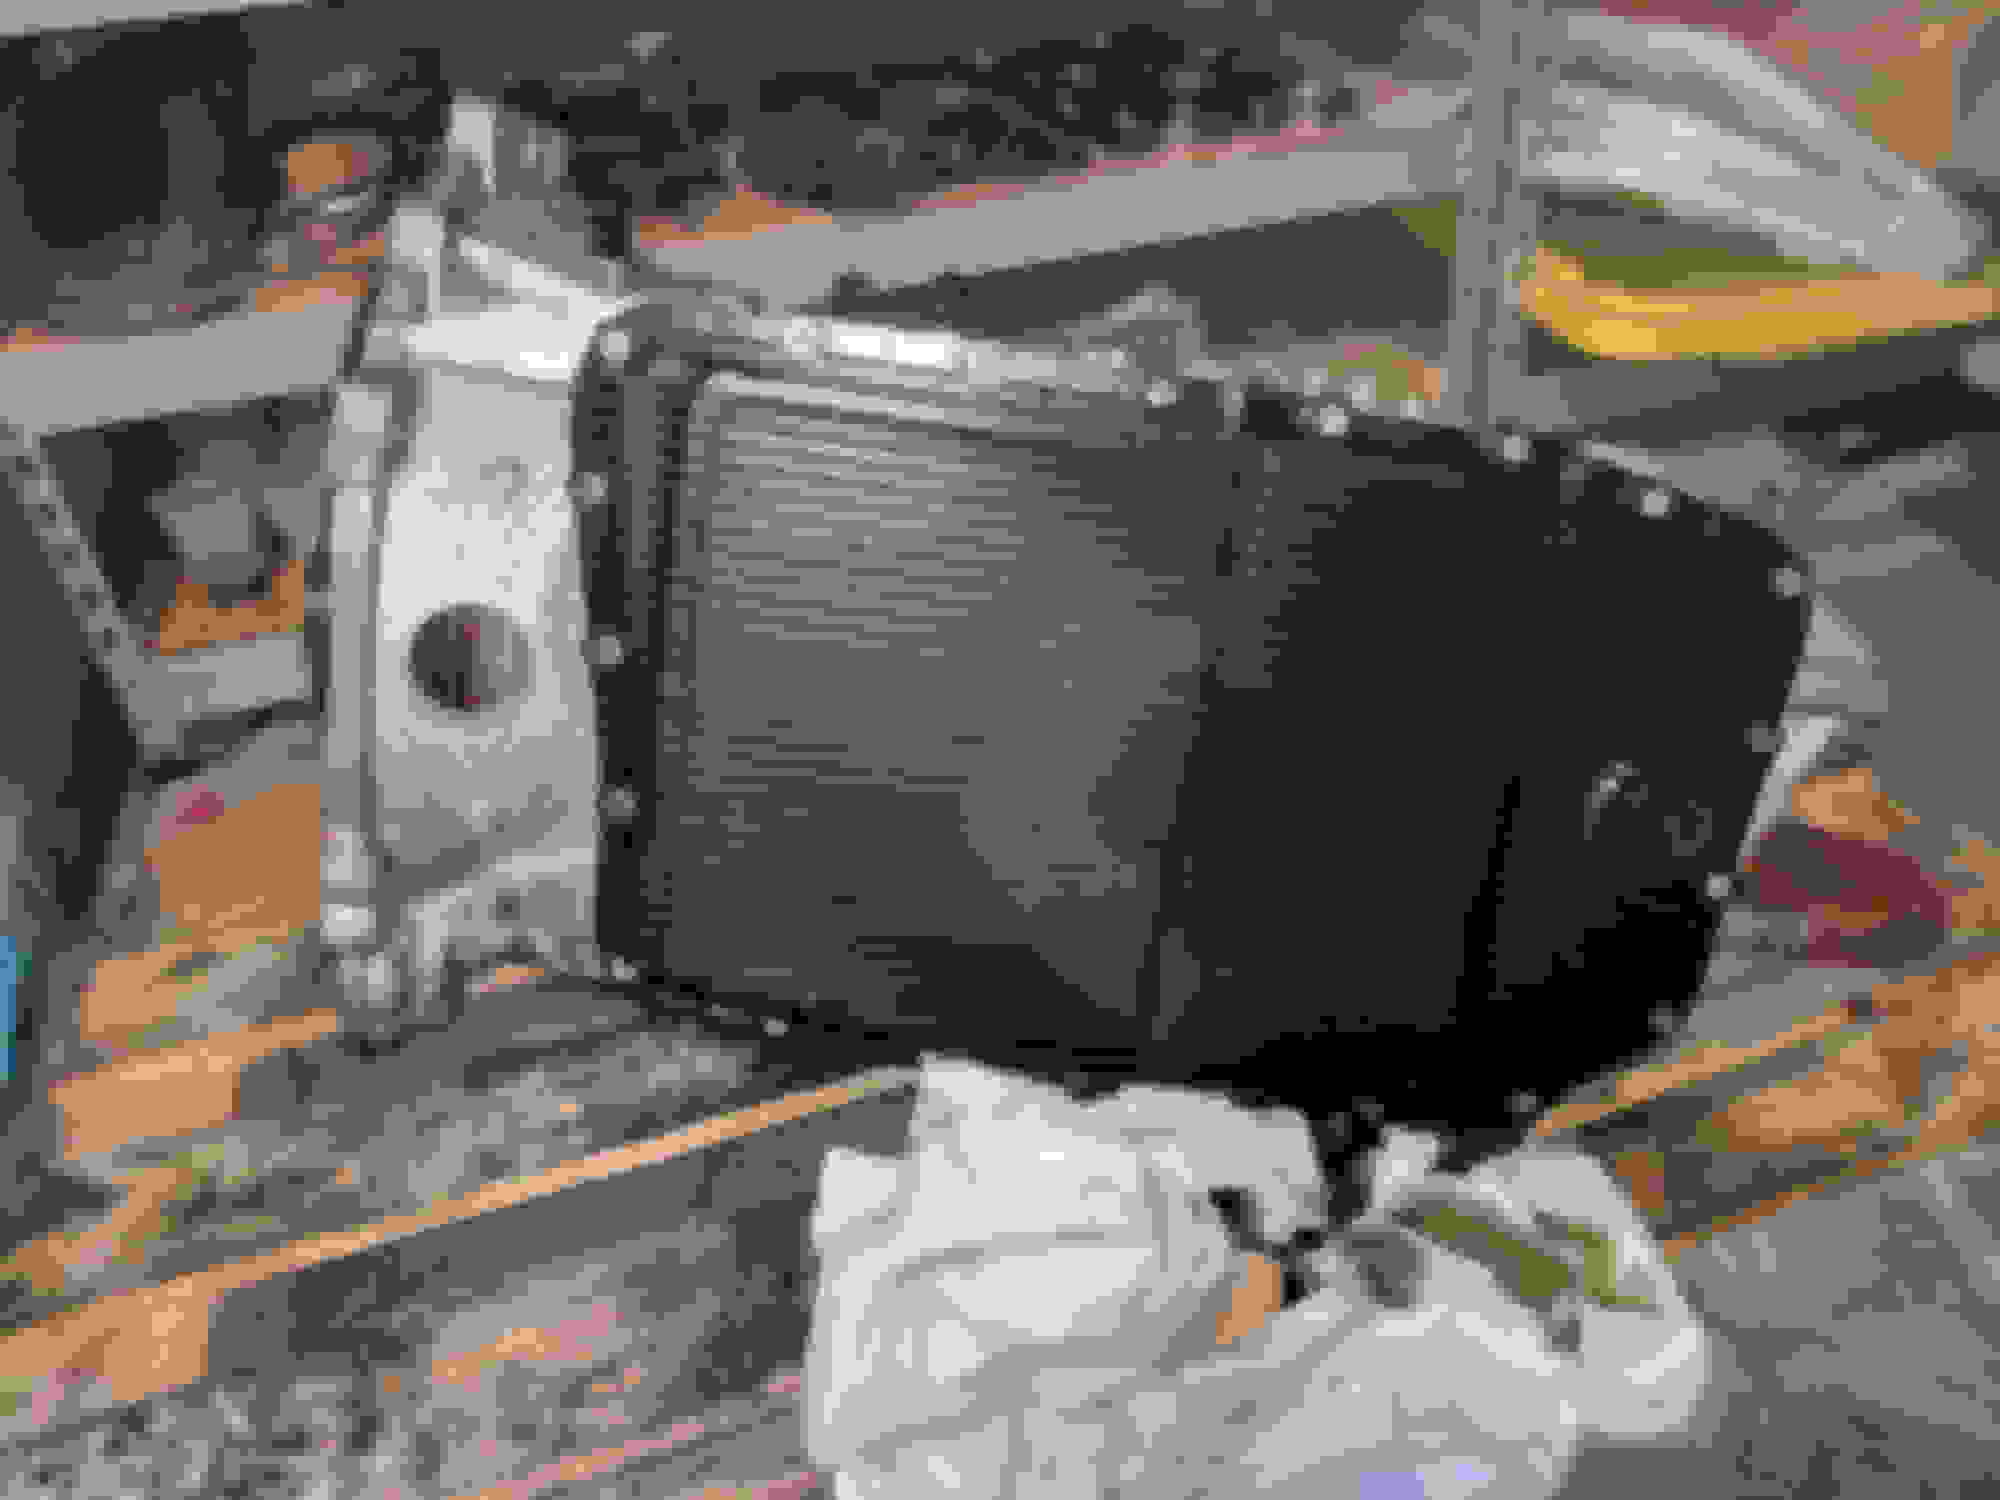
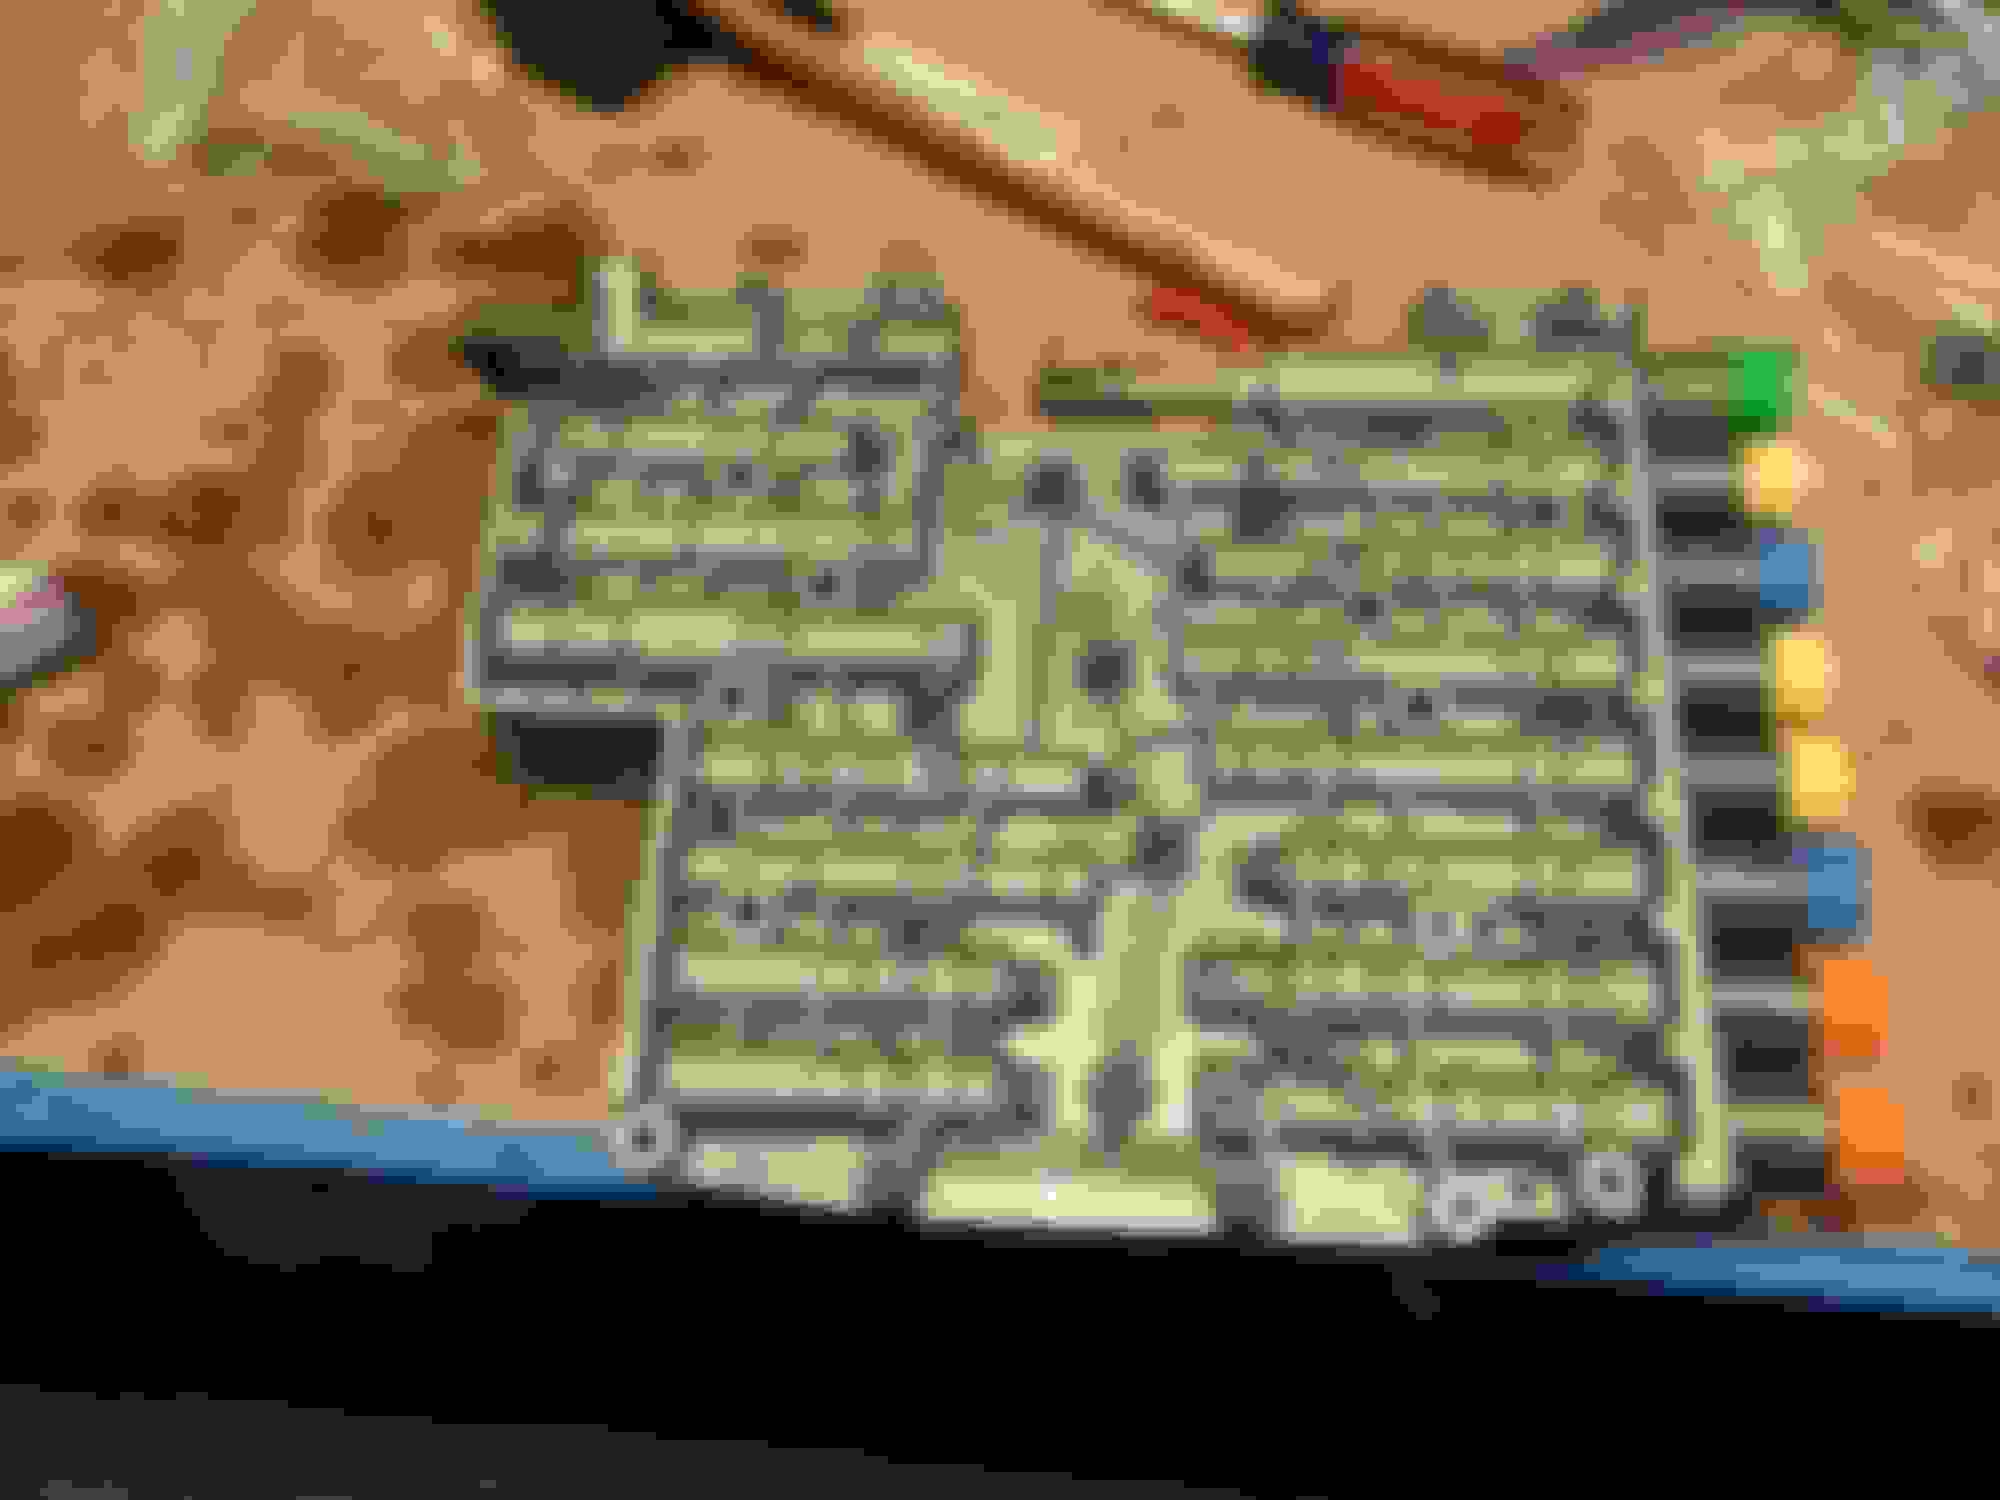
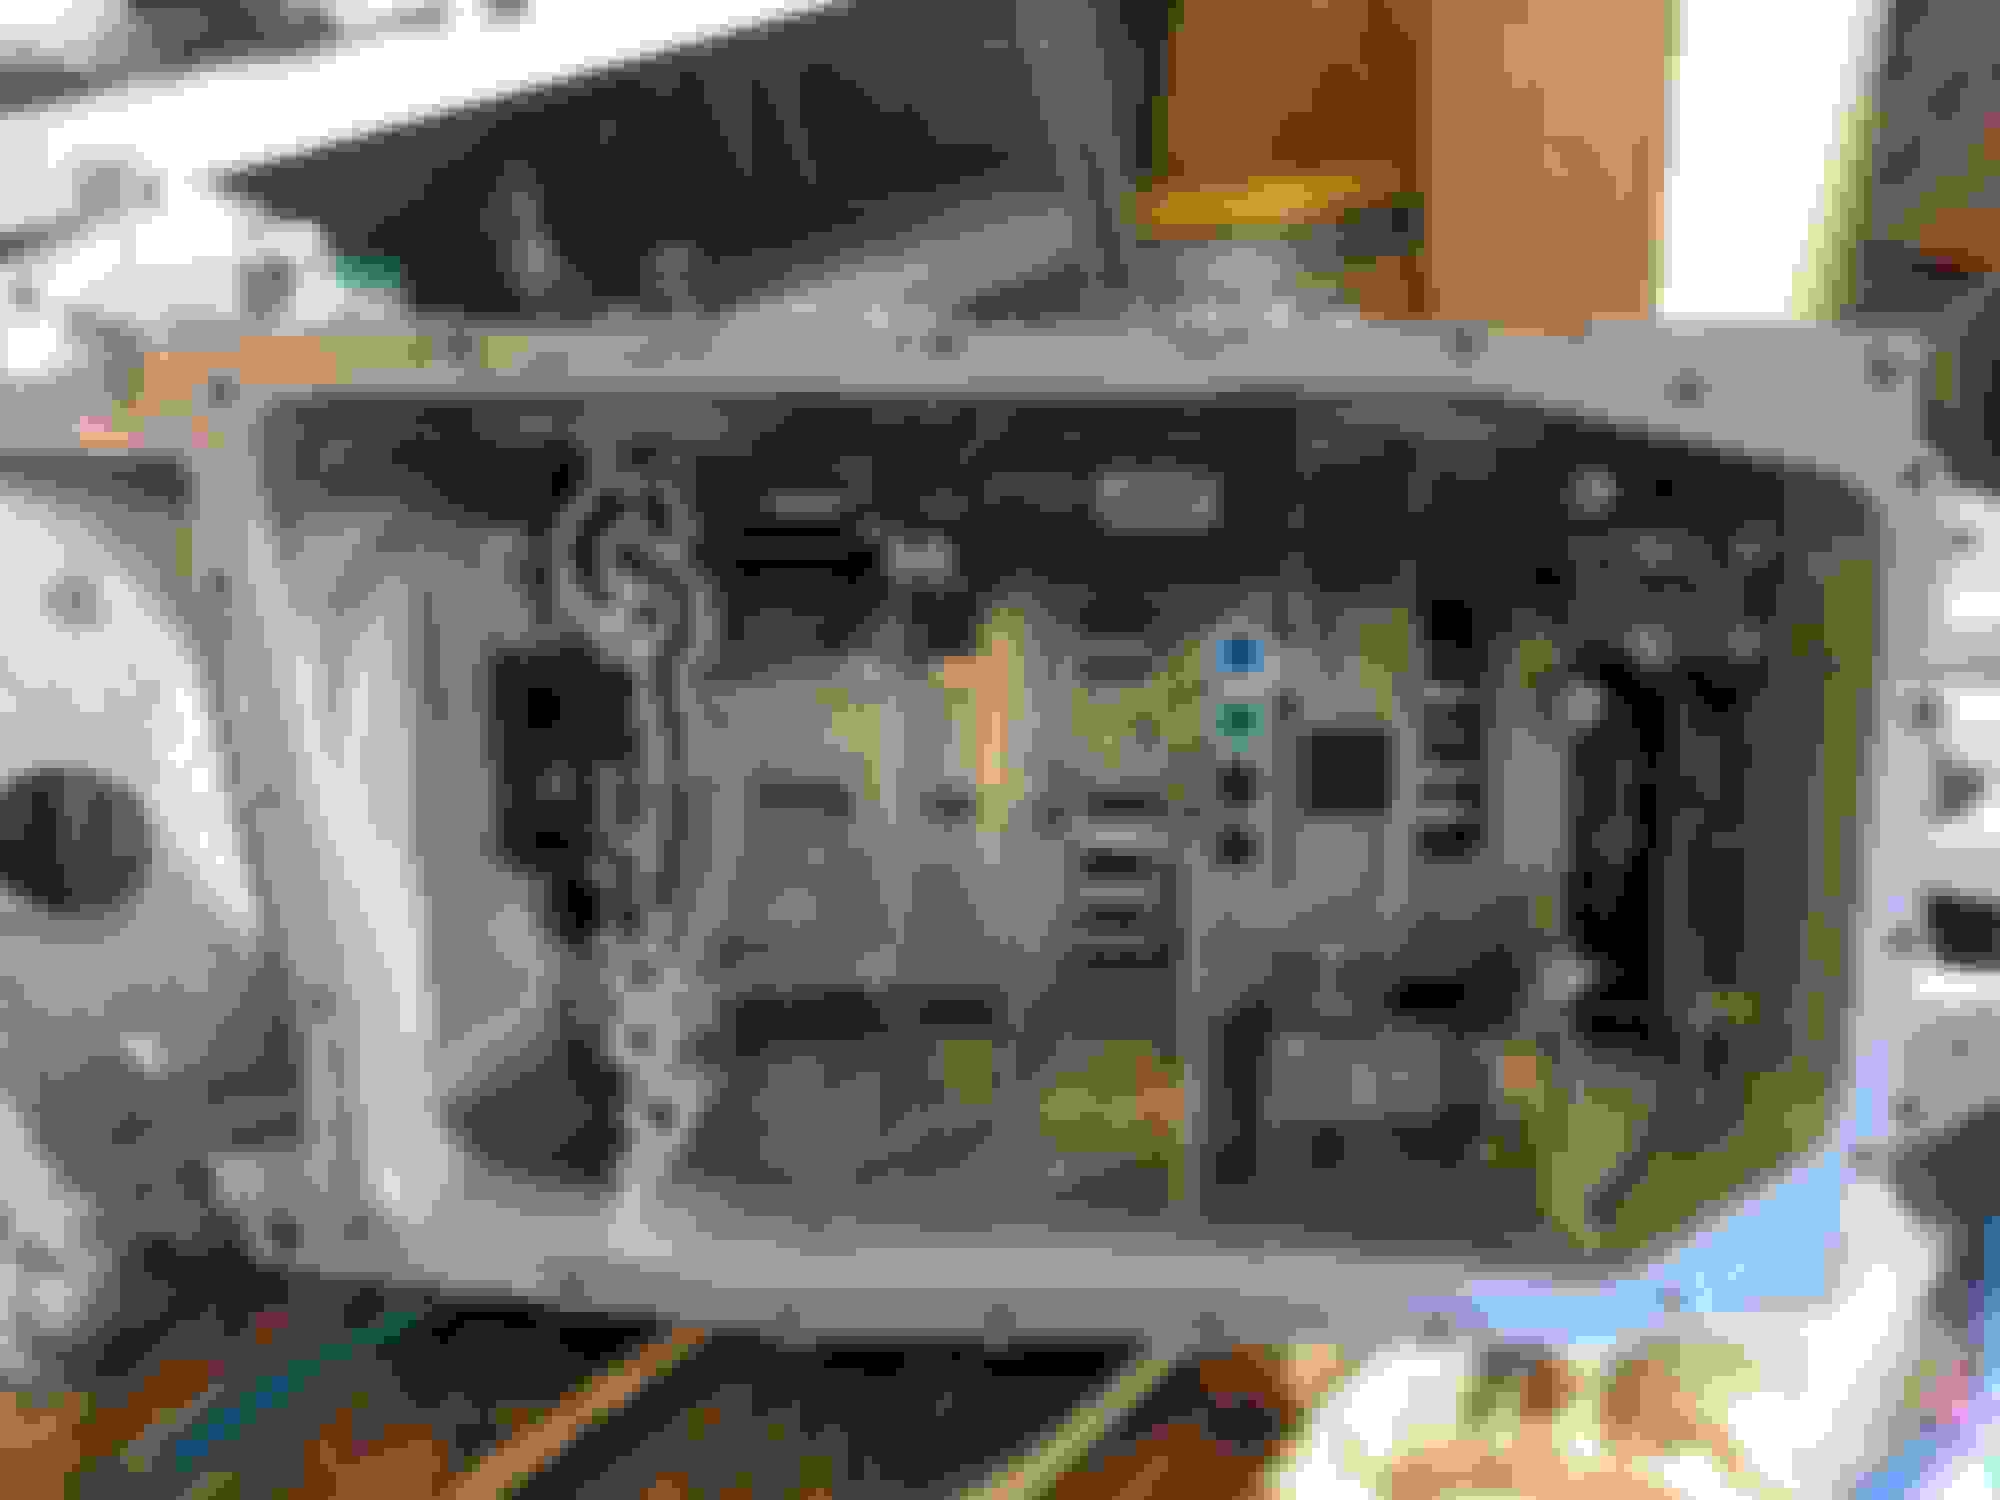
Here you can see the valve body inside the gearbox. The row of cylinders with colored ends down the side are the various solenoids, the brass cylinder with the slot cut out of it at the top driven by the green solenoid operates the parking brake. Finally, the white tab at the bottom right of the valve body is the connector sleeve release.
Pull the white tab up to release the connector sleeve. My sleeve was in tight and after checking I'd pulled the tab up far enough I needed to yank it from the outside with a pair of pliers. These sleeves are a common place for fluid to leak so it makes sense to change it.
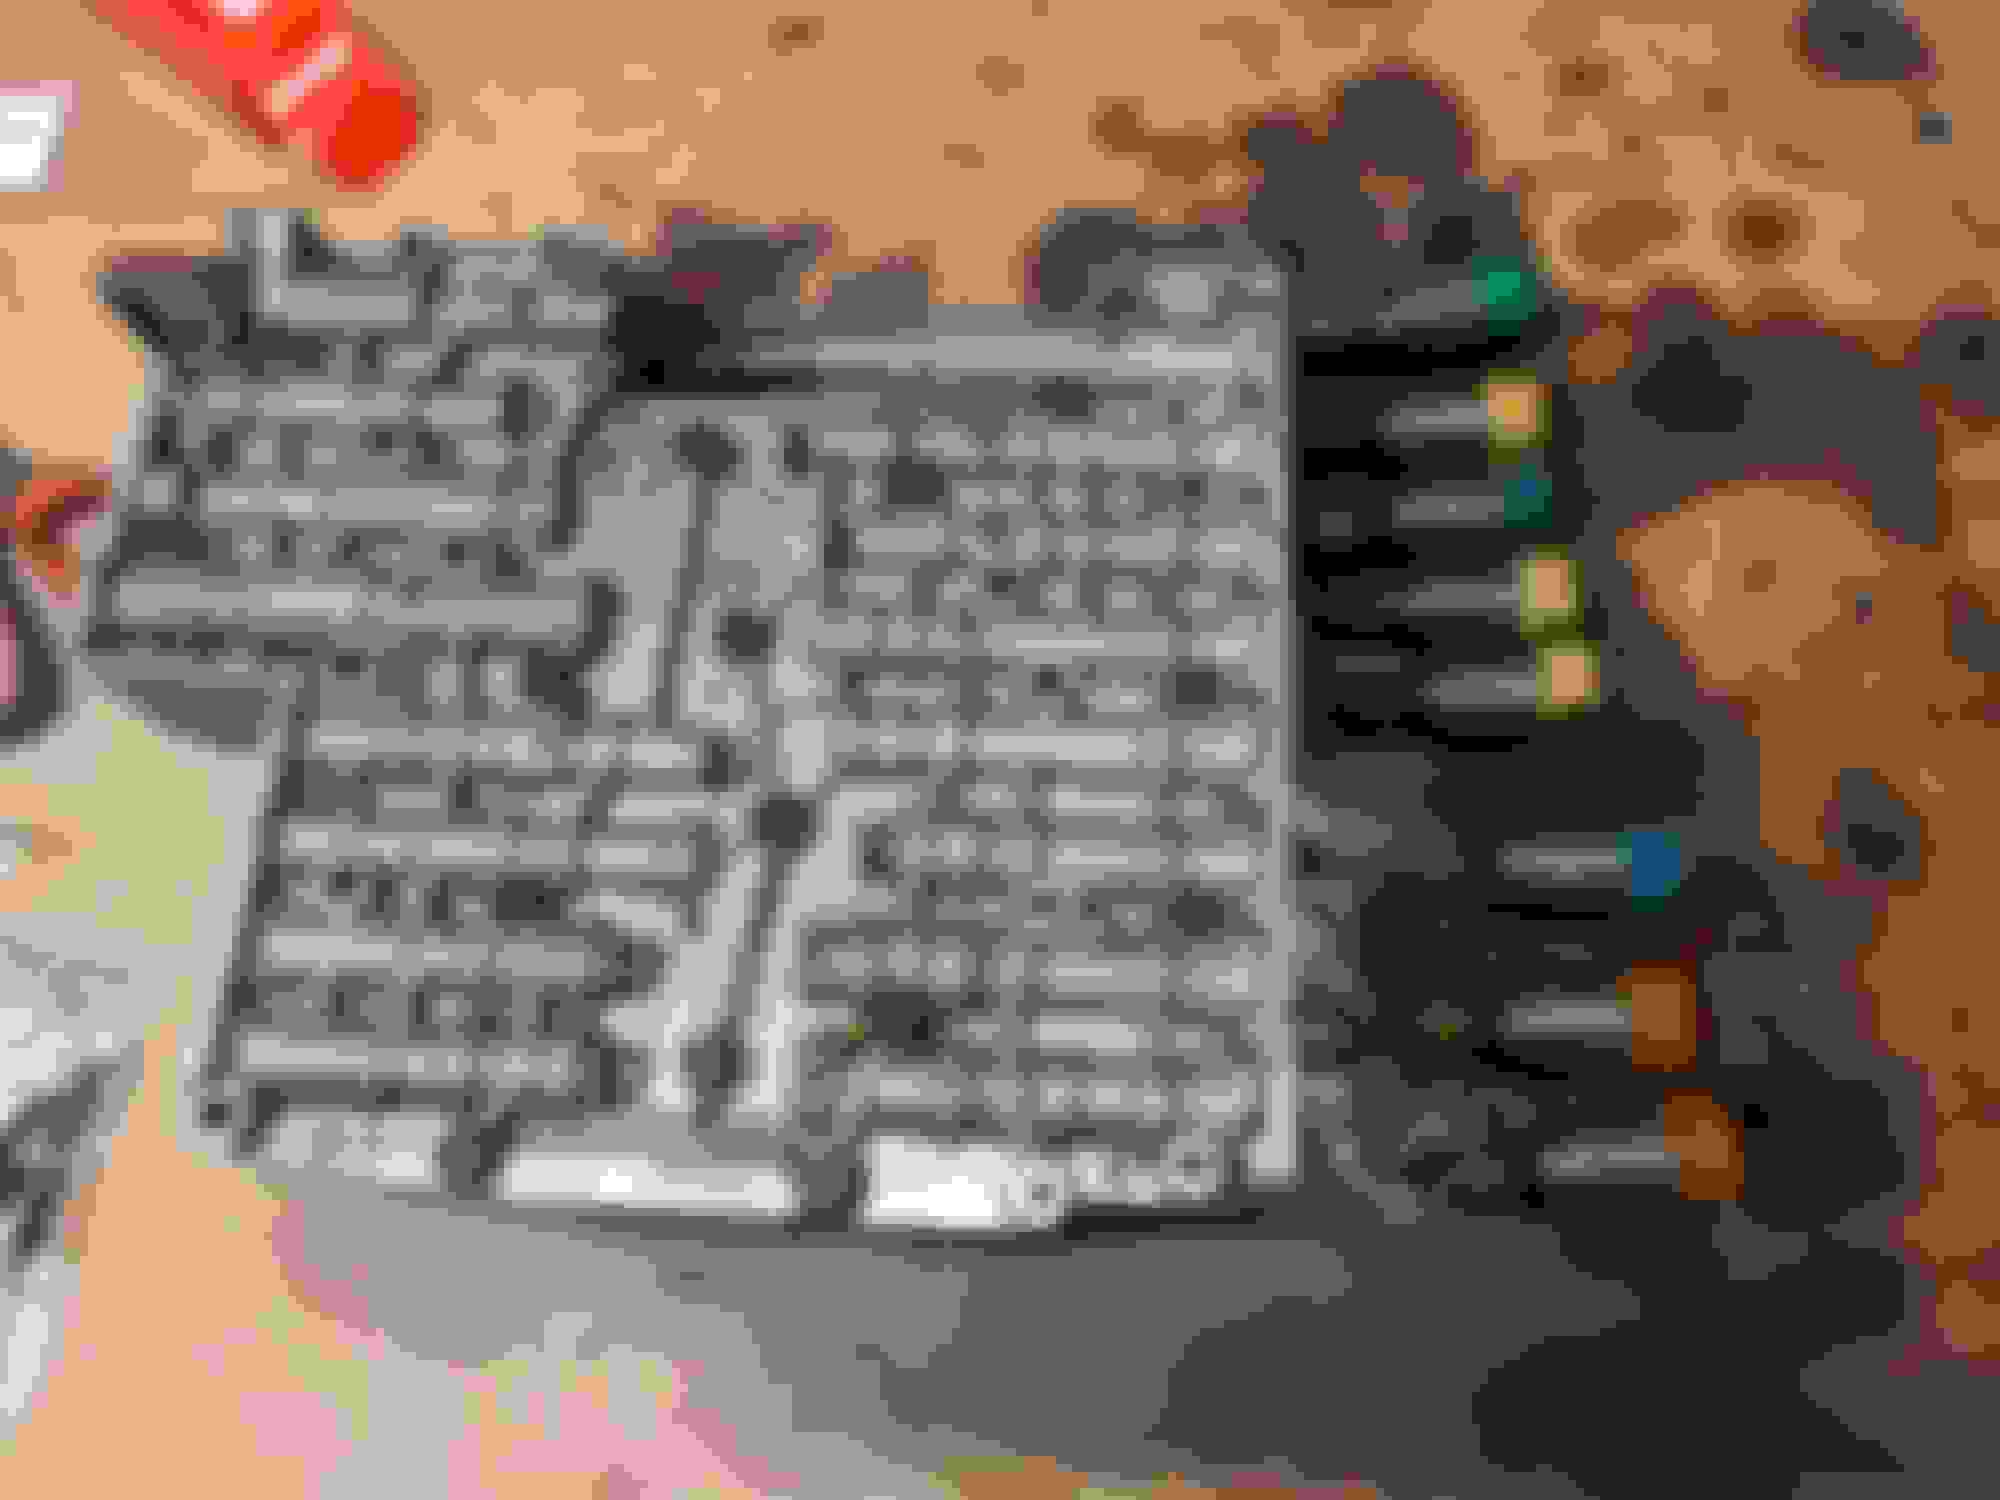
Next, remove all the T40 bolts holding the valve body into the gearbox. This is pretty easy to follow because there are only two head sizes of bolt on the valve body - T27 and T40. Just remove and set aside all the T40 bolts and you should be able to pull the valvebody out of the transmission. The things to note in this pic are the valve body seal on the left with two rectangles on it - these can crack and leak fluid and are a common failure point, the metal lever at the top that the slotted parking brake piston on the valve body engages with, and the four circular valve body seals. These should also be changed when you have the oil pan off or the valvebody out.
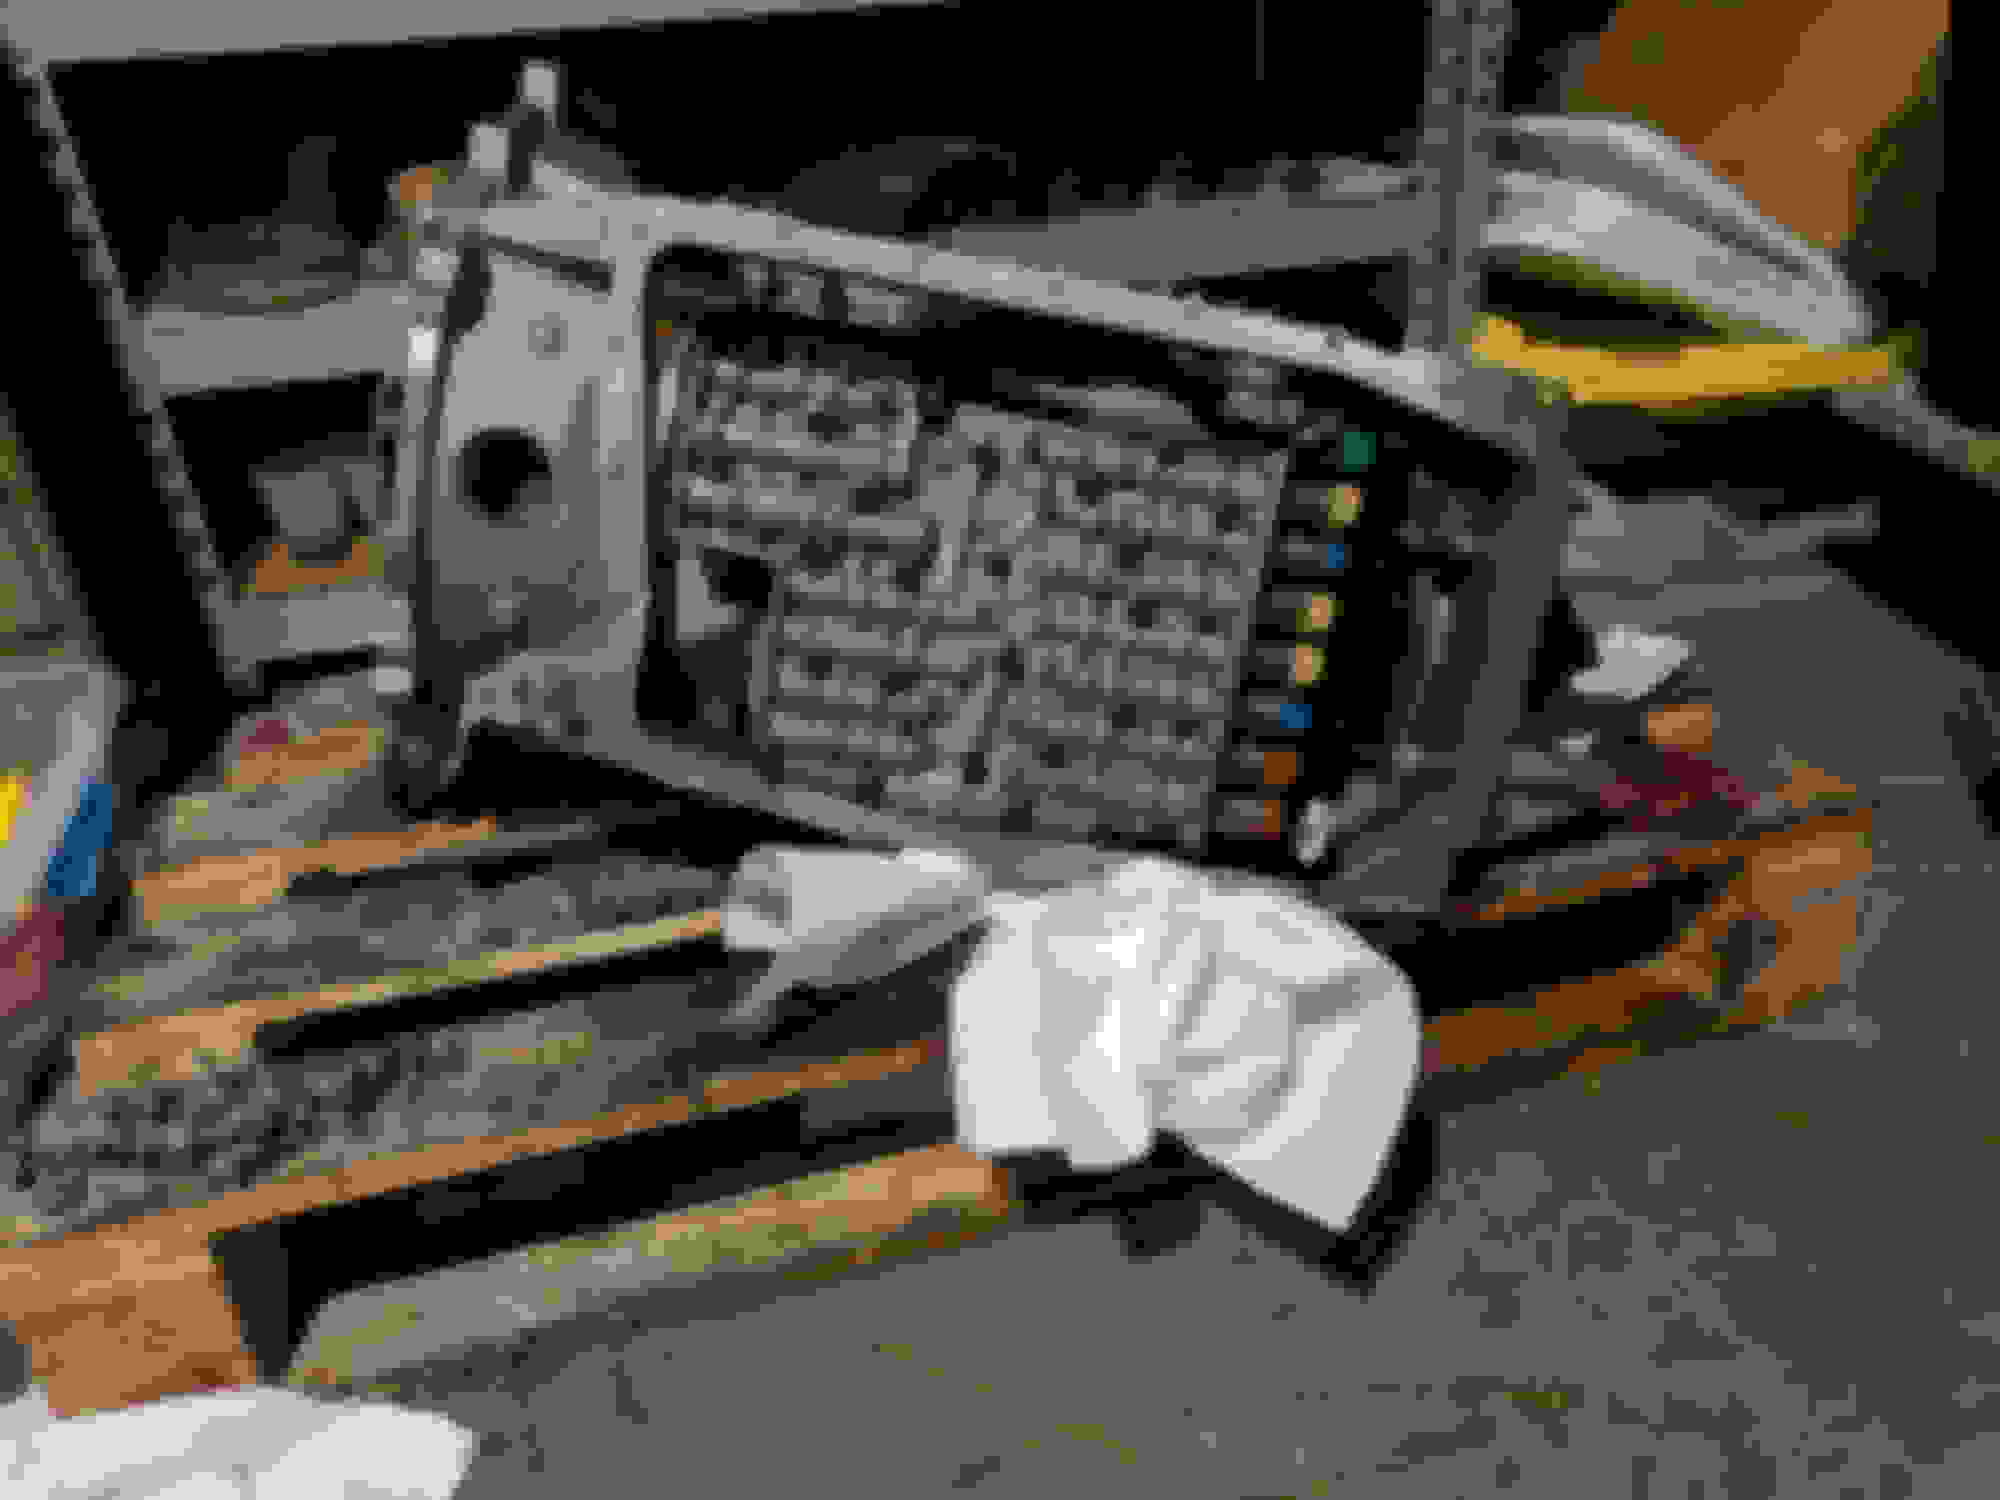
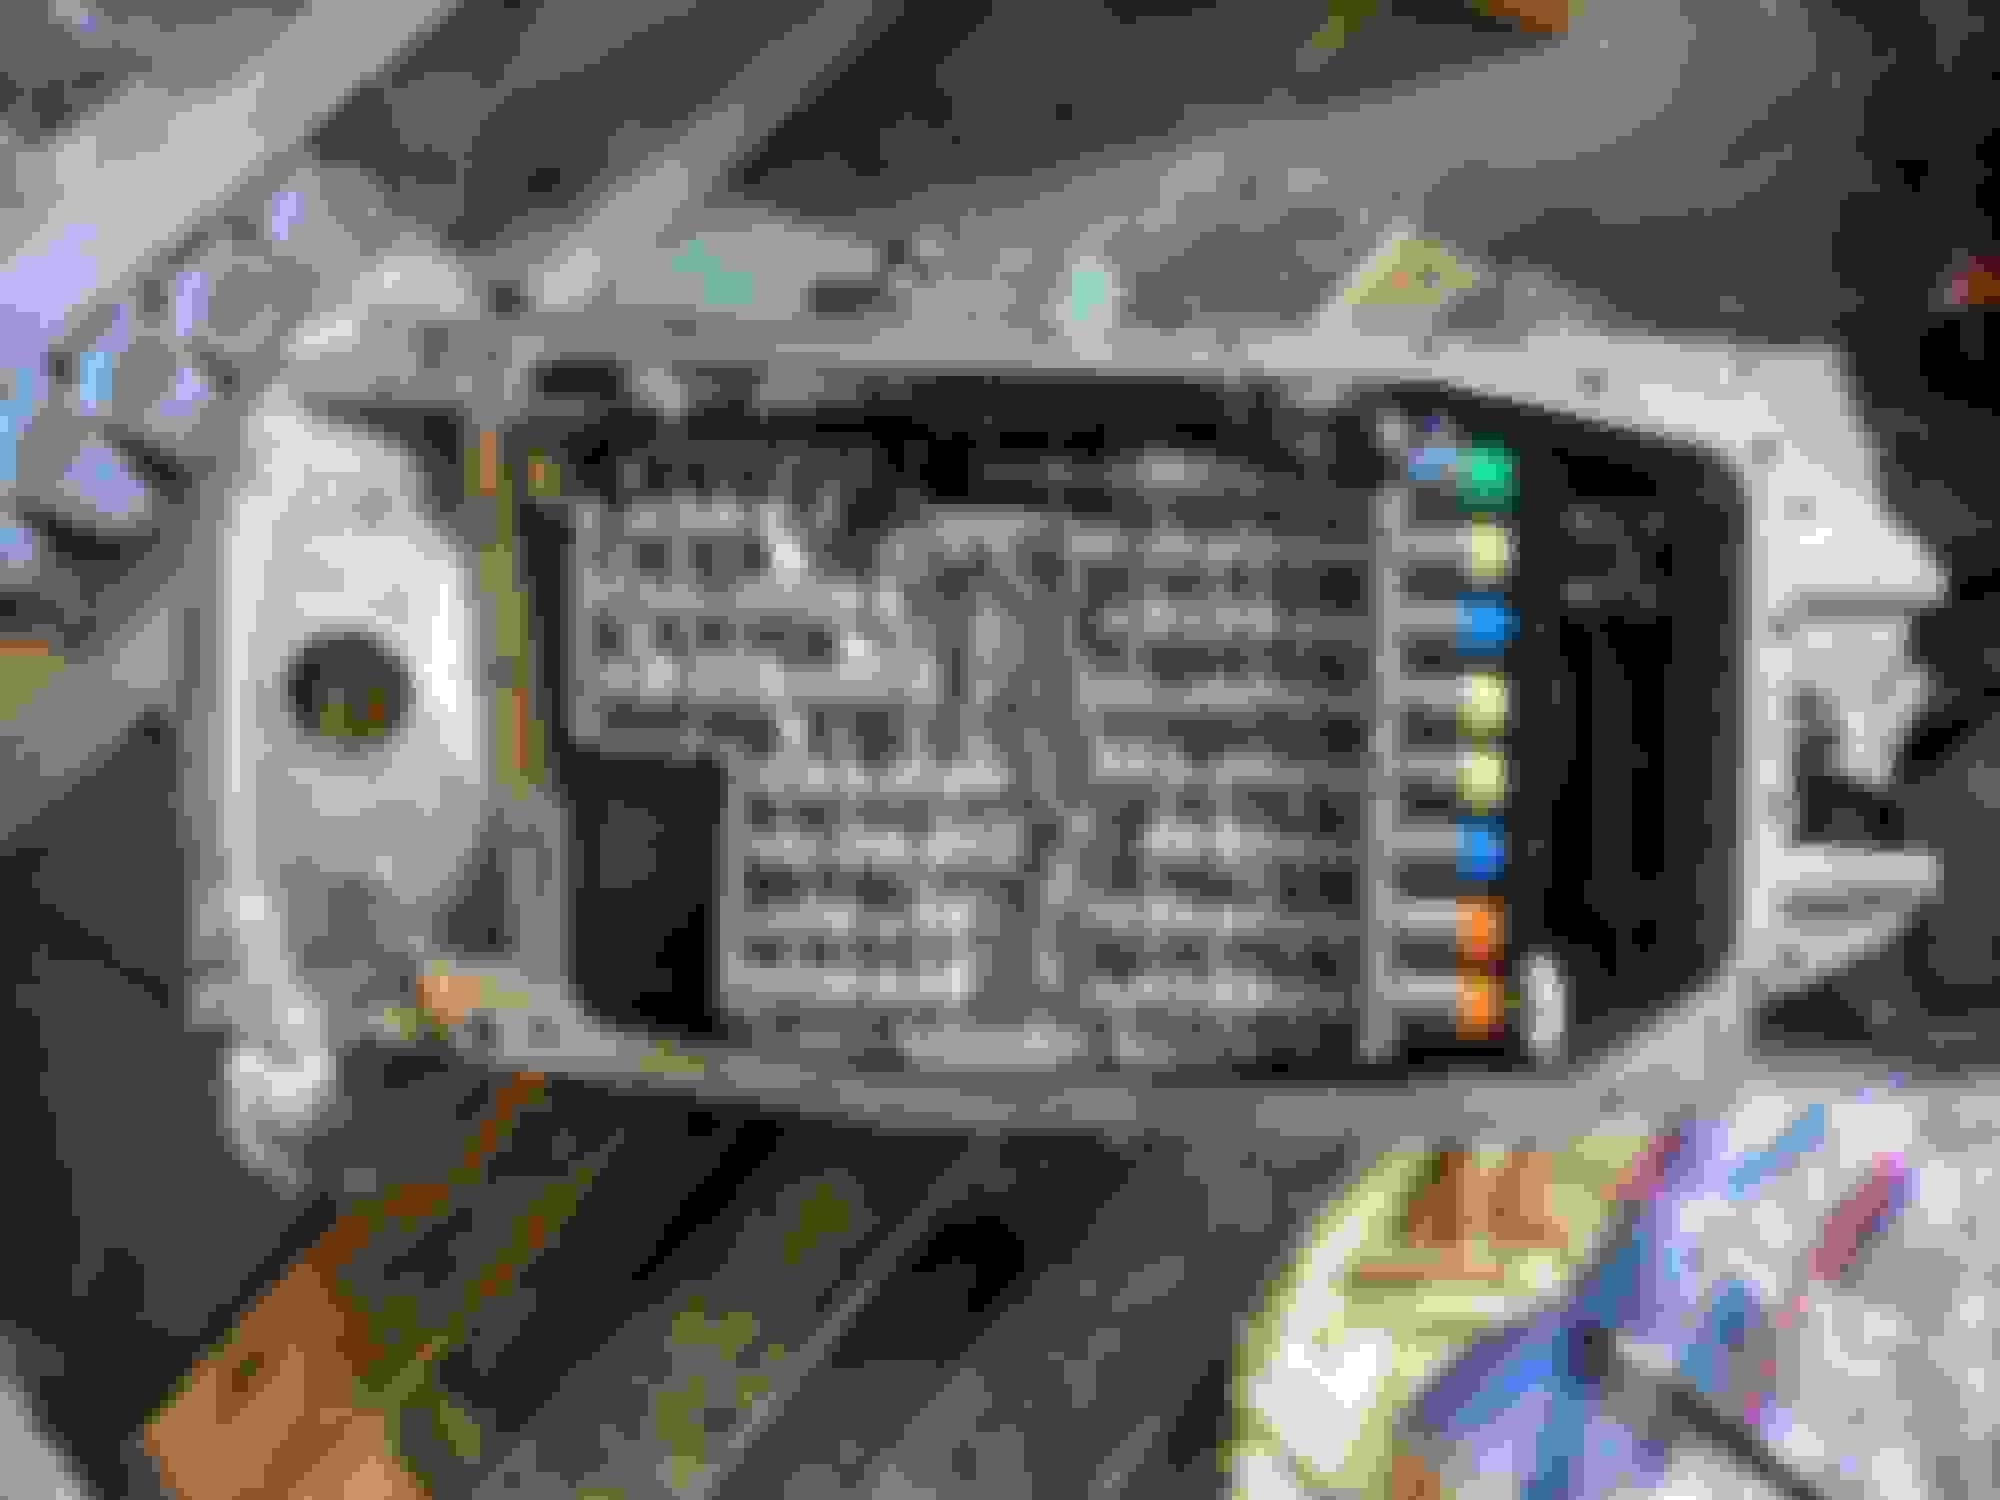
With the valvebody on the bench, remove the 3x T27 bolts holding the wiring loom casing onto the valvebody and unplug the connectors at each end. Remember to avoid touching any contacts.
Next, flip the valvebody over, and you'll be able to see which T27 bolts are holding the black plastic mechatronic unit to the valvebody. Remove these, disengage the parking brake cylinder pin from the sliding brown potentiometer track shown in the bottom of the pic, and pry the mechatronic unit off the valvebody. It maybe a little tight as the mechatronic unit has two metal locating dowels to allow reassembly of the valvebody and unit.
You'll be left with a valvebody that looks like this.
Next, we can remove the solenoids. They're held in place by a metal retaining clip that runs the length of the valvebody, held by small screws by each solenoid. Remove these screws and lift the retaining plate out, and set them aside.
Remove the solenoids just by tugging them out. Make a note of their locations (or use these pictures as a guide).
Next, remove the MV2 solenoid on the other side of the valvebody. This has a spring and a metal cup behind it so be careful to stop it pinging out when you remove the solenoid.
Warning
Before you go any further, remember - this is the bit where tiny parts can go everywhere, never to be found again, and ruin your day. Be slow and careful with this bit.
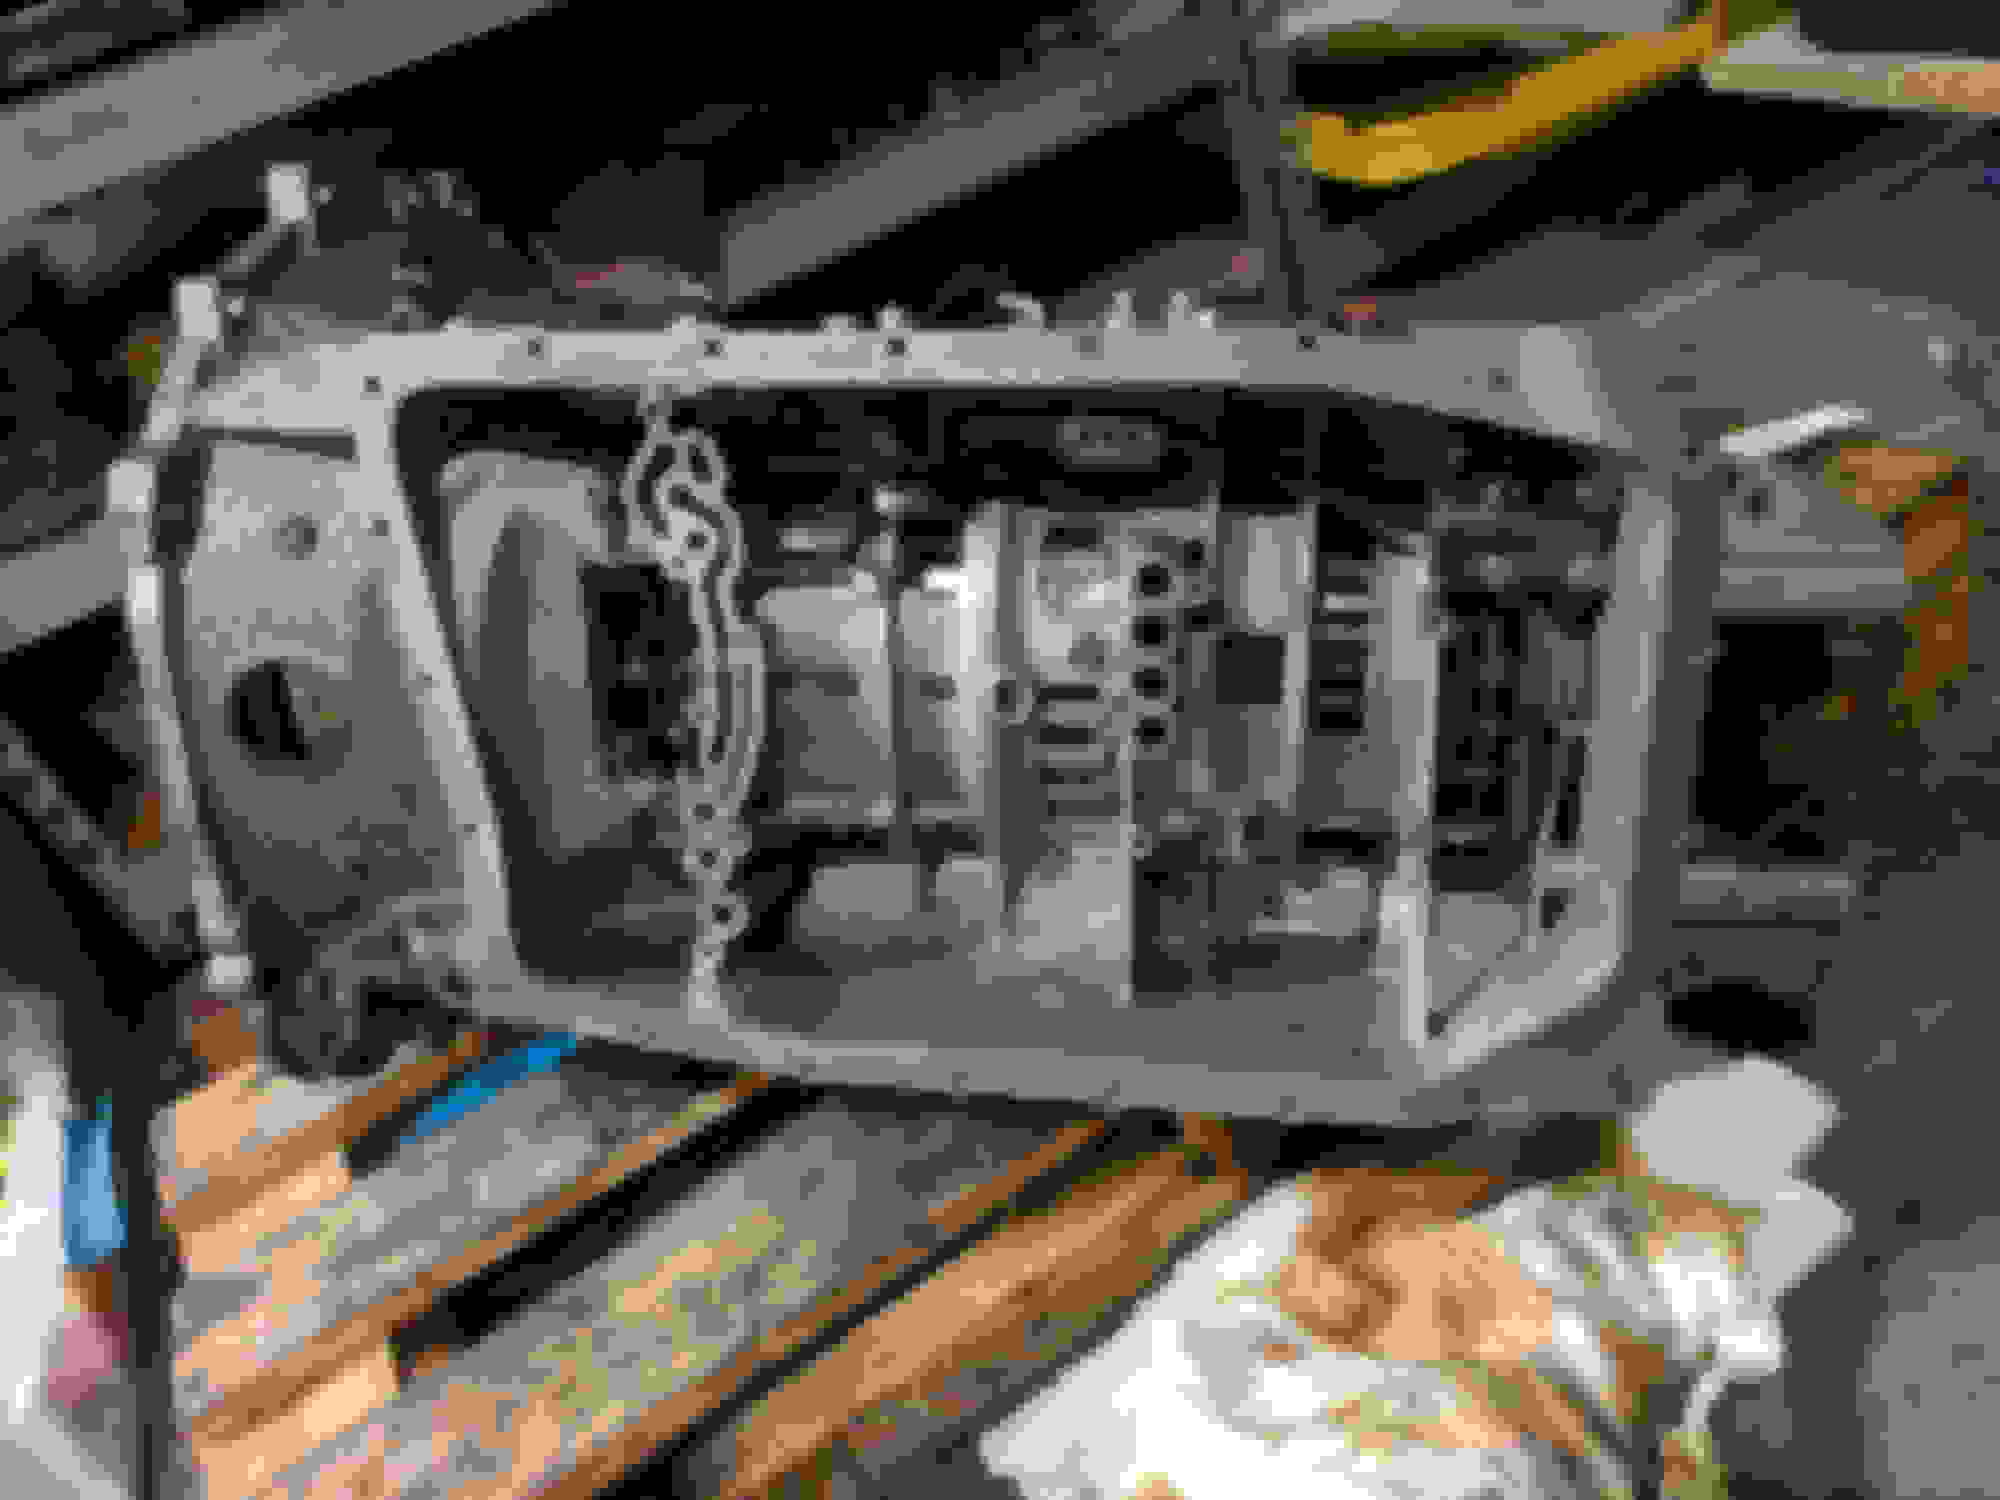
Next you can separate the valve body. Remove all the remaining T27 bolts and put them aside. Next, you'll need to carefully pry the valvebody apart. Once you lift the top part of the valvebody off, you'll see the separator plate. Don't be surprised if it pops up when you lift the top of the valvebody up, as there are small springs underneath it that do this. These separator plates are technically re-useable if the black seal lines are not damaged, but given they're available for about $60 I figured it was worth just buying a new one for reassembly.
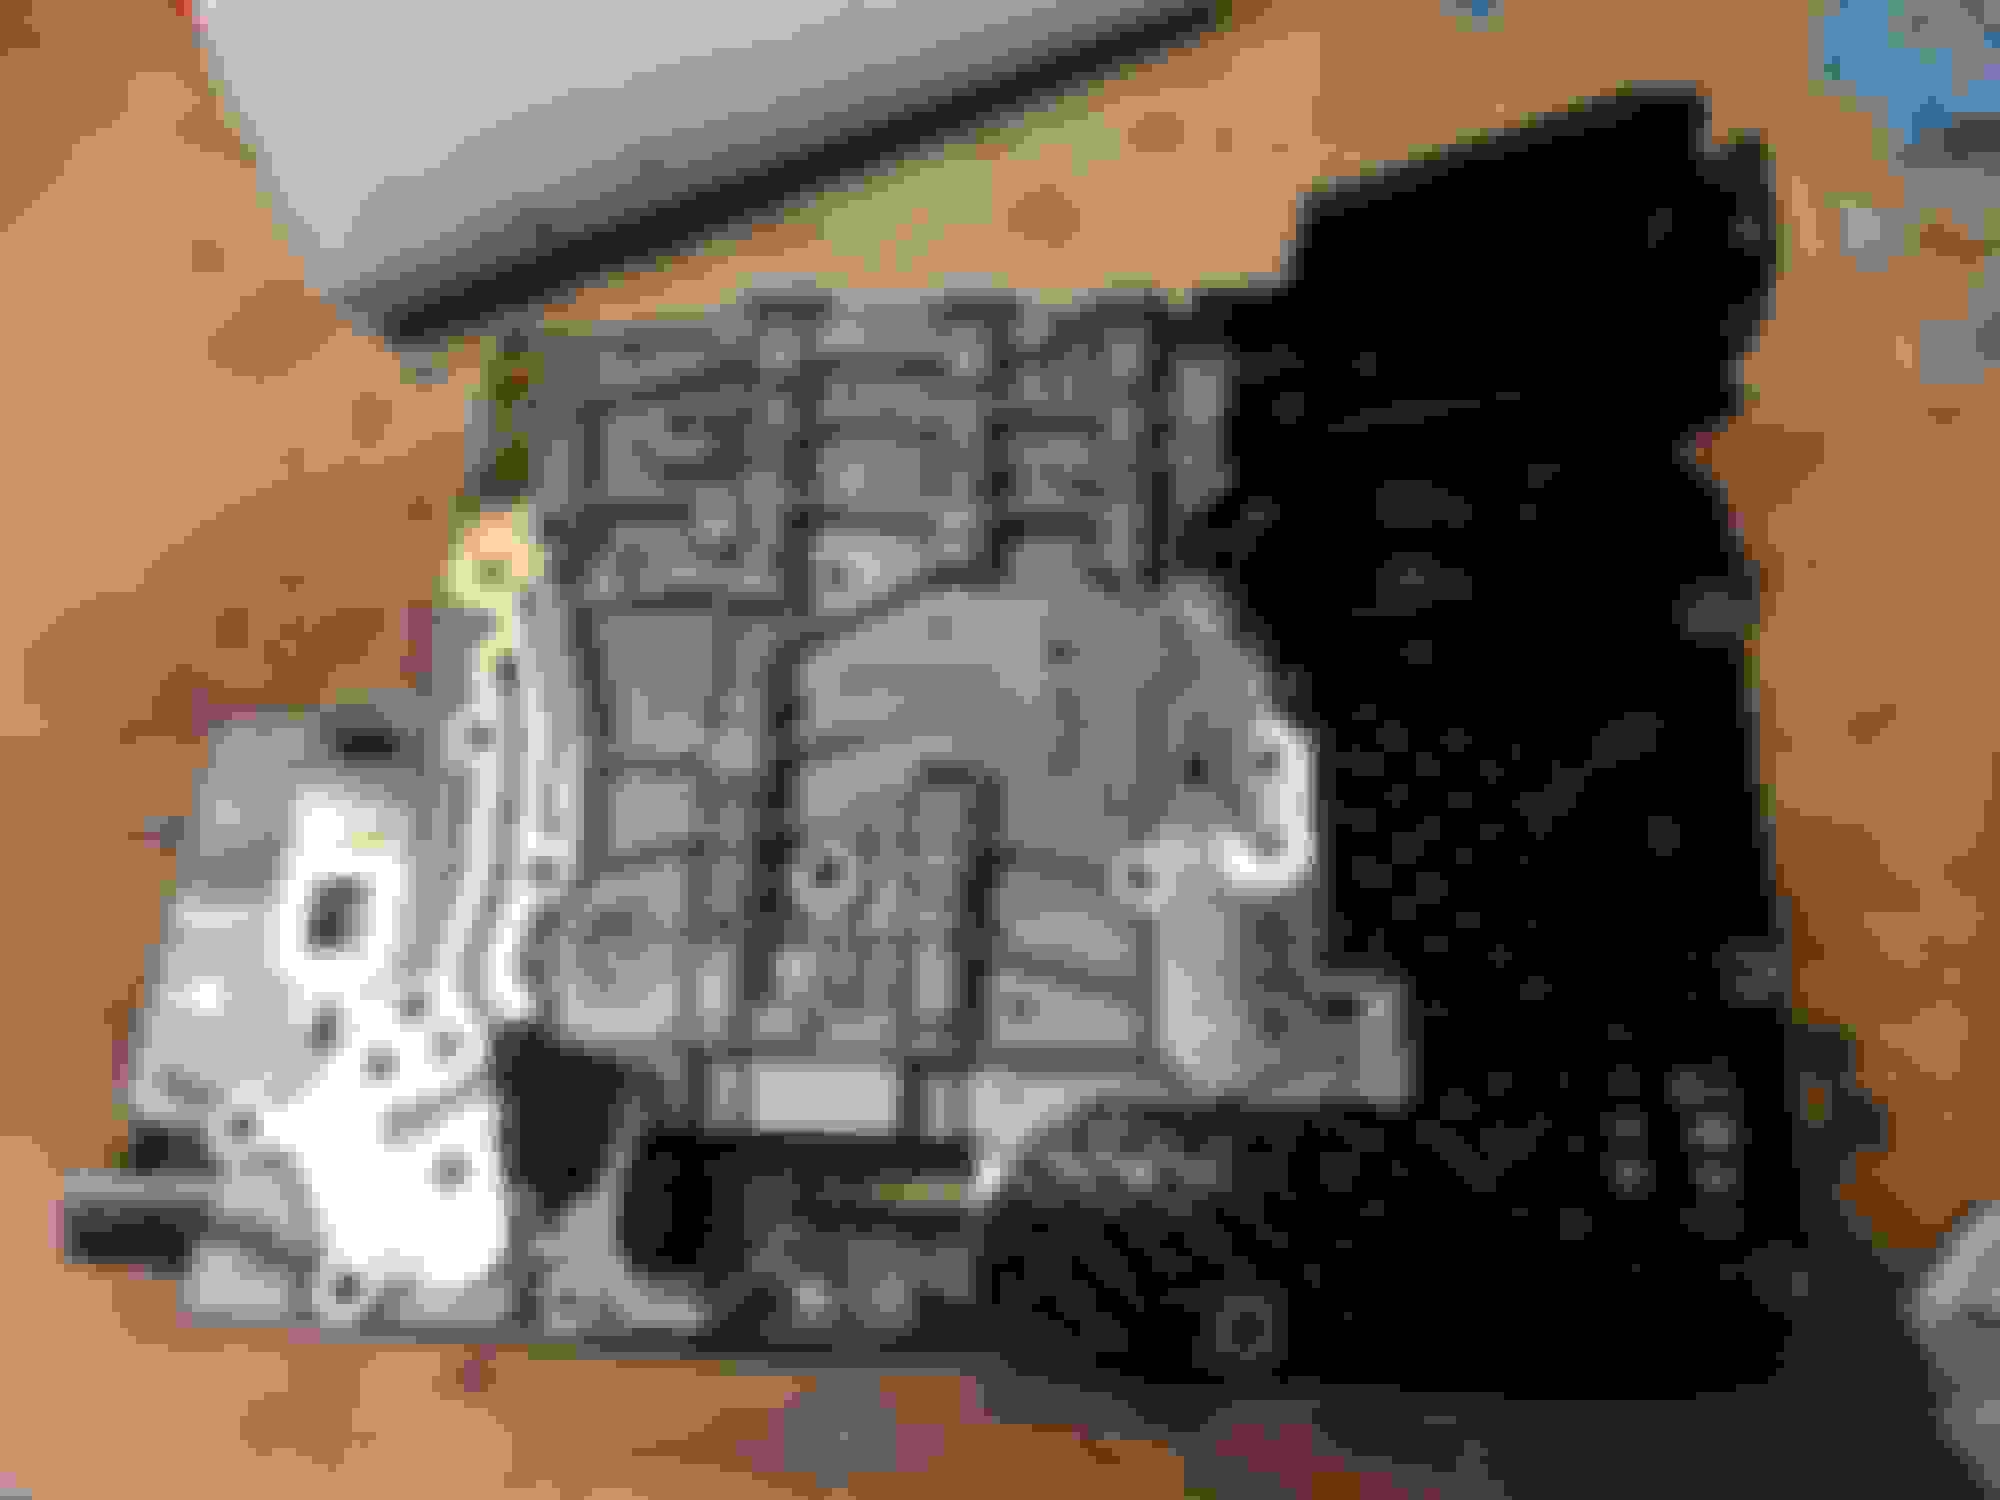
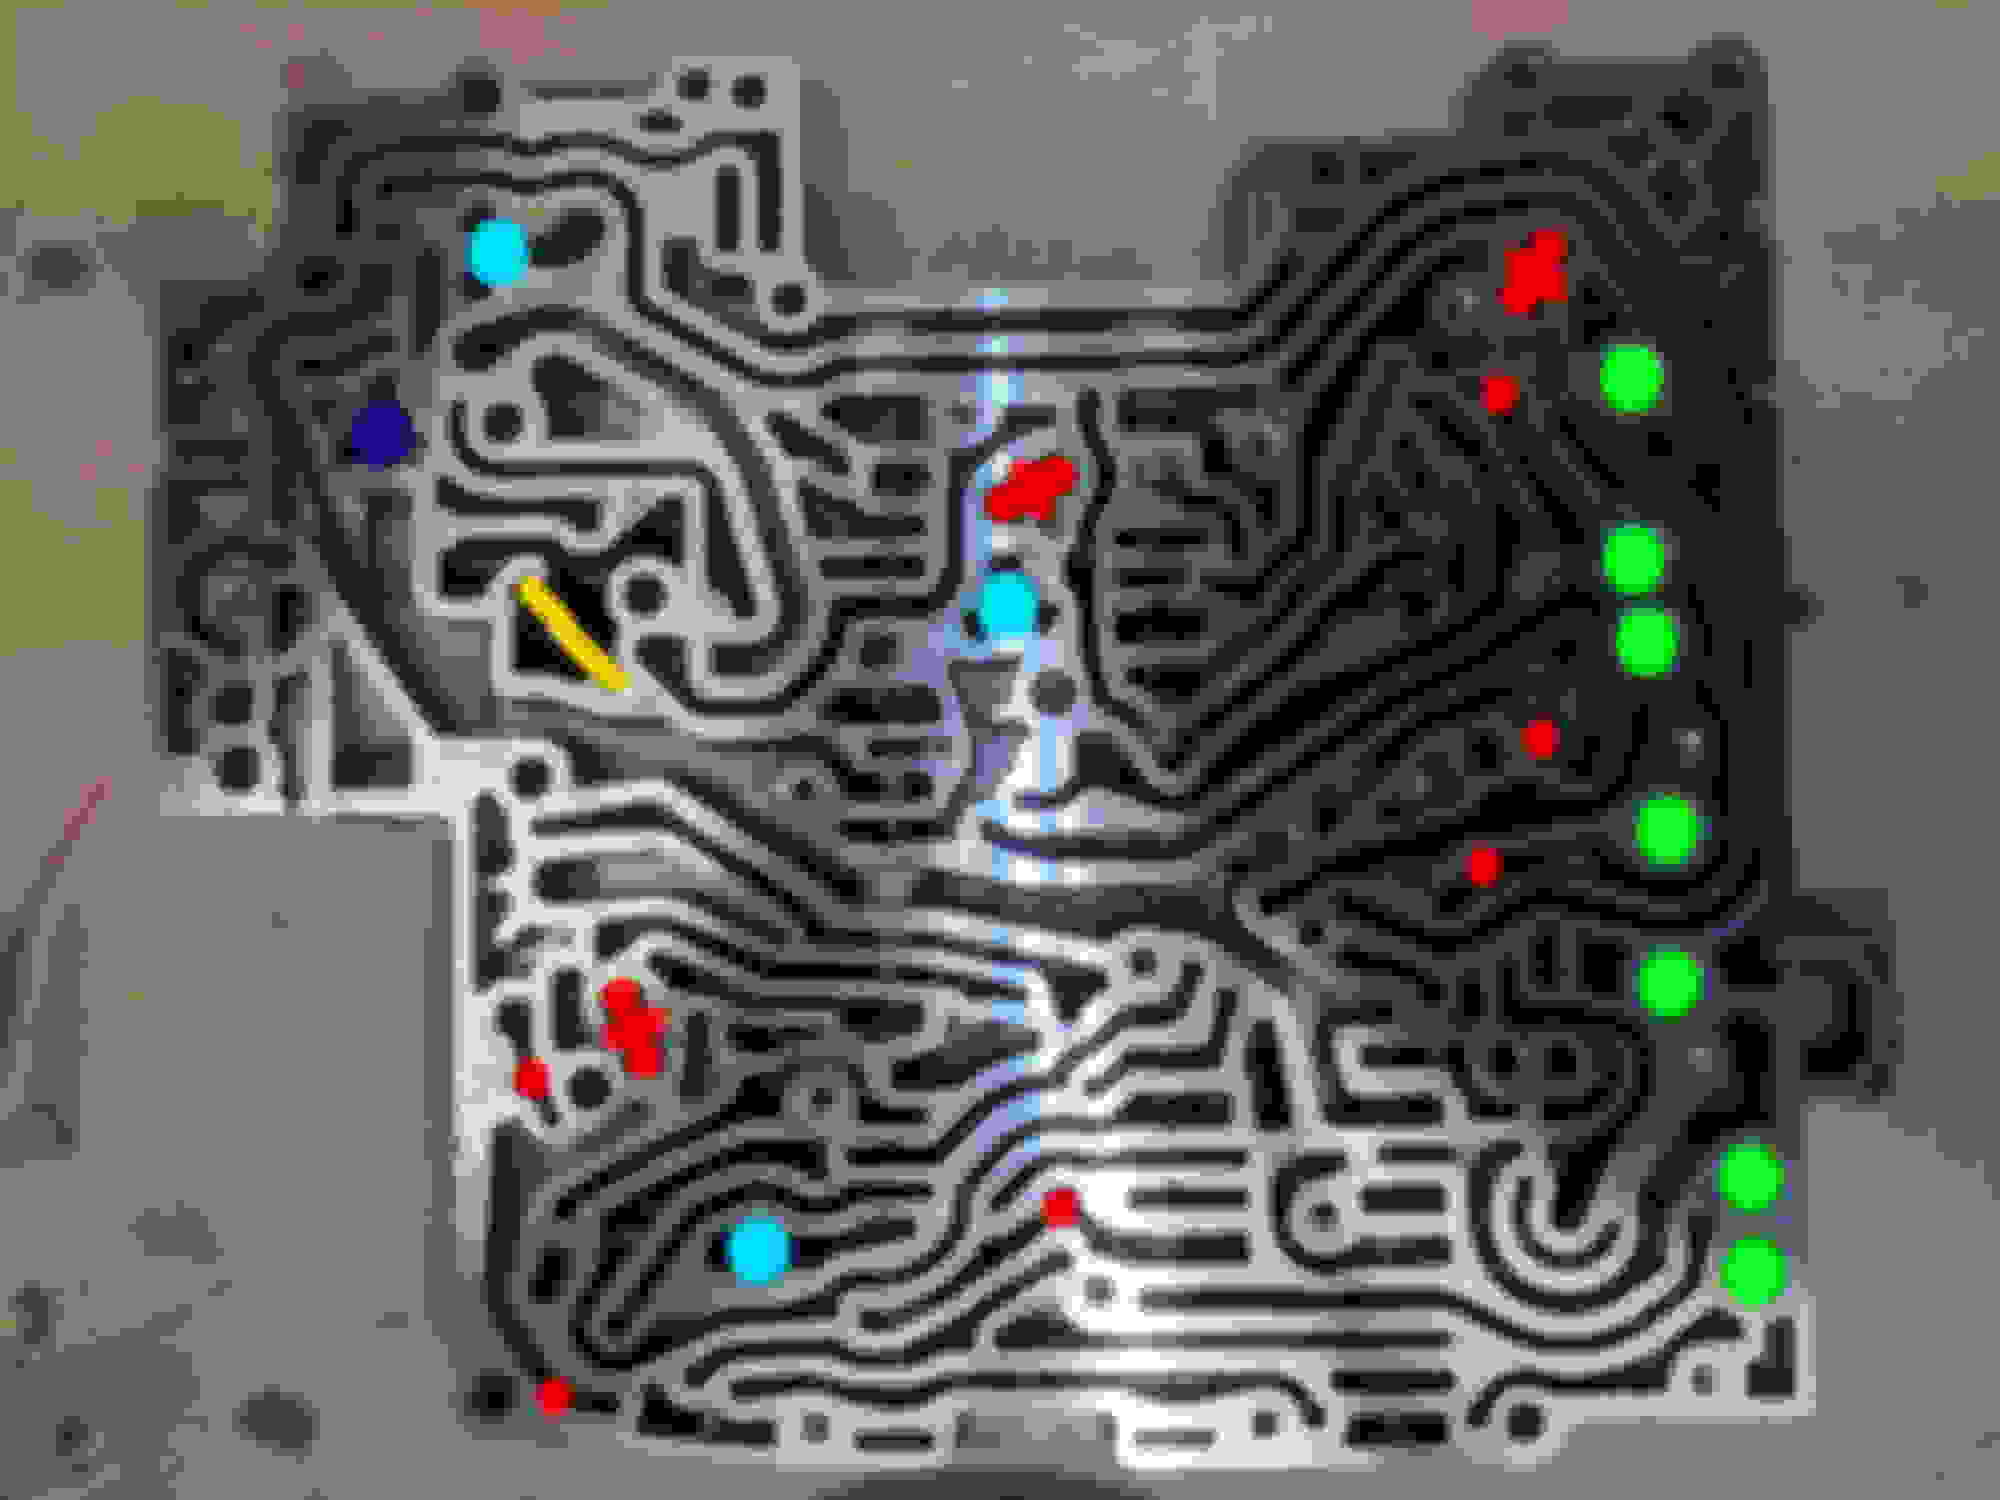
Next carefully lift the separator plate off, and you'll see this:
There are a few small parts here, so in case you lost any, here's a reference image. The red dots are the checkball locations (there are two types of checkballs, single ones which are basically small black *****, and double ones which are two joined together with a vertical bar between them), the 3x light blue dots and 1x dark blue dot are the springs with light/dark blue plastic tops, the yellow line is a mesh filter, and the green dots are pistons.
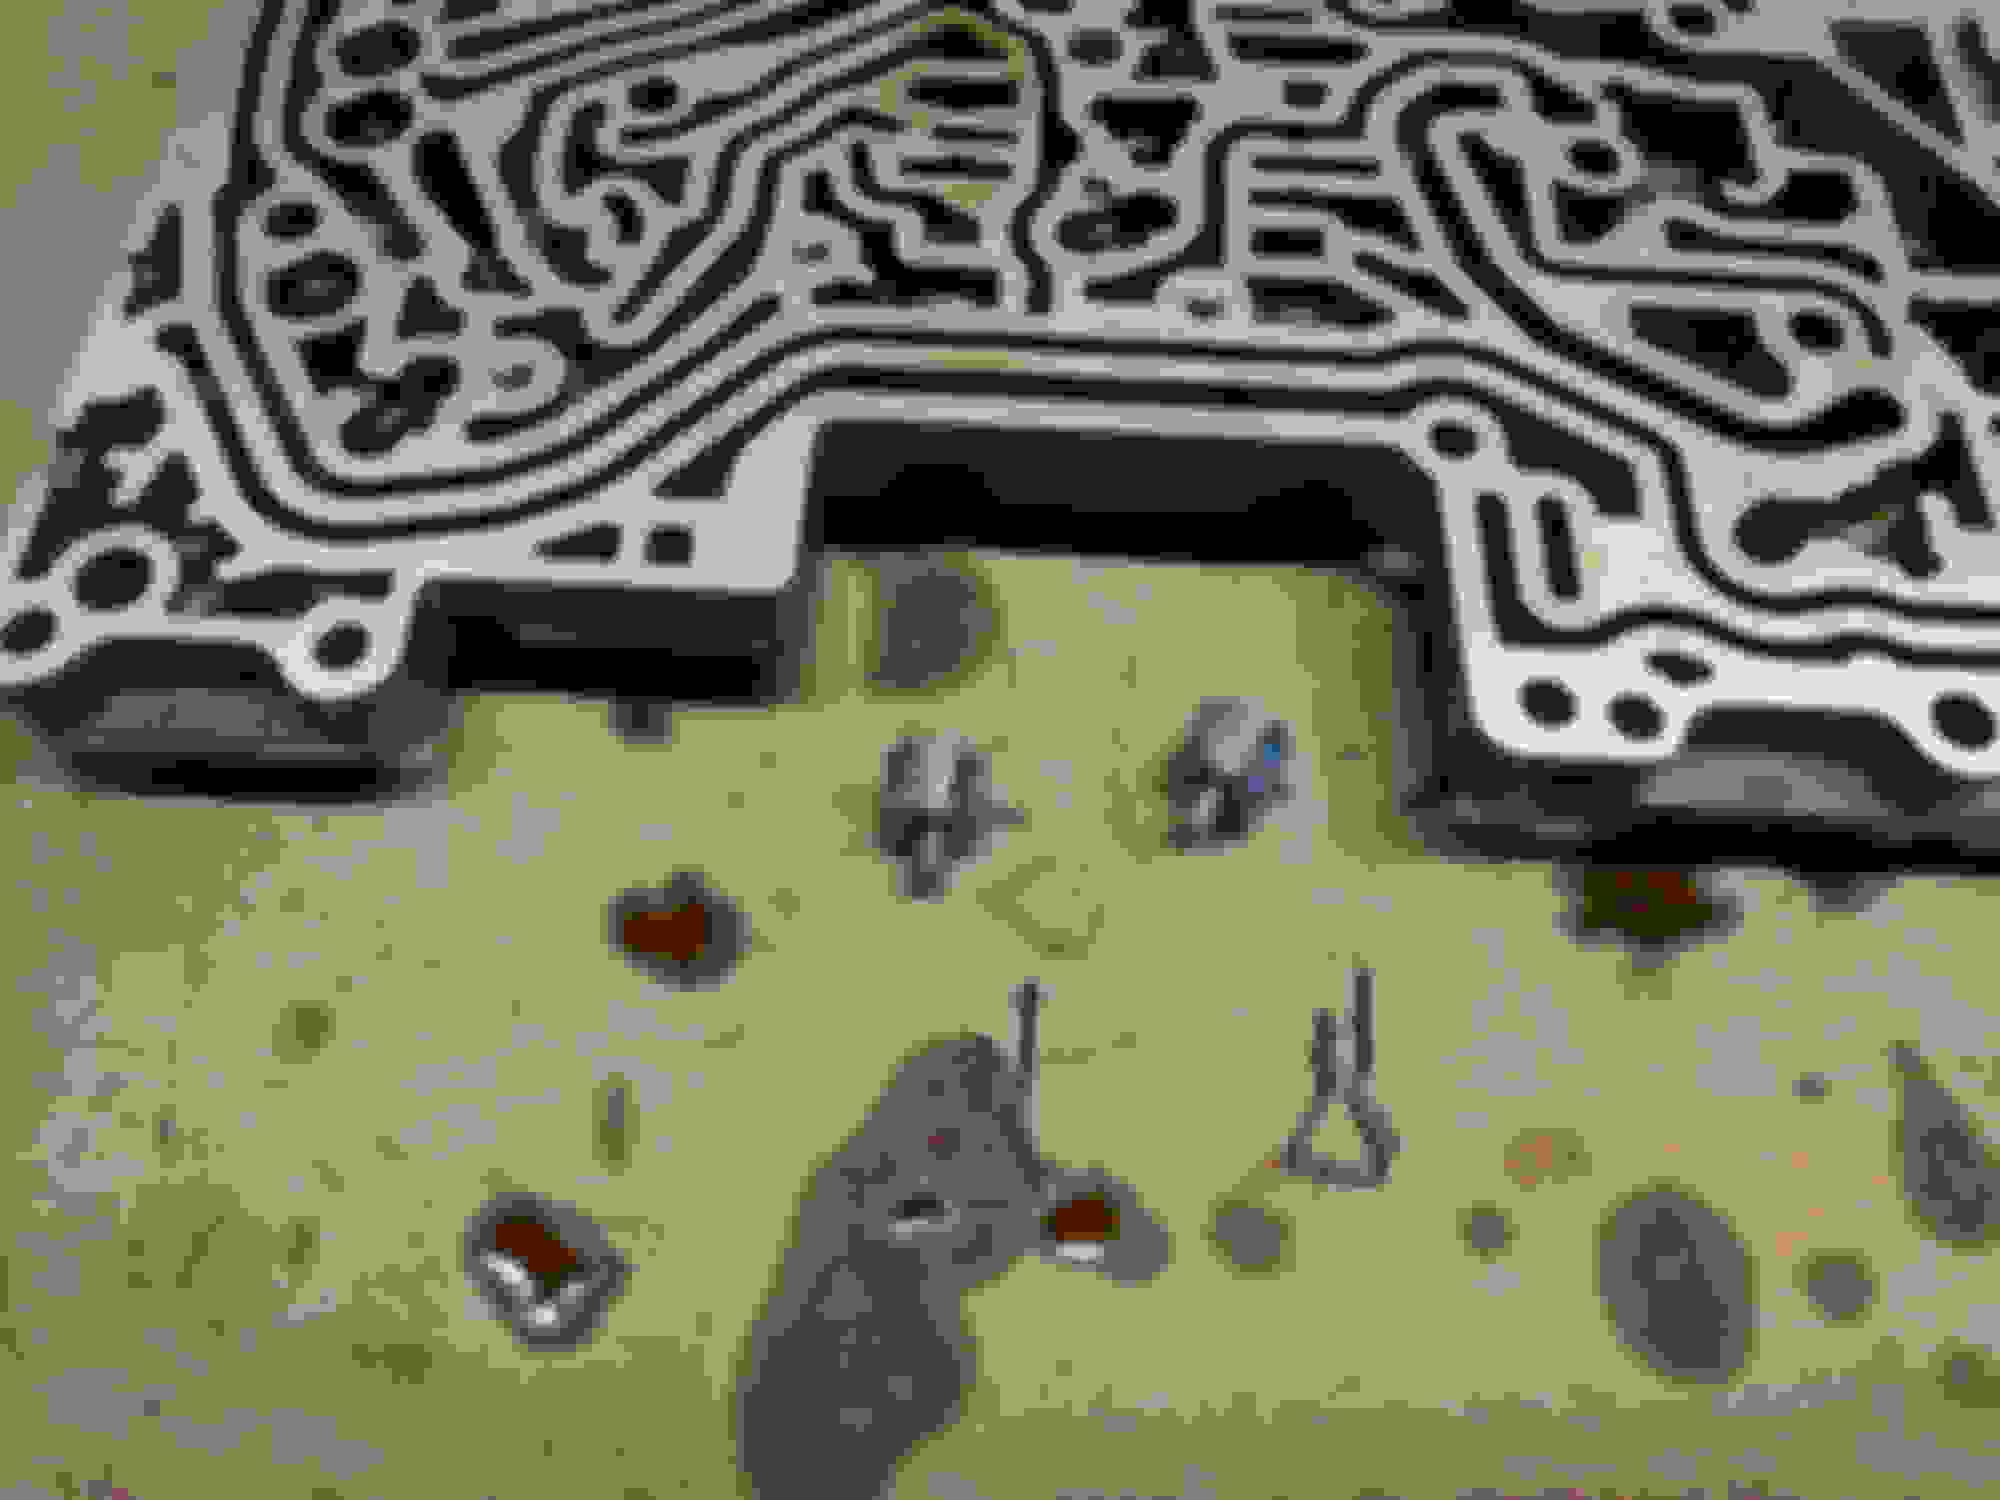
Remove all these items carefully using a small screwdriver and bag them up individually for reassembly. Start with the springs, then the checkballs (pry these out with a small screwdriver) , filter, and finally remove the pistons by hanging the valve body off the bench and pushing them up from underneath with a very small (jeweler's) screwdriver poked through the hole underneath each piston.
Next, unpack the Zip Kit and lay the bags out.
There's not much point in me repeating the Zip Kit instructions and they're fairly easy to follow - it includes new end plugs with O-Rings, new pistons, and a variety of O Rings for solenoids as well as spare O-Rings for each pack in case you break any. The only hints I'd have is that the O-Ring'd end plugs are a tighter fit (because of the O-Rings) than the original plugs, so you'll probably need to drive them in with a soft mallet or similar.
Here's a couple of pics during fitting the zip kit. It's basically just a case of removing a retaining clip and pulling the old parts out, before installing any replacement ones.
If you're installing new solenoids, then you can ignore the replacement O-Rings in the Zip Kit but otherwise it's worth fitting them onto the solenoids before reinstalling.
Reassembly is pretty much the reverse of dismantling (like Haynes Manuals). Replace the check *****, springs, and filter back into their original positions in the lower valve body (the pistons should've already been replaced as part of the Zip Kit fitting), carefully lay the new separator plate onto the lower valvebody, making sure the plastic "hats" on top of the springs sit in their respective holes on the separator plate. Next carefully lay the upper half of the valve body on top and replace the T27 torx bolts that hold it together.
Next, install all solenoids, noting carefully their positions based on color. Refit the retainer plates and screws.
Now you can install the Mechatronic unit (obligatory static warning again - don't touch the contacts). You'll probably find you have to just slightly loosen the T27 torx bolts (though not too loose, as you'll be turning the vavlebody over to install the mechatronic and back again) holding the unit together in order to allow the locating dowels on the mechatronic unit to slide through both halves of the valvebody as the likelihood is they're not bolted together completely straight and you won't be able to push the dowels through. Also make sure that the parking brake cylinder pin is engaged with the potentiometer on the mechatronic unit. Once you've done this, flip the valvebody back over and install remaining T27 bolts to hold mechatronic unit on, and tighten all T27 bolts to 6Nm.
Finally, install the wiring connector sleeve and the bolts holding it on. Plug it in.
You're now ready to install the valvebody back into the gearbox. Firstly. we'll fit new seals. The replacement seals I got were color-coded due to length, with blue being the longest, then green, then the two shortest black ones. Push these seals in as far as they'll go.
Next, install the valvebody and all the T40 bolts holding it into the gearbox tightened to 8Nm. Make sure that the parking brake piston engaged with the lever inside the gearbox.
Next, install the new valvebody sleeve. You'll probably have to push it in reasonably hard in order to push the white locking tab down to secure it in place. There's a groove to make sure it's lined up correctly.
Fit a new oil pan, gasket, and use new bolts for refitting.
Done!
@davetibbs Hey I�m glad I found this thread again. I�ve done lots of searching into the Exedy route and have decided to take on the challenge myself. I�ve officially confirmed parts needed and have actually ordered most of them as well as a spare trans and another for a donor on the upgraded parts. It is definitely a big job but it looks like you�ve already done quite a bit more than I have with the whole engine rebuild. But can�t go wrong with 1000hp rated internal transmission parts. Not like I would ever realistically see that number but the added peace of mind is always nice as I�ve surpassed the factory rated 700nm some time ago and have actually started seeing the results of that with slight issues. And of course I, like I�m sure many of us do, all too often get the �**** it may as well if I�m in there� type of attitude as don�t want to pull trans more than once. I�m not quite done adding some fun to the car so this to me seems like a necessity. TCM tune will be after and if some other goodies ever shows up then they are definitely getting worked in to the mix as well.
Anyways, Haven�t seen much from you lately and I hope all is well with the Jag, if you still have it. I know we aren�t too far from each other geographically so if you have any questions or anything about the Stage 2 please feel free to message and maybe we can meet up and chat or go for a cruise one day, and see who�s car is quicker. In �Mexico� of course.. 😂
I am new to this forum, I have 2010 jaguar xf 5.0l naturally aspirated. Whenever I push hard on accelerator, it shows transmission fault and car stops shifting. Then I have to stop and restart the car, everything is fine after that. I was thinking to change the valve body seals and see if that makes a difference but I could not find those seals anywhere neither with dealer nor online. this would be a great help if someone can send me a link.
For future reference you have a ZF6HP28 transmission. Sometimes you will see 6R60-6R80 in addition to ZF6HP26-ZF6HP28 when looking for parts but don�t let that mislead/ confuse you. They have some interchangeability. However, I believe the Valvebody and Mechatronic units DO NOT interchange. Good luck and feel free to message if you have any questions. I�ve done the sleeve/ seals and bridge seal already and it�s not the easiest the first try. I had to call a couple BMW shops and message a few members myself to get a few questions answered.
Great thread! Planning to maintenance my valve body at some point and was thinking has somebody gone beyond stock solenoids and/or TCU tune for 6HP28? I don't have real faults nor misbehavior in the transmission but it's time for fluid change and "while you're almost there" , I might as well do other maintenance. The only thing that bugs me, is the TC not locking very easily while coming out from slow intersection on D, meaning that it will come out with 2nd gear (I think) slowly accelerating and TC just doesn't lock up until very late and already time to change the following gear. You can help it by accelerating more heavily or stab the pedal but that's not the way I like it. This can be a feature as 6-speed is with a bit longer gears than 8-speed for instance but if it can be fixed, why not doing it.
So, related to that bug, I was asking whether someone has swapped different solenoids to gain better lock up or for some other reasons? Secondly, has someone installed a TCU tune for this transmission and what are the implications?
Not that I am any sort of expert but what you describe sounds like weak solenoids and fluid issues. I think if there is weak pressure against the solenoids or solenoids sticking it can make for slugish shifts. Follow the process very carefully and keep things clean. Have an accurate temp gun for fluid refill.
I agree that it may very well be the fluid and/or solenoids and that's why I planned to renew them. I had 3.0D XF earlier that only had 50 tkm and it did the same sluggish TC lock up with 2nd or 3rd gear when accelerating easily. Gear changes itself were/are good but TC behavior. That's why I thought that maybe there is a upgraded solenoid for torque converter clutch (EDS6) that someone has come across. it can also be that the software for diesel (that I have) is a bit different than petrol but I doubt that it's designed the way I'm experiencing it.
I haven't found the time yet for tear down maintenance. So, I will perform the same process described in this thread. Solenoids, zip kit, o-rings etc. I haven't come across with "upgrade" solenoids to go with, so need to go with standards.
 06-18-2022, 11:14 PM