
Broken seat
#1
 02-19-2012, 08:19 AM


#2
02-19-2012, 02:53 PM

Senior Member
Bill-
Well, IMHO you are doing it perhaps the hard way or at least the most expensive. Several posters in this forum have just removed the triangular bracket that cracked, and replaced or rewelded it. You have to grind off a big rivet to get the bracket off the seat frame, and rerivet in a replacement. I don't remember reading any threads about unskinning and reskinning a seat cover onto a different frame, though.
So you may be the first to tell the rest of us how hard it is! Keep us posted.
#3
02-19-2012, 06:24 PM
Veteran Member
If you've got a couple of hours and a few tools, it's not difficult.
Going from memory you'll need a couple of things to change the covers.
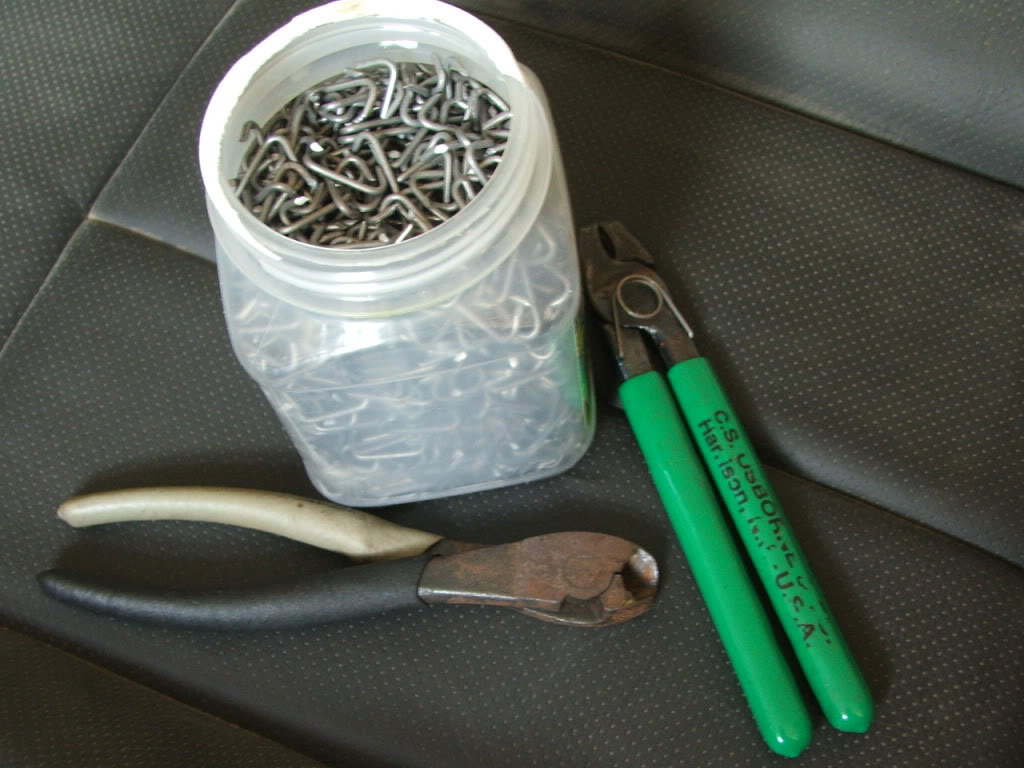
Hog rings
Hog ring pliers
Good side cutters or 'snips'
phillips screwdriver
Strong hands!
Disconnect the battery at the neg terminal.
To remove the seat from the car, 4 big torx bolts that go into the floorpan via spires nuts, careful they don't disappear under the carpet.
Rock the seat forward and disconnect the seat loom and heater cables move the seat forward tip it sideways out of the door. Try and cover paintwork/trim (so as not to damage it) with a duvet/blanket.
To remove the seat back, there are two clips holding the top and sides, the top ones are fir tree clips, a good tug backwards to release them - the sides are on the frame so you need to flare the back panel over them by pulling outwards and back. 2 screws hold the very bottom with plastic hinges. You'll need to tip the seat forward to get at them
Remove the head rest with a sharp tug straight up
The switchpack is held in with tangs, see this link,
https://www.jaguarforums.com/forum/x...er-seat-61657/
the top of the seat cover is held onto the frame with plastic edging, pull down on it to release from the frame.
The lower edge/sides are the same, and clips hold the rest of the leather onto the frame.
Once you've undone the sides, you can see how the face is attached to the seat, via hog rings wire runners and plastic cables. Snip these rings to release the cover. Be careful not to snip the steel and plastic runners.
The base is more of the same.
To assemble,
start at either the front back of base and botton/top of seat back by locating the push on trim back onto the frame and start on the rings,
you already have guide holes to feed the rings into, I found loading the hog ring pliers with the ring, then feeding it onto the plastic cable, then closing the ring up onto the wire runner worked best. An even pressure to locate the rings gets the same factory finish.
If you bought the part, I assume you fancy tackling fixing it yourself, but you do need the tools I mentioned or you'll not get the finish.
Pictures are of the tools, and 'skinned' seat(s).

Hope (I haven't forgotten anything) this helps
Going from memory you'll need a couple of things to change the covers.
Hog rings
Hog ring pliers
Good side cutters or 'snips'
phillips screwdriver
Strong hands!
Disconnect the battery at the neg terminal.
To remove the seat from the car, 4 big torx bolts that go into the floorpan via spires nuts, careful they don't disappear under the carpet.
Rock the seat forward and disconnect the seat loom and heater cables move the seat forward tip it sideways out of the door. Try and cover paintwork/trim (so as not to damage it) with a duvet/blanket.
To remove the seat back, there are two clips holding the top and sides, the top ones are fir tree clips, a good tug backwards to release them - the sides are on the frame so you need to flare the back panel over them by pulling outwards and back. 2 screws hold the very bottom with plastic hinges. You'll need to tip the seat forward to get at them
Remove the head rest with a sharp tug straight up
The switchpack is held in with tangs, see this link,
https://www.jaguarforums.com/forum/x...er-seat-61657/
the top of the seat cover is held onto the frame with plastic edging, pull down on it to release from the frame.
The lower edge/sides are the same, and clips hold the rest of the leather onto the frame.
Once you've undone the sides, you can see how the face is attached to the seat, via hog rings wire runners and plastic cables. Snip these rings to release the cover. Be careful not to snip the steel and plastic runners.
The base is more of the same.
To assemble,
start at either the front back of base and botton/top of seat back by locating the push on trim back onto the frame and start on the rings,
you already have guide holes to feed the rings into, I found loading the hog ring pliers with the ring, then feeding it onto the plastic cable, then closing the ring up onto the wire runner worked best. An even pressure to locate the rings gets the same factory finish.
If you bought the part, I assume you fancy tackling fixing it yourself, but you do need the tools I mentioned or you'll not get the finish.
Pictures are of the tools, and 'skinned' seat(s).
Hope (I haven't forgotten anything) this helps
Last edited by Sean B; 02-19-2012 at 06:44 PM. Reason: more steps added..
#4
02-19-2012, 06:38 PM
Veteran Member

#5
02-19-2012, 07:00 PM
Veteran Member
#6
02-19-2012, 07:04 PM
Veteran Member


Thread
Thread Starter
Forum
Replies
Last Post
Currently Active Users Viewing This Thread: 1 (0 members and 1 guests)