When you click on links to various merchants on this site and make a purchase, this can result in this site earning a commission. Affiliate programs and affiliations include, but are not limited to, the eBay Partner Network.
2013 XJ 3.0 AWD Supercharger and Cooling System Overhaul
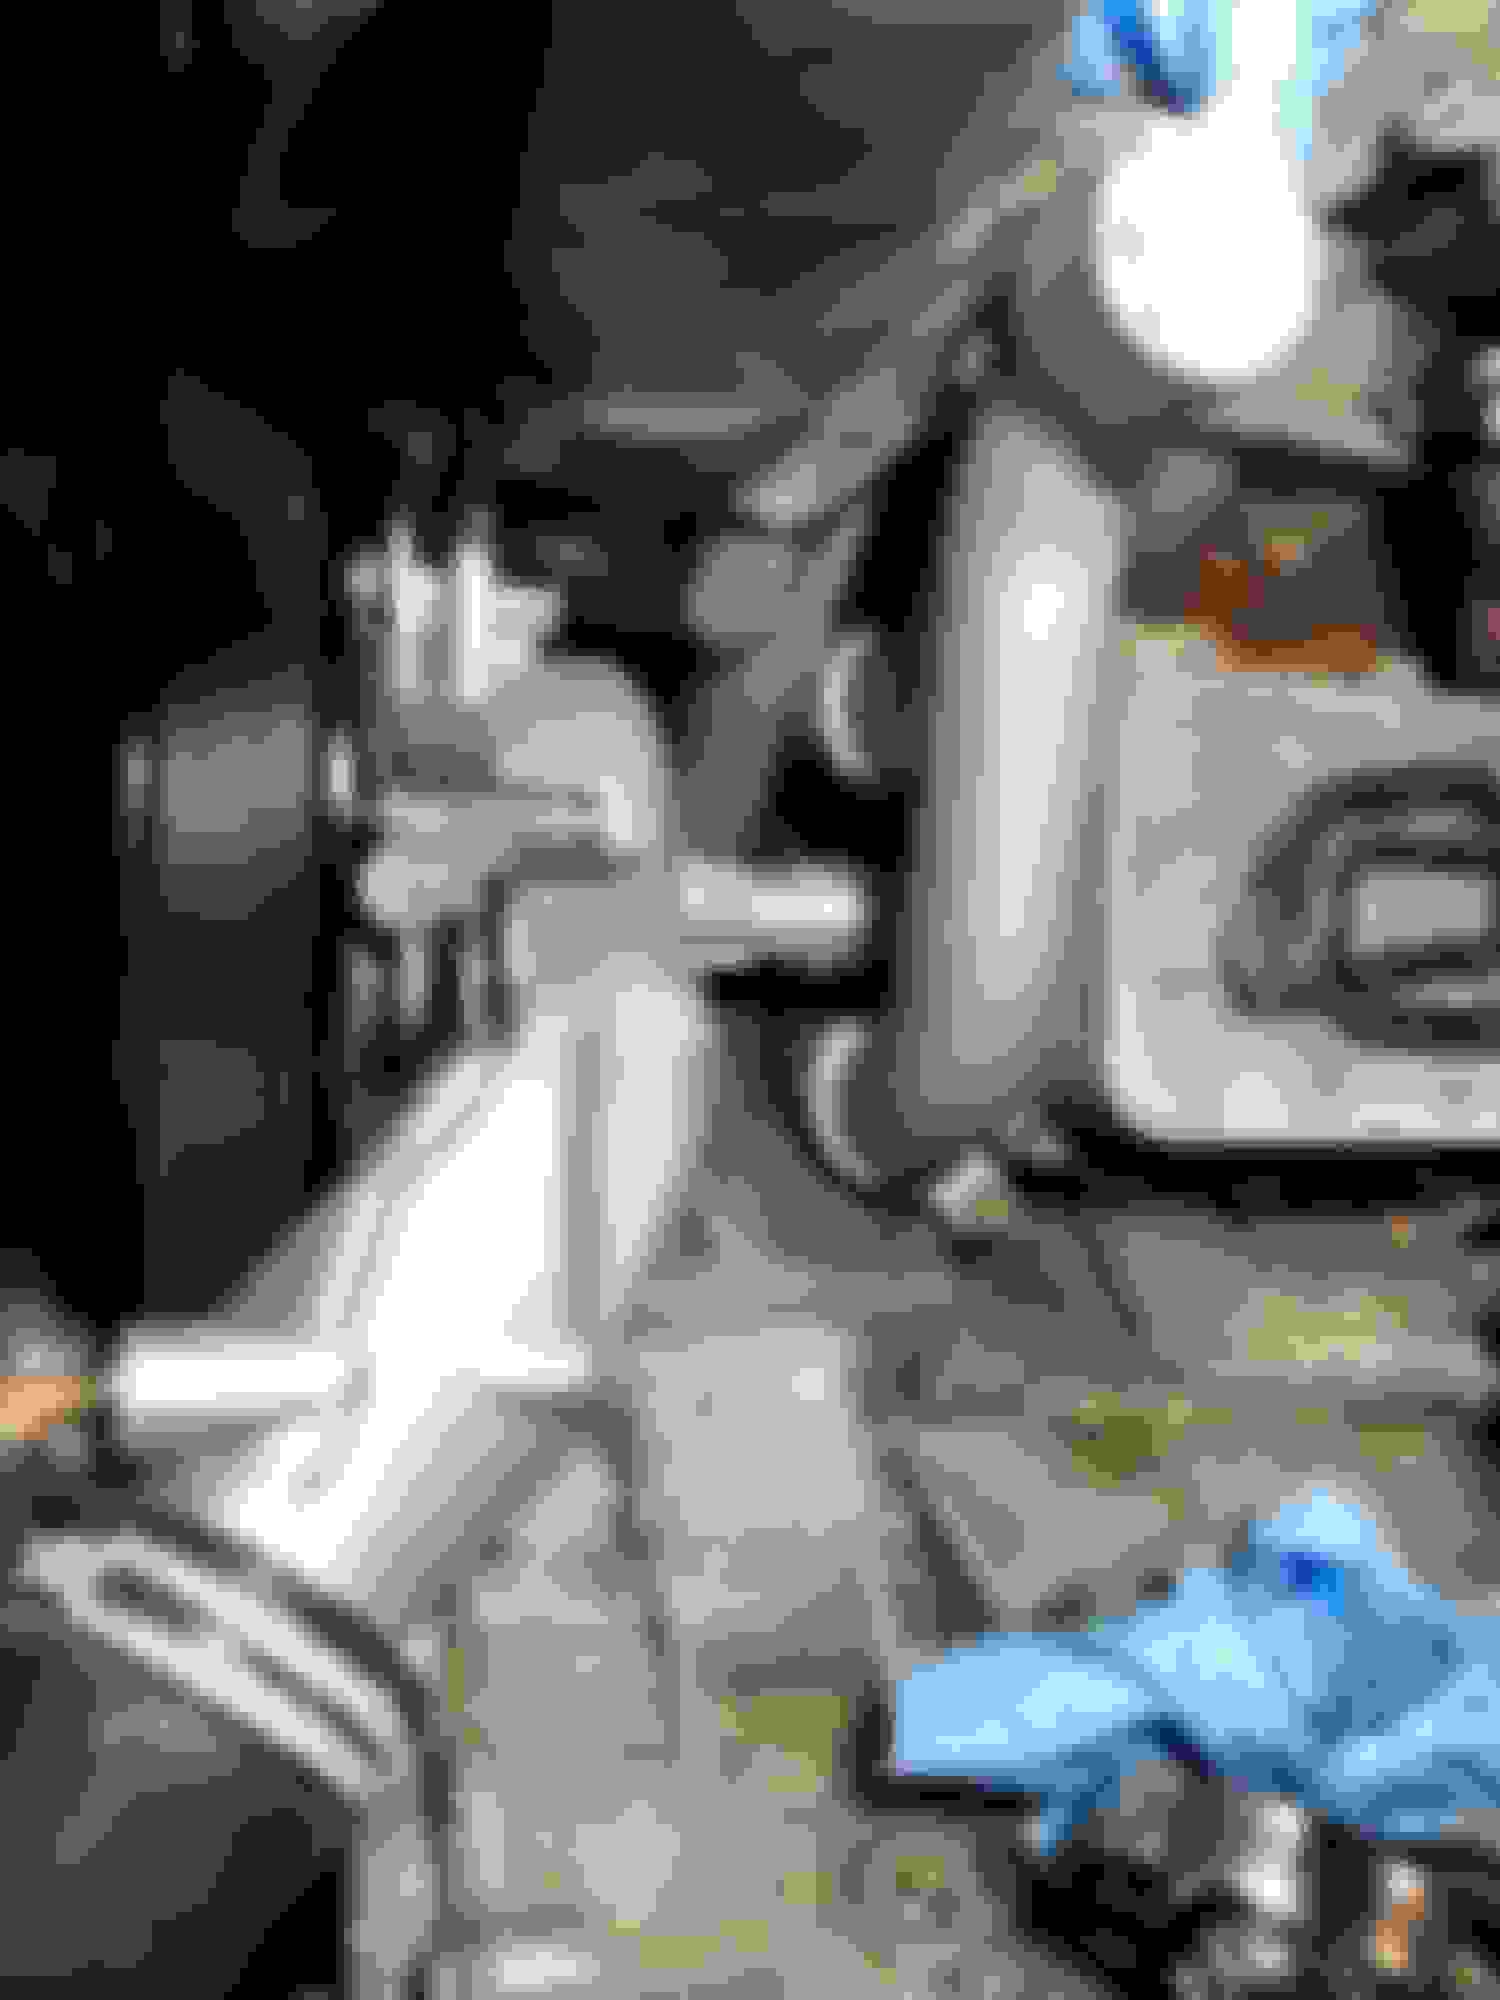
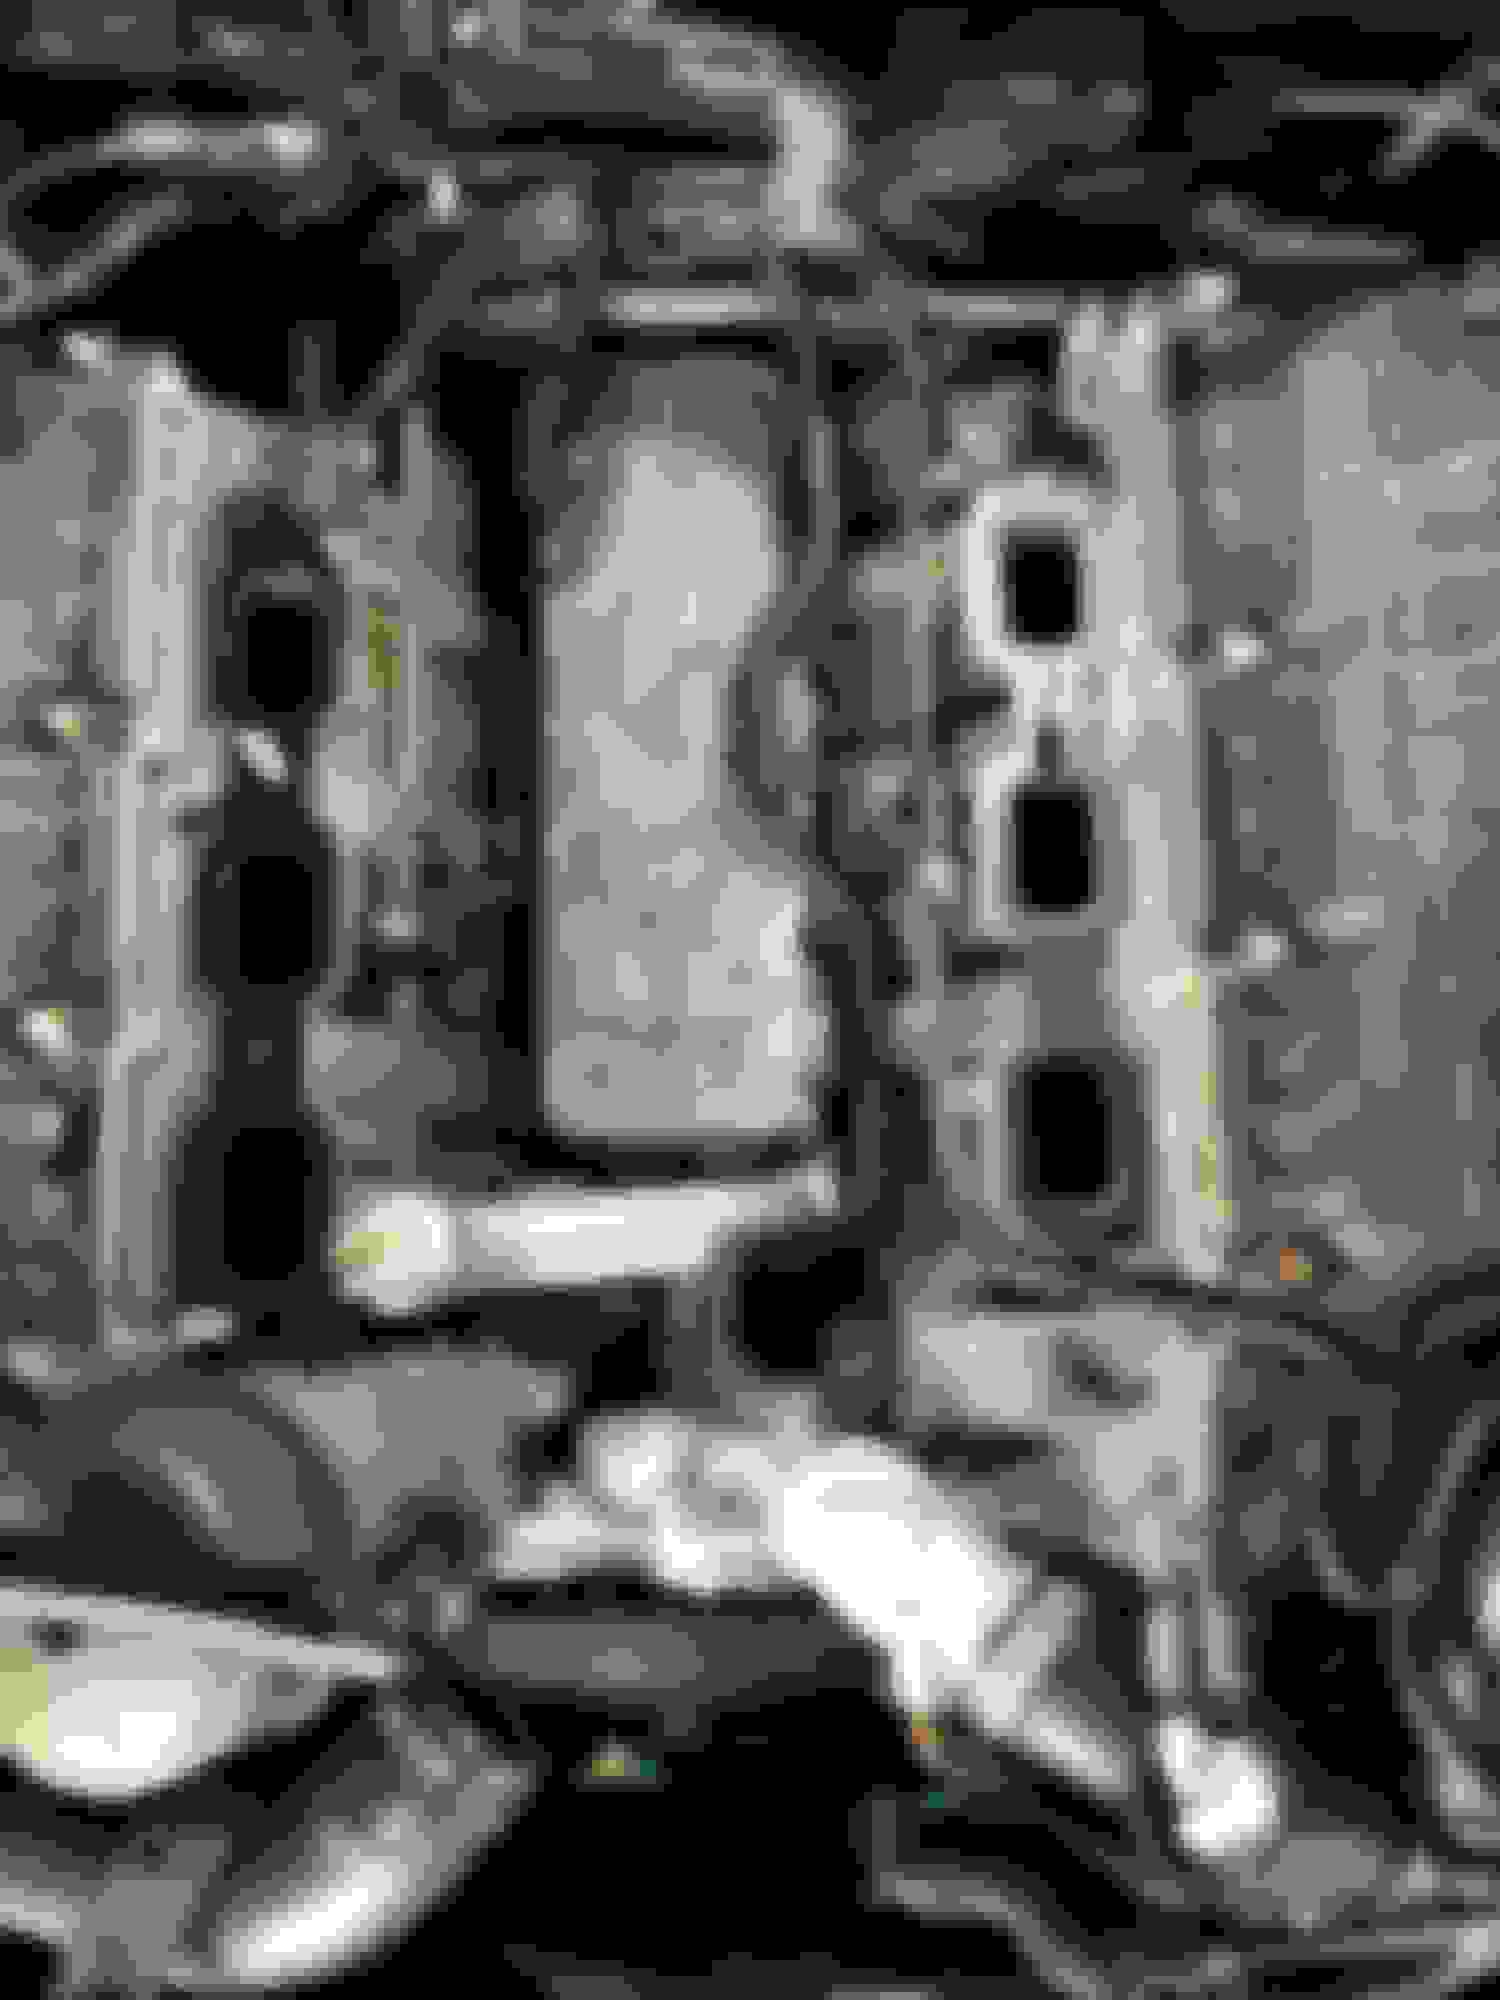
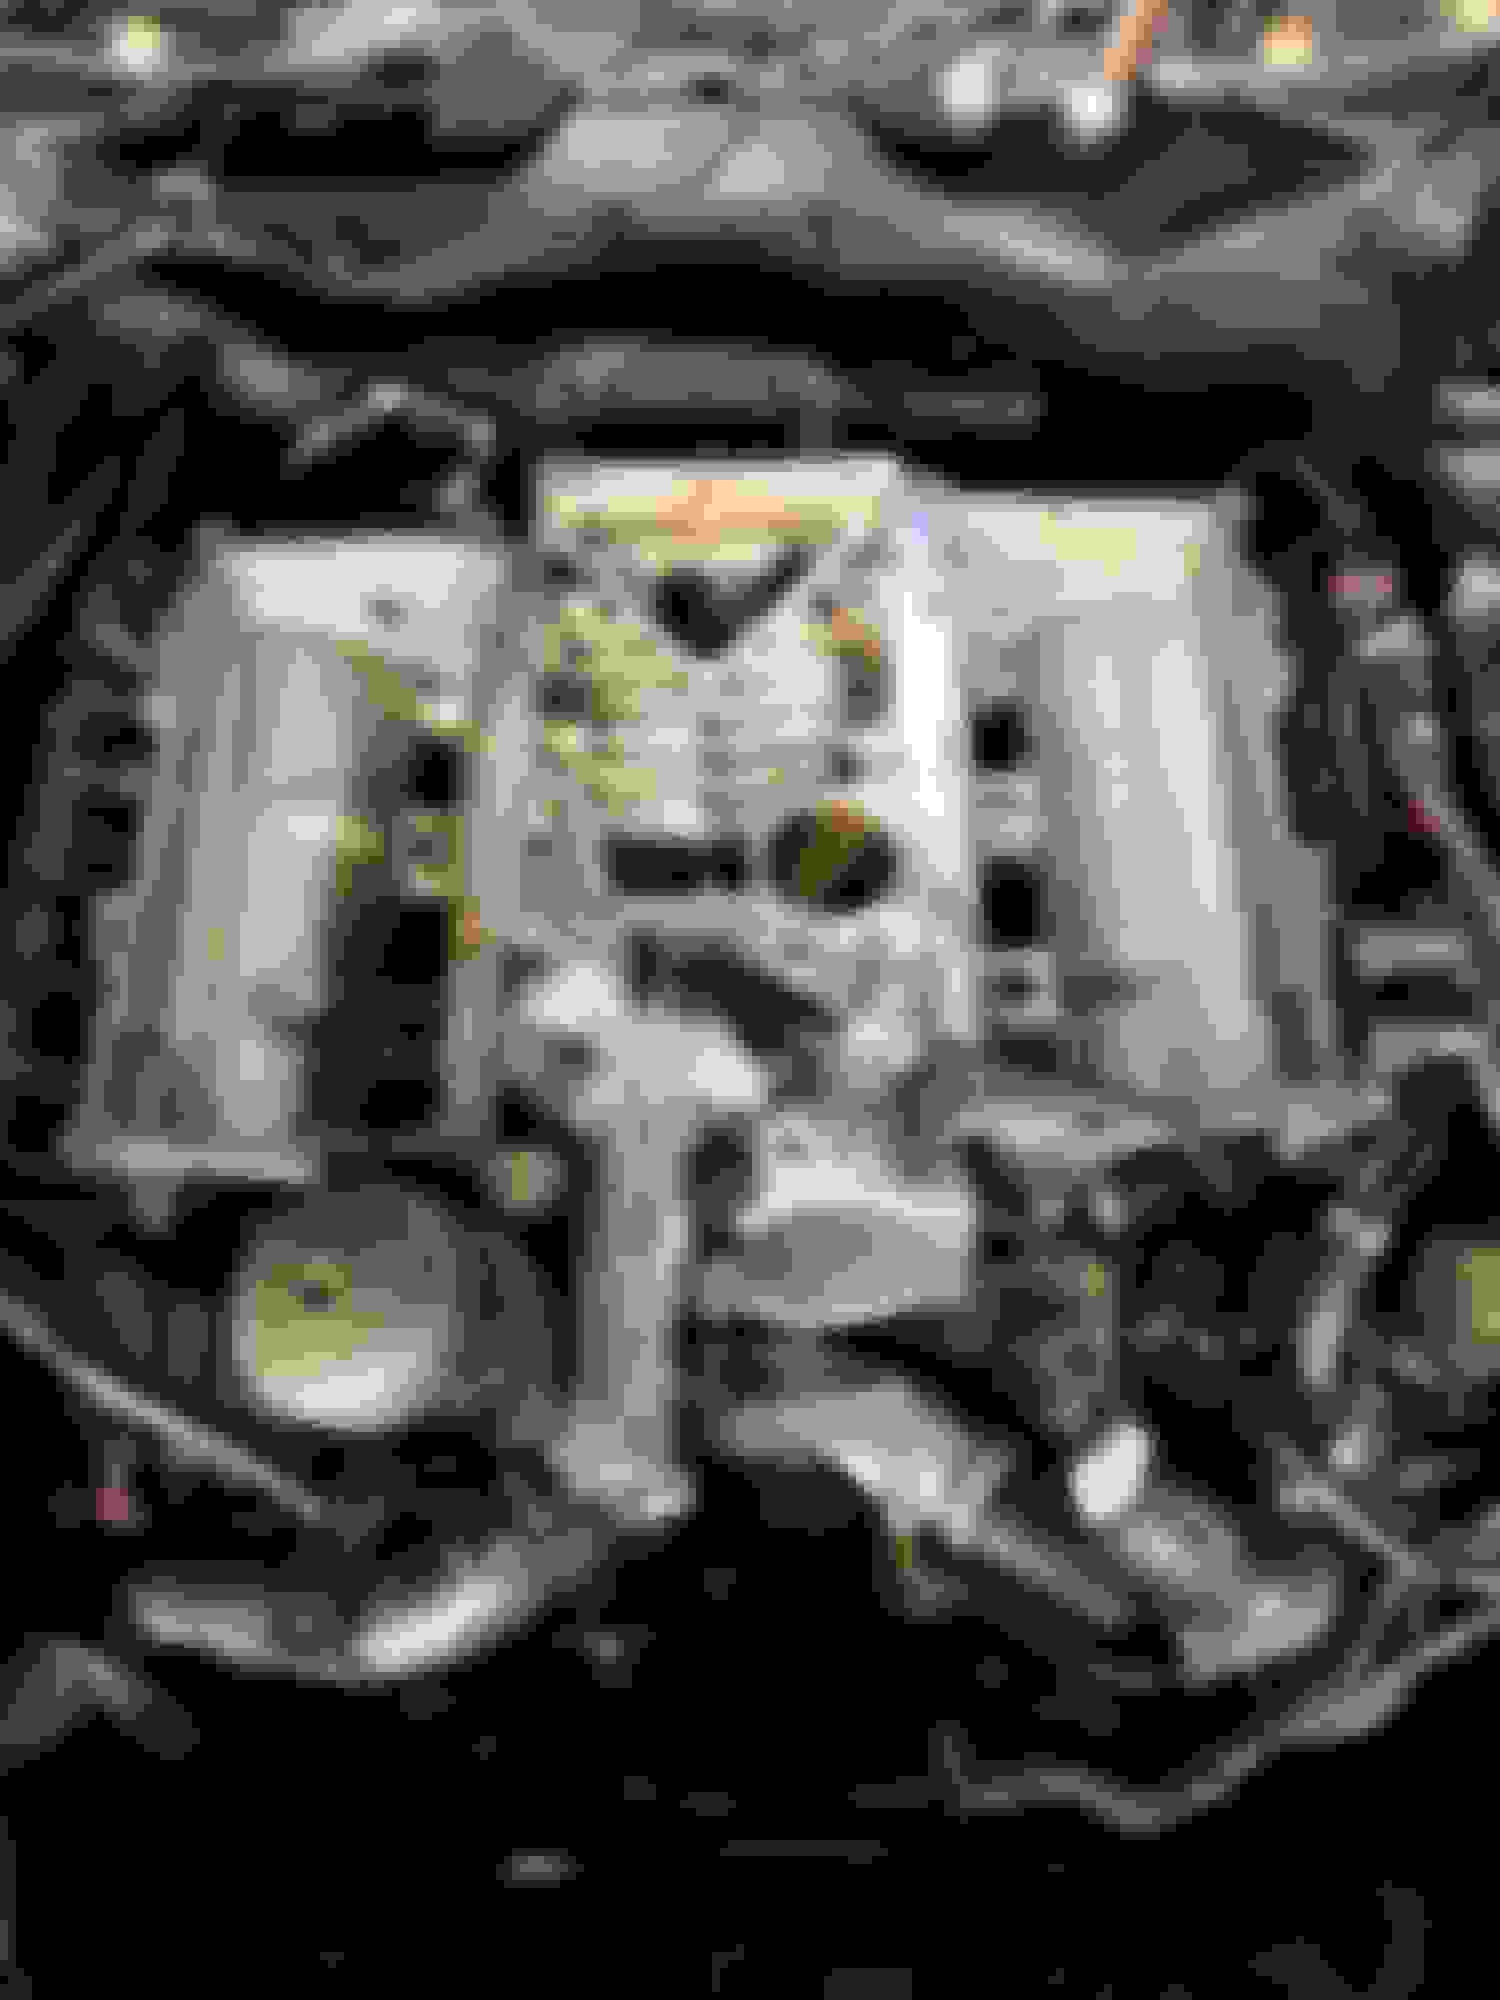
Spent easily 20+ hours over the past couple weeks on a supercharger and cooling system overhaul on my 2013 Jaguar XJ 3.0 AWD at 134k miles. I bought the car a year ago Labor Day and talked the asking price down $1k since the seller didn’t know the vintage of the water pump and I planned to replace. I also had a supercharger rattle and a close call in December with a coolant over temp event after idling 20 minutes in a Starbucks drive-thru. Total I spent on this repair in parts (minus my ever expanding toolkit and two broken bolts that I over-torqued and had to drill and tap…) was: $1,211! Thanks to all those in the x351 and F-Type forums who have shared their experiences with this work! I also spent an hour’s worth in Topix to download my VIN’s specific cooling system manuals.
I replaced everything on the list below, including a few aftermarket upgrades for aluminum versions of the upper and lower crossover pipes and oil cooler pipe. I wanted this maintenance to give the car its next lease on life. Unfortunately my local shop closed its doors at the end of the year, so it was a choice of driving an hour away for a willing independent Jag shop to repair something that wasn’t broken yet or work on it myself with downloaded manuals. Money dictated that I do it myself!
I have a definite deeper respect for professional mechanics after taking on this job myself! I think I’ll find a nice indy Jag shop for the AWD ATF flush that I need soon, and whatever bigger jobs come up. I’m proud to have worked through it, but I’ll stick to something I can definitely get done in a weekend. One additional upgrade I’ll do based on looks is replace the partially melted air intake pipe with the nice-looking one from Mina Gallery.
Water Pump
-AJ813909 #1– latest Jaguar design (~2015) $229
-4x Bolts C2Z1859 (included with water pump)
Coolant
-Prestone GM Dexcool Orange 50/50 3 gallons $60 (topped off what didn’t drain through the radiator since it was replaced six months ago)
Thermostat
-AJ812976 Thermostat $92
-Water Outlet Tube Connector Brass Euroamp $10
Hoses/Pipes
-AJ813917 plastic – upgrade to metal (installed aluminum replacement) $31
-AJ813865 plastic – want to upgrade to metal (installed aluminum replacement) $31
-C2Z22073 Lower Cooler Hose to Thermostat $33
-AJ814053 Rear Engine Heater Manifold Flange Pipe with O-rings included $171
-C2Z18677 Throttle Body to Rear Manifold Hose (under supercharger) $53
Oil Cooler Connector Tube
-C2Z18658 – upgrade to aluminum URO product LR028136PRM $19
Gaskets/O-Rings
-2x Oil cooler O-ring seals - AJ811539 $7 for one (oil cooler pipe came with one)
-2x Engine coolant pump gasket AJ813609 (included with water pump)
-2x C2Z28262 Engine Coolant Pipe O-ring (included with aluminum pipes)
-1x C2Z17248 Supercharger Gasket
-2x C2Z17249 Intake Manifold Gasket $70 for aftermarket set with supercharger gasket
Supercharger Rattle Fix
-C2D53104 - Snout kit purchased aftermarket including bolts $260
-Flat file for removing radiator drain plug (what a terrible plug, stripped top of screw cap so easily), impossible without some giant Phillips or flathead screwdriver
Zip-tied the expansion tank vent hose to the upper pipe.
Your doing a very complete repair!
Since you have the V-6 we just found out there is another Aluminum replacement part for the cooling system!
You can now get the rear water manifold in Aluminum which is a great development. Have not seen anyone install one yet so it is a bit of an unknown at this point but looks good. Kinda expensive at $250 too but you list the factory plastic version at $171 so maybe not bad?
Doh! That makes me mad, I looked around a bit before ordering since I wanted to upgrade this too, but hoping for the best. My old one had very slight evidence of coolant residue, so hoping this new one lasts a while. I ordered the genuine Jaguar part, but it looks like the Chinese part can be had for $40.
Speaking of the rear heater manifold, it is next to impossible to set the bolts to torque rating without specialized equipment. I could only get my torque wrench on one bolt for each side of the engine (there are six total). I had to play it by feel with a 1/4” drive small socket wrench for the others…
I guess since I have the Base model, I don’t have the symposer installed. It made accessing the back easier for sure! After reading about it, I’d rather not have it I think.
I very much agree and finally unhooked mine. Don't know why I waited so long it was simple to do and I can easily hook it back up if I wanted too.
.
.
.
1) Clip in all sensors fully! I found the supercharger snout intake pressure sensor unplugged and supercharger bank 1 temperature sensor not fully plugged in (back of supercharger on LH drivers side). Both threw CEL codes (P007B for temp)
2) While supercharger and intake manifold is exposed, take time to replace both knock sensors. I cleaned my connectors but did not replace, and now I’m getting P0328 Knock Sensor 1 Bank 1 High Input. The engine was a bit noisier on the way home today so it may be onto something, but this is the same code I saw on the way home after buying the car. Next time, replace em, especially if there’s evidence of coolant on top of the engine like mine.
Let me know if I can breaking any etiquette by jumping on this post with my quesiton, but its related.
I can make a separate post if you all say so.
Have a 2013 XFR, so 10 years old... 114,000 kilometers.
1. Ready to send it in for preventative, coolant pipes updates (metal from plastic) this winter
2. Should I just handle the superhcarger on the same appointment. Rebuild? Bearrings? "Whatever you all suggest?"
3. Is there a reasonable pully update if I replace bearings or rebuild... something not requiring heat and supporting systems upgrades?
Since I was after the supercharger rattle, I looked into just replacing the coupling or replacing the whole supercharger snout with damaged shaft. In the end, with the relatively low cost of the snout rebuild kit (I bought an aftermarket version and so far so good!) I think a full snout replacement is worthwhile especially if you have the rattling coupling. Of course get the oil changed out while you have it off. That used oil stunk terribly, so much that my family questioned me about it every day for a couple weeks afterwards!
Sometimes the snout shaft gets severe wear and grooves worn in it. This will not be visible until it's all taken apart. Not sure that wear will hurt anything but that's why I went with a new snout. Plus I found a great deal on a new in the box one on EBay. Just a lucky find!
Of course now I am hungering after that TVS2300 blower upgrade which if I get it will already come equipped with a new snout anyway.
.
.
.
Thank you so much for this write-up! I've been quoted AU$1900 in labour alone for the cooling system pipe replacement so I'm putting some serious thought into doing it myself, and this post has helped a lot
Did you have any difficulty getting the supercharger off? I've seen a few videos of supercharger removal on F-types where the blower was stuck to the head and *popped* off quite violently... did yours co-operate?
dangoesfast, honestly I understand why a professional repair by a Jag Indy shop would be better since they have done it before. Since I have never done it, even with manuals and videos it took easily 20 hours of labor and scratching my head. And yes, I figured out the hard way to drill, tap, and helicoil broken screws! But in the end, I was broke and had collected the necessary parts already. It was time! I learned a lot and now feel more comfortable replacing the spark plugs in the near future.
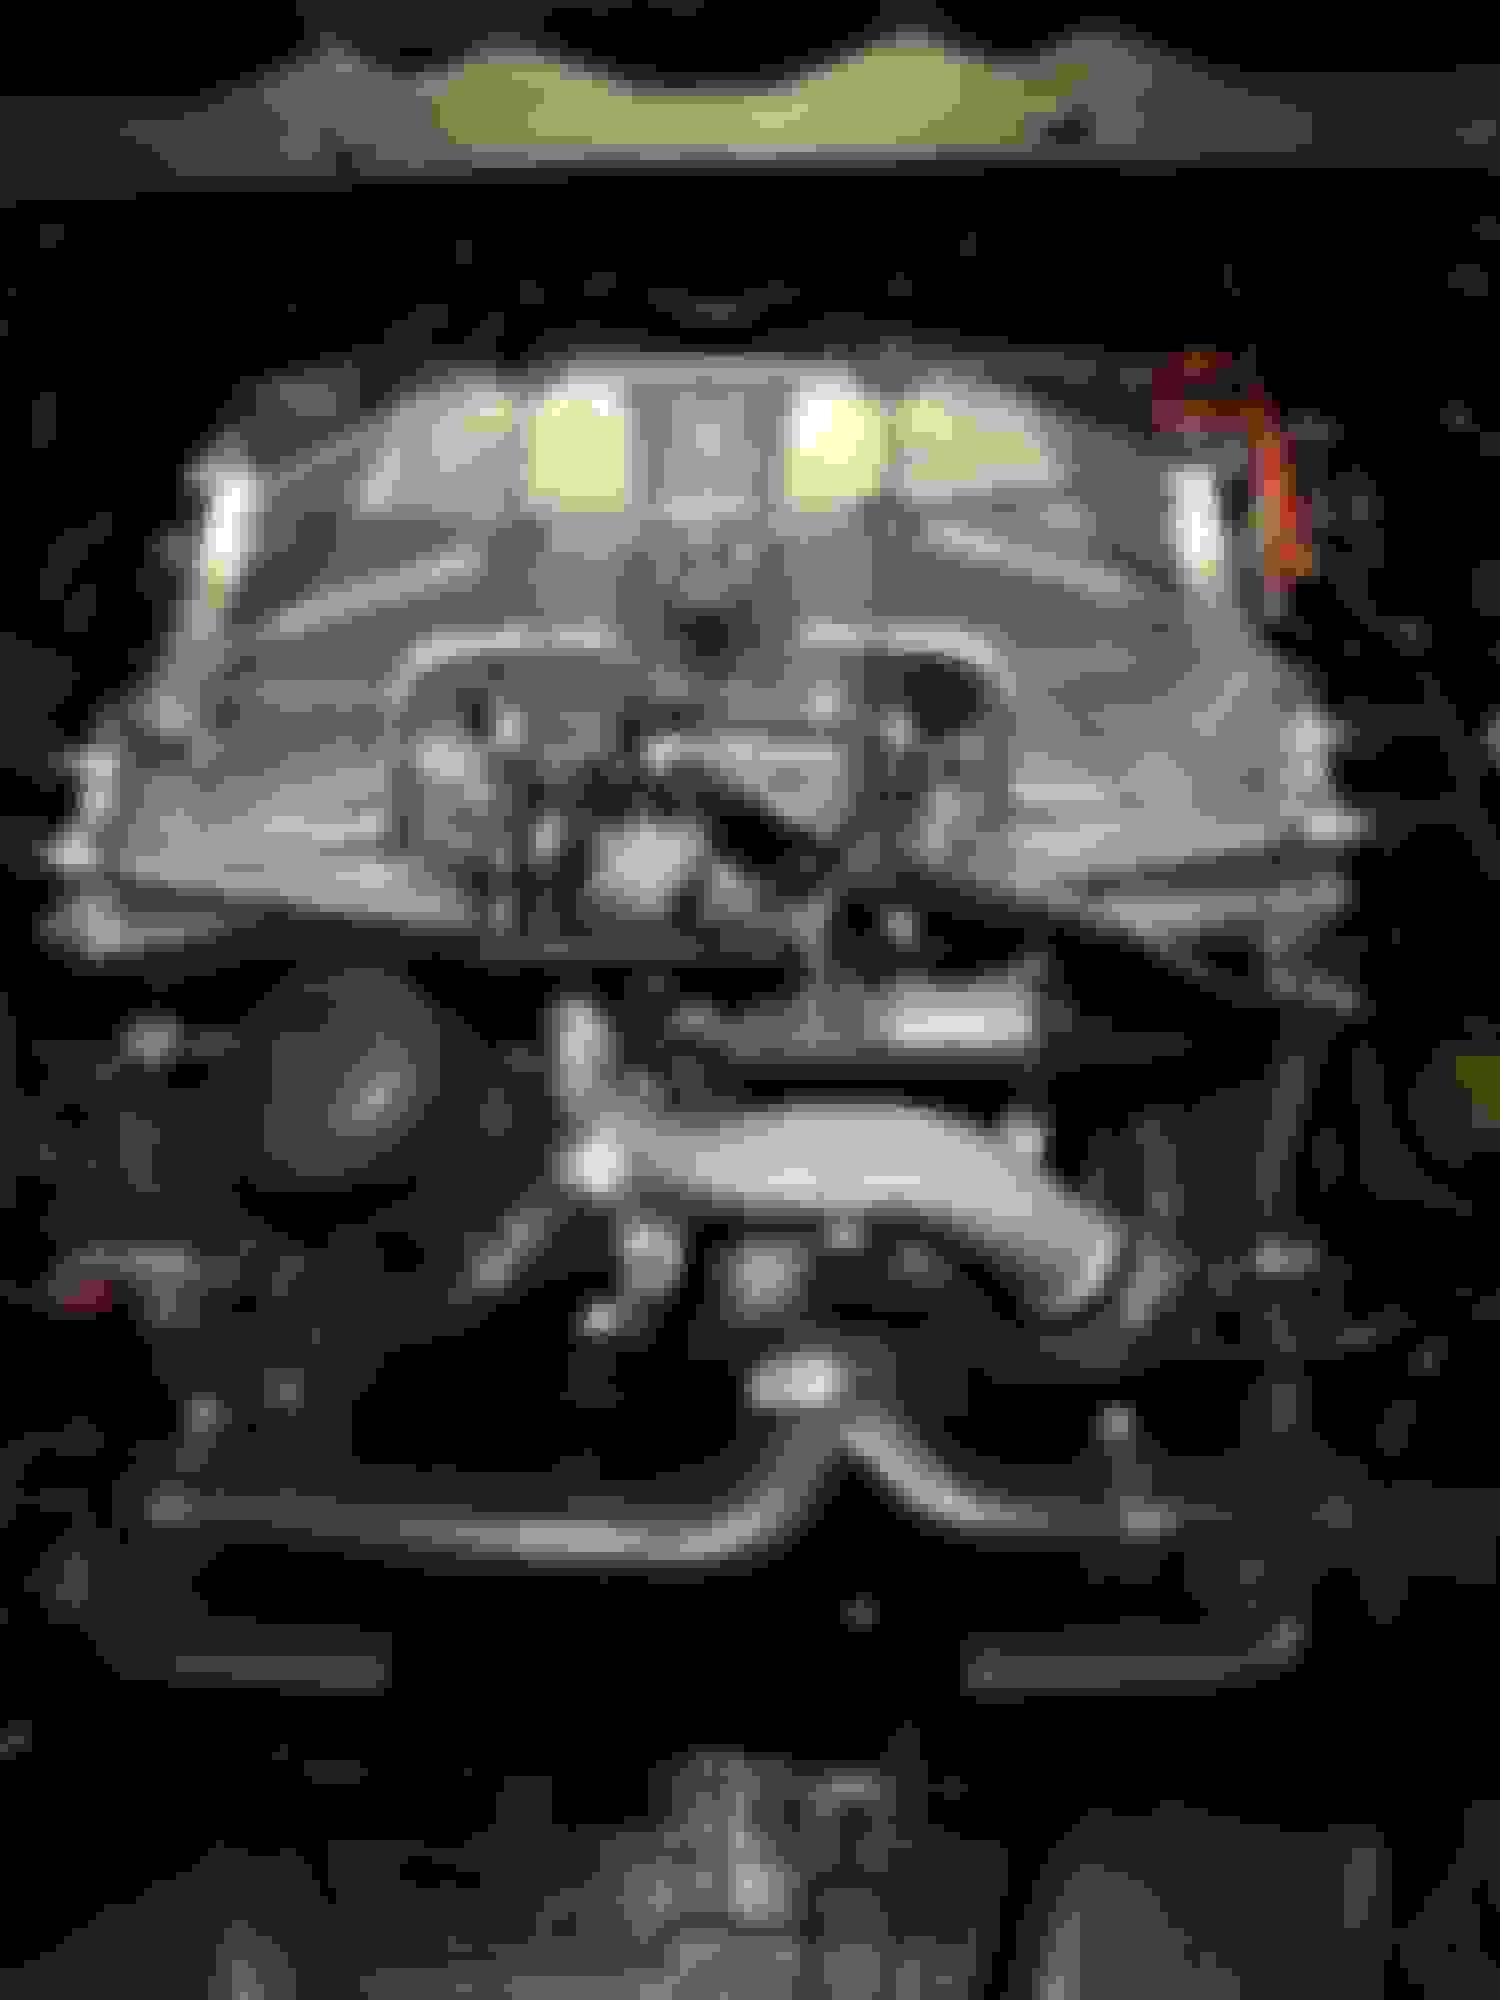
Removing the supercharger base after the charge cooler was removed from the top was tricky, yes! I found that the guide dowel was seized on the driver’s side (LHD, Bank 2) and it took a lot of prying and torquing to get it loose. Then I realized that I didn’t have the Bank 1 dowel at all. Maybe the reason I have a Bank 1 knock CEL and an apparent slight air leak (long term fuel trim averages 5% on Bank 1)… I used a pry bar from the front under the throttle body opening, then from the rear between the engine and supercharger to pop it loose.
Getting the snout free was a challenge too! I hammered a pry bar at the joint between the supercharger and snout with all fasteners out, but it was ultimately gravity that broke the gasket seal after going to work for the day and giving it 8 hours to fall apart.
Just remember to take pictures along the way and label your hardware in baggies. That suggestion definitely saved me after several days into the job.
dangoesfast, honestly I understand why a professional repair by a Jag Indy shop would be better since they have done it before. Since I have never done it, even with manuals and videos it took easily 20 hours of labor and scratching my head. And yes, I figured out the hard way to drill, tap, and helicoil broken screws! But in the end, I was broke and had collected the necessary parts already. It was time! I learned a lot and now feel more comfortable replacing the spark plugs in the near future.
Removing the supercharger base after the charge cooler was removed from the top was tricky, yes! I found that the guide dowel was seized on the driver’s side (LHD, Bank 2) and it took a lot of prying and torquing to get it loose. Then I realized that I didn’t have the Bank 1 dowel at all. Maybe the reason I have a Bank 1 knock CEL and an apparent slight air leak (long term fuel trim averages 5% on Bank 1)… I used a pry bar from the front under the throttle body opening, then from the rear between the engine and supercharger to pop it loose.
Getting the snout free was a challenge too! I hammered a pry bar at the joint between the supercharger and snout with all fasteners out, but it was ultimately gravity that broke the gasket seal after going to work for the day and giving it 8 hours to fall apart.
Just remember to take pictures along the way and label your hardware in baggies. That suggestion definitely saved me after several days into the job.
Great tips, thanks very much. The cost is one thing but I also really enjoy working on cars, so this is a fun job for me and one I'd be happy if I managed to get done in 20 hours.
My XE's Dynamat install took 23 hours, although the first door was about 10 or 15 of those hours and the other three were quick once I figured out what I was doing
UPDATE on this:
In the pursuit of chasing my 5% long term fuel trim on Bank 1 and the occasional knock sensor CEL P0328-22, I performed a smoke test with no clear results after hearing a hissing noise from that side of the engine. I proceeded to reinstall the original charge cooler gasket (the big one) by removing all bolts on top and the RH fuel rail attachment. I had to lift the charge cooler high off the top of the supercharger with my right arm and it was tight but was able to swap the gasket with my left hand. I didn’t want to remove the coolant hoses to the charge cooler!
My thought was that the aftermarket gasket was not made as well as the original (rubber was different at the seal)…
After two days of driving, no real change to the fuel trim on either bank, maybe slightly worse…but no more knock sensor CEL yet. I’ll keep y’all updated with questions on what to do next.
Update on the CEL: I have had no repeat CEL after replacing the aftermarket charge cooler gasket with the original stock one after two and a half weeks of driving everyday. I also installed the Mina Gallery intake last week with no abnormal fuel trim or CEL.
Not sure why but I think I have to recommend the stock charge cooler large gasket vs aftermarket. Take care of it during removal and it is reusable.
Thanks for posting that the large "top hat" gasket for the SC is re-usable. It's an expensive gasket and I purchased one before this was widely known.
Jaguar has you replace it.
.
.
.
 08-21-2023, 04:39 AM