When you click on links to various merchants on this site and make a purchase, this can result in this site earning a commission. Affiliate programs and affiliations include, but are not limited to, the eBay Partner Network.
Ok guys and dolls, here is what's wrong with my left front (drivers side U.S.) Air spring shock.
The "Air Spring Strut Pressure Valve" is leaking. [My hearing aids] have a feature that allows me to change the receiving volume with my I-phone and running the volume all the way up on one ear piece, I located the source of my leak. The aforementioned valve.
This is the brass fitting that is screwed into the top of the air shock and where the 1/4 inch black air line screws onto. This looks more or less just like an adapter for the air line to be attached to the strut, but by definition, it is called a valve. I have checked everyone, to include Jaguar, but no one sells just the little valve. The dealer parts dept. quoted me $1300 bucks and I asked "Just for the valve??" and he said "oh no, for the whole strut, we don't sell the parts for them"--basically the same answer everywhere.
So my question is: Is there any of you that has a used strut you removed from your car that has that valve still attached and would you be willing to remove it and sell it to me? Name your price---with-in reason that is.
Either email me or reply to this message and I'll get in touch. If you need a picture, I'll try to post one, if possible.
1. If you are absolutely certain it is the pressure retention valve that is leaking, it could be the O-ring on the threaded end of the valve. Here's a photo courtesy of reyesl:
This is a snip from a photo at reyesl's thread on dissecting a front air spring/damper:
2. If it is possible the leak is not from the pressure retention valve but rather from the brass air hose fitting, many owners have cured leaks by following Jaguar's instructions: remove the old brass compression ring or "olive:"
Once the olive and fitting are removed, cut 5 mm/0.2 in. off of the air hose. The new cut should be as clean and square as possible (90 degrees to the axis of the hose). Jaguar recommends special hose-cutting pliers (hose cutter 204-494 from SPX OTC or hose cutter YA1000A from Snap-On/Blue Point). But you should be able to make an acceptable cut with the careful use of a safety razor blade and a cutting board.
Install a new brass fitting and olive and secure to the pressure retention valve taking care not to overtighten. This process is described in the Chassis section of the Workshop Manual, section 204-05. I think abonano has posted on this topic.
I have a strut that was leaking. Will try to pull the "valve" tonight. I recommend you pull yours, find the o-ring size and also replace the 18.00 hose fitting. There is no valve because it allows air flow in both directions. This is most likely a fitting leak. Or the dreaded seal underneath that seems to be the weak point of the Jaguar air springs.
The only other Bilstein air springs that I have any first hand experience with are D3 Audi A8. The most common failure with them is the air bladder. They look a lot alike. Both are air springs with active dampening and manufactured by Bilstein.
Thanks to you both--Don and Panelhead.
I have unscrewed the valve from my strut and looking at Dons picture of the valve, The difference between that valve and mine is the size of the "O" ring. Mine was very small in diameter compared to this one. However I did try another "O" ring which was a bit larger, but still leaked.
Panelhead, I'm beginning to think along the "dreaded seal" idea, because even after the new "O" ring, it leaked and if I applied a little pressure in any direction, the leak either increased or slowed, so we'll see if you intend to sell me your old valve.---I agree with you on "is this a valve or not" because air does go either way, however, I tried blowing or sucking both ways and could not get any air, by mouth, either way, so maybe it's a pressure thing (valve).
Thanks to you both for the reply and suggestions. I'll continue to plug along..
"is this a valve or not" because air does go either way, however, I tried blowing or sucking both ways and could not get any air, by mouth, either way, so maybe it's a pressure thing (valve).
According to the Air Suspension section of the Dealer Training manual, the valve is designed to retain a minimum pressure of 3 bar / 43.5 psi in the air spring bladder to prevent it from collapsing and creasing. This suggests it is a two-way device but limits the flow in one direction only.
If you don't have the Air Suspension section, you can download it here:
I knew someone would ask, so remember, I'm an old dude that grew up in a tool shed and if we didn't have a tool we made one--or at least tried.
Standing there for a while looking down at that valve I wondered if I had anything in my tool boxes that would do the job, then it hit me--I had a great idea----I went and had a beer----
Enjoying my brew, I wondered if I had anything that would cut one of my foreign sockets, then went back out to the garage and selected a (I think) 14mm socket that would just slide over the top of the valve and rest on the lower flange of the valve--the one with the notches in it--as if there was another.
I then marked where the notches were and place the socket upside down in my vise, got out my Dremel Tool, selected a couple of the correct disk and had at it. After some time and a number of disk, I had a tool with square little **** (sorry ladies) that fit the valve just right--or close enough to give it a try.----Had another beer----
With a little pressure (somewhat more the I expected) it unscrewed. Changed the [O] ring and replaced. Did as recommended about the air line, reattached that, cranked her up, waited for it to rise, shut the engine off, cranked up my hearing aid and listened--still leaking. Had another beer.
But that's it Pal. Nothing special, but a simple tool that works. The only trouble I had was the fit against the aluminum structure. A little grinding of the socket on my table grinder helped that, but still a tight fit.
Cheers
Last edited by Chuck Schexnayder; 11-29-2016 at 04:06 PM.
abonano, Don, Panelhead------, Since my last, at making a tool that would work in removing the Valve in the subject, I acquired a different valve from a local garage and trying to use the tool I made as mentioned above, it was even harder trying to use it to remove the old valve, but remove it I did.
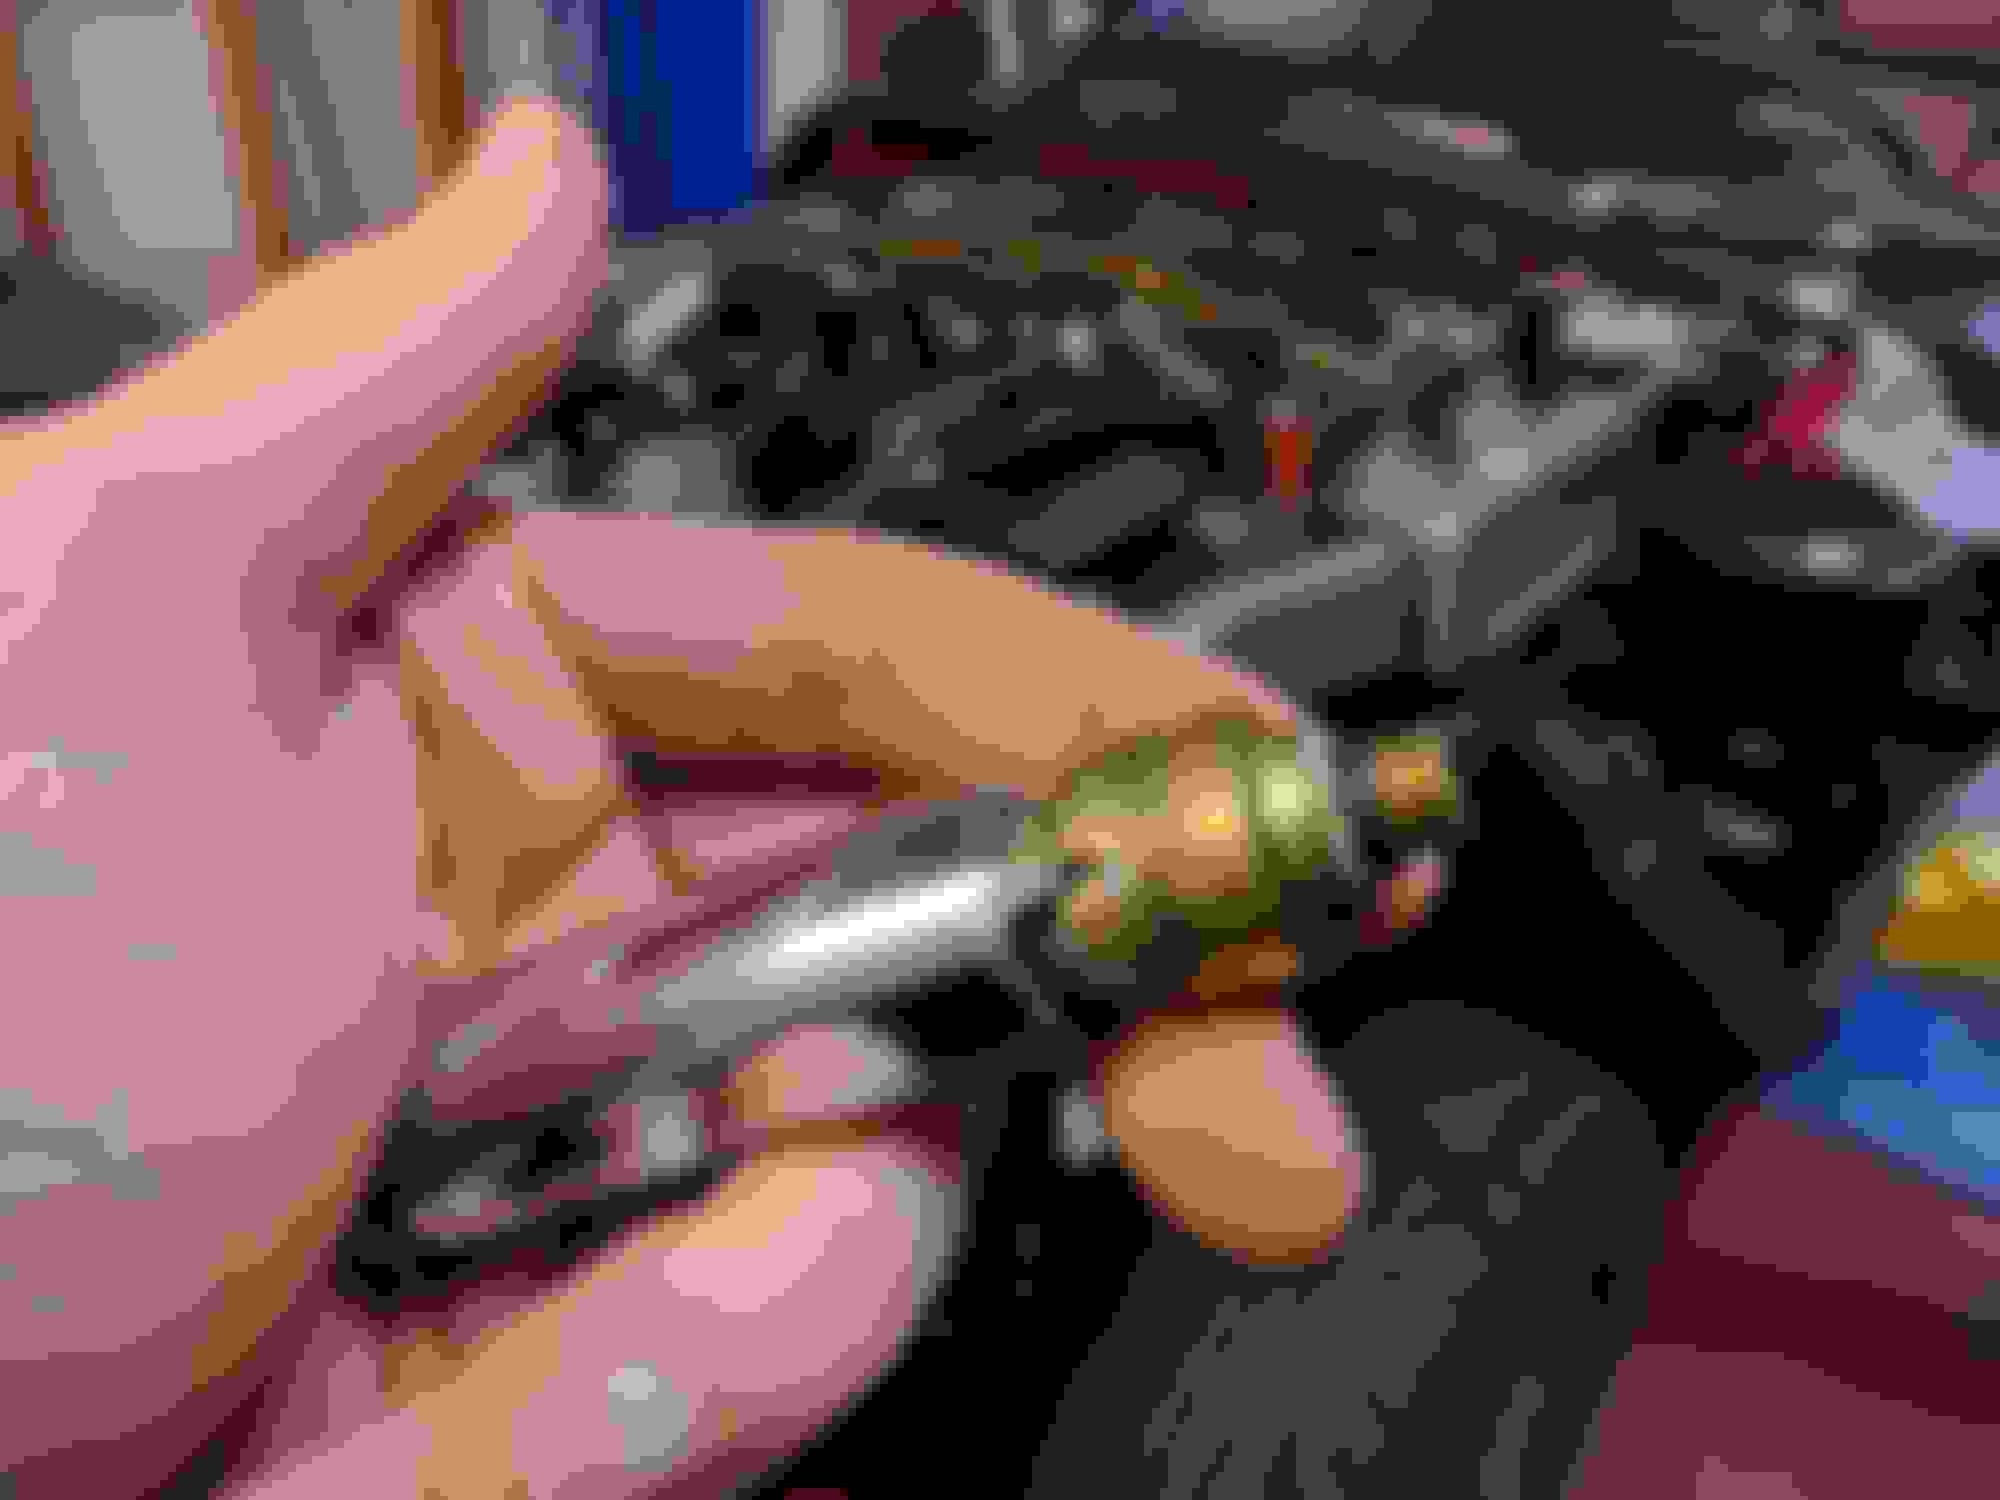
I was afraid to use it again for fear of ruining the replacement valve, so came up with another idea. This time I took a couple of pictures in an attempt to explain what I did. See below.
As you can see in the pictures and knowing the valve was made of rather soft brass, I put the valve in my vise and using a 13mm socket, I placed the socket over the upper end of the valve and taped the socket onto the valve, maybe an 1/8 of an inch, which cut groves into the brass. (I used the old valve for the pictures) You may have to enlarge the picture of the valve lying on its side to see the groves. This allowed me to screw the new valve into the air strut with my fingers enough to get it started, then placing the socket back on the valve, allowed me to further seat the valve. You don't need a lot of force--just enough to call it snug. I also, prior to screwing the valve back in, used lock-tight on the threads. Hey, not to worry about the lock-tight, if it doesn't leak, who's going to ever unscrew it again--not me.
I then fixed the air line again screwed it onto the valve--again just sung--.
Reconnected the bty, cranked her up, waited until it was level and checked for air leaks---none. A happy camper, which deserved another beer...
Note: After removing the old valve, I noted the threads were actually striped, which of course was causing the air leak in the first place. I could have done it myself with the first attempt at tool making, but since I was trying to stop a leak in the first place, maybe not. Anyway, it's been a little over 4 hours since I did the work and so far she's sitting tall and smart, Even cranked it up to see if there was any rise--none.
Hope this little tid bit helps you guys. Later..
Well crap, lost the pictures. Will up load later.......
As promised---the pictures to go with post above...
Attached Thumbnails
__________________
Last edited by Chuck Schexnayder; 12-06-2016 at 11:52 PM.
Fixing air leak with newer air valve.
hello to all----
Well the car sat all night and the temp this morning was 51*. Not cold by some standards I know, but still cool. The car sat high and dry and did not rise on start up. So as far as I can tell, the fix worked. Was it the newer valve or, that plus the lock-tight---who knows. If I ever have to do a fix like that again, lock-tight will be there just to be sure.
Sorry to take up so much space on the forum with this little problem, but maybe it will help someone.
I had the same issue where the air was leaking out of the bottom end of the valve after removing it to replace A arms. After speaking with Arnott, they mentioned there was a tool I needed to tighten up the valve, which I don't have and they won't help on, instead they wanted to sell me a new strut.
So, I used a flat head screw driver and a mallet to tighten the valve, also applied thread lock. Fingers X that this does the trick.
Funny but this is exactly the situation I'm in too. I have a leak on the pressure retaining valve after removing the strut to replace control arms.
So I'm guessing you removed the valve and fit a new lower O-ring? All with just a screw driver? Pretty cool.
Does anyone have a source or part number for these valves?
As I read this thread it occurred to me that Chuck has a formula to measure level of difficulty. 1 pint symbol = easy up to 5 pint symbols = most difficult. .
Many fingers and toes crossed because I think I fixed it for $5.
Bought a 14mm deep drive socket (3/8") and cut it to shape with an angle grinder. Hand tweaked with a file. Removed the valve, polished it up a little with a brass brush and replaced the O-ring. Unlike Chuck, I did the opposite and used dielectric grease on the O-ring and all the fittings. No leaks. At least it passed my soapy water test now,
To think how many people replaced an entire air strut just for this 2 cent O-ring.

 11-28-2016, 05:05 PM


 Had another beer.
 , which deserved another beer...