When you click on links to various merchants on this site and make a purchase, this can result in this site earning a commission. Affiliate programs and affiliations include, but are not limited to, the eBay Partner Network.
Thank you to Casper. I did my supercharger oil change today on my 2005 XJR at 102,000 miles. Oil started to drain out as I loosened the plug. Everything went well however putting the plug back in was a PITA. I did not really have the correct tools but I managed after about 20 minutes of fiddling. The old oil was pretty dark.
I used "Two GM Supercharger Oil OEM w/ Syringe 4 ounce Bottle Eaton Coupler change kit" from Ebay at $30 including shipping.
My next job will be the transmission oil flush and change.
what kind of socket and size did you use to open the fill tube? Anything special? I have a 2006 xjr with 95,000 miles on it. Thanks
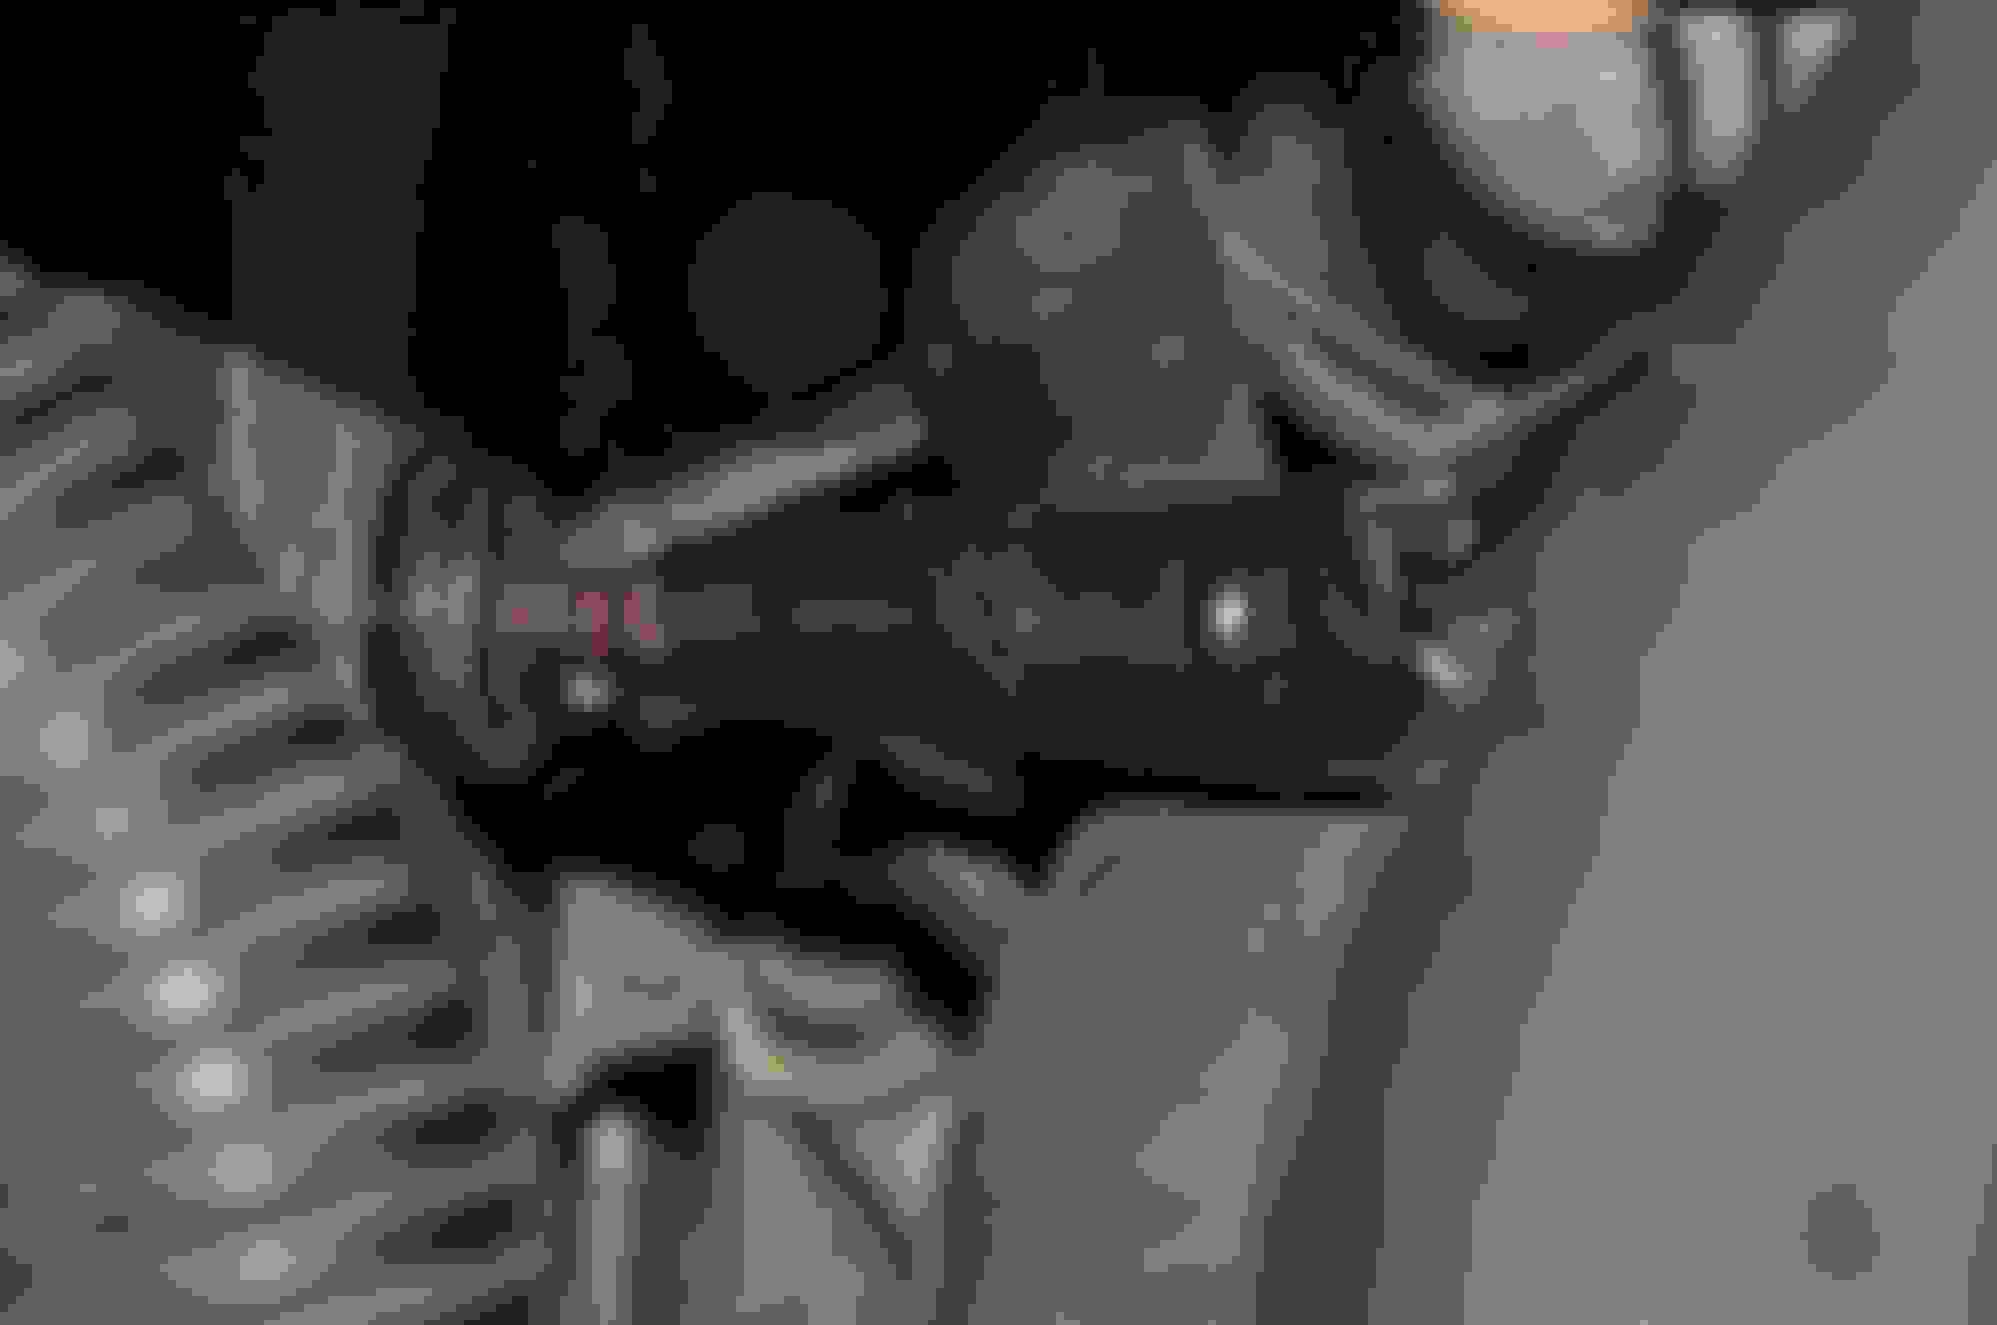
The plug has a 6mm hex head. Going to flush mine as soon as it comes back from the stereo shop.
The Alpine speakers were blown from previous owner abuse. Getting all replaced with AD Design. Hope it plays better.
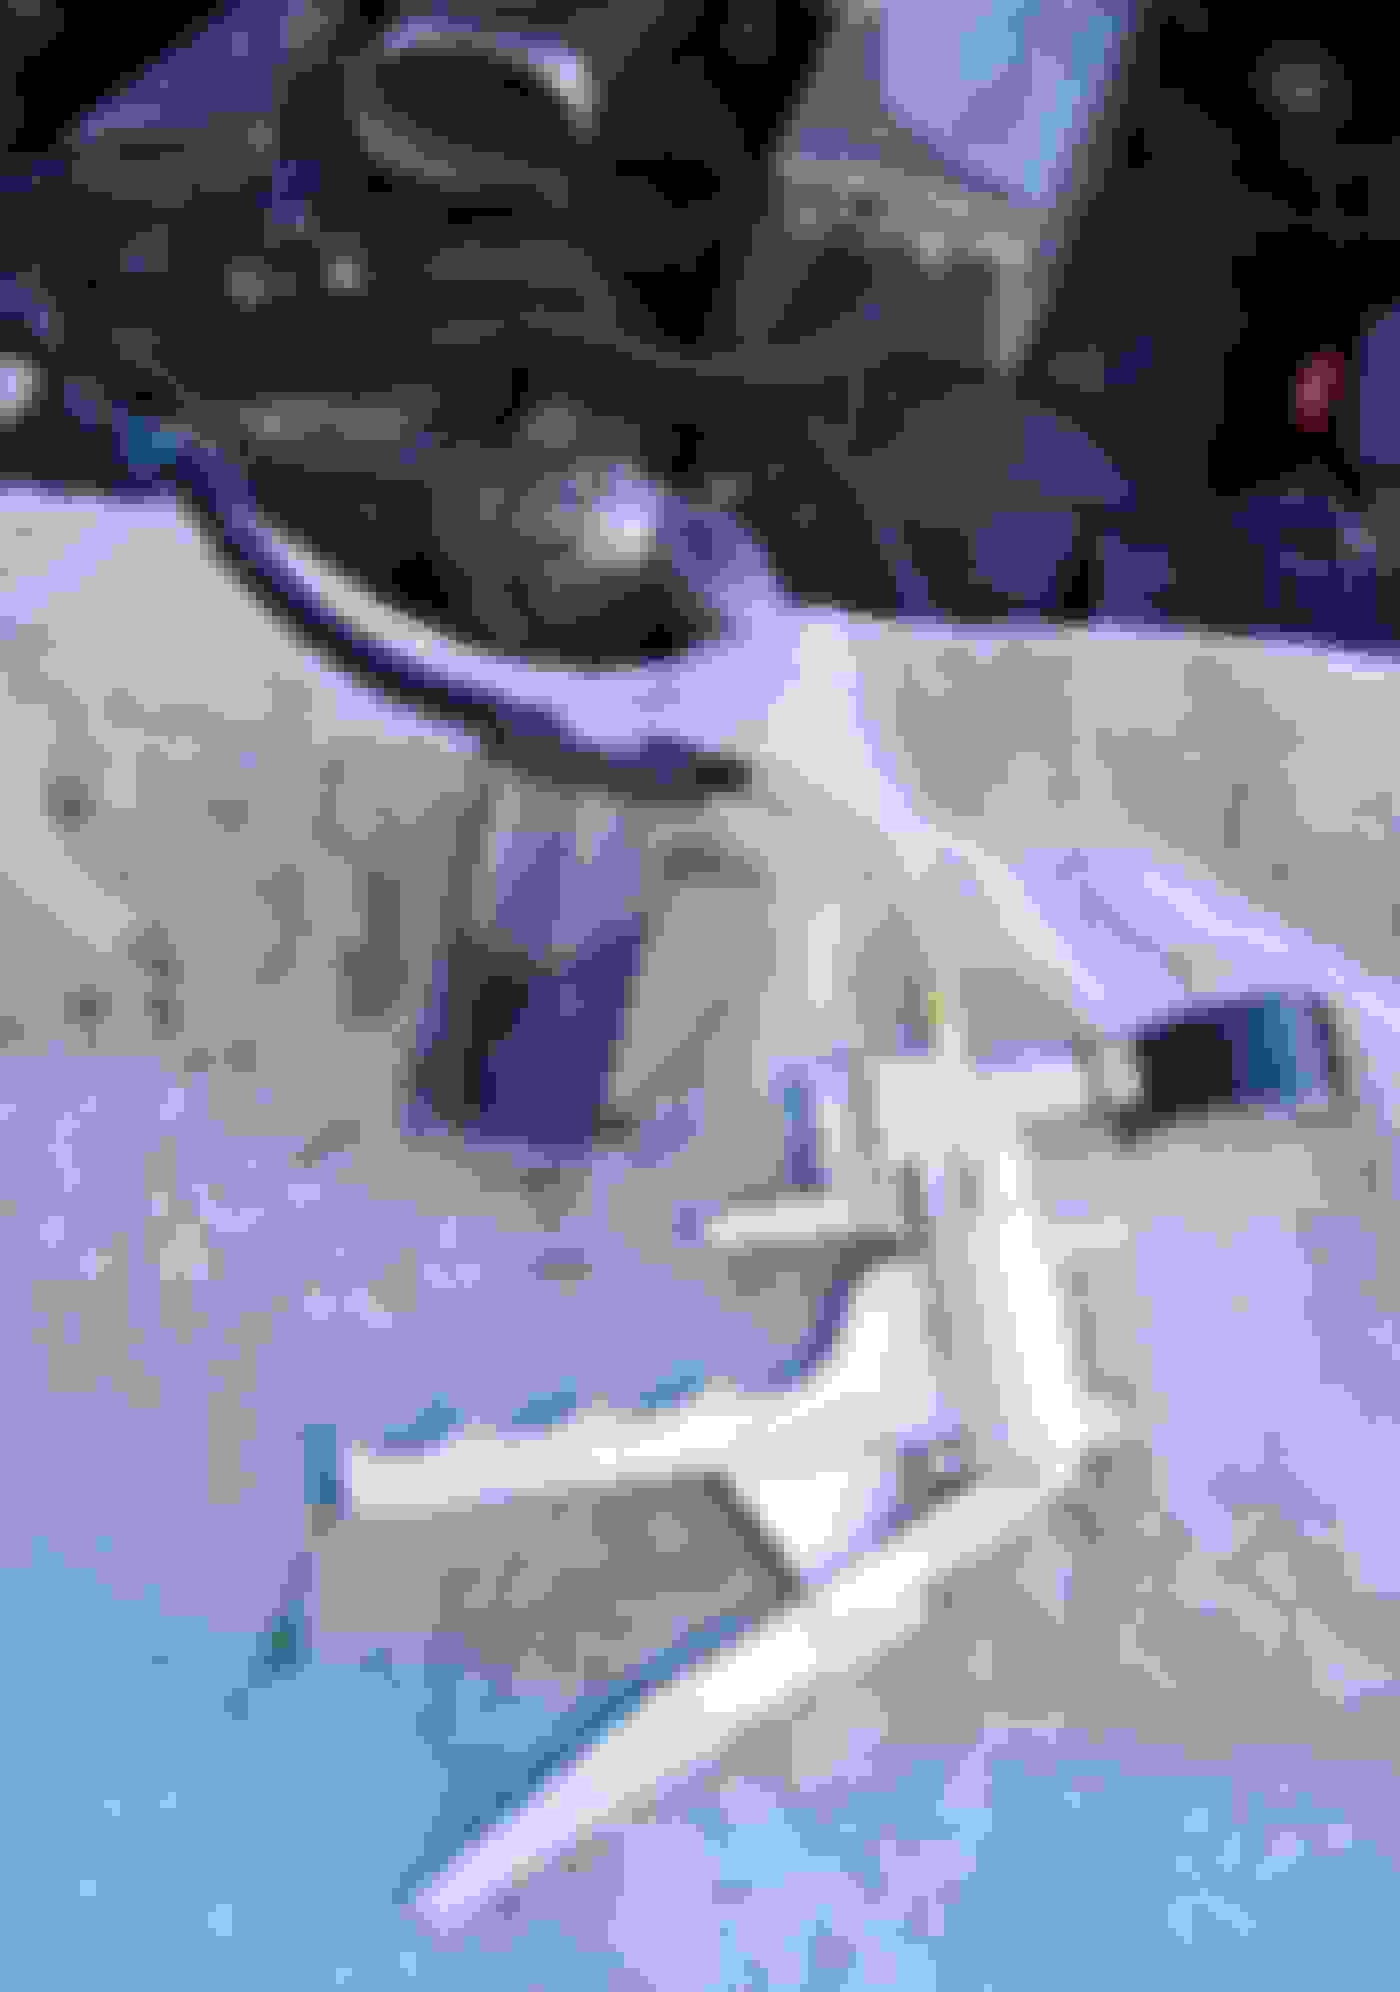
Yes you do. Make sure you have a small enough "tube" positioned correctly as far in thru the filler hole as possible when filling. I used one of those red tubes you find on a can of WD40. I attached it to a larger tube from the pump/syringe gadget using a heatshrink sheath for electric wiring.
Yes you do. Make sure you have a small enough "tube" positioned correctly as far in thru the filler hole as possible when filling. I used one of those red tubes you find on a can of WD40. I attached it to a larger tube from the pump/syringe gadget using a heatshrink sheath for electric wiring.
Hi mate, Quick question if you can help please.
So once I have fully filled oil to the top. Do I start the car up so the new oil heats up/spins and then re open to top up more? Like the Transmission fluid or just one time fill to the top and job done?
Make sure you "fiddle" the extraction tube down and in as low as possible to get as much fluid out as possible.
You are actually getting past the bottom of the rotor gears at the back of the snout assembly when pushing the thin tube in and down.
The rotor gears, two, dip into the oil and spread it around when in operation.
Plan on doing mine a second time. With overflow I still had 1 - 1.5 ounces left from 8 oz.
Plan was to flush, then run 10,000 miles and do again. The fluid looked better than expected. I have read the description of extracted fluid. I think it is worse on the x308.
This was slow the first time. Should be a 1 hour operation second time.
Last edited by Panelhead; 08-06-2016 at 07:36 AM.
Reason: Spelling
I had a couple of issues that caused some heartburn. A 6mm allen wrench would not fit. 4.5 mm was too loose. 5mm would not fit. The plug on my 2006 XJR was 3/16".
I also had some oil drain as the plug was removed. I did not get as much oil out as some of the earlier posts. I fabricated a suction tube out of a rusty piece of old brake line, which helped me get about another ounce of oil out.
It does smell bad, but then again, so does the new oil. I bought my oil at the parts counter at the local Chevrolet dealer. I added about 7 ounces at which point clean oil started to come out of the filler plug hole.
Perhaps a bit of an update on this procedure? This was very easy, about 45 minutes this morning. I saw where everyone was using a syringe. I found by using a brake vacuum pump (readily available at any Harbor Freight type store) with provided inline container (its only 4.5 oz and is marked, but is easily detaches to drain into a recycle container and reattach). By using the brake vacuum pump you'll have it later to do brake jobs if you don't already have one. I used 5/16od x 3/16id clear vinyl hose reduced to a 1/8 x 5" piece of heat shrink (nice suggestion Plums) with a wrap of gorilla tape to seal the junction (I put vacuum instead of heat shrink on the pic, oopsie). By using the vacuum pump, this allowed me to have my other hand to move the end around to get everything. I managed to get all nasty 7 oz removed because you can kept the vacuum going like a vacuum cleaner as you maneuver the end around. Refilling, I used a clean length of the same hose and a funnel so I could monitor it so as not to overfill it too much and make a big mess. A 4" balled end 3/16" allen is your best friend for removing and reinstalling the plug btw.
I also changed my supercharger oil over the holidays. Thanks to Mike Baker I knew the drain plug was 3/16 inch rather than metric, but I found it too fiddly trying to use an L-shaped Allen wrench. Instead, I used a 3/16 in. Allen bit in a 1/4 in. socket with a swivel joint and long extension. A magnetic bit or socket would have been handy but I don't have them in these sizes, so I fixed the bit in the socket with electrician's tape so it wouldn't fall out:
I worked the extension below the coolant hoses until I could fit the bit into the drain plug. With a 1/4 inch ratchet I could apply all the torque necessary to break the drain plug loose, and the unrestricted angle of rotation made twisting the plug out a simple matter:
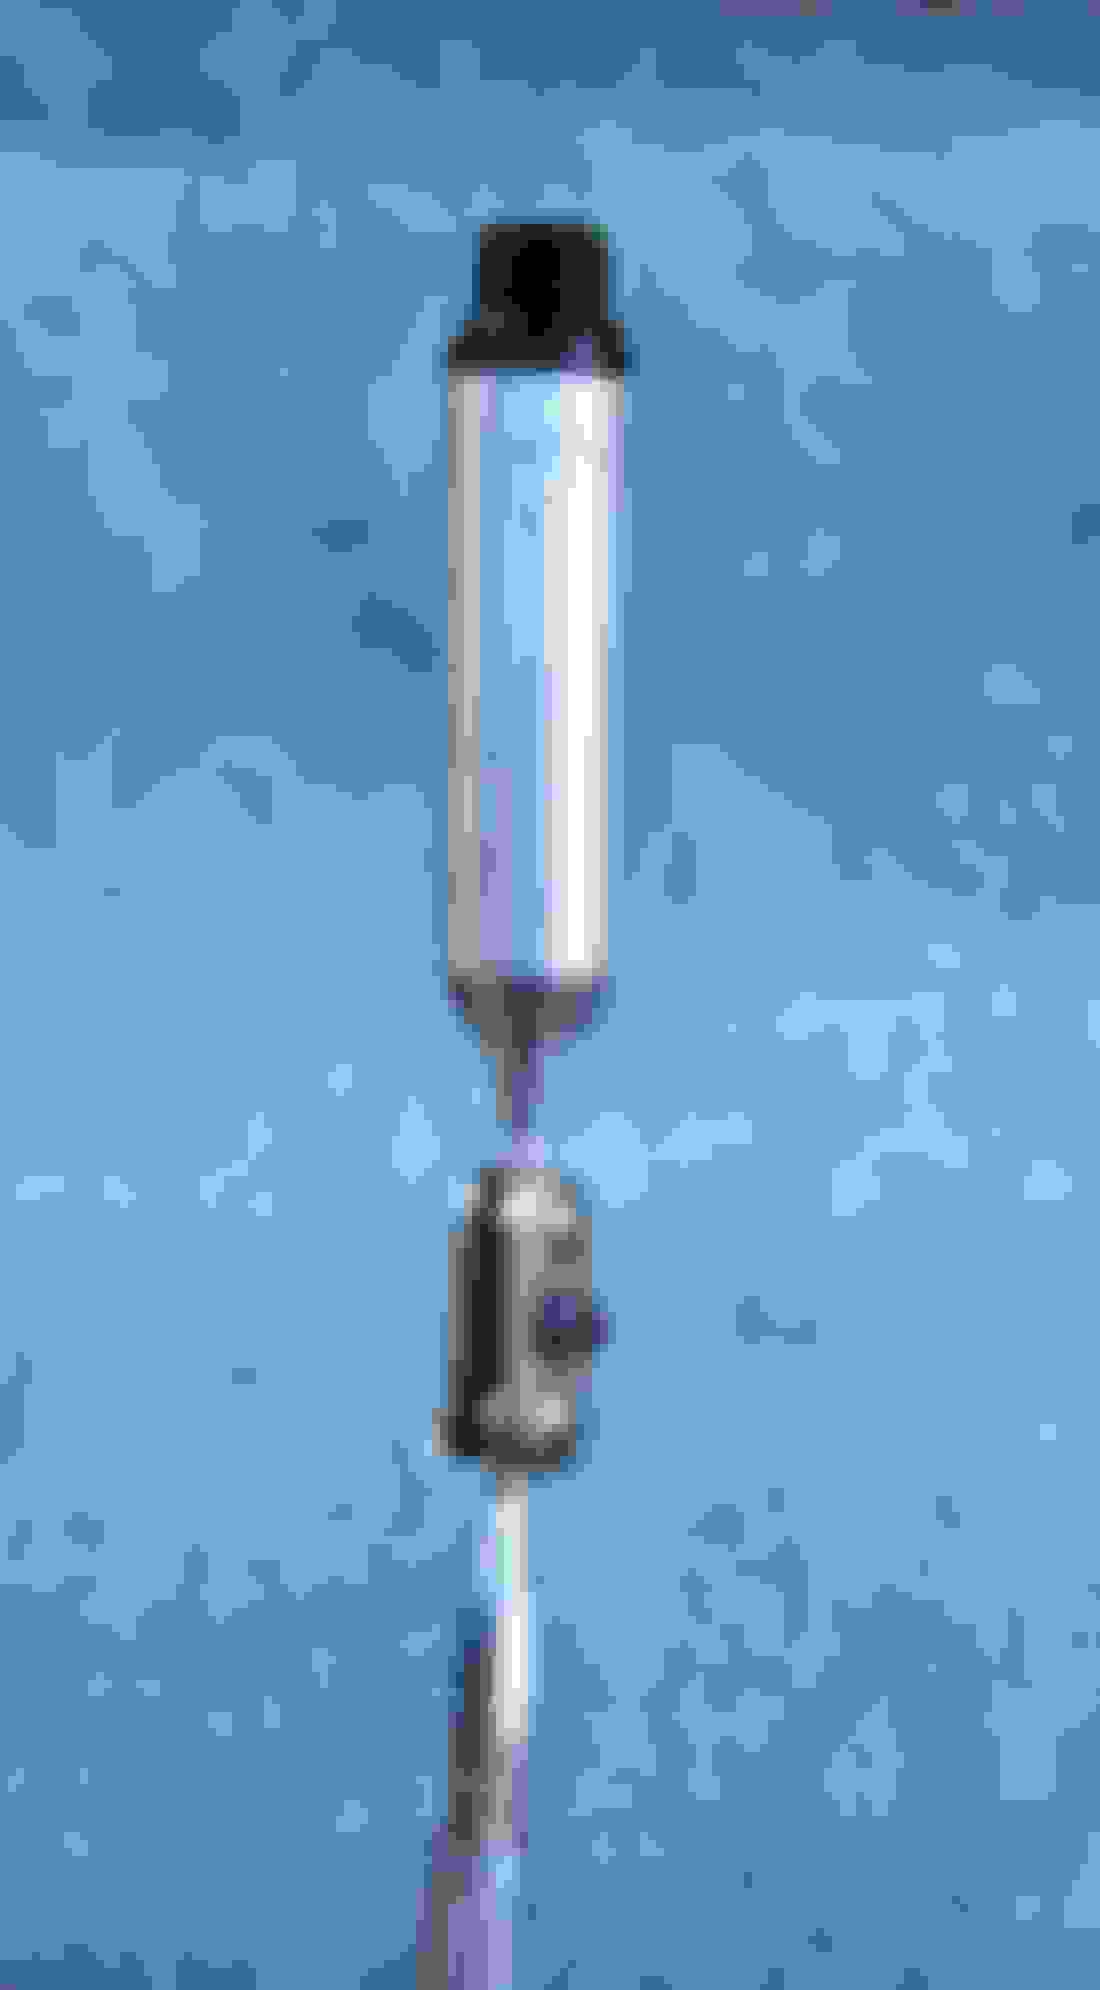
I used a length of rubber vacuum hose from my parts bin with a small I.D. of about 1/16 in. / 1.5mm. I tried to withdraw the old fluid using a syringe, but it took a lot of pressure to pull the fluid through the small hose, so like Highhorse I used my Mityvac hand vacuum pump:
The small I.D. of the hose also made the flow of new fluid very slow, so I used the syringe to force it into the supercharger:
And of course, when trying to reinstall the drain plug for the first time, I dropped it. A magnetic retriever saved the day:
I do not have a supercharger in my Jag, but reading your comments got me curious. I always thought that superchargers are lubed by the engine oil, so it is very important to keep the engine idle for a good 30 seconds before turning it off. But I see now that the superchargers in your cars have their own reservoir of turbine oil, so they are always properly lubed even if the engine is turned off.
Maybe I am confusing superchargers with turbos. What is the difference?
Turbos do usually share the engine oil supply. Coking the turbos was an issue a long time ago.
The cooling for turbos comes from the lubrication system.
The Eaton type superchargers seem to have an internal oil supply. The cooling comes from the cooling system.


 02-02-2015, 04:49 PM