When you click on links to various merchants on this site and make a purchase, this can result in this site earning a commission. Affiliate programs and affiliations include, but are not limited to, the eBay Partner Network.
With the objective of replacing valley hoses and as many other coolant hoses as possible, is it necessary to remove the intercoolers too? I assume the SC is the snout attached to the belt & that the intercoolers are the two identical rectangular parts on either side that are composed of the same metal & are marked "Supercharger".
With the objective of replacing valley hoses and as many other coolant hoses as possible, is it necessary to remove the intercoolers too? I assume the SC is the snout attached to the belt & that the intercoolers are the two identical rectangular parts on either side that are composed of the same metal & are marked "Supercharger".
Thanks and best,
Steve S.
Hi Steve,
No, they don't have to be removed. They stay in place, and you disconnect the gaskets on their inner faces to remove the supercharger outlet adaptor, then the supercharger.
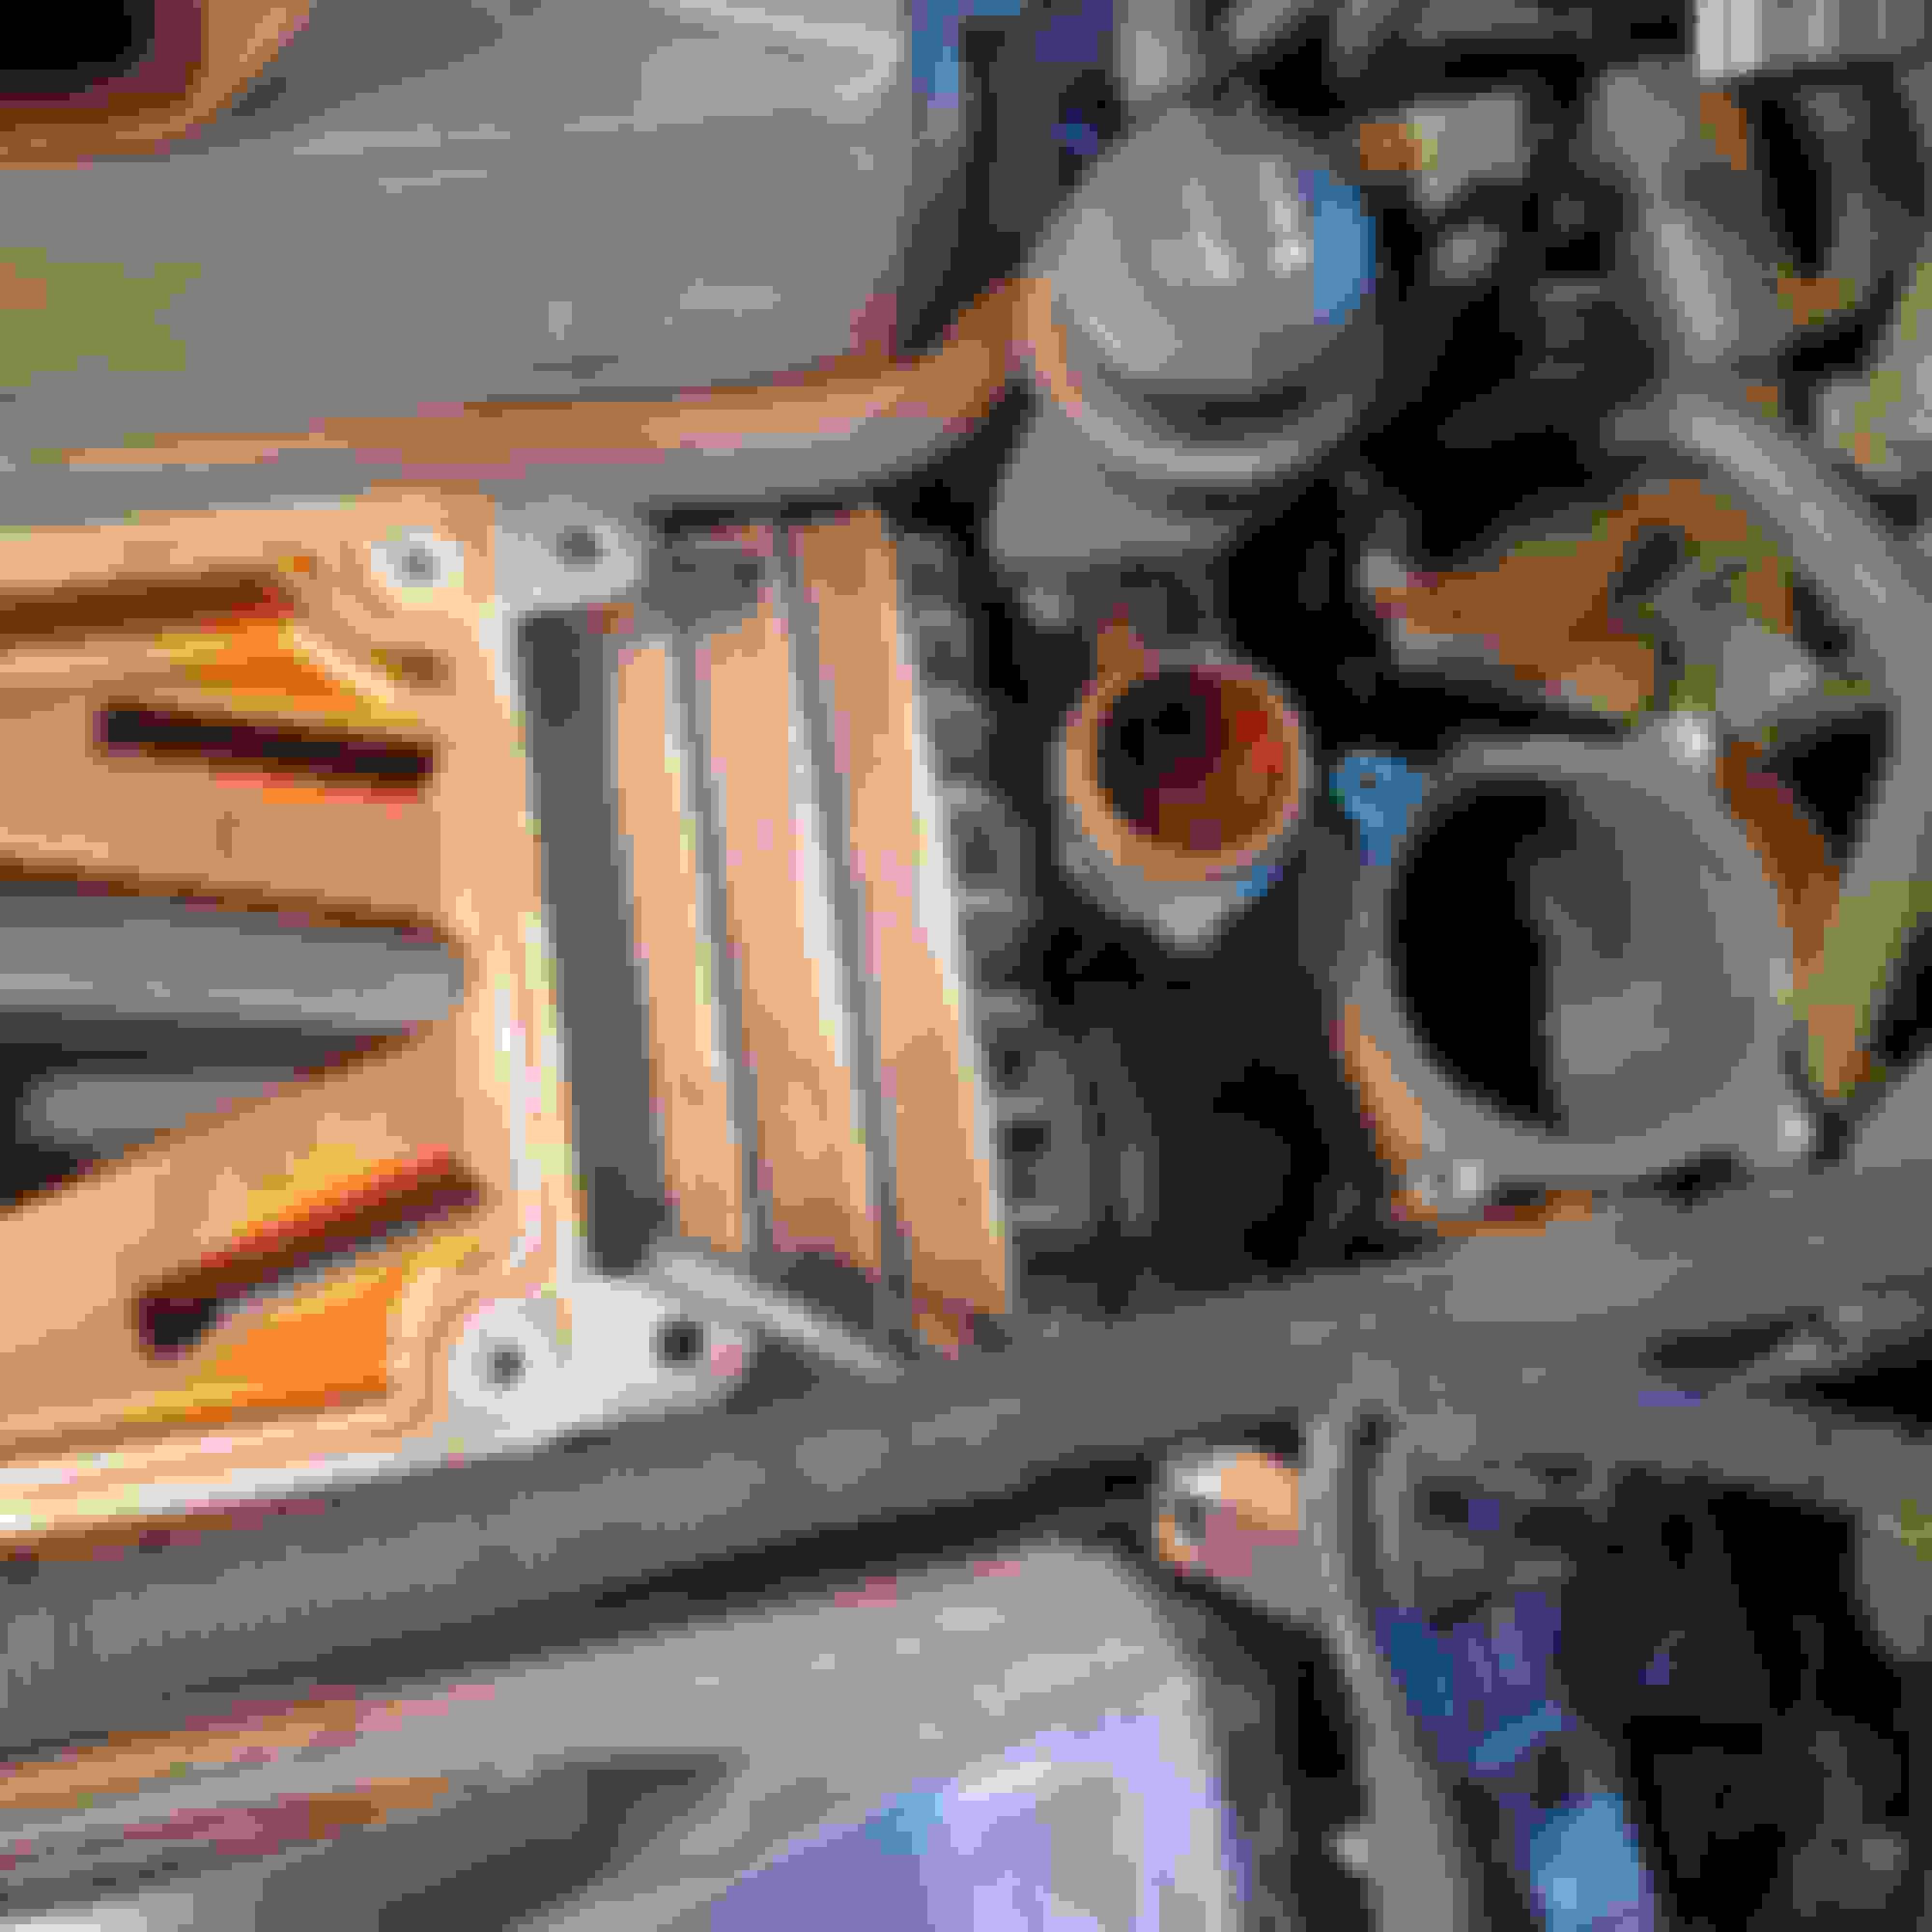
In the pics, the bolts are arrowed. You will have to remove the coolant pipes first, but that's easy with the special tool.
Removed the 4 #10 blts and the unusual #8 with its washer. Prying slightly, the SC seems free (very slight movement) at the intercooler gaskets. I moved the clip on the hose down. Should I expect some resistance in removing the SC? My concern, of course, is that something else needs disconnecting & I break something.
Thanks,
Steve S.
P.S. It is amazing how different your intercoolers are from my 04! Mine has very smooth sides & tops.
Common sense says that I should tap around the base of the SC with a rubber mallet or block of wood? What about PT Blaster? Does it need to just lift off or does it need to slide forward or back?
I am assuming that it shouldn't just come off easily? Since the 5 bolts came off so easily, I was expecting it just to lift off.
Common sense says that I should tap around the base of the SC with a rubber mallet
Not wood, but a soft-faced deadblow hammer and "common sense' seems to work on most anything with seals, O rings, gaskets, etc. that tend to grow together with contamination, heat, and age.
If nowt else, the nature of the response to a light blow can pretty well indicate if there is one or more fasteners still to be found and released.
You got this far, I'm presuming you have the "feel" to sense that, not pick up a BFH and beat the living s**t out of it.
That comes later... when yer "spare me, Father - I'm working on an AJ133" meds wear off.....
In the first picture is the SC with the 4 bright bolts with #10 Hex heads that hold the SC to the intercoolers. The four dark bolts with the #8 Hex head are for bolting the SC to the block. Once the hose on the end of the snout & the tiny hose on the rear are disconnected, the SC comes off with no force required. I will now do more research to see if the intercoolers, etc. need to be removed in order to get all of the hoses replace. But that a subject for another thread. Once the air untake manifold was removed, I would say that removing the SC is actually one of the esier things assuming, of course, that all 8 bolts are removed.
Great work, Steve. But that's just the outlet adapter. What you can now see exposed with the rotating blades, is the supercharger. There are two bolts at the front, and one under the intake elbow at the back. I removed mine with the intake elbow connected. The intake elbow also has a bracket to hold it at the back with, I think, 8mm nuts. It is very fiddly to remove but a 1/4" ratchet and universal joints are essential. The bracket is visible on the picture I uploaded with the supercharger removed, right at the back of the valley. Keep going, you're nearly there!
The intercoolers are different on later cars, and have external ribs.
Got the thermostat tower off & now I'm ready to take the Big Boy off, finally. It's 4:30 PM PT here. Think I'll have a wee dram & off for a nice dinner!
Wellll.. I have only ever shared a blankey with grasshoppers by pure accident, so it weren't ME who "over shared" on kinkery-foolery!
Got the thermostat tower off & now I'm ready to take the Big Boy off, finally. It's 4:30 PM PT here. Think I'll have a wee dram & off for a nice dinner!
I KNEW Jaguar lovers were discerning individuals as appreciated more than one of life's fineries. Got yer priorities right on that score! Just beware of grasshoppers in stilletto heels. Gold-diggers, one and all.
Finally got the throttle body off & I thought that the 3rd bolt holding the SC would manifest itself. Instead, I still have a lot behind the SC! What are the 2 openings? The larger dark one is where the throttle body was; the other is smaller and is some kind of throttle. I assume that these have to be removed in order to finally get the supercharge off? If so, where do I look for the bolts & screws? Is it possible to get to the 3rd bolt of the throttle body and take all off together?
Hi Steve,
The larger opening is the intake elbow. Under the back of this there is a bracket that bolts into the elbow. This is just visible at the back of the valley in the picture above of the empty valley. There are two small (8mm?) bolts that secure the elbow. You can get to the fourth bolt that holds the throttle body to the back of the supercharger. Then you can remove the throttle body complete with intake elbow. There is an electrical plug, a couple of breather hoses, some coolant lines and the vacuum feed to the brake booster also. The service manual has a good guide to this procedure, along with the writeup in jaghelp.com about the S-Type R supercharger removal, and our old friend "into the valley".
Keep going, you're nearly there!
Hi Steve
Yes the EGR does need to be removed, there are two bolts (10mm I think) that hold it to the elbow. I used a 1/4" drive 6 point socket with a short extension. It helps to have a mirror or a borescope camera to find the bolt heads the first time. I put a smear of toothpaste inside the socket, as it helps prevent it slipping. The other end of the corrugated semi-flexible EGR duct is fitted on the exhaust manifold with two nuts. I didn't have any problem with them, but again, stick to 6-point sockets. If you can, it's best to remove the EGR duct as it looks fragile and gets in the way.
When refitting the EGR to the elbow at reassembly time. I put the two bolts into the EGR valve before I put it in place. I then wound a rubber band around the two bolts to stop them falling out of the EGR. Lastly, I tied a length of string to the rubber band. I was able to offer the EGR up to the elbow, and reach in and start the two bolts in the elbow threads. After getting the bolts well started, I pulled the string and it removed the rubber band. Then I just had to tighten and torque the bolts.
Hi Steve,
The service manual has a good guide to this procedure, along with the writeup in jaghelp.com about the S-Type R supercharger removal, and our old friend "into the valley".
Keep going, you're nearly there!
Pete M
Jaghelp.com is not coming up. Is that the actual url?
Thanks, Bagpype. Same thing happened to me when I tried to call it up. I found 4 sites reportedly catering to Jag owners. However, only this one seems legit & active & the 350 section on this site isn't as active as it was. I suspect that is because cars & drivers are long in the tooth or amongst the Dearly Departed. Many threads, including Stickies, direct us to a "media..." which gives an error message. I was going to play with it a bit using a different browser, etc.
Pete M, Did you remove & clean your intercoolers? What about the oil in the SC? Did you change or look at it? BTW, I have a concept re the plastic bulkhead I'm going to play with. I think my idea will allow better insulation and ease of removal. Started thinking of this when the idea of testing, etc. & then having to remove heater hoses to reinstall the plastc....
 04-04-2024, 12:11 PM