When you click on links to various merchants on this site and make a purchase, this can result in this site earning a commission. Affiliate programs and affiliations include, but are not limited to, the eBay Partner Network.
Quote:
"Did you remove & clean your intercoolers? What about the oil in the SC? Did you change or look at it?"
Unquote
Back from my vacation to France, and after the suspension problems on my recent trip to Italy, this time the car behaved impeccably...
But to your questions, even if addressed to Pete M.:
I indeed removed the intercoolers on my car and cleaned them internally, I have a small washing system for mechanical parts. Alternatively, you can use (lots of) brake cleaner. There was quite a bit of dirt coming out of them, so I think that cleaning them was not a bad idea.
I did not replace my SC, the black coating on the SC blades looked fine and it turned easily with no bearing noise. But an oil change is definitely a thing to do, and with the SC out of the car it is so much easier! I had the impression that after the SC oil change the response in was much better than before.
Only be aware that, although the X350 is "metric", the SC is not, and therefore you need "inch tools" for it.
Only be aware that, although the X350 is "metric", the SC is not, and therefore you need "inch tools" for it.
THIS.... has been going-on since even before Louis 'one who tends goats' AKA "Chevrolet" and his brothers emigrated to the US from the French-speaking side of Switzerland.
Back when "metric" tools were seriously hard to find in inchland, we bought a few select sizes of our socket wrenchs in 32nd and now and then even 64ths' of an inch sizes to cope.
By the time my '84 Jeep's alternator mounting adaptor assembly had half the fasteners in inch, the other half in Metric, side-by-side... I had long since laid-in both races of wrenches ....and more.
Europeans may fuss over that need of dual sets of tools. 'mericans are so familiar with the necessity as to no longer pay it any mind.
Nor the Brits.
Their rail, firearms, motorcar, and cycle manufacturers protected their tiny markets by each designer taking care not to use any fasteners to the same standards or sizes his competitor might have adopted - foreign OR domestic.
No problem. In Blighty, (or the "Old Dominion" ) even "face" spanners and "hook" spanners are often as not 'adjustable'.
God must have loved "standards" .... or she would not have made so many of them..
Forgive my confusion! I meant Thomas, not Pete!
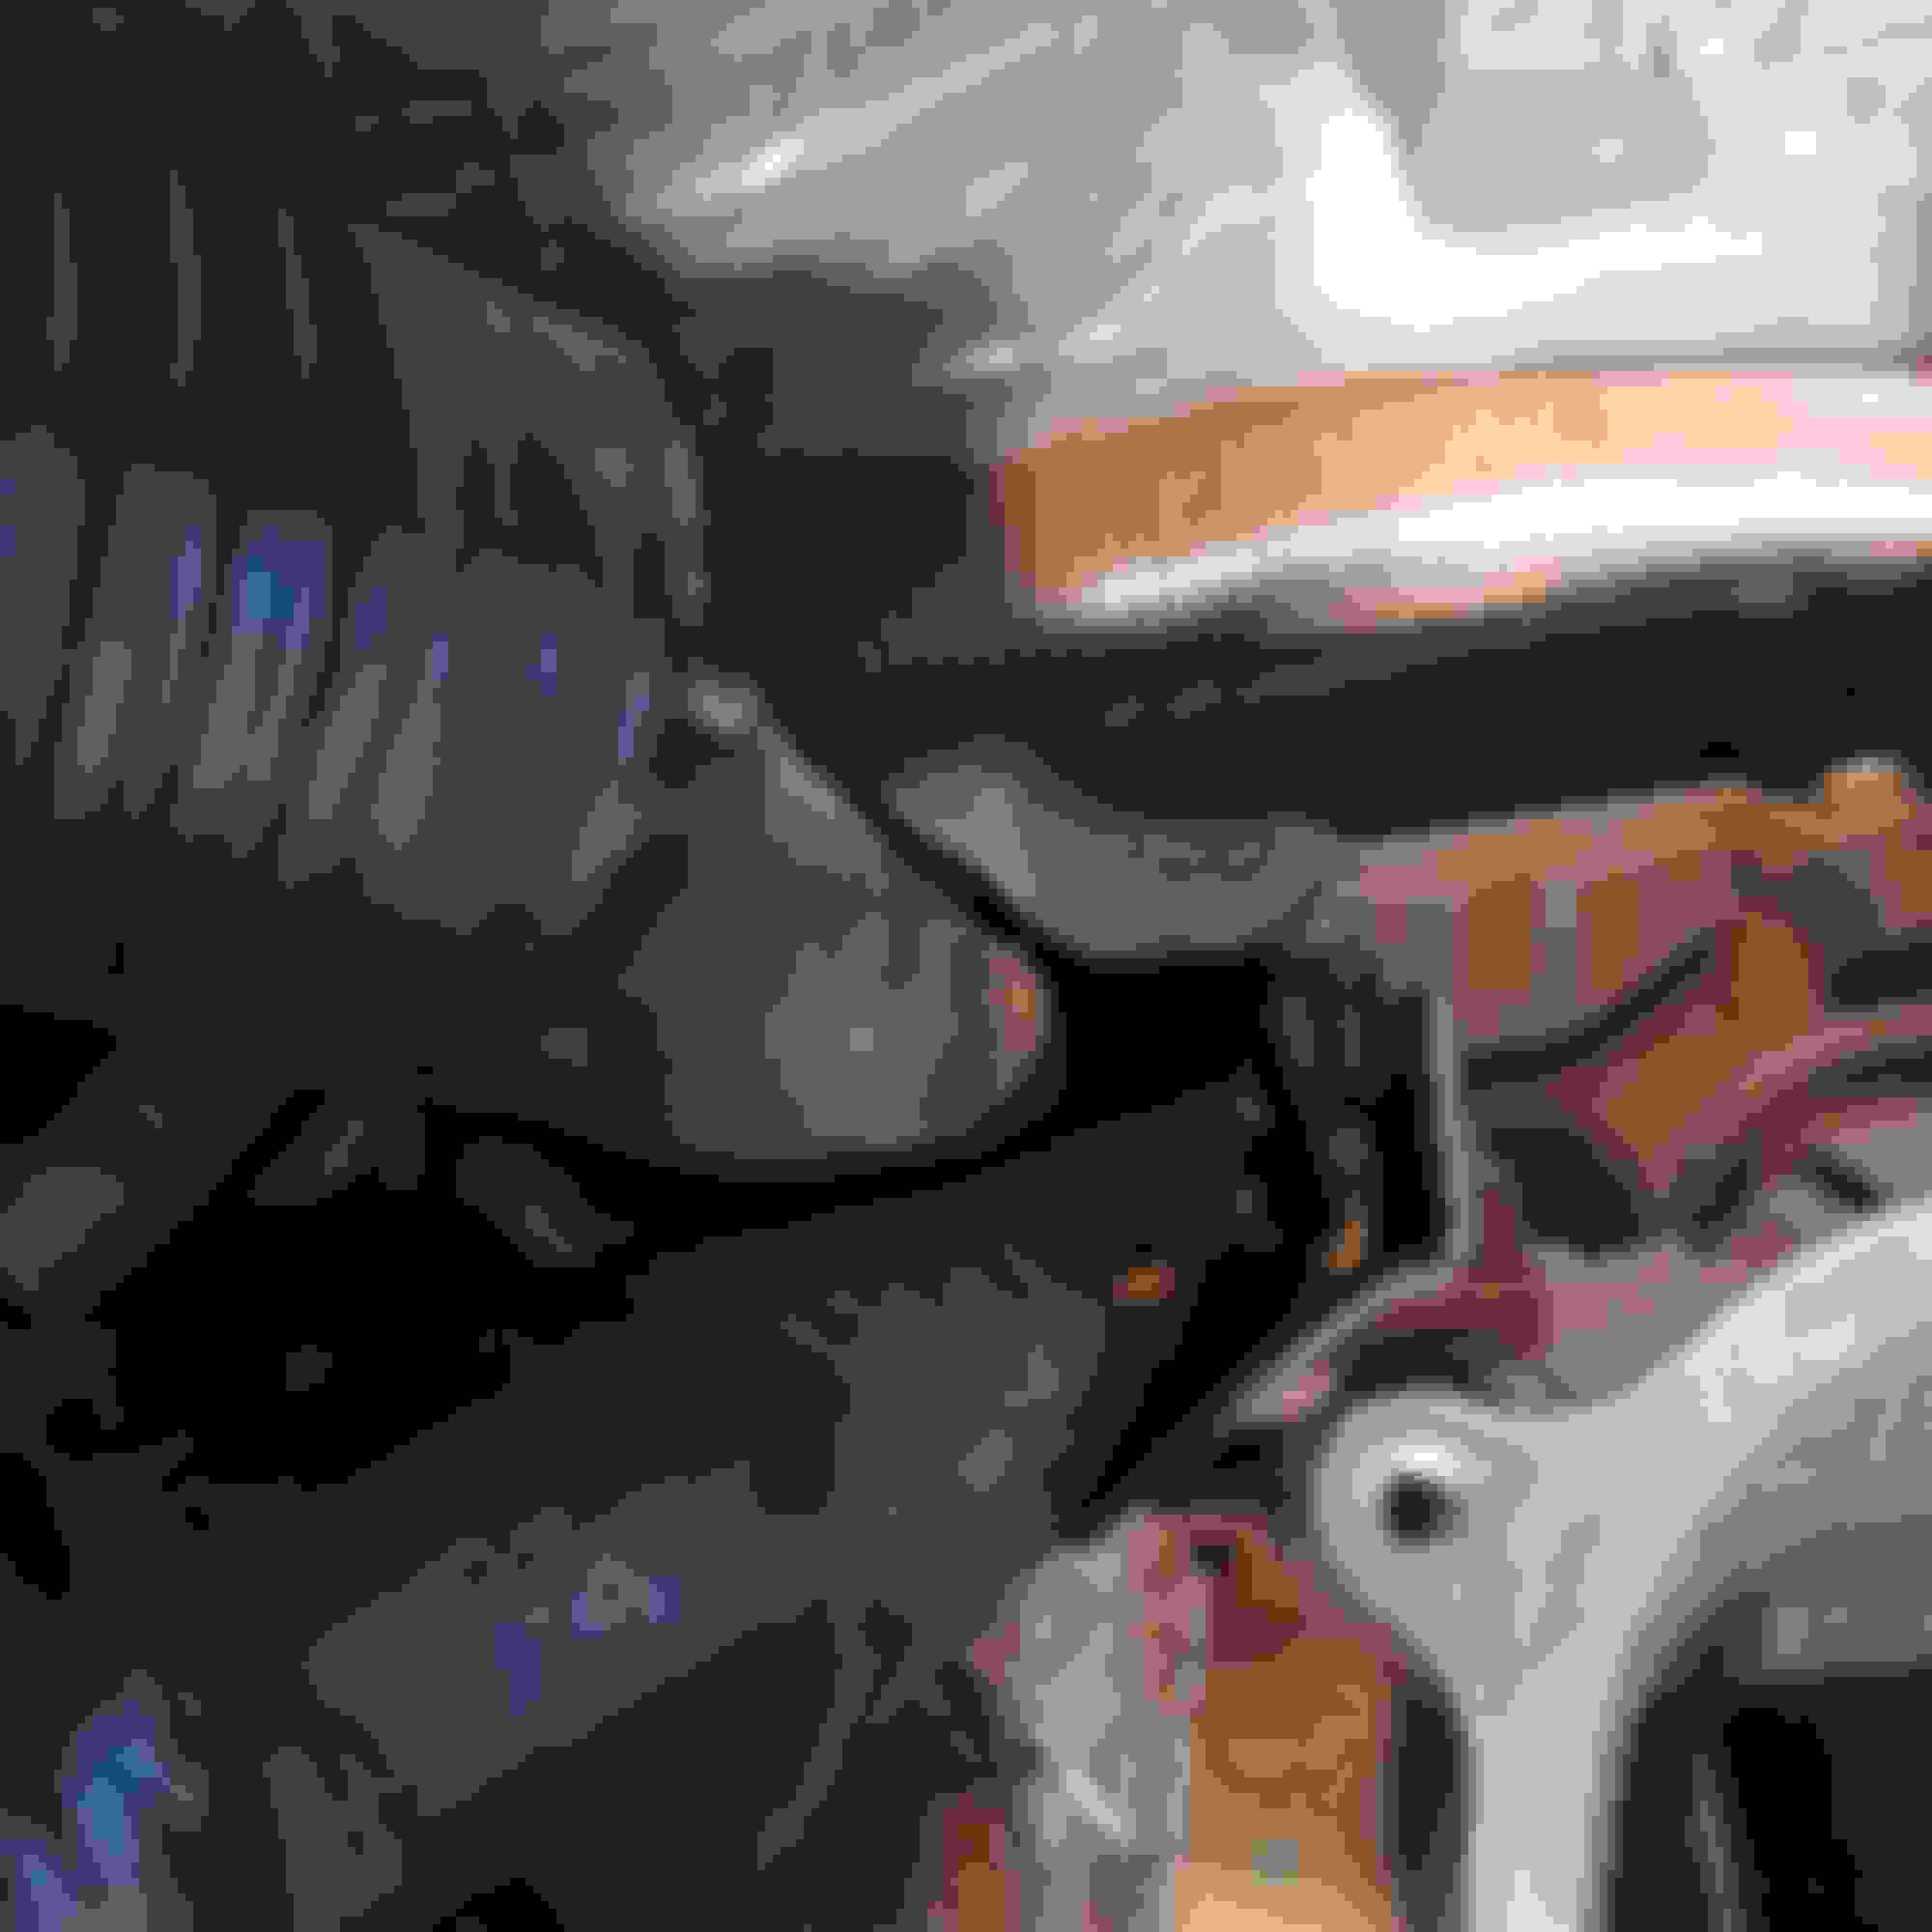
What is the part in the 1st Picture? It seemed to be in the way, so I took it off.
I don't know if it is clear enough; but in the second picture, there are two wire bundles which attach behind & below the elbow. Do they need to be removed? While I was able to get 1 bolt out of the EGR, the other bolt would come out easier if one of the aforementioned bundles was moved. There seems to be some kind of clamp at the end of the bundles?
Thanks and best,
Steve s.
I do not understand the whole ranting about the issue, and I was not fussing about the need of a dual set of tools.
As, to my knowledge, the SC is the only part on the whole car that is not metric, I thought that it is an exception worth mentioning. Nothing more, nothing less.
As, to my knowledge, the SC is the only part on the whole car that is not metric,
Actually it is not the only place an SAE or "US" (formerly "Imperial", if not always exactly so) size was utilized.
Even where no supercharger was ever fitted.
A set of "low profile" AKA 'thin" open-end wrenches for the brake calipers (not the same sizes front/rear, nor between Jaguar/Rover) is not unique to JLR, but are a benefit vs use of grotty "vice" grips..
As with 'flare nut" wrenches in sets of SAE AND Metric, it was no surprise they can come in handy for more than just brake or fluid-line work.
That said, the only Jaguar-specific "new" tool I had to purchase was the "penta" socket for the X350's electric parking brakes.
That's not a Metric/US issue. Design Engineer whimsey, rather.
Forgive my confusion! I meant Thomas, not Pete!
What is the part in the 1st Picture? It seemed to be in the way, so I took it off.
I don't know if it is clear enough; but in the second picture, there are two wire bundles which attach behind & below the elbow. Do they need to be removed? While I was able to get 1 bolt out of the EGR, the other bolt would come out easier if one of the aforementioned bundles was moved. There seems to be some kind of clamp at the end of the bundles?
Thanks and best,
Steve s.
the first is the vacuum operated controller for the supercharger bypass. The bundles are to the ecm which is under the cabin air filter housing. I found moving them a bit gave easier acces to the egr stuff
In the pictures, you can see a plastc "boot" that covers the terminus of the two large wire bundles. I was able to cut the yellow plastic zip tie & with a screwdriver, I was able to pop the "clip" at the top & I was able to remove the #10 nut where the "boot" connects to a stud. I think that I can force the plastic over the threaded stud, but not with ease. It doesn't seem right to force it too hard for fear of breaking something.
Question: How do these wires get unplugged? Is the plastic "boot" part of the connector? Or, are the connectors just being covered by the boot? Should I force the plastic keeper part off the threaded stud or is there a better way?
OK, I just discovered that the boot is more extensive & is attached to the bulkhead in another spot with a # 6 or 8 bolt. I will remove said bolt & see if the rest is intuitive. Howevr, if you are familiar with this peculiar fitting, I am appreciative of any help... Thanks, Steve S.
Removed 2 #8s, one by feel. There may also be a #10 bolt detectable by feel also. It would be great just to know what the dang thing is called so I could find one online & see how it works. Anyone? Thanks, Steve S.
The number #10 bolt that is not visible is actually a #13. That seems awfully large to be holding a plug. I may be able to remove the EGR without disconnecting these bundles. However, it is my understanding that the EGR is tricky to get back on. So, I think it would be better to remove the bundles. If I only knew how!
The number #10 bolt that is not visible is actually a #13. That seems awfully large to be holding a plug. I may be able to remove the EGR without disconnecting these bundles. However, it is my understanding that the EGR is tricky to get back on. So, I think it would be better to remove the bundles. If I only knew how!
Sounds as if you are operating without an endoscope?
Worth having for EXTERNAL look-see into any place your head won't fit, every bit as much as for down inside bores and such.
Save their nowadays relatively modest cost back in reducing waste of scarce time very quickly. Several good ones in the market. My go-to is a Teslong NTS500B, controllable built-in illumination and straight-ahead or side-look at button-touch.
Thank you, Bill! I'll definitely invest in one of those. If I can handle this task, a colonoscopy should be a breeze!
I've never ventured onto the "Technical" Forum before, but I think I'll give it a shot later. I'm exhausting just a few of you wonderfully empathetic souls in attempting to accomplish this task on the 350 Forum. If the Technical Forum has a broader audience, perhaps I'll get a response. Surely, this part, or something similar, has been used more than once on a 2004 XJR? Before I do, I will attempt to provide better pictures and a more detailed description. After my time in the Army, my first job was teaching high school Physics for five years; I frequently found that the quality of the answers to a question was directly proportional to the quality of the way the question was posed. So, I'll endeavor to improve the question.
You'd think identifying this part would be simple. However, I've been unsuccessful in even finding a picture of it on the internet. The bundles being offered on eBay are numerous, but even there, the part isn't shown.
As always, any and all help is greatly appreciated!
It's been awhile since I had an X350 supercharger out, but my recollection is that I have never had to remove that conduit from the wiring harness. It may be secured in a few places with either fir tree fasteners that you pry out with a forked trim tool, or a nut or screw that secures a flange to a bracket or some part of the engine. You will only be able to displace it a little bit for slightly improved clearance. However, there is a molded panel secured to the central area of the firewall/bulkhead that can be removed to improve your access to the rear of the engine. Once you remove the fasteners, which I seem to recall are 10 mm nuts, removing the panel is a matter of carefully tugging it out past all the other obstructions. Just take care not to break any wires, vacuum or breather hoses.
For removal of those EGR valve fasteners, I use 1/4" drive sockets with a flex joint and long extension. I wrap electrical tape around the socket and flex joint and onto the extension to eliminate the risk of dropping the socket or flex joint down into the nether regions and to reduce the "floppiness" of the flex joint. Off the top of my head, the extension I use is probaby 8" to 12" long, so I am actually twisting the ratchet well out of the way of all those hoses and electrical harness obstructions.
The screws on the sides of the throttle body elbow are another challenge, and I use a similar setup with a 1/4" drive socket.
One thing to be aware of is the plastic brake booster vacuum pipe that plugs into the right side (as viewed from the driver's seat) of the intake elbow below the throttle body. The quick-connect fitting for the pipe tends to break, so you will want to have a new fitting on hand for reassembly. The part number is C2S15816:
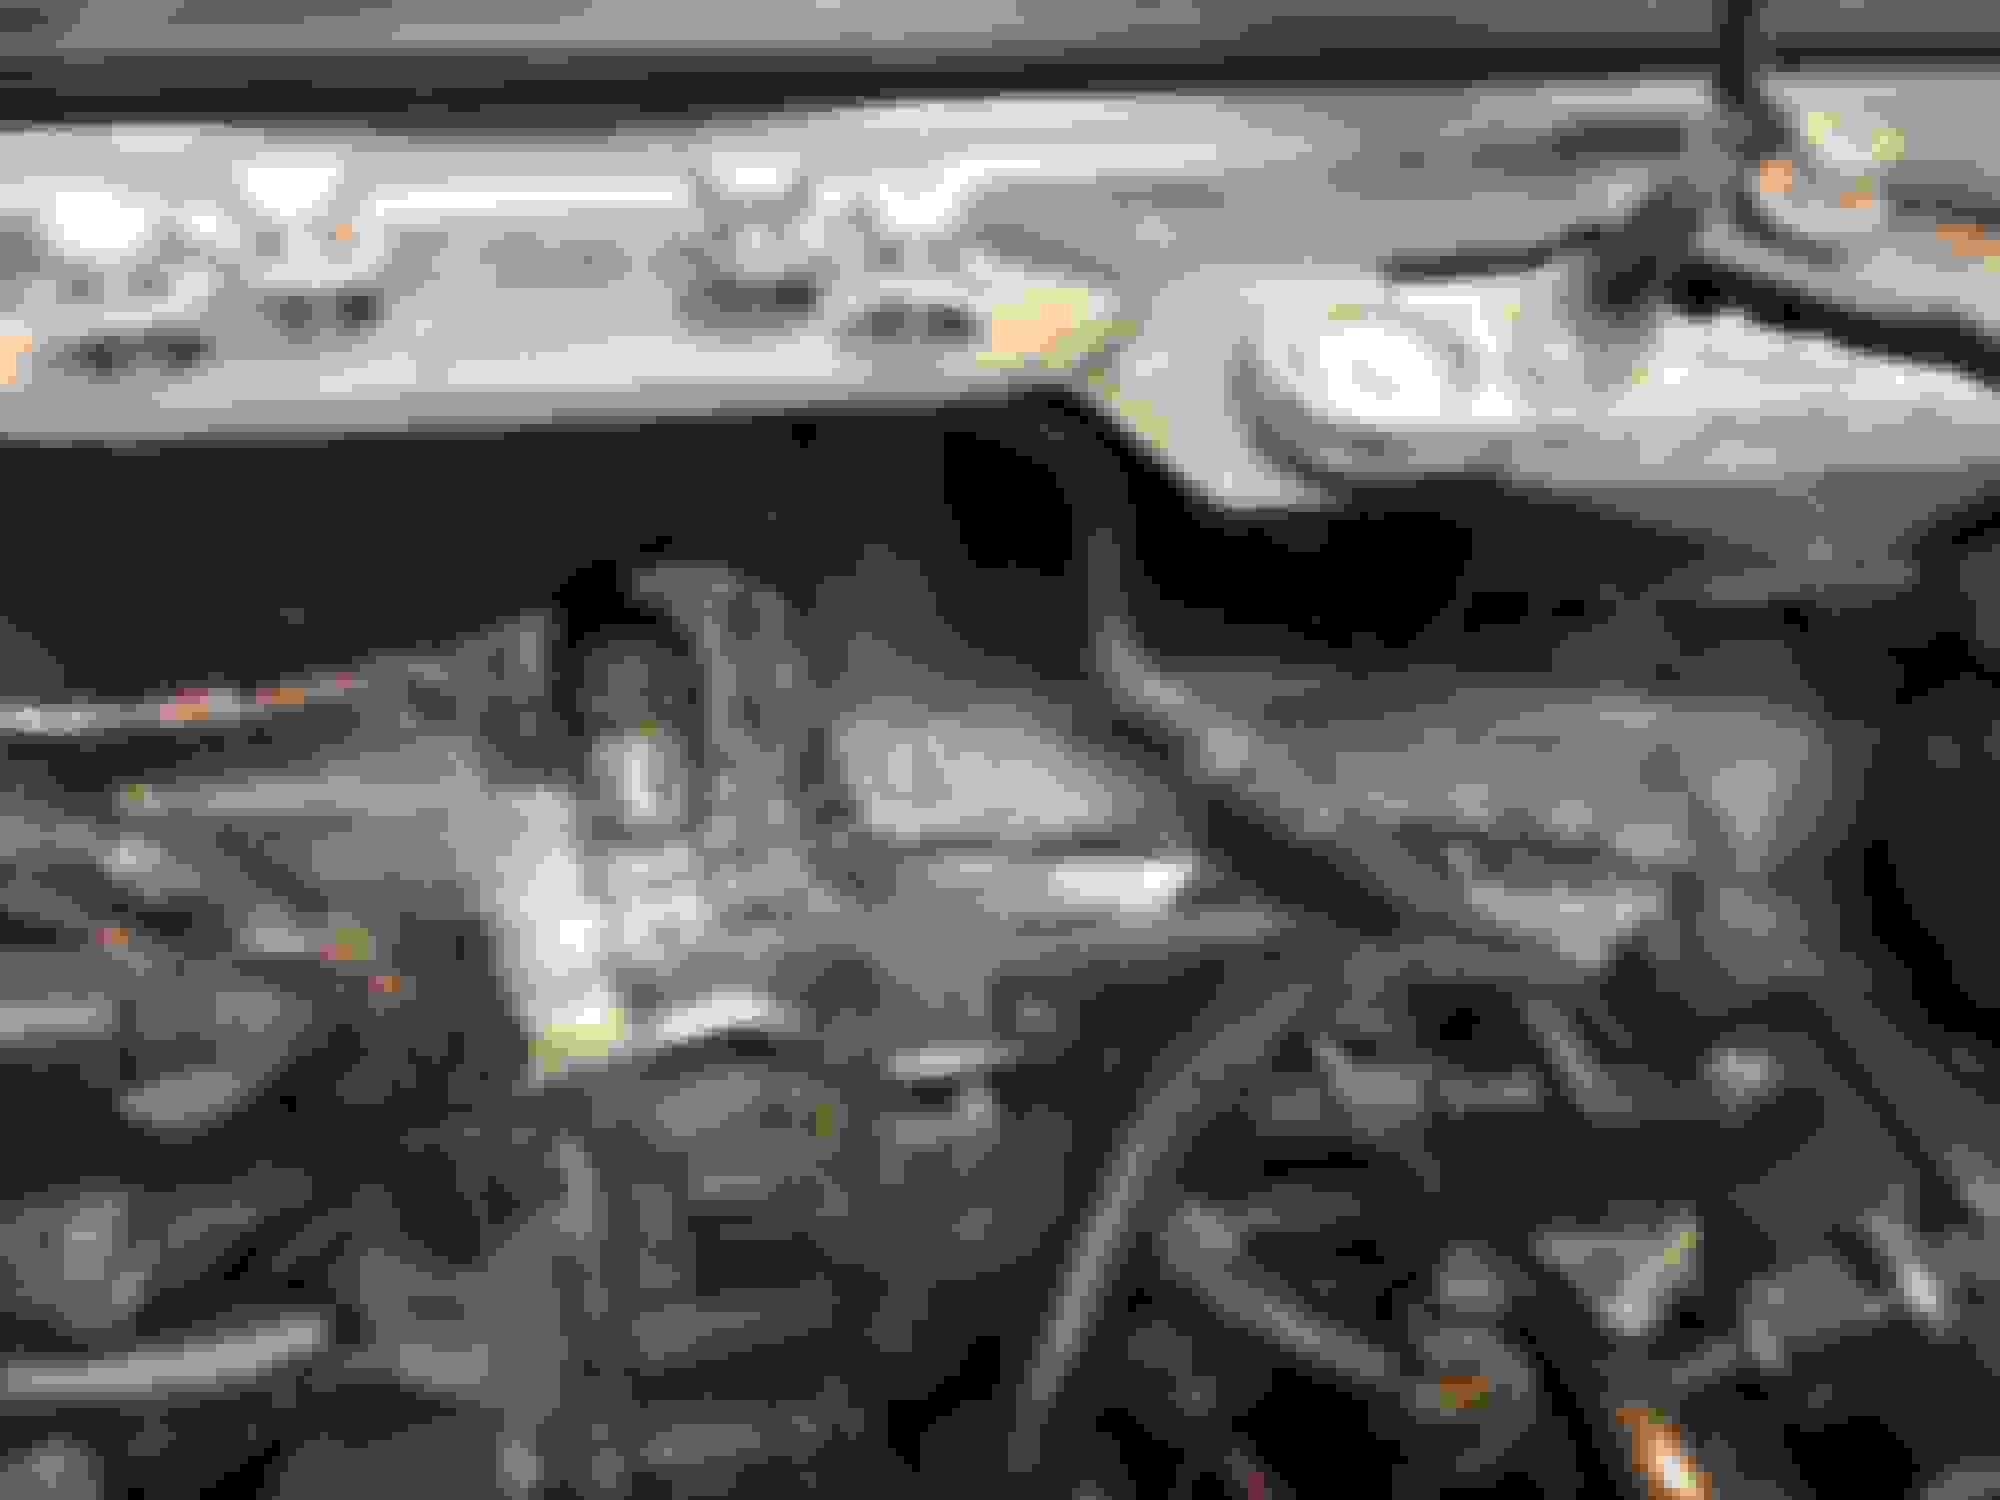
I also did not remove the cables from the plastic casing, just moved it as a whole. I have found some other pictures that I took at the time that hopefully help. You will see that the casing is kind of "U" shaped and quite big.
Regarding the C2S15816 mentioned by Don B., I actually do not know why Jaguar also sells the brass fitting. You normally should only need the plastic part plus the o-ring that is inside the brass fitting.
As for an endoscope, it is really fine and useful (I also have it), in addition to one or more mirrors, which are sometimes easier to handle.
Thomas, your 1st and 2nd shots show the plastic cover quite clearly. The last photo shows it particularly well. What you can't see is how it actually becomes more "rectangularly" shaped & is bolted in 3 places.
While I will explore further, My gut tells me to replace the nut & bolts that I have removed from this connector & endeavor to remove the EGR, etc. with it in place.
Thank you, Bill! I'll definitely invest in one of those. If I can handle this task, a colonoscopy should be a breeze!
LOL! Hoping to avoid that, but one can use it for a lot more than just motorcars. Had to place some data cables in the DR wall, near where wiring was suspected to be. Tiny opening for the 'scope, and I easily avoided the power wiring.
...... I'm exhausting just a few of you wonderfully empathetic souls in attempting to accomplish this task on the 350 Forum.
Uh, no. I hope you stay here.
Your thread has added value partly because you have come into the tasking WITHOUT the common assumptions and prior knowledge of those who have done this stuff or similar more often.
The result is you - and the ''helpers" - have been covering finer details that many of us tend to not mention at all.
Ex: I take for granted that any tool needed is already in my arsenal, wouldn't have bothered mentioning fastener 'race' (SAE / Metric), their sizes, nor whether hex, Allen, Torx, etc. I just take as given that "everyone" has all of the above and will grab the one they need - or know where to get it.
Writeups like that abound. "First, pull the supercharger.." as if it were as simple as popping a champagne cork, then on to the next.
As it is NOT that simple, that can leave a 'genuine' first-timer with a ton of surprises no one bothered to mention.
Please carry on ... with all the grotty details...
I'm still reading. Learning, even.
And neither one of MY AJ133 motors even HAS a supercharger...
My heartfelt gratitude for your insightful guidance and unwavering encouragement throughout this journey. Your wisdom is a beacon, illuminating the path forward!
The champagne bottle stands ready, its cork poised for release. Yet, in the back of my mind, I wonder: Will my awesome cat respond gracefully, or will she unleash a cascade of cryptic error codes? Either way, it will be great to find out.
Regardless, I raise my glass to you and your indomitable spirit!
 04-07-2024, 04:55 PM