XJ XJ6 / XJ8 / XJR ( X350 & X358 ) 2003 - 2009

What did you do to your X350/X358 today?

Thread Tools
 
Search this Thread
 
  #481  
Old 03-28-2018, 05:48 PM
romroc's Avatar
Senior Member
Join Date: May 2017
Posts: 240
Received 19 Likes on 15 Posts
Default

Originally Posted by NightHawk
Doesn't everyone love when recent repairs fail? I know I do... I got around to doing some replacing of my front suspension parts when trying to hunt down a very annoying creak last July. Replaced both front curved control arms with MAS auto parts, as the driver side hydra bush had failed 100%. No change in the noise. Fast forward to mid October when I had my indie do the air shock bushing on the driver side, and voila! Noise is gone.

Short lived that was, within 2000km the noise had begun to return. The other day it got Really bad coming home, so I stuck my head in underneath to see what is going on and..


Both failed. Luckily I have a second 101-7517 Beck/Arnley but it makes me wonder if I should get a different bushing considering this one didn't even make it 5000km. I am attempting to contact both MAS auto and Beck/Arnley about warranty replacement especially considering how they toot their horns about "OE Quality"

So, after all the ranting I have a question. Seeing as the bushings are already destroyed, would silicone spray lubricant shot inside of them at least make them slightly quieter until I can replace them again?
​​​​​​
​​​​​​I will be trying to keep the driving to a minimum although I'm not sure if it's making a huge difference at this point
I like WD40 Rust penetrant. Heavy enough, easy applicator, use every month, see if it helps.
 
  #482  
Old 03-31-2018, 05:55 PM
jackra_1's Avatar
Veteran Member
Join Date: Aug 2014
Posts: 6,264
Received 1,756 Likes on 1,327 Posts
Default

Finished replacing the last two of 4 pulleys to try and stop an annoying squeak.

The alternator is new so that really counts as 5 pulleys replaced!

Had to take out the coolant reservoir for these last two.

AND I still had the squeak. However this time I could hear where it was coming from whereas before I could not.

It is coming from the pulley on the SC!!!! I have only done about 6,000 since that was rebuilt!

When I sprayed WD40 just behind the pulley the squeak stopped.

I left the drivers door window open and maybe that is why I have a completely flat battery?
 
  #483  
Old 03-31-2018, 06:56 PM
romroc's Avatar
Senior Member
Join Date: May 2017
Posts: 240
Received 19 Likes on 15 Posts
Default

Originally Posted by jackra_1
Finished replacing the last two of 4 pulleys to try and stop an annoying squeak.

The alternator is new so that really counts as 5 pulleys replaced!

Had to take out the coolant reservoir for these last two.

AND I still had the squeak. However this time I could hear where it was coming from whereas before I could not.

It is coming from the pulley on the SC!!!! I have only done about 6,000 since that was rebuilt!

When I sprayed WD40 just behind the pulley the squeak stopped.

I left the drivers door window open and maybe that is why I have a completely flat battery?
try wd40 rust penetrant. It's magic.
 
  #484  
Old 03-31-2018, 07:08 PM
jackra_1's Avatar
Veteran Member
Join Date: Aug 2014
Posts: 6,264
Received 1,756 Likes on 1,327 Posts
Default

Originally Posted by romroc
try wd40 rust penetrant. It's magic.
I do have some so will try it.

The battery was not flat. My negative connection was loose!!
 
  #485  
Old 04-01-2018, 09:56 AM
TBoneous's Avatar
Junior Member
Join Date: Jan 2018
Location: Santa Rosa California
Posts: 17
Received 7 Likes on 2 Posts
Default

I had a new head liner put in and replaced a delaminating front windshield. I washed her up, drover her to the backyard an snapped this pic. Man! These are beautiful cars!

This is Abby at home in the Sonoma county wine country! Ain’t she pretty?
 
Attached Thumbnails What did you do to your X350/X358 today?-13749fb2-f2f2-4b2b-9ca5-8c27ef76e668.jpg  
  #486  
Old 04-01-2018, 08:46 PM
romroc's Avatar
Senior Member
Join Date: May 2017
Posts: 240
Received 19 Likes on 15 Posts
Default

Originally Posted by TBoneous
I had a new head liner put in and replaced a delaminating front windshield. I washed her up, drover her to the backyard an snapped this pic. Man! These are beautiful cars!

This is Abby at home in the Sonoma county wine country! Ain’t she pretty?
they are puurty and the specs are equally impressive
 
  #487  
Old 04-03-2018, 12:30 PM
stham's Avatar
Senior Member
Join Date: Apr 2017
Location: Orlando
Posts: 200
Received 71 Likes on 33 Posts
Default

Ive been slowly collecting the equipment needed to properly scan & reflash modules on my XJR with the JLR SDD. I finally got the last few pieces (wire, clamps and a GOOD power supply) all within a nifty budget.


I adjusted ride height on all 4 corners, the heights were surprisingly all wonky. Here's the final result, im very pleased.


I dont get how some people can hate on this air suspension!
 
  #488  
Old 04-03-2018, 12:41 PM
jackra_1's Avatar
Veteran Member
Join Date: Aug 2014
Posts: 6,264
Received 1,756 Likes on 1,327 Posts
Default

Squeak gone!

After replacing 4 pulleys I still had an annoying squeak. It went away when I sprayed behind the SC pulley.

So called PSE, who rebuilt the SC, and low and behold they no longer exist having sold their assets to another company.

So much for my 3 year warranty!

Spoke to Ed, at this new company, and he persuaded me that it was the belt causing the "chirp".

So today I replaced the SC belt which was new 6,000 miles ago.

No more "chirp".

While I have the radiator shield off I will de-rust the crossmember.

It is not that bad at all but I might as well while I can get at it.
 
  #489  
Old 04-03-2018, 02:25 PM
romroc's Avatar
Senior Member
Join Date: May 2017
Posts: 240
Received 19 Likes on 15 Posts
Default

Originally Posted by stham
Ive been slowly collecting the equipment needed to properly scan & reflash modules on my XJR with the JLR SDD. I finally got the last few pieces (wire, clamps and a GOOD power supply) all within a nifty budget.


I adjusted ride height on all 4 corners, the heights were surprisingly all wonky. Here's the final result, im very pleased.


I dont get how some people can hate on this air suspension!
I like it, its very comfy yet tactile over the road.
 
  #490  
Old 04-03-2018, 03:14 PM
Wingrider's Avatar
Veteran Member
Join Date: Sep 2016
Location: Stow Ohio
Posts: 3,271
Received 798 Likes on 670 Posts
Smile

Love turns to hate, then back, when things get back to normal, lots of times, on all sorts of things.
 
  #491  
Old 04-03-2018, 04:28 PM
ayavner's Avatar
Senior Member
Join Date: Sep 2015
Location: Sherman, TX
Posts: 270
Received 51 Likes on 34 Posts
Default

Replaced the coolant tank cap. Shortly thereafter observed a Check Engine Light... not sure the 2 are related, but looks like another rabbit hole to go down...

New rotors and pads for the rear arrived today though, looking forward to getting those on!
 
  #492  
Old 04-19-2018, 12:06 PM
jackra_1's Avatar
Veteran Member
Join Date: Aug 2014
Posts: 6,264
Received 1,756 Likes on 1,327 Posts
Default

Took my back seats out ready for a 450 mile trip up to Cape Cod.

I can load more "stuff" to take and without damaging the seats. Most "stuff" will stay up there but tools will make the round trip.

I also take out the floor in the trunk over the spare wheel out. I can get several standard storage bins in then.

Also installing a "ski hatch" so will try and finish that job that I started months ago.
 
  #493  
Old 04-21-2018, 07:58 PM
Join Date: Mar 2012
Location: Hazlet Township, NJ
Posts: 4,746
Received 1,423 Likes on 1,066 Posts
Default

Dropped the rear bumper to replace a wonky reverse parking sensor. Surprised in the end how simple it was to drop it.

4 bolts behind the plastic trunk retainer, 4 plastic screw rivets under side and the 2 bolts under the rear wheel liner then pull out/back each side.

Applied anti seize to the bolt that reside under the rear wheel liner - each side, applied dielectric grease to each rear parking sensor connection, ensured all connectors were fully seated and cleaned things up before reinstalling the rear bumper assembly.

Now, time to troubleshoot an inoperative aux cooling pump.
 

Last edited by abonano; 04-21-2018 at 08:08 PM.
The following users liked this post:
jackra_1 (04-22-2018)
  #494  
Old 04-22-2018, 09:42 AM
PeteK812's Avatar
Senior Member
Join Date: May 2014
Location: Bloomington IN
Posts: 267
Received 41 Likes on 30 Posts
Default

Hey, jackra_1, how about some photos and a description of the ski-hatch project?
 
  #495  
Old 04-22-2018, 10:15 AM
jackra_1's Avatar
Veteran Member
Join Date: Aug 2014
Posts: 6,264
Received 1,756 Likes on 1,327 Posts
Default Ski hatch project

Originally Posted by PeteK812
Hey, jackra_1, how about some photos and a description of the ski-hatch project?
Some pics as requested.

Spent a lot of time trying to figure out how to install the whole ski hatch from some other car.

Ended up just modifying the swing hatch itself to attach to a metal bar in the rear seat.

It does not lock because of that however serves the purpose I had in mind for fishing rods.

I used a white pull strap to stop the hatch swinging back into the trunk.

It is a "tight fit" so it will not swing forward without pulling.

Note the plate that was originally in place over the hole. Just drilled out pop rivets to remove that.
 
Attached Thumbnails What did you do to your X350/X358 today?-p1000136.jpg   What did you do to your X350/X358 today?-p1000135.jpg   What did you do to your X350/X358 today?-p1000134.jpg   What did you do to your X350/X358 today?-p1000133.jpg   What did you do to your X350/X358 today?-p1000132.jpg  

  #496  
Old 04-22-2018, 10:28 AM
Boomer from Boston's Avatar
Senior Member
Join Date: Nov 2010
Location: West Central Mass. USA
Posts: 709
Received 87 Likes on 71 Posts
Default

To abonano re reverse parking sensor:
When you removed/loosened the various fasteners holding the rear bumper on, how did you keep it from falling to the floor? Did you leave it hanging by the sensor wiring?
 
  #497  
Old 04-22-2018, 11:36 AM
jackra_1's Avatar
Veteran Member
Join Date: Aug 2014
Posts: 6,264
Received 1,756 Likes on 1,327 Posts
Default

Originally Posted by Boomer from Boston
To abonano re reverse parking sensor:
When you removed/loosened the various fasteners holding the rear bumper on, how did you keep it from falling to the floor? Did you leave it hanging by the sensor wiring?
When I took my front bumper off I used several of those see through crates to support the bumper as it came off and then disconnected the wiring loom connector.
I would do the same on the rear if I had to take it off.
 
  #498  
Old 04-22-2018, 12:34 PM
X358XJR's Avatar
Junior Member
Join Date: Apr 2018
Location: Crewe
Posts: 4
Likes: 0
Received 0 Likes on 0 Posts
Default Window Seal

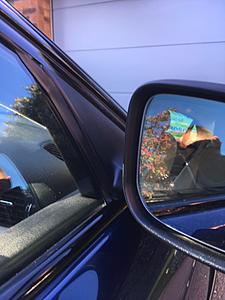
Sorted out window seal by driver's door mirror. Had been incorrectly seated at some point in the past, been meaning to do for a while, but only remember about it when travelling at motorway speeds and getting wind howl. Only took five minutes to fix. Not sitting quite right due to being in the wrong position for so long.

What did you do to your X350/X358 today?-img_0324.jpg
 
  #499  
Old 04-22-2018, 05:04 PM
Fraser Mitchell's Avatar
Veteran Member
Join Date: Dec 2009
Location: Crewe, England
Posts: 9,406
Received 2,450 Likes on 1,948 Posts
Default

Well actually it was yesterday !
Decided that as winter seemed in retreat, it was time to replace my Jaguar wheel centre badges. These start nice and shiny, but every winter they get tarnished and look bad. Polishing doesn't really work. I tried a bit of chrome cleaner, but ended up wearing away the paint without any improvement to the shine on the metal. I did this as being a bit of a Mean Sod, I would have liked the badges to last a bit longer.
Anyway, grubbed around in the garage and found the set I had bought last year still in their packets, put them on, and threw the old ones in the bin. I use cheap lookalikes made in Italy that are so cheap it's worth just replacing every year.

Of course then the chrome valve stem covers and caps looked really doggy now, so again grubbed around and found some new chrome stem covers. The caps polished up fairly well, but two of the Jaguars on the end have disappeared so come Monday, I'll be on eBay looking for a new set.

Incidentally, since I fitted the 17" wheels with fat tyres in autumn last year, all kerbing problems have disappeared and the wheels are still pristine.
 
  #500  
Old 04-22-2018, 08:46 PM
Join Date: Mar 2012
Location: Hazlet Township, NJ
Posts: 4,746
Received 1,423 Likes on 1,066 Posts
Default

Originally Posted by Boomer from Boston
To abonano re reverse parking sensor:
When you removed/loosened the various fasteners holding the rear bumper on, how did you keep it from falling to the floor? Did you leave it hanging by the sensor wiring?
No, I had help once it was time to actually remove the rear bumper.

Rested it on a single step ladder while handling the sensor swap.


Quick Reply: What did you do to your X350/X358 today?


All times are GMT -5. The time now is 04:09 PM.