When you click on links to various merchants on this site and make a purchase, this can result in this site earning a commission. Affiliate programs and affiliations include, but are not limited to, the eBay Partner Network.
I have older Jaguar 1989 XJS that has some scratches and areas the leather has dried and faded from the sun. What is in leather repair kit and where can you get the original Jag. color die. My car has like a burgundy leather interior, I think it was called Mulberry.
Patrick - You can look up Leatherique products. All natural and many Jag owners have had success. They have numerous dyes and reconditioning products.
Tandy Leather sells a product by the name of.
Dr Jacksons Hide Rejuvenator.
About the consisty of butter, or cold animal fat.
Natural oils from rending the animals hide.
Believe its cattle hides, but could be wrong.
Store in Akron Ohio, closed decades ago.
Lady rubbed it onto her arm, & soaked right in.
Been using it on ALL smooth leather goods since then.
Have had to order it off of the computer.
Havn't seen it around here since the store closed.
Not at all expensive compaired to the others
Today I replaced all of the micro-switches in one of my remotes. It had something like shellac, or varnish spilled on it so none of the buttons functioned. I cleaned everything with a circuit board cleaner in an ultrasonic bath, but the micro-switches are just too gummed up. I knew I would need to replace them. So, I did that, and reprogrammed the remote, then I got to work fitting a battery maintainer. All I need to do now is open the trunk, and connect the SAE plugs. Nice!
I have to order some parts today too. My mechanic gave me a "wish list".
Left front upper ball joint
Left rear upper ball joint
Rear inner and outer tie rods
Right rear upper control arm
park brake cables (3)
Skid plate
Right front side reflector
Right rear side light
Are ball joints individually available for purchase? Do the rear tie-rods go by some other nomenclature? I can't find them listed anywhere.
Apparently the brake cables have all collapsed and no longer work, although, they are not seized...good news. If the armoured outer layer is similar to bicycle brakes, I should be able to cobble a fix with some heavy-duty cable of similar construct. The brake cables are another item that is hard to find.
I put 6 ounces of seafoam in the crankcase because I have a noisy lifter. It was quiet when I bought it. The oil looks odd. The oil has a purple hue to it. It smelled fine and had no water in it. Regardless, I'll run it for about 100 km's then change the oil. When I first saw the purple hue, I wondered if it's transmission fluid. Some unscrupulous sellers use transmission fluid to temporarily quiet a noisy lifter.
I also learned about how tight the space is underneath the driver's seat. I dropped my key down "The abyss", that knuckle--scraping black-hole between the seat and the centre console that nothing can escape from. It took 10 minutes and a bent coat hangar to rescue the key. The coat hangar now has a place in my boot tool kit..
I finally forced myself to change the spark plugs, something I always dreaded and was a bit scared to start, given the great accessibility of no. 7 and 8 plus the need to „build“ the wrench from various short extensions individually to the length that every cylinder allows.
Was easier than expected, but still not something I‘d do as pastime on a day I have nothing else to do
The old Bosch FR6KI332S plugs had been in only approx. 30.000 kms, but because the engine runs a bit on the rough side and I read in many LPG-related sources that for gas operation NGK is the way to go, I changed to NGK IFR5N10 now.
Old plugs didn’t look bad I think, but it runs, well, hard to say, different now with the NGKs. I‘m tempted to say smoother, but that may be the same psychological effect like the engine running better after washing the car
Below a picture of the old plugs, you are welcome to send me your analysis of how they look. Without the background of perceived engine harshness before the change I would personally say they look absolutely ok.
Interesting that the porcelain insulators on numbers 1 and 3 is starting to discolour........getting the appearance of the telltale yellowing at the base.
Most of mine had the same effect at 140,000Km (when I changed mine after acquiring the car....assuming they had never been changed)
I have always been wary of the presence of that discolouration, taking it as a sign that the plugs that have likely served their time.
true, these 2 look a bit strange there. BERU analyses such a yellowing outside as attraction of oil and gas particles by the magnetic field of the discharge and calls it harmless for the plug itself and its function. Haven�t found another explanation by other manufacturers yet.
But RH cylinder bank also runs rougher than LH, also more fluttering in the fuel trims than LH, so maybe there is something to it.
Mostly I found the edges of the center electrodes burned quite round, probably difficult to see in the picture resolution. And that the rear cylinders are so much darker than the others.
well, my son�s first reaction on the test drive with new plugs was �hey, that runs so much smoother�, so I just take his subjective and technically totally uninfluenced statement as a positive one and keep watching fuel consumption over the next few tanks of gas. Typically, if anything gets better or worse, it shows in efficiency of the system
Could also be that 1 and 3 are the closest plugs to the PCV assembly, and therefore be more prone to any of the incidental fumes that might happen to leak from the fittings.
Today I paid off $1.09 of my $4000 rear suspension repair.
($4000 repair if it lasts 10yrs = $400/yr or $1.09 per day)
Why should I complain then? GRUMP oh sorry $NZ, even better!
Could also be that 1 and 3 are the closest plugs to the PCV assembly, and therefore be more prone to any of the incidental fumes that might happen to leak from the fittings.
that�s a good thought, and in fact the PCV valve sits at cylinder 3 and the hose trails to the front passing close by the cylinder 1 spark plug. so I tick this off as the solution in the back of my mind
Interesting that the porcelain insulators on numbers 1 and 3 is starting to discolour........getting the appearance of the telltale yellowing at the base.
Most of mine had the same effect at 140,000Km (when I changed mine after acquiring the car....assuming they had never been changed)
I have always been wary of the presence of that discolouration, taking it as a sign that the plugs that have likely served their time.
The condition is known and explained in a TSB. It is called Corona staining, and is caused by the high voltage of the coils atomizing anything like oil or water that may be accumulating in the spark plug well. I have not seen that condition is related to any performance issues and the TSB does say there are no performance issues related to the staining.
However if you have some oil or moisture accumulating in teh spark plug well, that is indicative of the cam cover seals begining to leak.
I also recall here is a maintenance instruction to remove the coils and check the rubber insulators for accumulation of stuff, clean and inspect the rubber insulators, coil condition, wires and springs. I do note the coils at the rear of the engine for bank 1/A and 2/B seem to be susceptable to early failure due to potential heat being trapped near the firewall. I have had 4 coils now fail in those rear bank positions in as many years so I always carry spares.
Today..... nuttin. Over the weekend, started Leatherique'ing the seats Friday night and let it sit till Sunday before doing the clean up. While she sat all day Saturday soaking her seats I replaced the broken thermostat housing which looked like every other warn one we have seen, although I had to take more apart than expected to reach the broken off part that was sitting in the cooling system behind the water pump -_-.
Still enjoyed the play time!
Next few days will be claybar, polish then ceramic coating ready for a drive down to Austin on Friday.
Finished my laundry list today, 98k miles on the beast:
removed 8 glued on fuel injector connectors
Replaced 8 fuel injector connectors with new
removed glued on MAP connector
replaced map connector with new
built the intake manifold with all new gaskets upper, lower, rear, TB connections
Cleaned, reverse flushed, flow metering and spray pattern 8 fuel injectors
new o-rings all 8 injectors
new MAP sensor (old one plastic was turning to cheese)
New Radiator - old one plastic tanks and connections were turning to cheese and the upper radiator hose had nothing to hold onto. Did not have to disconnect the AC lines, just finessed carefully
(all hoses were replaced less than 20k miles)
fixed leaky coolant expansion tank by replacing the bleed O ring
New Iridium "performance upgrade" spark plugs
replace two defective coils that had arcked through the bakelite plastic just above the rubber boot
fixed two stripped out coil holder threaded inserts - one each side
replaced fuel filter
oil and filter change
new OAT coolant
fashioned better vacuum breather hoses to get rid of the garbage crinkly ones that always break and leak
It is unbelievable the amount of plastic I had to remove and reinstall to do this job.. Reward, engine runs like a new car.
I also discovered a new way to exchange the transmission fluid. I am making an adapter to interrupt the upper connection at the radiator into a tank and return new fluid. Much easier than making adapters to attach onto the side of the transmission, you can swap the fluid standing up. I will be cutting up my old radiator for some hardware connections.
Last edited by StagByTriumph; 08-13-2023 at 11:35 PM.
Finished my laundry list today, 98k miles on the beast:
removed 8 glued on fuel injector connectors
Replaced 8 fuel injector connectors with new
removed glued on MAP connector
replaced map connector with new
built the intake manifold with all new gaskets upper, lower, rear, TB connections
Cleaned, reverse flushed, flow metering and spray pattern 8 fuel injectors
new o-rings all 8 injectors
new MAP sensor (old one plastic was turning to cheese)
New Radiator - old one plastic tanks and connections were turning to cheese and the upper radiator hose had nothing to hold onto. Did not have to disconnect the AC lines, just finessed carefully
(all hoses were replaced less than 20k miles)
fixed leaky coolant expansion tank by replacing the bleed O ring
New Iridium "performance upgrade" spark plugs
replace two defective coils that had arcked through the bakelite plastic just above the rubber boot
fixed two stripped out coil holder threaded inserts - one each side
replaced fuel filter
oil and filter change
new OAT coolant
fashioned better vacuum breather hoses to get rid of the garbage crinkly ones that always break and leak
It is unbelievable the amount of plastic I had to remove and reinstall to do this job.. Reward, engine runs like a new car.
I also discovered a new way to exchange the transmission fluid. I am making an adapter to interrupt the upper connection at the radiator into a tank and return new fluid. Much easier than making adapters to attach onto the side of the transmission, you can swap the fluid standing up. I will be cutting up my old radiator for some hardware connections.
Looking forward to seeing your final product on flushing out the trans lines... but keep in mind, have to measure output and equate to amount replaced...
Finished my laundry list today, 98k miles on the beast:
removed 8 glued on fuel injector connectors
Replaced 8 fuel injector connectors with new
removed glued on MAP connector
replaced map connector with new
built the intake manifold with all new gaskets upper, lower, rear, TB connections
Cleaned, reverse flushed, flow metering and spray pattern 8 fuel injectors
new o-rings all 8 injectors
new MAP sensor (old one plastic was turning to cheese)
New Radiator - old one plastic tanks and connections were turning to cheese and the upper radiator hose had nothing to hold onto. Did not have to disconnect the AC lines, just finessed carefully
(all hoses were replaced less than 20k miles)
fixed leaky coolant expansion tank by replacing the bleed O ring
New Iridium "performance upgrade" spark plugs
replace two defective coils that had arcked through the bakelite plastic just above the rubber boot
fixed two stripped out coil holder threaded inserts - one each side
replaced fuel filter
oil and filter change
new OAT coolant
fashioned better vacuum breather hoses to get rid of the garbage crinkly ones that always break and leak
It is unbelievable the amount of plastic I had to remove and reinstall to do this job.. Reward, engine runs like a new car.
I also discovered a new way to exchange the transmission fluid. I am making an adapter to interrupt the upper connection at the radiator into a tank and return new fluid. Much easier than making adapters to attach onto the side of the transmission, you can swap the fluid standing up. I will be cutting up my old radiator for some hardware connections.
Like the vacuume hose idea very much.
Simple, inexpensive, & better, nice work.
Thanks for the kudos.
I made similar hoses for both my '00 XJ8 and my '01 XJ8, making that a set-and-forget type of job and part of eliminating several of the "Bank too Lean" problems.
Every time I'd do any engine service it was like walking on eggshells not to hit one of those crinkle hoses for fear of breaking one, including changing the airbox filter which I also modified to remove the two tabs on the engine side to the airbox can be opened easier.
The OE plastic crinkle hoses can be carefully cut off the connector by scoring the hose on the connector and with a slight screwdriver action, split the hose right off the barb end. Then high quality reienforced hose installed to fit so there is no strain on the connector. I think that probably cost me all of $15 in hose cost and 15 minutes to fabricate.
I used spring clamps from my parts bin to keep the look more "OE".
Nice to be able to full throttle accelerate again with no issues.
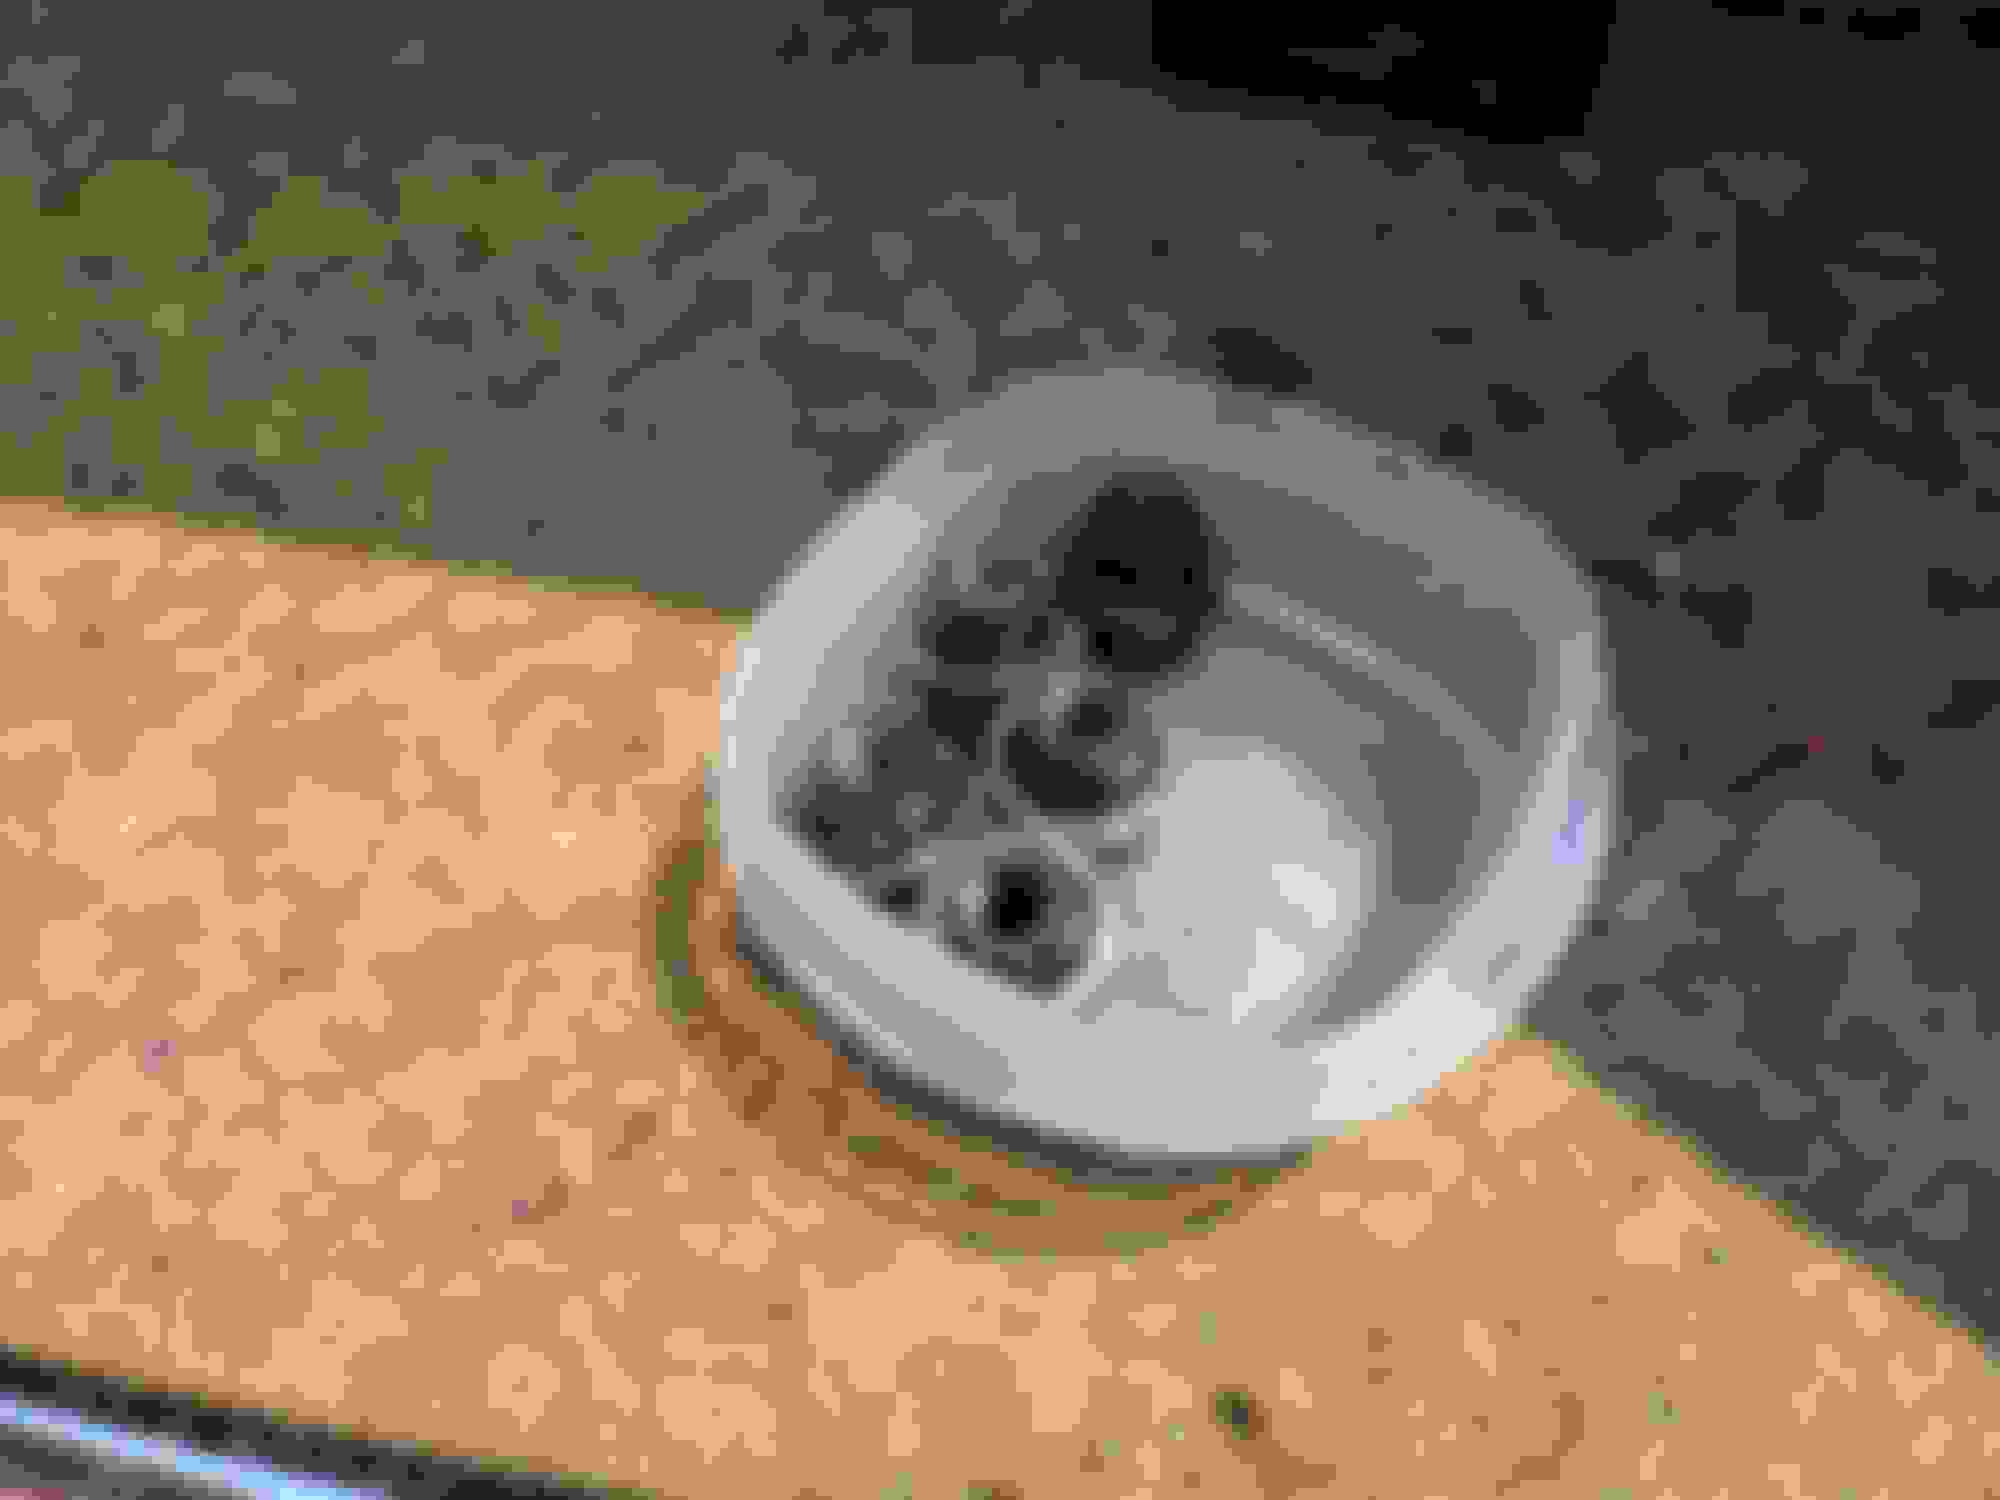
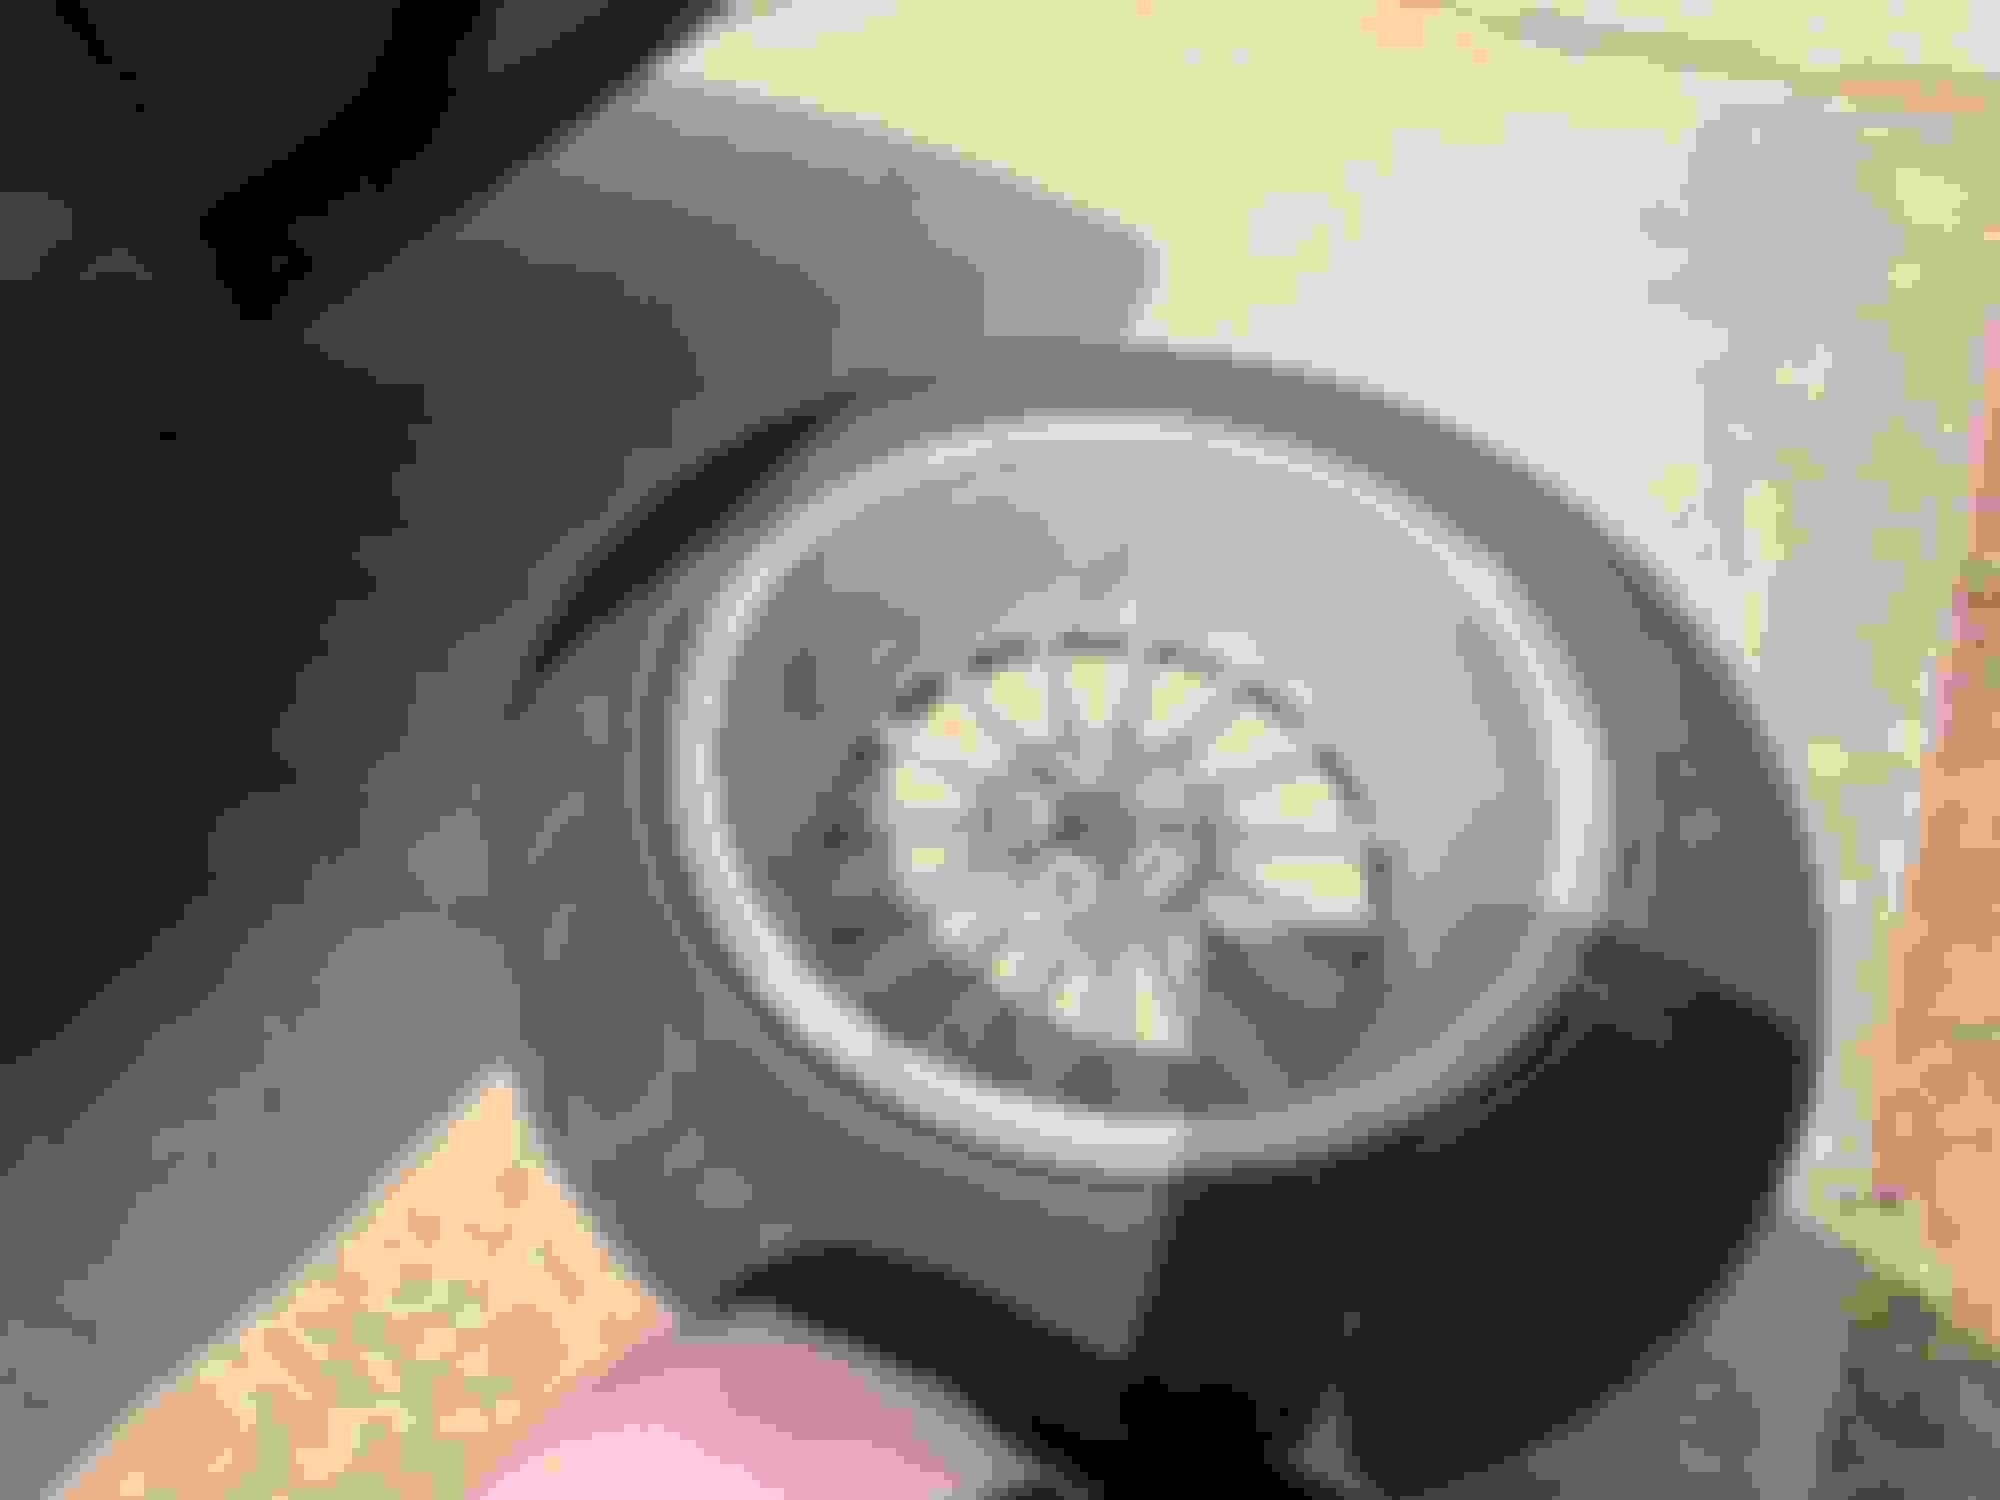
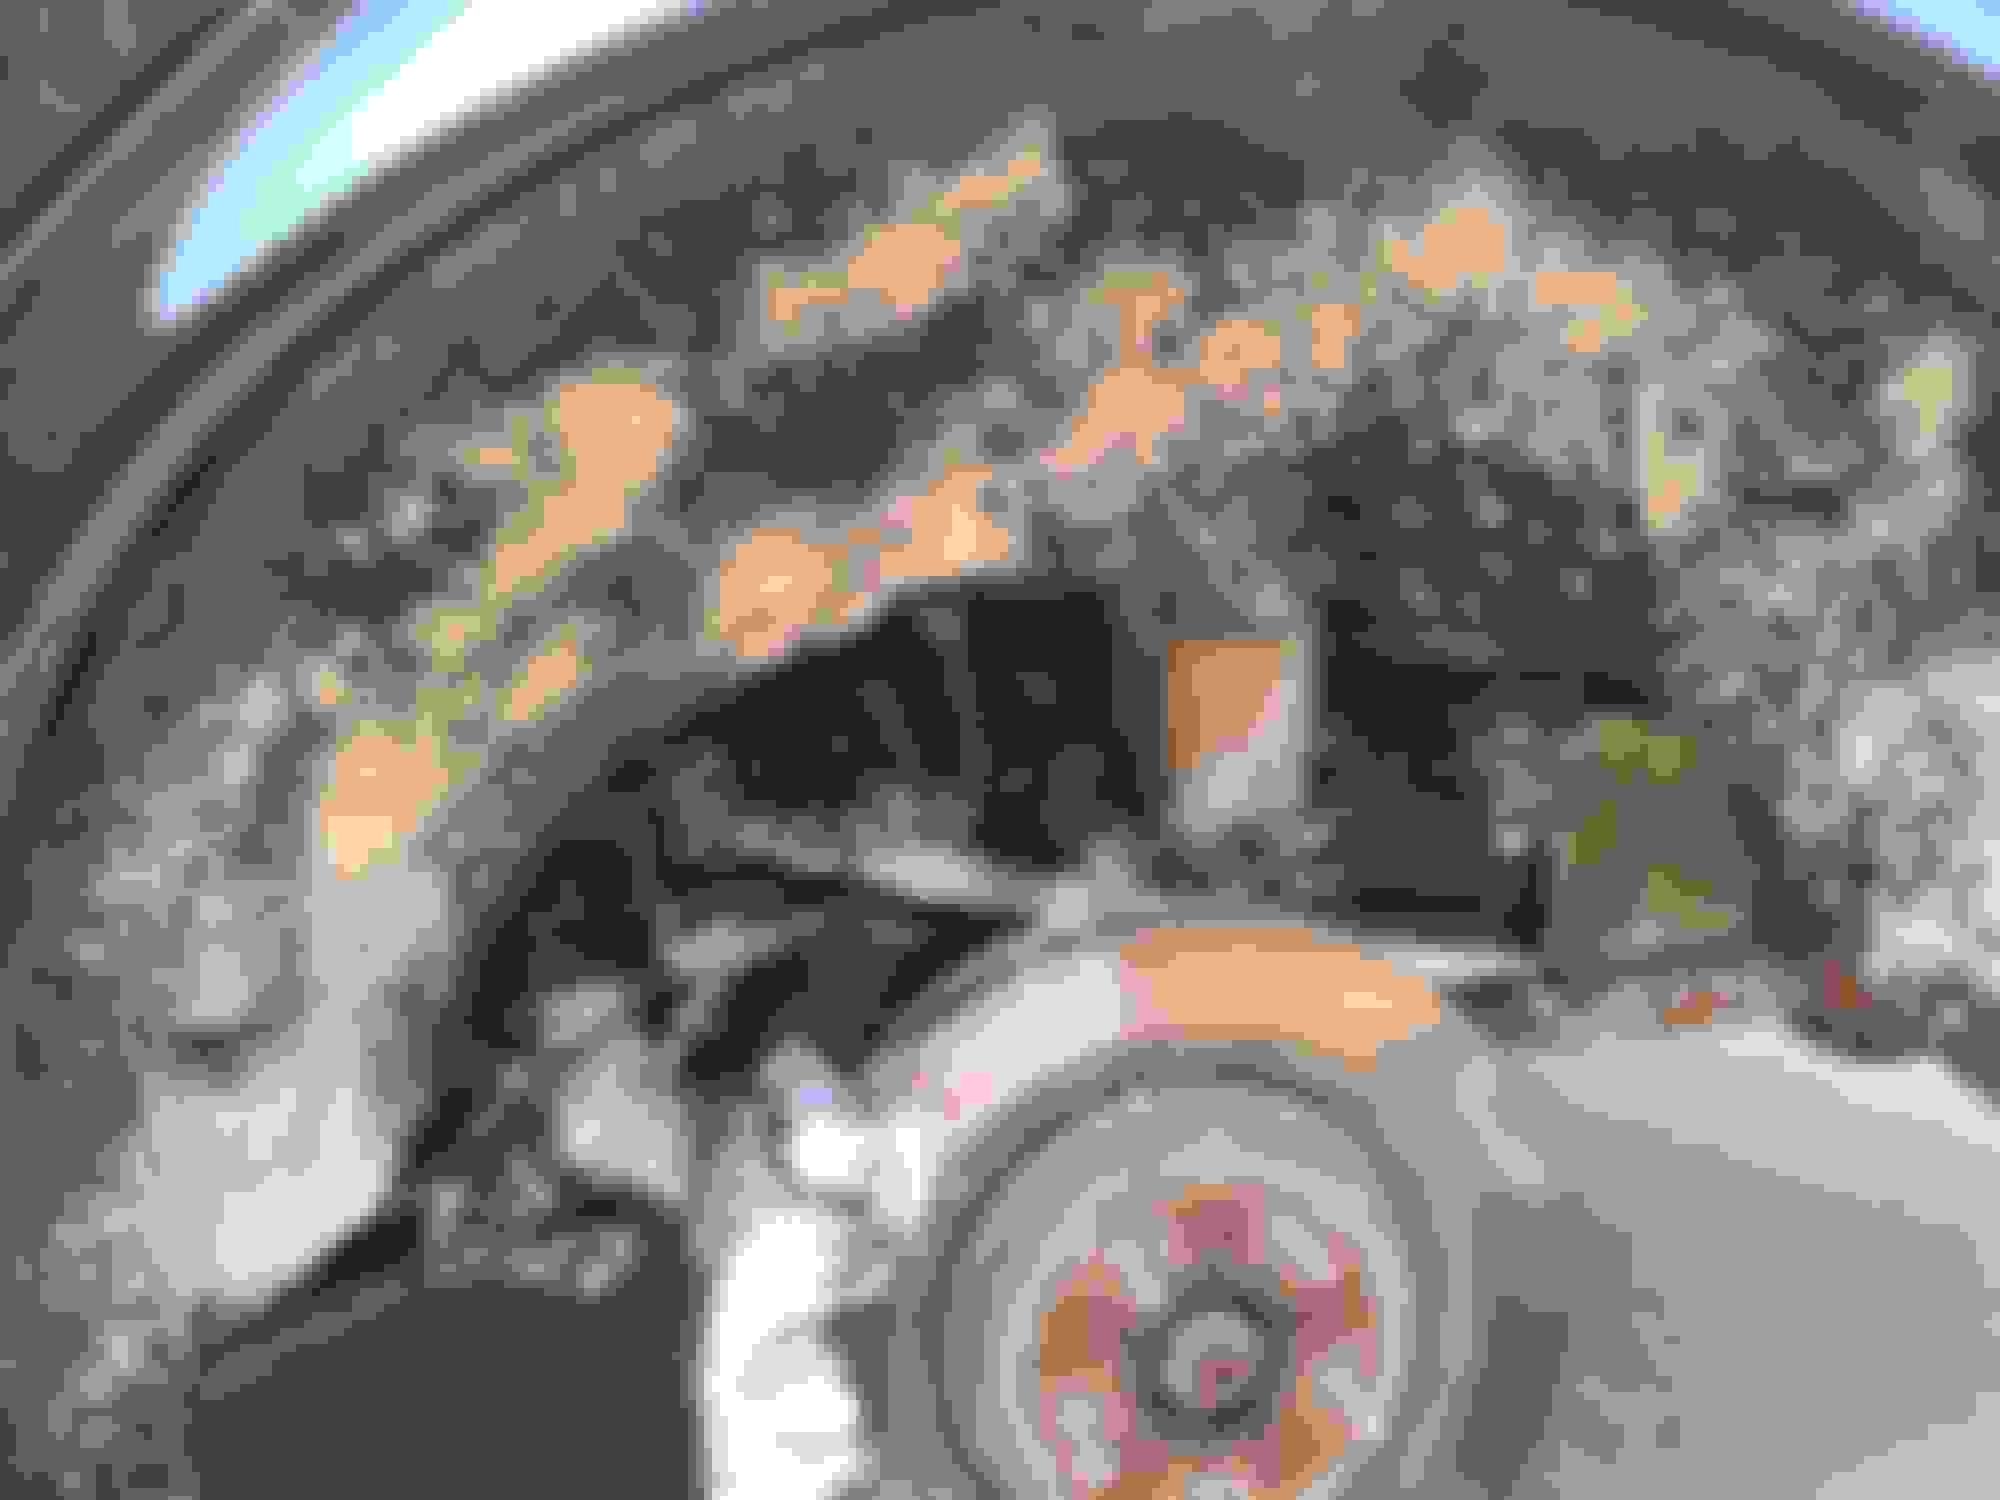
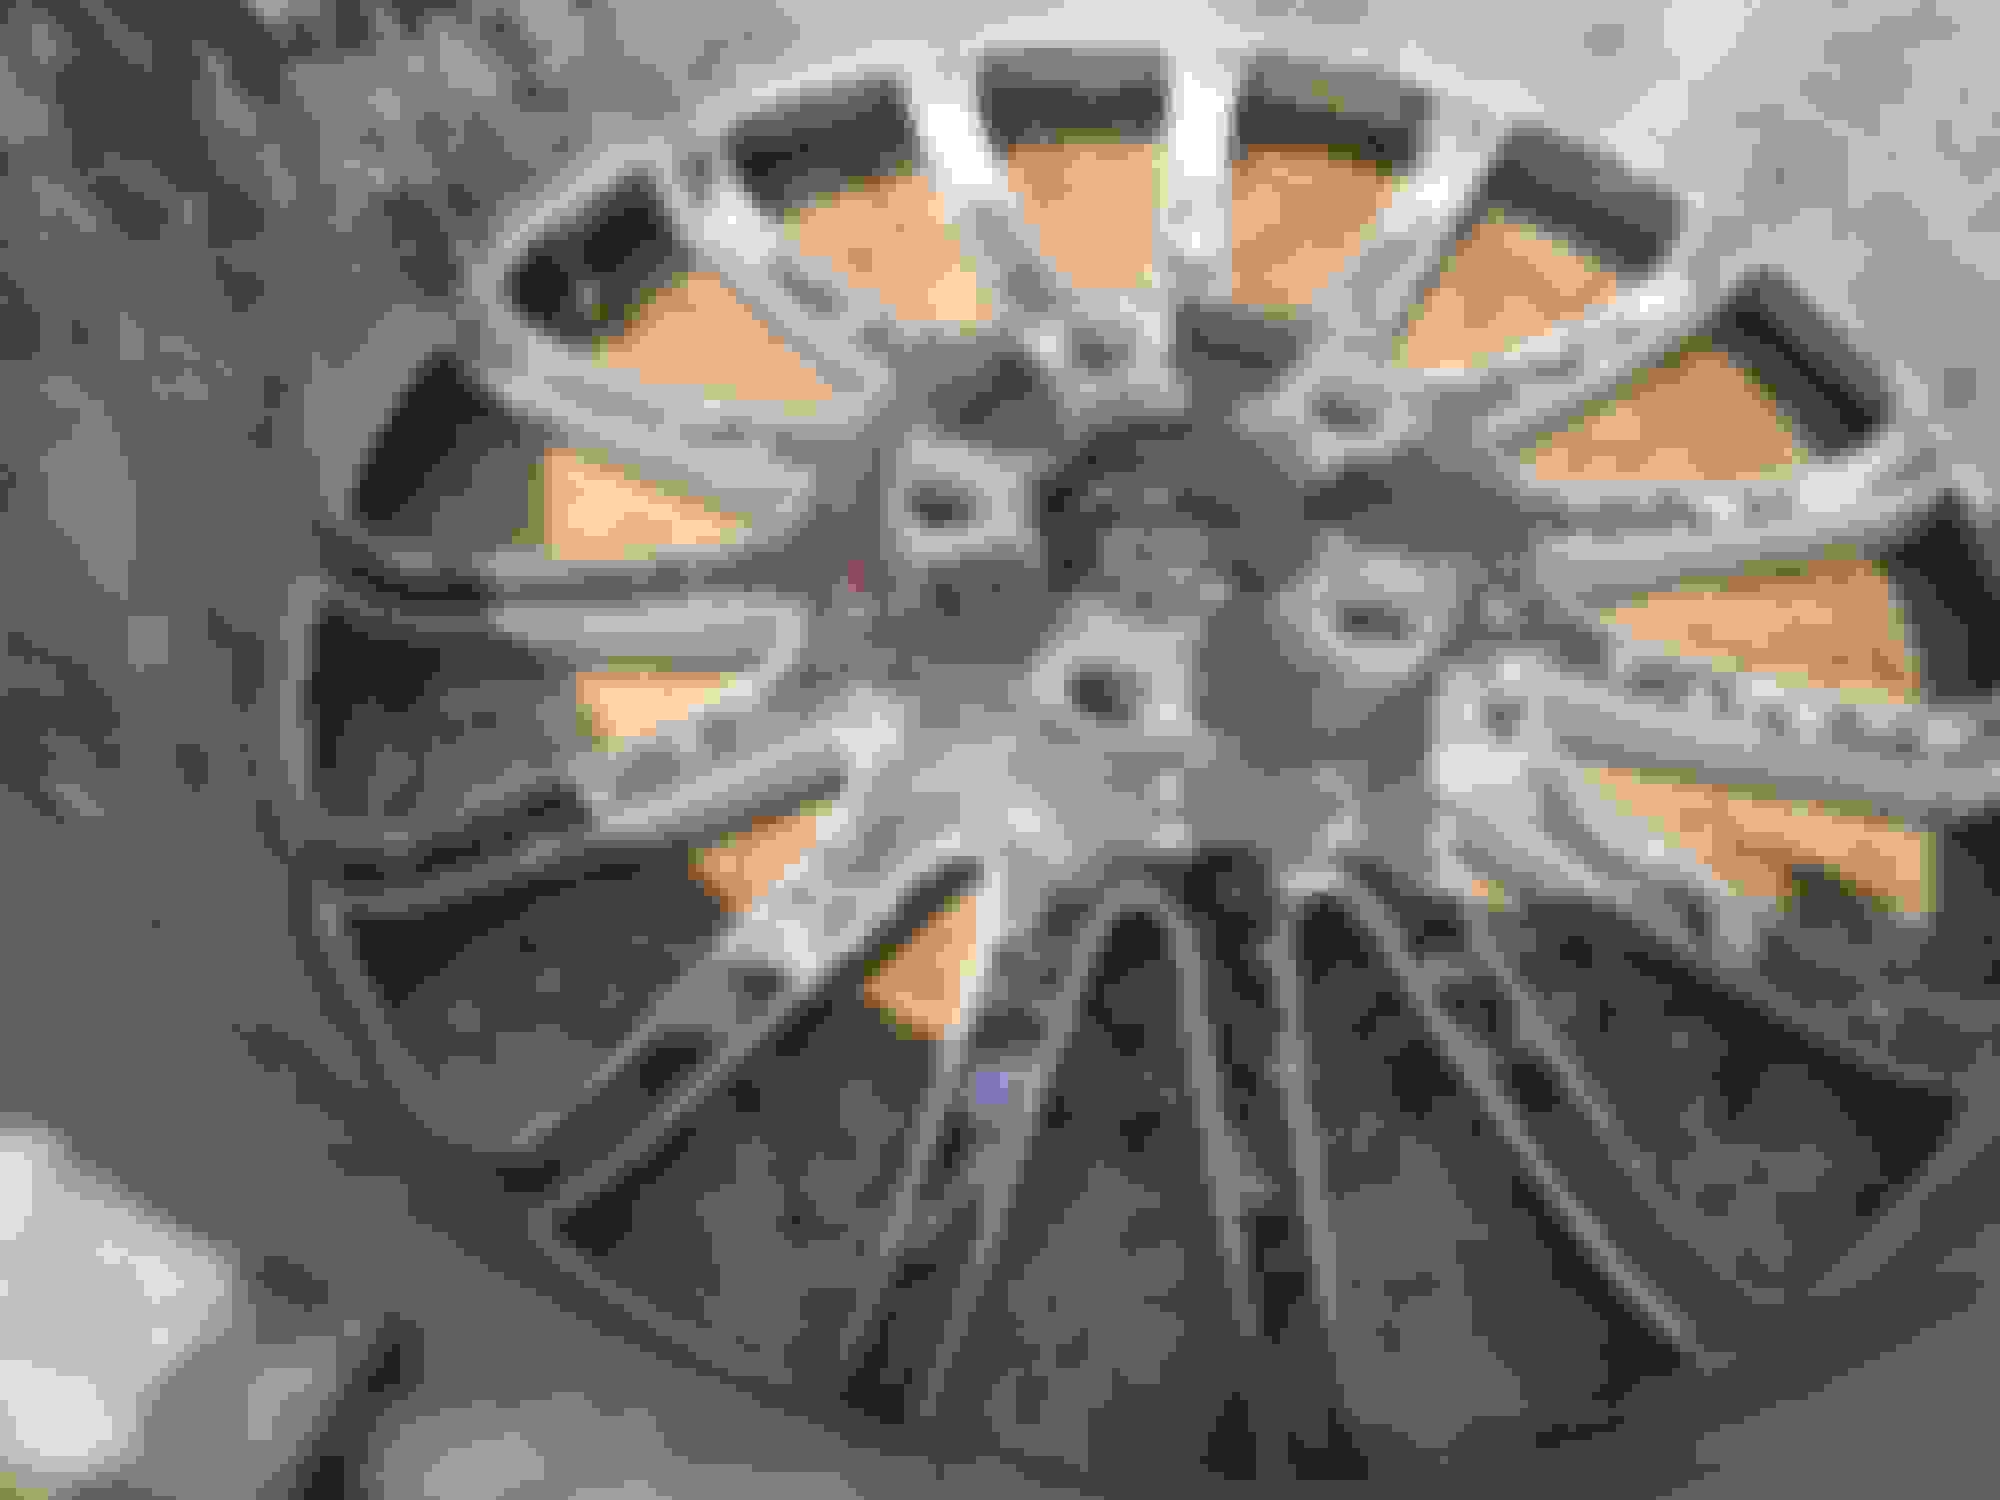
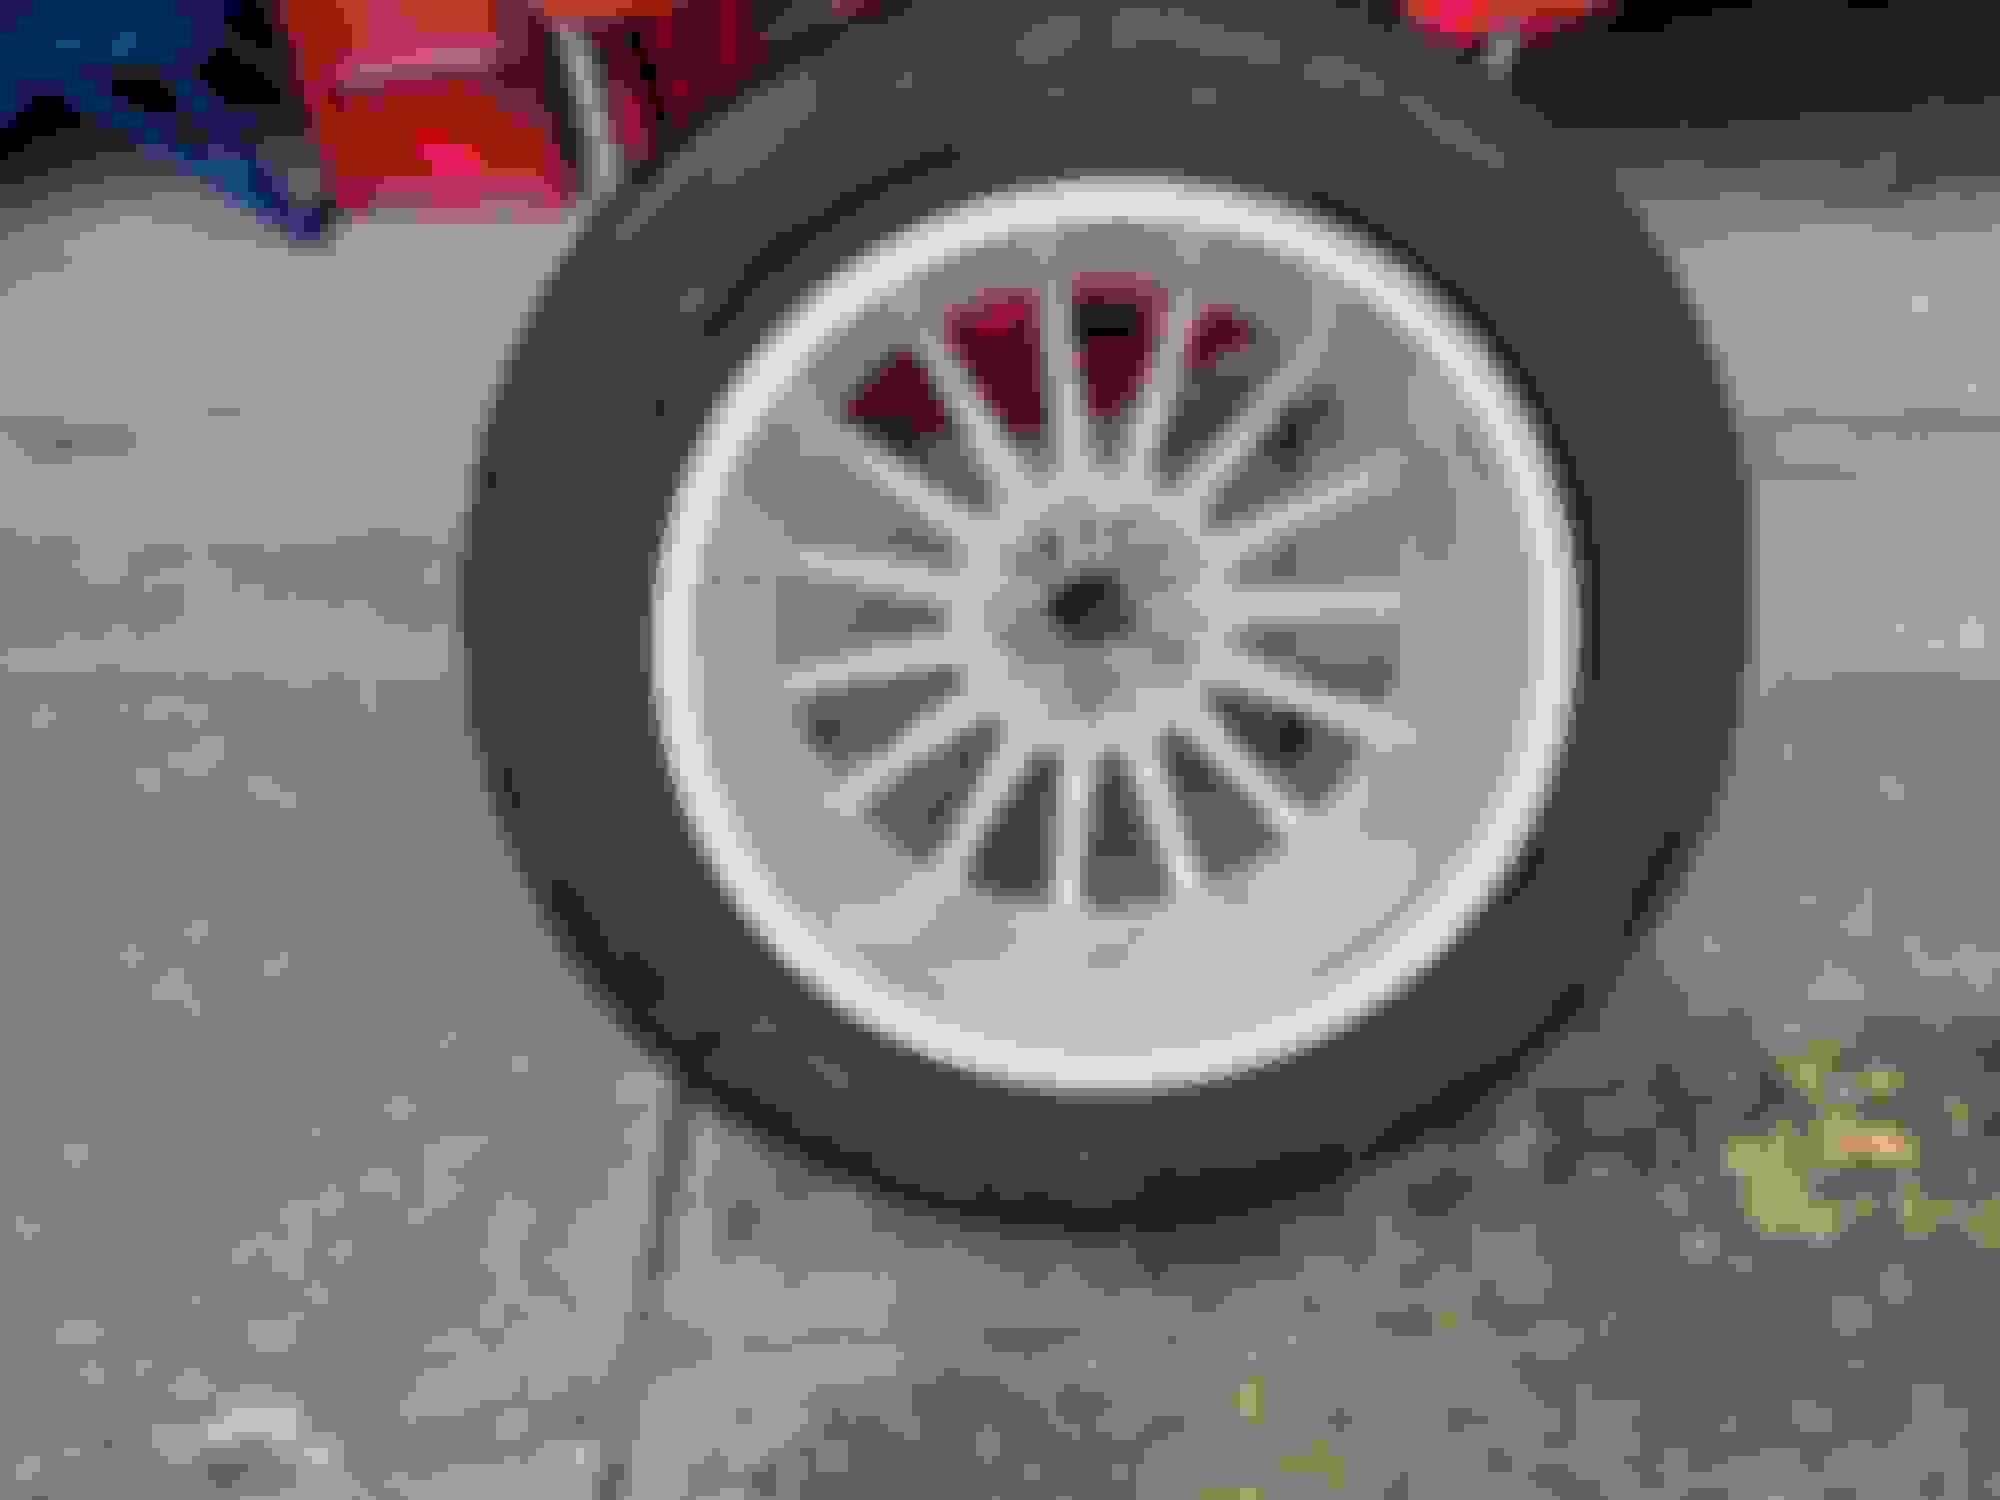
Last week I removed a front wheel while doing some maintenance and while that wheel was off, I gave it a thorough cleaning front and rear. I was surprised this week at how clean it was compared to the other 3 wheels soooo I did the other 3 while doing the wheel wells and putting my nuts in soak :0) Nuts in soak. Before cleaning Wheel off. Cleaning wheel arch Soaking back side Breaking down dirt After a third soak Inside wheel Back side after cleaning Backside after cleaning Scrubbing wheel well Remnants Scrubbing backside Cleaning behing wheel nuts Using wheel brush Using wheel brush After cleaning After cleaning Applying tire shine with a paint prush for an even coat. All done. "HER" has her own plate :0)
Last week I removed a front wheel while doing some maintenance and while that wheel was off, I gave it a thorough cleaning front and rear. I was surprised this week at how clean it was compared to the other 3 wheels soooo I did the other 3 while doing the wheel wells and putting my nuts in soak :0)"HER" has her own plate :0)
Well done! Your car looks like it just came from the factory. What did you use to clean the wheels? I have some baked on grime that won't come off with the usual sprays from the auto parts store. Wondering if perhaps you found the secret sauce.
Well done! Your car looks like it just came from the factory. What did you use to clean the wheels? I have some baked on grime that won't come off with the usual sprays from the auto parts store. Wondering if perhaps you found the secret sauce.
Thanks for the Kudo's Greg. Nothing more than Maguires wheel cleaner that's shown in the pic along with the tire treatment. I must confess the front of the wheels had a few weeks head start over this project so its an unfare advantage over the rear. That said, I've been impressed with the product (that I think in the USA you can find anywhere) but please note while cleaning the arches, it was a tad.... toxic in a confined space lol. Still did a great job. The whole job tuck a couple of bottles but this was a one off. One bottle should last a couple of cleans after this. The wheel brushes impressed me too. Hope this helps and thanks again for the words.
It's been a minute since I been on here but I'm excited to share that I made a slight upgrade to the 2006 XJ8 Vanden Plas recently. I love everything about this car. Shout out to all the x350 & x358 owners out there. We own the last real Jaguar made in my own opinion. Sending everyone positive energy and light. Good night.
 01-18-2023, 02:13 PM