XJR HID arc capsule replacement
#1
 03-18-2012, 02:26 AM


When I got this XJR a couple of months ago the left headlamp assembly was obviously new, while the right one looked like a 7 year old light. I checked pretty thoroughly for any damage but couldn't find any, leaving me to wonder why an expensive headlamp assembly had been replaced. The right light was flickering, and after reading about people trying to replace the capsule with the headlamp in the car I think what probably happened was that the left light went out someone broke it while trying to replace the capsule (bulb.) I decided to do my replacement with the headlamp out of the car.
First the plastic shield over the radiator needed to come off.

It was held on with a few fasteners and easily came off. This exposed the two screws on either side of the radiator that hold the grille in.
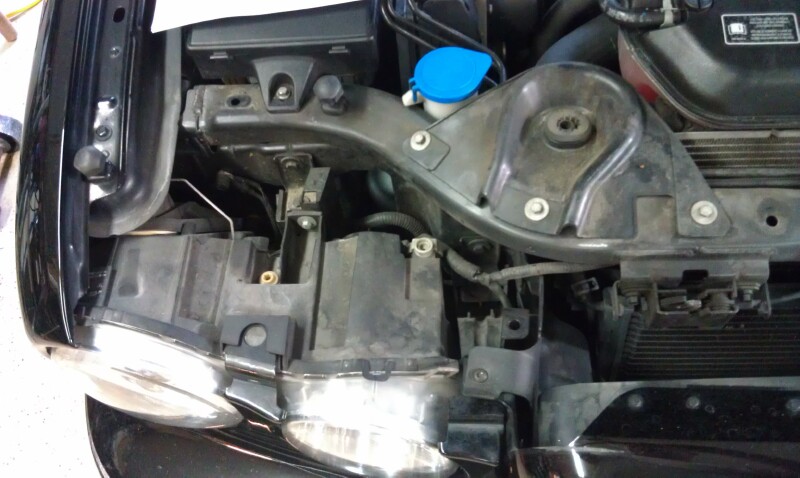
The grille just slides out to the front, and then you can take the plastic air deflectors on each side out too.
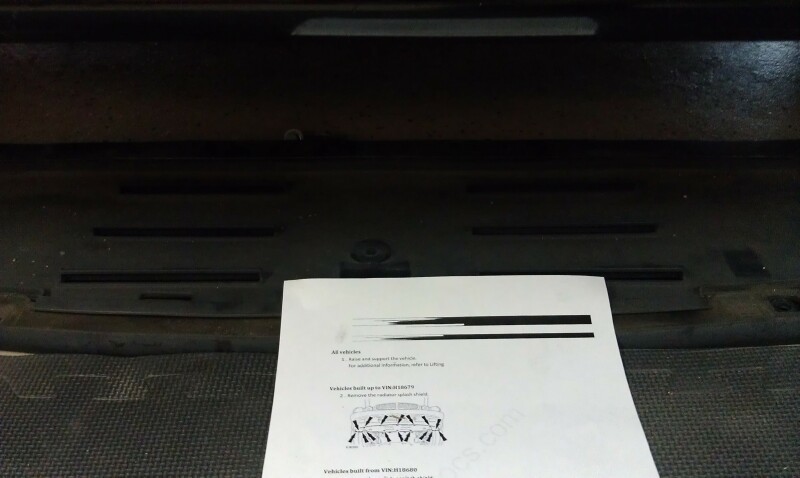
Mine is an early 04 build, so I had 16 screws to take out of the radiator splash shield. Later cars have a few less.
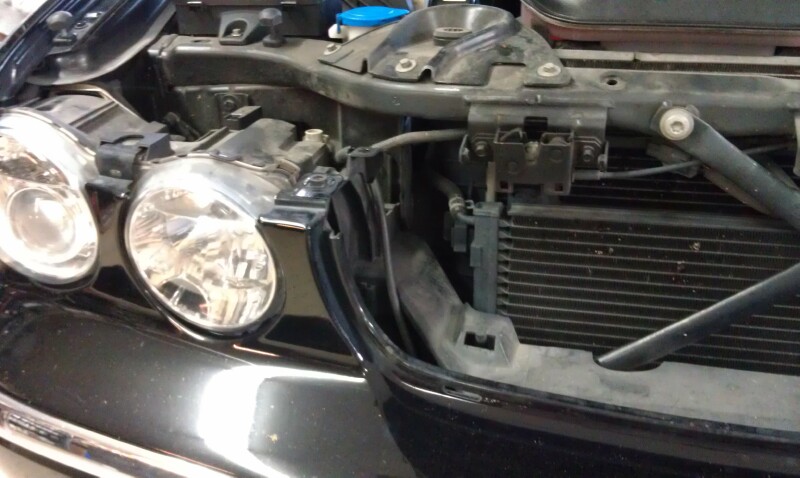
The workshop manual said to remove the parking lights. They just pop out, so I worked a small screwdriver behind the lens and pried gently. Once they were out I wondered why, as they look like they would just come out with the bumper cover, and the wiring stays with the cover. While putting the light back in later I discovered why - the metal piece you see in the center of the light opening is not part of the bumper cover, and the light plug won't slide past it.

Then the whole bumper cover just slides off towards the front. There is one wiring connection on the passenger side and you can set the cover aside.
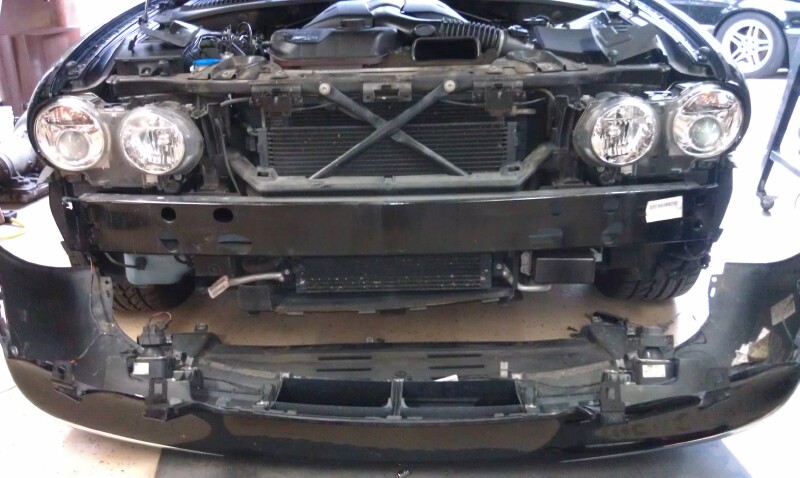
Three 8mm bolts hold the lamp assembly, one at the top and two at the bottom. There is one electrical plug to disconnect and the lamp comes out.

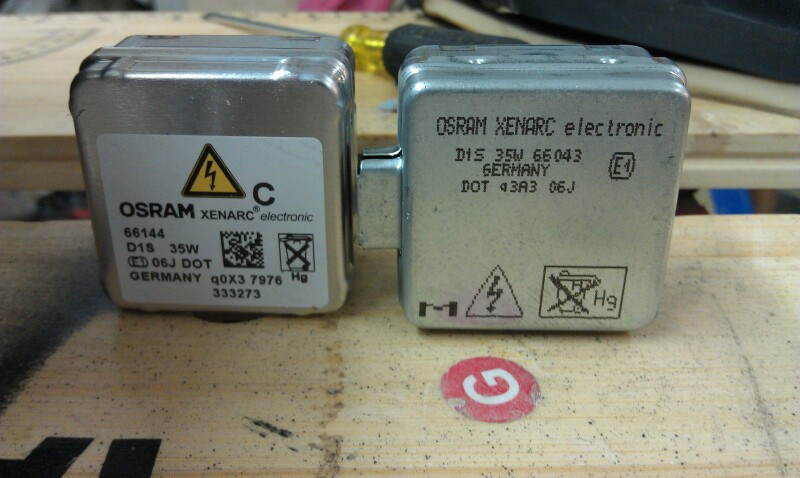
Old capsule on the right, new one on the left. As someone said in another thread, the part number is different on the new one.
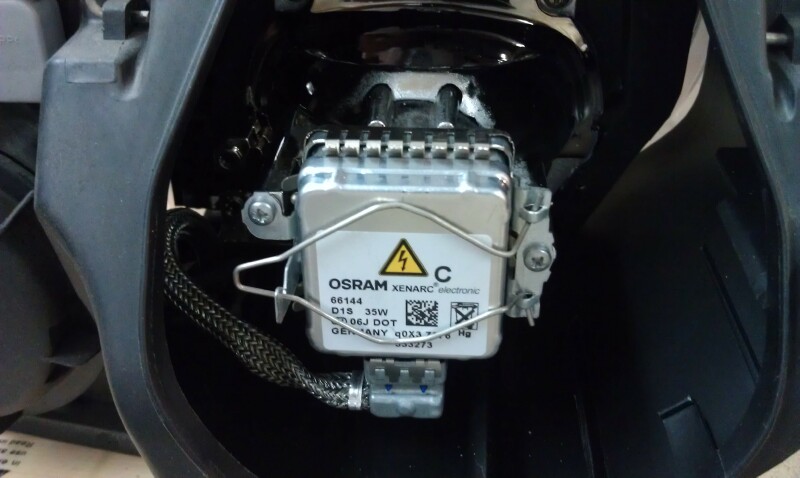
New capsule installed.
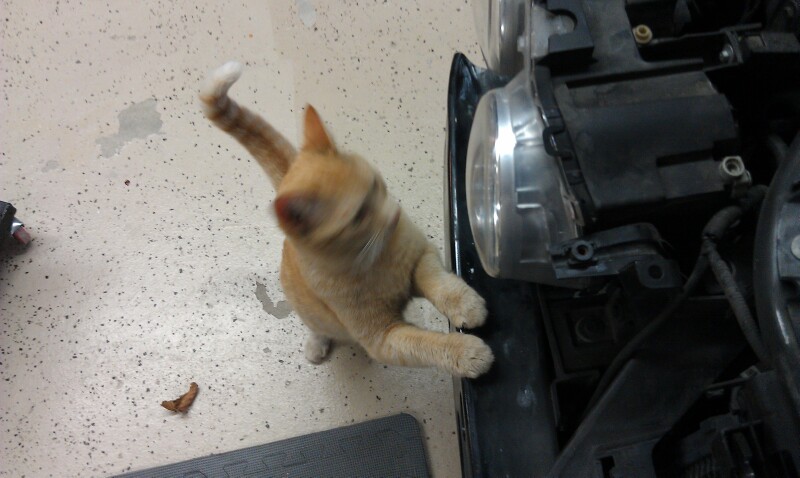
Whew! Passed the cat scan!
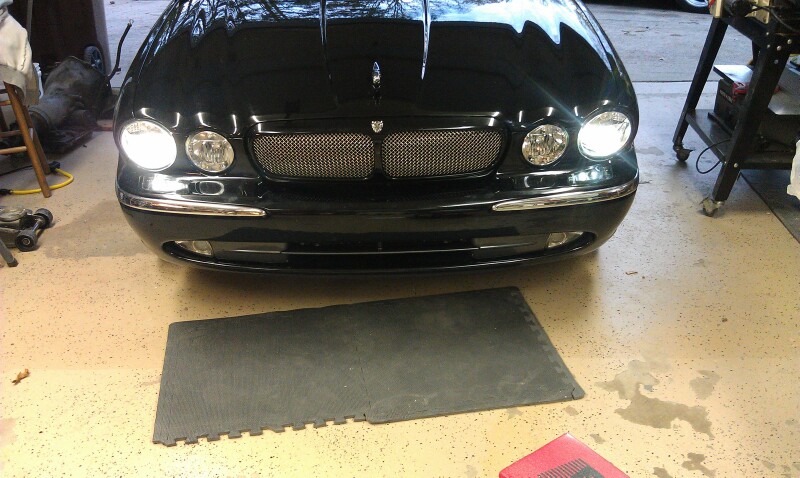
All back together and working fine.
It took about an hour overall. Doing it a second time would be faster. The only tricky thing was the radiator splash shield. There is a lip that has to slide over the edge of the bumper cover, and it's tricky to do with one person.
Given the cost of a new lamp assembly, as how easy it was to remove it, I wouldn;t even try to do it in the car. In fact, I think this way is probably faster too.
First the plastic shield over the radiator needed to come off.
It was held on with a few fasteners and easily came off. This exposed the two screws on either side of the radiator that hold the grille in.
The grille just slides out to the front, and then you can take the plastic air deflectors on each side out too.
Mine is an early 04 build, so I had 16 screws to take out of the radiator splash shield. Later cars have a few less.
The workshop manual said to remove the parking lights. They just pop out, so I worked a small screwdriver behind the lens and pried gently. Once they were out I wondered why, as they look like they would just come out with the bumper cover, and the wiring stays with the cover. While putting the light back in later I discovered why - the metal piece you see in the center of the light opening is not part of the bumper cover, and the light plug won't slide past it.
Then the whole bumper cover just slides off towards the front. There is one wiring connection on the passenger side and you can set the cover aside.
Three 8mm bolts hold the lamp assembly, one at the top and two at the bottom. There is one electrical plug to disconnect and the lamp comes out.
Old capsule on the right, new one on the left. As someone said in another thread, the part number is different on the new one.
New capsule installed.
Whew! Passed the cat scan!
All back together and working fine.
It took about an hour overall. Doing it a second time would be faster. The only tricky thing was the radiator splash shield. There is a lip that has to slide over the edge of the bumper cover, and it's tricky to do with one person.
Given the cost of a new lamp assembly, as how easy it was to remove it, I wouldn;t even try to do it in the car. In fact, I think this way is probably faster too.
The following 22 users liked this post by gmcgann:
01Silverstone (03-17-2018),
04XJwpg (03-20-2012),
DanJensen (03-01-2014),
Don B (11-25-2014),
dsetter (03-18-2012),
and 17 others liked this post.
#3
09-22-2012, 04:03 PM
Lucky me with the old school halogen. Lol, jk, wish I had xenon. Will the xenons work with my headlamps?, being that my 04 xj8 is using halogen bulbs, or could I use a typical aftermarket xenon kit? I know I won't have the projection lens, but the xenons are still brighter, and look awesome.
#4
09-22-2012, 07:23 PM
Senior Member
#5
09-23-2012, 09:12 AM
I had to replace the Ballast last year (3 times) due to my decision to purchase used componts from Ebay. 
After the 3rd attempt, I was able to complete the replacement within 15 minutes. I posted a few photos in my garage.
Note to "usmc1211" and any others that are contemplating swapping out Halogens for HIDs: It is illegal to replace a factory installed Halogen bulb with an HID bulb! The HID bulb will produce a glare as seen from on-coming traffic. You could modify the internals of the housing to prevent glare but that would be risking a chance of damaging the assy.
If I could, I would replace my HIDs with halogens! I dont know if they can be swapped out?
The human eye's color perception and differentiation is much, much better under Halogen light than under the light produced by HIDs.
#7
09-24-2012, 10:07 PM
If you are replacing your halogens with HIDs---after you remove the Halogen bulb---look inside the projector housing/lens though the bulb socket---if there is a flat metal plate with a notch, you are good to go--if not, recommend that you don't do it---might have a lot of angry drivers.
The plate blocks the light/glare of the bulb so that there is a pronounced cut-off of the light beam. If properly adjusted, it should cut the light beam below the windshield level or about the center of the grill on XJs.
My wife's X-Type has the metal plate in the Halogen Projectors.
The plate blocks the light/glare of the bulb so that there is a pronounced cut-off of the light beam. If properly adjusted, it should cut the light beam below the windshield level or about the center of the grill on XJs.
My wife's X-Type has the metal plate in the Halogen Projectors.
Trending Topics
#9
09-25-2012, 10:38 AM
Replacing, or rather retrofitting, HID capsules into a halogen light is not a good idea. Not only will you get far worse lighting, but it can be dangerous as well, not to mention illegal. Modern headlights are designed as a package - bulb type, lens design, etc. Any changes at all will degrade performance. Here's a good article about this subject: Daniel Stern Lighting Consultancy and Supply
The following users liked this post:
plums (11-21-2012)
#10
11-21-2012, 06:29 PM
Veteran Member
Replacing, or rather retrofitting, HID capsules into a halogen light is not a good idea. Not only will you get far worse lighting, but it can be dangerous as well, not to mention illegal. Modern headlights are designed as a package - bulb type, lens design, etc. Any changes at all will degrade performance. Here's a good article about this subject: Daniel Stern Lighting Consultancy and Supply
+1
#11
11-24-2012, 05:36 AM
Thanks GMCGANN for your detailed procedure. Your procedure taught me a lot about removing the bumper and the headlight unit itself!
I replaced my capsule a while back, albeit the hard way. I did it without removing the headlight unit assembly as you did. At first it took me about 2 hours or so, and I ended up with a bruised hand from scratches caused by tight spaces and sharp corners within the light assembly area.
Having repeated the procedure many times thereafter, as I was not happy that at first it took me so long to do the job, I repeated it for the sake of improving my "replacement time", and this time I got it right. You see, it pays sometimes to be a little stubborn and to never give up. I am able to replace the capsule without removing the light assembly in just under 25 minutes, with no scratches to my hand. This new achievement is not caused by the shrinking of my hand shrinking, as I am a big oke with a big hand attached to a body weighing no less than 100KG (200 pounds).
I discovered that to do it quickly without removing the light assembly, you simply need to:
0. remove the plastic shield over the radiator as per GMCGANN's instructions, then
1. remove the wire clip holding the light assembly cover. The cover is removed easily by sliding it upwards, then
2. unclip the wire clip holding the capsule in, which would allow the capsule to easily come out, then
3. remove the electrical wire connector from the capsule, replace the old with the new capsule, then
4. orientate the capsule to align the capsule's protrusion to the groove (wedge) of the light assembly, thereafter
5. follow the process above in reverse.
6. Where you could find more time being wasted, it would be in the insertion of the light assembly cover as it is a little tricky to align to the light assembly grooves to make it airtight again, and to prevent moisture from getting into the light assembly. But with patience, you can get the job done perfectly.
In conclusion, I'd say, if you are to attempt replacing your capsule my way, then do it earlier in the day when there's plenty of and sufficient sunlight. When you get used to doing it that way, you'd soon become a pro like me :-) and can now replace your HID capsule in less than 25 minutes!
The following users liked this post:
Zvonas (11-30-2012)
#12
11-24-2012, 05:44 AM
I'd like to remove the metal plate inside my fog lights as they are currently useless in the fog. I'd also like to use them to supplement my HID's, which are not as bright as the new model cars (especially new German and Japanese cars) but limit their use to brighten the road surface in semi-urban roads with poor lighting, markings and condition.
Does anyone know how to remove that metal plate in foglights nd can provide detailed diagrammatic explanation as GMCGANN did with his capsule removal explanation?
I once posted an article a while back asking for advice on this subject. Maybe by now, someone has a broken foglight they can play with and shed more light to us about the safe removal of its metal plate.
#13
12-02-2012, 08:16 PM

The following users liked this post:
Cherry_560sel (01-22-2014)
#14
12-03-2012, 10:50 AM
#15
12-03-2012, 02:12 PM
Definitely HID, was going to get 6000k but decided to go with the 4300k when I saw the e-bay deal.
http://www.ebay.com/itm/4300k-Bulbs-...ht_3038wt_1141
I think it went so easy because I was prepared and read the forums. I would not have known how to remove the cover at the bottom without the instructions. Try it, you basically just unlatch and push towards the fender and it pops right out.
The bulb is a little tricky but the wire stretches enough for you to be able to pull the bulb back out and down and around and out. Like movers moving a couch through a doorway.
Last edited by Plant; 12-03-2012 at 02:52 PM.
#16
12-04-2012, 08:29 AM
See my other post: "Brighter Xenons" Update for a step by step pictorial guidelines of doing the job - https://www.jaguarforums.com/forum/x...98/#post633049
#17
12-04-2012, 08:56 PM
I replaced both HIDs within 25 minutes, with photos that I posted in my "Garage"
First time was an hour as I had to replace both Ballast.
Second time was 15 minutes to replace one Ballast.
Third time was 25 minutes to replace both HIDs.
The trick is, not to remove the Bumper Cover completely...leave it attached to the Engine Cover and support it with a box and something soft (bubble wrap).
#18
12-04-2012, 09:37 PM
Definitely HID, was going to get 6000k but decided to go with the 4300k when I saw the e-bay deal.
4300K Bulbs HID Xenon Low Beam Headlight Pair 2 Bulb D1S D1R D1C 4300 K 14A | eBay
4300K Bulbs HID Xenon Low Beam Headlight Pair 2 Bulb D1S D1R D1C 4300 K 14A | eBay
#19
01-27-2013, 03:15 PM

I'm in the middle of replacing my driver side headlamp assembly due to water intrusion. I've gotten as far as taking the radiator shield off, but I can't get the bumper cover to slide forward. According to the workshop manual, there are some retaining clips where the cover meets the fender. The illustration (p 540, step 8) shows that I need to pull outward? to release them, but I can't get it to budge. What am I doing wrong?
#20
01-27-2013, 03:34 PM