El Gato Grande - The International Car Of Adventure
#21
 09-15-2012, 12:38 PM


Ok, Tim, little treat for you! Everyone's going mad over LED lights, day running lights and all those posh looking Audi style lights, etc...
As I've seen in some other post, opinion about putting led strip on a Jag is rather negative, and I'm not surprised, because in most of DIY cases it would look rather poo... I did it myself on my father's Chrysler Grand Voyager, and I wasn't pleased with result at all.
But I still wanted all the lights in the front of my XJ6 to be illuminated, as sort of day running lights, with some LEDs. And since my wife asked me the same thing, (mutant or what, reading my thoughts!) after a short while I came up with rather risky (at least it might seem to start with) idea. Maybe I'll let the pictures do most of talking.
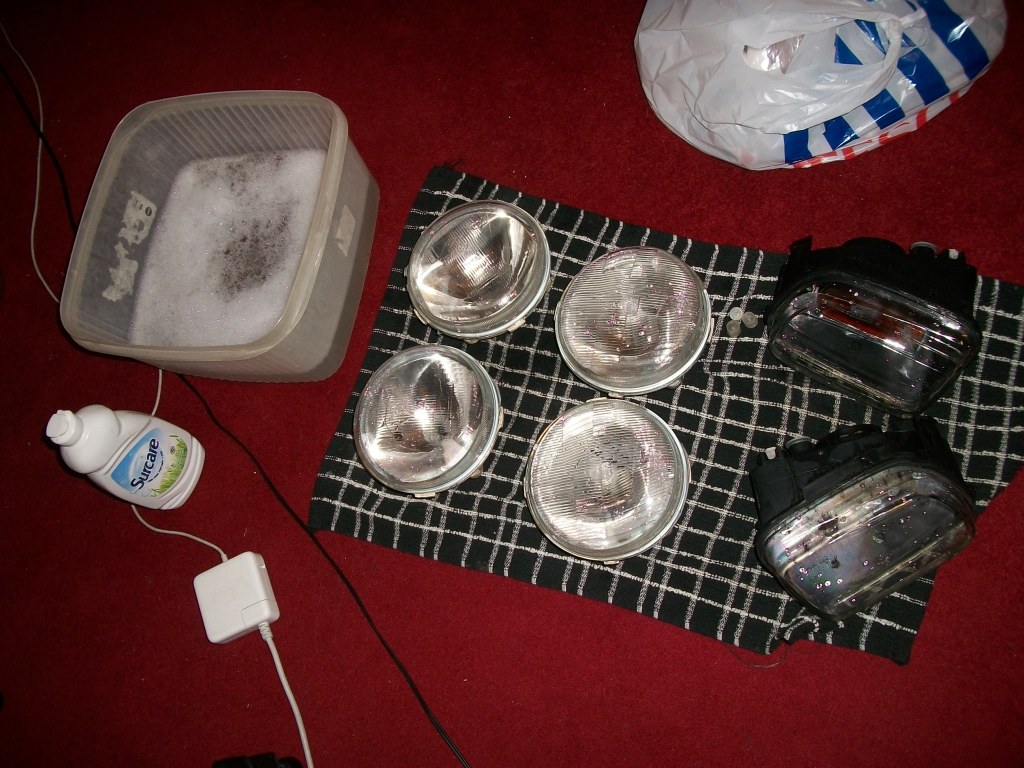
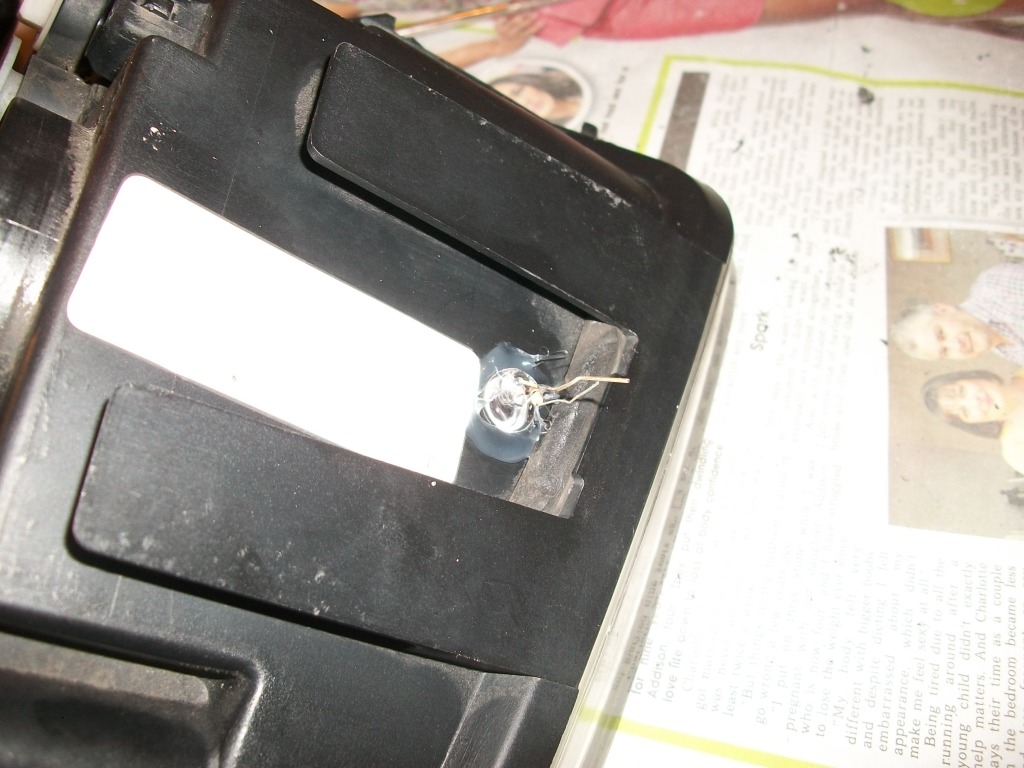
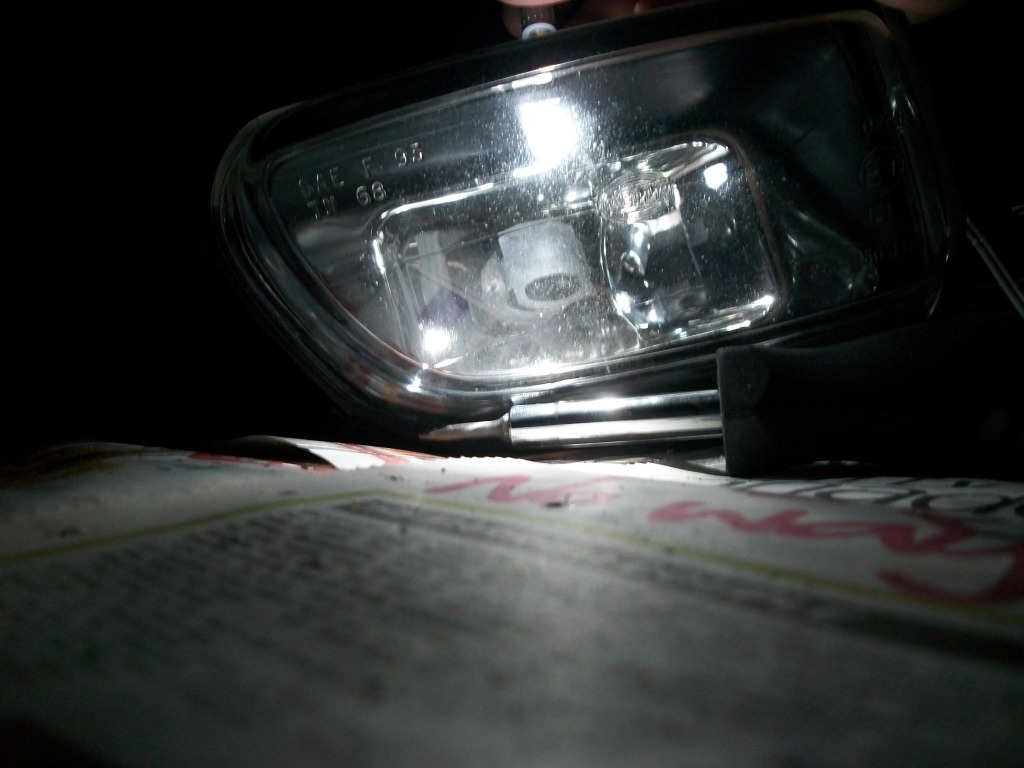
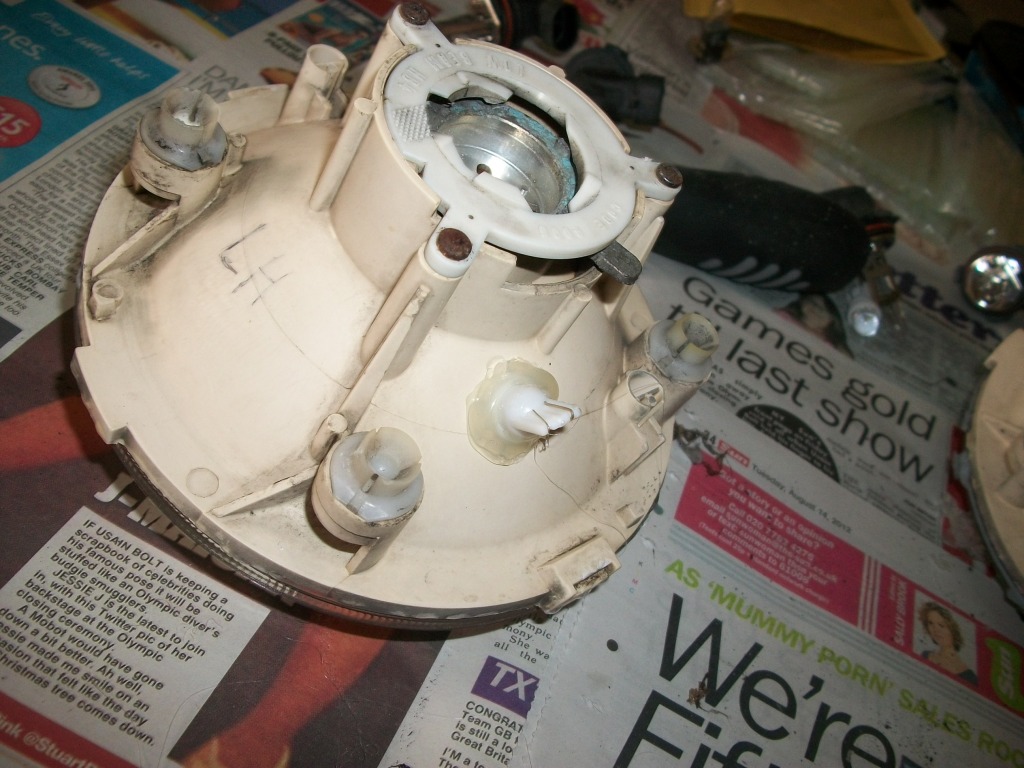
After pulling the lights out of the car, I decided I'm not going to clean them until most of preparation is finished. It should become clearer in few seconds

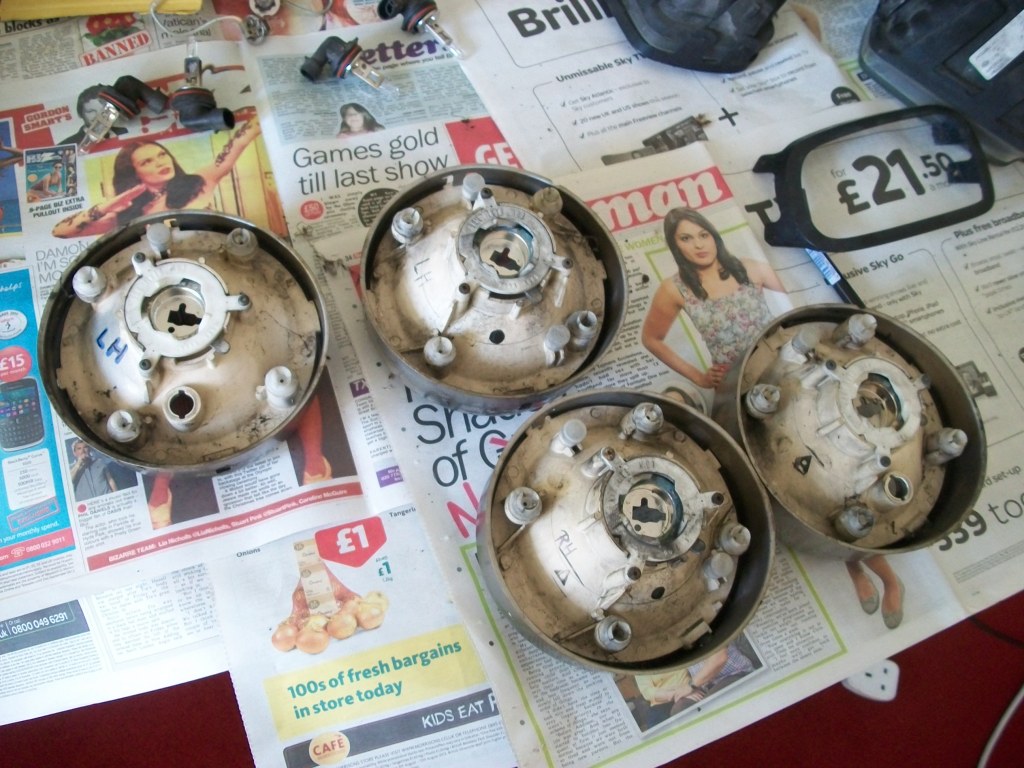
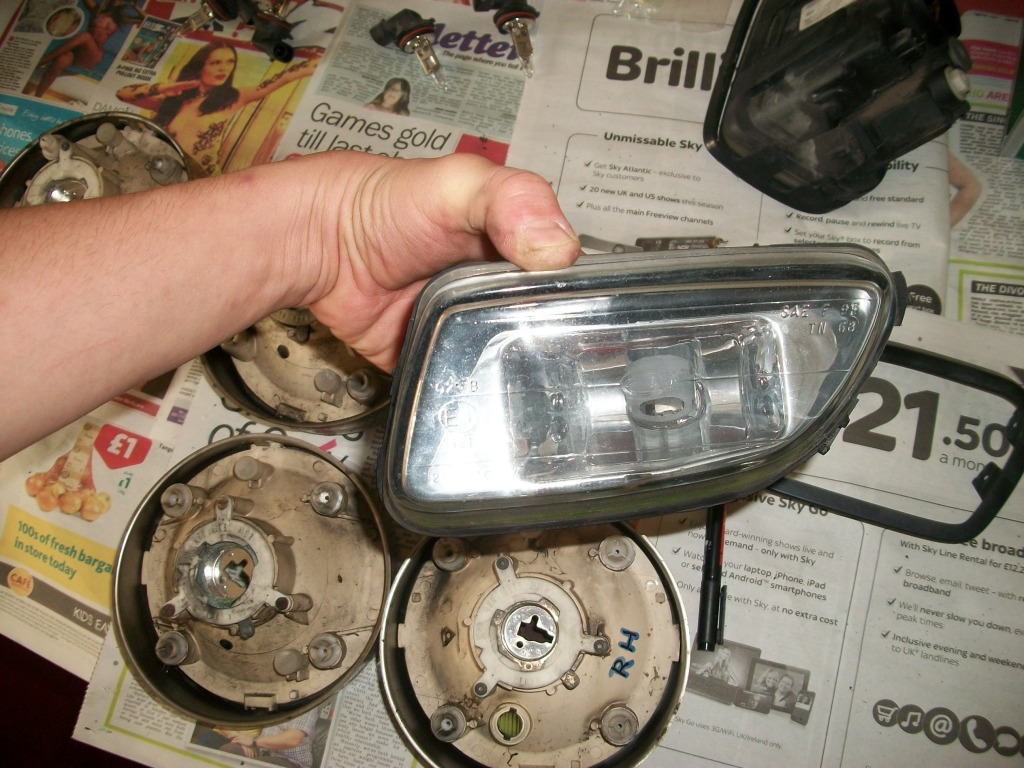
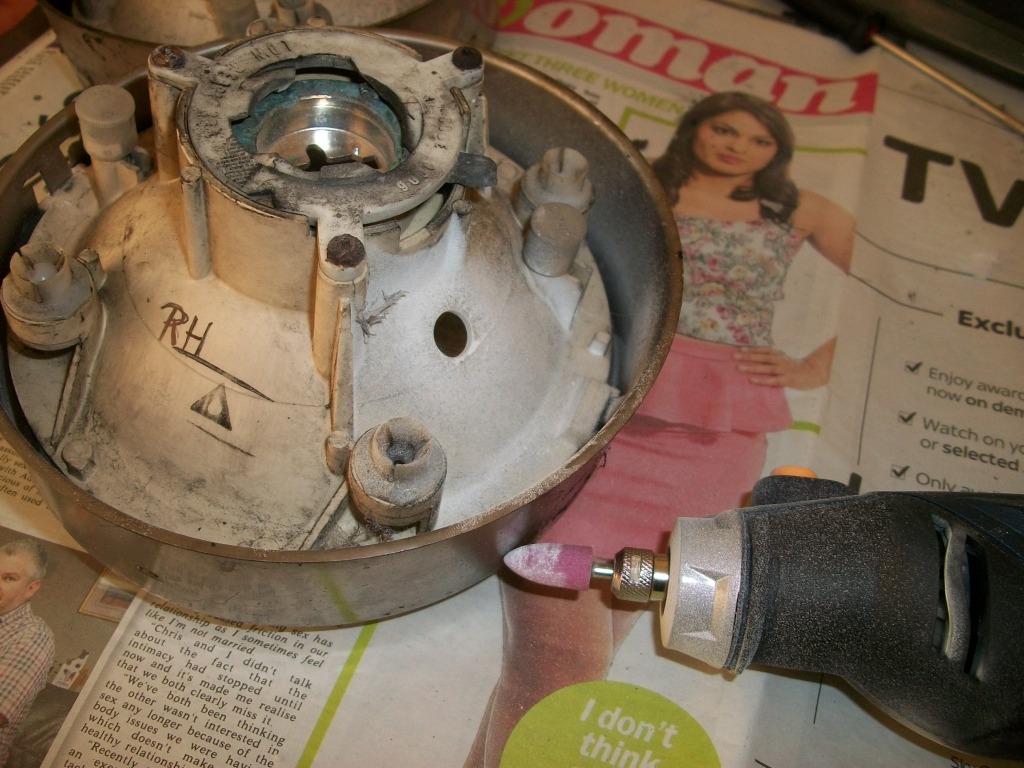
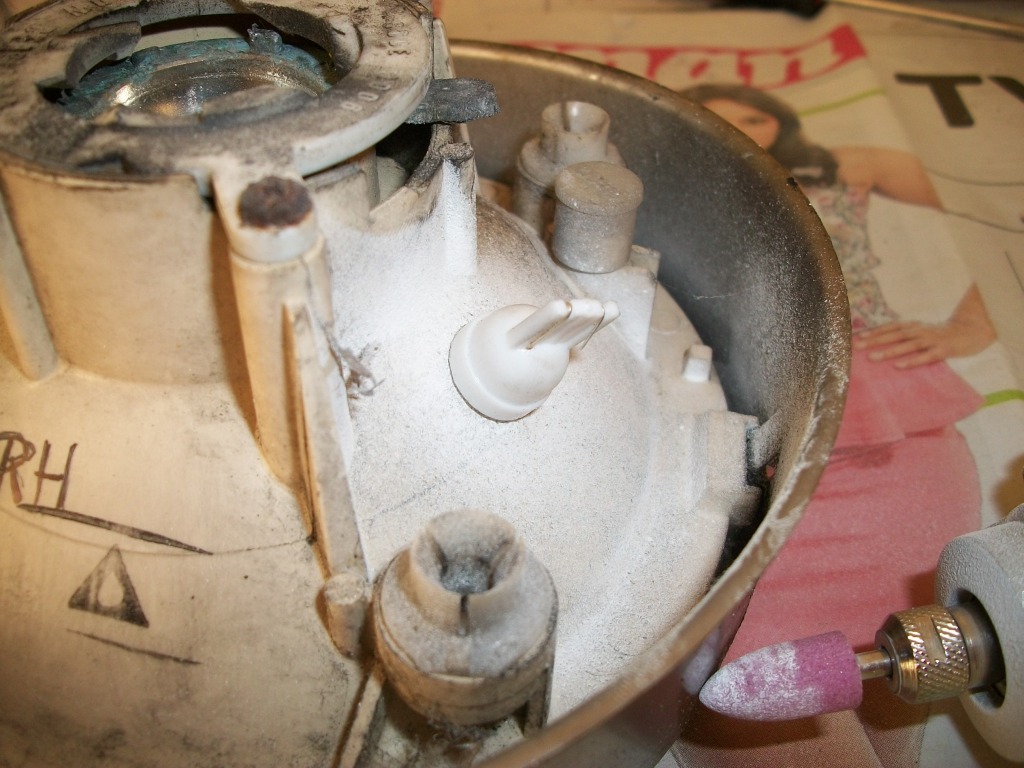
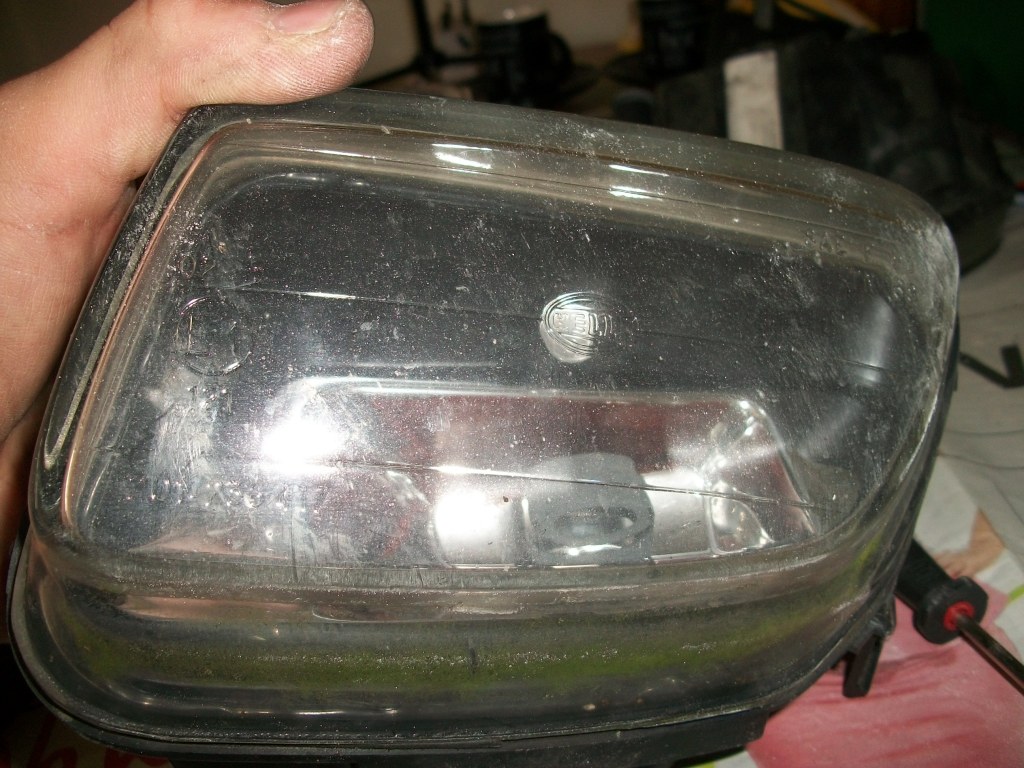
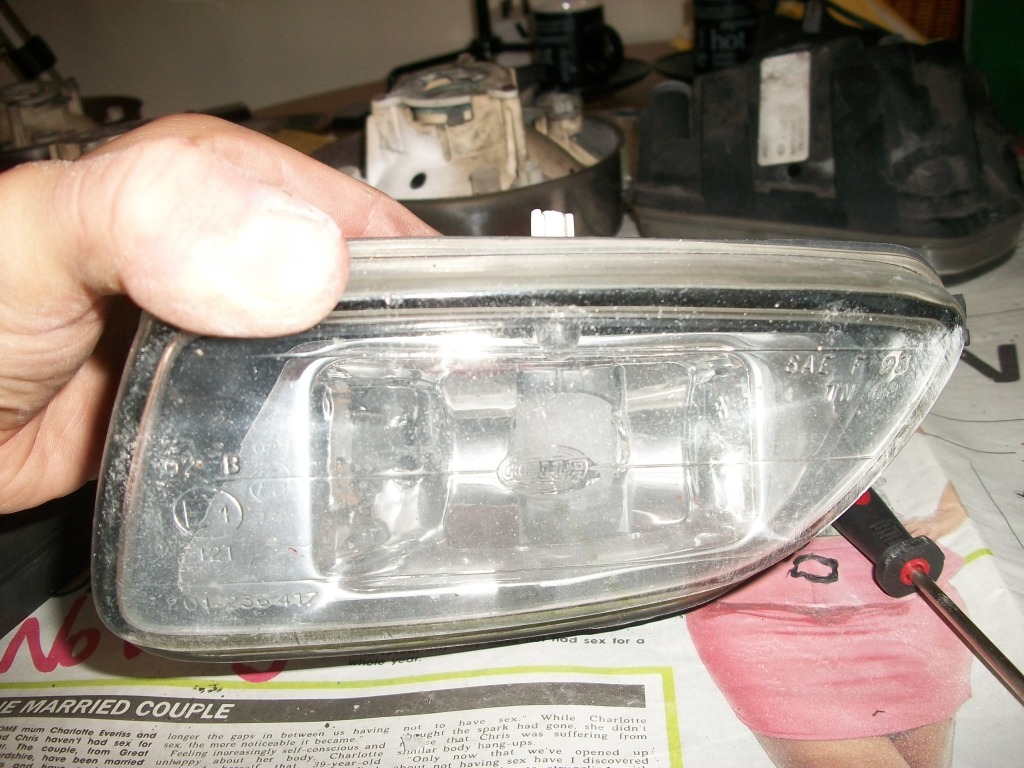
LEDs on pictures are for test fit purposes only, NOW I shall clean the lights inside, I didn't do it earlier as I knew drilling the lights would produce a bit of dust, which I'd have to get rid of, so double cleaning would be pointless. Full beam, or high beam if you prefer, lights were drilled to accomodate single big LED in roughly same location as the low beam lights. Plastic is hard enough not to start melting while drilled, there's just a bit of dust, which I found better than melting plastic of fog light cover. And hole in the fog lights is positioned in such a way, that LED itself will not be visible, unless someone decides to give the bumper a kiss.
Let me know what you guys think about this mod! When everything's finished, I'll post a video tutorial as well, if the mod will be approved by Jaguar Forums users
As I've seen in some other post, opinion about putting led strip on a Jag is rather negative, and I'm not surprised, because in most of DIY cases it would look rather poo... I did it myself on my father's Chrysler Grand Voyager, and I wasn't pleased with result at all.
But I still wanted all the lights in the front of my XJ6 to be illuminated, as sort of day running lights, with some LEDs. And since my wife asked me the same thing, (mutant or what, reading my thoughts!) after a short while I came up with rather risky (at least it might seem to start with) idea. Maybe I'll let the pictures do most of talking.
After pulling the lights out of the car, I decided I'm not going to clean them until most of preparation is finished. It should become clearer in few seconds
LEDs on pictures are for test fit purposes only, NOW I shall clean the lights inside, I didn't do it earlier as I knew drilling the lights would produce a bit of dust, which I'd have to get rid of, so double cleaning would be pointless. Full beam, or high beam if you prefer, lights were drilled to accomodate single big LED in roughly same location as the low beam lights. Plastic is hard enough not to start melting while drilled, there's just a bit of dust, which I found better than melting plastic of fog light cover. And hole in the fog lights is positioned in such a way, that LED itself will not be visible, unless someone decides to give the bumper a kiss.
Let me know what you guys think about this mod! When everything's finished, I'll post a video tutorial as well, if the mod will be approved by Jaguar Forums users
#22
09-15-2012, 01:43 PM
After wash (inspired by link Jaguar XJ6; Jaguar X300; Jaguar XJ6 3.2 Sport; Miscellaneous notes )
Now, a quick question, should I leave them to dry like this, or should I flip them, so they would be resting on lenses?
Now, a quick question, should I leave them to dry like this, or should I flip them, so they would be resting on lenses?

#24
09-16-2012, 09:00 AM
Senior Member
#25
09-16-2012, 02:35 PM
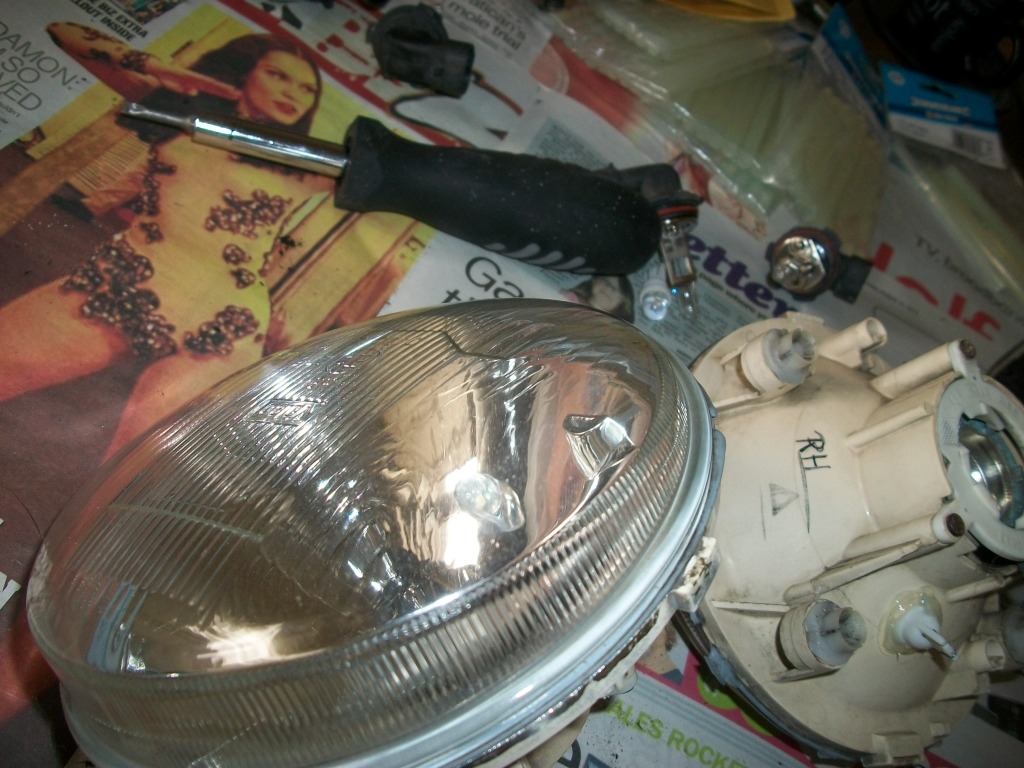
The holes I made are rather tight fit, but yes, sealing them up is another thing as well. And since they sit in the new 'socket' tightly I decided to go for hot glue. 
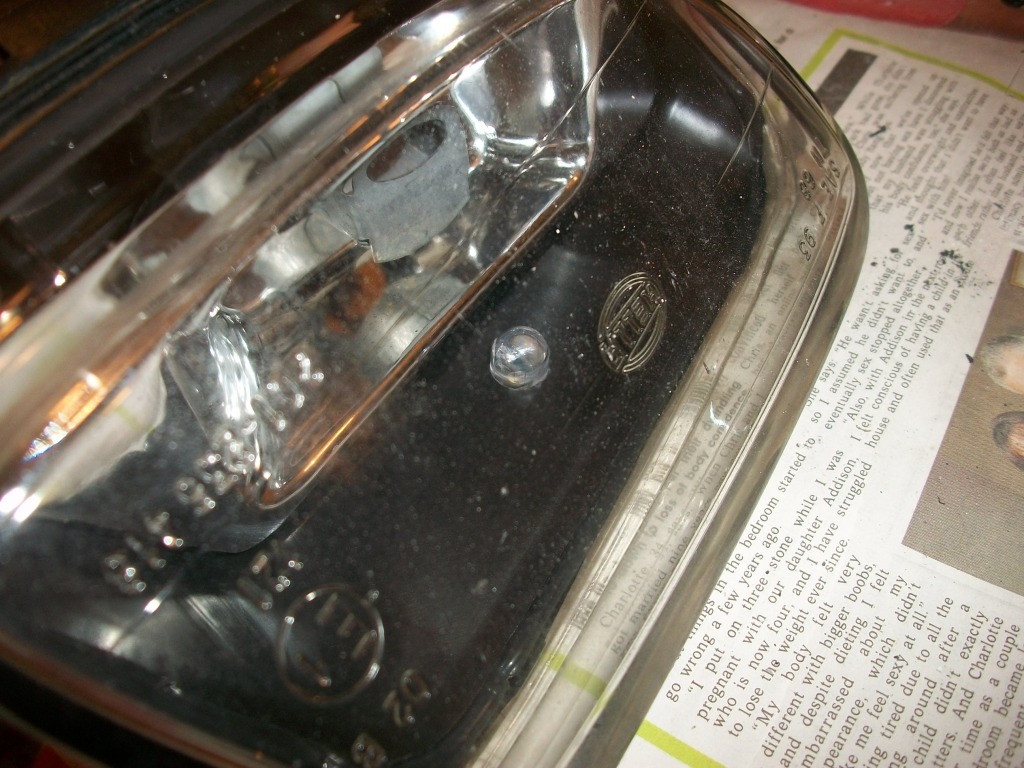
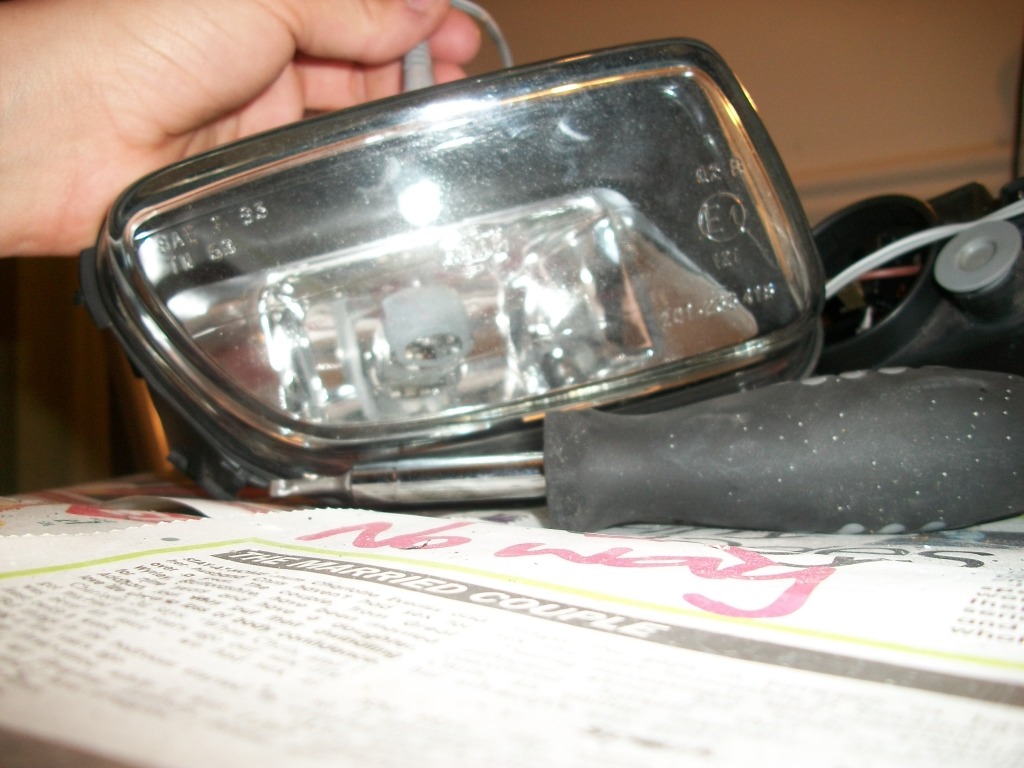
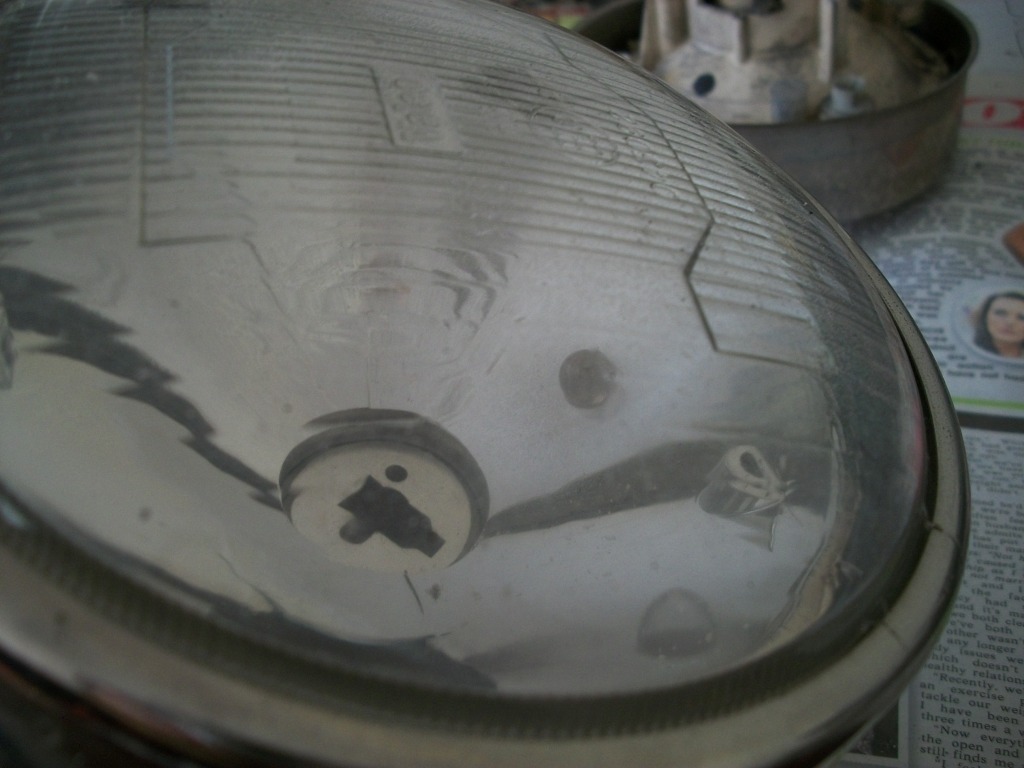
The units have been cleaned, all those 'particles' you can see on the glass seems to be just the standard damage on the outside.
I'm thinking about wiring them up to the standard sidelights (the front ones will be replaced with LED's as well) and adding extra switch for the LEDs in high beam and fogs, if it makes sense... Probably I'd have them on most of the time, but it would be possible to switch them off if necessary
#27
09-17-2012, 07:06 AM
Senior Member
If you use the LEDs, I'm pretty sure you have to get the ones that won't throw the error to the computer.
Like these.
Like these.
#28
09-18-2012, 02:30 AM
As I mentioned before, I wanted to run separate wire from sidelights to separate switch, which would enable me to switch on/off the additional LED lights... Now, here's the problem, I wanted to tap into one of the wires not far off the main light switch, but which one should I tap into? I tried to get the power from the main switch, as there are 4 wires and the solder is pretty much exposed, so it should make it easy, but then I run the tests with multimeter, I totally lost it, I can't figure out which cable should I connect to  Or should I connect it somewhere else? My electronic knowledge is very, very basic
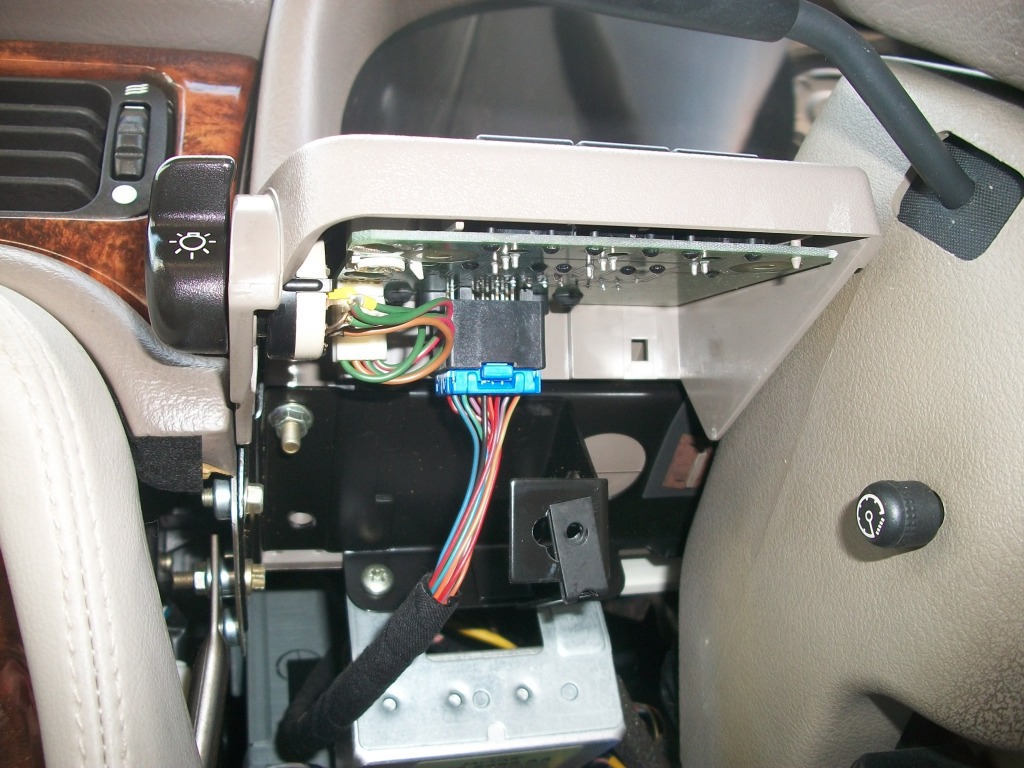
If anyone can help and you need a better picture or at a different angle, just let me know, and I'll upload as soon as I can!
Or should I connect it somewhere else? My electronic knowledge is very, very basic If anyone can help and you need a better picture or at a different angle, just let me know, and I'll upload as soon as I can!
#30
10-06-2012, 04:28 PM
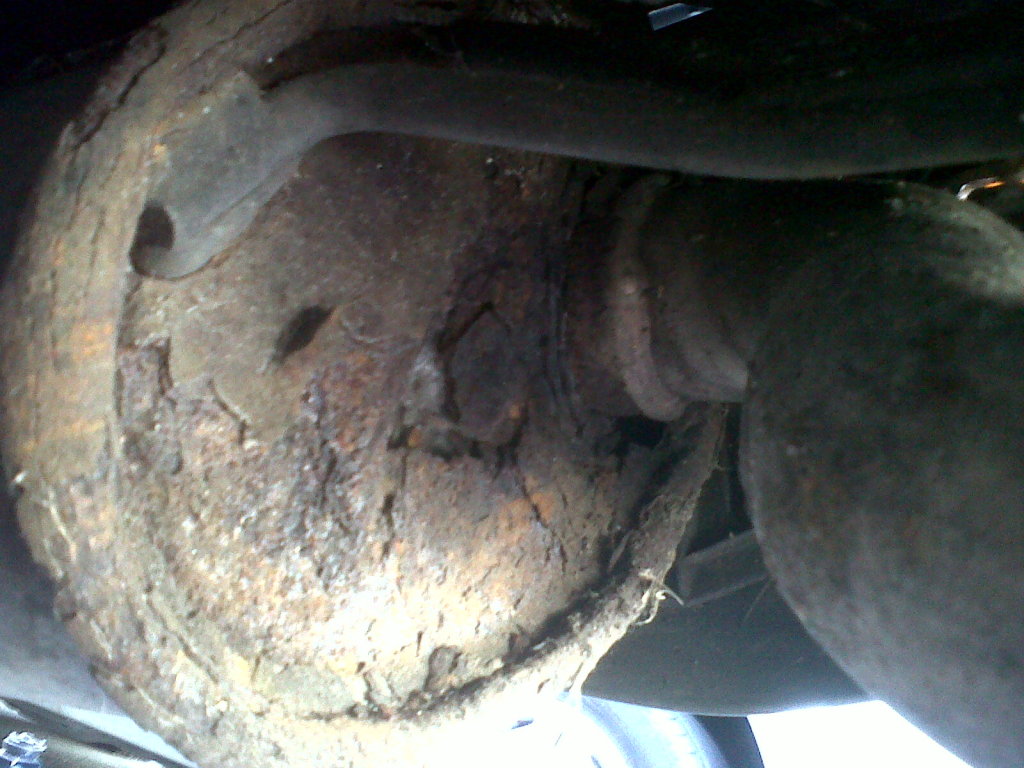
Today I managed to change the oil in gearbox... According to every source possible, it should be 1.4l of oil in it... A lot less than automatic But what I drained out of it wasn't even 0.5l!!! 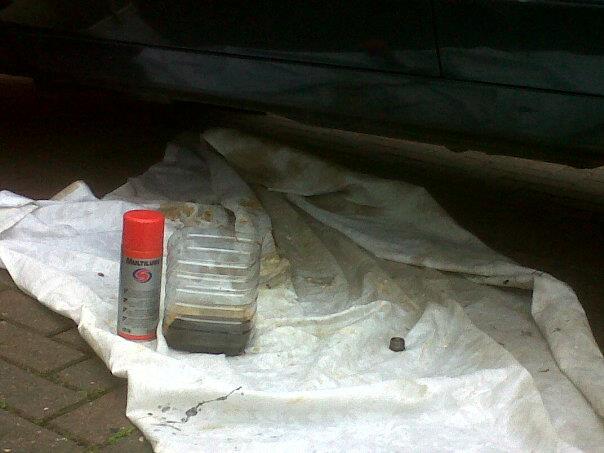
Outrageous!!! That might explain why gearbox felt a bit stiff... And hopefully that might help as well with a bit of a noise I was getting in neutral... We shall see... I changed the oil in differential as well, thanks to the guide in Quick How To Links... It smelt nasty! And stuff that collected at the bottom, on the drain plug was like nasty version of Play-Doh!
By the way, I still haven't sorted the wires out for the 'lights conversion', as one weekend we went away to Thorpe Park in London, and the other weekend it was raining... Since garages in UK were built only for Minis and not for Jags, the only things we keep in garage is extra freezer and washing machine, and the amount of work done on the car depends entirely on weather... The schedule for it is getting tight, still plenty of things to finish, not enough time though Although after today it seems the list is getting slightly shorter rather than longer 
Any help and suggestions appreciated here: I replaced the mirror switch which was broken in rather nasty way,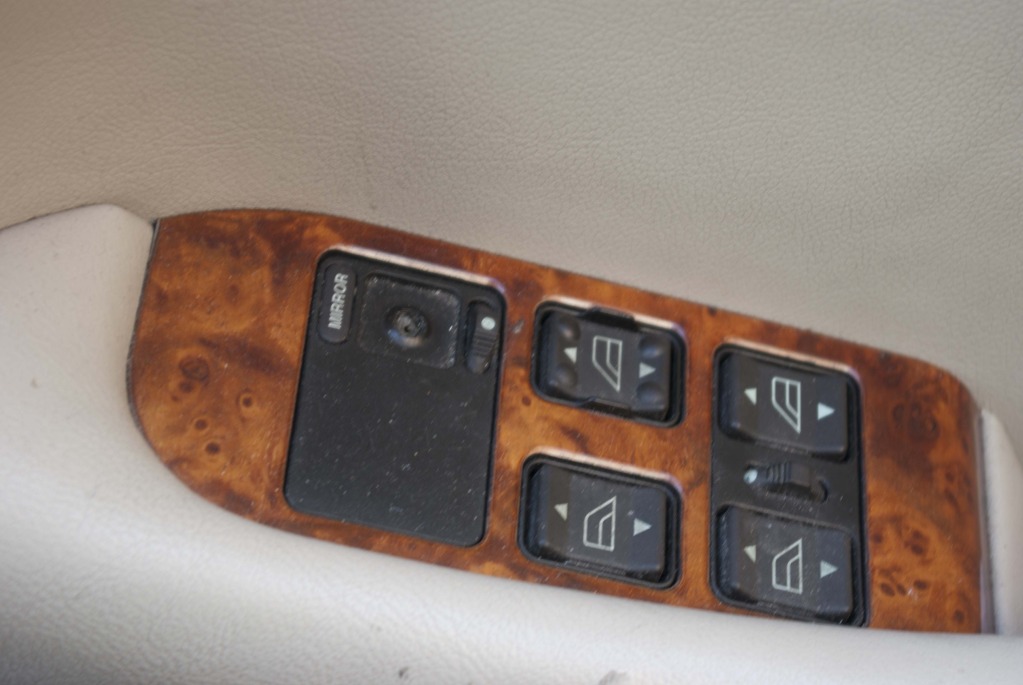
Got replacement for 12 quid with postage, although I still can't get the mirrors to work... I run out of daylight at the time to carry on pursuit, but where are the fuses that I should check for it? Cheers guys!
But what I drained out of it wasn't even 0.5l!!! Outrageous!!! That might explain why gearbox felt a bit stiff... And hopefully that might help as well with a bit of a noise I was getting in neutral... We shall see... I changed the oil in differential as well, thanks to the guide in Quick How To Links... It smelt nasty! And stuff that collected at the bottom, on the drain plug was like nasty version of Play-Doh!
By the way, I still haven't sorted the wires out for the 'lights conversion', as one weekend we went away to Thorpe Park in London, and the other weekend it was raining... Since garages in UK were built only for Minis and not for Jags, the only things we keep in garage is extra freezer and washing machine, and the amount of work done on the car depends entirely on weather... The schedule for it is getting tight, still plenty of things to finish, not enough time though
Although after today it seems the list is getting slightly shorter rather than longer Any help and suggestions appreciated here: I replaced the mirror switch which was broken in rather nasty way,
Got replacement for 12 quid with postage, although I still can't get the mirrors to work... I run out of daylight at the time to carry on pursuit, but where are the fuses that I should check for it? Cheers guys!
#31
10-07-2012, 08:58 AM
Senior Member
#32
10-07-2012, 09:12 AM
#33
10-15-2012, 09:14 PM
So the quality is actually not that bad, which saves me few quid on replacing speakers. Which I've spent on Andy's bracket... And received email from him it's in post, so it should be with me soon Can't wait to drive that thing!!! Still some time to go though... Although less with every single day... Ok, so lets get through the list of things sorted out so far:
Engine oil: changed
Gearbox oil: changed - no more noise in neutral
Differential oil: changed
windows: tinted - rear glass doesn't look the best, but as long as helps keeping it cooler, then good
stickers: attached

Although I ordered them a lot smaller, I won't be complaining, I paid only about 15 quid for them, and since they are IN YOUR FACE more people will visit the website
alternator belt: tensioned properly now, no squealing nor squeaking
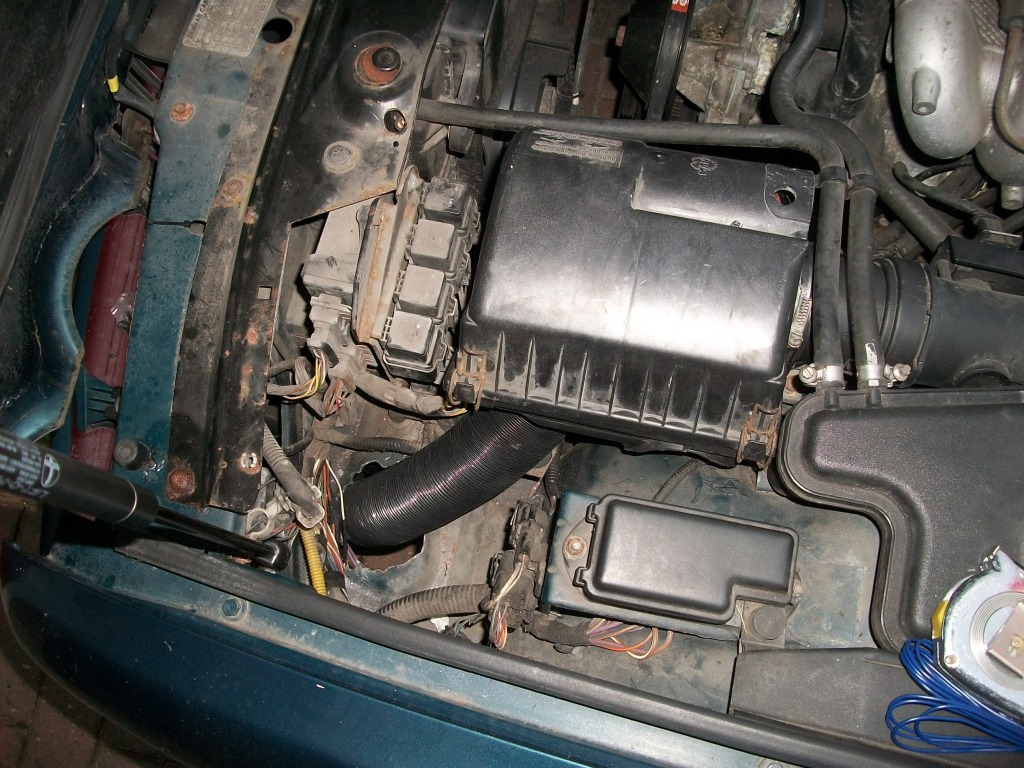
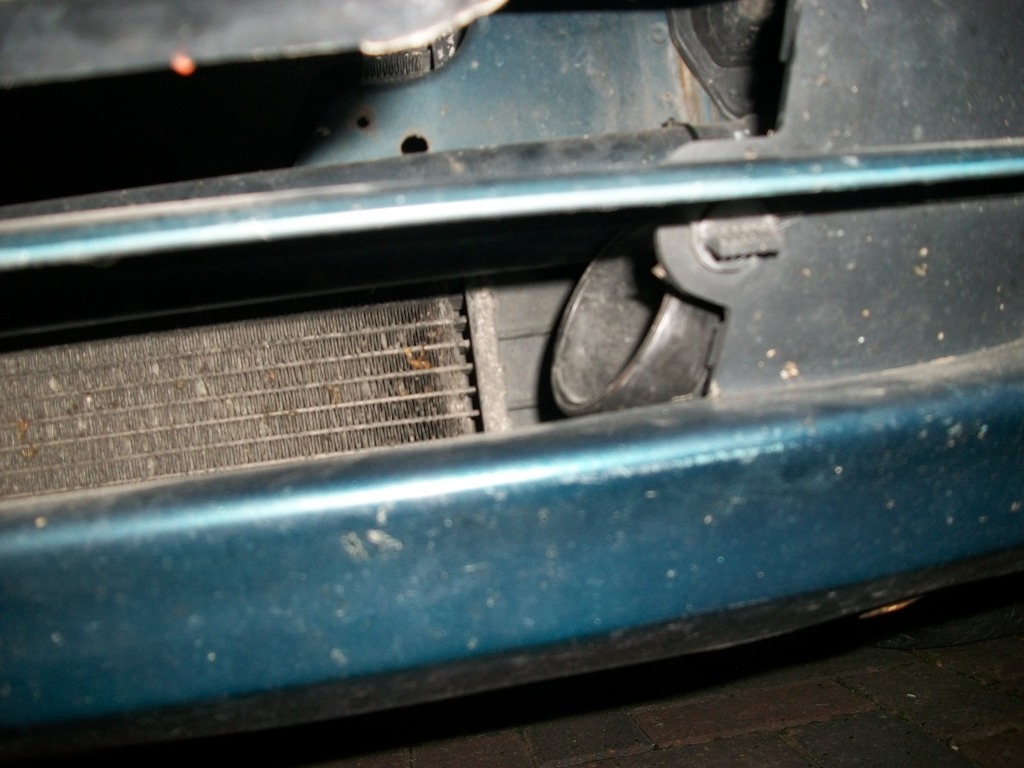
air filter: high flow installed with modified air box, with air duct feeding cold from behind the bumper, lower grille
suspension: front shock top bushes replaced (without taking wheels off and without spring compressor)
Ok, now to the things that still need doing:
kitty: attach the mascot to the bonnet, need to find some screws for it...
exhaust: there's still little blow on right end box, need to patch it up
parking sensors: finish wiring them up (speaker mounted under rear shelf, removed rear seat in order to do that)
rust: fixed, sprayed, need to polish up the paintwork
headlights: need to finish wiring, put them back in
stereo: need to sort out the surround (in the making)
kill switch: need to figure out which wire :-/ (any help in the priv messages please)
interior bulbs: need to order LED replacements
seats: need deep clean, driver's seat stitched back up, needs little more fixing + restoring colour to all seats
headliner: needs glueing...
wing mirrors: switch panel replace, need to locate the fuse as the buggers won't budge...
clock: need to fix the screen...
I think I missed something, on both lists... just can't really remember what... I have only 2 hands (although my wife helped me today by cleaning the rear seat while it was out, and by installing and running the wires for the parking sensors), and not much time to spare... And the deadline is getting closer, so believe me, I'll be doing as much as I can today (which will start in about 4h time, yes, I do have sleeping disorder, or some type of insomnia), even if it rains... All the support from this forum is deeply appreciated, as my budget on this project is very tight, and yes, as someone said to buy the Jaguar Heritage disc, I would do it, but even though it's cheap, I don't want to spend that extra money on info for car which I'm not going to keep. Don't get me wrong guys, I love that Jag to bits, I would keep it if I could, but it would just ruin me
Bought it only for the purpose of that road trip... Ok, the wind is picking up, very strong now, which means whatever I'm going to do today is going to be pain in the bum... AAAAAHH!!!
I think I'm getting desperate to get it finished before deadline!!!
#34
10-21-2012, 04:07 AM

#36
10-26-2012, 01:59 AM
Cheers mate! Hahaha, I wasn't sure if anyone was still following any of it I'm about to get back on it today, as I still have few hours, then again on Sunday... Uh... It's not easy being on a night shift and trying to get everything done by the end of November while doing it only for few hours every week, being limited by other commitments, weather and amount of sunlight
I managed to solder sockets for new LED lights, so hopefully the headlights should be going back in today, which would provide me with (nearly) finished front end! (I want to put the leaper on the bonnet as well, but I was struggling to find right size screws they seem to be M5 size, but the thread is a bit more spaced than standard screws, so standards don't go in, and any other size doesn't fit). I'd be able to put the plastic cover under the bumper back on and lower the car, get it off the jack stands, and put the locking nuts on font wheels! I decided to go with 2 per wheel, as some thieves can be desperate and actually manage to get the wheels off if there's just one locking nut... Not sure how they do it, but I'm on different forum as well, and few guys had that happen to them... I'd rather avoid that while on road trip!
Oh, by the way, my wife decided to have a go with a drill, and she managed to install and wire up the parking sensors! Sometimes she really surprises me
I'm about to get back on it today, as I still have few hours, then again on Sunday... Uh... It's not easy being on a night shift and trying to get everything done by the end of November while doing it only for few hours every week, being limited by other commitments, weather and amount of sunlight I managed to solder sockets for new LED lights, so hopefully the headlights should be going back in today, which would provide me with (nearly) finished front end! (I want to put the leaper on the bonnet as well, but I was struggling to find right size screws
Oh, by the way, my wife decided to have a go with a drill, and she managed to install and wire up the parking sensors! Sometimes she really surprises me
#38
10-27-2012, 01:50 PM
Did I mention I painted the engine? Yeah, I gave it a bit of respray, so here you have the old look:
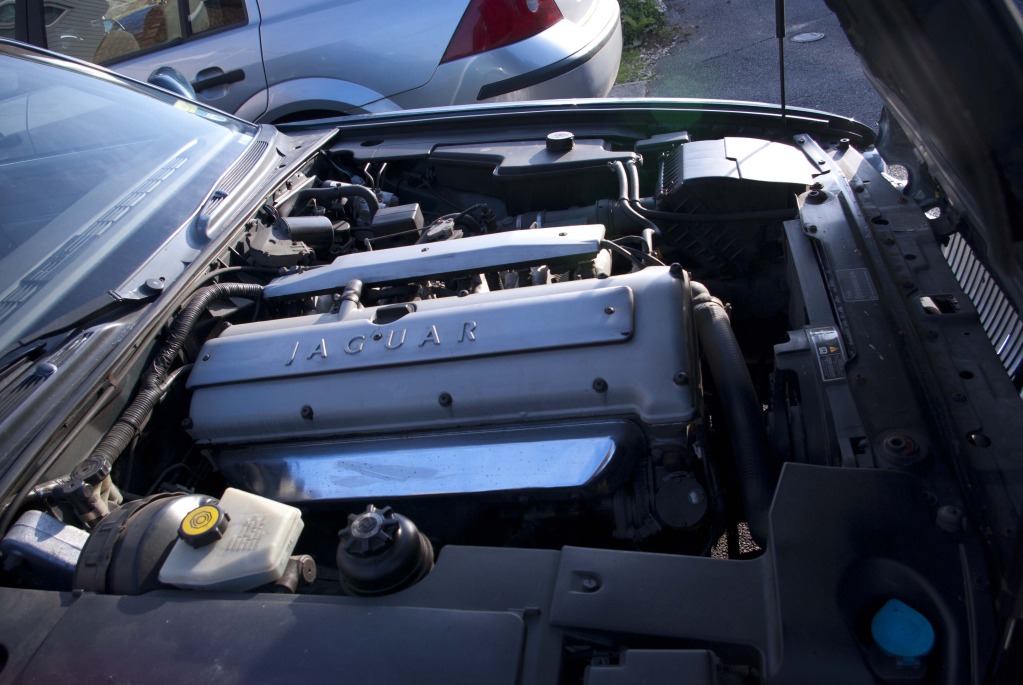
and the new look:
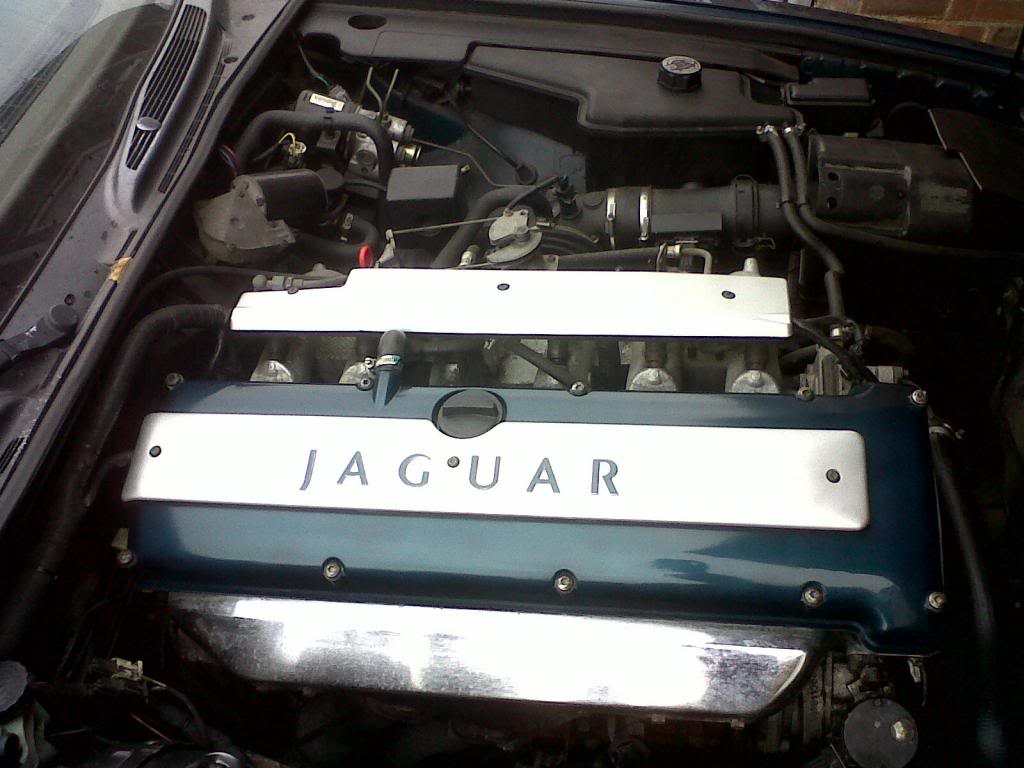
Paint job is not perfect, but for a quick job on the driveway looks ok, I hope!
I haven't finished the lights mod, as the rain stopped me... Never mind, lets hope for dry Sunday...
and the new look:
Paint job is not perfect, but for a quick job on the driveway looks ok, I hope!
I haven't finished the lights mod, as the rain stopped me... Never mind, lets hope for dry Sunday...
#40
10-30-2012, 04:21 AM
Thanks Tim! A bit of a cowboy job that was, as I didn't take it off the engine, I sprayed it there... The colour was my first time experience with air brush, and clear coat from rattle can. Then gave it a quick sanding where I had few runs, first wet 1200, then wet 2000, and then a bit of hand polishing with T-Cut, and then some Shine Thingy Product from CarPlan (same company as T-Cut).
The following users liked this post:
mgb4tim (11-13-2012)