Installing the Harmonic Balancer
#1
 09-01-2013, 12:31 AM

Got my unit back from the Damper Doctor a few days ago. Rebuilt, fresh paint, and a 3-year warranty. It was a little over a week from shipping it out to receiving it back. My only complaint is they painted the inside of the hole and keyway. It was already a tight fit, not sure I could accommodate a layer of paint. I dispatched it easily with a wire-wheel on a drill. Borrowed a tip Gonzo provided for smearing adhesive on hoodliner edges and swabbed a bit of wheel bearing grease on the inside and keyway with a Q-tip prior to installation. I lined up the roll pin in the timing wheel with the hole in the damper and then installed the fixing bolts with a bit of Loctite blue, torqued to 18.87 nm. (well, the spec is 15.5 to 20.5 and 18.87 is one of the index marks on my torque wrench...)
As I mentioned in the Timing Cover Seal post, my Woodruff key was firmly affixed in the crankshaft keyway and I really didn't make any attempt to dislodge it. Without having to worry about keeping that in place, it was still relatively difficult to get the alignment right. I tried shooting down the keyway with the macro setting and flash, but that proved of limited usefulness. Next I tried a small round shop mirror on extendable stem on the back-side of the damper. This was better but it was tough to get enough light back there to see much. I tapped it on with a rubber mallet, then used a drift & the mallet on a timing tooth to align the keyway. I used the fixing bolt and a ratchet to press it the rest of the way on.
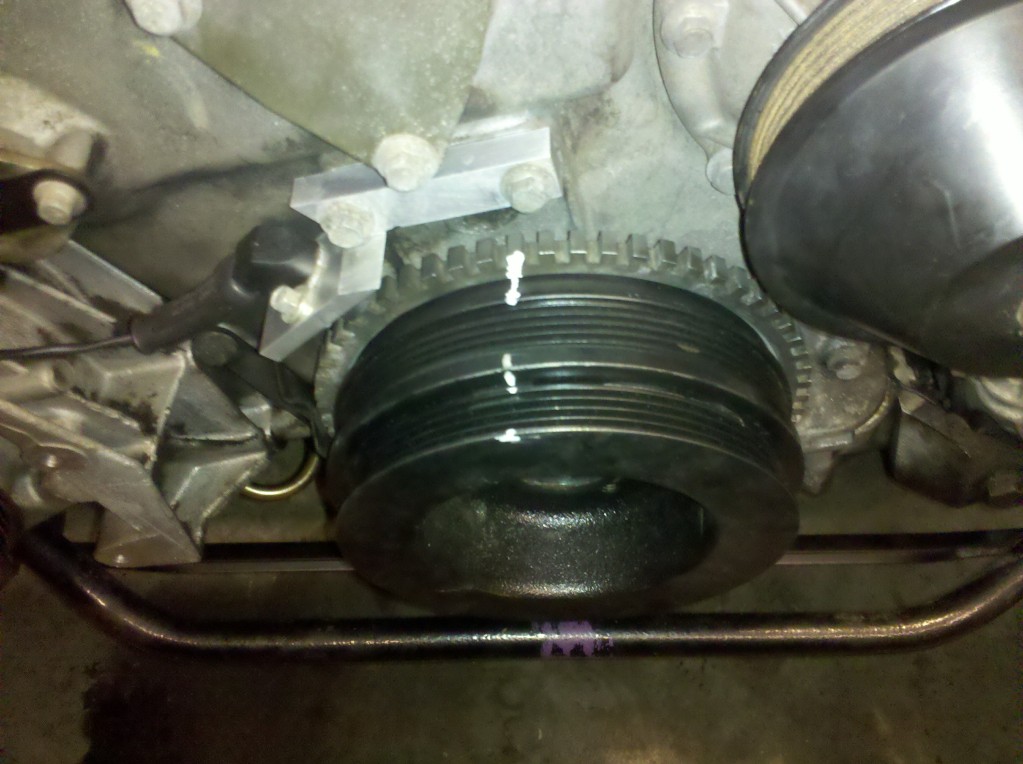
As you can see, I have re-marked it so any future failure will be obvious.
The torque spec from the manual is 183-223 nm, crossing to about 135-165 ft-lbs. The impact wrench I bought to remove the fixing bolt claims working torque of 200-900 ft-lbs and is rated at 90-120 psi. Still undecided at this point; I'll definitely put a bit of Loctite Blue on it for final torqueing, but not sure if I'll try to block the engine and use a proper torque wrench or just set the NitroCat to its lowest setting, set 120 psi and go with that.
Edit: 9/2/13) I strung up this Rube Goldberg contraption to approximate a strap wrench in order to see if I could hold the pulley against the min torque spec of 183 nm. Didn't work.
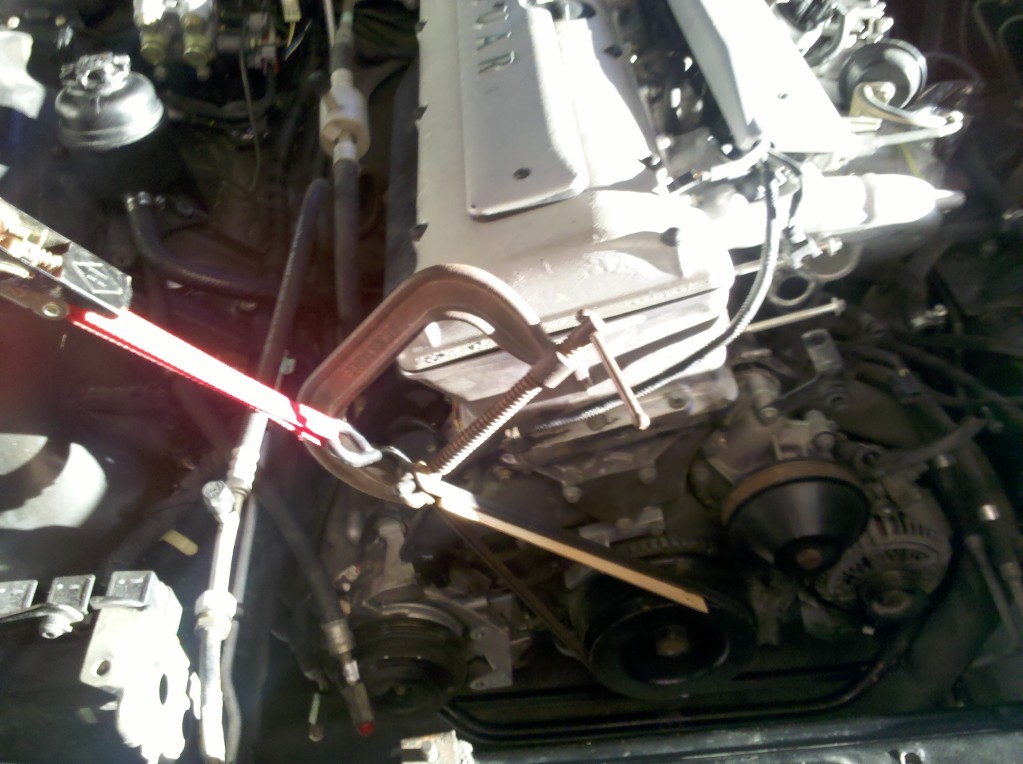
Yeah, a tie-down strap anchored to a high structural member of the shop, then a ratchet-strap tensioning the old a/c belt wrapped around the crank pulley, a very large C-clamp to keep the belt from rotating around the ratchet-strap hook, and....finally, a strip of wood wedged between the pulley and belt in an attempt to keep the pulley from slipping in the belt, after I'd applied all the tension I dared via the ratchet-strap. I know, right?
So my next approach was to take my NitroCat 1200K and zip a rear lug bolt out of the tractor, then, at 90 psi and on the lowest of the 3 settings, re-install it and then try to torque it with the torque wrench set at 183 nm. When I released as soon as it stopped turning, I found it wasn't quite up to 183. However, when I let it hammer about a second or two, then attempted to torque it, I got a click immediately, before any movement. So, with this "hard science" in my hat, I cranked the regulator up until I had 120 psi with the impact wrench running free, slathered the crank bolt in Loctite Blue, hand started it, then zipped it in with the NitroCat set to it's lowest of the 3 settings, ostensibly delivering something on the order of 200 ft-lbs. Then I dismantled my Rube Goldberg contraption, and hammered at it for a second or three with the impact wrench again. I'm calling it done.
Edit: 9/8/13: Got the cooling system all in order and fired it up today for the first time since fitting the rebuilt damper. All is well - no wobbly bits, and better yet, no squeal and protestation from the belt drive! Haven't had any motor oil seep down from the timing cover seal yet, either, so hopefully that is mended. Seat leather is still out for repair, so maybe by next weekend I can return the car to service.
Last edited by aholbro1; 09-08-2013 at 10:42 PM.
The following users liked this post:
BigBossRadio (04-13-2014)

Thread
Thread Starter
Forum
Replies
Last Post
'05 Gold XJ8L VDP
XJ XJ6 / XJ8 / XJR ( X350 & X358 )
2
09-18-2015 07:15 AM
Currently Active Users Viewing This Thread: 1 (0 members and 1 guests)