When you click on links to various merchants on this site and make a purchase, this can result in this site earning a commission. Affiliate programs and affiliations include, but are not limited to, the eBay Partner Network.
While replacing the rear wheel bearings of my X300 / 94, I found out, that the bearings on the pivot axle of the hub carrier were rusted. At least a lot of rusty stuff was coming out while trying to clean them.
The inner parts of those bearings came out easily by hands, but the bearing cups inside the hub carrier seem more tricky. Has anyone a good hint how to get those cups out?
Thanks for the confirmation. That was my first idea too, but I just had a problem figuring out with what tool I could hammer it out. Then I found it: a really serious size nail used for very heavy timber. Using that upside down, did the job. The cups are now out. Thanks for the help.
Originally Posted by Doug
The bearing cups must be driven out with a hammer and drift, or similar tools
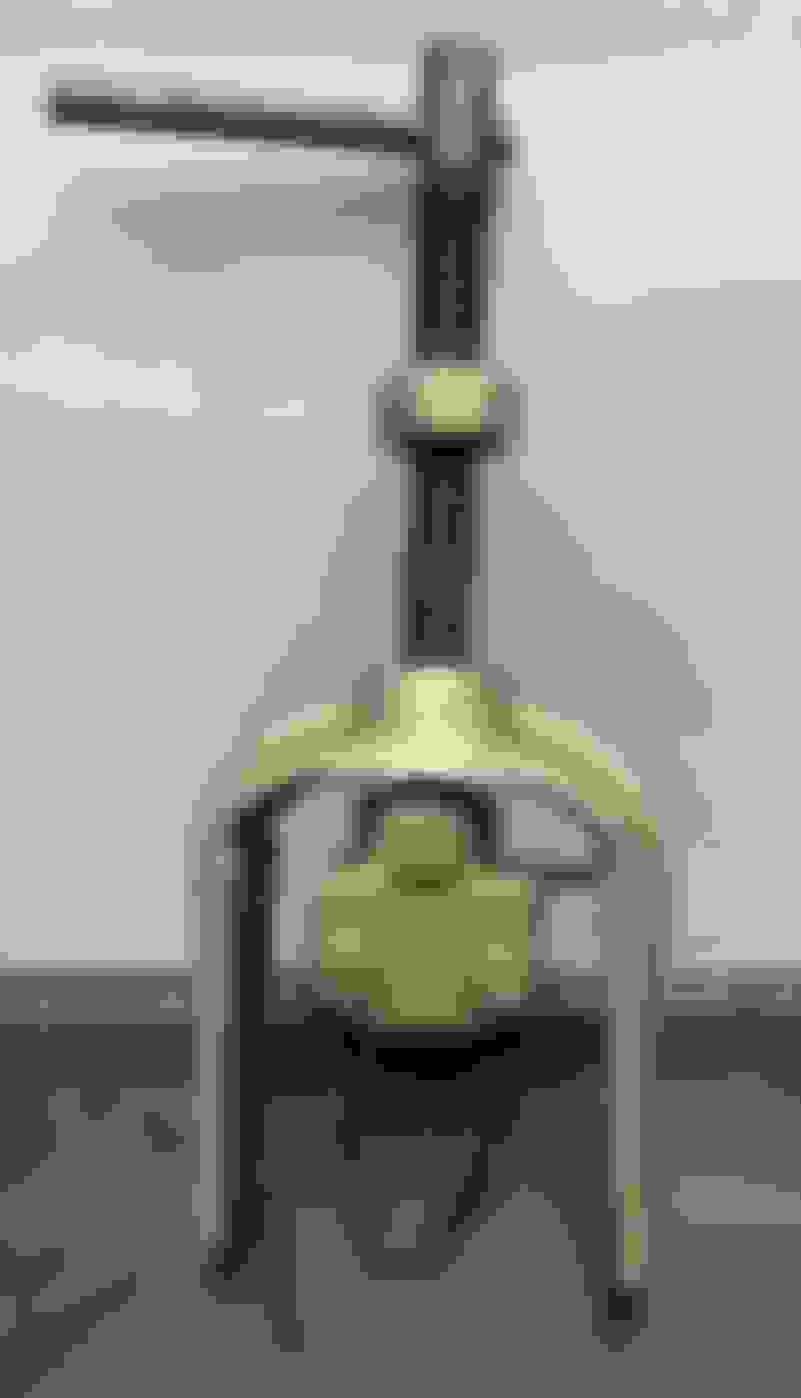
A long drift punch and hammer are probably the tools most of us have on hand or can improvise, but for future readers of this thread, other options for pulling those bearing races include some 2-jaw pilot bearing pullers, like the one below. If you've ever done a clutch replacement you may have used one. Some auto parts stores rent them out. The jaws must be reversed so they can grab the back edge of the race via the two notches in the hub carrier bore:
Here's one with the jaws set up correctly:
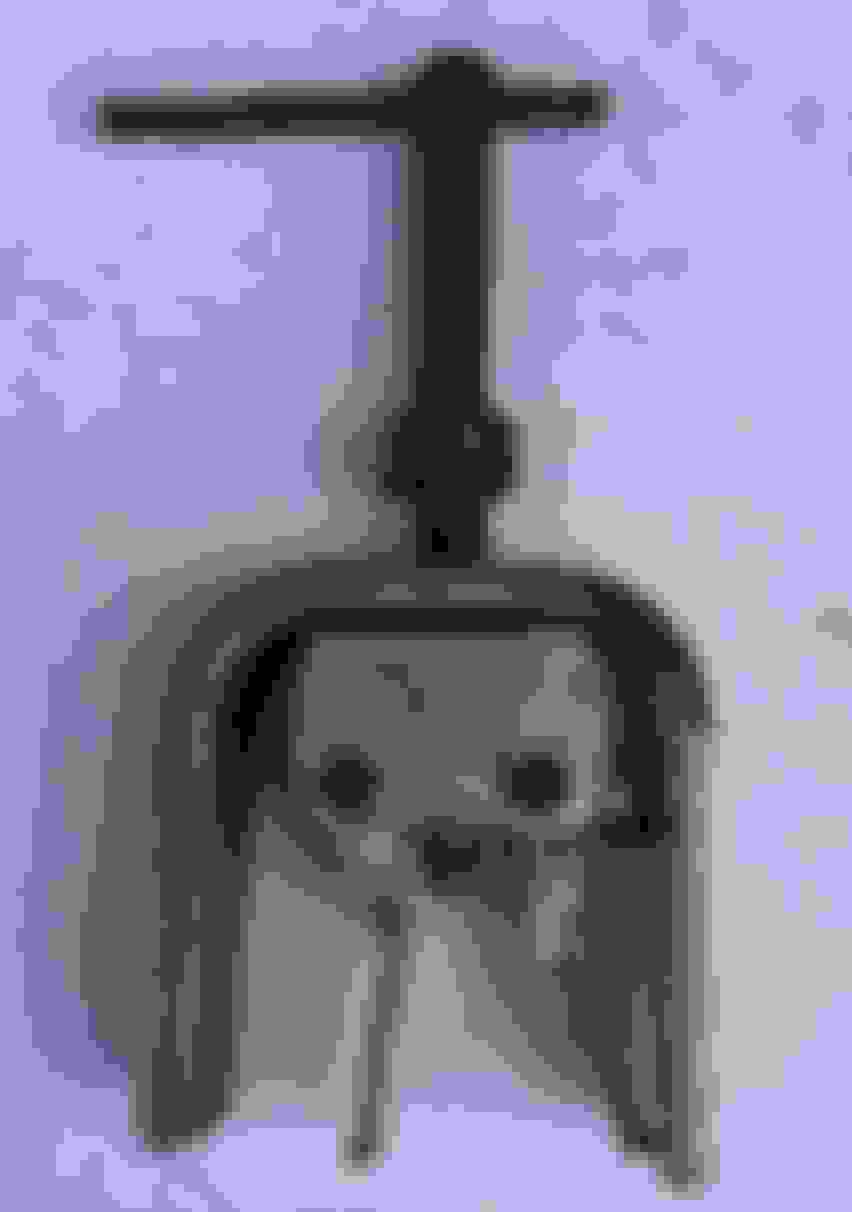
Another type that can be used fits on a slide hammer. The square jaw tips might need to be ground to smaller tapered points to fit the notches in the bore:
I met a new challenge with this issue. The new bearings are now in and I started to assemble the hub carrier back. The problem I met, was that when I put those two (one at each side) spacers back, the complete assebly was too wide to fit back. I checked, whether the outer races of the bearings was fully seated, yes they were. I used some pressure via these spacers using a bolt and washers trying to squeeze it smaller, but didn't succeed even the pressure was enough to make the bearing really tight. I took the extra grease out, didn't succeed. I tried the hollow axle to the available space and it was a perfect match, so the spacers should be able to get deep enough to be about the same level than the axle. Now when putting the axle even at the other end, there is abt. 4mm gap (a bit less than one spacer, see the photo).
Now I started to wonder, whether I got right bearings: I removed one outer race of the new bearings and measured both inner and outer races and compared to the old ones: do difference. To measure if the there is a difference how deep the new and the old outer races could be seated, I seated old outer race back, which I did cut to be used as a tool to hit the new ones in and thus easy to put in and take out: no difference.
I'm a bit confused, especially as I expected this to be one of the easiest parts of the whole job of renewing wheel bearings and shocks. Could someone help, please.
I tried to press them in even with the power of a bolt, nut and washers. I could not push them in enough. During that trial the bearing got very sticky, so I assumed all the pressure went to the bearings. Did I do something wrong?
By the way, in your picture there is only one spacer on the other side. I had two, one each side.
Parts 15, 16, 17 and 18 are in pairs, one on each side of the hub carrier, but only one set is shown in the diagram, so your parts are correct. One other possibility that comes to mind is could it be that you have switched parts 16 and 17 on one end?
Your bearing seal looks perfectly flush, so it appears that at least on that end the bearing is properly seated. Does the seal on the other end look flush like that?
Thanks again for the reply. I'm quite positive that I have not mixed items 17 and 16, as the 16 is clearly a spacer and 17 a washer (only one on the other side). I think I have found one affecting item, which is visible in the picture:
On the left side is the old bearing (made by Timken) and on the right is the new one. In the new one the rubber cover goes more at the center of the bearing, which prevents the spacer to go deeper, as it did in the old bearing. This gives totally abt 2 mm more space. I'll try it today. Hopefully it will fit now with new Timken made bearings.
Succeeded. Anyhow I needed to heat the arm to make the gap the last mm wider. But as stated, now the hub carrier is on it’s place. Thanks all for the help.
Now I did the other side. No problems at all. It seems that the assembly was just very tight on the other side.
Originally Posted by nakuttaja
Succeeded. Anyhow I needed to heat the arm to make the gap the last mm wider. But as stated, now the hub carrier is on it�s place. Thanks all for the help.

 05-17-2020 | 08:59 AM