When you click on links to various merchants on this site and make a purchase, this can result in this site earning a commission. Affiliate programs and affiliations include, but are not limited to, the eBay Partner Network.
I have managed to successfully remove the central h
eating vent in the dash. There is however a wire with a plug on it coming from the rear of the vent.
Does anyone know What this wire is for and secondly how do I actually unplug the existing wire to allow me to refits the replacement vent.. The wire appears to disappear behind the passenger airbag fascia. Do I need to remove this to unplug the wire, if so how......
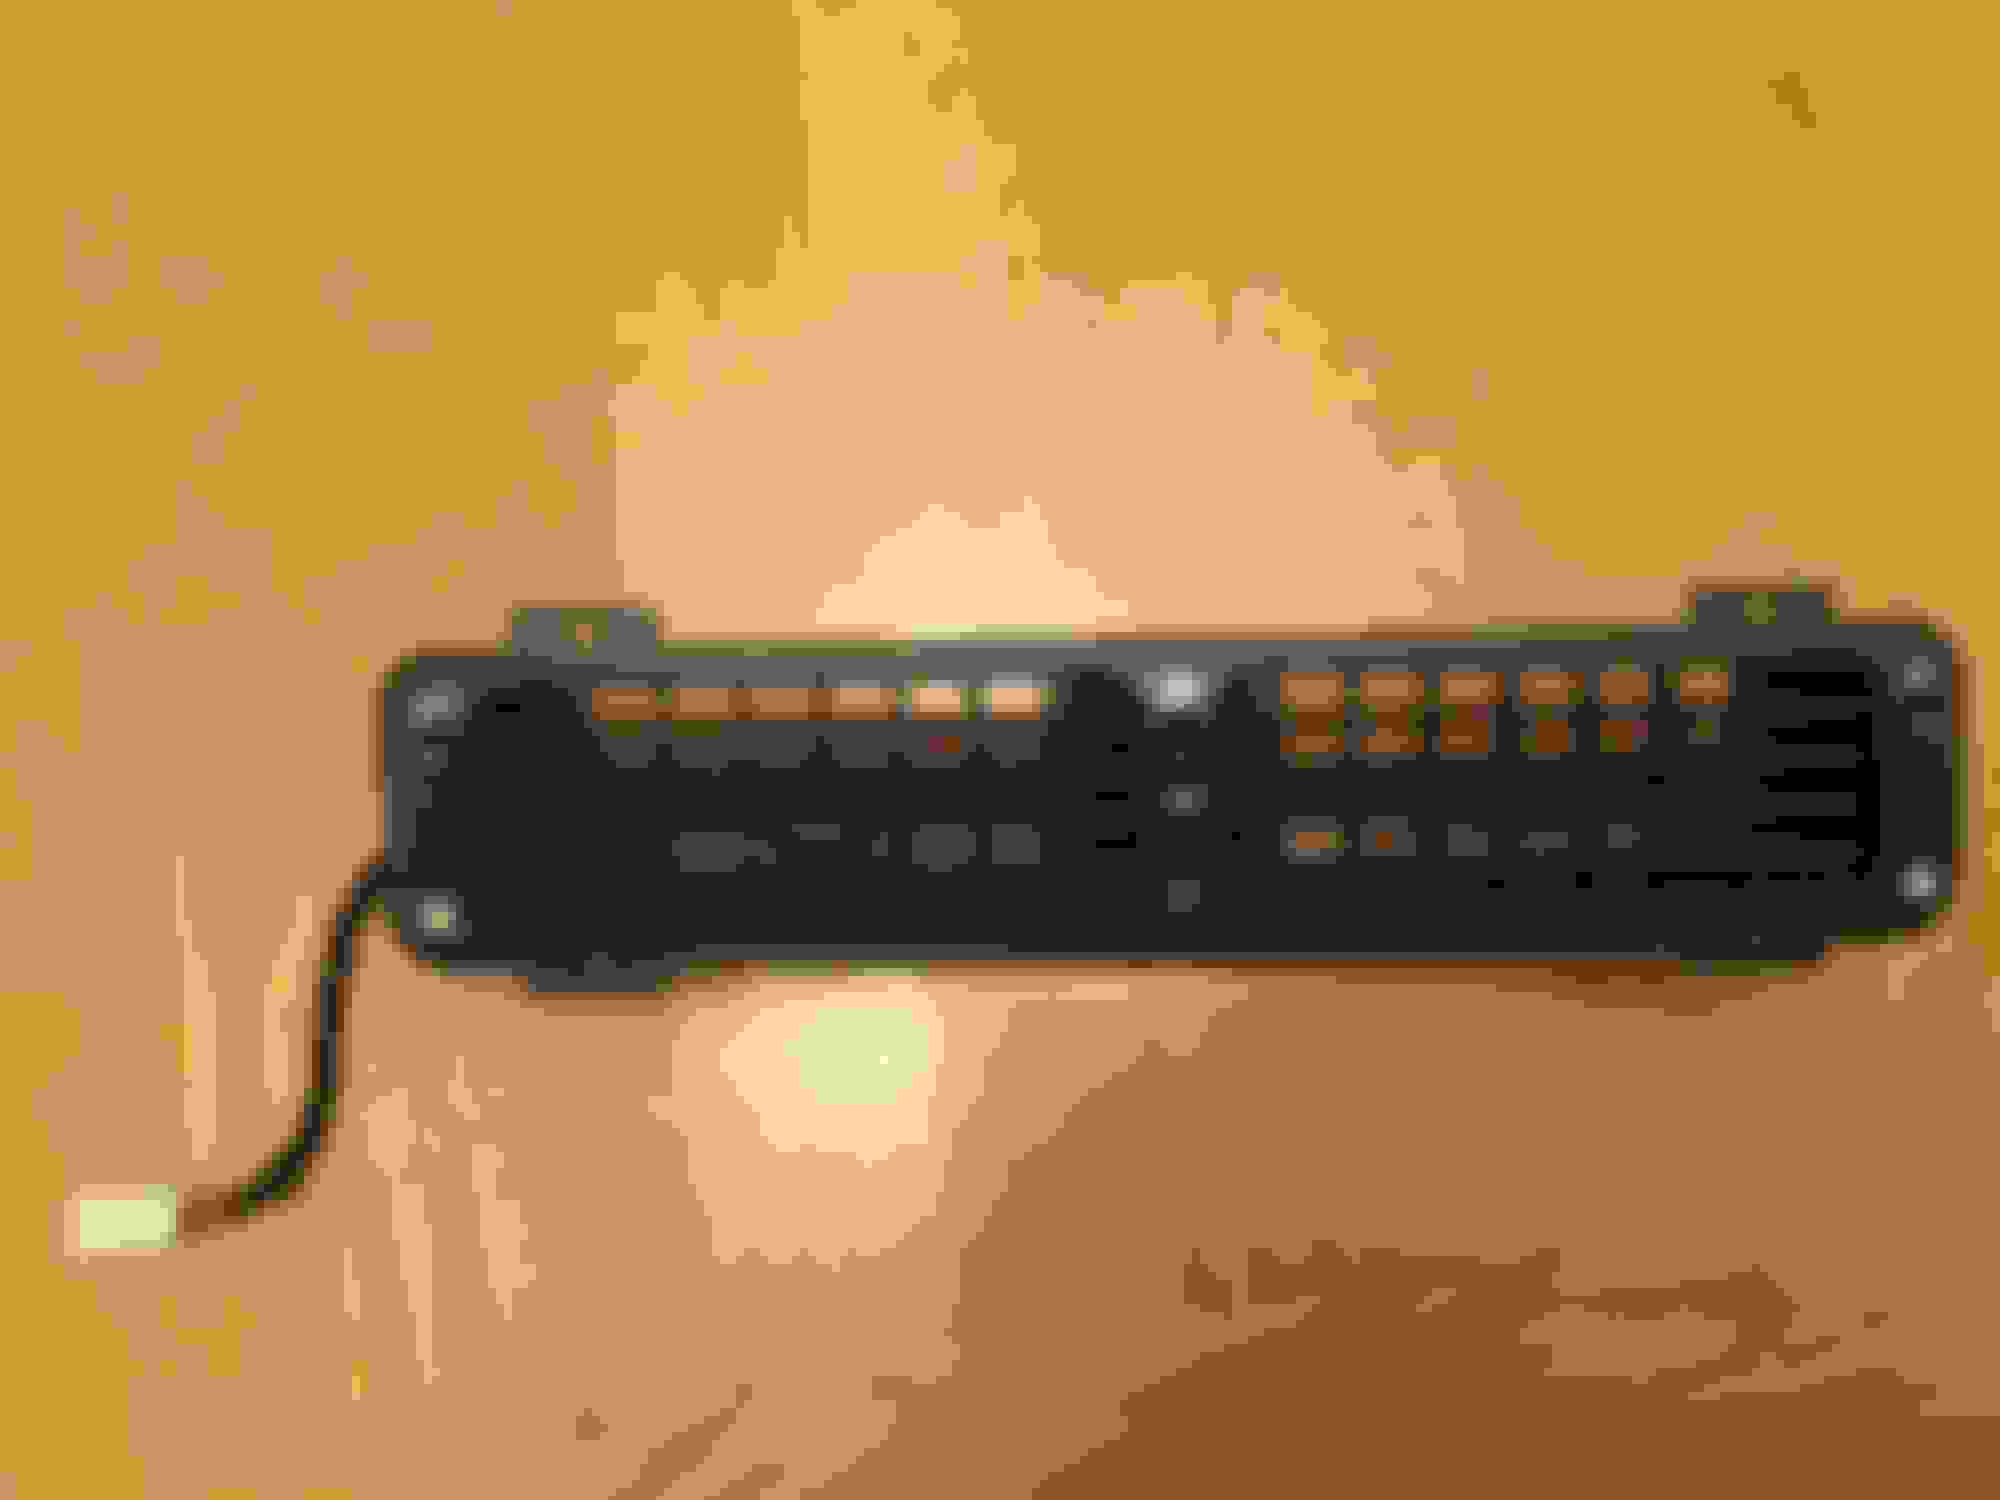
The wire and plug is on the left as in the picture
From my understanding the wood trim is permanently attached to the plastic vents... and only the springs are what hold the whole vent assembly in place.
That plug is to control the hot/cold adjuster in the middle of the vents. I usually take that out away from the vent assembly
Yes, the plug somehow actuates hotter/colder temps for the center vent. It plugs in off to the right, down beside the console.
Repairing my vent is one of my projects too. Mine suffers from the two main problems these vents have:
1) Lazy/broken horizontal vanes that no longer move in unison.
2) Broken clips that hold the vent in the dash.
The first seems to a very common design fault, and the second seems to be a function of age as the ABS holding the clips breaks, sometimes spontaneously or when the vent is pulled out.
I have some donor vents that have good vanes, and some with most of the clips intact, so I'm going to try to frankenstein them together into one good unit and see if I can reinforce the clips somehow.
New vents are $200+ the last time I looked... which is nuts. And their plastic is probably aged and brittle now too being likely NOS.
I have a 96 XJR with the same "lazy vents" problem. I purchased a used vent assembly (new ones of almost $400), but I need some guidance in how to remove the old one and install this used one. Jagbits advises that they are easy to do, but I'd like to know if any special tools are required (I think one is referenced in the Jaguar service manual). It appears that the wooden facia must be removed first. I understand it's held in place by four clips, but I haven't found any photos of this clips or the back side of the facia plate.
Wood fascia comes out with it...all as one assembly. There is a special tool. I think Motorcarman has posted a picture, as well as perhaps instructions on how to make one (a tool) that will fit the purpose.
Search will reveal it...but I can't think of any key terms other than searching the X300 forum for posts by Motorcarman containing "Center" or "vent" or "Center Vent" if you can figure out how to make it an "AND" case
Al , not having removed this item to see it I have had success in other areas with broken items with JB Weld like for the broken ears . Good professional material that can be sanded and drilled to shape . Might reinforce the ears with same metal backing like a beer can . Full 24 or 48 hour cure on the metal bond otherwise the metal can be used as a mold and peeled off early in the cure . Important in that it comes in 2 curing times depending on the repair layup
The vent assembly is held with spring clips, it should just pull out. The wood fascia is attached to a plastic backing piece, and the plastic has 4 pins that go through the vent assembly and have the "finger trap" style push clips that hold it to the vent assembly.
To remove the vents I bought a set of nylon trim pry bars from Harbor Freight. They work great if you gently pry from either side of the vents, way better than screwdrivers since they are a lot wider and a lot less chance of cracking a part.
I usually take that out away from the vent assembly
How do you disconnect the wires from the vent assembly? I had a quick look, but given the fragile plastics, didn't want to use excessive force. If that is somehow difficult, how do you access the other end of the loom to disconnect it?
I did this replacement some time ago, Only to have my good replacement go the same way and develop those lazy vents. When I get around to it I'll try and repair the original I pulled out and swap it back in.
That wire as mentioned above disappears behind the passenger airbag. I couldn't find exatly where it plugs in myself and elected to simply cut the wire and do some soldering to attach the replacement vents.
As for the wood veneer, Once the vents are out I've read others have had success carefully prising off the spring clips that hold it to the vents. I had no success with this at all and managed to snap them all off. A couple of drops of contact adhesive saved the day and I'm the only one who will ever know that at a glance they are not held in place properly.
so I have the problem of floppy vents as many do.
I got some 3d printed pieces to clip to the back of the vents and repair it however I can't for the life of me get them in.
I managed to get them behind the vanes however cant get them to clip on. maybe the print is not quite right but I can't seem to pull them with enough force to clip them on.
I want top be able to remove the vent assembly from the car so I can take it to the bench where I can work on it better however I can't see how to remove the switch from the middle of the assembly.
how do I remove it from the assembly?
if I can't remove it from the assembly where exactly does it run?
do I need to remove the glovebox to get to the other end and unplug it?
or do I need to remove the skislope and radio assembly to get it?
i saw in a thread somewhere someone saying they replaced their unit in 2 minutes. that makes it seem really easy to get it unplugged.
I had the same issue. I made the clips and was able to get them in, but you have to take the back of the vent very carefully with a Dremel, put in the clips, which is a pain in the A&&, and then either duct tape, plastic weld, or glue the backs back on. I did this to my old red when I had it and just performed the surgery on Old Blue three weeks back. There may be another way but that is the only way I could get it to work

 01-30-2015, 12:06 PM