
Remove and replace intake manifold studs when replacing gasket?
#1
 03-22-2017, 02:21 PM

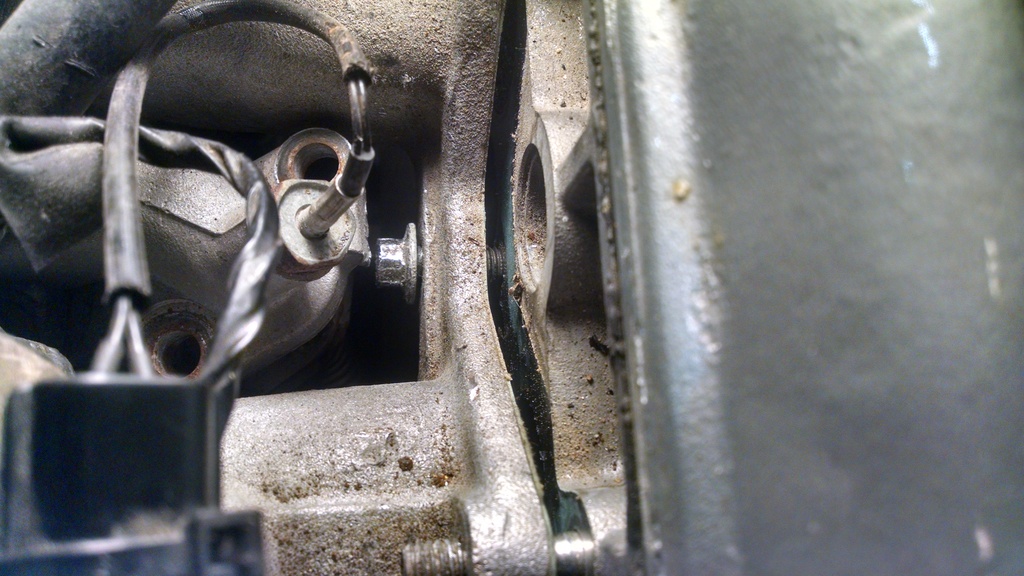
I'll be pulling my intake in a week or two, and wondered if it is recommended (or not) to replace the six studs (item 4 in diagram) when doing so?
I've got two new spares just in case I damage one or two, but didn't know if they are supposed to be replaced over time or if once used. So I thought I'd proactively check so I could get them ordered if necessary.
Oh, if they do need to come out, what's the best way to get one out successfully?
.
I've got two new spares just in case I damage one or two, but didn't know if they are supposed to be replaced over time or if once used. So I thought I'd proactively check so I could get them ordered if necessary.
Oh, if they do need to come out, what's the best way to get one out successfully?
.
#2
03-22-2017, 08:09 PM
Veteran Member
Bless your heart, Al. I just completed my second water-rail gasket renewal and to me, it is the equivalent of JoycesJag's view of the rear door lock actuator on the S-Type.....a total bitter ex-wife of a job! And you have the supercharger gubbings in the way, as well!!!
I didn't replace the studs in either car, just remove and replace the nuts. Neither has caused problems since, but by way of full disclosure, I only finished the 95 on Monday, so have only put a couple hundred miles on the repair thus far. On the 95, I DID add a stud, so-to-speak: It is M8 cap screws across the bottom of the intake, 7 total. The middle one is virtually spanner-proof. You can get an open-end on it, with a little room for movement.
If you've removed all the other fasteners, and loosened that one, you can slip a box-end past the EGR flange and onto it, AFTER removing the two nuts from the EGR fitting and dropping it down. In my case, that ONE BOLT was so tight the open-end just slipped. I finally managed to finagle the box-end past the EGR and got it broken loose with a few hammer-hits.
However, after a few turns, it started to get ever tighter....eventually resulting in the (box end)wrench slipping round the flats. Fortunately, it was now loose enough that I could slip a hacksaw blade down between the bolt head and the manifold flange.
After removing the head from the bolt and the manifold from the head, I locked a couple of M8 nuts together on it and attempted to remove it with good access for a socket/ratchet assy. A few more turns and it got progressively tighter so I became concerned it would snap off flush with the head or possibly even break the head.
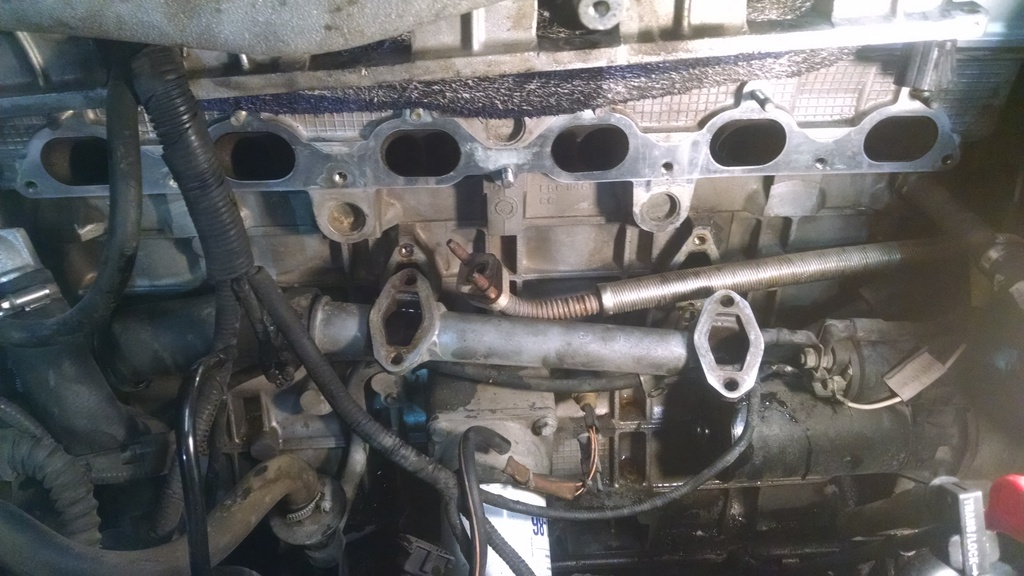
So I ceased, measured the protruding bit, measured one of the other seven bolts and determined it was in fine position to serve as a stud with adequate thread-engagement in the head and enough clearance at the EGR. I just used a nut on re-assembly in that position.
I didn't replace the studs in either car, just remove and replace the nuts. Neither has caused problems since, but by way of full disclosure, I only finished the 95 on Monday, so have only put a couple hundred miles on the repair thus far. On the 95, I DID add a stud, so-to-speak: It is M8 cap screws across the bottom of the intake, 7 total. The middle one is virtually spanner-proof. You can get an open-end on it, with a little room for movement.
If you've removed all the other fasteners, and loosened that one, you can slip a box-end past the EGR flange and onto it, AFTER removing the two nuts from the EGR fitting and dropping it down. In my case, that ONE BOLT was so tight the open-end just slipped. I finally managed to finagle the box-end past the EGR and got it broken loose with a few hammer-hits.
However, after a few turns, it started to get ever tighter....eventually resulting in the (box end)wrench slipping round the flats. Fortunately, it was now loose enough that I could slip a hacksaw blade down between the bolt head and the manifold flange.

After removing the head from the bolt and the manifold from the head, I locked a couple of M8 nuts together on it and attempted to remove it with good access for a socket/ratchet assy. A few more turns and it got progressively tighter so I became concerned it would snap off flush with the head or possibly even break the head.

So I ceased, measured the protruding bit, measured one of the other seven bolts and determined it was in fine position to serve as a stud with adequate thread-engagement in the head and enough clearance at the EGR. I just used a nut on re-assembly in that position.
The following 2 users liked this post by aholbro1:
al_roethlisberger (03-22-2017),
Don B (03-25-2017)
#3
03-22-2017, 09:01 PM

Veteran Member
Join Date: Mar 2008
Location: Pacific Northwest USA
Posts: 24,932
Received 10,990 Likes
on
7,217 Posts
I never replaced 'em.
The wiring harness snaking thru the branches of the manifold can be a stinker to deal with, though. Just a heads up !
Cheers
DD
The following 2 users liked this post by Doug:
al_roethlisberger (03-22-2017),
Don B (03-25-2017)
#4
03-22-2017, 10:00 PM
#5
03-22-2017, 10:13 PM
Veteran Member
Join Date: Mar 2008
Location: Pacific Northwest USA
Posts: 24,932
Received 10,990 Likes
on
7,217 Posts
The following 2 users liked this post by Doug:
al_roethlisberger (03-22-2017),
Don B (03-25-2017)
#6
03-22-2017, 11:43 PM
Do you recommend any type of gasket sealant on the intake gasket?
.
#7
03-23-2017, 05:20 AM
Veteran Member
Join Date: Mar 2008
Location: Pacific Northwest USA
Posts: 24,932
Received 10,990 Likes
on
7,217 Posts
The following 2 users liked this post by Doug:
al_roethlisberger (03-23-2017),
Don B (03-25-2017)
Trending Topics
#8
03-23-2017, 07:44 AM
Veteran Member
I didn't use sealant on either of my recent ones. You can get a socket on most of the lower cap-screws, but only with wobble-extensions and/or universal joints - all of which distort the torque as-measured by the torque-wrench click.
I was somewhat surprised to find no gasket between throttle-body and intake. After thinking on it awhile, I recalled I'd had that TB off once before for cleaning so it shouldn't have surprised me. Nonetheless, I fabricated a gasket upon re-assembly. When I renewed the water-rail gaskets on the 96, I didn't bother removing TB before removing the intake, so don't know if that is a trend, or not.
I was somewhat surprised to find no gasket between throttle-body and intake. After thinking on it awhile, I recalled I'd had that TB off once before for cleaning so it shouldn't have surprised me. Nonetheless, I fabricated a gasket upon re-assembly. When I renewed the water-rail gaskets on the 96, I didn't bother removing TB before removing the intake, so don't know if that is a trend, or not.
The following users liked this post:
Don B (03-25-2017)
#9
03-23-2017, 08:00 AM
Yeah, I was doing some research on the TB, whether it had a gasket or not, and it is surprising that seems like it never did on the X300 and none is shown in the parts diagram. According to the thread below, it just fits with no gasket and some apply a non-hardening sealant, but that's it:
https://www.jaguarforums.com/forum/x...ket-not-44083/
BTW, this is what I'm up to:
https://www.jaguarforums.com/forum/x...e-body-141262/
.
https://www.jaguarforums.com/forum/x...ket-not-44083/
BTW, this is what I'm up to:
https://www.jaguarforums.com/forum/x...e-body-141262/
.
#10
03-25-2017, 08:26 AM

Veteran Member
I have a XJS with a similar AJ16 naturally aspirated engine. There is no gasket, but I applied some Hylosil AF on both faces, and put them together.
Mating two metal surfaces together, without some kind of gasket really goes against everything I know, which admittedly isn't much. Especially when the connection needs to be "air tight".
I attempted to install EAC9822 which does show up in JDHT as a gasket suitable for the XJS, but it does not fit properly and should not be used.
The following 2 users liked this post by Vee:
al_roethlisberger (03-25-2017),
Don B (03-25-2017)
#11
03-25-2017, 10:25 PM


Join Date: Feb 2014
Location: Crossroads of America
Posts: 19,689
Received 13,509 Likes
on
6,644 Posts
Hi Al,
It is factory-correct to use no sealant on the throttle body, which is a good reason to be very careful when cleaning the metal mating surfaces because scratches may cause problems. It's also correct to use no sealant on the intake manifold gasket, but that assumes you follow the manual and install a new gasket. If you can't bring yourself to not use a sealant, be absolutely certain the product you use is oxygen-sensor safe since not all sealants are.
Note also that the torque specification for the intake manifold screws and nuts is a surprisingly low 16 ft. lbs. (21.5 Nm) to 21 ft. lbs. (28.5 Nm). I've found that these fasteners sometimes loosen over time as the gasket compresses, so I always aim for the higher end of this range.
Since the torque is so low, using a 1/4 inch ratchet, long extension and universal joint can help access some of those hard-to-reach fasteners, and using the same long 1/4 inch extension with a 3/8 inch to 1/4 inch adapter can also allow you to use your torque wrench. As aholbro1 mentioned, some force is lost through torsion of the extension, and universal joints add resistance that can lead to false torque readings, leaving the fastener too loose, so you have to take that into account.
Cheers,
Don
Last edited by Don B; 03-25-2017 at 11:42 PM.
The following users liked this post:
al_roethlisberger (03-25-2017)