1999 XJR Transmission shifter
#1
 09-21-2014, 06:28 AM


Join Date: Sep 2014
Location: California
Posts: 10
Likes: 0
Received 0 Likes
on
0 Posts
Yesterday. I had to have my XJR flatbedded to my house - when I'd gone to leave a store, it wouldn't engage gears properly - R didn't reverse, It would try to drive forward in Neutral, and on some starts, it bucked and the engine would falter when in P (suggesting it was in gear).
I do not yet have the service manuals. These are available on CD-ROM from JDHT still (I still have one from an XJ40 I used to own)?
It seems shifter related. Transmission hasn't been lagging or misbehaving, was silk on the drive up to the store where the shifter went nuts.
I've read a few threads here and seen similar symptoms, that seem to point to the shift linkage being out of adjustment or the electronic control box adjacent to the shifter lever not making proper connections. I've attempted to re-seat the electrical connections on that box, but it looks as if I need to remove the entire centre console to get sufficient access to the box.
I've yet to try a battery reset (pull negative lead from battery, contact + terminal with it for 10-20 seconds). Before doing this, I'd like to know what else resets with this - the alarm fob pairing? ECU trip data? Stereo (does it have a security code, if so, I don't know what it is). I did pull the Transmission ECU fuse at position 1 in the engine bay fuse box (forward left side of the engine bay), but that had no effect.
Back at my house, I jacked the vehicle (block under the crossmember behind the oil pan) and rested it at the forward jack points on a pair of 6 ton jack stands (none of those tinfoil stands for me), and got under the vehicle to have a look. The transmission, tunnel, driveshaft is all spotless. not even road grime on it. I see the shift lever enter the tunnel from behind the transmission, and come up to the selector on the side. Had my son hold a cellphone camera and video the linkage as I shifted through the gears (ignition to run, engine not started). Going from P->R involves a long actuation, then R->N->D are successive shorter motions, and entering the J gate for 4->3->2 doesn't move it at all (which is expected). Nothing looks loose, though there's a small tear in the accordion bootie on the linkage.
I've removed the console trim (and in the AM, will have removed the console housing itself) so that I can access the control box to the side of the shifter lever and have a look inside at the contacts (per
https://www.jaguarforums.com/forum/x...problem-78781/). The shift positions each light up when the shifter is at their respective location with the exception of 4, which only lights up if the lever is ever so slightly forward of the bottom of the J track.
If this is likely an adjustment issue on the cable, what is the adjustment procedure - given that the transmission seems to be in drive when in park, repeatedly hitting the starter to check if it is adjusted seems prone to damage something. Can I probe a connection (say by pushing a pin into one of the connector pin sockets and measuring for continuity, or voltage) to verify what gear the box is claiming I'm in (or is it sufficient that the correct light lights up on the J-gate?)
I'd like to get this sorted so that I can drive it again come Monday.
Oh, and what's the trick to removing the Mercedes dipstick cap? Am I not supposed to be able to check the transmission fluid level or condition? I went to check yesterday, and made the discovery that I can't pop that out. I assume there's some tool with a hook that is supposed to come up from below the cap alongside the tube and release the clip. No, I don't really expect fluid level would cause the transmission to act like it's in drive when the gearshift is in park, but it was something to check.
Thanks for any insights.
#2
09-21-2014, 07:31 AM

Veteran Member
#3
09-21-2014, 01:15 PM
Join Date: Sep 2014
Location: California
Posts: 10
Likes: 0
Received 0 Likes
on
0 Posts
I still have several specific questions before I proceed:
* what all will be reset with the battery disconnect and shorting ground cable to positive to positive?
* does this model year have a stereo security code of any sort?
* will the alarm fob need to be re-paired?
* what is the procedure for checking the adjustment of the shifter cable? Tweak, tighten, start car and damage transmission, try again?
Thanks.
#4
09-21-2014, 10:30 PM

Veteran Member
Hi
See this other thread on the shifter:
https://www.jaguarforums.com/forum/x...p-soon-126328/
Jim Lombardi
See this other thread on the shifter:
https://www.jaguarforums.com/forum/x...p-soon-126328/
Jim Lombardi
#5
09-22-2014, 02:49 AM
Join Date: Sep 2014
Location: California
Posts: 10
Likes: 0
Received 0 Likes
on
0 Posts
I don't have a mechanical problem moving the shifter through it's range.
I have the rear fittings from the centre console removed, but the console seems to be anchored above the stereo and controls.
Jaguar Workshop Manuals > XJR (X308) V8-4.0L SC (AJ27) (2000) > Body and Frame > Interior Moulding / Trim > Console > Component Information > Service and Repair > Center Console > Page 5973
I've clicked on a lot of "next page" and searched the site, but can't find the info on the removal of the centre A/C fascia.
#6
09-25-2014, 10:43 AM
Join Date: Sep 2014
Location: California
Posts: 10
Likes: 0
Received 0 Likes
on
0 Posts
The disc which I ordered from XK's Unlimited arrived in yesterday's post. Wow, that's some horrendous copy protection they have on it. Couldn't use it on my Mac, couldn't even use it from a windows VM on my Mac, and clearly can't copy the files to my tablet so they'll be easier to reference when in the auto.
Sadly, after getting it to a windows system, the disc seems to be an abbreviated form of the service manual - has owner handbooks, and information on the engine and transmission mechanicals, and management systems, but no information on interior trimwork? No parts breakdowns? The service documentation for my other Jaguars has always included the full spectrum of service data, why not the XJR?
I'd look to get the console the rest of the way out this weekend and examine the transmission switchbox, but I'm _still_ at a loss as to how to properly remove the wooden trimpiece (centre A/C vent) above the console, which seems to be restricting it from removal.
It seems curious that given the nature of this fault, I don't get a transmission/check engine light - shouldn't the OBDII fault with weird inputs from the shifter?
FTR, the ad network being used on this site appears to have been compromised - it is periodically popping up a page reload to some video converter site (which is assuredly malware). Only happens when I'm on this site reloading this thread, and not every time.
#7
09-25-2014, 11:01 AM
Join Date: Sep 2014
Location: California
Posts: 10
Likes: 0
Received 0 Likes
on
0 Posts
Can anyone confirm if the JTP1012 DVD (which claims to replace the JHM1190, which is what I ordered) actually covers interior trim, etc? The summaries I'm seeing don't lay out chapters, just the broad strokes, and from what I see, TSBs look like the only added bit - yet the disc costs nearly 4x as much...
Trending Topics
#8
09-29-2014, 09:59 PM
Join Date: Sep 2014
Location: California
Posts: 10
Likes: 0
Received 0 Likes
on
0 Posts
Let's see if a FOURTH attempt to post works. Apparently, I need to save my post in another app because this site will log me out while I'm editing, and when I post, it THROWS THE MESSAGE AWAY when it prompts me to log in again. Frightfully annoying.
I've removed the stereo and climate panels, and inserted an inspection camera up behind the dash. From what I can see, it sure seems as if there are threaded studs heading forward with nuts retaining them, in the vicinity of the upper "corners" above where the climate panel resides. Good thing I didn't plow forward and try to pry off the centre wood trim, because I'd have probably only succeeded in damaging it and still wouldn't have gotten the console out.
I'm at a loss as to how anyone should be expected to remove the nuts and EVER get them back in to re-install the centre console.
Surely those who have done this before could provide some guidance? I can't find any information on this site about console removal (rather, this part of it, the ski slope and stowage compartments were trivial enough).
If I'm posting in the wrong forum, I'd greatly appreciate a pointer to where I should post.
I'd better hurry up and click send.
#9
09-30-2014, 01:48 AM
Veteran Member
First, a tip about posting. Just before you hit submit, select all, copy. Then it is in your clipboard. There is really no need to save it anywhere. If the post fails, you can then just paste from the clipboard.
Second, JTIS and TSB's are available from links in the stickies. Sometime in the past I have posted a link to a pdf version of JTIS that is limited to the X308.
You will have to remove the wood panel around the center vent. There are two screw under the panel below the vent. These are referred to below from JTIS:
12. Slacken and remove the two centre console front securing
screws.
13. Ensuring that harness is clear, pull console rearwards to
withdraw front dowels from tunnel locations.
I am almost sure that there are threads with pictures of the floor console being removed.
It is just that they are in the context of other things. Try some of the stereo installation
articles.
Last edited by plums; 09-30-2014 at 01:50 AM.
#10
09-30-2014, 07:22 AM

Can anyone confirm if the JTP1012 DVD (which claims to replace the JHM1190, which is what I ordered) actually covers interior trim, etc? The summaries I'm seeing don't lay out chapters, just the broad strokes, and from what I see, TSBs look like the only added bit - yet the disc costs nearly 4x as much...
#11
09-30-2014, 08:22 AM
Join Date: Sep 2014
Location: California
Posts: 10
Likes: 0
Received 0 Likes
on
0 Posts
#12
09-30-2014, 08:34 AM
Join Date: Sep 2014
Location: California
Posts: 10
Likes: 0
Received 0 Likes
on
0 Posts
I tried downloading a large multipart reference (JTIS 21), but my browser reported the first part was malware and deleted it.
Somewhere (I think a parts vendor) I found some white-on-black linedrawing images which showed the two front panel screws looking much more like they were down near the stereo. In any event, I don't see any screwheads anywhere.
Why would someone need to remove the console surround to do stereo work? I extracted the stereo unit with just the ski slope out of the way.
The threaded studs I saw with the inspection camera are about the location of where the upper dowels are in the diagram I found online.
#14
09-30-2014, 10:44 AM
Join Date: Sep 2014
Location: California
Posts: 10
Likes: 0
Received 0 Likes
on
0 Posts
I'll go troll youtube tonight I guess. Thanks.
#16
09-30-2014, 06:50 PM
Veteran Member
Here are 3 PDF files I created covering the Floor Console removal & install":
Floor Console:
1999 Floor Console R&I.pdf
Instrument Cluster Panel (shown as Right Hand Drive model)
1999 XJ Instrument Cluster Finish Panel R&I.pdf
Instrument Panel Trim Panel (Glove Compartment)
1999 XJ instrument panel finish panel R&I.pdf
Jim Lombardi
Floor Console:
1999 Floor Console R&I.pdf
Instrument Cluster Panel (shown as Right Hand Drive model)
1999 XJ Instrument Cluster Finish Panel R&I.pdf
Instrument Panel Trim Panel (Glove Compartment)
1999 XJ instrument panel finish panel R&I.pdf
Jim Lombardi
Last edited by jimlombardi; 09-30-2014 at 06:53 PM.
#17
09-30-2014, 09:19 PM
Join Date: Sep 2014
Location: California
Posts: 10
Likes: 0
Received 0 Likes
on
0 Posts
Step 12 - I lack context on where this is, as there's no apparent top lip of the console trim (the leather goes up and over the climate control panel, and if I'm to believe the image here is the region between the AC vent in the top, and the AC control recess below the nuts, then those screws would appear to be BEHIND the upper part of the console - the backsides of which I can see with an inspection camera, but I can't see the front. The line drawing shows no apparent trim running along near those screws.
In the PDFs (thank you!) it's the external procedure referenced as 76.47.06 at step 11 which would appear to be the centre AC vent fascia, which is what I need info on removing.
Thank you for the assist - I feel as if I might be able to get this sorted this weekend.
What is the part number for this reference, and where would I purchase it?
#18
10-03-2014, 10:31 PM
Veteran Member
Here is a description of removing the center veneer panel (vents and clock area) from another thread here on this forum:
pull off the veneer panel with a flat blade after protecting the surrounding dash area. It is just held on by clips. This will reveal the plastic vent panel. You will need to also remove the instrument cluster veneer panel and one edge of the airbag panel.Just pull off.
Now remove the four screws from the vent panel and you can remove the whole vent panel (the vents and clock assembly).
other comments from other threads:
from my experience a very wide putty knife is also useful for removing these trip pieces. the wideness spreads the force and usually makes cracking the finish less of a concern.
Snaps in using spring clips at the corners, but BE CAREFUL. These clips are way too large and the force needed to unspring them often cracks the clearcoat at the thinnest areas. Use a plastic pry tool and gently work off each corner a little at a time.
Jim Lombardi
Last edited by jimlombardi; 10-03-2014 at 10:34 PM.
#19
10-04-2014, 07:40 AM
Veteran Member
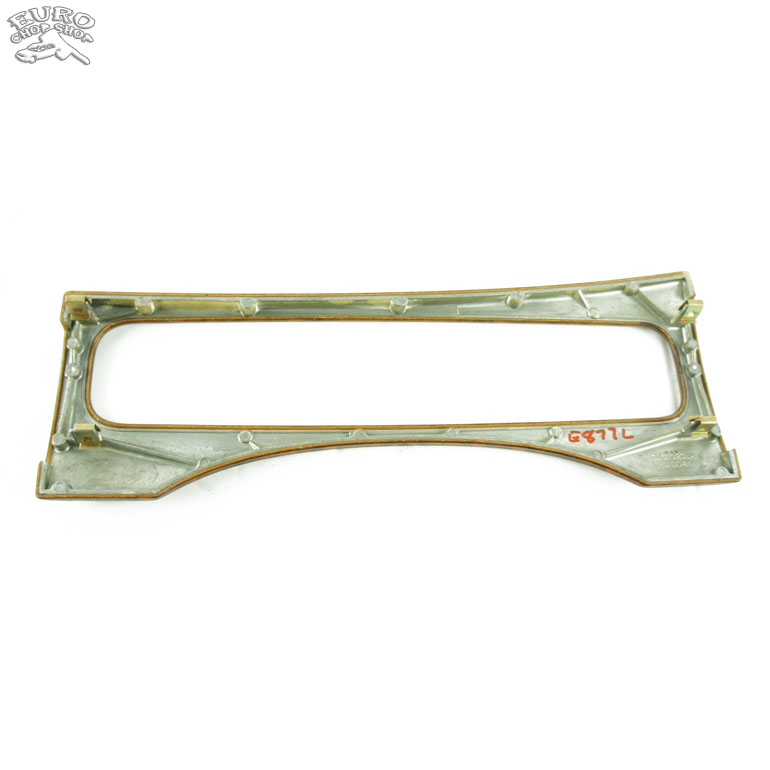
Part number (GNC6927XX - last 2 characters vary based on vin) for the centre AC vent fascia in external procedure referenced as 76.47.06 at step 11 is actually sold as a facia Veneer set:

Here are photos of a used centre AC vent Facia Veneer panel that is currently on Ebay:
Front

Back
Here is weblink to the Ebay listing:
Dash Vent Wood Trim Bezel Jaguar XJ8 1998 98 | eBay
Here is another Ebay list for all of the 98 03 jaguar XJ8 dash center wood trim panels - Note listing says condition - NEW:
98 03 Jaguar XJ8 Dash Center Wood Trim Panel Set | eBay

Jim Lombardi
Here are photos of a used centre AC vent Facia Veneer panel that is currently on Ebay:
Front
Back
Here is weblink to the Ebay listing:
Dash Vent Wood Trim Bezel Jaguar XJ8 1998 98 | eBay
Here is another Ebay list for all of the 98 03 jaguar XJ8 dash center wood trim panels - Note listing says condition - NEW:
98 03 Jaguar XJ8 Dash Center Wood Trim Panel Set | eBay
Jim Lombardi
Last edited by jimlombardi; 10-04-2014 at 03:48 PM.

Thread
Thread Starter
Forum
Replies
Last Post
Rlover
XJ XJ8 / XJR ( X308 )
10
03-30-2016 10:04 PM
neruda
S-Type / S type R Supercharged V8 ( X200 )
6
10-18-2015 01:19 PM
FS[Western US]: FREE- 99 XJR ECM and TCM
XJsc-guy
PRIVATE For Sale / Trade or Buy Classifieds
6
09-25-2015 11:09 AM
Currently Active Users Viewing This Thread: 1 (0 members and 1 guests)