
2001 XJR Build Thread
#1
 06-28-2020, 01:53 PM


I haven't seen much in the way of build threads here on these forums, but I usually make one for each car I build so here goes.
Purchased this 2001 Jaguar XJR in October or November with the intention of building it as a shop car. The shop ended up falling through, but I had already started stocking up parts so I decided to go for it. The car was overall very clean and in good shape, despite having over 180k miles. The car came with an obscene amount of service records dating back to when the car was brand new.
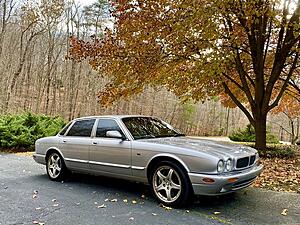
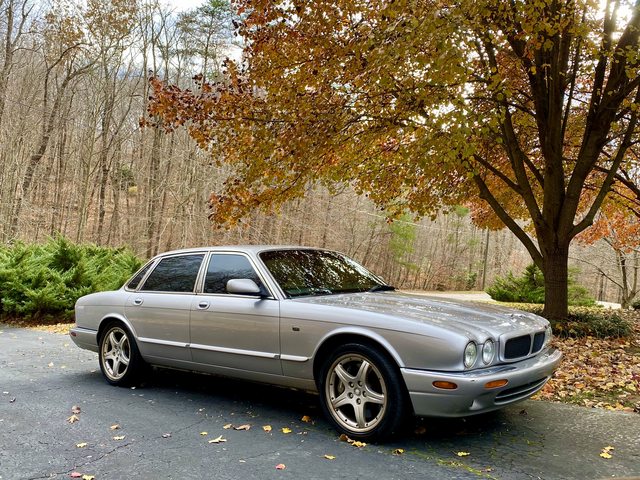
Post purchase car wash:
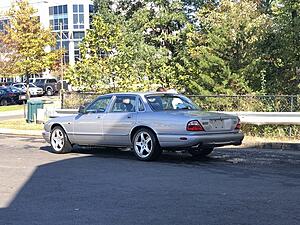
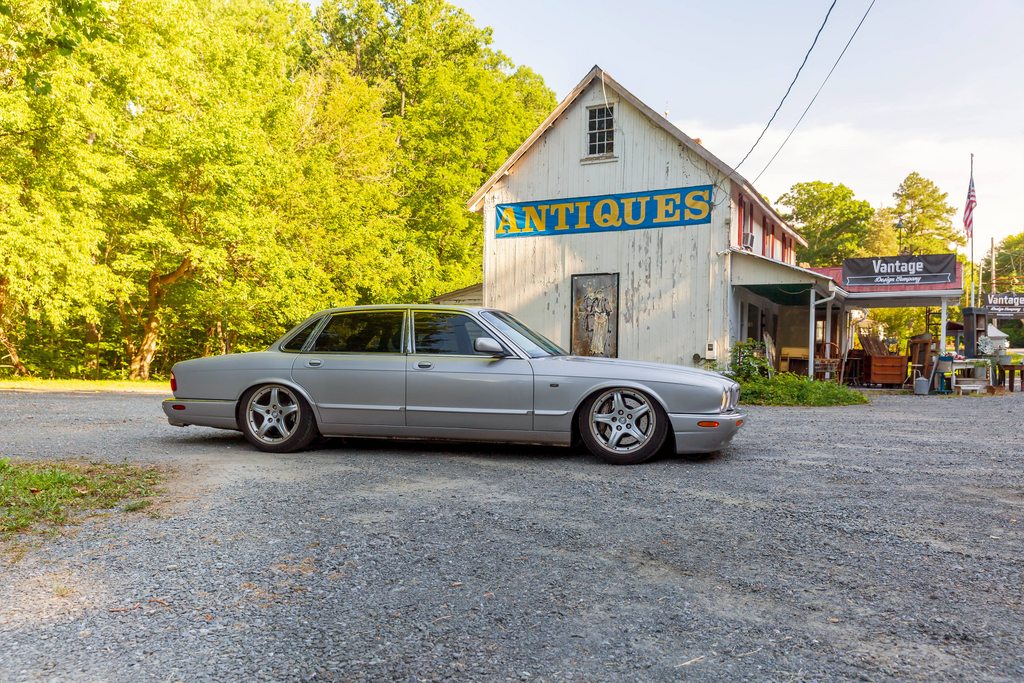
After cleanup and tint:
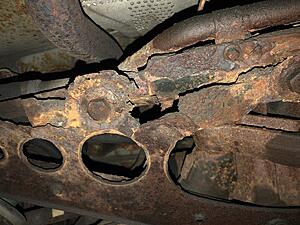
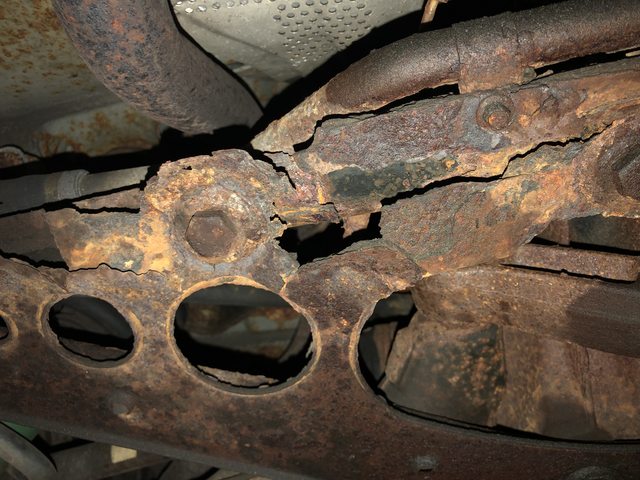
This is about the time the shop plan came off the table. So I just drove the car around for the next few months, while cleaning up some minor interior imperfections and fixing the cracked front grill. Throughout this time I had some wheel shake so I took the car to a friends shop for an alignment, he informed me the rear subframe was rusted to the point of the car being unsafe to drive. This is my fault for not inspecting the car better before I bought it, but its too late to throw in the towel now right?
Rusty Subframe:

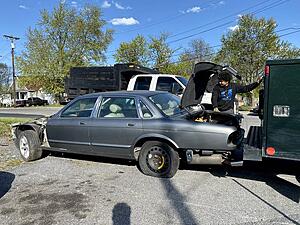
Randomly enough, I found a 2002 XJR on craigslist that had already had the front bodywork removed. I ended up getting the car for $400, and among other parts was able to use the complete (and spotless) rear end to replace my rusty mess.
The 2002 Parts Car:
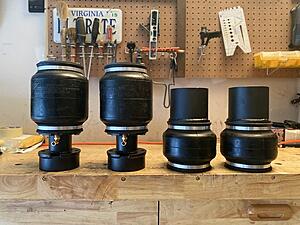
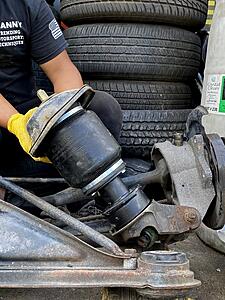
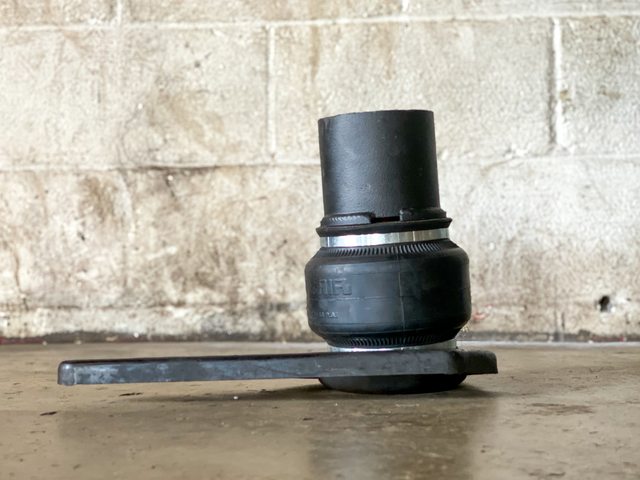
The plan was always to bag the car, so I had been collecting all of the necessary parts over those few months. I had an associate in California (Iceboxx Customs) make me some custom brackets to mount the bags.
Assembled Brackets and Bags:
Next up was to design and build the trunk setup with management, tank and compressors. The fuel tank being in the back of the trunk makes for a great place to mount everything. I measured out everything and cut a piece of MDF to mount flush against the tank, from there it was just about getting it laid out nicely and firmly mounted.
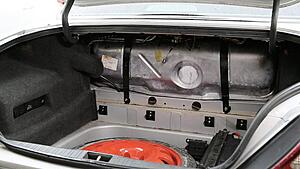
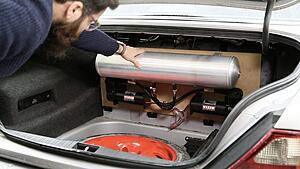
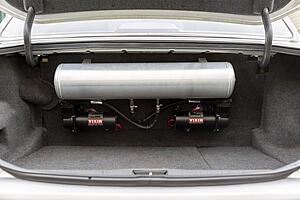
This car is set up really nice for an air ride setup, with the battery and fusebox being in the trunk already the wires between the management and battery don't have go far. With the trunk setup done, all that is really left is to run the air lines to each corner, then install the bag setups.
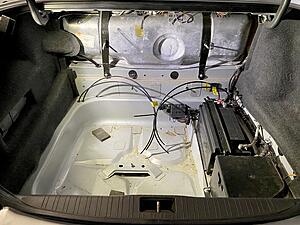
Air Lines run through grommeted holes in trunk floor:
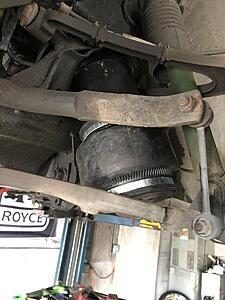
Rear end from the donor car is about ready for install. Unfortunately, the shocks from my car are seized, and the ones from the parts car are different. I ordered a set but they won't arrive until late this week. So this is pretty much a stopping point until they arrive.
Rough Mock Up Rear:
Rough Mock up Front:
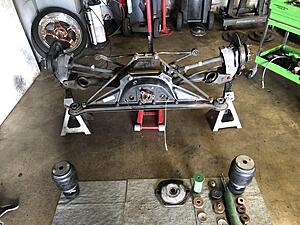
The new rear end sitting under my car:
Big ups to my guys at Trending Motorsports in Frederick, MD for making this all happen, and letting me keep all of my cars and parts cars there!
Purchased this 2001 Jaguar XJR in October or November with the intention of building it as a shop car. The shop ended up falling through, but I had already started stocking up parts so I decided to go for it. The car was overall very clean and in good shape, despite having over 180k miles. The car came with an obscene amount of service records dating back to when the car was brand new.
Post purchase car wash:

After cleanup and tint:
This is about the time the shop plan came off the table. So I just drove the car around for the next few months, while cleaning up some minor interior imperfections and fixing the cracked front grill. Throughout this time I had some wheel shake so I took the car to a friends shop for an alignment, he informed me the rear subframe was rusted to the point of the car being unsafe to drive. This is my fault for not inspecting the car better before I bought it, but its too late to throw in the towel now right?
Rusty Subframe:

Randomly enough, I found a 2002 XJR on craigslist that had already had the front bodywork removed. I ended up getting the car for $400, and among other parts was able to use the complete (and spotless) rear end to replace my rusty mess.
The 2002 Parts Car:

The plan was always to bag the car, so I had been collecting all of the necessary parts over those few months. I had an associate in California (Iceboxx Customs) make me some custom brackets to mount the bags.
Assembled Brackets and Bags:

Next up was to design and build the trunk setup with management, tank and compressors. The fuel tank being in the back of the trunk makes for a great place to mount everything. I measured out everything and cut a piece of MDF to mount flush against the tank, from there it was just about getting it laid out nicely and firmly mounted.


This car is set up really nice for an air ride setup, with the battery and fusebox being in the trunk already the wires between the management and battery don't have go far. With the trunk setup done, all that is really left is to run the air lines to each corner, then install the bag setups.
Air Lines run through grommeted holes in trunk floor:

Rear end from the donor car is about ready for install. Unfortunately, the shocks from my car are seized, and the ones from the parts car are different. I ordered a set but they won't arrive until late this week. So this is pretty much a stopping point until they arrive.
Rough Mock Up Rear:

Rough Mock up Front:

The new rear end sitting under my car:

Big ups to my guys at Trending Motorsports in Frederick, MD for making this all happen, and letting me keep all of my cars and parts cars there!
Last edited by ShootJoeC; 06-28-2020 at 06:06 PM.
The following 4 users liked this post by ShootJoeC:
#2
06-29-2020, 12:41 PM
Veteran Member

#4
07-09-2020, 10:46 PM

I love a good build thread myself.
Not a bagged low rider guy per se but always interested in everyone's own customs be they suspension, engine, body or interior. I also love bone stock survivors too.
I'm doing up a 98 XJR carnival red at the moment myself . Flawless body and undercarriage from NC. Just doing engine upgrades now. Getting caught up in thoughts of supercharger / crank pulley / intercooler, upgrade mods .
Don't worry I'll start my own thread if I feel the need to share more. Lol
As for the airbag work and custom plumbing. Right on ! Anything that keeps these great cars alive and on the road I support whether it be radical mechanical or artistic mods or super meticulous original restoration.
. I admire the neat and organized installation.
Well done!
#6
07-12-2020, 02:02 PM
Could I get some bag and system specs from you? I have been wanting to bag my 1999 XJR. I have never bagged a car and am unsure of what size pumps and tank I will need. What type of controller for the bags do you have? I would love to see more pics after you get your shocks.
Tim
Tim
The following users liked this post:
faisme111 (07-12-2020)
#7
07-12-2020, 02:32 PM
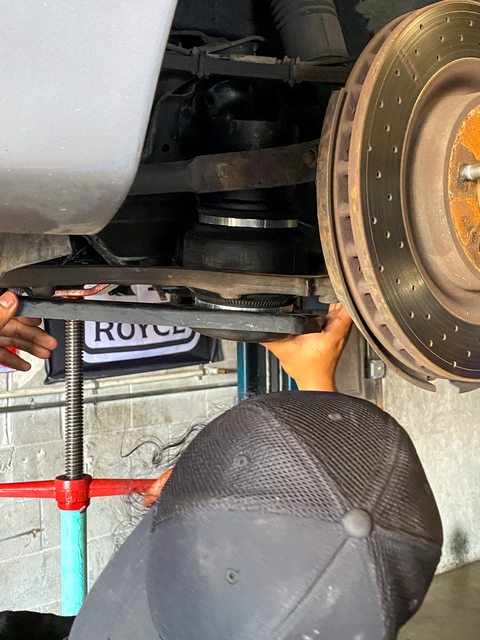
Ok guys! All four corners are installed and operational! I had quite the time finding shocks that would fit the rear after I swapped over from the 2002 Parts Car. I had to order three different sets to find one that would work, I will add the part numbers for those to the first post.
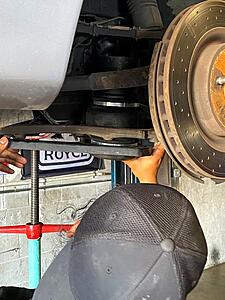
Front Assembly on the lower control arm:

Fitting the front assembly:
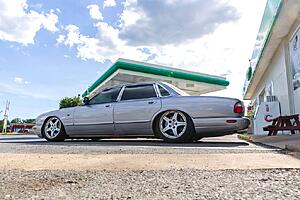
The Front not quite aired out:
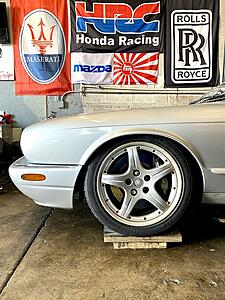
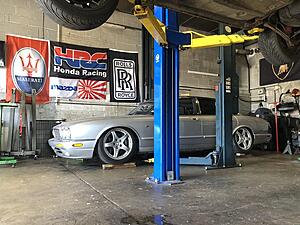
Lift lowered, bags aired out:
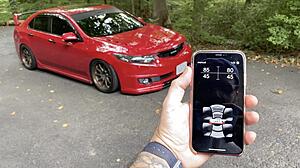
We will hopefully be finishing it up tomorrow. Still need to tweak a few things and set presets on the management.
A friend of mine stopped by yesterday with the same management I have (Airlift 3p) and we messed around a bit with the iPhone App controller. The system has a really nice controller that attaches to management via USB, but the app is a cool feature that until recently wasn't available from anyone.
Front Assembly on the lower control arm:
Fitting the front assembly:
The Front not quite aired out:

Lift lowered, bags aired out:

We will hopefully be finishing it up tomorrow. Still need to tweak a few things and set presets on the management.
A friend of mine stopped by yesterday with the same management I have (Airlift 3p) and we messed around a bit with the iPhone App controller. The system has a really nice controller that attaches to management via USB, but the app is a cool feature that until recently wasn't available from anyone.

Last edited by ShootJoeC; 07-12-2020 at 02:39 PM.
Trending Topics
#10
07-12-2020, 03:11 PM
Upgrading to 3H isnt hard at all, you just need to run a sensor to each corner. People claim to have trouble with 3H but almost every time its due to poor mounting of sensors. The cool thing about this management is you can purchase 3p and if you want to you can upgrade to 3H later. The harness for 3p includes the wiring to plug in the sensors.
The following users liked this post:
faisme111 (07-12-2020)
#12
07-12-2020, 04:17 PM
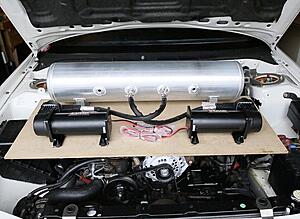
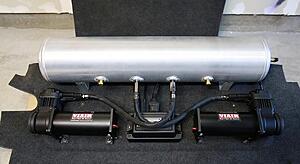
Airlift 3p Managment
Airlift 4 Gallon Tank
Two Viair Compressors
The compressors fill the tank, then there is a single output from the tank, into the managment. The managment has four outputs, one for each corner of car.
My last system I used just one compressor, but the car was much smaller, meaning it required less pressure to fill the bags, so it was quick enough. With the jaguar being so heavy I wanted to be able to fill the air tank very quickly.
The tank holds about 160 pounds of air, which is quickly depleted when going from 0psi to ~100psi per corner.
The following users liked this post:
faisme111 (07-22-2020)
#13
07-15-2020, 12:47 AM
Spent some time with the car today and got it working nicely. The majority of the issues were related to me not doing the best job with the fittings on the bags. They really have to be sealed with a good thread sealant or they will leak. They all seem great until you need it to hold 100psi! Definitely will need an alignment before I drive anywhere.
Does anyone know why I am unable to edit the first post of this thread?
Here is a quick video sample, much more to come!
https://www.youtube.com/watch?v=qBhp...ature=youtu.be
Does anyone know why I am unable to edit the first post of this thread?

Here is a quick video sample, much more to come!
https://www.youtube.com/watch?v=qBhp...ature=youtu.be
The following users liked this post:
Z07Brandon (07-15-2020)
#15
07-15-2020, 12:20 PM
#18
07-19-2020, 01:30 AM
Did you go with B6's? B4's in the front?
I found these..
https://www.x2industries.com/product...r-plates-pair/
I found these..
https://www.x2industries.com/product...r-plates-pair/
#19
07-19-2020, 12:56 PM
The following users liked this post:
Z07Brandon (07-19-2020)