
C16 RKC's car ownership thread
#41
 03-15-2022, 11:16 AM

Aston gets technical
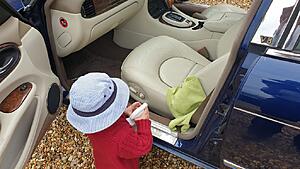
I suppose it was inevitable, but Aston loved to spend time on the cars. One Friday at the beginning of May we decided to investigate the non working heated seats on both Lindsey's Peugeot and my Audi.
I helped Aston get the seat out of the Peugeot.
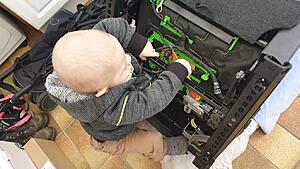
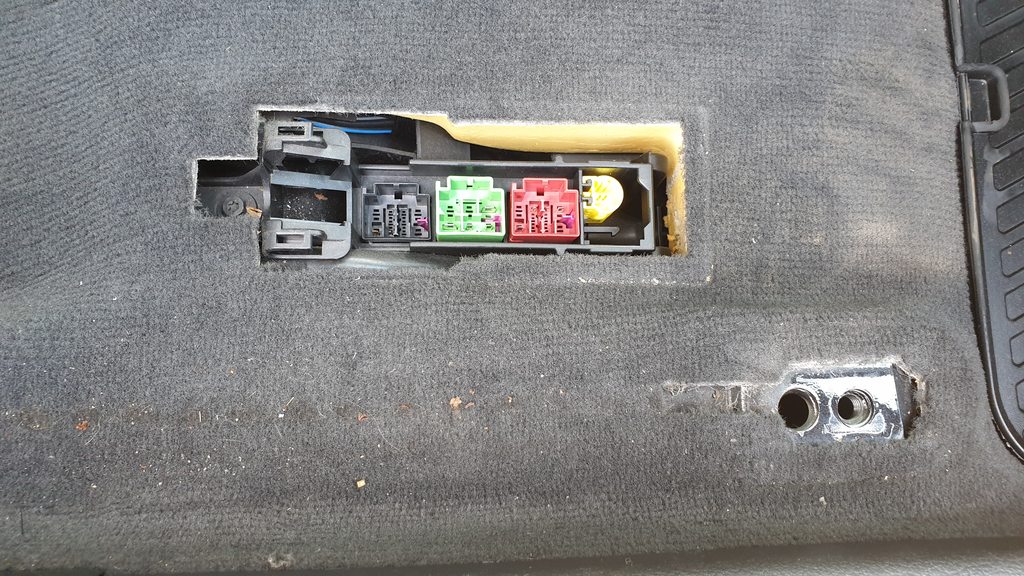
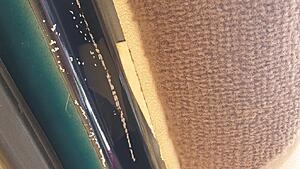
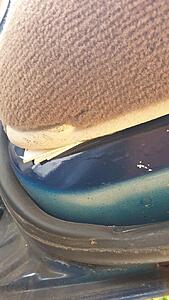
Aston narrowed the fault down to this burnt out connector. Putting a multimeter across the actual heating elements, they measured around 6 ohms, so they seemed OK - and most importantly not broken!

A bit of web research, and Aston found that this is a common problem on Peugeot models of this era. People seem to usually renew the wiring loom.

So it was straight back to work, because Aston had a better idea. We soldered new connectors (cut them from the new Ebay heated seat elements, that we now didn't need).


Did the same to the cables coming from the heating pad in the seat.

Then put the seat back in the car and tested. To our delight its lovely and toasty now! Works perfectly!
Only took a couple of hours...a perfect Friday afternoon job!
The heated drivers seat in the Audi was not working either, and Aston decided we should do that next. But I insisted we leave that until the next day. Aston's a bit of a workaholic... so this did not go down well!

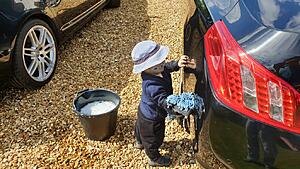
But the next day Aston was up early washing the cars, so I think he got over it...

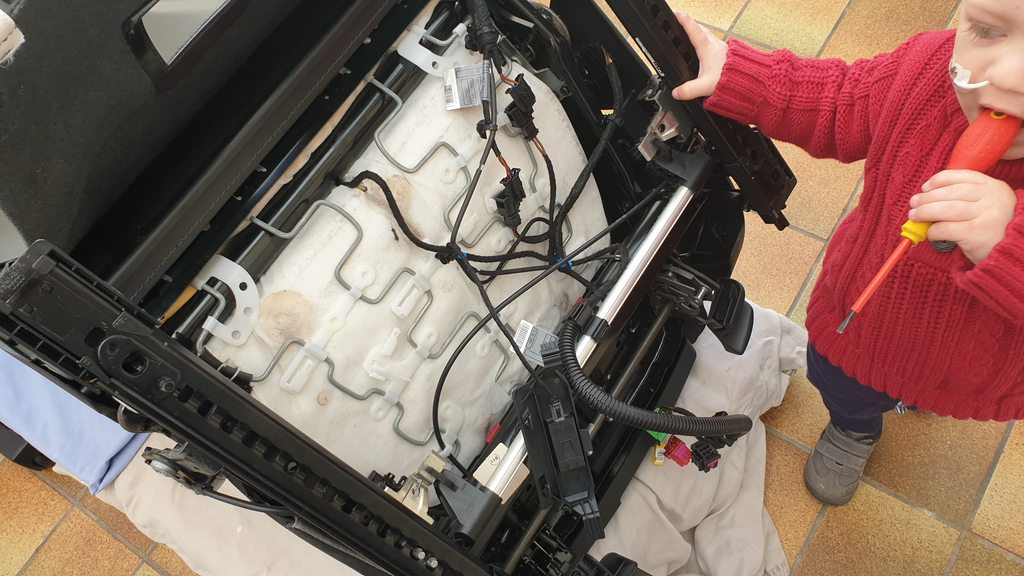
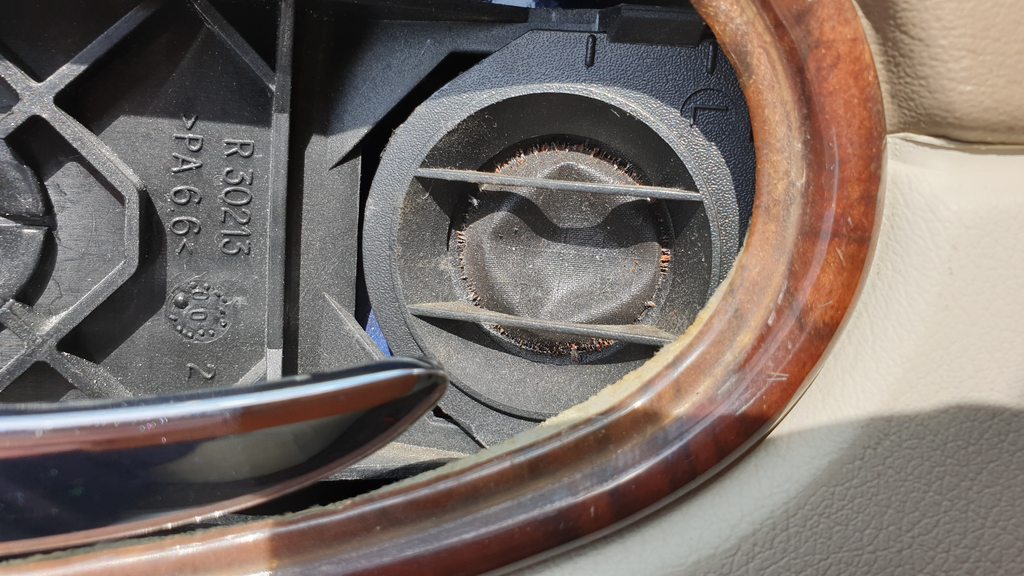
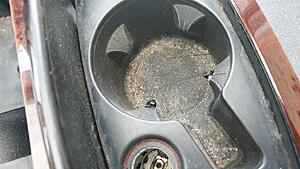
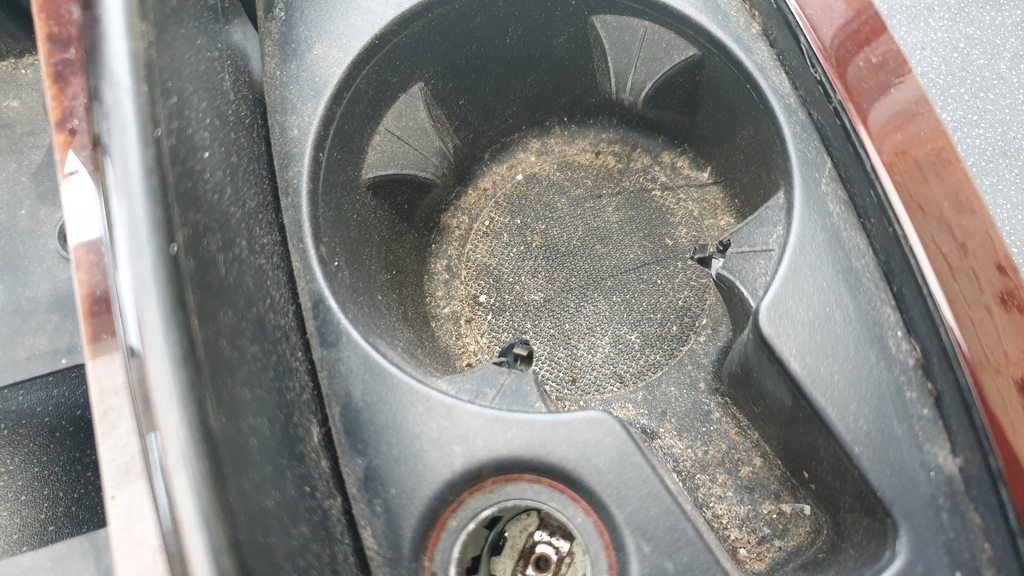
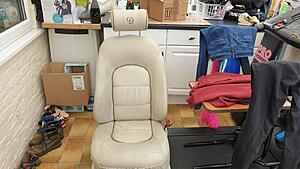
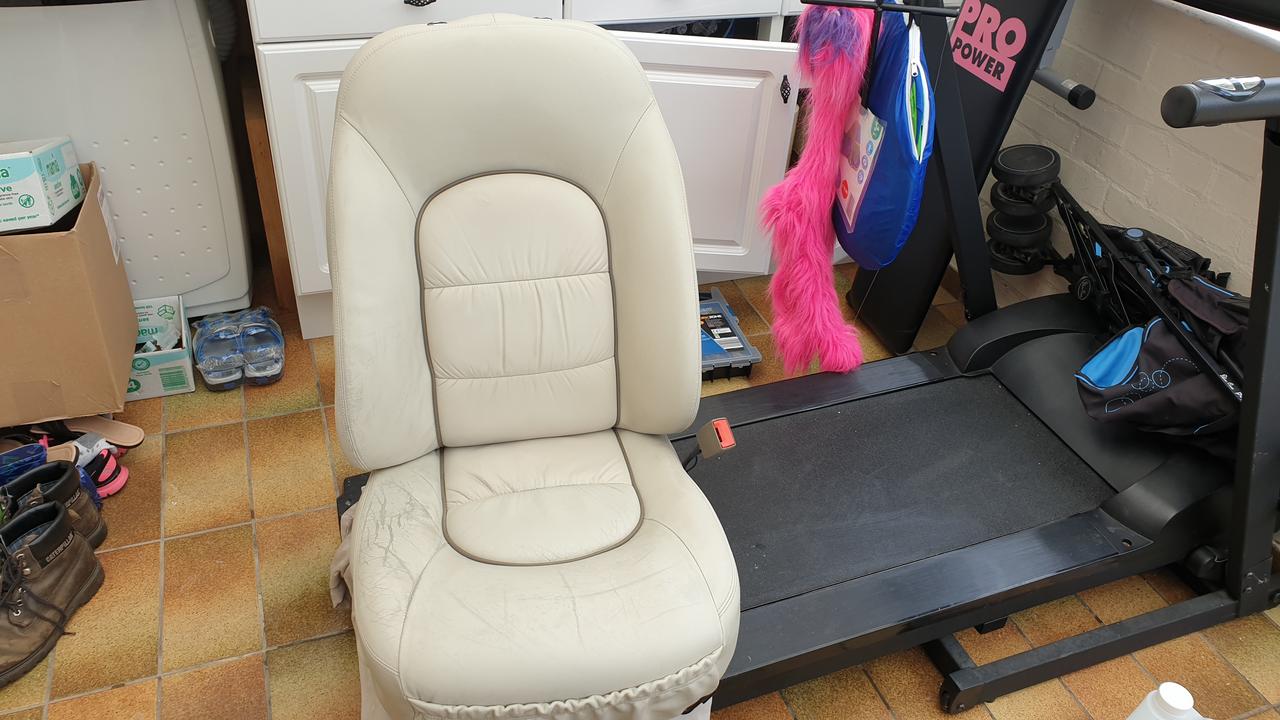
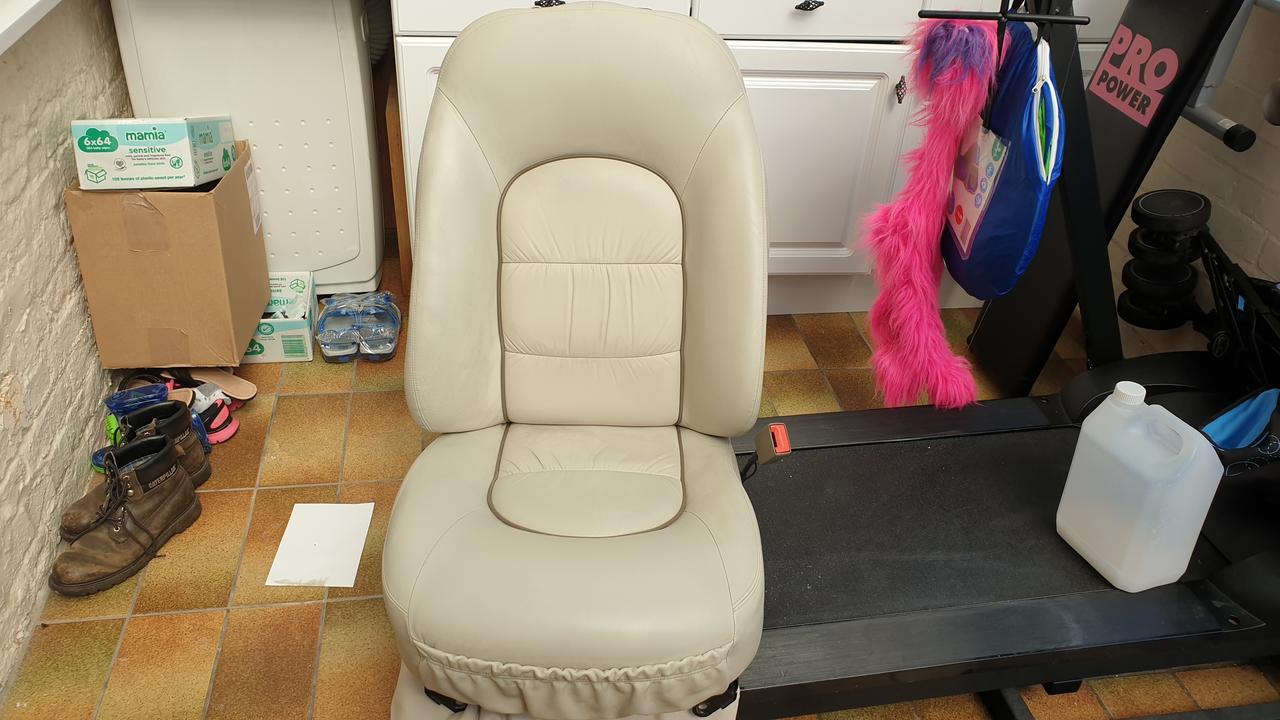
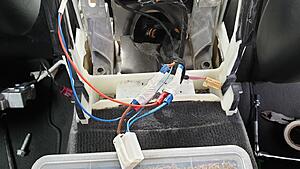
Later on we decided to look at the Audi drivers seat, so try and fix it. Got the seat released (again 4 bolts), and took a look. There is a convenient set of sockets in the floor.

Aston decided best thing was to measure the resistance across the heating element after unplugging the seat. The element measured around 7 ohms, which was great, but made it odd the seat was not working...
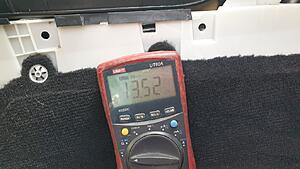
So we plugged the seat back in, and measured the voltage to the elements.

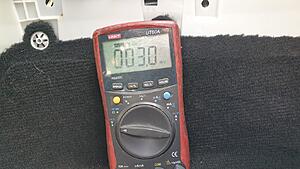
It was at only 3mV but every 2 minutes it would jump to 13V and stay there for 10 seconds, before dropping back to 3mV again.
Very odd, I was stumped. But Aston said it must be a control issue, and did a bit of research on Audi's. Turns out the Audi has a Thermistor in the seat. The seat can be set at a variety of heating settings between 0-6. The car then compares the setting with the feedback from the Thermistor, and turns the seat on/off to maintain the correct temperature.
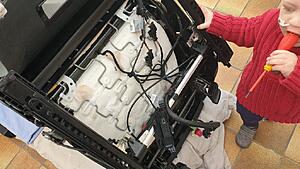
It appears my seat thinks its reached temperature when it hasn't. Assuming the Thermistor was up the spout, Aston dived in and pulled the seat apart, so we could investigate.
We found the Thermistor at the back of the seat base cushion.
(Yes that is a screwdriver in Aston's mouth... yes I am the worst father in the world)
A bit more research found a chap who had taken two measurements on his seat. He found 11 degrees C should be 15kohm and 20 degrees C should be 10kohm. Wish I'd found that sooner so we could have taken measurements before pulling apart the seat!
So looking at it, there was a small bead thermistor. Oddly it seemed to be working. At room temp (21 degrees) is measured 8kohms. This dropped to around 6kohm is I warmed it in my mouth.
Aston decided we should order some new Thermistors, so I did some research and worked out a Beta value for a suitable Thermistor using the temperature set points from the guy on the web (hoping they are right).

We had to order a new thermistor and work could not continue for the time being.
I suppose it was inevitable, but Aston loved to spend time on the cars. One Friday at the beginning of May we decided to investigate the non working heated seats on both Lindsey's Peugeot and my Audi.
I helped Aston get the seat out of the Peugeot.

Aston narrowed the fault down to this burnt out connector. Putting a multimeter across the actual heating elements, they measured around 6 ohms, so they seemed OK - and most importantly not broken!

A bit of web research, and Aston found that this is a common problem on Peugeot models of this era. People seem to usually renew the wiring loom.
So it was straight back to work, because Aston had a better idea. We soldered new connectors (cut them from the new Ebay heated seat elements, that we now didn't need).


Did the same to the cables coming from the heating pad in the seat.

Then put the seat back in the car and tested. To our delight its lovely and toasty now! Works perfectly!
Only took a couple of hours...a perfect Friday afternoon job!
The heated drivers seat in the Audi was not working either, and Aston decided we should do that next. But I insisted we leave that until the next day. Aston's a bit of a workaholic... so this did not go down well!

But the next day Aston was up early washing the cars, so I think he got over it...

Later on we decided to look at the Audi drivers seat, so try and fix it. Got the seat released (again 4 bolts), and took a look. There is a convenient set of sockets in the floor.
Aston decided best thing was to measure the resistance across the heating element after unplugging the seat. The element measured around 7 ohms, which was great, but made it odd the seat was not working...
So we plugged the seat back in, and measured the voltage to the elements.


It was at only 3mV but every 2 minutes it would jump to 13V and stay there for 10 seconds, before dropping back to 3mV again.

Very odd, I was stumped. But Aston said it must be a control issue, and did a bit of research on Audi's. Turns out the Audi has a Thermistor in the seat. The seat can be set at a variety of heating settings between 0-6. The car then compares the setting with the feedback from the Thermistor, and turns the seat on/off to maintain the correct temperature.
It appears my seat thinks its reached temperature when it hasn't. Assuming the Thermistor was up the spout, Aston dived in and pulled the seat apart, so we could investigate.
We found the Thermistor at the back of the seat base cushion.
(Yes that is a screwdriver in Aston's mouth... yes I am the worst father in the world)
A bit more research found a chap who had taken two measurements on his seat. He found 11 degrees C should be 15kohm and 20 degrees C should be 10kohm. Wish I'd found that sooner so we could have taken measurements before pulling apart the seat!
So looking at it, there was a small bead thermistor. Oddly it seemed to be working. At room temp (21 degrees) is measured 8kohms. This dropped to around 6kohm is I warmed it in my mouth.
Aston decided we should order some new Thermistors, so I did some research and worked out a Beta value for a suitable Thermistor using the temperature set points from the guy on the web (hoping they are right).
We had to order a new thermistor and work could not continue for the time being.
The following users liked this post:
ericjansen (03-15-2022)
#42
03-15-2022, 05:57 PM
Veteran Member
The following users liked this post:
c16rkc (03-16-2022)
#43
03-16-2022, 06:19 AM
No rest when there is a Daimler in need
Young Aston is a slave driver.
At the beginning of May 2020 we were in COVID lockdown, we could not go anywhere or do anything. But Aston had no intention of letting me relax.
We still intended to sell the Daimler, but why not spend a bit of time making it a bit better. We decided to look at the more ingrained dirt on the interior of the Daimler.
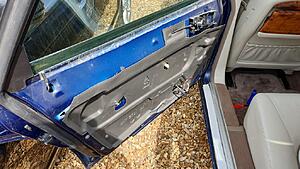
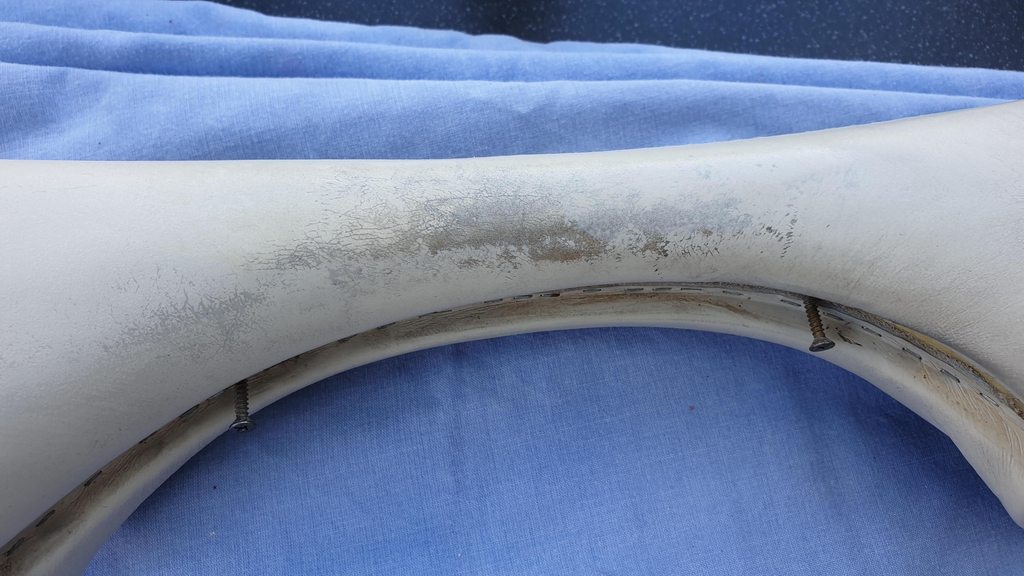
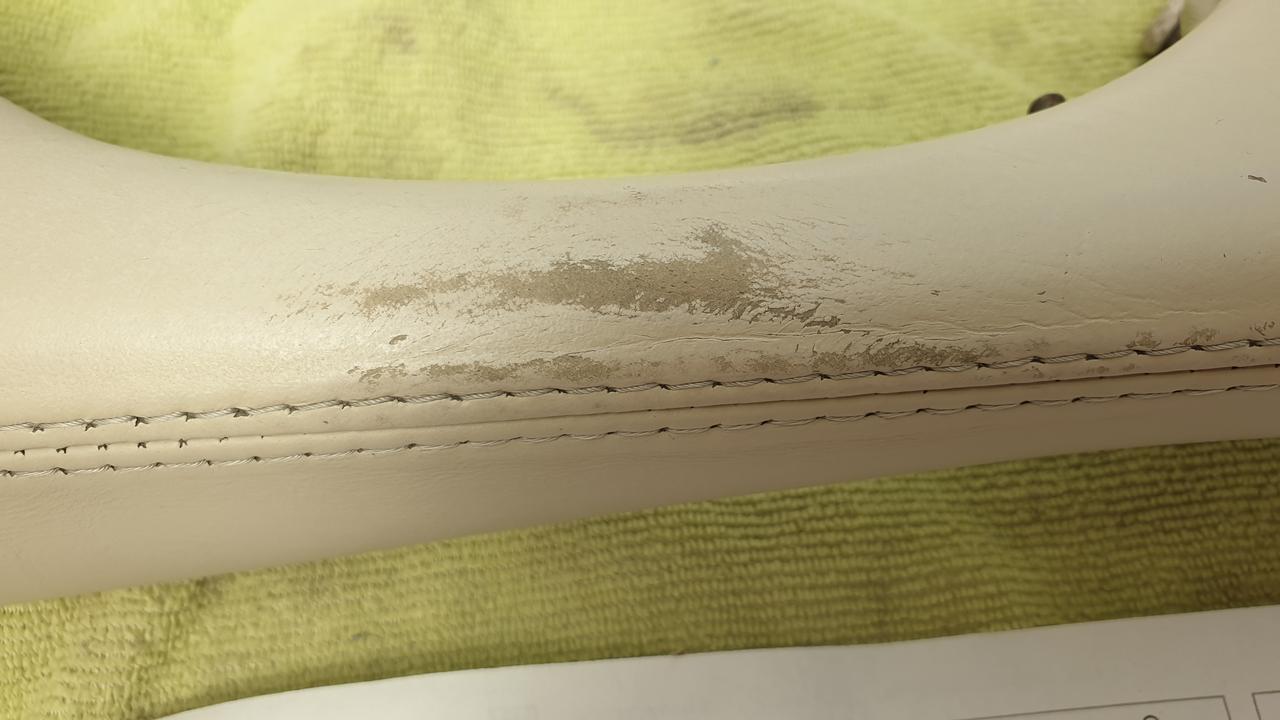
This patch on the drivers door armrest was really annoying Aston, as it spoilt the appearance of the car.

There is also a load of sticky foam and tape that worried him. So peeled the duct tape off and this is what was left.
Astons intuition told him that someone had probably broken the clips that hold the door card on, then used tape instead...
We removed the door card, and Aston was right; half the clips were either broken or missing.

Everything was removed from the door card, to best clean all the components.


Then inside we cleaned it using leather cleaners from Autglym, Dr Leather, and Meguiars...


All the little bits got a clean.

It took ages with a combination if Meguiars super degreaser, some leather cleaners to get what we did.
Back to the Audi
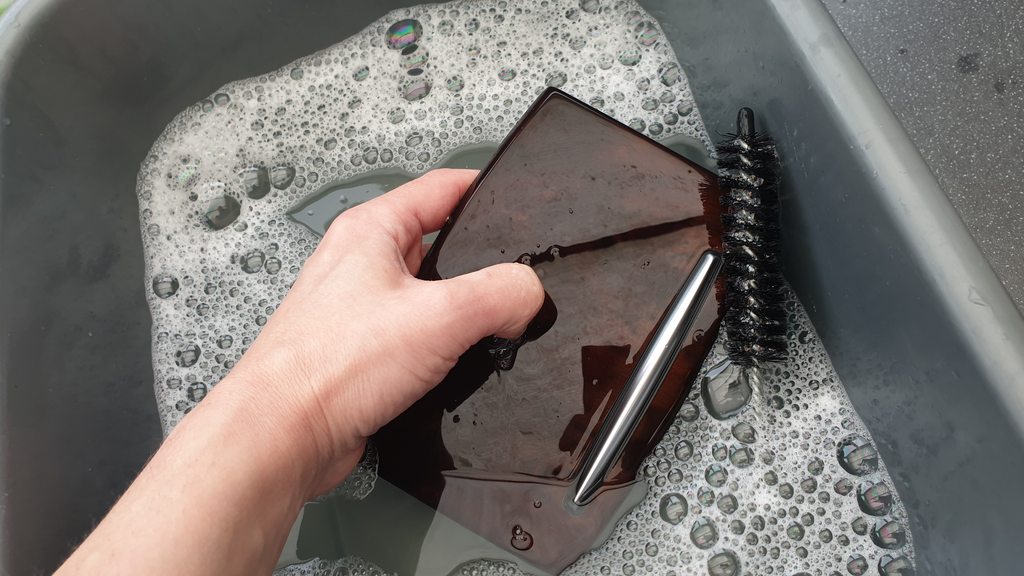
Work stopped on the Daimler, because we had a small delivery. Our Thermistors had arrived to repair the Audi heated seat.

Aston carefully soldered one in.

Then he put the seat back together.

I am pleased to say that after a quick test the seat was fully working! It got incredibly hot, and I have to say Audi heated seats are far better quality than the Mercedes and Jaguar ones I have pulled apart in the past. The heating elements are very thick and strong.
As one door opens
So later than day, 8th May 2020, we returned to the Daimler. After removing the drivers side door card the weekend before, it was easy for Aston to remove the other three (with my help of course).


Found this tweeter was looking damaged and in need of replacement.

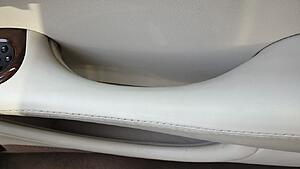
Then with a lot of pressure from Aston, I helped him to look at that awful drivers armrest:
Thoroughly cleaned it down, then used my gliptone kit to re colour. This was it loose fitted to the door card to ensure colour match.

Much better, but needs another few coats.

So this is the finished article (before/after shots):

It was only supposed to be a quick cleanup, and a survey of how bad it was under those door cards. So I was really pleased we made such a massive improvement.
80% better than it was, and both Aston and me were relieved to see there was no major damage underneath.
We pinched fixings from the other doors, and most were smashed on every door so we ordered some more for when we replaced the other door cards.
Young Aston is a slave driver.
At the beginning of May 2020 we were in COVID lockdown, we could not go anywhere or do anything. But Aston had no intention of letting me relax.
We still intended to sell the Daimler, but why not spend a bit of time making it a bit better. We decided to look at the more ingrained dirt on the interior of the Daimler.

This patch on the drivers door armrest was really annoying Aston, as it spoilt the appearance of the car.

There is also a load of sticky foam and tape that worried him. So peeled the duct tape off and this is what was left.


Astons intuition told him that someone had probably broken the clips that hold the door card on, then used tape instead...
We removed the door card, and Aston was right; half the clips were either broken or missing.

Everything was removed from the door card, to best clean all the components.


Then inside we cleaned it using leather cleaners from Autglym, Dr Leather, and Meguiars...


All the little bits got a clean.


It took ages with a combination if Meguiars super degreaser, some leather cleaners to get what we did.
Back to the Audi
Work stopped on the Daimler, because we had a small delivery. Our Thermistors had arrived to repair the Audi heated seat.

Aston carefully soldered one in.

Then he put the seat back together.

I am pleased to say that after a quick test the seat was fully working! It got incredibly hot, and I have to say Audi heated seats are far better quality than the Mercedes and Jaguar ones I have pulled apart in the past. The heating elements are very thick and strong.
As one door opens
So later than day, 8th May 2020, we returned to the Daimler. After removing the drivers side door card the weekend before, it was easy for Aston to remove the other three (with my help of course).


Found this tweeter was looking damaged and in need of replacement.
Then with a lot of pressure from Aston, I helped him to look at that awful drivers armrest:
Thoroughly cleaned it down, then used my gliptone kit to re colour. This was it loose fitted to the door card to ensure colour match.

Much better, but needs another few coats.

So this is the finished article (before/after shots):


It was only supposed to be a quick cleanup, and a survey of how bad it was under those door cards. So I was really pleased we made such a massive improvement.
80% better than it was, and both Aston and me were relieved to see there was no major damage underneath.
We pinched fixings from the other doors, and most were smashed on every door so we ordered some more for when we replaced the other door cards.
Last edited by c16rkc; 03-16-2022 at 06:23 AM.
#44
03-16-2022, 06:41 AM
Good clean fun
There was no stopping Aston the following weekend. First of all he had to get those cars cleaned, I helped, watched and learned as always...
Dreaming of Walnut
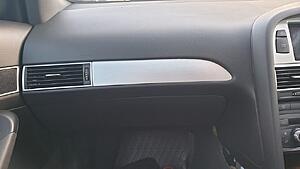
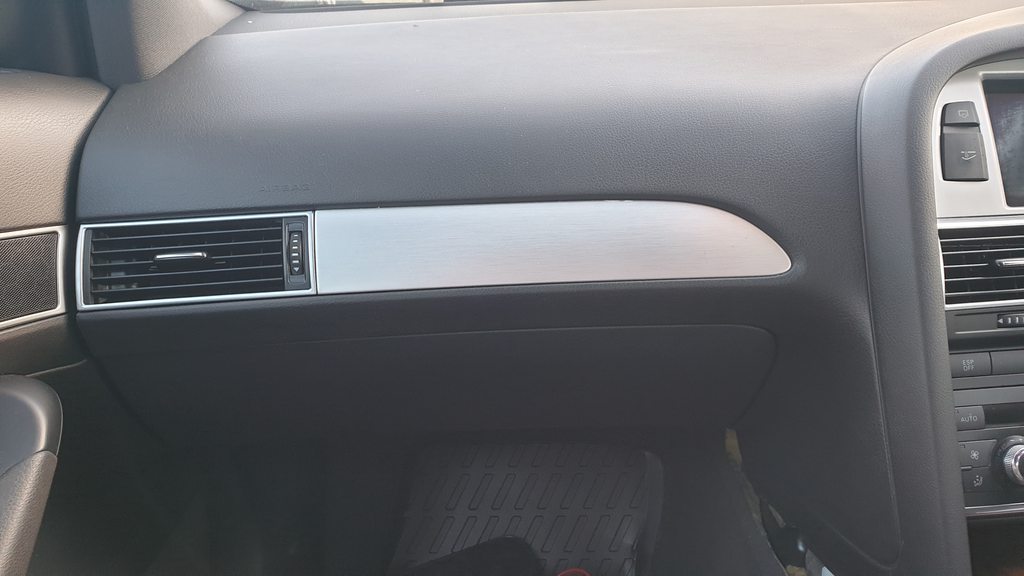
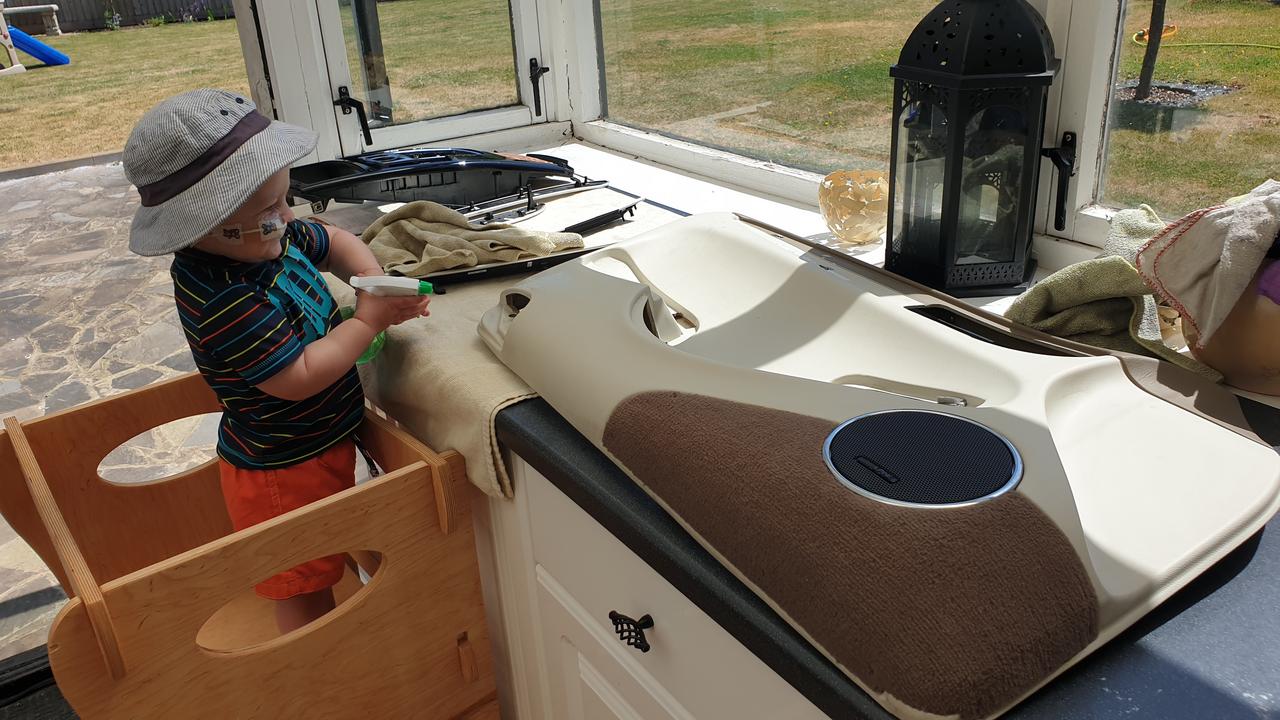
This is the standard "brushed aluminium" trim in my Audi. Standard figment on the Le Mans edition, and I hate it...!

I have always loved walnut in my cars, and seeing as it would cost over �100 to buy all the used walnut pieces to change mine over to walnut, I had the bright idea to Hydrodip them (water transfer printing). Aston had to sit this one out as there are dangerous chemicals involved.
So this is the trim all primed an painted.
So that part went well, but when I tried hydro dipping I was less than successful...


So hydrodipping is not easy at all.... plan B it is then... I'd considered piano black, and I had some black paint, but I thought all that black would be a bit plain. So I tried a gold detail. This is it after lacquer.


But I didn't like that either, too corny... so plan C?
I ordered a used wood trim set from Ebay!
[size=5]The little details
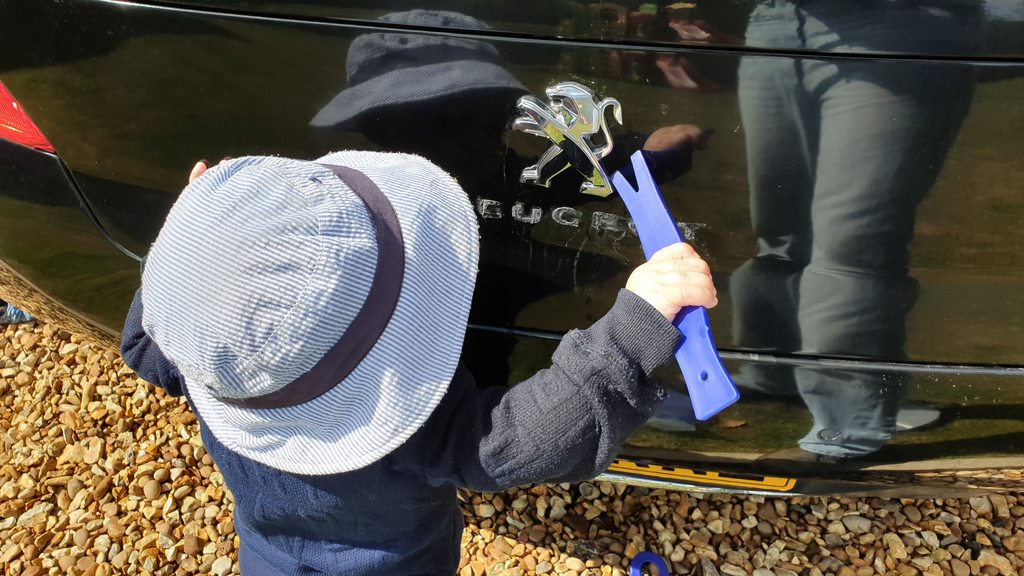
Back to Aston, and he was unhappy with the figment of the rear badges of Mummy's Peugeot.

They were not straight, and appeared to be stuck on with black Mastic, and the car has clearly had some paint. Guessing a bodged repair. Who knows what hidden history this car had!
So Aston carefully removed the badges.


So then after thorough cleaning to remove all that mastic glue, I helped Aston to machine polished the panel to bring it up a bit brighter. The paint job is not the best and it was still a little dull, but better.

Only had time to fit the main badge, the Peugeot lettering ended up never going back on... we no longer have the car but the letters are still in my "bits and bobs drawer".

Update the to do list
- Thoroughly clean the car, inside and out - This is 90% there.....
- Assess any remedial work to the paintwork (including pinstripes/overspray); then add plan to address using wet-sanding/compounding etc. - Getting there, 75% I'd say...
- Re-colour the armrest, and front seats where necessary.
- Re-colour passenger side armrest.
- Re-fit all door cards with brand new clips (most are broken or missing)
- Re-spray of front bumper.
- Re-spray of rear bumper.
- Assess if front sill covers can be re-fitted; fit if possible (If not, new sill covers BEC21887 at around �44 a pair).
- Re-fit the jacking point covers.
- Paint all parking sensor brackets, and refit new parking sensors (possibly with rear bumper re-spray?).
- Adjust position of wonky parking sensors. - Have done one, the other I did not like to disturb...
- Check height of exhausts, or is bumper wonky between exhausts? Investigate.
- Have rust attended to (by new bodyshop) on corners of passenger side doors.
- Have rust attended to (by new bodyshop) on front side, of drivers side front arch (where it meets bumper).
- Wire in some USB charging points and fit under armrest.
- New front Grille (there is minor marking around the "D" badge).
- New radiator "D" badge (mine has been badly painted gold!).
- New rear drivers side light, mine has crack in plastic lens.
- New rear passenger side light, as bodyshop have damaged the chrome surround.
- New "Daimler" or "V8" badges for side window chrome pillars (mine have once again been badly painted gold).
- Install "Audio aux input" (maybe this:*http://www.discountcarstereo.com/aux-jagr.html, or this:*http://factoryradioservice.com/jagua...nput-p-37.html)
- Investigate Bluetooth phone install (This might help:*http://jimroal.com/cars/X308Bluetooth.pdf)
- Re lacquer all wood trim (as it is faded and cracked in places)
- New gear knob (mine is faded)
- Thoroughly clean engine bay.
- Have gearbox oil changed.
- Purchase and fit missing under-bonnet tool kit.
- Re-fit brake cooling duct.
- Check arch liners front and rear; are the present, do I need new ones? (these are important for fitting the brake cooling duct).
-Full suspension bush kit, as there are a few knocks down there!
-New chrome lower window finisher all doors (GNA1710AE+GNA1711AE+GXF2521AD+GXF2520AD). These total around �800, for just the three they have, on Jaguar classic parts, so this might not ever get done!
-*NEW* Replace speakers for something better, maybe look into an aftermarket Amplifier too.
Completed items:
- Replace missing rear passenger side reflector (LNC5022AB) DONE!
- Repair drivers seat back rest adjustment (new seat module). DONE!
- Adjust rear side profile to line up properly with wing. DONE!
- Purchase LNF7361AA rear*parking sensor*bracket, then re-fit*parking sensor(Ordered from Jaguarclassicparts). DONE!
- Re-fit the chrome trim at drivers side front sill. DONE!
- Source set of original lambswool mats. DONE!
- Fit new tyres to rear wheels. DONE!
- Re-colour drivers side armrest. DONE!
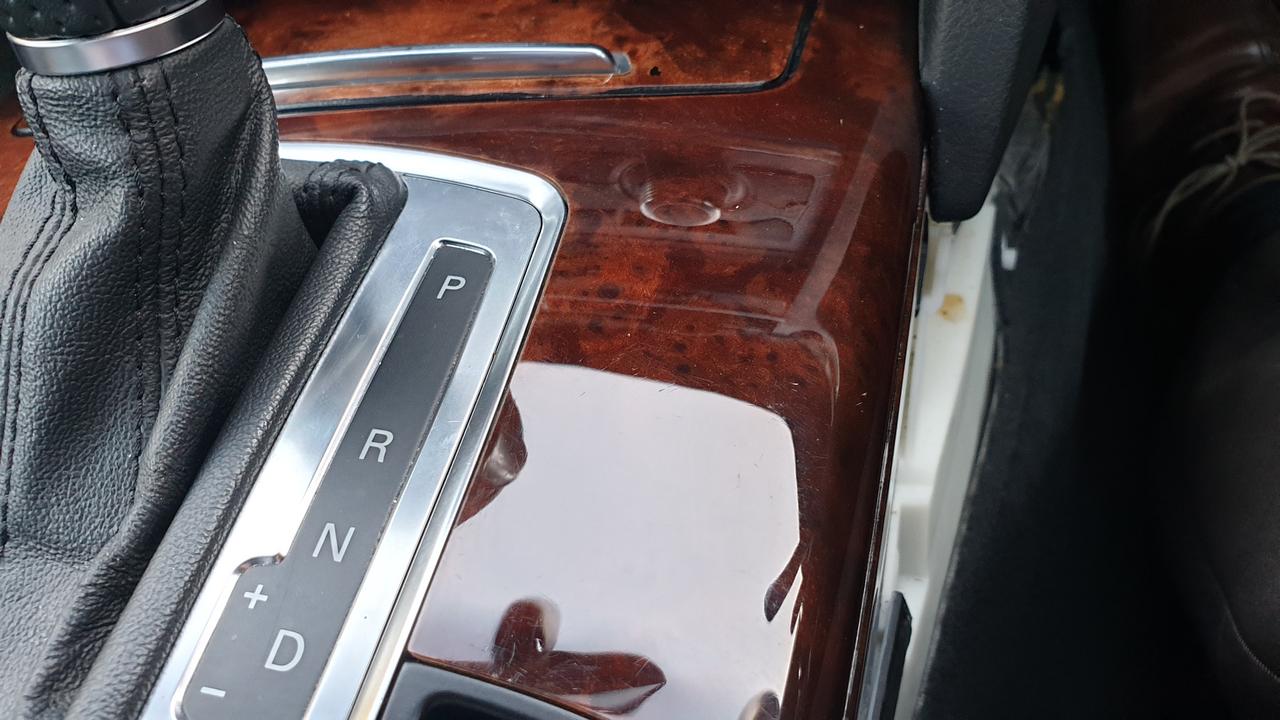
A nice walnut upgrade for the Audi
On the 22nd May 2020, the used walnut trim set arrived for the Audi. I snapped it for �60 posted, it was just missing the passenger side rear trim, which I have acquired for �15 elsewhere.
The state of it explained the low price...!


Luckily the broken corner here would be covered by the plastic trim when it is fitted.
So removed all the trim, and cleaned thoroughly.


Aston polished it all up with Meguiars ultimate compound.


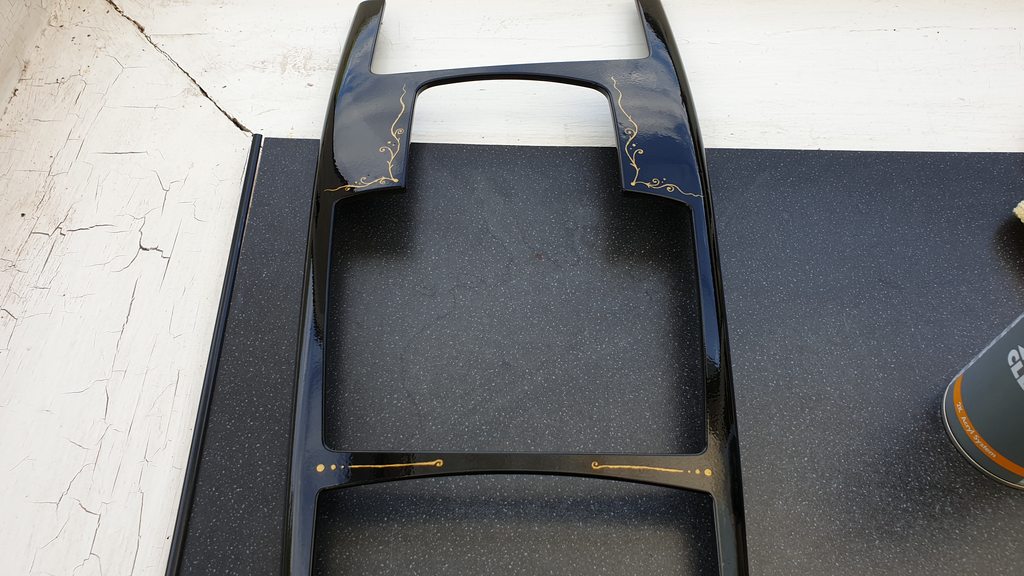
So the it was goodbye shiny aluminium trim:

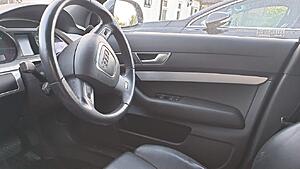
...and hello new Walnut luxury!


Strictly speaking, the Audi was not a Quattro so the dash trim was wrong, but I did not care. The Quattro logo actually looks really nice.
I put the interior back together completely.
Before:

After:

There was no stopping Aston the following weekend. First of all he had to get those cars cleaned, I helped, watched and learned as always...
Dreaming of Walnut
This is the standard "brushed aluminium" trim in my Audi. Standard figment on the Le Mans edition, and I hate it...!

I have always loved walnut in my cars, and seeing as it would cost over �100 to buy all the used walnut pieces to change mine over to walnut, I had the bright idea to Hydrodip them (water transfer printing). Aston had to sit this one out as there are dangerous chemicals involved.
So this is the trim all primed an painted.

So that part went well, but when I tried hydro dipping I was less than successful...


So hydrodipping is not easy at all.... plan B it is then... I'd considered piano black, and I had some black paint, but I thought all that black would be a bit plain. So I tried a gold detail. This is it after lacquer.


But I didn't like that either, too corny... so plan C?
I ordered a used wood trim set from Ebay!
[size=5]The little details
Back to Aston, and he was unhappy with the figment of the rear badges of Mummy's Peugeot.

They were not straight, and appeared to be stuck on with black Mastic, and the car has clearly had some paint. Guessing a bodged repair. Who knows what hidden history this car had!
So Aston carefully removed the badges.


So then after thorough cleaning to remove all that mastic glue, I helped Aston to machine polished the panel to bring it up a bit brighter. The paint job is not the best and it was still a little dull, but better.

Only had time to fit the main badge, the Peugeot lettering ended up never going back on... we no longer have the car but the letters are still in my "bits and bobs drawer".
Update the to do list
- Thoroughly clean the car, inside and out - This is 90% there.....
- Assess any remedial work to the paintwork (including pinstripes/overspray); then add plan to address using wet-sanding/compounding etc. - Getting there, 75% I'd say...
- Re-colour the armrest, and front seats where necessary.
- Re-colour passenger side armrest.
- Re-fit all door cards with brand new clips (most are broken or missing)
- Re-spray of front bumper.
- Re-spray of rear bumper.
- Assess if front sill covers can be re-fitted; fit if possible (If not, new sill covers BEC21887 at around �44 a pair).
- Re-fit the jacking point covers.
- Paint all parking sensor brackets, and refit new parking sensors (possibly with rear bumper re-spray?).
- Adjust position of wonky parking sensors. - Have done one, the other I did not like to disturb...
- Check height of exhausts, or is bumper wonky between exhausts? Investigate.
- Have rust attended to (by new bodyshop) on corners of passenger side doors.
- Have rust attended to (by new bodyshop) on front side, of drivers side front arch (where it meets bumper).
- Wire in some USB charging points and fit under armrest.
- New front Grille (there is minor marking around the "D" badge).
- New radiator "D" badge (mine has been badly painted gold!).
- New rear drivers side light, mine has crack in plastic lens.
- New rear passenger side light, as bodyshop have damaged the chrome surround.
- New "Daimler" or "V8" badges for side window chrome pillars (mine have once again been badly painted gold).
- Install "Audio aux input" (maybe this:*http://www.discountcarstereo.com/aux-jagr.html, or this:*http://factoryradioservice.com/jagua...nput-p-37.html)
- Investigate Bluetooth phone install (This might help:*http://jimroal.com/cars/X308Bluetooth.pdf)
- Re lacquer all wood trim (as it is faded and cracked in places)
- New gear knob (mine is faded)
- Thoroughly clean engine bay.
- Have gearbox oil changed.
- Purchase and fit missing under-bonnet tool kit.
- Re-fit brake cooling duct.
- Check arch liners front and rear; are the present, do I need new ones? (these are important for fitting the brake cooling duct).
-Full suspension bush kit, as there are a few knocks down there!
-New chrome lower window finisher all doors (GNA1710AE+GNA1711AE+GXF2521AD+GXF2520AD). These total around �800, for just the three they have, on Jaguar classic parts, so this might not ever get done!
-*NEW* Replace speakers for something better, maybe look into an aftermarket Amplifier too.
Completed items:
- Replace missing rear passenger side reflector (LNC5022AB) DONE!
- Repair drivers seat back rest adjustment (new seat module). DONE!
- Adjust rear side profile to line up properly with wing. DONE!
- Purchase LNF7361AA rear*parking sensor*bracket, then re-fit*parking sensor(Ordered from Jaguarclassicparts). DONE!
- Re-fit the chrome trim at drivers side front sill. DONE!
- Source set of original lambswool mats. DONE!
- Fit new tyres to rear wheels. DONE!
- Re-colour drivers side armrest. DONE!
A nice walnut upgrade for the Audi
On the 22nd May 2020, the used walnut trim set arrived for the Audi. I snapped it for �60 posted, it was just missing the passenger side rear trim, which I have acquired for �15 elsewhere.
The state of it explained the low price...!


Luckily the broken corner here would be covered by the plastic trim when it is fitted.

So removed all the trim, and cleaned thoroughly.

Aston polished it all up with Meguiars ultimate compound.


So the it was goodbye shiny aluminium trim:


...and hello new Walnut luxury!


Strictly speaking, the Audi was not a Quattro so the dash trim was wrong, but I did not care. The Quattro logo actually looks really nice.
I put the interior back together completely.
Before:
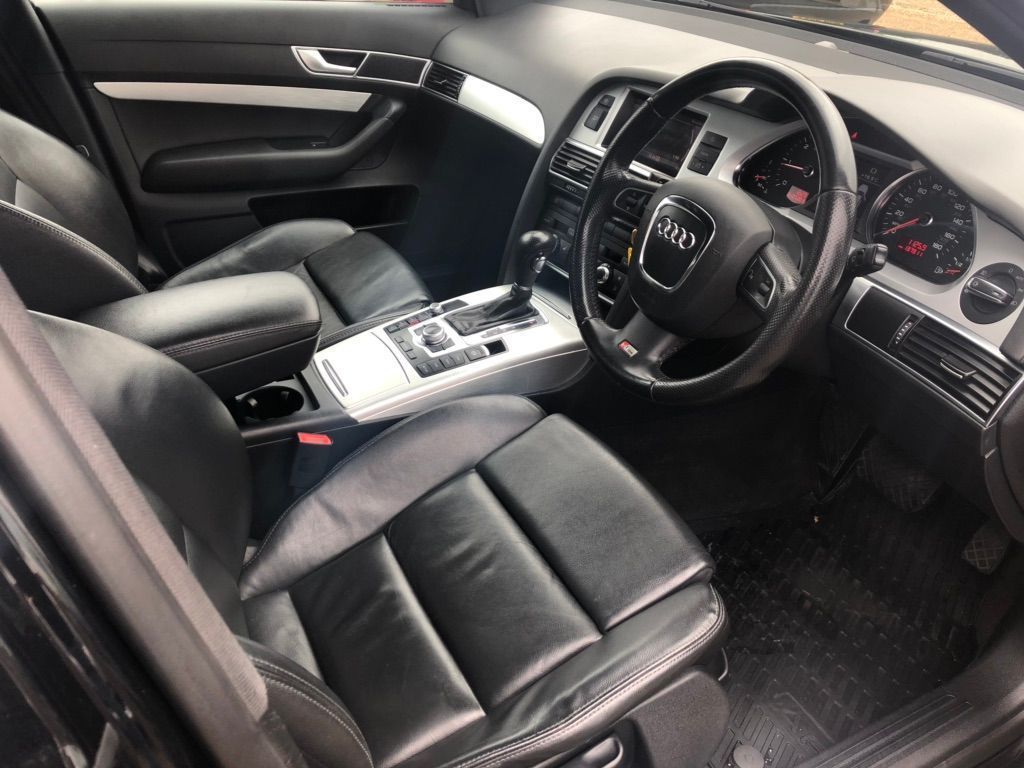
After:

#45
03-17-2022, 07:09 AM
More shenanigans with the Daimler interior
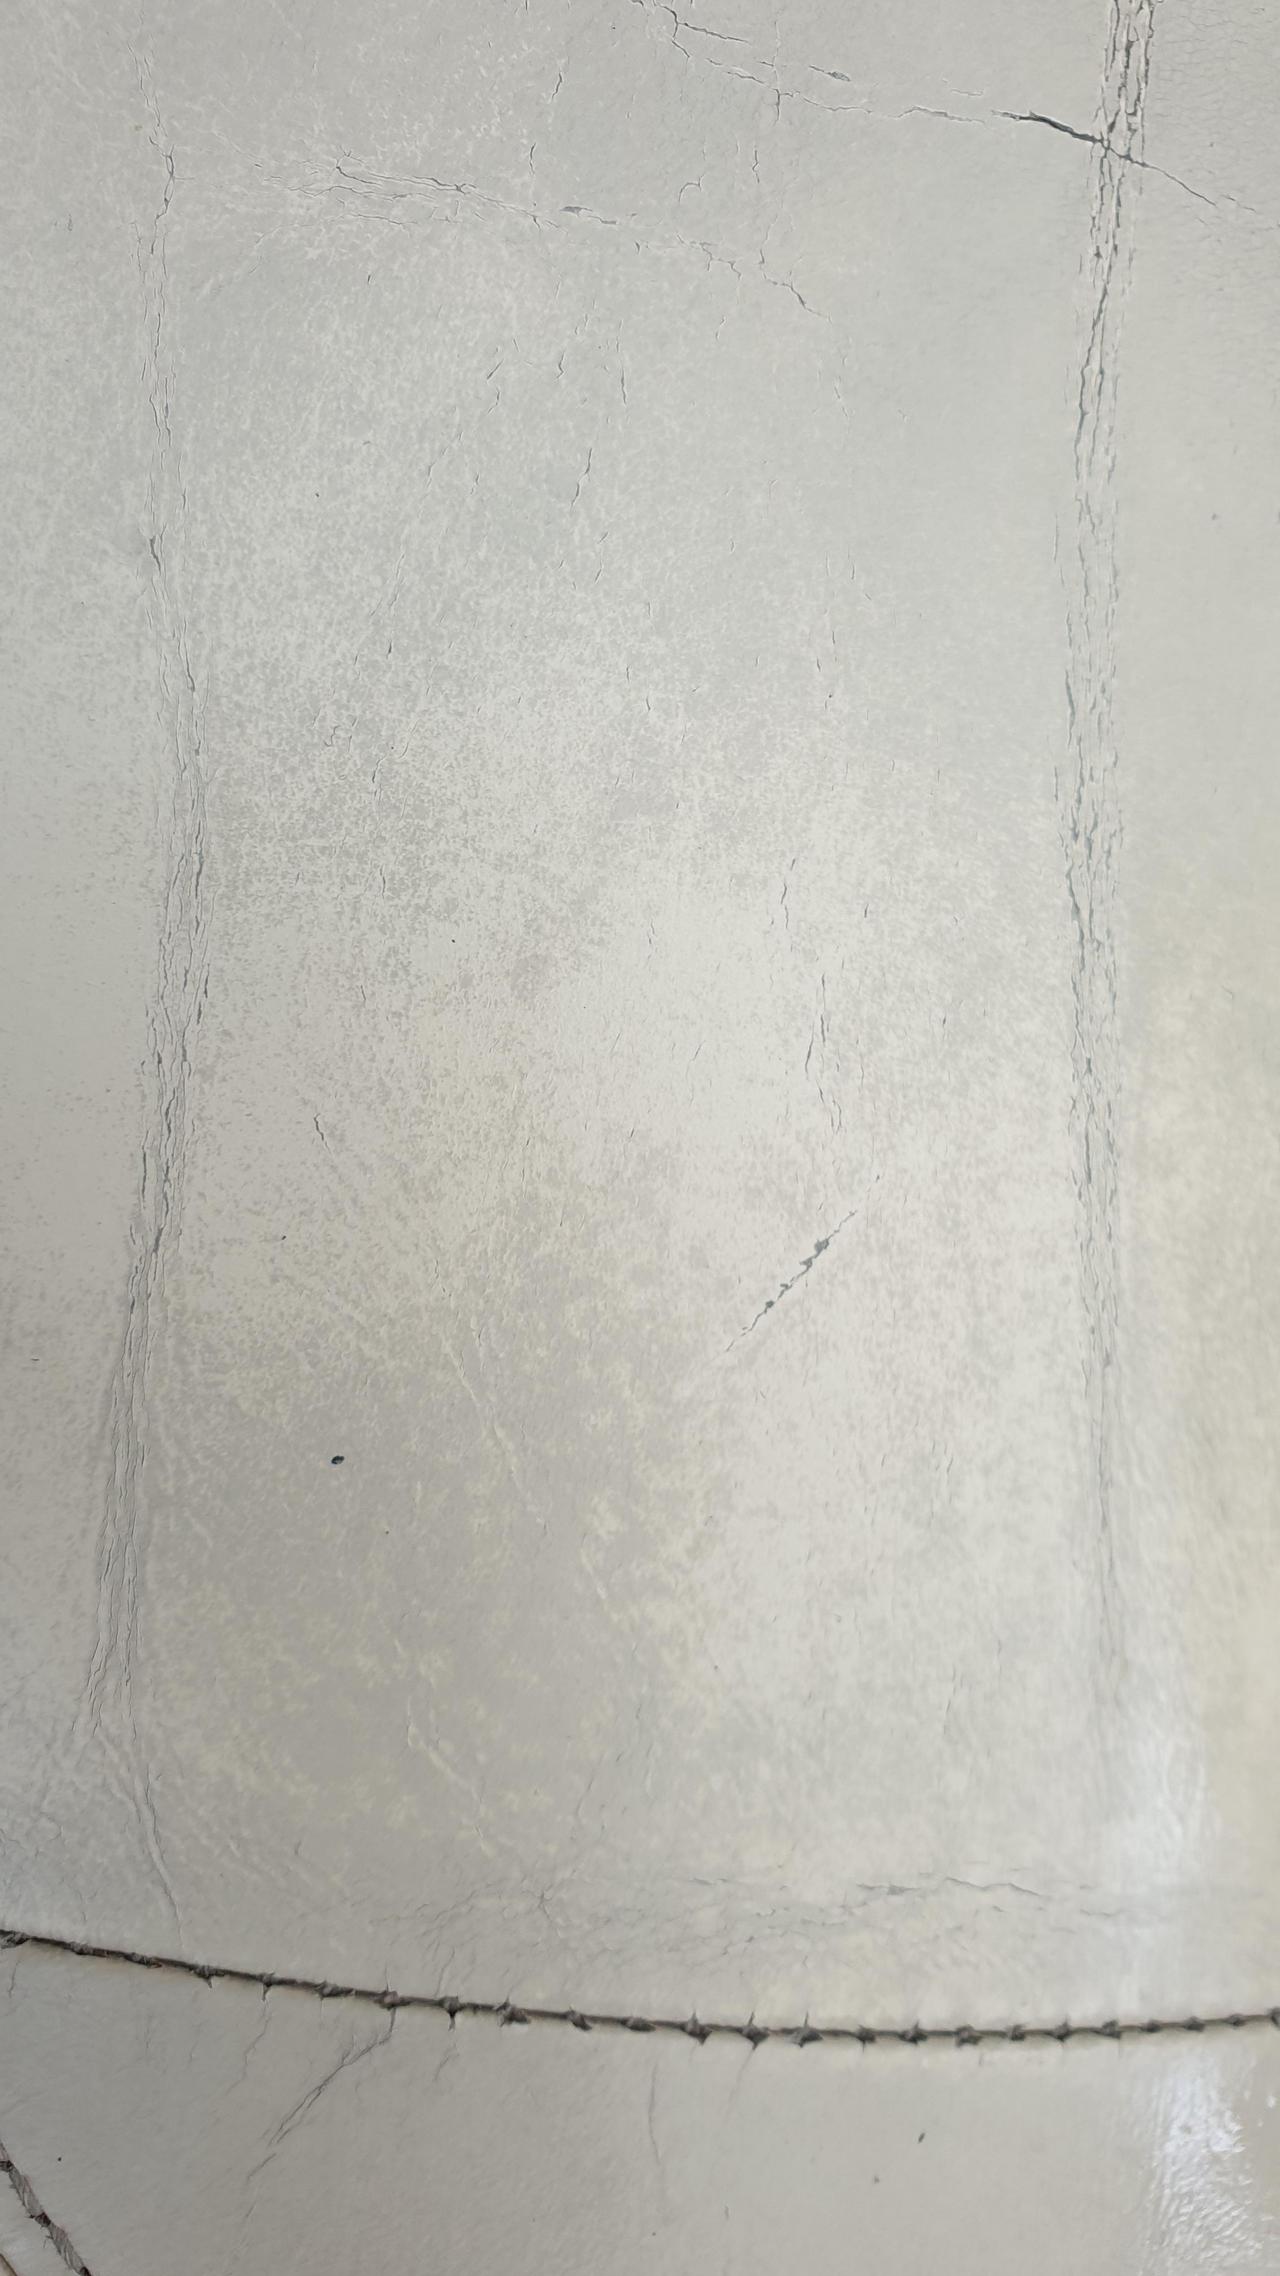
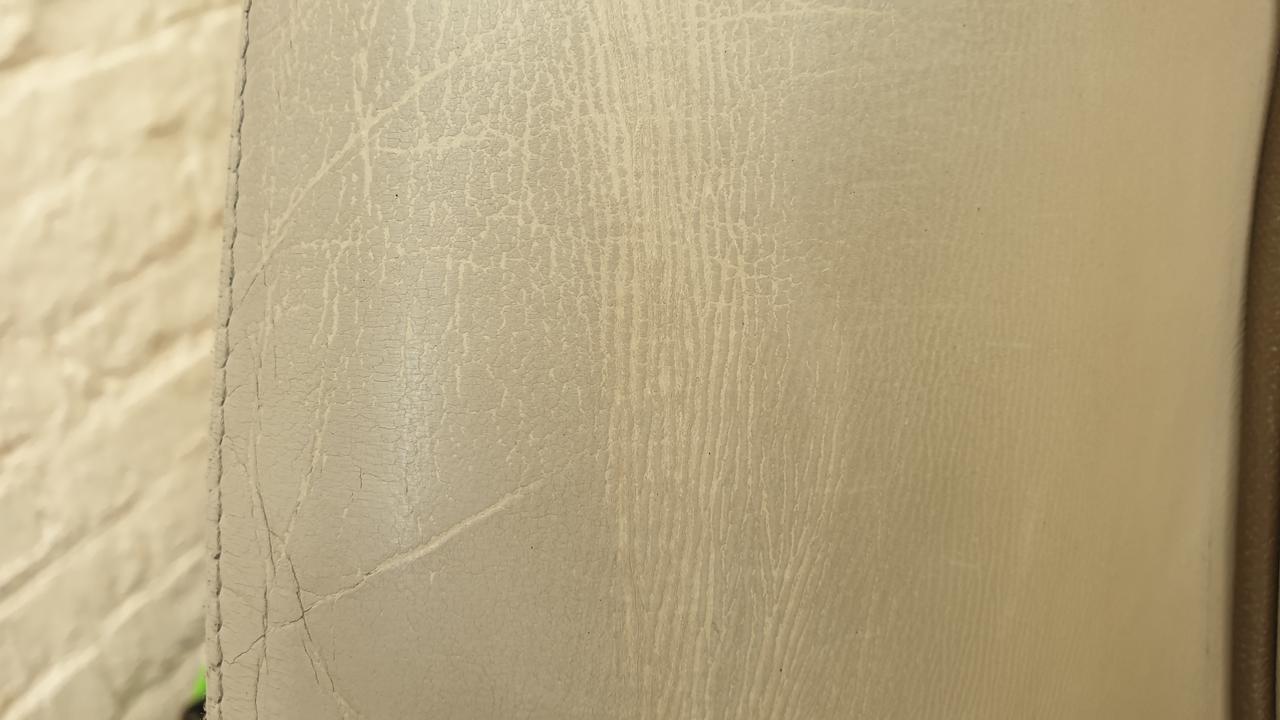
On the 23rd May, I assisted Aston to clean up the drivers seat.
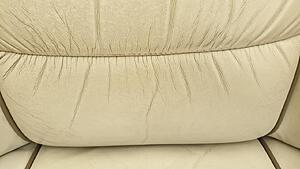
We decided to wet sand the base cushion, but the finish really was really shocking. We knew it would be very difficult to paint the rouched parts. I was suspecting new leather might be needed long term.


The next day we attacked the rest of the seat with cleaners again. Mequiars super degreaser seemed the best thing.
I just cannot understand what has happened to this car in it's life, these are the dirtiest, most ingrained with grime I have ever seen in my life.

This was a scary time, as we were not sure if the original leather dye was coming off or not - and in some places it did... But Aston is fearless when it comes to these things, and assured me he knew what he was doing. Thankfully I trusted him, and it's all worked out.
So now the seat was clean, wet-sanded down and ready for paint. Here are some before and afters.


We let them dry out thoroughly, then on the 25th May we painted them. I applied the leather paint with a sponge, dabbing on light coats one at a time, letting them dry then applying another etc.
This was the result.


It's not perfect, as there are creases, it really needed leather filler to smooth out. But it's an improvement that will do for now... although it does not live up to Aston's high standards..!
The colour is not a perfect match either but its closer than what looks to be a previous attempt by someone else.
The car has other priorities at the moment, but Aston thinks a partial retrim of the front seats is required one day.
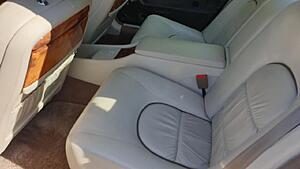
So here is the seat installed:

Much better!
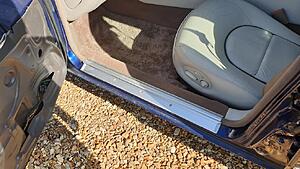
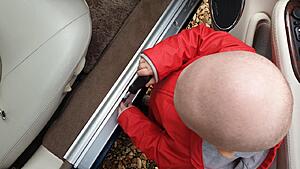
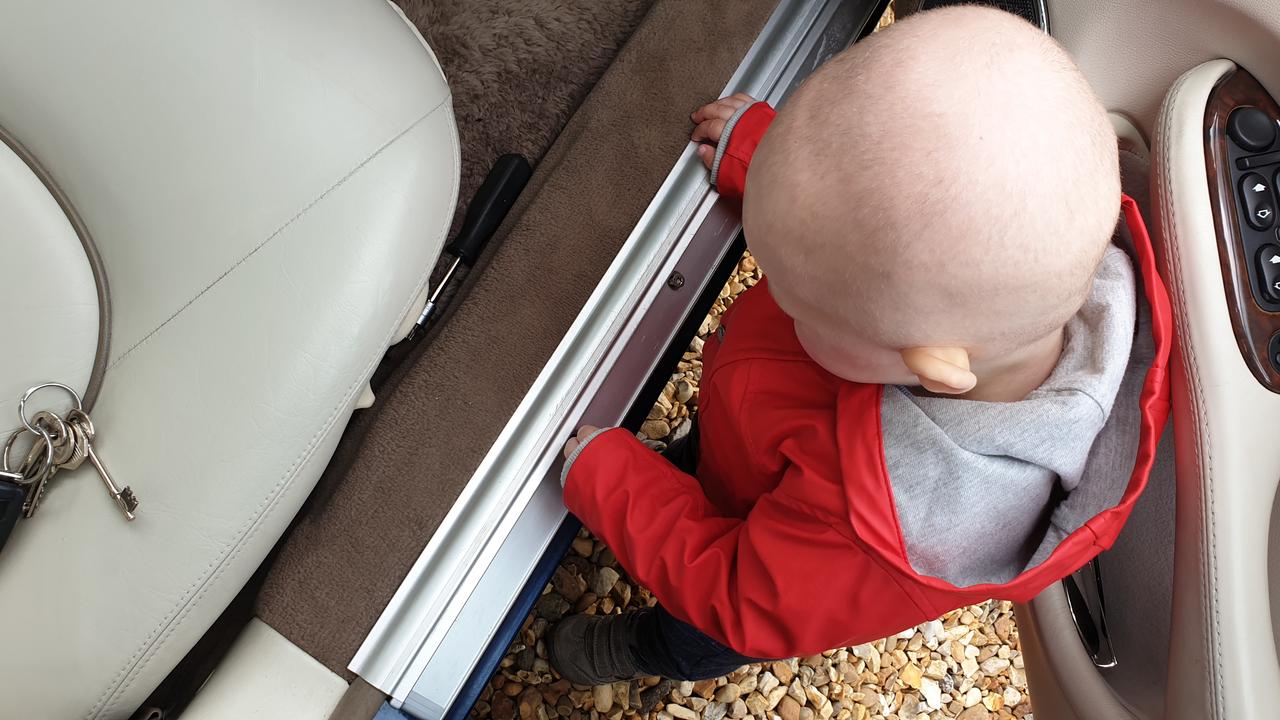
In preparation for the next step, Aston looked at the treadplates. The drivers side treadplate base was damaged by the monkeys who did the body/paintwork last year.

So it was removed and the sill was cleaned ready for a replacement.
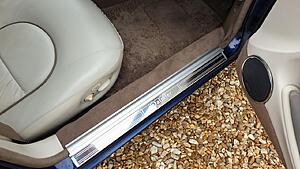
The rear drivers side one cleaned up nicely, took ages to clean all the residue from the old tape off. Used Autoglym Tar remover. Then cleaned with Meguiars Super degreaser and polished up.
https://i.imgur.com/JdQDuN9.jpg
Ditto the rear passenger side:

Could not help a sneaky picture of the inside starting to look good.... shame I made it blurred!
Noticed this grommet was missing by the rear door closure bracket:

Front passenger side (left for those driving left hookers) treadplate base was OK, so Aston just cleaned it up ready for new treadplate cover.
So that was it for that week. Ordered new fixings for the other door cards, and the missing treadplate covers.
Daimler looking nice in it's new home at the side of the drive. A rose beside two thorns...
On the 23rd May, I assisted Aston to clean up the drivers seat.

We decided to wet sand the base cushion, but the finish really was really shocking. We knew it would be very difficult to paint the rouched parts. I was suspecting new leather might be needed long term.


The next day we attacked the rest of the seat with cleaners again. Mequiars super degreaser seemed the best thing.
I just cannot understand what has happened to this car in it's life, these are the dirtiest, most ingrained with grime I have ever seen in my life.

This was a scary time, as we were not sure if the original leather dye was coming off or not - and in some places it did... But Aston is fearless when it comes to these things, and assured me he knew what he was doing. Thankfully I trusted him, and it's all worked out.
So now the seat was clean, wet-sanded down and ready for paint. Here are some before and afters.


We let them dry out thoroughly, then on the 25th May we painted them. I applied the leather paint with a sponge, dabbing on light coats one at a time, letting them dry then applying another etc.
This was the result.

It's not perfect, as there are creases, it really needed leather filler to smooth out. But it's an improvement that will do for now... although it does not live up to Aston's high standards..!
The colour is not a perfect match either but its closer than what looks to be a previous attempt by someone else.
The car has other priorities at the moment, but Aston thinks a partial retrim of the front seats is required one day.
So here is the seat installed:

Much better!
In preparation for the next step, Aston looked at the treadplates. The drivers side treadplate base was damaged by the monkeys who did the body/paintwork last year.

So it was removed and the sill was cleaned ready for a replacement.

The rear drivers side one cleaned up nicely, took ages to clean all the residue from the old tape off. Used Autoglym Tar remover. Then cleaned with Meguiars Super degreaser and polished up.
https://i.imgur.com/JdQDuN9.jpg
Ditto the rear passenger side:

Could not help a sneaky picture of the inside starting to look good.... shame I made it blurred!

Noticed this grommet was missing by the rear door closure bracket:

Front passenger side (left for those driving left hookers) treadplate base was OK, so Aston just cleaned it up ready for new treadplate cover.

So that was it for that week. Ordered new fixings for the other door cards, and the missing treadplate covers.
Daimler looking nice in it's new home at the side of the drive. A rose beside two thorns...
#46
03-17-2022, 07:30 AM
Daimler door cards
30th May 2020: Aston was eager to start early morning. Straight on to cleaning the remaining door cards.
Some goodies arrived in the week. That's the door card fixings, and two new treadplate finishers from Jaguar. Then a new grommet and treadplate base from Black Cherry Jaguar (a Jaguar used parts dealer).


Had to dye this front passenger armrest.
...a shot during (Aston was too busy for a finished shot before it went into the car.

Could not get this over spray off... so left it for the time being. it's the rear passenger side door card right at the bottom. Luckily it is not really noticable most of the time.

Used double sided sticky foam to fit the tread plate covers.

All fitted and looking much better:

Passenger side door card looks good, and armrest repair looks nice.

Did a repair to the passenger side seat base, the back rest was actually pretty good.

So that's the interior looking much better!


The only downside was that the replacement used treadplate I received from Black Cherry Jaguar was actually worse than the one I had removed, I was not going to use that!
I am being a bit of a fuss pot here, but I don't think this is good enough. I asked for a treadplate in decent condition, and I did not expect to receive one that has been damaged by someone trying to pry it off before realising there are screws to remove... I suppose the chap at Black Cherry Jaguar has a different opinion. That's me spending �32 for just a grommet then....
Have bought another full set elsewhere, hoping that at least one of the fronts are usable. Won't be using Black Cherry Jaguar again as his standards are obviously way below Aston's and mine! The funny thing is, without asking, the chap sent me 4 blurry photos before he sent the part, and I thought 'how odd', as all they did was show me how dirty they were... I did not really know what to say... Now I know why, so he can say... "I did send you photos first"... I personally think that's a very ungentlemanly thing to do.
So next couple of little things...
Smartened up the V8 badges, which I'll change to the correct Daimler ones eventually....

Tried one of the speaker grille logos too. They appeared to have been gold originally, so touched them up.


Then we needed to source a cover for the rear passenger side puddle light cover. This one was held on with clear sticky tape..!

That ended the weekend's work on the Daimler...
30th May 2020: Aston was eager to start early morning. Straight on to cleaning the remaining door cards.
Some goodies arrived in the week. That's the door card fixings, and two new treadplate finishers from Jaguar. Then a new grommet and treadplate base from Black Cherry Jaguar (a Jaguar used parts dealer).
Had to dye this front passenger armrest.
...a shot during (Aston was too busy for a finished shot before it went into the car.
Could not get this over spray off... so left it for the time being. it's the rear passenger side door card right at the bottom. Luckily it is not really noticable most of the time.
Used double sided sticky foam to fit the tread plate covers.
All fitted and looking much better:
Passenger side door card looks good, and armrest repair looks nice.
Did a repair to the passenger side seat base, the back rest was actually pretty good.
So that's the interior looking much better!
The only downside was that the replacement used treadplate I received from Black Cherry Jaguar was actually worse than the one I had removed, I was not going to use that!
I am being a bit of a fuss pot here, but I don't think this is good enough. I asked for a treadplate in decent condition, and I did not expect to receive one that has been damaged by someone trying to pry it off before realising there are screws to remove... I suppose the chap at Black Cherry Jaguar has a different opinion. That's me spending �32 for just a grommet then....
Have bought another full set elsewhere, hoping that at least one of the fronts are usable. Won't be using Black Cherry Jaguar again as his standards are obviously way below Aston's and mine! The funny thing is, without asking, the chap sent me 4 blurry photos before he sent the part, and I thought 'how odd', as all they did was show me how dirty they were... I did not really know what to say... Now I know why, so he can say... "I did send you photos first"... I personally think that's a very ungentlemanly thing to do.
So next couple of little things...
Smartened up the V8 badges, which I'll change to the correct Daimler ones eventually....
Tried one of the speaker grille logos too. They appeared to have been gold originally, so touched them up.


Then we needed to source a cover for the rear passenger side puddle light cover. This one was held on with clear sticky tape..!

That ended the weekend's work on the Daimler...
Last edited by c16rkc; 03-17-2022 at 11:11 AM.
#47
03-17-2022, 11:31 AM
June 2020
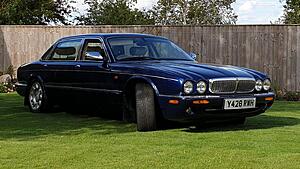
One weekend in June we moved the Daimler off the drive and on to the grass for some photos.

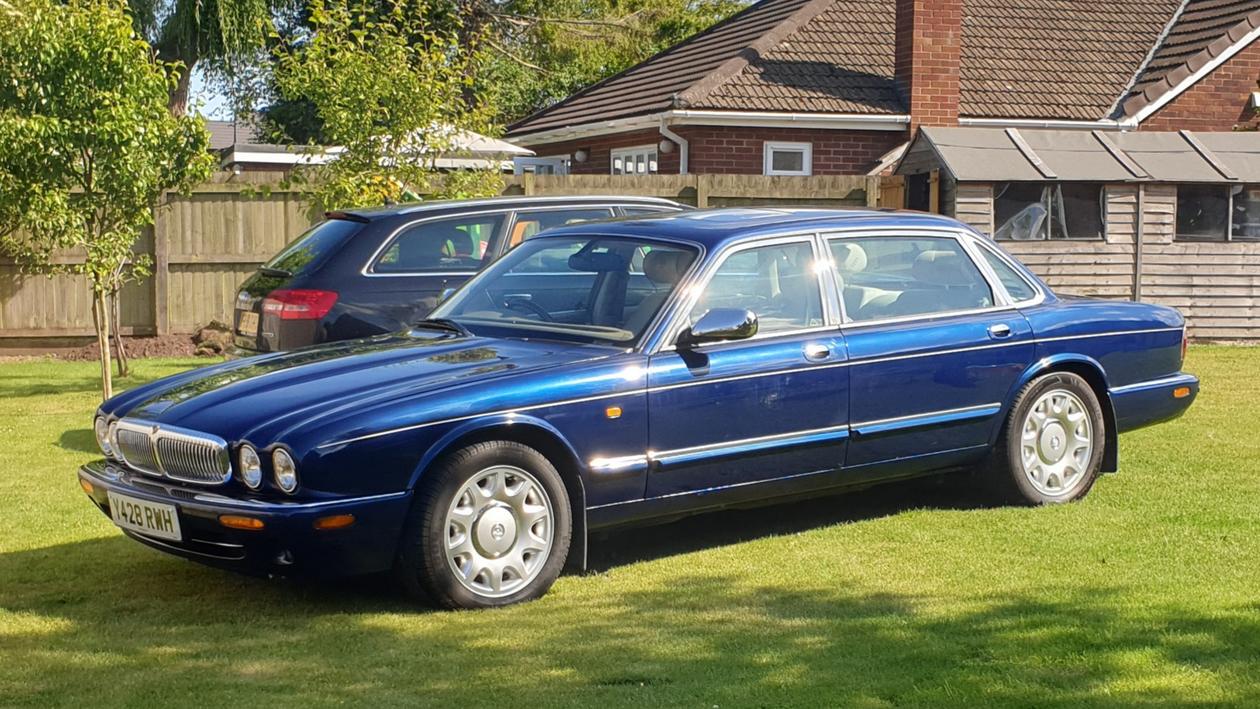
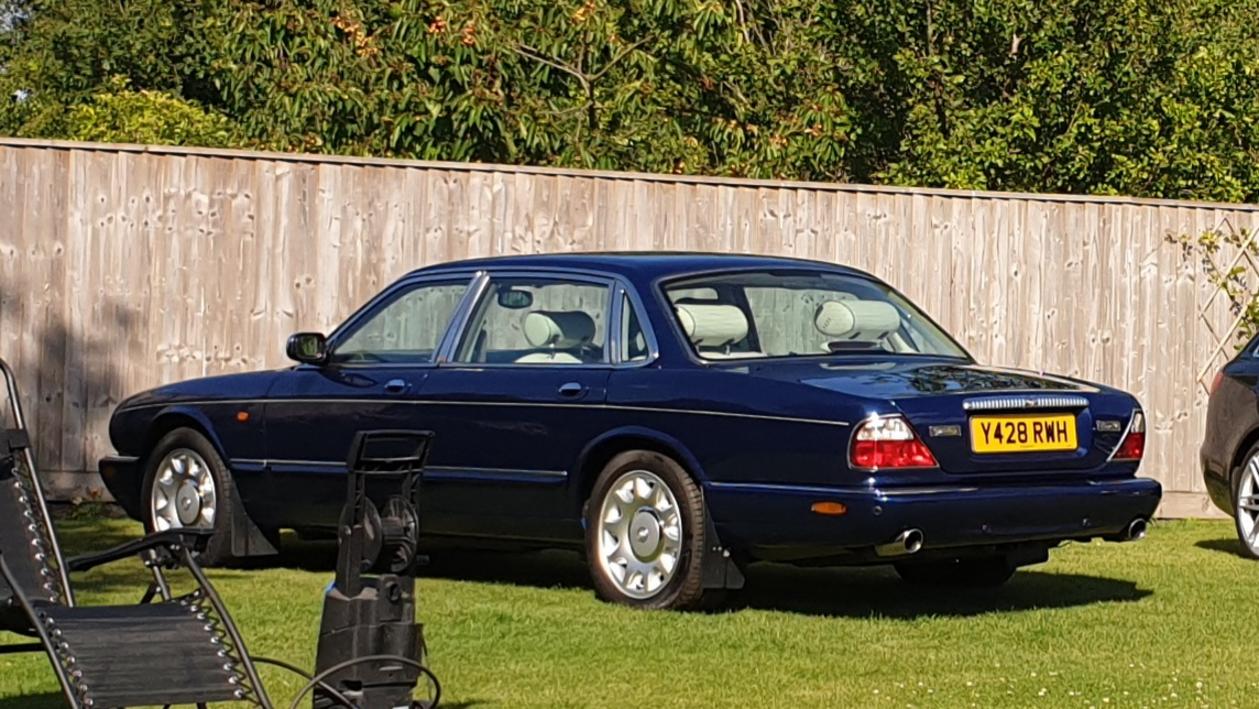
The car really is looking smart now, but there is still lots to do...
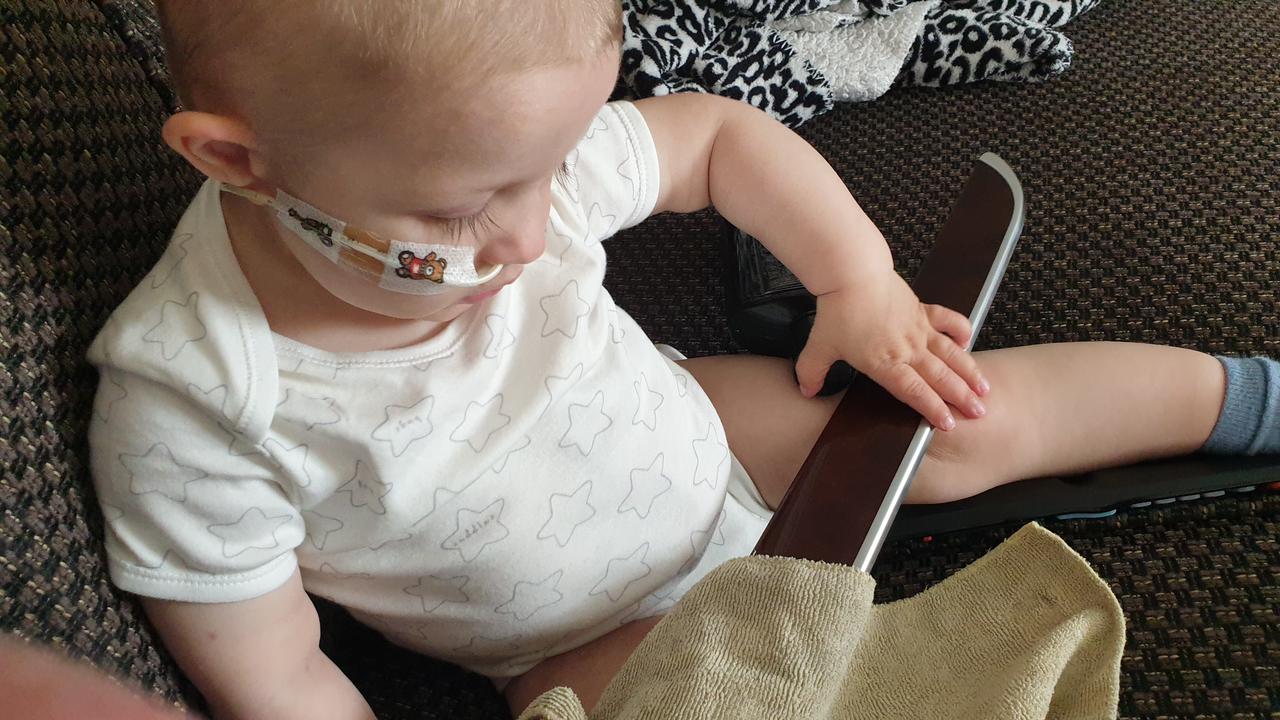
So then Aston entered stage 4 of his Chemotherapy, and he became quite ill. We ended up having to take him to hospital. But he slowly got better over a week, and here he is enjoying the hospital food!

Once he was out, obviously Aston's priority was doing more work on the Daimler!
I managed to buy a used driver side mirror off another Daimler Super V8. These have to be powerfold, and Electrochomatic, which is rare on UK spec X308 models.

But unfortunately, as with pretty much every one we see, the mirror glass was a stick on piece over a cracked original.... so we still needed the glass!

The glass is �200 new from Jaguar. I even saw some clown trying to sell a used and clouded/corroded one for �200 on Ebay (what a prat...). But then we sourced one for �86 BRAND NEW, on Ebay.
I fitted the mirror, but the power mechanism was not aligned correctly. Needed to have another go before I fitted the lovely spangly new mirror glass!
Then I bought a great Brodit phone bracket for the Audi.


I don't usually like this sort of thing. But the Bluetooth interface in the Audi does not allow me to skip tracks, so having the phone in a holder will allow me to control using the phone screen.
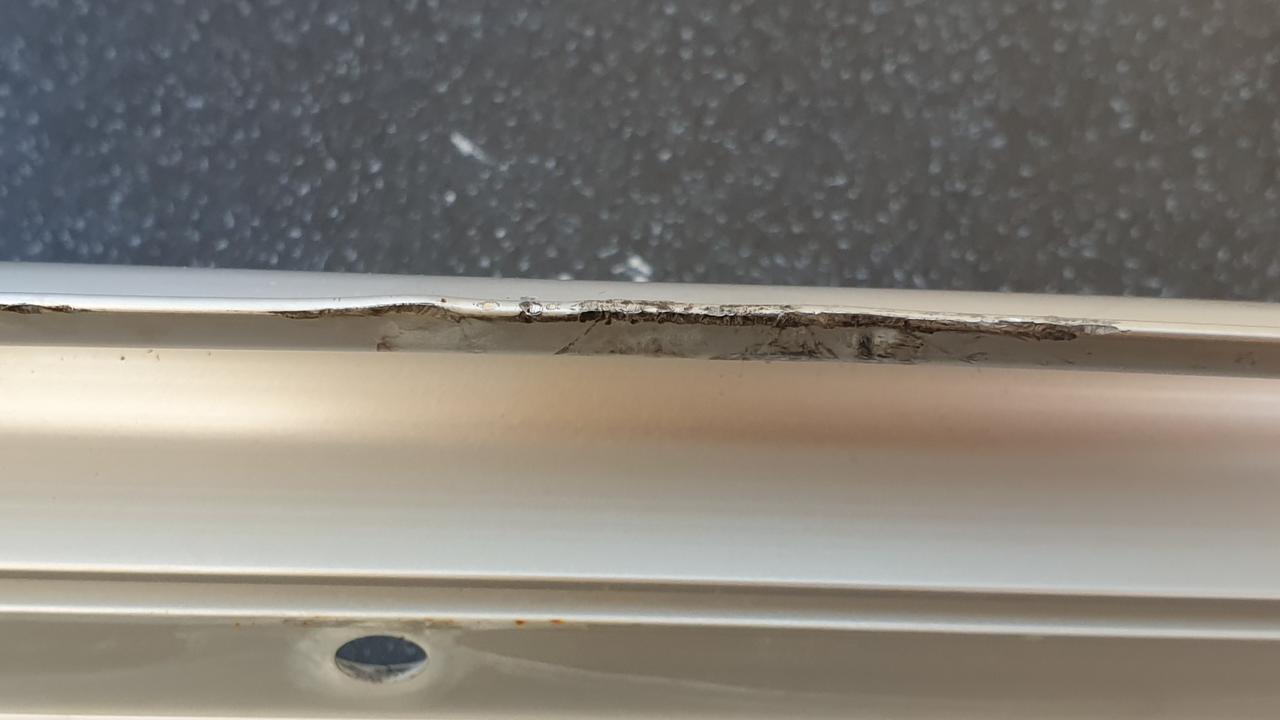
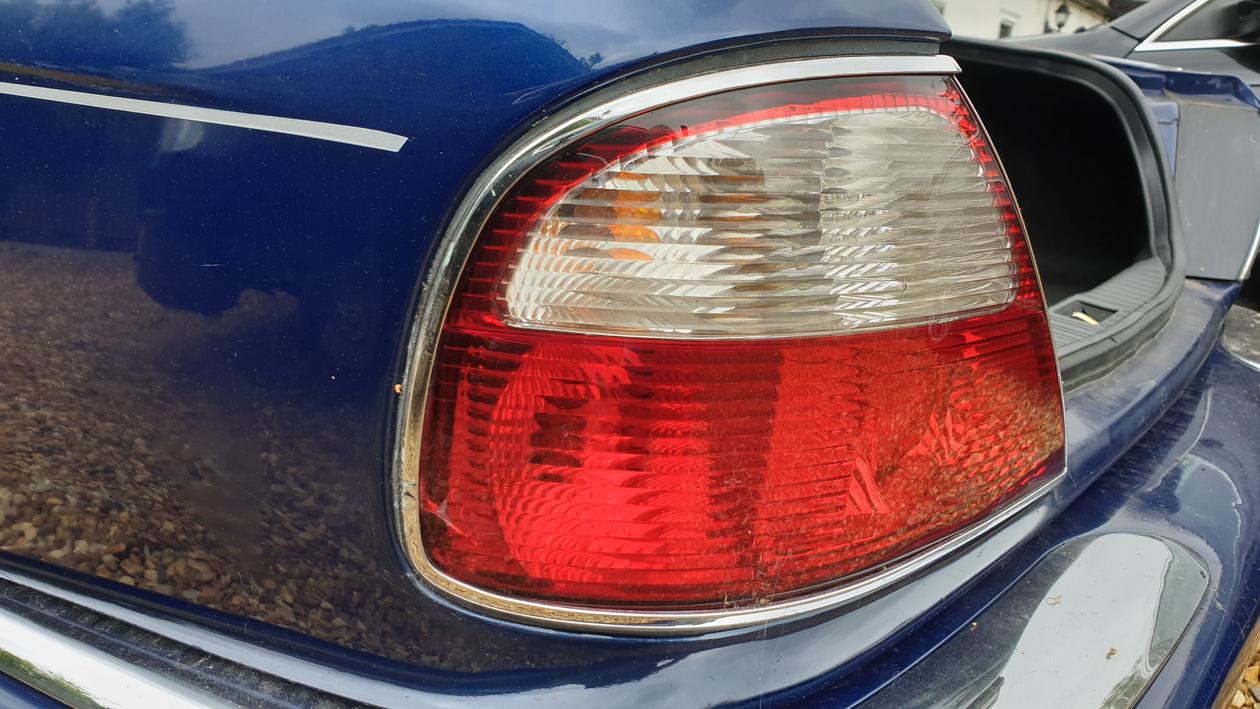
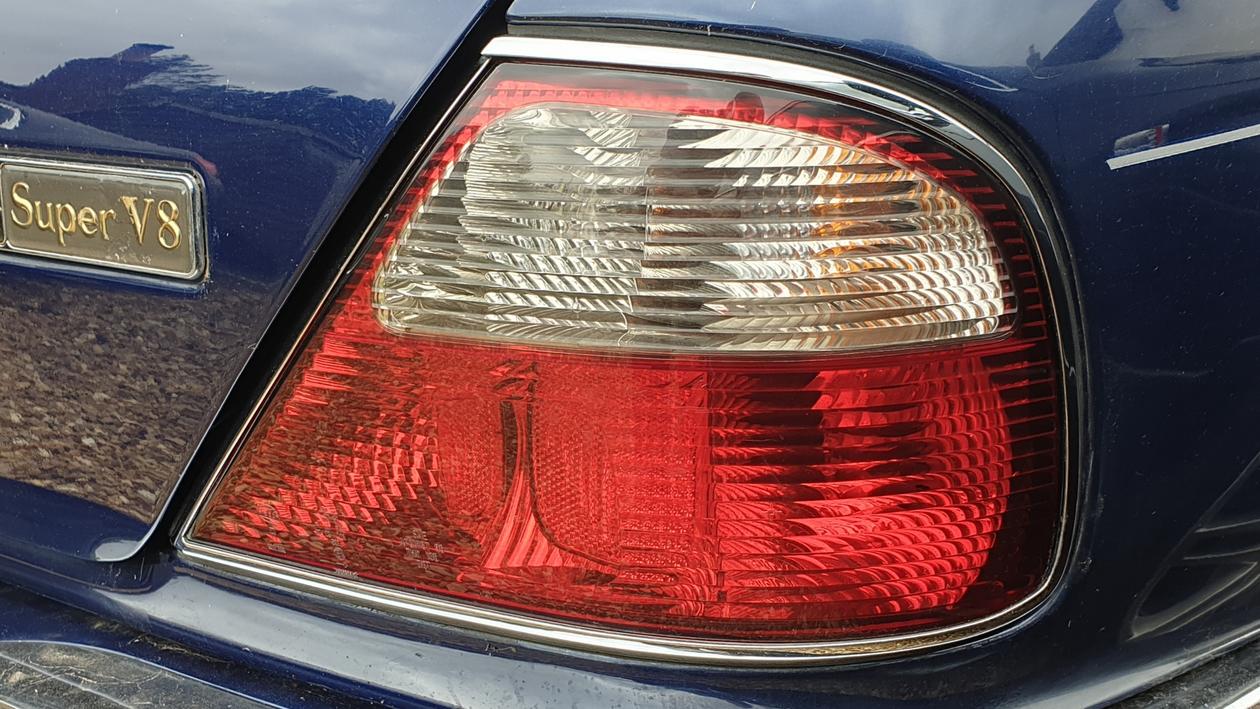
Then we attended to the rear lights on the Daimler. Both were damaged. The right one has a nasty, and badly repaired crack.


...and the left side on has damage to the chrome thanks to the idiots at the bodysuit, and a crack too.

Managed to source an "as new" pair from Ebay for a bargain �60.

Last thing, we replaced the puddle light cover that was cracked, and has therefore been missing these last few weeks... A bargain at �5...


One weekend in June we moved the Daimler off the drive and on to the grass for some photos.
The car really is looking smart now, but there is still lots to do...
So then Aston entered stage 4 of his Chemotherapy, and he became quite ill. We ended up having to take him to hospital. But he slowly got better over a week, and here he is enjoying the hospital food!
Once he was out, obviously Aston's priority was doing more work on the Daimler!
I managed to buy a used driver side mirror off another Daimler Super V8. These have to be powerfold, and Electrochomatic, which is rare on UK spec X308 models.
But unfortunately, as with pretty much every one we see, the mirror glass was a stick on piece over a cracked original.... so we still needed the glass!
The glass is �200 new from Jaguar. I even saw some clown trying to sell a used and clouded/corroded one for �200 on Ebay (what a prat...). But then we sourced one for �86 BRAND NEW, on Ebay.
I fitted the mirror, but the power mechanism was not aligned correctly. Needed to have another go before I fitted the lovely spangly new mirror glass!
Then I bought a great Brodit phone bracket for the Audi.
I don't usually like this sort of thing. But the Bluetooth interface in the Audi does not allow me to skip tracks, so having the phone in a holder will allow me to control using the phone screen.
Then we attended to the rear lights on the Daimler. Both were damaged. The right one has a nasty, and badly repaired crack.
...and the left side on has damage to the chrome thanks to the idiots at the bodysuit, and a crack too.
Managed to source an "as new" pair from Ebay for a bargain �60.
Last thing, we replaced the puddle light cover that was cracked, and has therefore been missing these last few weeks... A bargain at �5...
#48
03-17-2022, 11:41 AM
Peugeot wheels
The wheels on the good lady wife's Peugeot were looking very scabby (and they were like this when Lindsey got it).


So they were bundled into the boot of the Audi, so I can drop them off for a refurbishment. I then had to wait for them to be finished.
Daimler mirror
Then Aston wasted no time fixing that drivers side mirror power fold mechanism. It is still a little loose, but at least it works now.


We also fitted the brand new mirror glass.


You can see the nice new one next to the old one with stuck on piece.

So thats much better then!
Then we (literally) had a nice drive around the garden in the Daimler, Aston driving of course.
Parked it up and took some more garden photos.


Looks nice in the sun, although it needs another wash... it's very dusty!
I taxed it a couple of weekends ago, and Lindsey took the Daimler to the hospital while I took the wheels to the refurbishers.
The wheels on the good lady wife's Peugeot were looking very scabby (and they were like this when Lindsey got it).


So they were bundled into the boot of the Audi, so I can drop them off for a refurbishment. I then had to wait for them to be finished.
Daimler mirror
Then Aston wasted no time fixing that drivers side mirror power fold mechanism. It is still a little loose, but at least it works now.


We also fitted the brand new mirror glass.


You can see the nice new one next to the old one with stuck on piece.

So thats much better then!
Then we (literally) had a nice drive around the garden in the Daimler, Aston driving of course.
Parked it up and took some more garden photos.


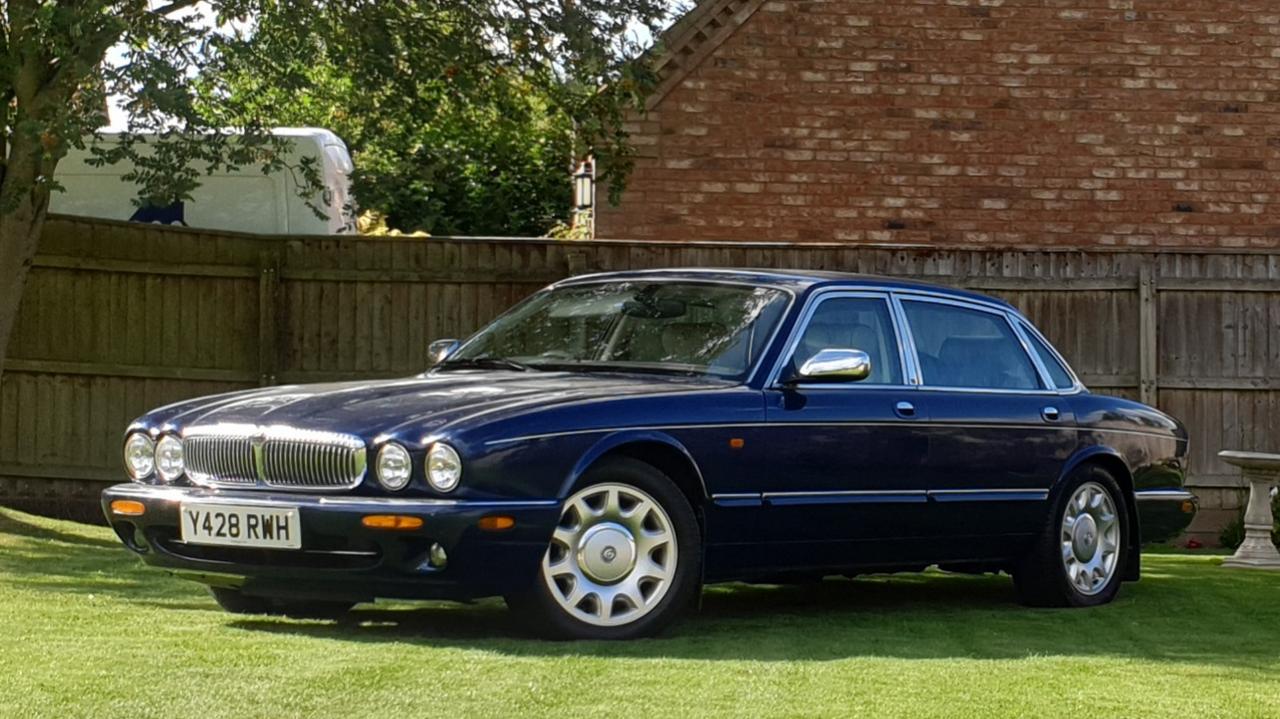

Looks nice in the sun, although it needs another wash... it's very dusty!
I taxed it a couple of weekends ago, and Lindsey took the Daimler to the hospital while I took the wheels to the refurbishers.
#49
03-18-2022, 05:18 AM
Something a little different
I may be a little batty troubling everyone on here with this, but I thought it might interest some of you. I am also curious if anyone else has every done any thing similar?
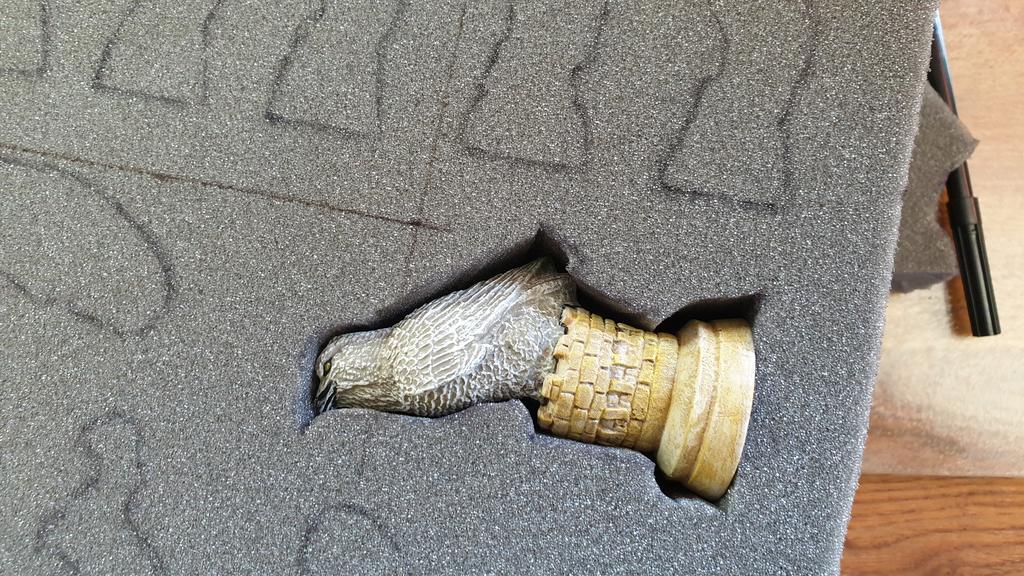
I'm making Aston a chess set, which I can give him in nearly 20 years time; on his 21st birthday.
They are stonecast birds, from moulds I bought online. I've not cast them all yet, but I'm halfway there. Then I'm painting them with acrylic paints, which is taking me a while... but there's no hurry! I have not done any for some time now due to life becoming rather busy. But I'll get back to it soon.
Will be dark red bases one side of board, sandstone bases the other.

This is a box I'm putting them in. Bought the box online, then cut foam for a shaped insert. Will be staining and varnishing the box, then maybe velvet lining on the foam.
I'll need 2 boxes for all 16 pieces...


Aston won't remember in 19 years time... so I let him take a look...

From the leftover foam, I've got a foam set out of it too...

I have since read about a man who had bought his son a bottle of scotch whisky since his birth. When the boy had grown up the bottles were worth a fortune, perhaps 21 year old Aston would prefer that... but its too late now! Ha!
Has anyone else done anything like this? Any interesting ideas?
I may be a little batty troubling everyone on here with this, but I thought it might interest some of you. I am also curious if anyone else has every done any thing similar?
I'm making Aston a chess set, which I can give him in nearly 20 years time; on his 21st birthday.
They are stonecast birds, from moulds I bought online. I've not cast them all yet, but I'm halfway there. Then I'm painting them with acrylic paints, which is taking me a while... but there's no hurry! I have not done any for some time now due to life becoming rather busy. But I'll get back to it soon.
Will be dark red bases one side of board, sandstone bases the other.

This is a box I'm putting them in. Bought the box online, then cut foam for a shaped insert. Will be staining and varnishing the box, then maybe velvet lining on the foam.
I'll need 2 boxes for all 16 pieces...


Aston won't remember in 19 years time... so I let him take a look...

From the leftover foam, I've got a foam set out of it too...

I have since read about a man who had bought his son a bottle of scotch whisky since his birth. When the boy had grown up the bottles were worth a fortune, perhaps 21 year old Aston would prefer that... but its too late now! Ha!
Has anyone else done anything like this? Any interesting ideas?
#50
03-18-2022, 05:25 AM
Brake calipers always look better painted
On the 7th July 2020, while my wife's Peugeot wheels were being refurbished, Aston decided to freshen up the calipers.

(For anyone who is worried, I can assure everyone that this is a joke, and Aston was never allowed near the spray paint!)
We then took a family drive in the Daimler for a bit of fun. He clearly likes the supercharger!

Treadplates
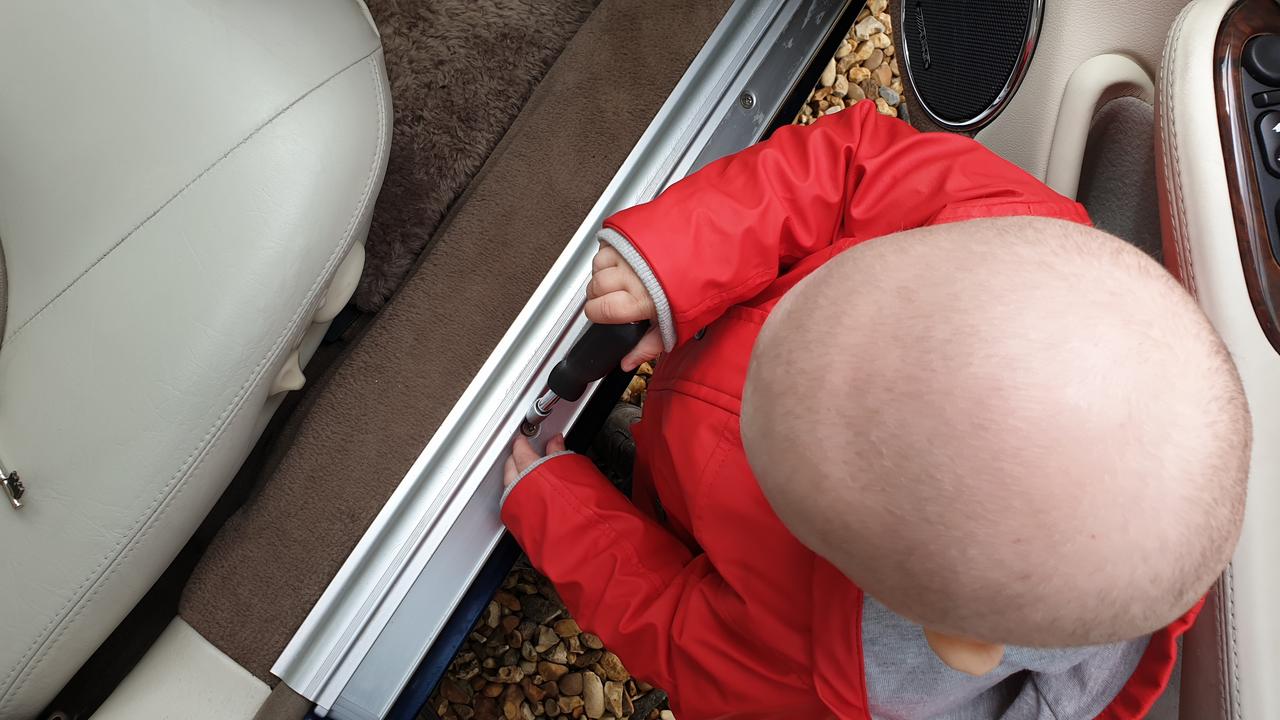
The following day, Aston and me tackled the Daimler drivers side sill, that we were not able to do a few weeks back as the sill plate was damaged.
Some may remember mine had been damaged by the bodyshop, by them trying to lever it off. I then ordered a replacement from Black Cherry Jaguar spares, and it turned up ever worse - and absolutely filthy too!
So then I bought a whole set of four from Simply Performance Jaguar spares (I got a set of four, for the same price as just one from Black Cherry!), and thankfully this time I had a result. All four were in nice condition (not immaculate, but these are 20 year old cars!), just a few scuffs, but most importantly no physical damage. They were also nice and clean.
Aston picked the best one, then fitted it on.

Then Aston very carefully fitted the stainless steel plate cover - and completed the satisfying task of removing the protective film!

Shame it gets stuck to your hands...
https://i.imgur.com/H9XKGNO.jpg
All finished!
So he decided a celebration drive in the Audi... the pest...

On the 7th July 2020, while my wife's Peugeot wheels were being refurbished, Aston decided to freshen up the calipers.

(For anyone who is worried, I can assure everyone that this is a joke, and Aston was never allowed near the spray paint!)
We then took a family drive in the Daimler for a bit of fun. He clearly likes the supercharger!

Treadplates
The following day, Aston and me tackled the Daimler drivers side sill, that we were not able to do a few weeks back as the sill plate was damaged.
Some may remember mine had been damaged by the bodyshop, by them trying to lever it off. I then ordered a replacement from Black Cherry Jaguar spares, and it turned up ever worse - and absolutely filthy too!
So then I bought a whole set of four from Simply Performance Jaguar spares (I got a set of four, for the same price as just one from Black Cherry!), and thankfully this time I had a result. All four were in nice condition (not immaculate, but these are 20 year old cars!), just a few scuffs, but most importantly no physical damage. They were also nice and clean.
Aston picked the best one, then fitted it on.
Then Aston very carefully fitted the stainless steel plate cover - and completed the satisfying task of removing the protective film!

Shame it gets stuck to your hands...
https://i.imgur.com/H9XKGNO.jpg
All finished!

So he decided a celebration drive in the Audi... the pest...
#51
03-18-2022, 06:08 AM
The Peugeot's refurbished wheels
We are now up to the 11th March 2020, and Lindsey's wheels were returned beautifully refurbished. I also treated the car to new Chrome wheel bolt covers, and new wheel centres.

Aston gave mummy's car a wash to keep it shining like the new wheels.
Adaptive fast charger
Then I started work on a charge cable I could route to the bracket when it arrives.
Pulled apart my fast charging adapter.

Soldered in some new power wires.

Then poked them through the case, and put back together.

All taped up and ready to go in...

So back in the Peugeot, I hacked into the cigar lighter socket power, and ran a charge cable out.
Just need the bracket now!

A bit of dreaming?
I bought this book from Gumtree. Got it second hand for �5 in perfect condition, might have a series 2 coupe one day?

We are now up to the 11th March 2020, and Lindsey's wheels were returned beautifully refurbished. I also treated the car to new Chrome wheel bolt covers, and new wheel centres.

Aston gave mummy's car a wash to keep it shining like the new wheels.

Adaptive fast charger
Then I started work on a charge cable I could route to the bracket when it arrives.
Pulled apart my fast charging adapter.

Soldered in some new power wires.

Then poked them through the case, and put back together.

All taped up and ready to go in...

So back in the Peugeot, I hacked into the cigar lighter socket power, and ran a charge cable out.
Just need the bracket now!

A bit of dreaming?
I bought this book from Gumtree. Got it second hand for �5 in perfect condition, might have a series 2 coupe one day?

#52
03-18-2022, 06:31 AM
Audi fast charge!
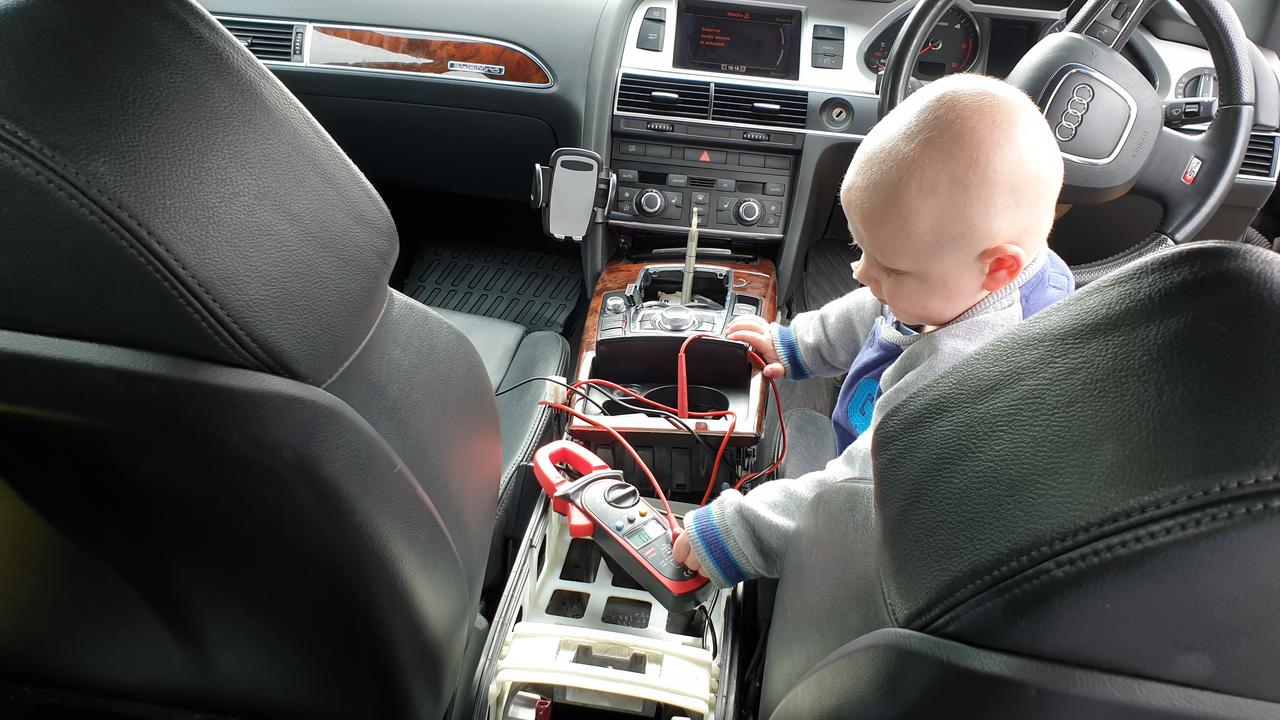
Following the success of the fast charger installation on my wife's car the previous weekend, Aston was kind enough to treat me to the same thing in the Audi. So 18th July we pulled the Audi centre console apart.

We made up another lead out of a second Samsung fast charger. Then hacked onto the power circuit in the Audi to install it.


Ran the USB cable up to the front of the centre console.
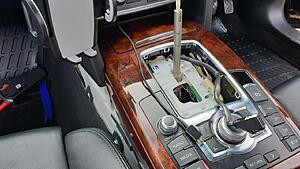
Then put everything back together, and this provided a convenient charge cable below the bracket to fast-charge my phone... Excellent!

Thank you Aston!
#53
03-18-2022, 06:46 AM
A little work on the Daimler interior
Late July I tried sometime new, an update video. Was a bit of fun for Aston and me.
We gave the rear a bit of a spruce up, and there was a bit of trim that annoyed me at the rear of the Daimler, I wanted to see if I could fix it.
Video is here:
Late July I tried sometime new, an update video. Was a bit of fun for Aston and me.
We gave the rear a bit of a spruce up, and there was a bit of trim that annoyed me at the rear of the Daimler, I wanted to see if I could fix it.
Video is here:
Last edited by c16rkc; 03-18-2022 at 08:17 AM.
#55
03-18-2022, 08:34 AM
Auxiliary audio input for the X308
Aston wanted to be able to listen music from an auxilliary source - such as a phone, so we experimented with modifying the head unit to take one.
I was enjoying my videos at that time, so you guessed it... another video.
I promise there will be some more photos eventually, I semmed to go through a stage of doing a lot of videos.
#56
03-18-2022, 08:37 AM
The Daimler restoration - the first year
Yep, another video, I decided to make one about the Daimler, and how it came to become Astons.
I know videos are not everyone's cup of tea, so apologies to the people who would have rather I made a photo based post. But I was having such good fun making the videos.
Yep, another video, I decided to make one about the Daimler, and how it came to become Astons.
I know videos are not everyone's cup of tea, so apologies to the people who would have rather I made a photo based post. But I was having such good fun making the videos.
#58
03-18-2022, 08:46 AM
Update to the Daimler's "To do" list:
- New battery DONE 21-12-2020
- Repair crash damage at rear passenger quarter, repair rust on all four arches and sills DONE
- Replace missing rear passenger side reflector (LNC5022AB) DONE
- Thoroughly clean the car, inside and out. - DONE (But always ongoing)
- Assess any remedial work to the paintwork (including pinstripes/overspray); then add plan to address using wet-sanding/compounding etc. Mostly done, but there are still areas that need attention.
- Re-colour the armrest, and front seats where necessary. DONE.
- Fit missing wheel nut, then assess if any new tyres needed, spare is definitely needed! DONE - Replaced both rears, but front tyres are starting to crack with age so need replacement soon
- Re-spray of front bumper.
- Fit front parking sensors (yes I know I am a pansy)
- Re-spray of rear bumper... as it was not done properly on the last body shop visit, maybe one day...
- Adjust rear bumper side profile to line up properly with wing. DONE
- Assess if front sill plates can be re-fitted; fit if possible DONE brand new sill plates fitted
- Re-fit the jacking point cover.
- Purchase LNF7361AA rear parking sensor bracket, paint it, and then re-fit parking sensor. Fitted but needs painting.
- Adjust position of wonky parking sensors, re-paint those which need it. Adjusted, but paint needed to make perfect.
- Check height of exhausts, or is bumper wonky between exhausts? Investigate.
- Re-fit the chrome trim at drivers side front sill. DONE
- Have rust attended to (by new bodyshop) on corners of passenger side doors.
- Have rust attended to (by new bodyshop) on front side, of drivers side front arch (where it meets bumper).
- Wire in some USB charging points and fit under armrest.
- New front Grille (there is minor marking around the "D" badge).
- New radiator "D" badge (mine has been badly painted gold!).
- Replace drivers side aluminium kickplate damaged by bodyshop DONE.
- New rear lights as both cracked in plastic lens DONE 18-06-2020
- Replace non-working powerfold drivers side mirror, and new mirror glass DONE 22-06-2020
- New "Daimler" or "V8" badges for side window chrome pillars (mine have once again been badly painted gold).
- Install "Audio aux input" DONE - but needs tweeking
- Investigate Bluetooth phone install (This might help: http://jimroal.com/cars/X308Bluetooth.pdf)
- Re lacquer all wood trim (as it is faded and cracked in places)
- New gear knob (mine is faded)
- Thoroughly clean engine bay.
- Have gearbox oil changed.
- Repair faulty drivers seat, backrest motor not working DONE 04-05-2020 was control module
- Replace corroded subframe brackets for MOT DONE 23-04-2020
- Welding of underside for MOT DONE 23-04-2020
- Investigate "Check engine" light, suspected coil packs DONE replaced all spark plugs and coil packs
- Purchase and fit missing under-bonnet tool kit. DONE 09-06-2020
- Purchase set of original lambswool mats DONE
- Attend to "knocking" in suspension at front (think it is strut tops)
- Investigate lack of heating in cabin (suspected siren has blown fuse)
- Inspect top timing chain tensioners, and replace if necessary
- Rear seats are not moving, none of the buttons work - including the seat heaters
- Several bulbs are required to get all the dials and buttons lit up
#60
03-18-2022, 09:10 AM
New cars!
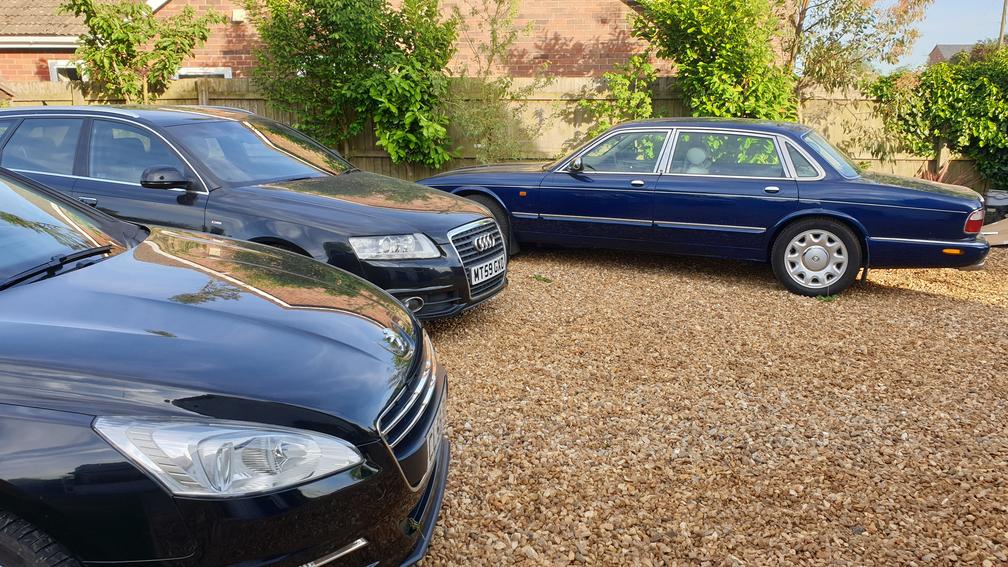
In March 2021 we decided as things were going well, we had spare money to spend on some nice new cars as our daily drivers.
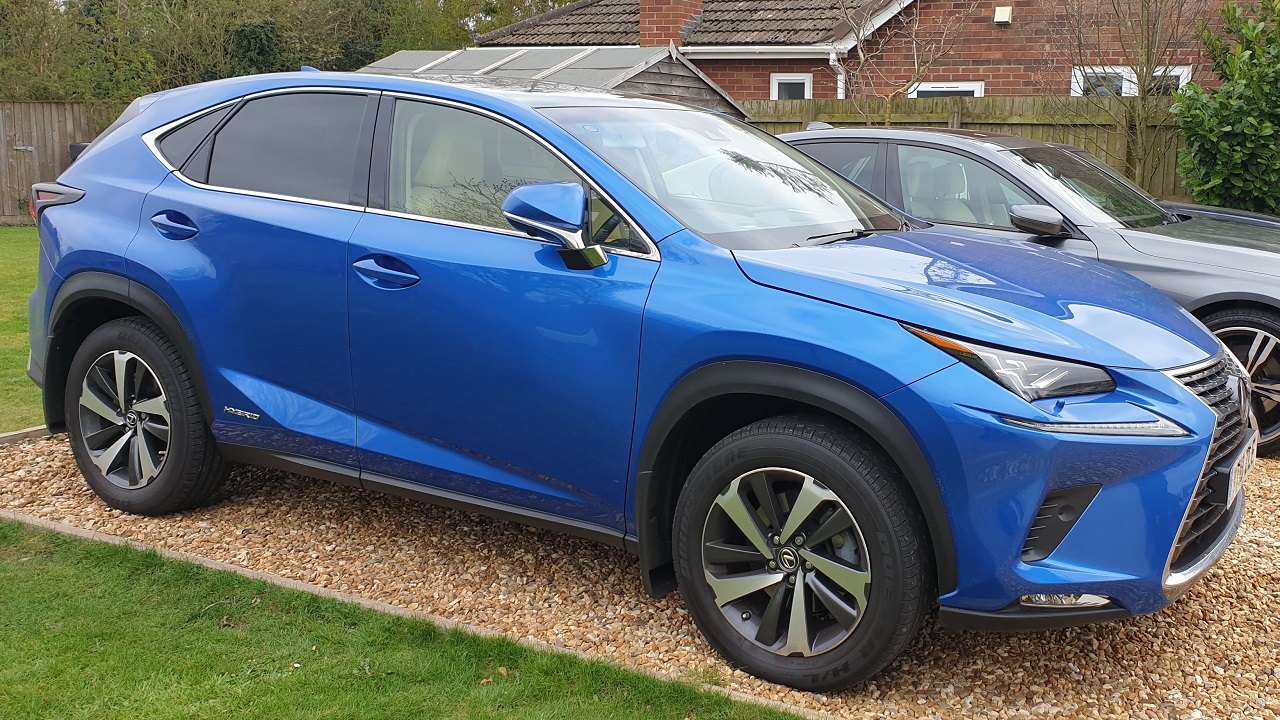
First of all, be bought Lindsey this Lexus Hybrid.
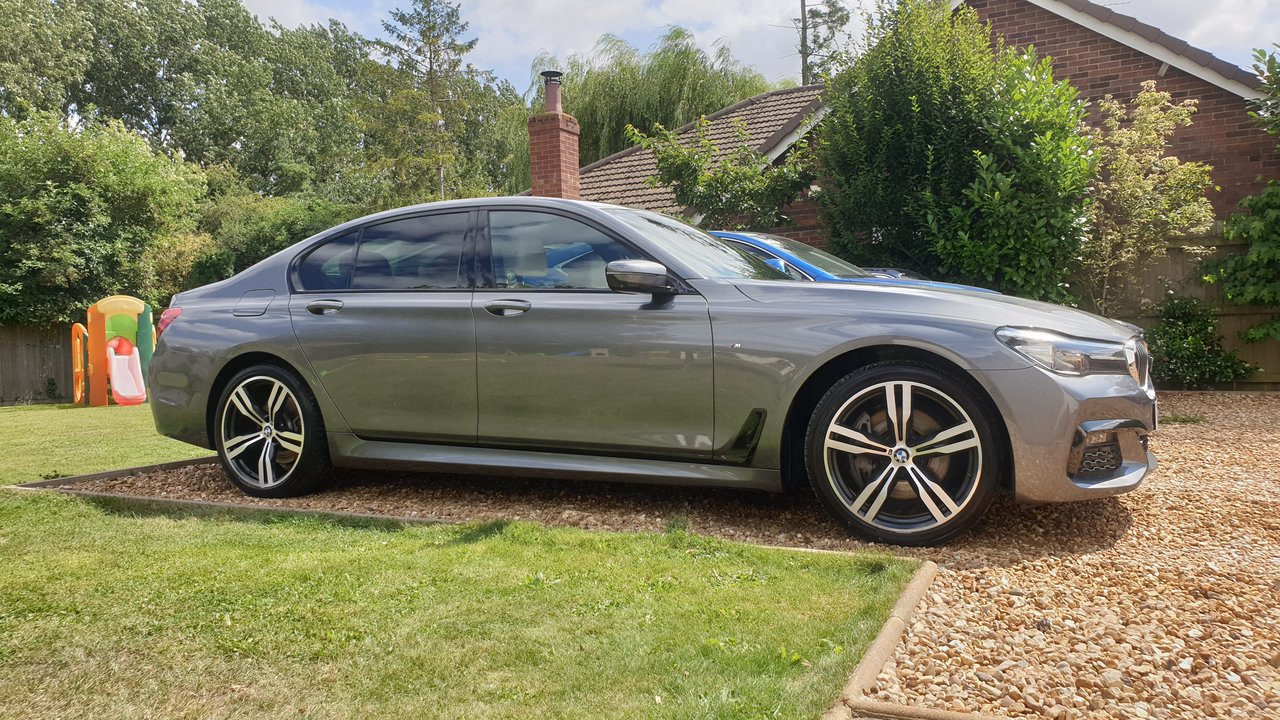
We also bought me this BMW 7 series:
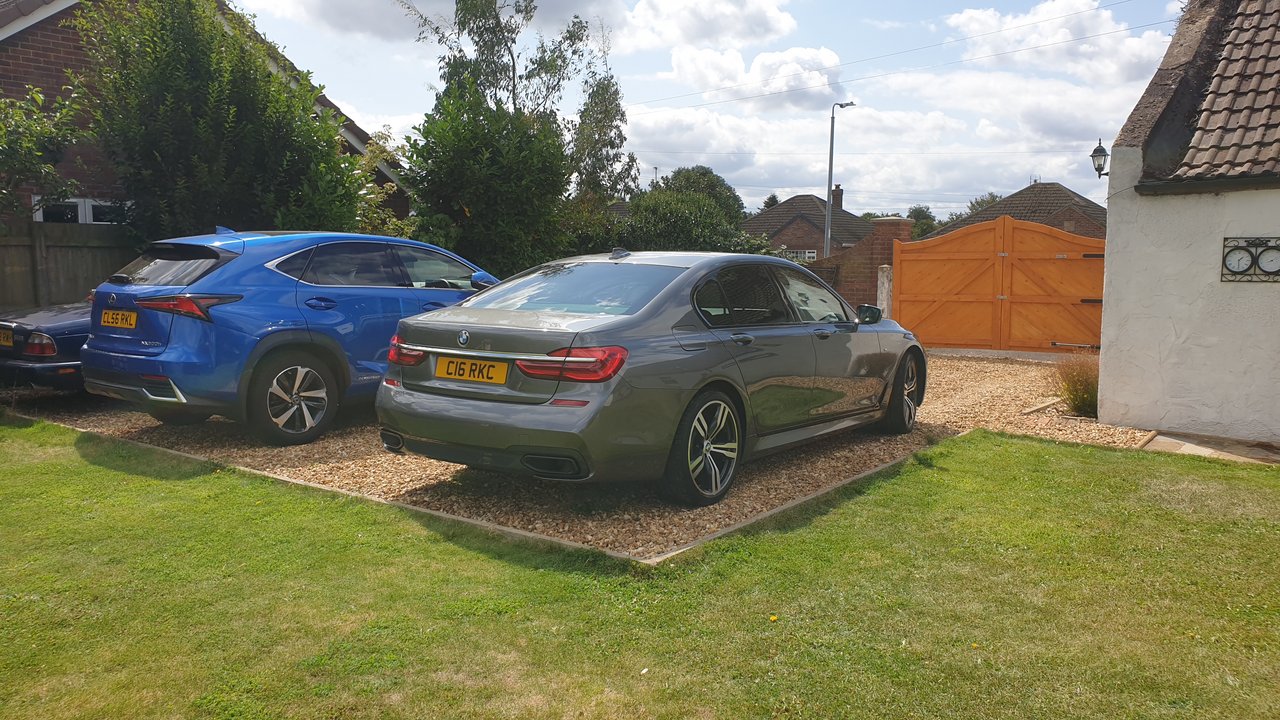
We were absolutely spoilt with these, and we therefore sold the Peugeot, Audi, and we also sold that second LPG converted Daimler we had on the drive.
This put us back to 3 cars.
The poor old Daimler did not get much attention after that, as we made ourselves quite busy!
In March 2021 we decided as things were going well, we had spare money to spend on some nice new cars as our daily drivers.
First of all, be bought Lindsey this Lexus Hybrid.
We also bought me this BMW 7 series:
We were absolutely spoilt with these, and we therefore sold the Peugeot, Audi, and we also sold that second LPG converted Daimler we had on the drive.
This put us back to 3 cars.
The poor old Daimler did not get much attention after that, as we made ourselves quite busy!