
C16 RKC's car ownership thread
#101
 07-28-2022, 10:39 AM

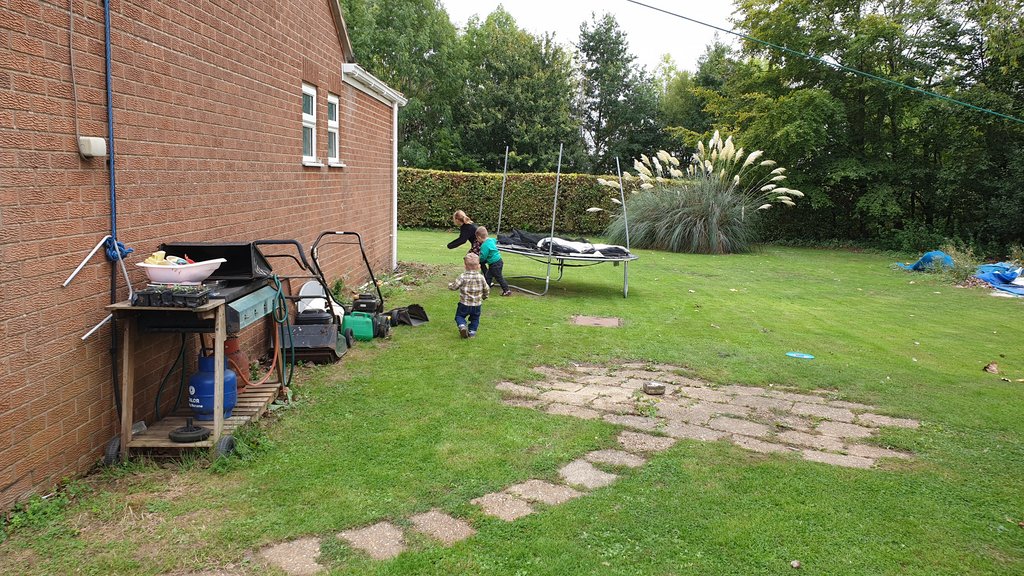
Storage for all my crap
The big garage has gone from a giant empty space, to being full of the three cars and loads of our "stuff" from both the shed, house, cars, and garden. I needed to sort out the storage cupboards properly, so I could clear up and put some stuff away.
Last weekend I finally got to spend a day on it.
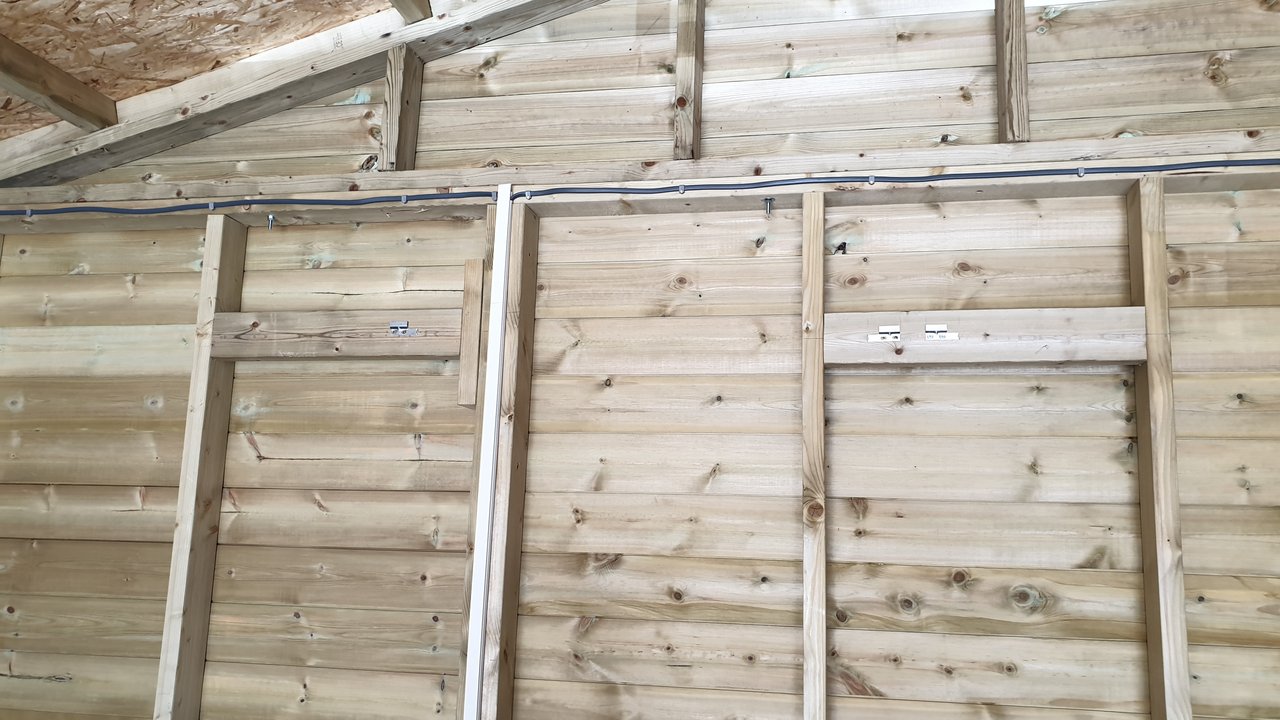
I ordered four sheets of 18mm thick marine ply board, and some timber. I had noticed that the 38mmx38mm timbers I had put in at high level to support the wall cabinets had twisted, and the cabinets had started to sag. I therefore had to take them all off and replace the timbers with some 100mm x 50mm pieces that could be secured better. These helped immensly.
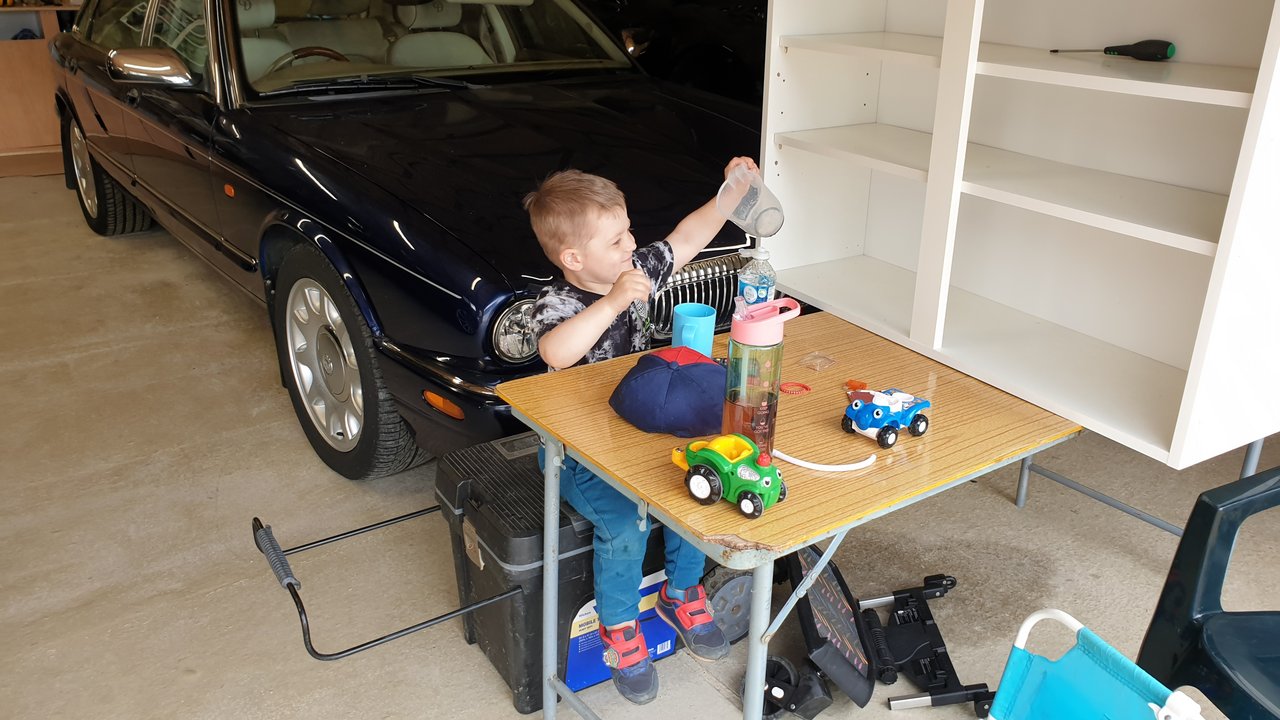
Aston helped out as usual, by looking after the cabinets I removed from the wall.
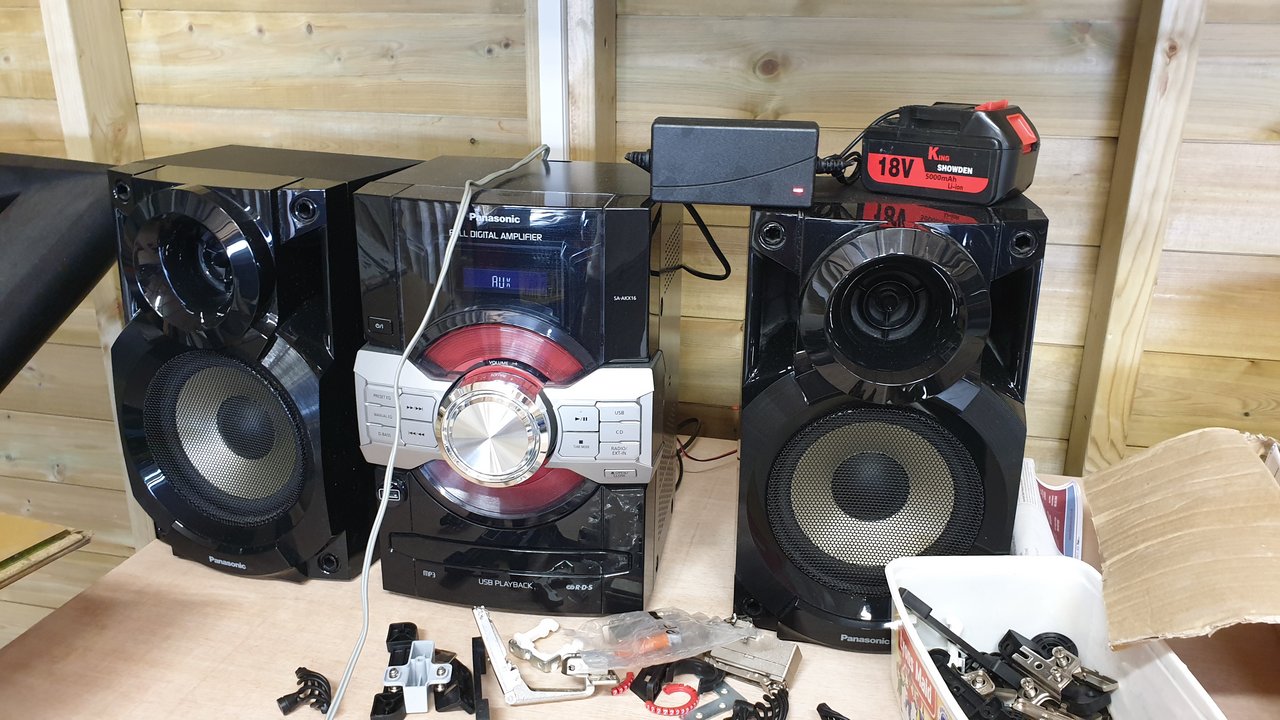
I set up my 10 year old Hi-Fi that had been lurking in the loft. This will come in handy for some "garage" music (Pun intended).
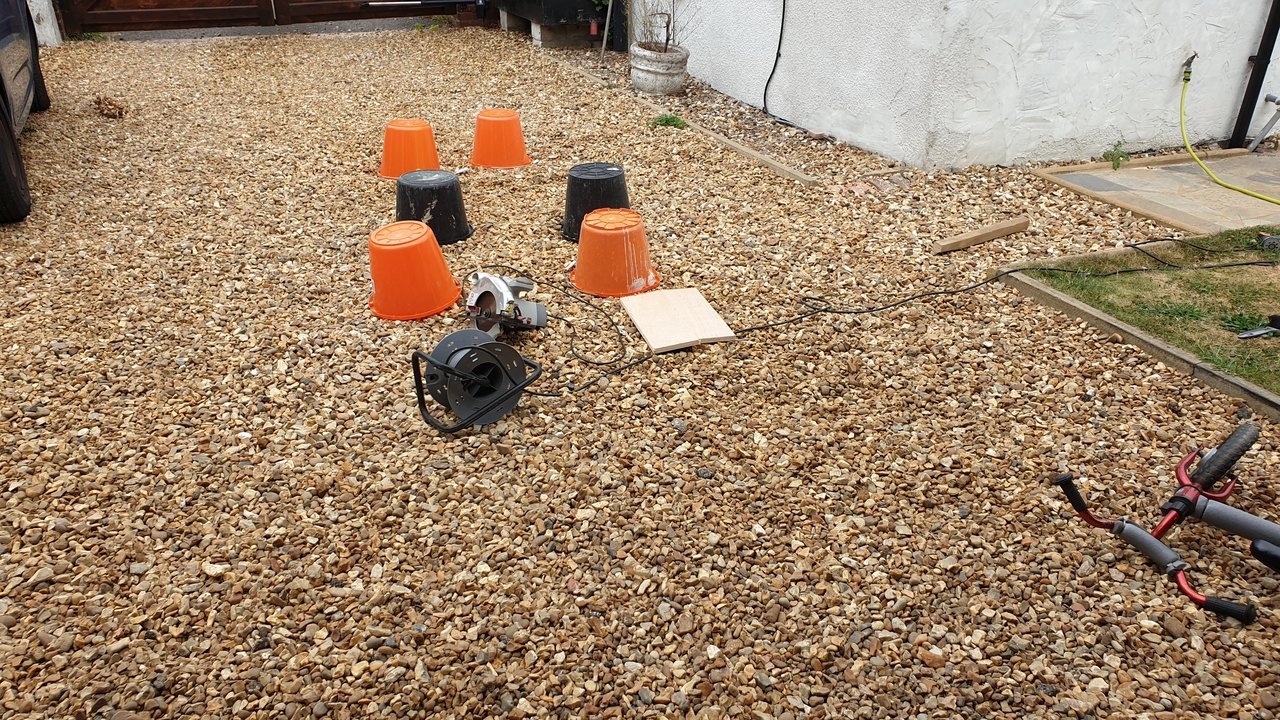
Then I setup some buckets to rest the large 1200mm x 2400mm sheets of plywood on, which I sawed them into pieces for the cupboards.
I then fitted kickboards, and center supports to hold the doors. I am going for an "industrial" look for the garage; which co-incidentally is much cheaper than all those posh kitchen cupboard doors you can buy.
OK, you got me, the cheapness is actually why I'm doing it like this... but I like it.
So that's it and up to date as of last weekend. I ran out of time, and had to down tools, but I also had no hinges or handles for the doors. More for me to do next week!
The big garage has gone from a giant empty space, to being full of the three cars and loads of our "stuff" from both the shed, house, cars, and garden. I needed to sort out the storage cupboards properly, so I could clear up and put some stuff away.
Last weekend I finally got to spend a day on it.
I ordered four sheets of 18mm thick marine ply board, and some timber. I had noticed that the 38mmx38mm timbers I had put in at high level to support the wall cabinets had twisted, and the cabinets had started to sag. I therefore had to take them all off and replace the timbers with some 100mm x 50mm pieces that could be secured better. These helped immensly.
Aston helped out as usual, by looking after the cabinets I removed from the wall.
I set up my 10 year old Hi-Fi that had been lurking in the loft. This will come in handy for some "garage" music (Pun intended).
Then I setup some buckets to rest the large 1200mm x 2400mm sheets of plywood on, which I sawed them into pieces for the cupboards.
I then fitted kickboards, and center supports to hold the doors. I am going for an "industrial" look for the garage; which co-incidentally is much cheaper than all those posh kitchen cupboard doors you can buy.
OK, you got me, the cheapness is actually why I'm doing it like this... but I like it.
So that's it and up to date as of last weekend. I ran out of time, and had to down tools, but I also had no hinges or handles for the doors. More for me to do next week!
The following users liked this post:
Ken Cantor (07-28-2022)
#102
09-14-2022, 10:57 AM
The Daimler finally gets some love and attention
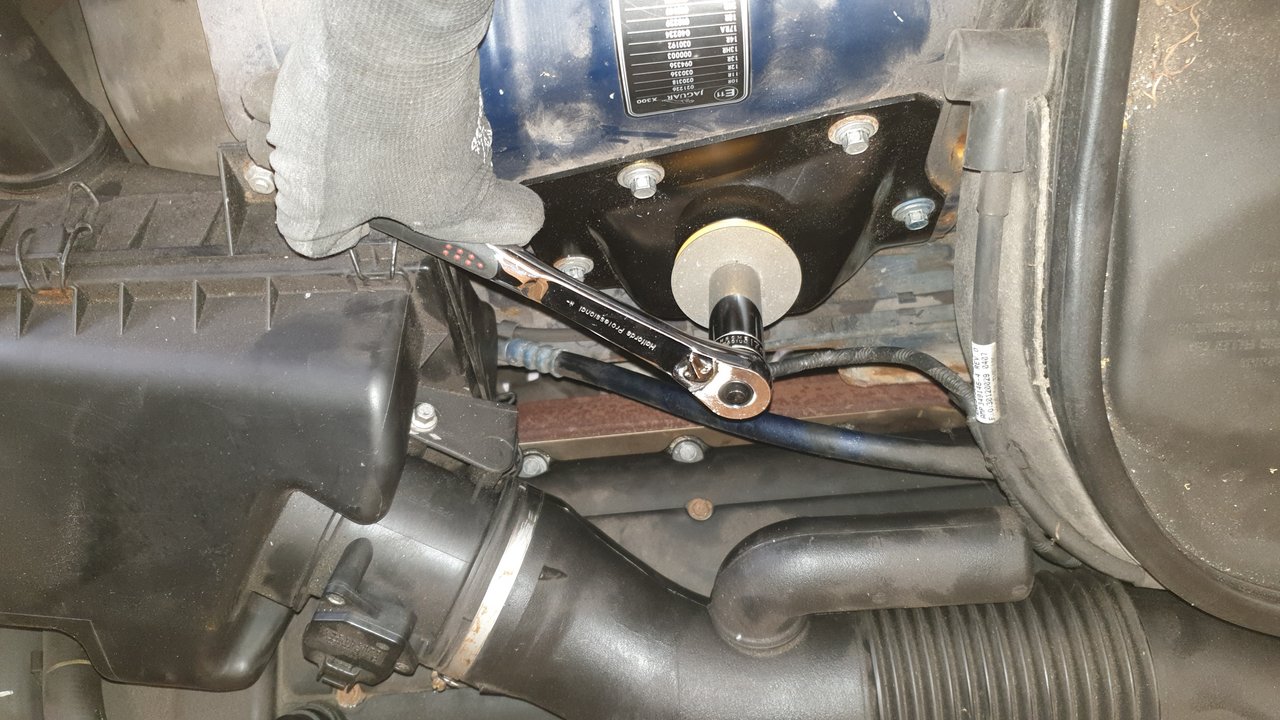
Nothing particularly exciting, but I finally got a few minutes to spend on the Daimler last weekend. I replaced the top front shock mounts, which are prone to going without much indication, and I am hoping are the source of my subtle "knocking" over bumpy roads.
It was so much easier than I expected, and I had both sides done in not much more than 30 minutes.
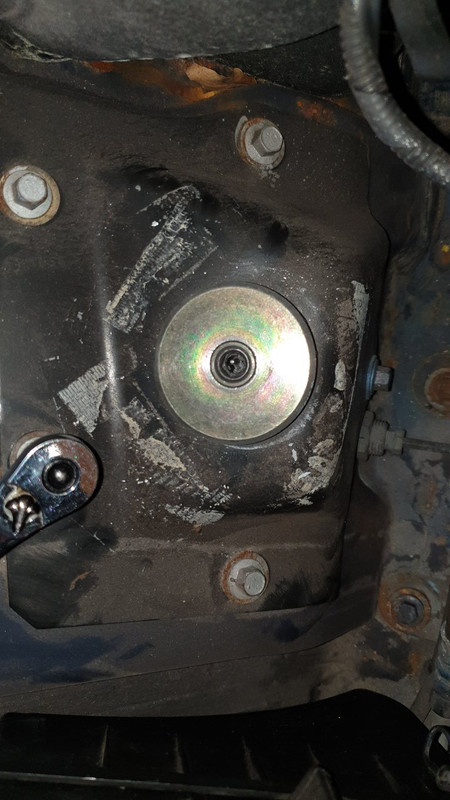
Before drivers side (no visible damage):
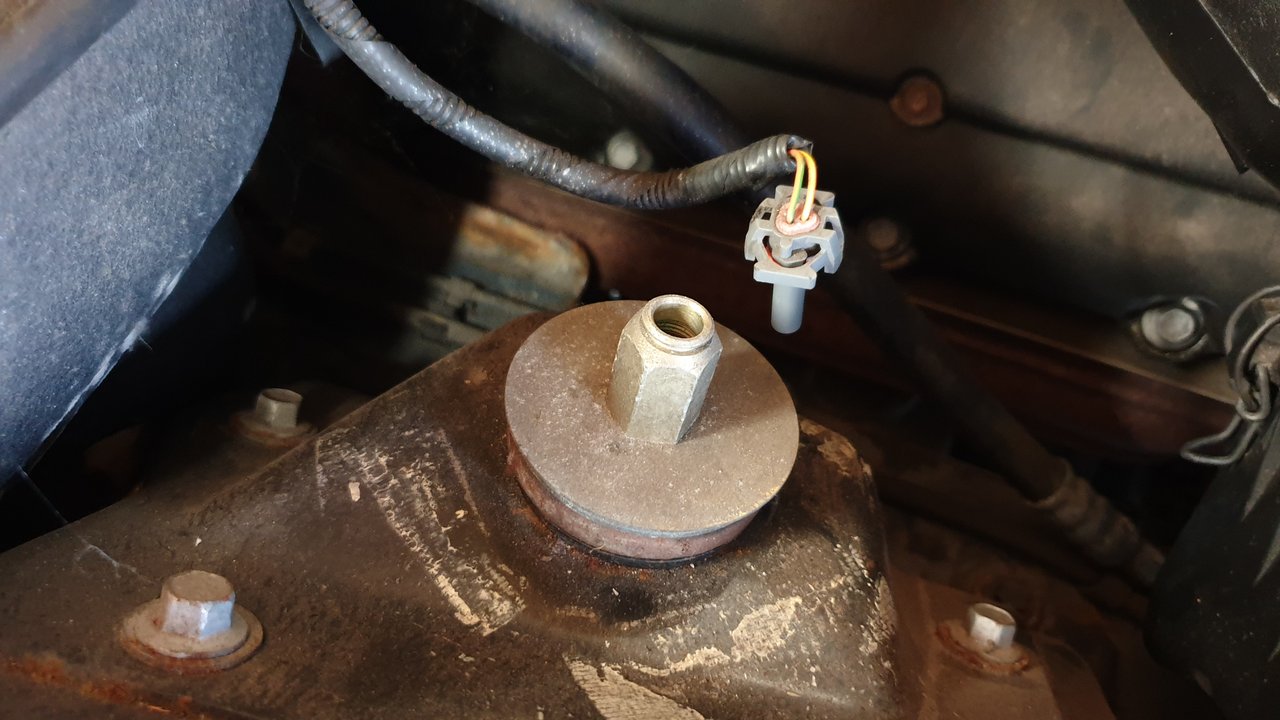
Before passenger side (damage visible, and this is the side that knocks):

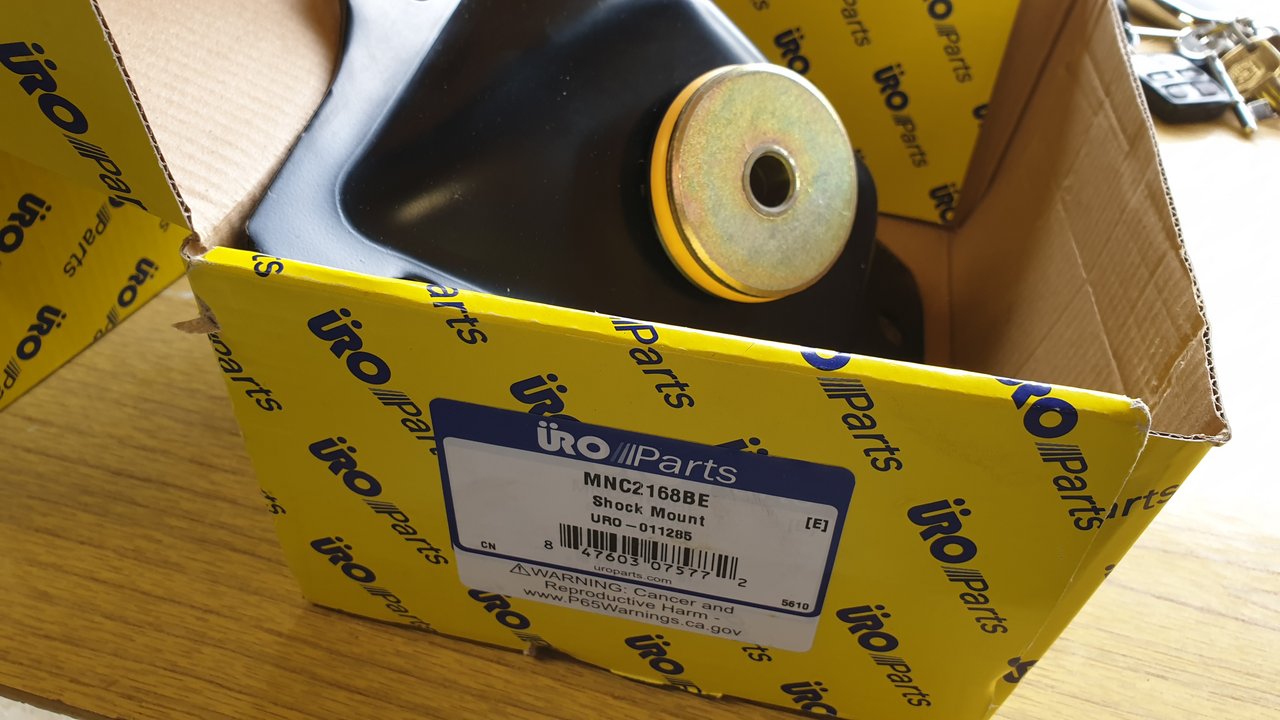
I purchased two replacements online from a USA company, because these CATS models seem very rare, and I could find no stockists in the UK, or at least not at sensible prices.
Steps to replace.... Jack the car up so that the wheel is just touching the floor:
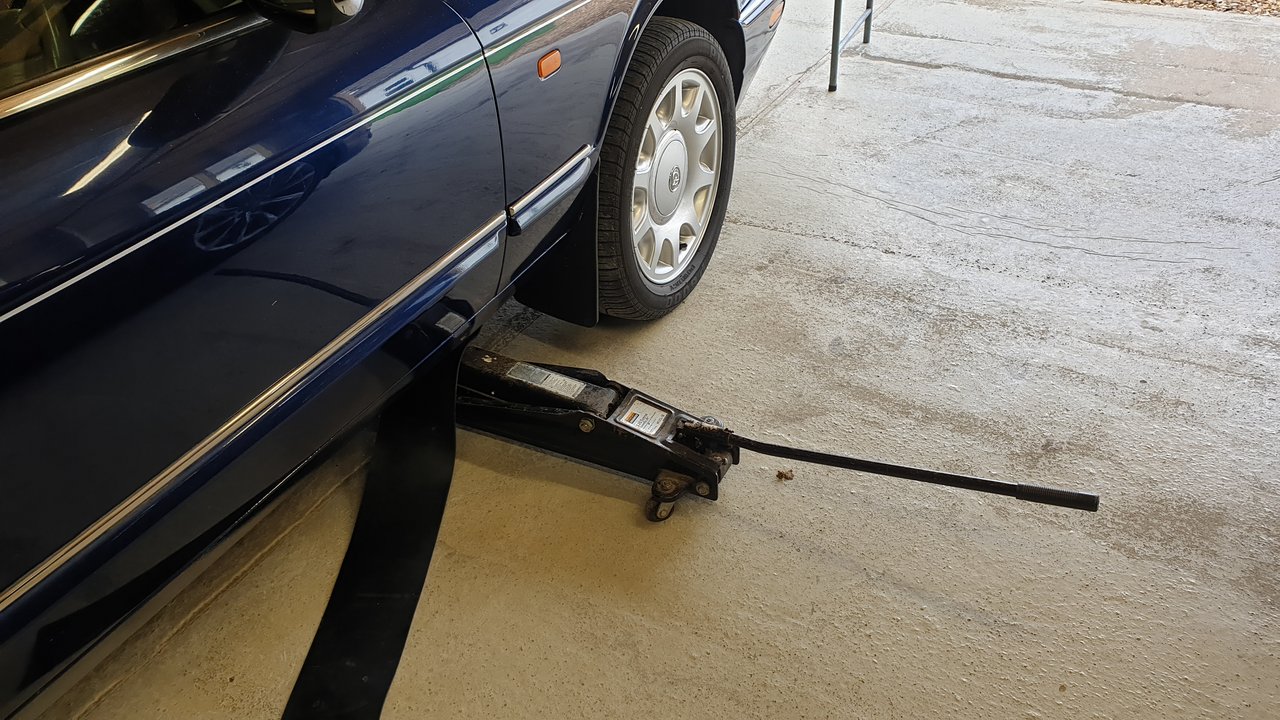
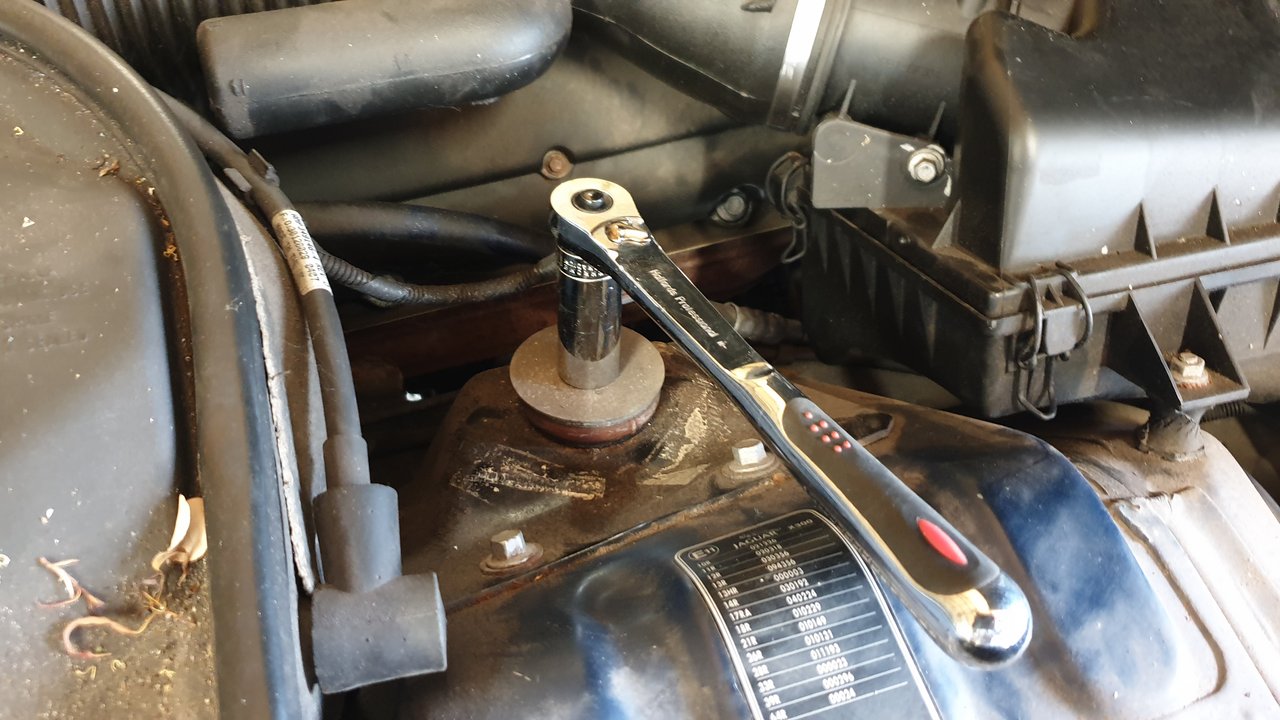
Remove top "tall" nut:
Remove the 5 hex bolts that hold the assembly in place:
The lift it away, the position of the strut poking through can be adjusted with the jack.

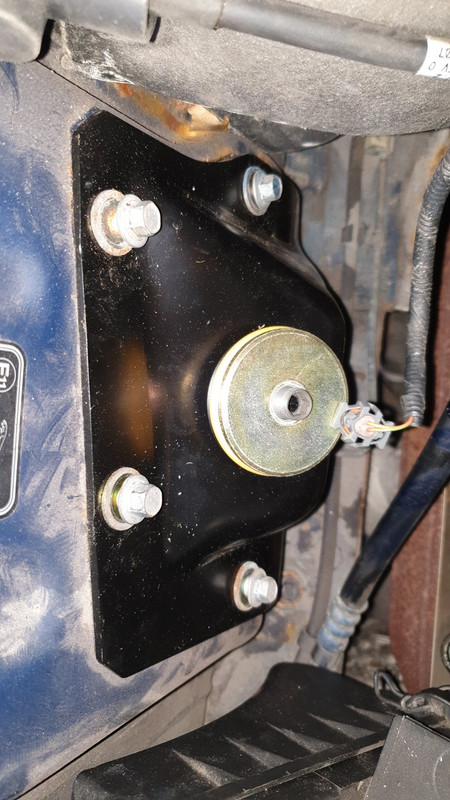
Fit the new assembly, making sure the strut top is poking through (again adjust with jack if necessary):
Tighten the tall nut back on. A pair of mole grips can hold the strut in place under the wheel arch:
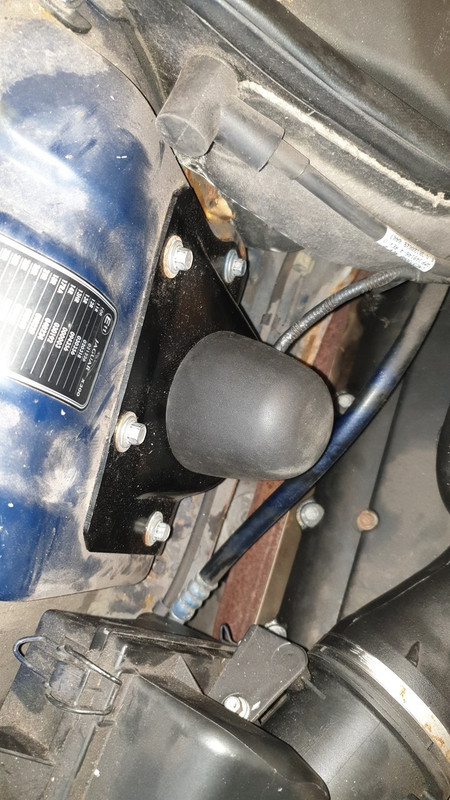
Then I also purchased a used strut top cover a few months back, and popped it into place. This will keep the CATS (Computer Active Technology Suspension) cable safe.
All done!
I so want to drive my Mercedes...
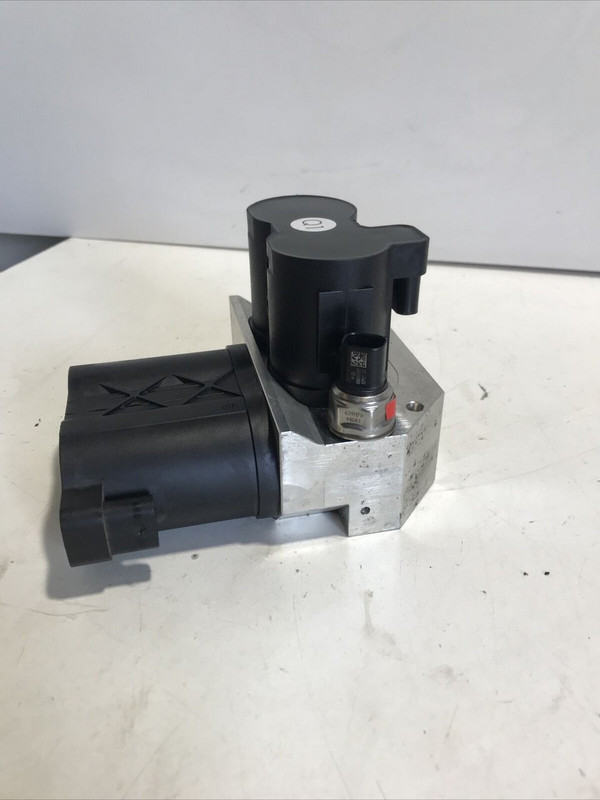
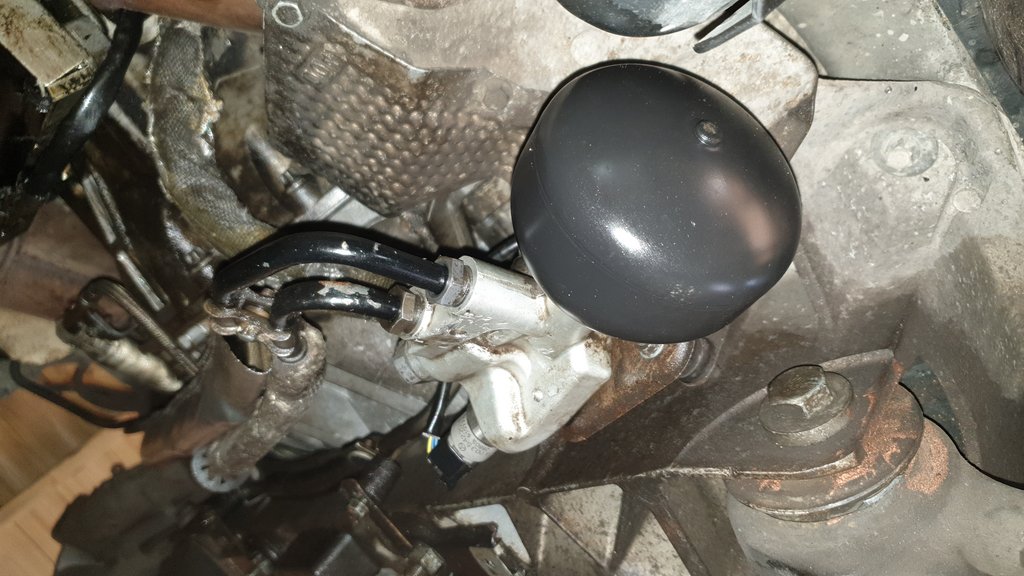
With that done, I turned to my poor sickly looking Mercedes CL500. It has been on axel stands since May, and I have not done anything to it for over 3 months.
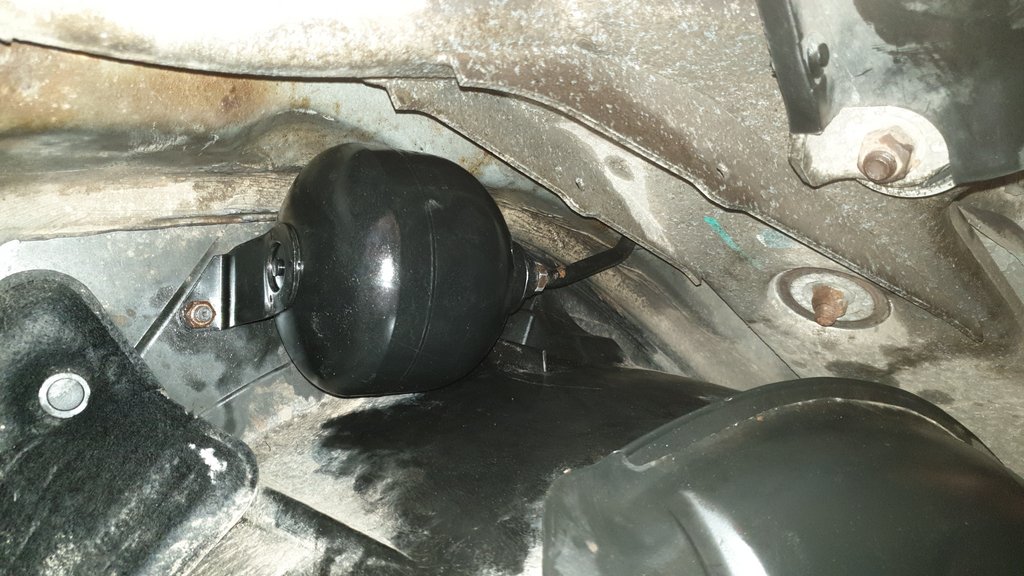
On the last occasion, I managed (with the help of Lindsey's brother Adrian; my brother in law) to replace the rear return accumulator, and refurbish the rear ABC block. But the front block was ceased to the front hose assembly, as well as one of the valves, so I had ordered both a replacement hose, and a replacement block.
Sadly, because I am an idiot... things did not pan out well...
First of all, the hose went in perfectly.... phew. So that's �71.66 spent well.
But when it came to the block, I quickly realised I had made a mistake. I foolishly assumed the W216 blocks were backwards compatible, and I purchased one at a steal for �108.10. I now realise the reason it was cheap is because these hardly ever fail, and are not suitable for fitment to the W215... Doh!
So I have ordered another ABC block, this time a W220/W215 version. This time I hope it goes without a hitch... shame it cost me �205!!
The only other things I managed to do were to replace the front main accumulator, and while I fed in the new front ABC pipe (that was a pain!), Adrian spend a couple of wasted hours trying to get at the rear main accumulator before realising he had to remove the exhaust. I removed the exhaust myself, but by that time we ran out of time; but it still did not seem to want to budge!
So anyway, not much progress on my W215 ABC issues... and the new list looks like this:
Replace rusty front ABC valve block (The W216 block I bought �108.10 is no good. Replacement A2203201258 ordered �205 Ebay).
I'll spend a bit more time on it this coming weekend. Hoping to get the rear main accumulator changed, and the pulsation dampner too.
I am still hopeful this car will run in 2022!
Nothing particularly exciting, but I finally got a few minutes to spend on the Daimler last weekend. I replaced the top front shock mounts, which are prone to going without much indication, and I am hoping are the source of my subtle "knocking" over bumpy roads.
It was so much easier than I expected, and I had both sides done in not much more than 30 minutes.
Before drivers side (no visible damage):
Before passenger side (damage visible, and this is the side that knocks):
I purchased two replacements online from a USA company, because these CATS models seem very rare, and I could find no stockists in the UK, or at least not at sensible prices.
Steps to replace.... Jack the car up so that the wheel is just touching the floor:
Remove top "tall" nut:
Remove the 5 hex bolts that hold the assembly in place:
The lift it away, the position of the strut poking through can be adjusted with the jack.
Fit the new assembly, making sure the strut top is poking through (again adjust with jack if necessary):
Tighten the tall nut back on. A pair of mole grips can hold the strut in place under the wheel arch:
Then I also purchased a used strut top cover a few months back, and popped it into place. This will keep the CATS (Computer Active Technology Suspension) cable safe.
All done!
I so want to drive my Mercedes...
With that done, I turned to my poor sickly looking Mercedes CL500. It has been on axel stands since May, and I have not done anything to it for over 3 months.
On the last occasion, I managed (with the help of Lindsey's brother Adrian; my brother in law) to replace the rear return accumulator, and refurbish the rear ABC block. But the front block was ceased to the front hose assembly, as well as one of the valves, so I had ordered both a replacement hose, and a replacement block.
Sadly, because I am an idiot... things did not pan out well...
First of all, the hose went in perfectly.... phew. So that's �71.66 spent well.
But when it came to the block, I quickly realised I had made a mistake. I foolishly assumed the W216 blocks were backwards compatible, and I purchased one at a steal for �108.10. I now realise the reason it was cheap is because these hardly ever fail, and are not suitable for fitment to the W215... Doh!
So I have ordered another ABC block, this time a W220/W215 version. This time I hope it goes without a hitch... shame it cost me �205!!
The only other things I managed to do were to replace the front main accumulator, and while I fed in the new front ABC pipe (that was a pain!), Adrian spend a couple of wasted hours trying to get at the rear main accumulator before realising he had to remove the exhaust. I removed the exhaust myself, but by that time we ran out of time; but it still did not seem to want to budge!
So anyway, not much progress on my W215 ABC issues... and the new list looks like this:
Replace rusty front ABC valve block (The W216 block I bought �108.10 is no good. Replacement A2203201258 ordered �205 Ebay).
- Replace main front hose (A2159971382 used parts on order which cost �71.66 hose)
- Refurbish the rear ABC valve block (DONE WITH KIT FROM X8R)
- Replace front main accumulator (Part A2203270115)
- Replace rear main accumulator (Part A2203270115 I purchased a pair brand new for �257.32).
- Replace the third (smaller) return accumulator (Part A2203270415 bought for �154.17 and fitted).
- Replace the pulsation dampner (Part A2203270215 I purchased one brand new for �114).
- Tope up the fluid after the above, to test (I purchased 1ltr of Pentosin CHF 11S for �15)
- Inspect/clean OR replace the ride height sensors (Part 0105427717 at between �20-50 each - not purchased yet)
- Change the ABC fluid and filter (may get a Mercedes specialist to do this...)
I'll spend a bit more time on it this coming weekend. Hoping to get the rear main accumulator changed, and the pulsation dampner too.
I am still hopeful this car will run in 2022!
#103
09-17-2022, 01:34 PM
Serious Daimler time
The Daimler went for it's MOT on Thursday.
It was not really a surprise something was going to fail, but I was not expecting welding.
This was the score:
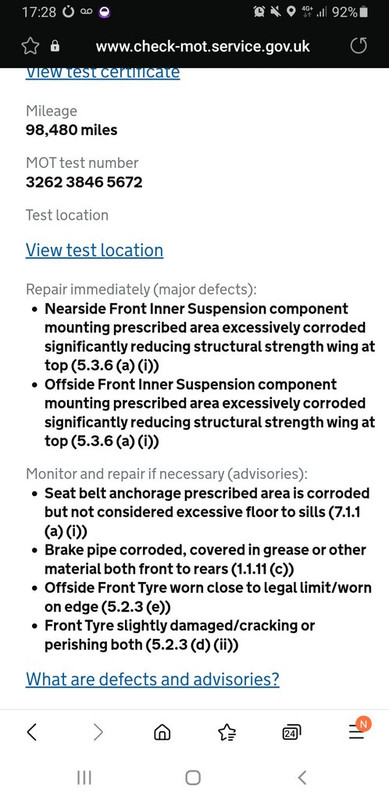
The advisory on tyres was no surprise, as I did the rears a couple of years ago and knew the fronts needed doing next. Brake pipes is just off of those things. But the welding it needs did catch me off guard.
Turns out it's pretty serious, as when the paint and loose rust was broken away this is the state of things! (Same both sides)

...and this is it from inside the arch:
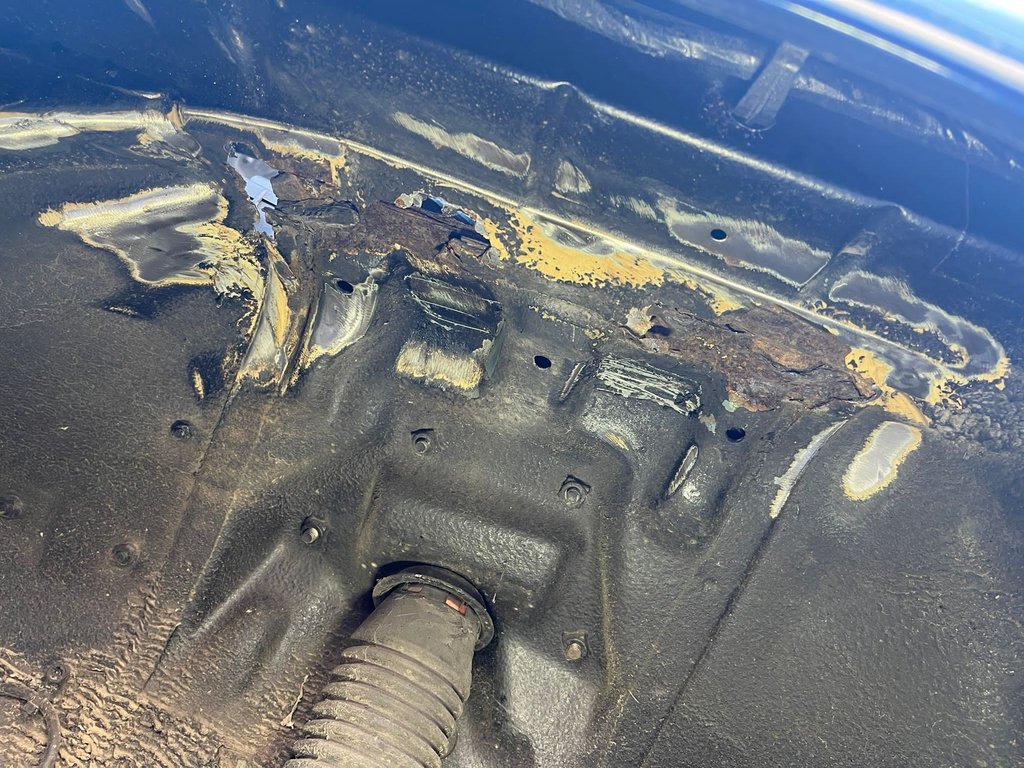
It needs this section cut out, and fresh metal shaped and welded in. Luckily I found a good panel beater and body shop who know each other and work together!
I decided if I am getting this done, may as well get the couple of other bits it needs at the same time. So will also get this spot of rust on drivers side arch done:

Then I am also going to have a respray to the front bumper, and bonnet, as well as the seat belt anchor points from the MOT advisory sorted. She should be near perfect after that... finally!
She went into the bodyshop yesterday, and they say it will be 2 weeks... we'll see....
The Daimler went for it's MOT on Thursday.
It was not really a surprise something was going to fail, but I was not expecting welding.
This was the score:
The advisory on tyres was no surprise, as I did the rears a couple of years ago and knew the fronts needed doing next. Brake pipes is just off of those things. But the welding it needs did catch me off guard.
Turns out it's pretty serious, as when the paint and loose rust was broken away this is the state of things! (Same both sides)
...and this is it from inside the arch:
It needs this section cut out, and fresh metal shaped and welded in. Luckily I found a good panel beater and body shop who know each other and work together!
I decided if I am getting this done, may as well get the couple of other bits it needs at the same time. So will also get this spot of rust on drivers side arch done:
Then I am also going to have a respray to the front bumper, and bonnet, as well as the seat belt anchor points from the MOT advisory sorted. She should be near perfect after that... finally!
She went into the bodyshop yesterday, and they say it will be 2 weeks... we'll see....
Last edited by c16rkc; 09-17-2022 at 03:16 PM.
#104
09-26-2022, 05:48 AM
Finally... some progress!
Another update today, as I have had a relatively productive couple of weeks.
First of all, on Saturday the 18th Aston woke me early to play racetrack... this led on to a full car themed day!

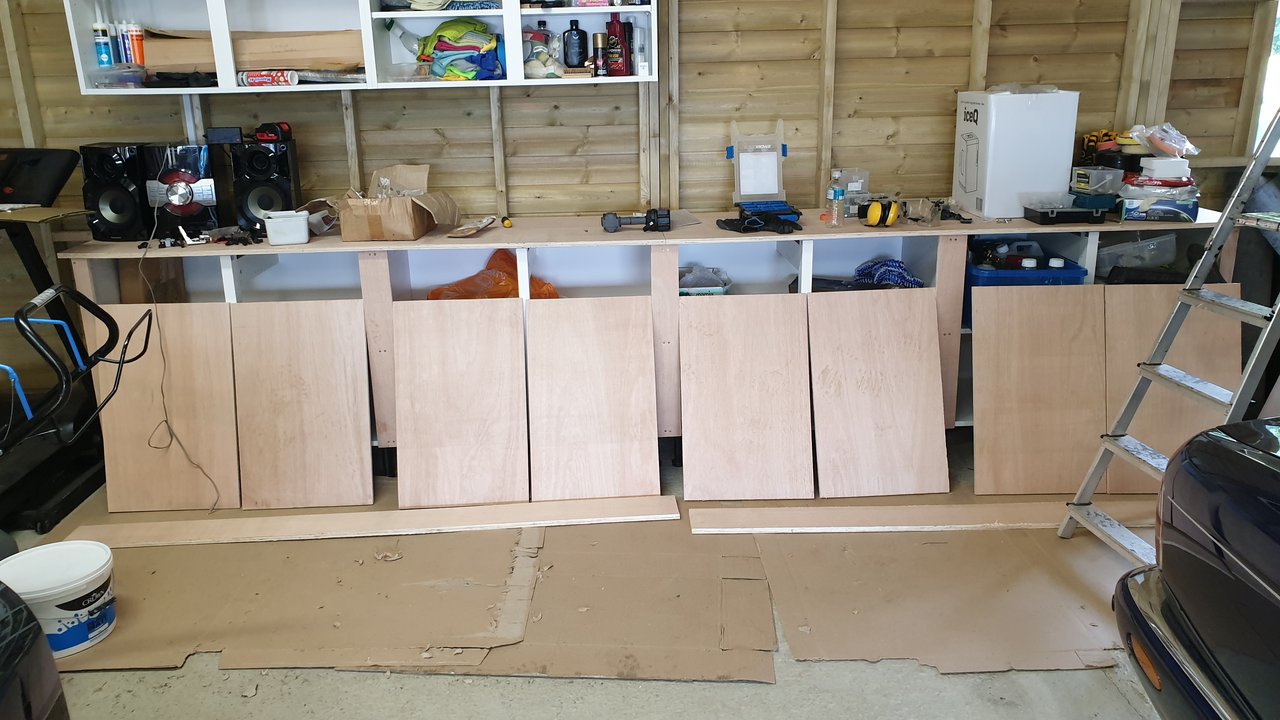
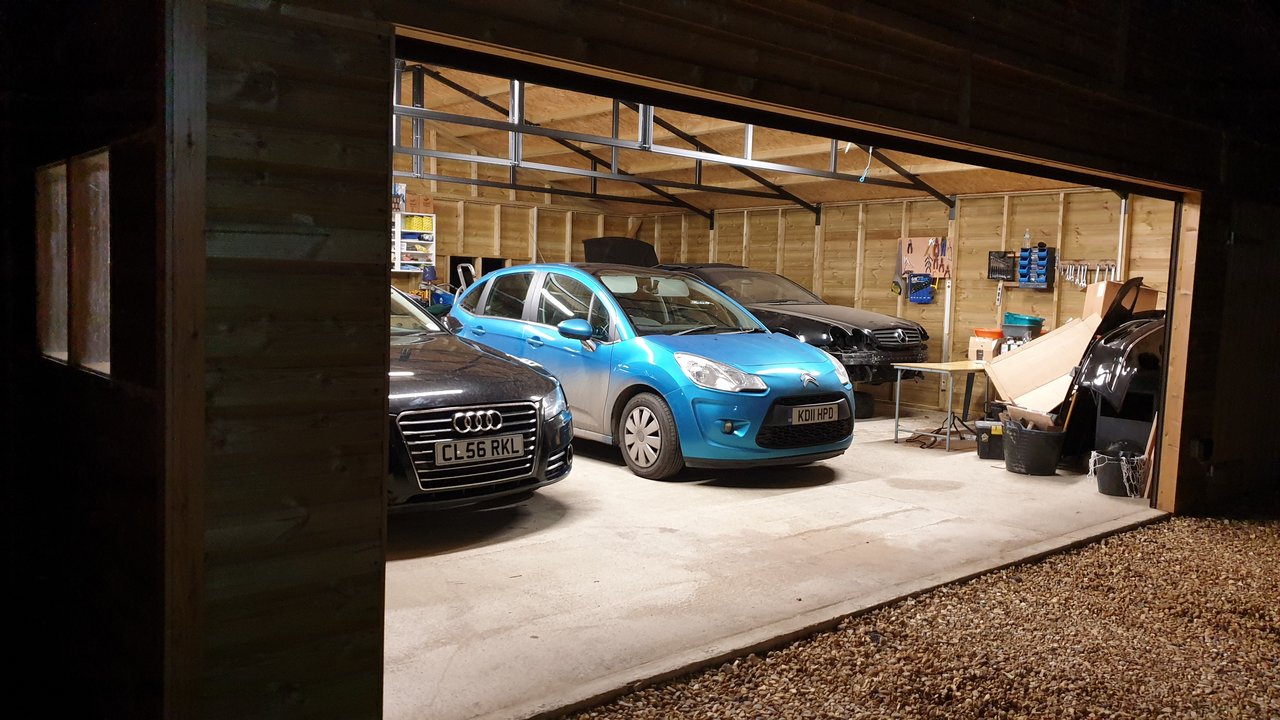
The Daimler was dropped off at the bodyshop, and we were left with a nice empty garage space in the middle. The eagle eyed will also notice my lower cupboards at the back now have doors. I did this a few months back, but I still need to sort out the high level cupboards.
Also notice the orange buckets... Aston has been using them as steps so he can tinker with all my stuff!
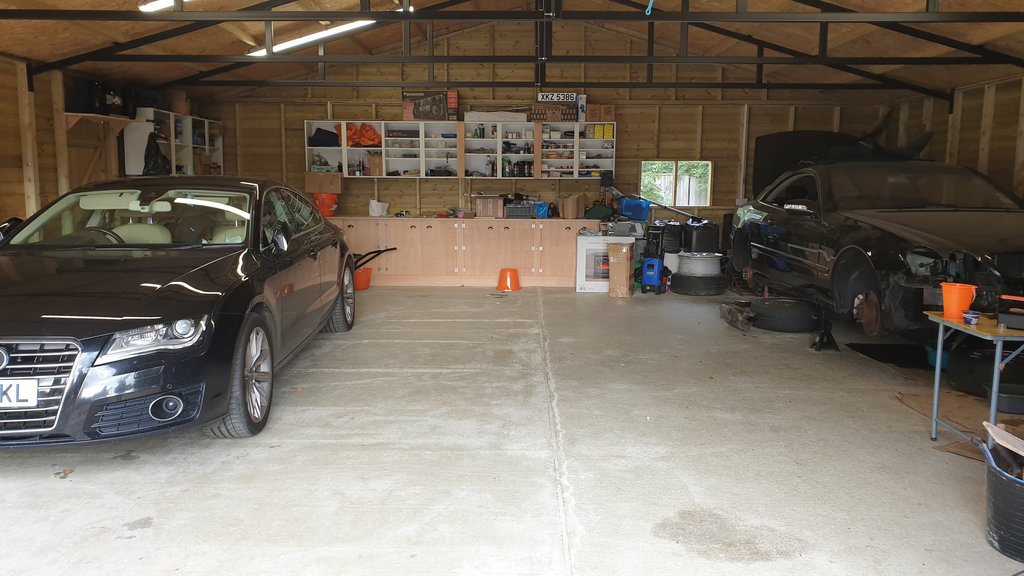
But what I forgot to mention before, was that I also took the Audi to the bodyshop to have it repaired too... this now looks wonderful!
They have done an amazing job, and the car looks near perfect now. It runs out of MOT in November, so my plan is to put another 12 months on it and then move it on (sell it!). Sadly I have become quite fond of Jellybean now (the Citroen), and the Audi is therefore surplus to requirements.
I did some more work to the Mercedes CL for the rest of the day (as a few posts above), So then on the Sunday 19th September, we went over some friends to let the two pests run around and burn off some energy.
These are people possibly even more mad than me, as there are cars everywhere... but I confess the son runs a garage from home, so I guess he has a better excuse than me.")

So fast forward to Saturday 24th September, and more work on the Mercedes CL happens!
First of all, we manage to get the old Pulsation dampner off, and replace it with a crispy brand new one!
Then I received my replacement ABC block for the front, and was able to install the refurbishment kit to it, and then fit it.

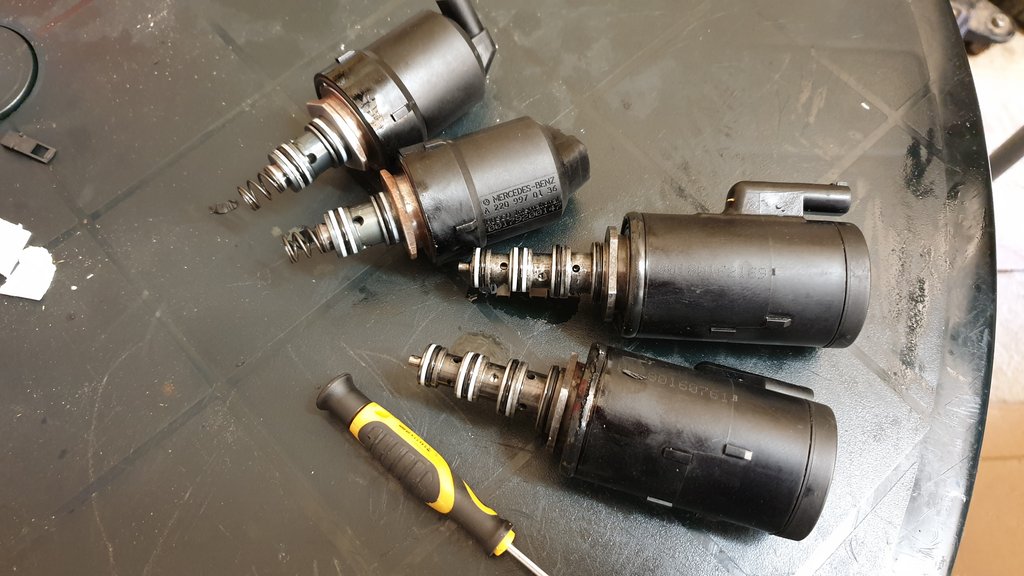
All fitted with accumulator!
We also managed to remove the rear main accumulator too, and replace with new.
Due to access this was a real pain, and I had to bend over the mounting legs to rotate it and get it out, as the hose fittings has seized completely. I had to spend ages freeing them up before the new one could go in.
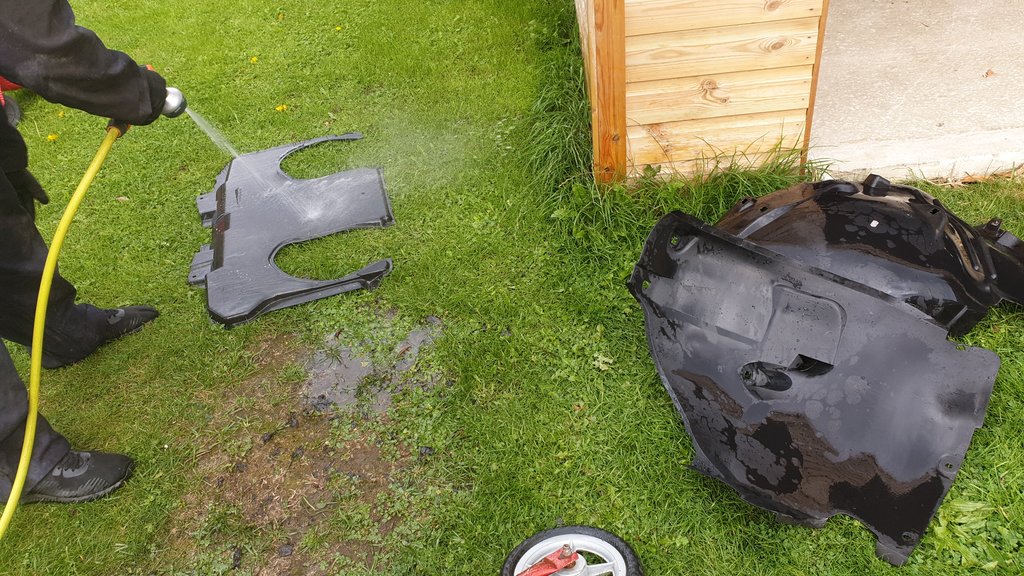
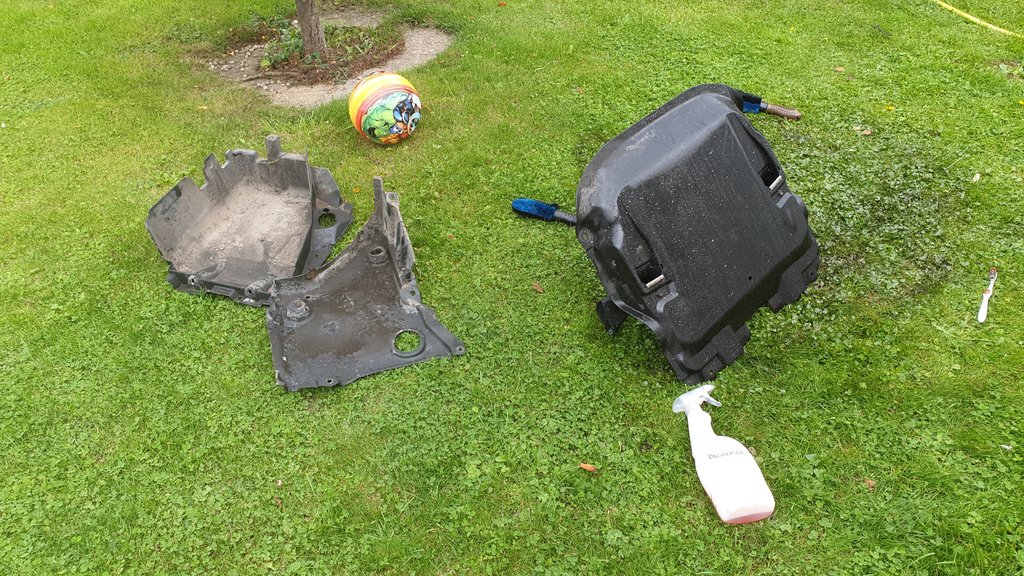
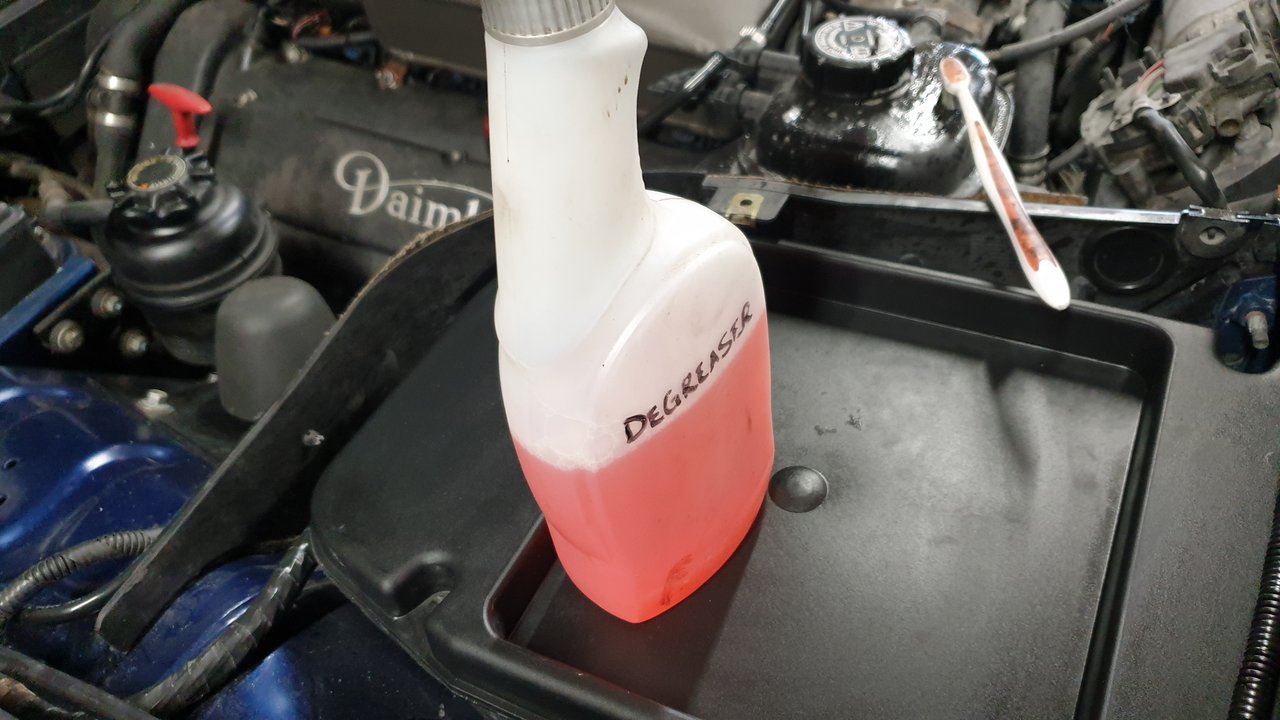
Then I decided all the undertrays needed a jolly good clean with Meguiars super degreaser and a hose!
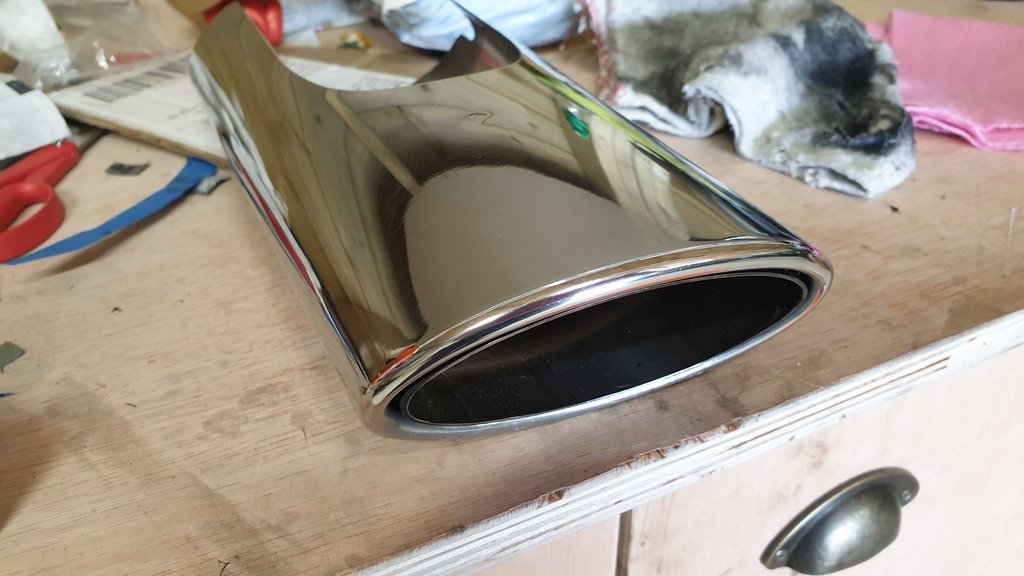
Lastly for the Mercedes... I used tar removed, Autosol, Mequiars ultimate compound, and Meguiars chrome cleaner, to shine up the tail pipe trim from the exhaust we had to remove to get to the rear main accumulator.
So my updated list for the Mercedes CL ABC works:
- Replace rusty front ABC valve block (Replacement A2203201258 ordered �205 Ebay - Fitted and DONE).
- Replace main front hose (A2159971382 used parts on order which cost �71.66 hose - Fitted and DONE)
- Refurbish the rear ABC valve block (DONE WITH KIT FROM X8R)
- Replace front main accumulator (Part A2203270115)
- Replace rear main accumulator (Part A2203270115 I purchased a pair brand new for �257.32 Fitted and DONE!).
- Replace the third (smaller) return accumulator (Part A2203270415 bought for �154.17 and fitted).
- Replace the pulsation dampner (Part A2203270215 I purchased one brand new for �114 - Fitted and DONE).
- Top up the fluid after the above, to test (I purchased 1ltr of Pentosin CHF 11S for �15)
- Inspect/clean OR replace the ride height sensors (Part 0105427717 at between �20-50 each - not purchased yet)
- Change the ABC fluid and filter (may get a Mercedes specialist to do this...)
My next step will be to either top up the Pentosin (and get a garage to flush it), or completely flush out and replace it with new filters myself. I am not sure which I will do yet.
I am going to leave the ride sensors for the minute as they look OK, and see what happens when it is back on the road.
You may also have noticed the Mercedes is missing it's front bumper, grille, and lights. The grill/lights are having a thorough clean, and then the front bumper, bonnet, and front wings are all having a respray to get rid of the chips and lacquer peel. I'll get this done by the bodyshop when I have the car back on the road.
Another update today, as I have had a relatively productive couple of weeks.
First of all, on Saturday the 18th Aston woke me early to play racetrack... this led on to a full car themed day!
The Daimler was dropped off at the bodyshop, and we were left with a nice empty garage space in the middle. The eagle eyed will also notice my lower cupboards at the back now have doors. I did this a few months back, but I still need to sort out the high level cupboards.
Also notice the orange buckets... Aston has been using them as steps so he can tinker with all my stuff!
But what I forgot to mention before, was that I also took the Audi to the bodyshop to have it repaired too... this now looks wonderful!
They have done an amazing job, and the car looks near perfect now. It runs out of MOT in November, so my plan is to put another 12 months on it and then move it on (sell it!). Sadly I have become quite fond of Jellybean now (the Citroen), and the Audi is therefore surplus to requirements.
I did some more work to the Mercedes CL for the rest of the day (as a few posts above), So then on the Sunday 19th September, we went over some friends to let the two pests run around and burn off some energy.
These are people possibly even more mad than me, as there are cars everywhere... but I confess the son runs a garage from home, so I guess he has a better excuse than me.
So fast forward to Saturday 24th September, and more work on the Mercedes CL happens!
First of all, we manage to get the old Pulsation dampner off, and replace it with a crispy brand new one!
Then I received my replacement ABC block for the front, and was able to install the refurbishment kit to it, and then fit it.
All fitted with accumulator!
We also managed to remove the rear main accumulator too, and replace with new.
Due to access this was a real pain, and I had to bend over the mounting legs to rotate it and get it out, as the hose fittings has seized completely. I had to spend ages freeing them up before the new one could go in.
Then I decided all the undertrays needed a jolly good clean with Meguiars super degreaser and a hose!
Lastly for the Mercedes... I used tar removed, Autosol, Mequiars ultimate compound, and Meguiars chrome cleaner, to shine up the tail pipe trim from the exhaust we had to remove to get to the rear main accumulator.
So my updated list for the Mercedes CL ABC works:
- Replace rusty front ABC valve block (Replacement A2203201258 ordered �205 Ebay - Fitted and DONE).
- Replace main front hose (A2159971382 used parts on order which cost �71.66 hose - Fitted and DONE)
- Refurbish the rear ABC valve block (DONE WITH KIT FROM X8R)
- Replace front main accumulator (Part A2203270115)
- Replace rear main accumulator (Part A2203270115 I purchased a pair brand new for �257.32 Fitted and DONE!).
- Replace the third (smaller) return accumulator (Part A2203270415 bought for �154.17 and fitted).
- Replace the pulsation dampner (Part A2203270215 I purchased one brand new for �114 - Fitted and DONE).
- Top up the fluid after the above, to test (I purchased 1ltr of Pentosin CHF 11S for �15)
- Inspect/clean OR replace the ride height sensors (Part 0105427717 at between �20-50 each - not purchased yet)
- Change the ABC fluid and filter (may get a Mercedes specialist to do this...)
My next step will be to either top up the Pentosin (and get a garage to flush it), or completely flush out and replace it with new filters myself. I am not sure which I will do yet.
I am going to leave the ride sensors for the minute as they look OK, and see what happens when it is back on the road.
You may also have noticed the Mercedes is missing it's front bumper, grille, and lights. The grill/lights are having a thorough clean, and then the front bumper, bonnet, and front wings are all having a respray to get rid of the chips and lacquer peel. I'll get this done by the bodyshop when I have the car back on the road.
The following users liked this post:
Ken Cantor (09-27-2022)
#105
10-03-2022, 04:27 AM
Some images may offend!
I know, I know, this is hardly the place to post pictures of a villainous Audi... but on Sunday we gave the Audi the clean of it's life and I was so impressed I just had to post some pictures... lets face it I hardly have a track record of posting relevant stuff!
The bumpers off respray looks incredible, and they have also blended in the paint at the back all the way up to the pillars to it matches in nicely. I am really impressed with the work the bodyshop have done.
I put some brand new Goodyears on the front Friday afternoon, so it just needs a fresh MOT now and it is going up for sale!!!
I am really looking forward to seeing the Daimler when it comes back from the same bodyshop. It should be done before this coming weekend.
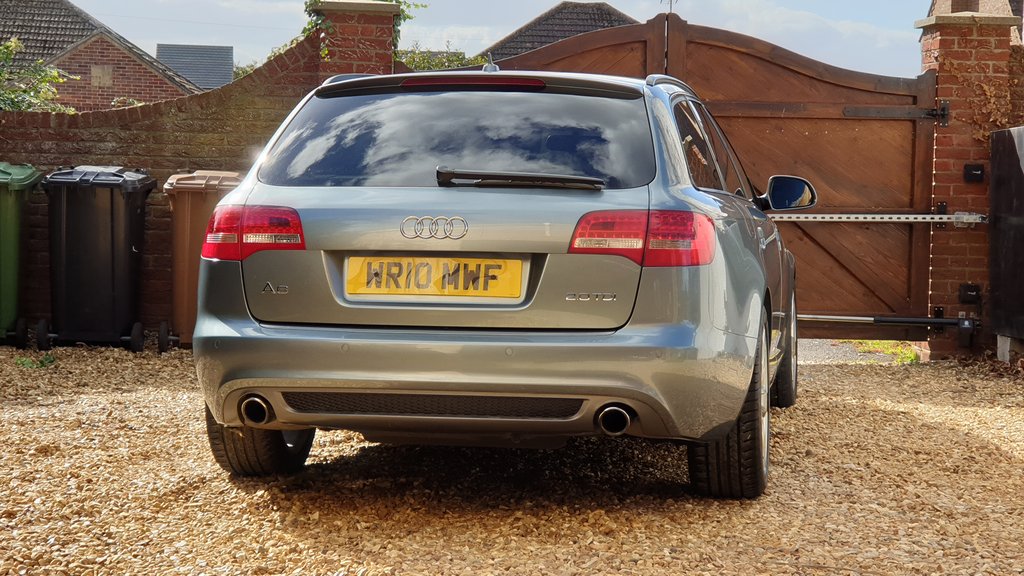
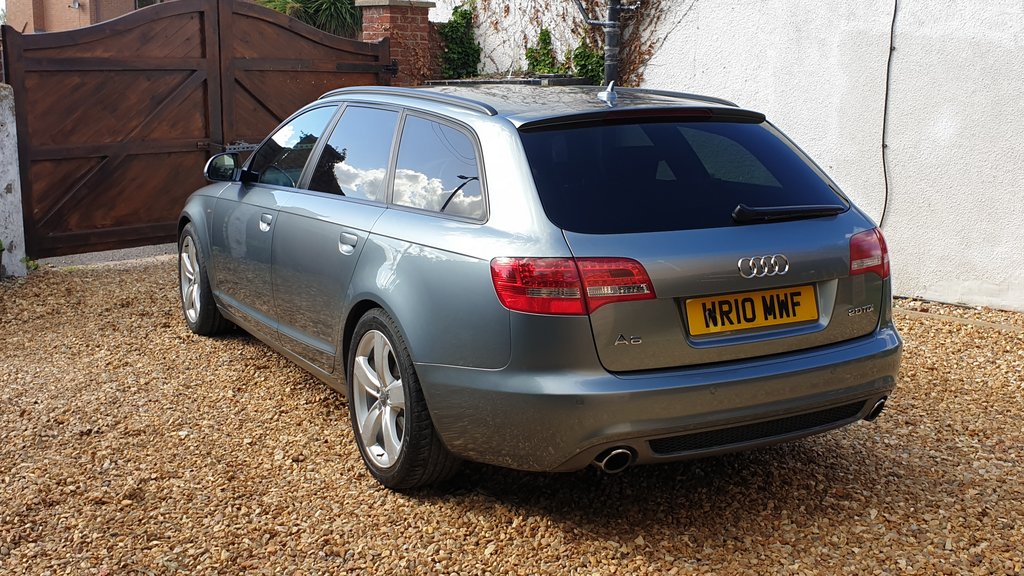
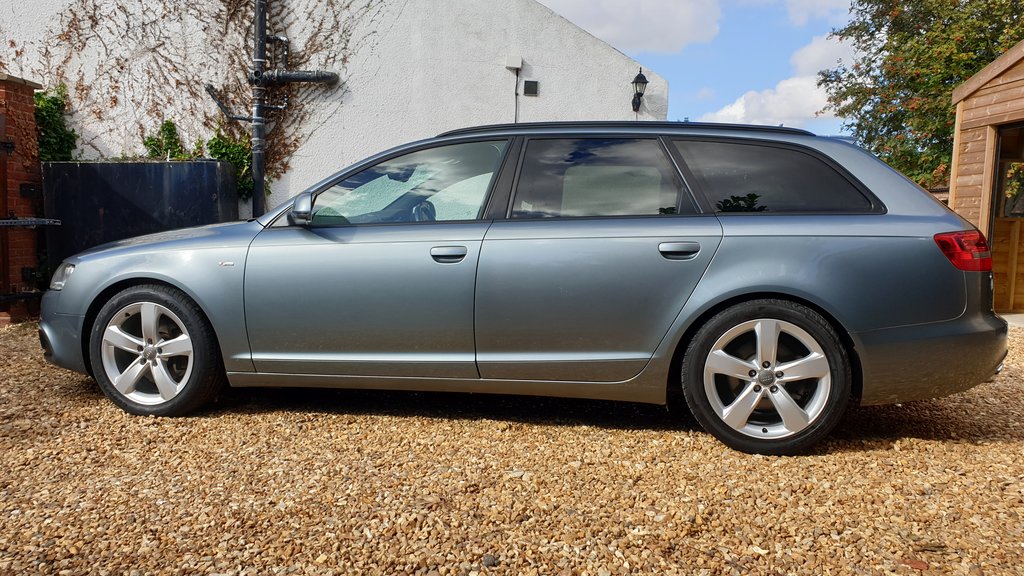
The following users liked this post:
Ken Cantor (10-03-2022)
#106
10-03-2022, 08:39 PM


Veteran Member


The following 2 users liked this post by sov211:
c16rkc (10-04-2022),
markdpeter (10-04-2022)
#108
10-04-2022, 06:10 AM
Little things...
After cleaning up the Audi on Sunday, I did not have much time to spend on the Mercedes CL500.
I re-fitted the drivers side exhaust section (which had to be removed to get to the Rear main accumulator), and it looked fantastic with a cleaned up exhaust tip.
So I decided to do the passenger one too!
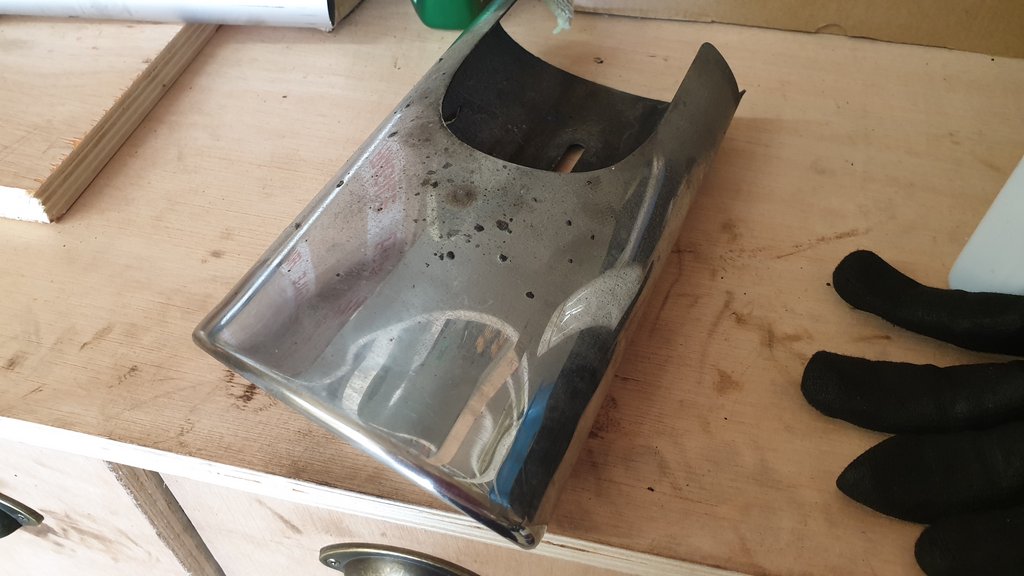
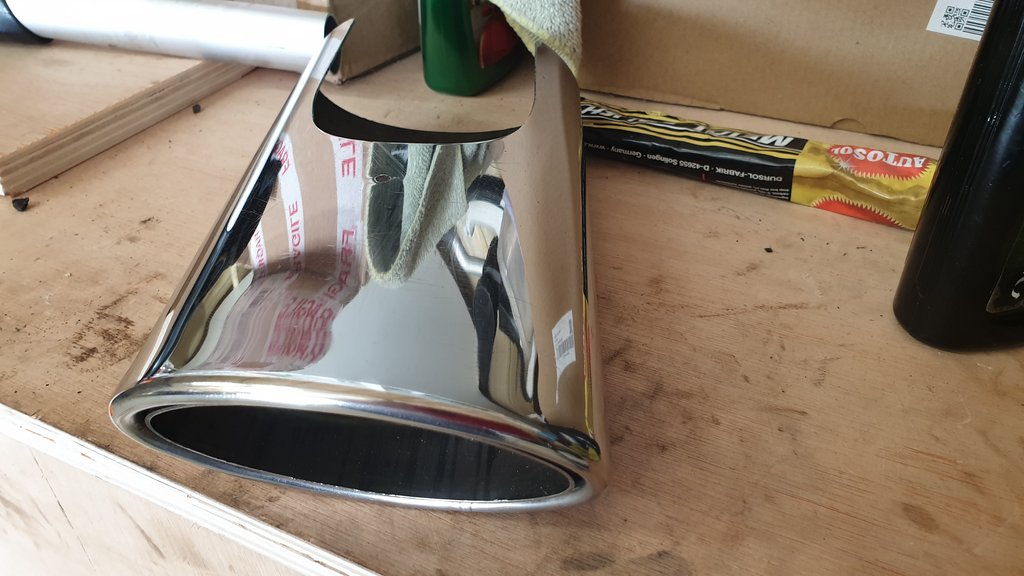
They were cleaned with Autoglym tar remover, polished with Autosol, polished again with Meguiars ultimate compound, then a final finish with Meguiars metal polish to shine them up.
It's a real testament to the quality of this Mercedes. The whole exhaust is no doubt original, but is in near perfect condition. The exhaust tips are polished stainless steel, and they polish up beautifully, with little effort.
In preparation I have now ordered 10 litres of CHF 11S, and the necessary hosing to do the fluid change. It looks quite straightforward from the videos I have seen.
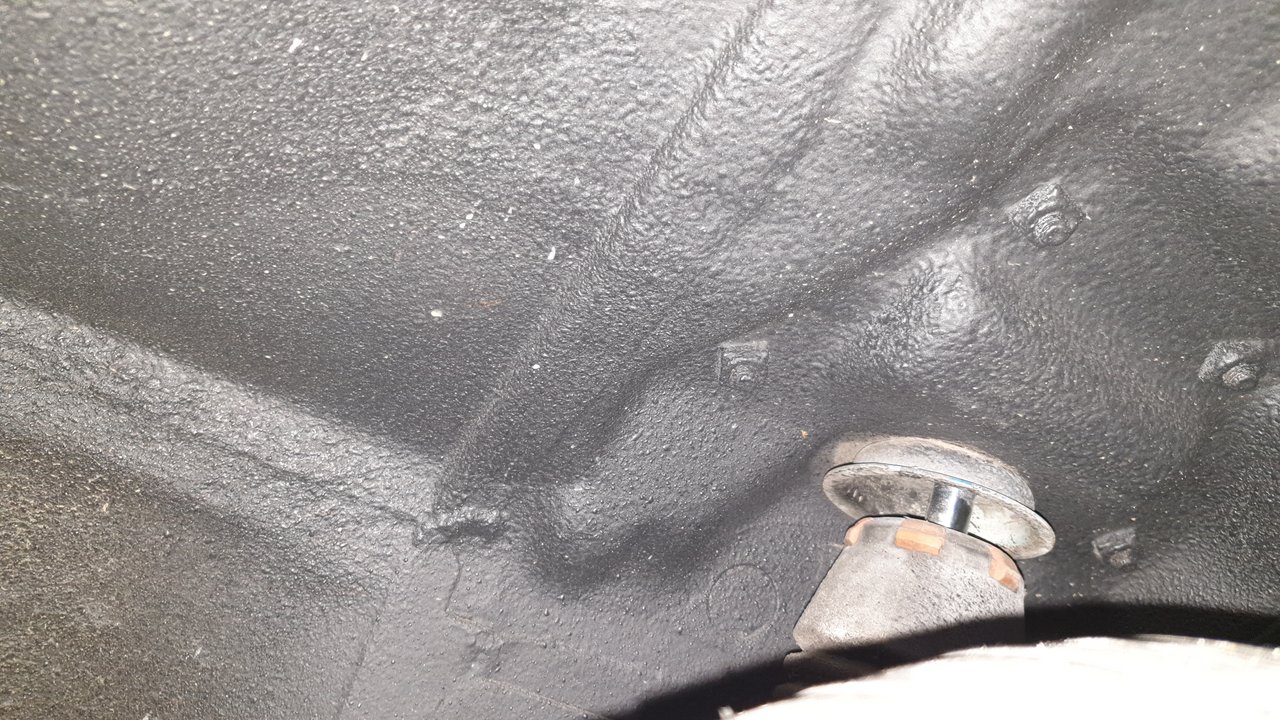
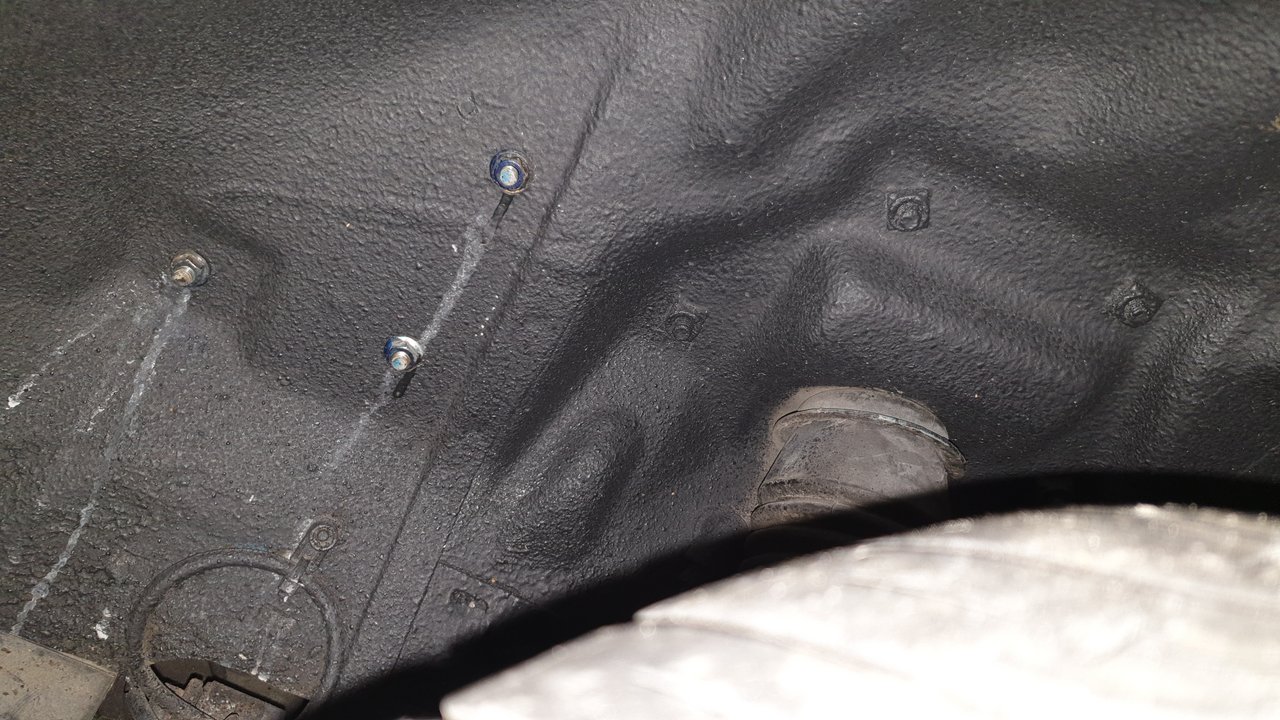
But I also decided to lay down some fresh cardboard under the Mercedes last weekend, to get a fresh perspective on the leaks. To my surprise there are no longer leaks from 2 places, but now just one. So that makes things easier. The leak appears to be under the gearbox, and I will let a garage take care of that. So now that I have cleaned the undertrays, hopefully the front ones under the engine will now stay clean!
I am going to clean up all the underside of the engine, gearbox, and anything else covered in oil. I can then see what re-appears.
After cleaning up the Audi on Sunday, I did not have much time to spend on the Mercedes CL500.
I re-fitted the drivers side exhaust section (which had to be removed to get to the Rear main accumulator), and it looked fantastic with a cleaned up exhaust tip.
So I decided to do the passenger one too!
They were cleaned with Autoglym tar remover, polished with Autosol, polished again with Meguiars ultimate compound, then a final finish with Meguiars metal polish to shine them up.
It's a real testament to the quality of this Mercedes. The whole exhaust is no doubt original, but is in near perfect condition. The exhaust tips are polished stainless steel, and they polish up beautifully, with little effort.
In preparation I have now ordered 10 litres of CHF 11S, and the necessary hosing to do the fluid change. It looks quite straightforward from the videos I have seen.
But I also decided to lay down some fresh cardboard under the Mercedes last weekend, to get a fresh perspective on the leaks. To my surprise there are no longer leaks from 2 places, but now just one. So that makes things easier. The leak appears to be under the gearbox, and I will let a garage take care of that. So now that I have cleaned the undertrays, hopefully the front ones under the engine will now stay clean!
I am going to clean up all the underside of the engine, gearbox, and anything else covered in oil. I can then see what re-appears.
#110
10-04-2022, 08:15 AM
Hi Randy, no those exhausts are for the Mercedes CL500; the Daimler hopefully gets back this weekend but it's missing from my garage at present 
I'm not sure if that was a dig/hint or not, but if people don't want to see the non-Jag posts then let me know and I'll not put them up anymore. I love lots of different brands of car, and love to read about them all, but I accept not everyone is like that - and I also accept this is a Jaguar forum and I do not mean to offend anyone.
I also accept this is a majority American forum, and I have noticed American forums tend to have stricter rules than UK ones. So if I am disrespecting them by posting other brands of car, then again let me know, and I'll make amendments to the way I post.
Last edited by c16rkc; 10-04-2022 at 08:19 AM.
#111
10-04-2022, 04:31 PM
Veteran Member
Join Date: Mar 2022
Location: Edmonton, Alberta, Canada
Posts: 3,068
Received 2,708 Likes
on
871 Posts
Chris,
I can't speak for the moderators or others but as "a regular reader" I much enjoy the eclecticism (is that even a word?) of your thread/posts. Does it "belong" as a thread in this forum? It does for me.
There is no misrepresentation here in my books. The thread is clearly titled "C16 RKC's car ownership thread", not "C16 RKC's Jaguar Thread" and it's clear quite quickly from browsing it - indeed just from looking at your signature - that (a) it deals with more than an X308 and (b) that it isn't a thread directed towards a specific solution to a specific problem with a specific car.
While our X308's may be a common element, I don't believe they need to be a mutually exclusive/mandatory element to everything that gets exchanged here.
Your commentary is never judgmental and you are entertainingly free with what's going on in your life in general as well as with your cars. The ongoing point/counterpoint is both entertaining and welcome.
Furthermore, much of what you do post about in regard to your non-Jaguar cars is quite applicable to our Jaguars as well when it comes to your approach to trouble-shooting, patience, cleaning and detailing, pride of ownership, maintenance and storage etc. Even the information regarding your efforts to clean up the Mercedes' exhaust tip is as applicable to an X308's exhaust tip with some useful references to sequencing and product selection/use.
Some things - including banter between friends - simply transcends being brand specific and I think, if anything, we should be encouraging that rather than precluding those things. For those wanting to retain a more focused experience, they can simply skip our threads or place us on "ignore" without depriving us of each other's on-line company.
Ken
Last edited by Ken Cantor; 10-04-2022 at 04:34 PM.
The following 3 users liked this post by Ken Cantor:
#112
10-05-2022, 02:32 AM
Thanks Ken, I'm mindful I don't want to post things people don't want to read, so I just wanted to check. I once had a whole thread deleted on a BMW forum years ago because I had gone "off topic", so I know some forums are quite strict on what you are allowed to post.
I understand not everyone will be a fan of my "casual" approach, and while I can't seem to help making my stories more personal, I can imagine it seems distracting garbage to some readers. But sadly it's just the way I write things.
The only saving grace for me is that I should be posting some juicy X308 material soon... assuming my Daimler X308 gets back from the bodyshop soon!
Last edited by c16rkc; 10-05-2022 at 02:49 AM.
The following users liked this post:
neurojag (10-05-2022)
#113
10-23-2022, 01:14 PM
Easy come easy go
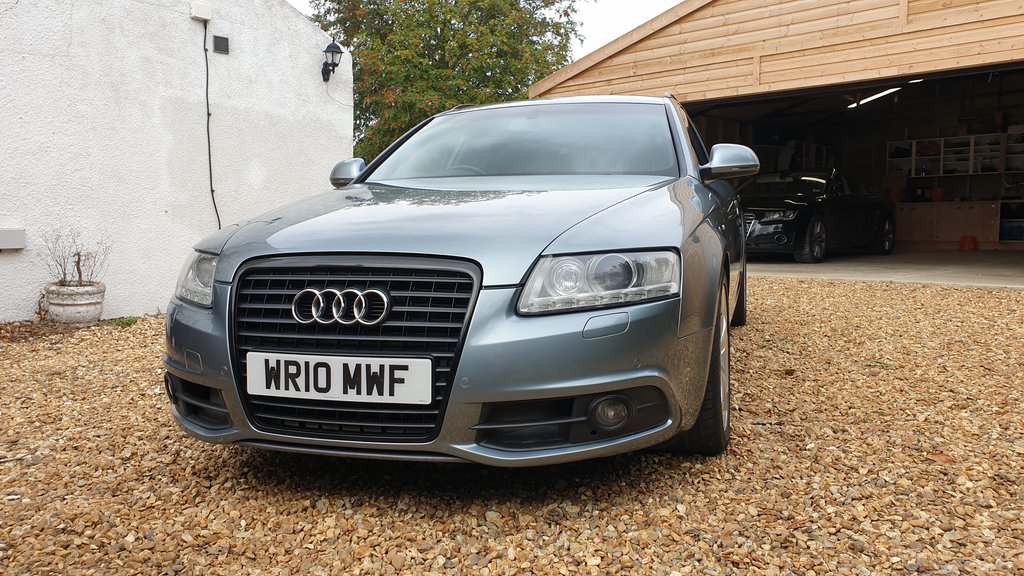
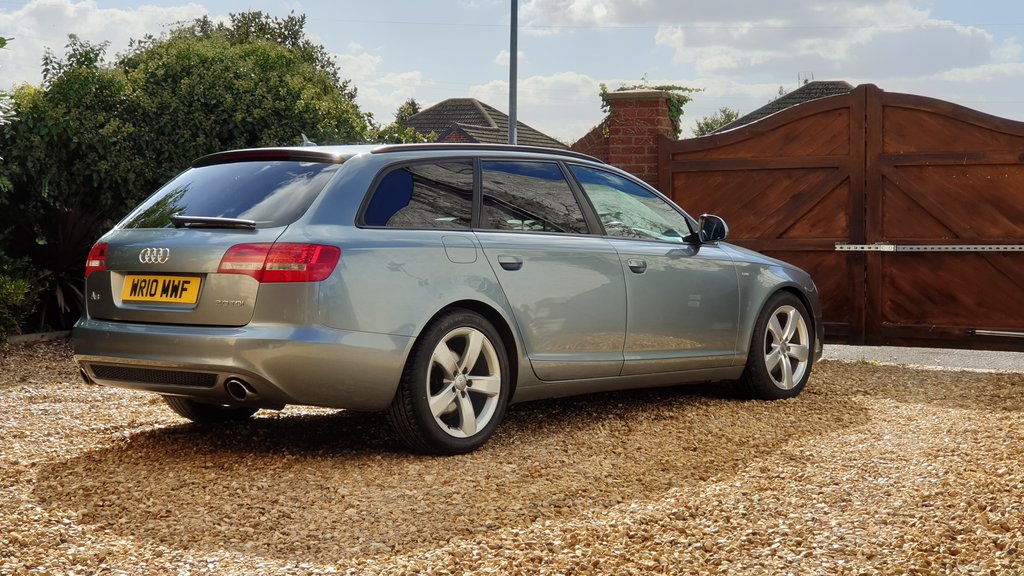
So the first bit of news... yesterday (Saturday) someone came and bought my A6 estate. Was a lovely easy sale, but then again the car was close to mint so I was expecting it to sell easily.
Our beauty returns from beauty treatment with some side effects
So the good news is the Daimler is back, and I am thrilled with the paintwork done. It's 100% better than the last place I used, and it means the Daimler would now appear perfect to the average person.
It has had the following beauty treatments:
The suspension struts are repaired inside and out.
Full bonnet respray, off the car. The front trims around the lights were also painted to match, as well as both front arches blended.
Front bumper removed, all accessories removed and full respray.
Rust repair to front drivers side arch (this was missed by last bodyshop)
Rust repair to lower edge of both passenger doors
It looks tremendous... but nothing ever goes to plan, and there are some new issues for me to sort.
First, the spray work went over the pinstripes, and the sprayshop did not know how to replace them so left them missing.
The boot now only opens by key. The boot lid button does not work, neither does the fob button, or the button on the dash.
I can't figure out why...
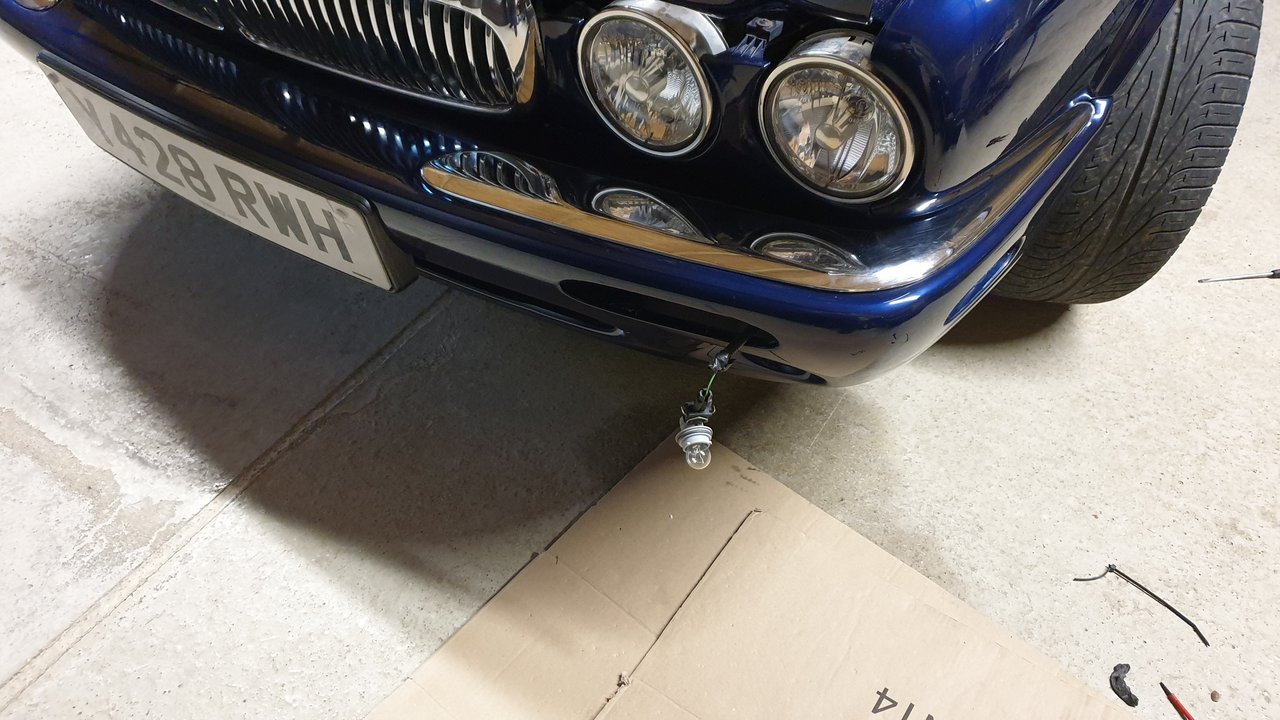
The front passenger side indicator no longer works, and it's not the bulb. Its not the connectors at the front bumper either.
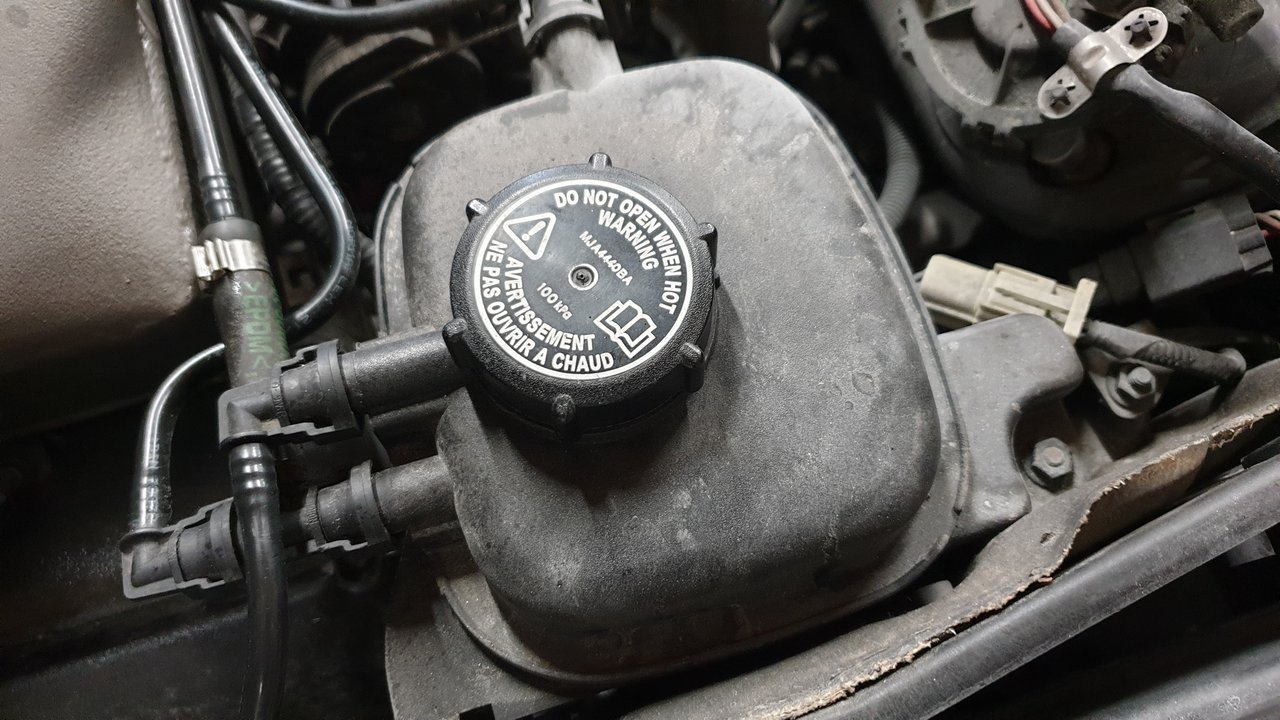
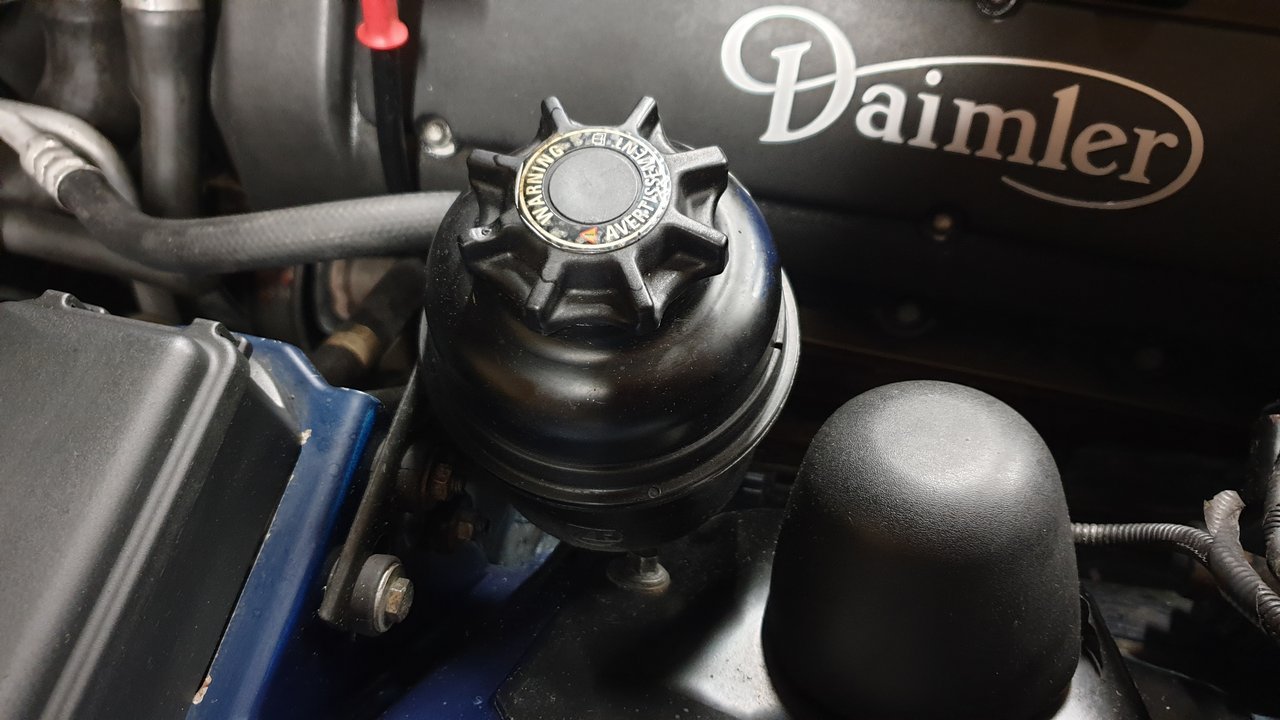
Lastly, the coolant now continuously says low level on the dash, even though coolant level is fine.
So lots for me to sort out sadly... I was feeling pretty miffed with the car on Sunday, despite the bodywork looking much better.
Most annoyingly I can't take it for an MOT until I get these bits sorted.
So the first bit of news... yesterday (Saturday) someone came and bought my A6 estate. Was a lovely easy sale, but then again the car was close to mint so I was expecting it to sell easily.
Our beauty returns from beauty treatment with some side effects
So the good news is the Daimler is back, and I am thrilled with the paintwork done. It's 100% better than the last place I used, and it means the Daimler would now appear perfect to the average person.
It has had the following beauty treatments:
The suspension struts are repaired inside and out.
Full bonnet respray, off the car. The front trims around the lights were also painted to match, as well as both front arches blended.
Front bumper removed, all accessories removed and full respray.
Rust repair to front drivers side arch (this was missed by last bodyshop)
Rust repair to lower edge of both passenger doors
It looks tremendous... but nothing ever goes to plan, and there are some new issues for me to sort.
First, the spray work went over the pinstripes, and the sprayshop did not know how to replace them so left them missing.
The boot now only opens by key. The boot lid button does not work, neither does the fob button, or the button on the dash.
I can't figure out why...
The front passenger side indicator no longer works, and it's not the bulb. Its not the connectors at the front bumper either.
Lastly, the coolant now continuously says low level on the dash, even though coolant level is fine.
So lots for me to sort out sadly... I was feeling pretty miffed with the car on Sunday, despite the bodywork looking much better.
Most annoyingly I can't take it for an MOT until I get these bits sorted.
Last edited by c16rkc; 10-23-2022 at 01:18 PM.
The following users liked this post:
Ken Cantor (10-23-2022)
#114
10-23-2022, 01:17 PM
Good clean work
On Sunday I cheered myself up with a couple of easy wins.
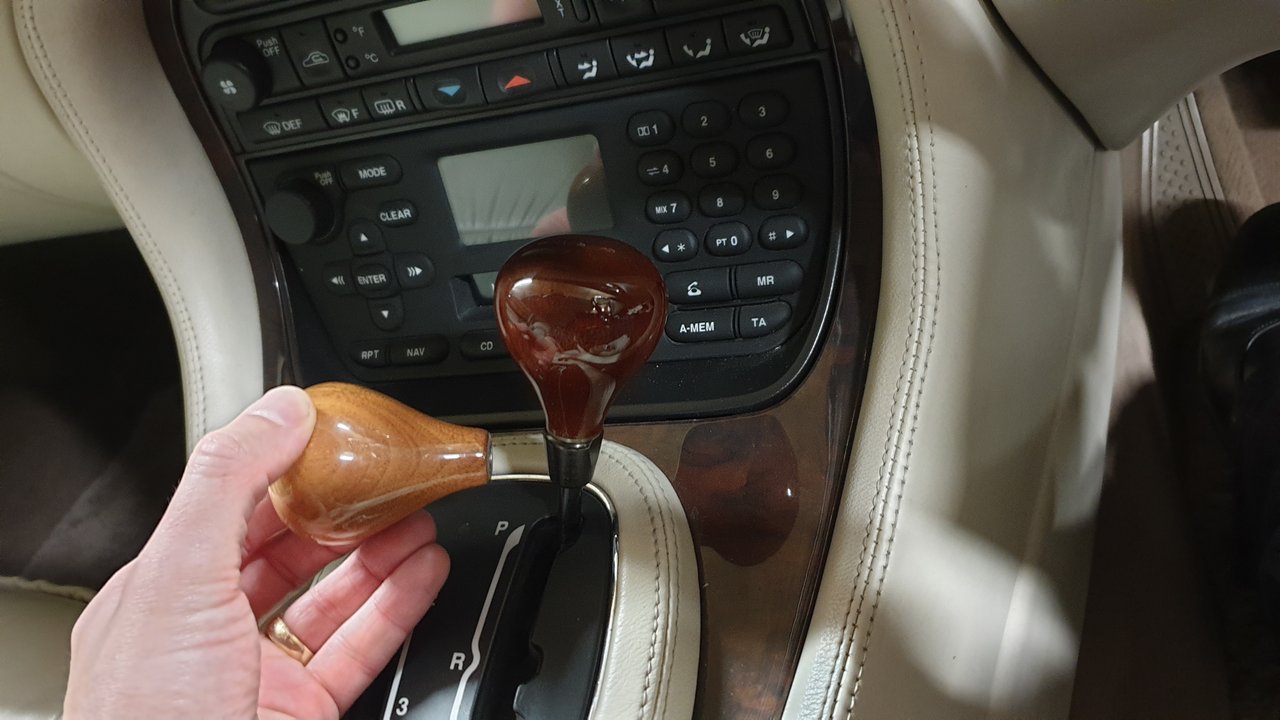
I replaced the faded old gear knob with a nice spanking brand new one.
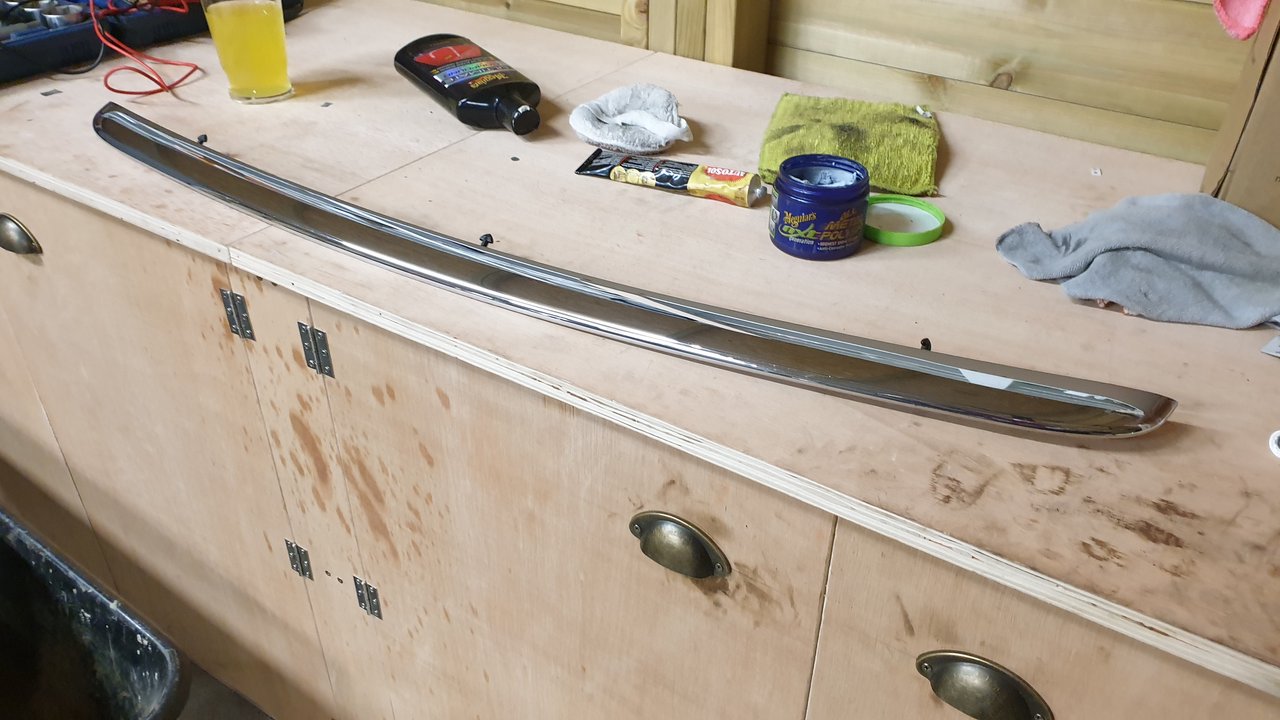
I shined up the lower chrome trim from the front bumper.
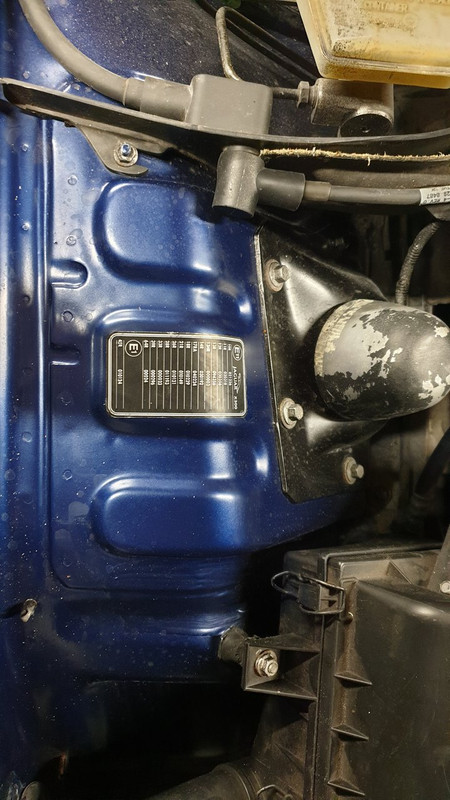
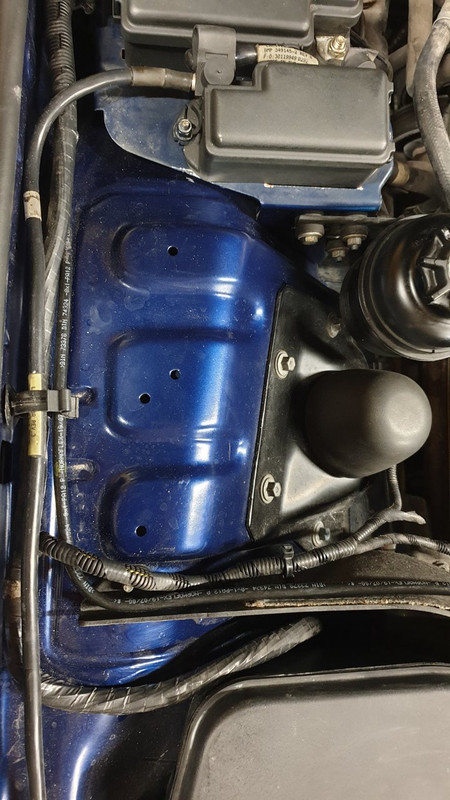
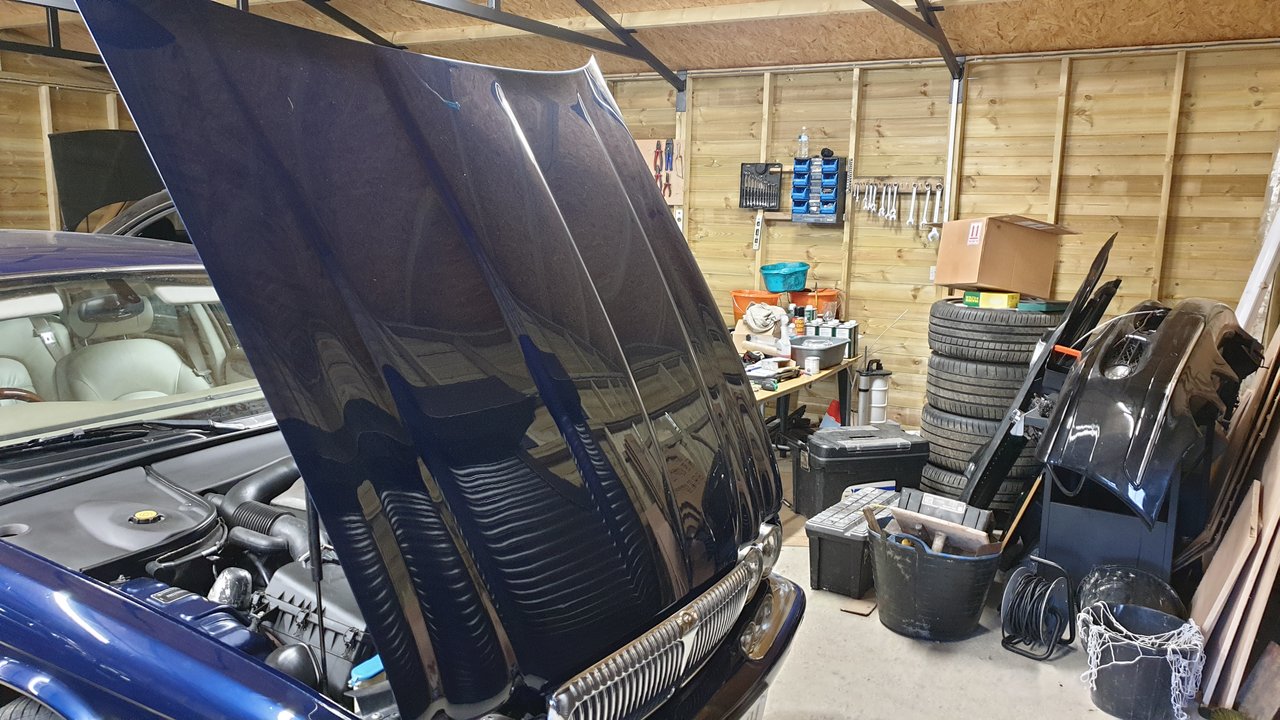
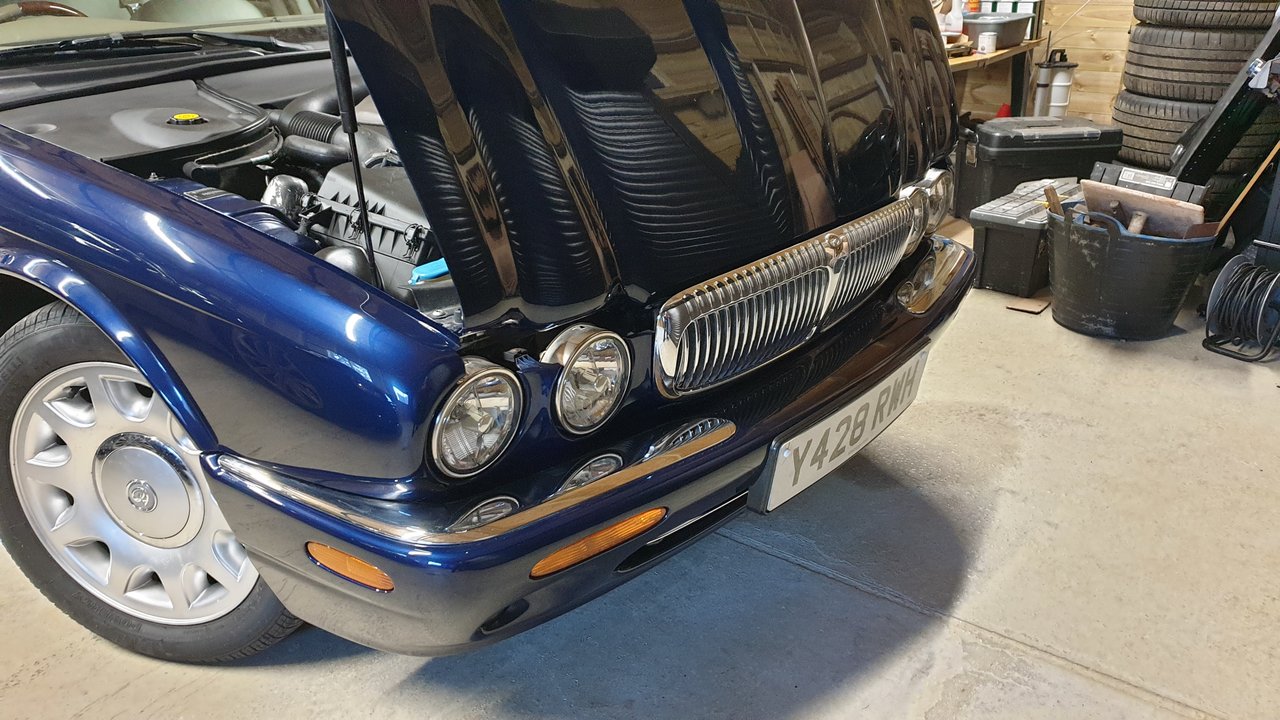
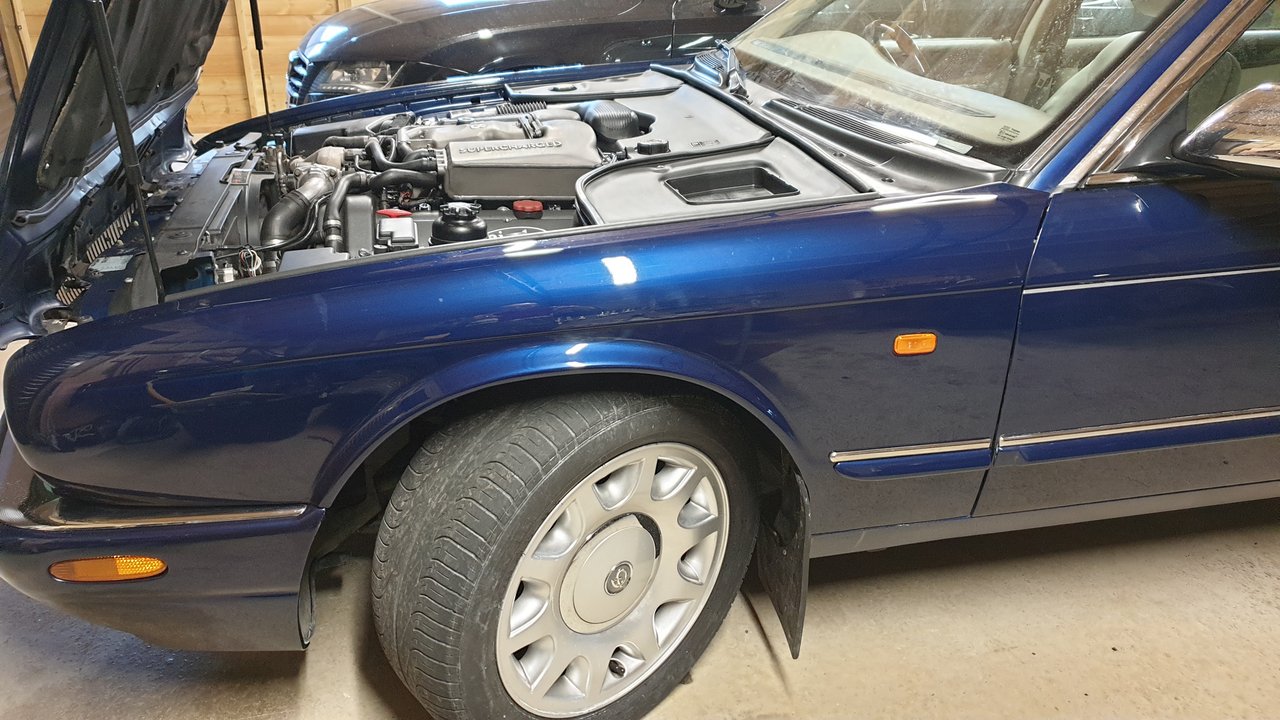
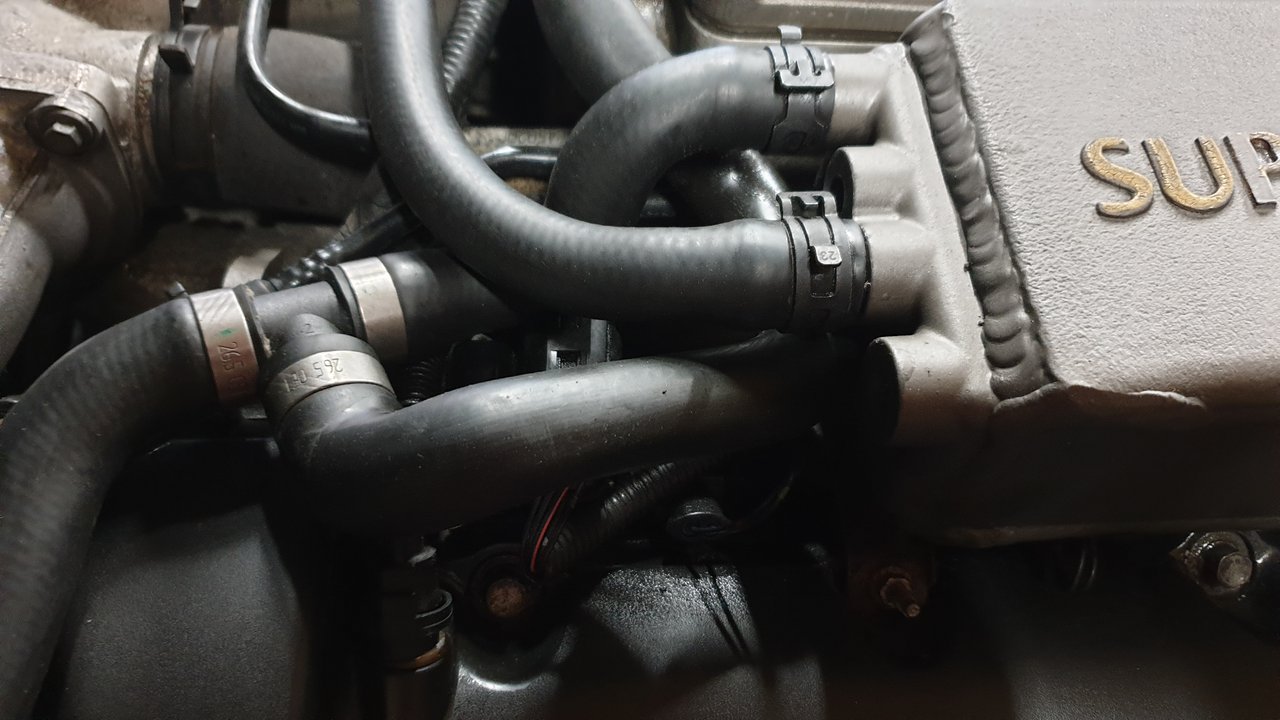
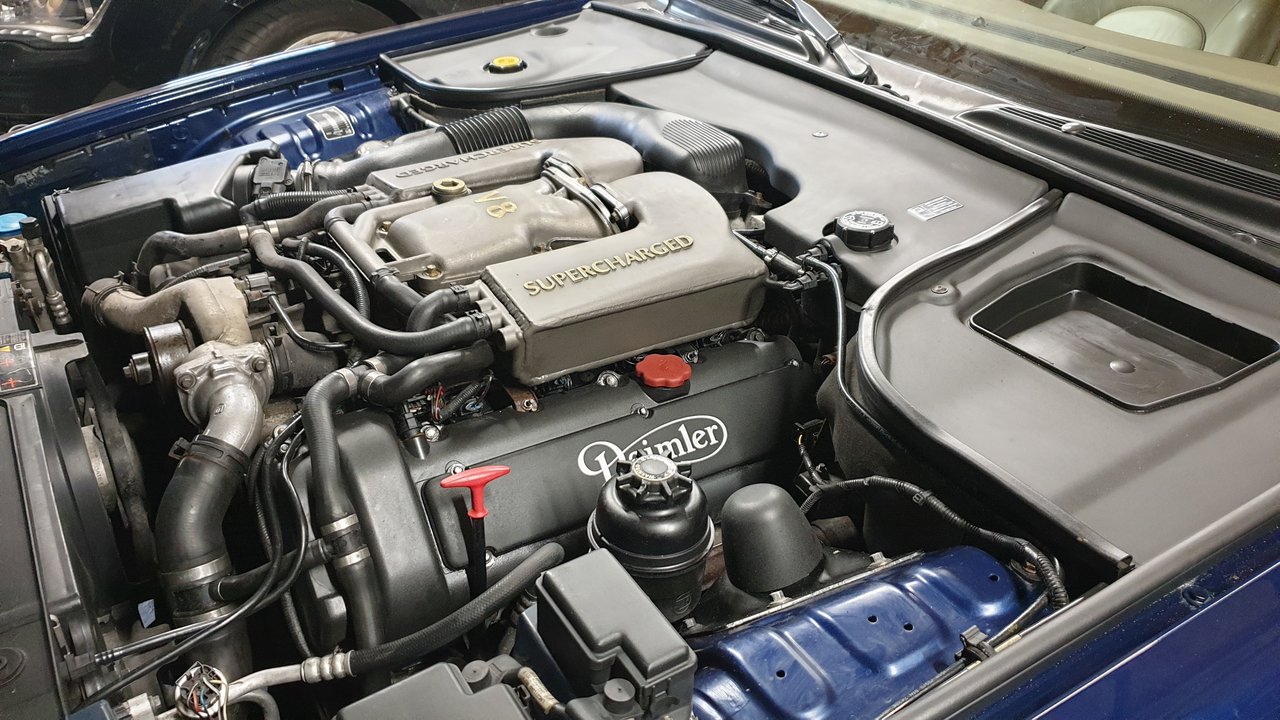
Then after two bodyshop visits, the already mucky engine bay had become embarrassing... particularly with all the dust. I gave it a light clean in some areas.
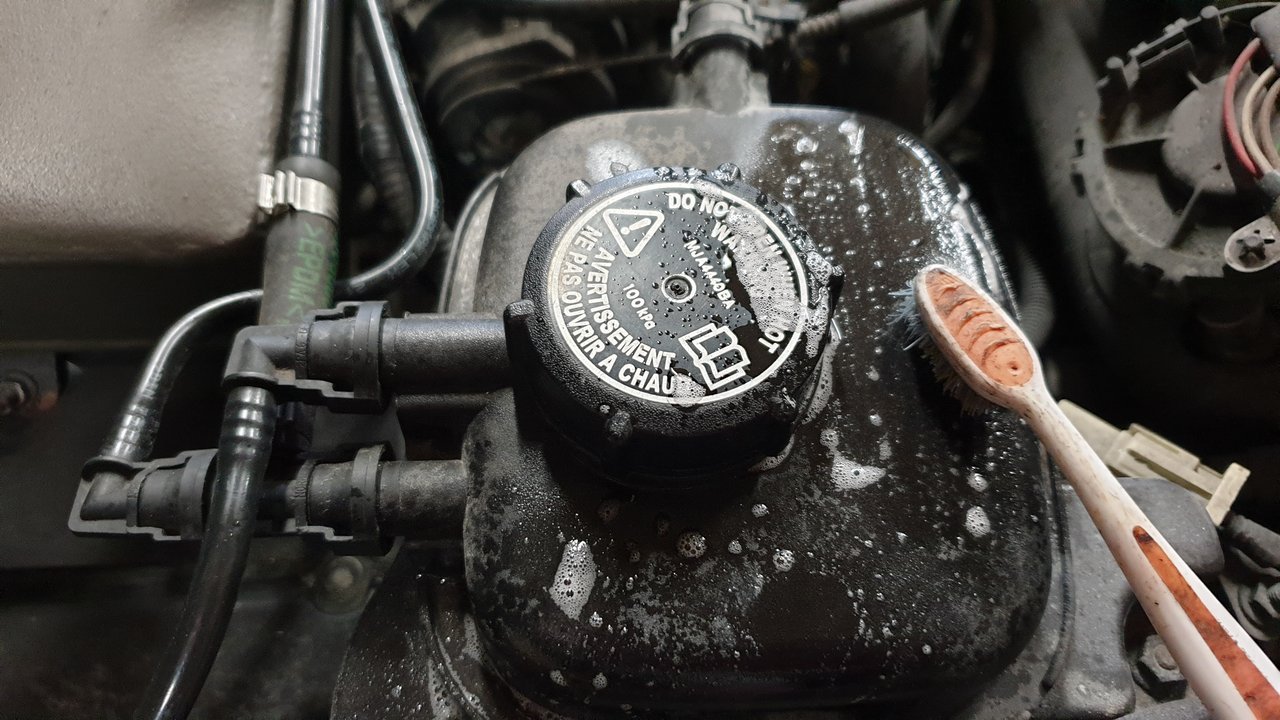

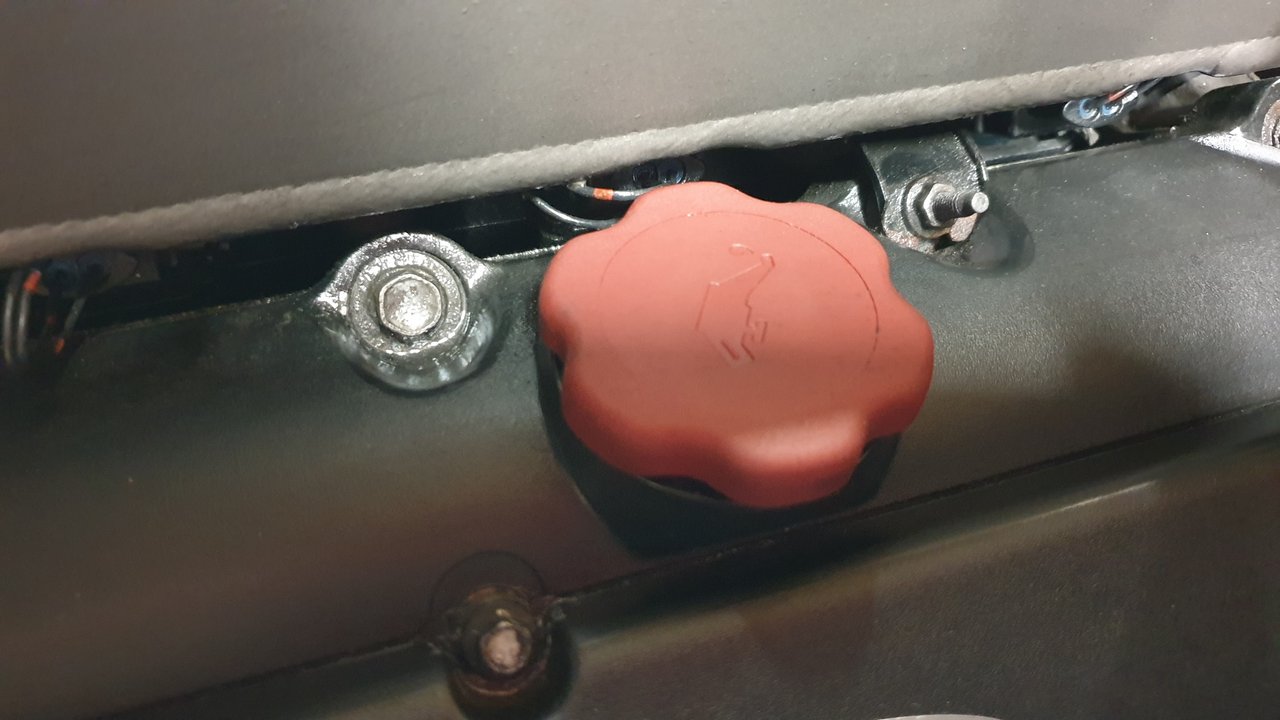
Then I decided that the DIY gold paint from a previous owner needed freshening up. I was torn between cleaning it all off or going over it. I decided to give it another go.
Before...
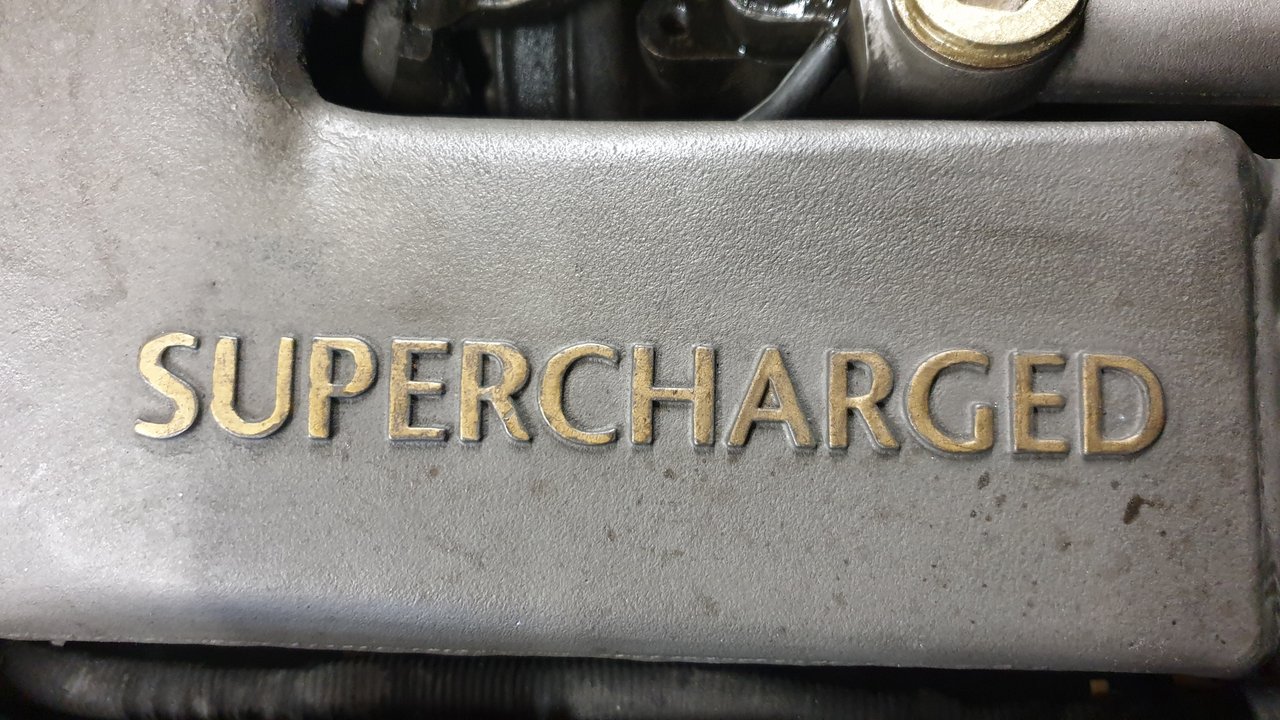
After...
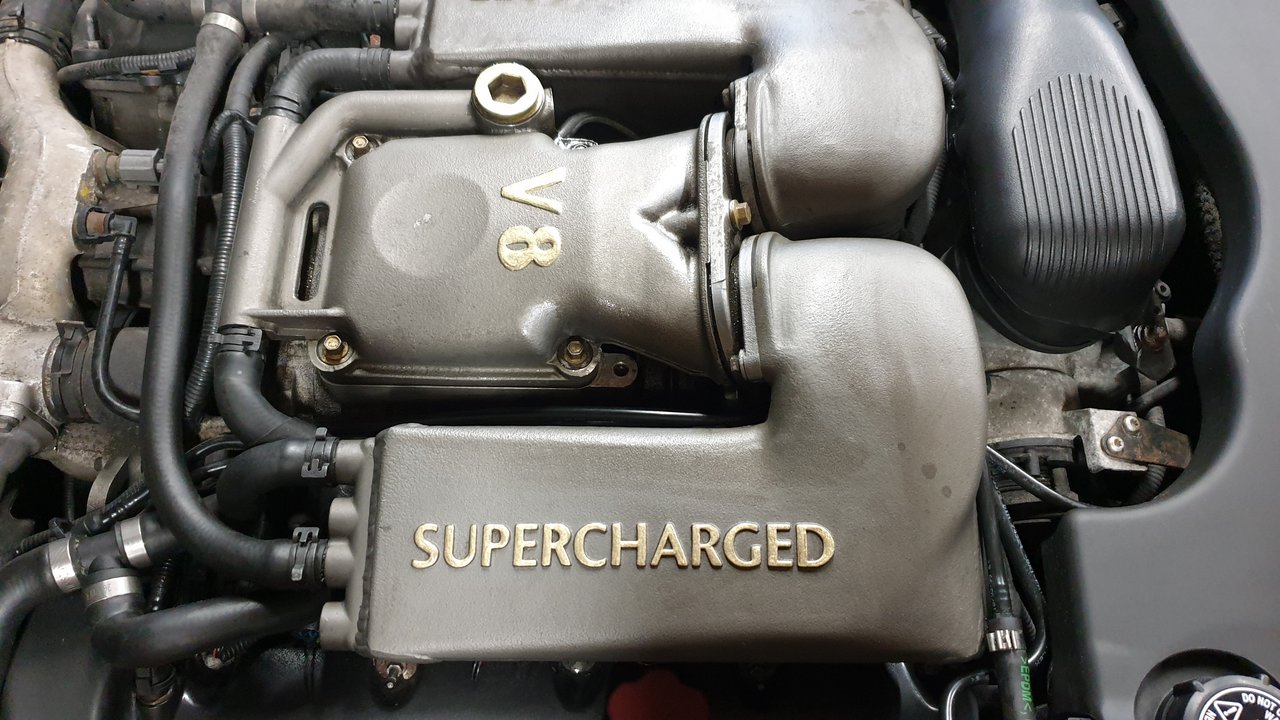
I'm still undecided, but I will see what it looks like when I'm done.
What does everyone else think?
Still lots to clean under here, but a good start to the passenger side of the engine bay.

That's all for this weekend.
Thanks for reading!
On Sunday I cheered myself up with a couple of easy wins.
I replaced the faded old gear knob with a nice spanking brand new one.
I shined up the lower chrome trim from the front bumper.
Then after two bodyshop visits, the already mucky engine bay had become embarrassing... particularly with all the dust. I gave it a light clean in some areas.
Then I decided that the DIY gold paint from a previous owner needed freshening up. I was torn between cleaning it all off or going over it. I decided to give it another go.
Before...
After...
I'm still undecided, but I will see what it looks like when I'm done.
What does everyone else think?
Still lots to clean under here, but a good start to the passenger side of the engine bay.
That's all for this weekend.
Thanks for reading!
The following users liked this post:
Ken Cantor (10-23-2022)
#115
10-25-2022, 03:45 AM
Things in life do not always go the way you want them to, and despite a great weekend, Aston spiked a high temperature yesterday. He seems absolutely fine, and there is no sign that he is ill in any way; but protocol means he has to be checked out at hospital, and stay until they know they have found the cause. This means our little pest is bored in hospital again.
I do feel sorry for the little fella, trapped in a small room; he plays with some toys and does some colouring, but in the end both Aston and my wife just want to go home...

The hospital is not really a good place for our other son, 2 year old Spencer, so after work I collected him from the hospital, took him home, and then got him to bed at around 7:30pm. This left me at a loose end...
Time to have a look in the garage!
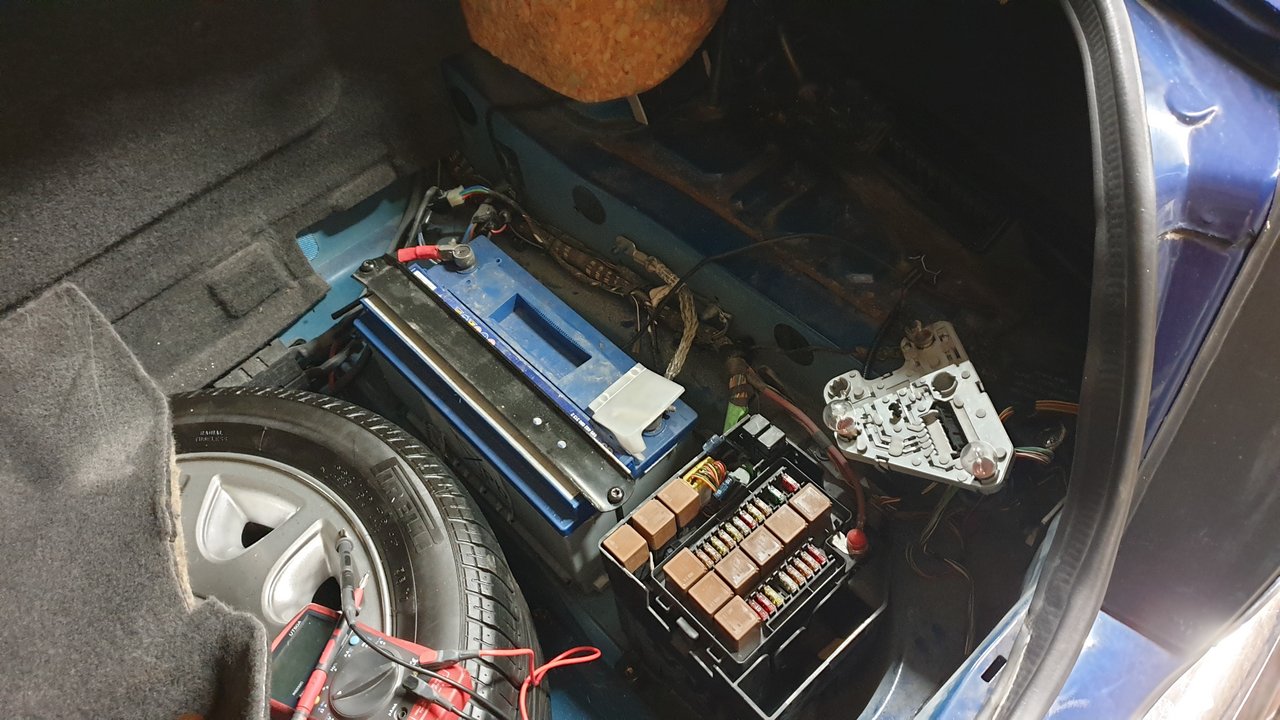
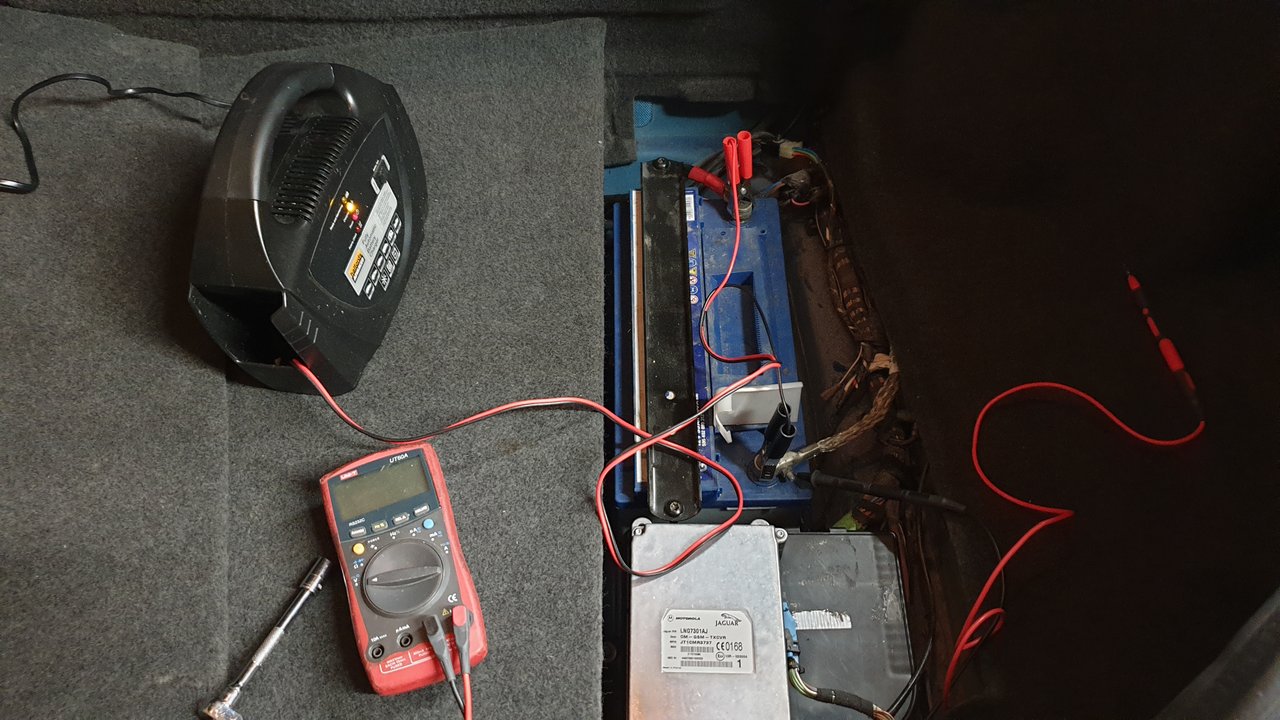
Thanks to a helpful member on this forum, I had some nice tips about things to check. But the first thing that had occured to me was that electrical problems are often due to a poor quality battery. Therefore is seemed sensible to check this out first. I could not really pull the car apart, as I had to keep an eye on sleeping Spencer, but 10 minutes could not hurt.
I put a meter on the battery, and measured a pathetic 9.4VDC! This could certainly cause issues.
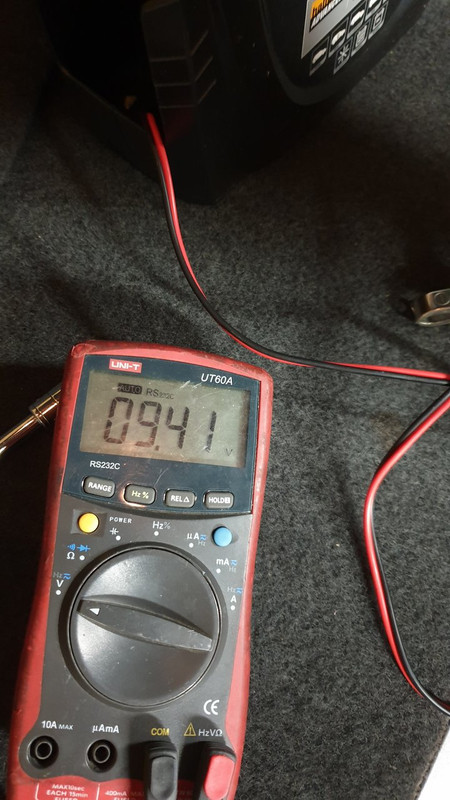
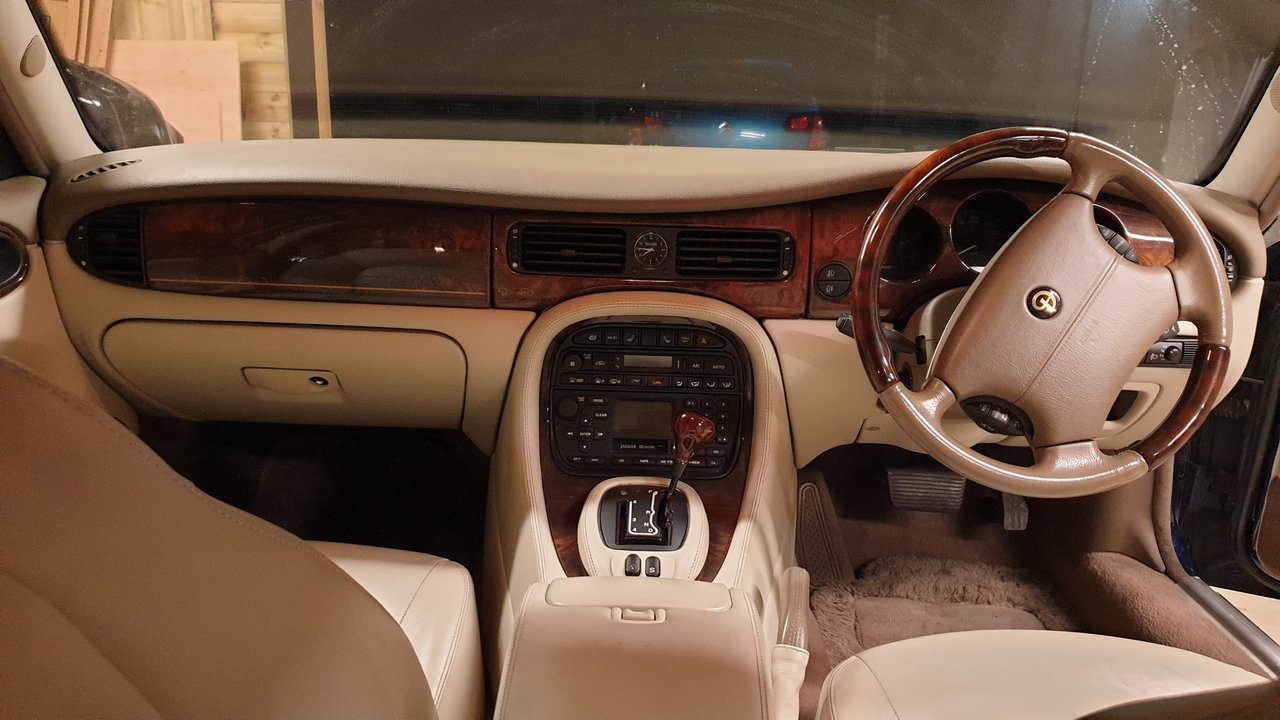
So the battery is on charge, and I shall check things again tomorrow.
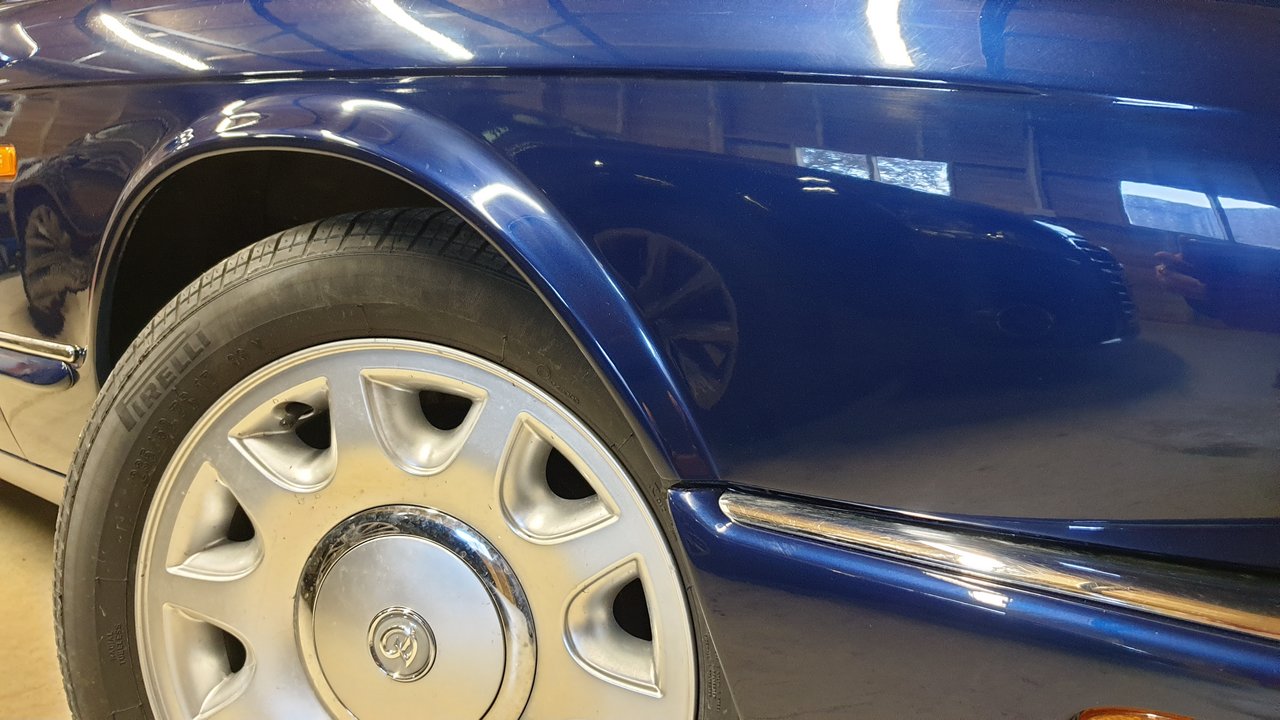
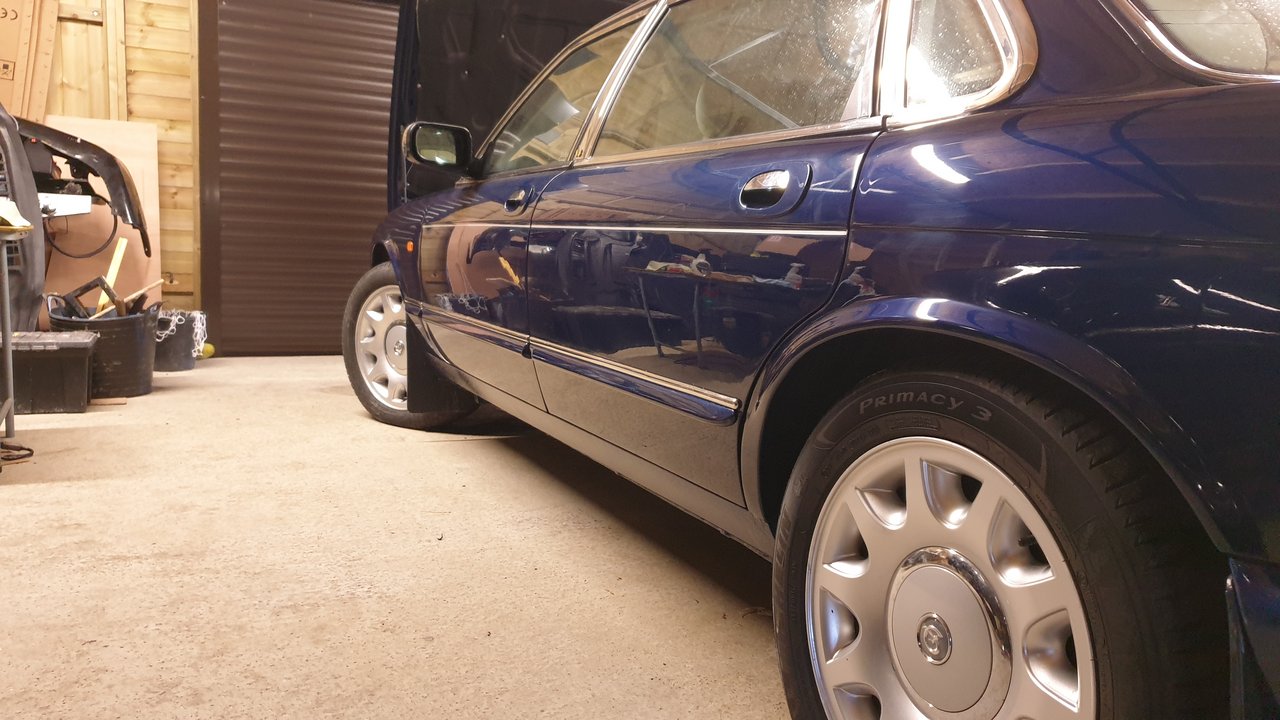
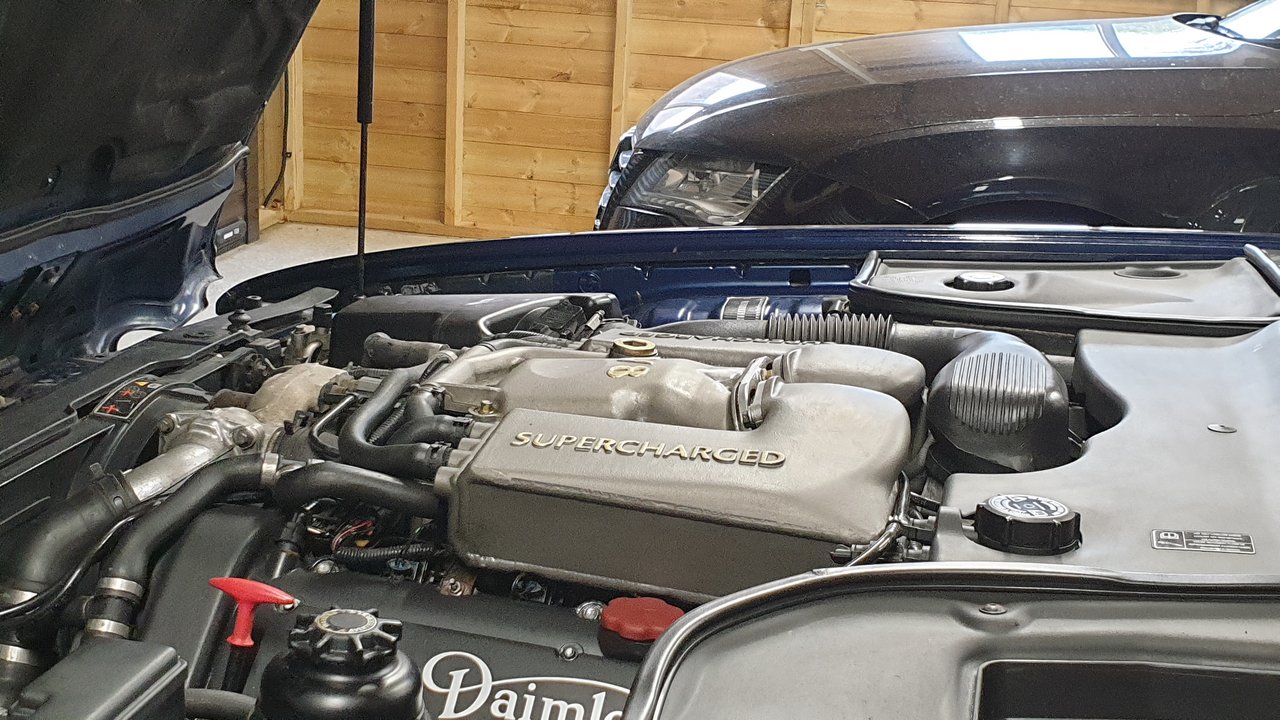
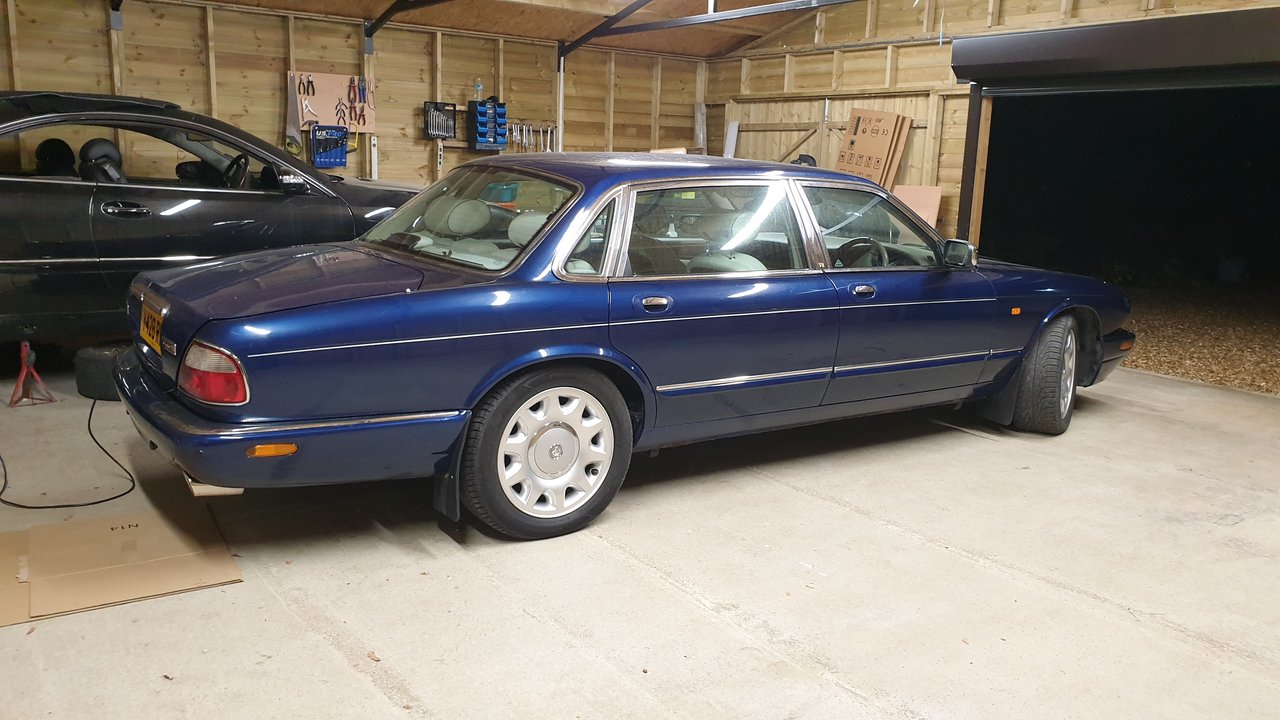
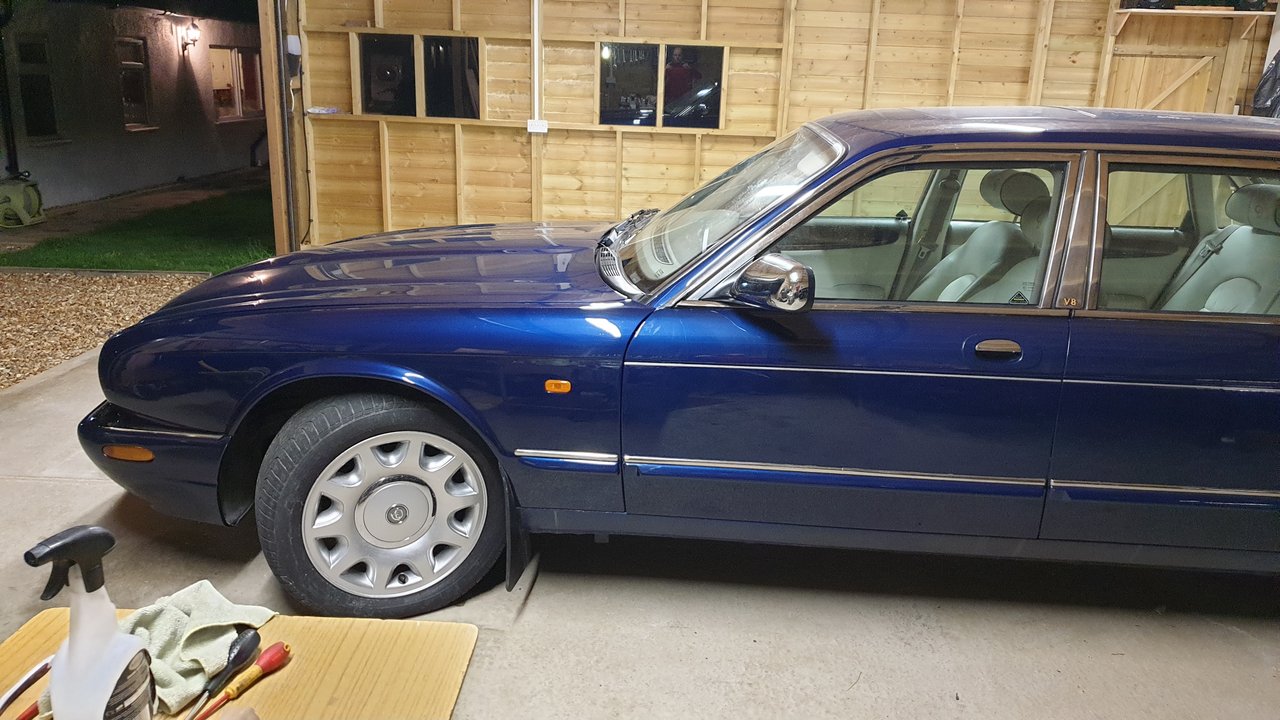
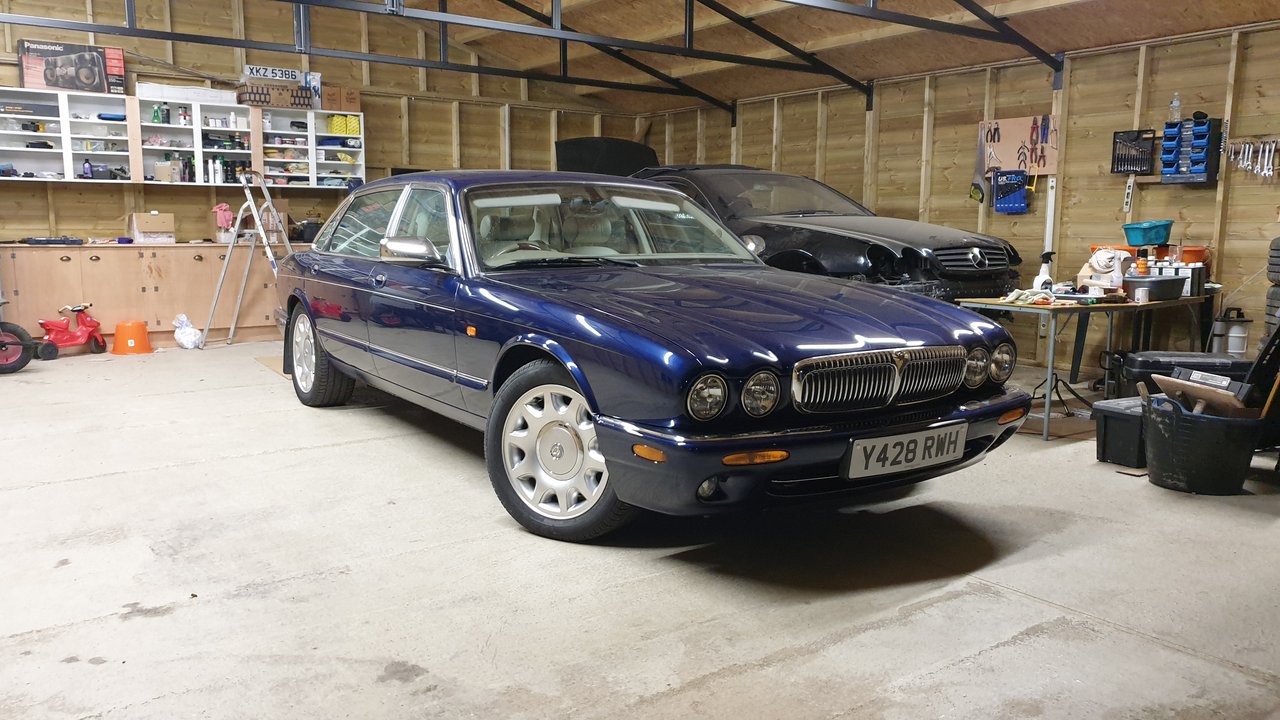
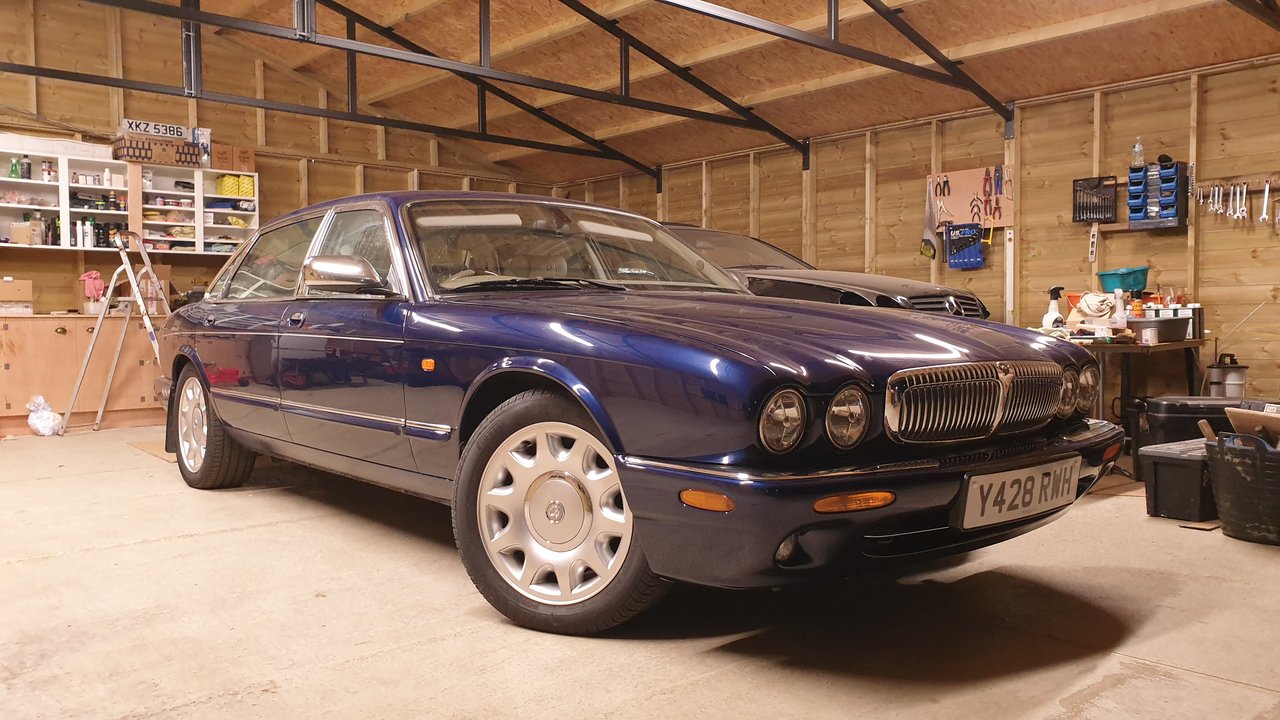
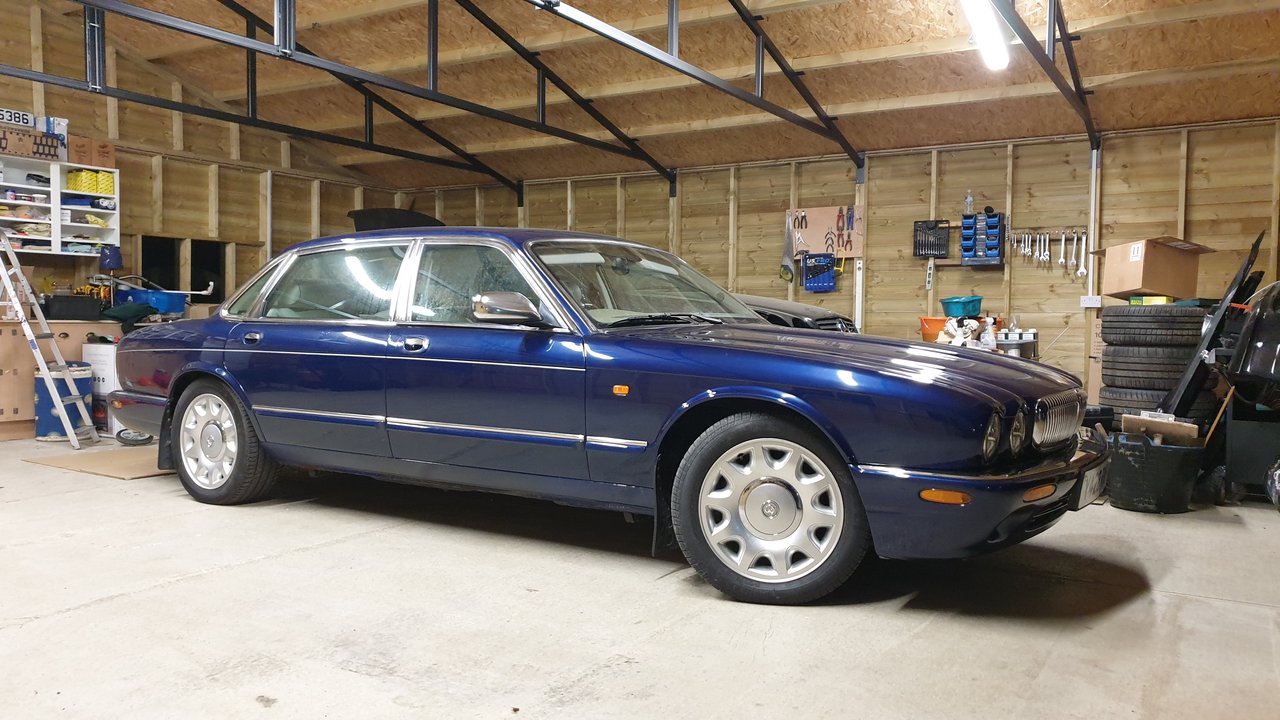
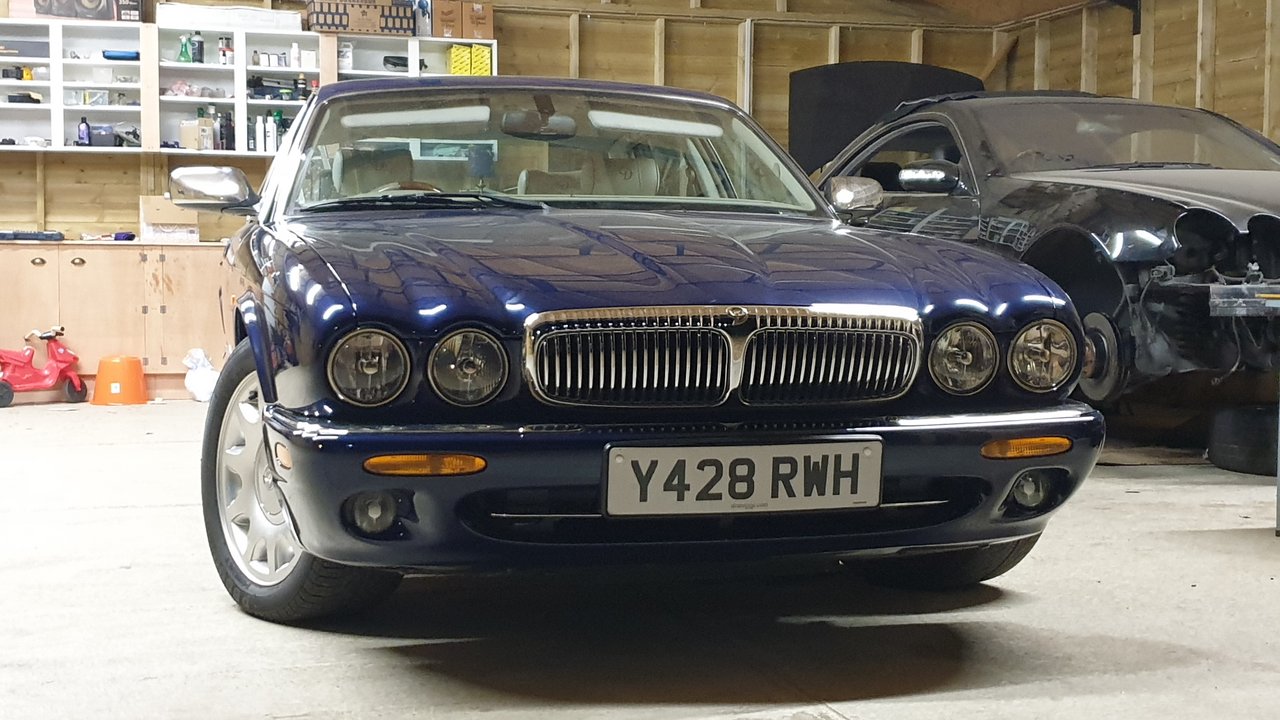
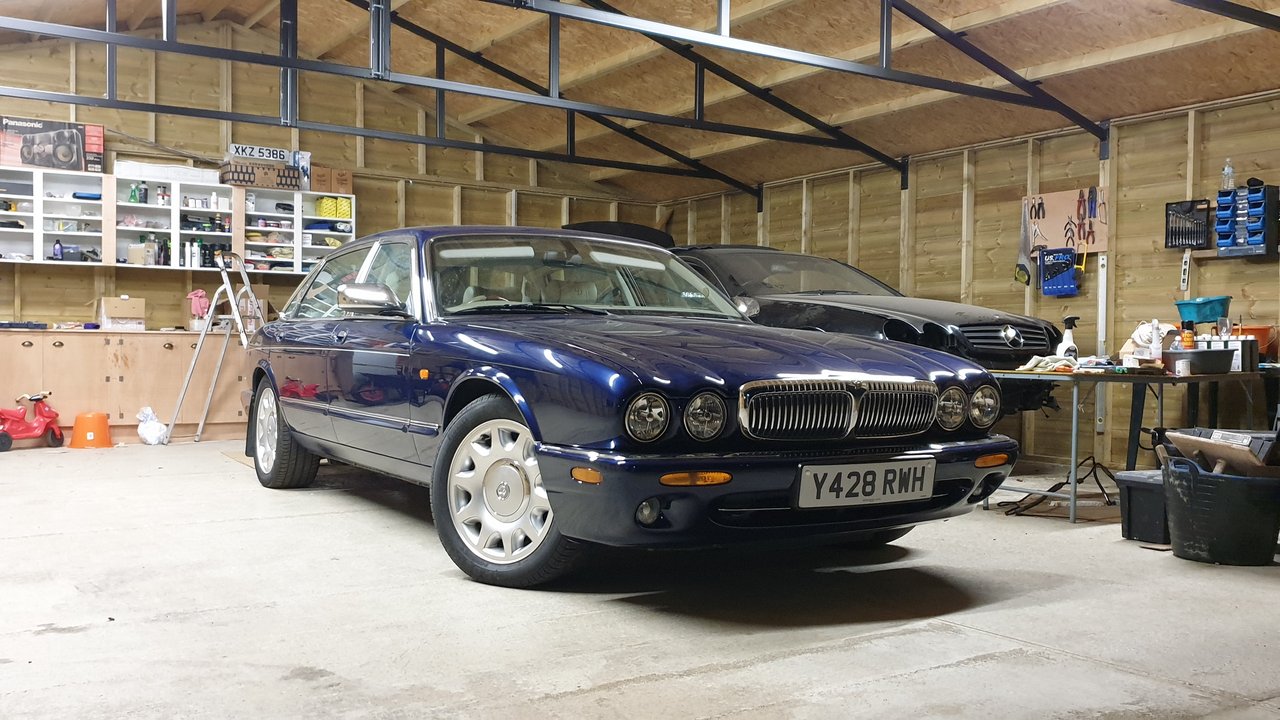
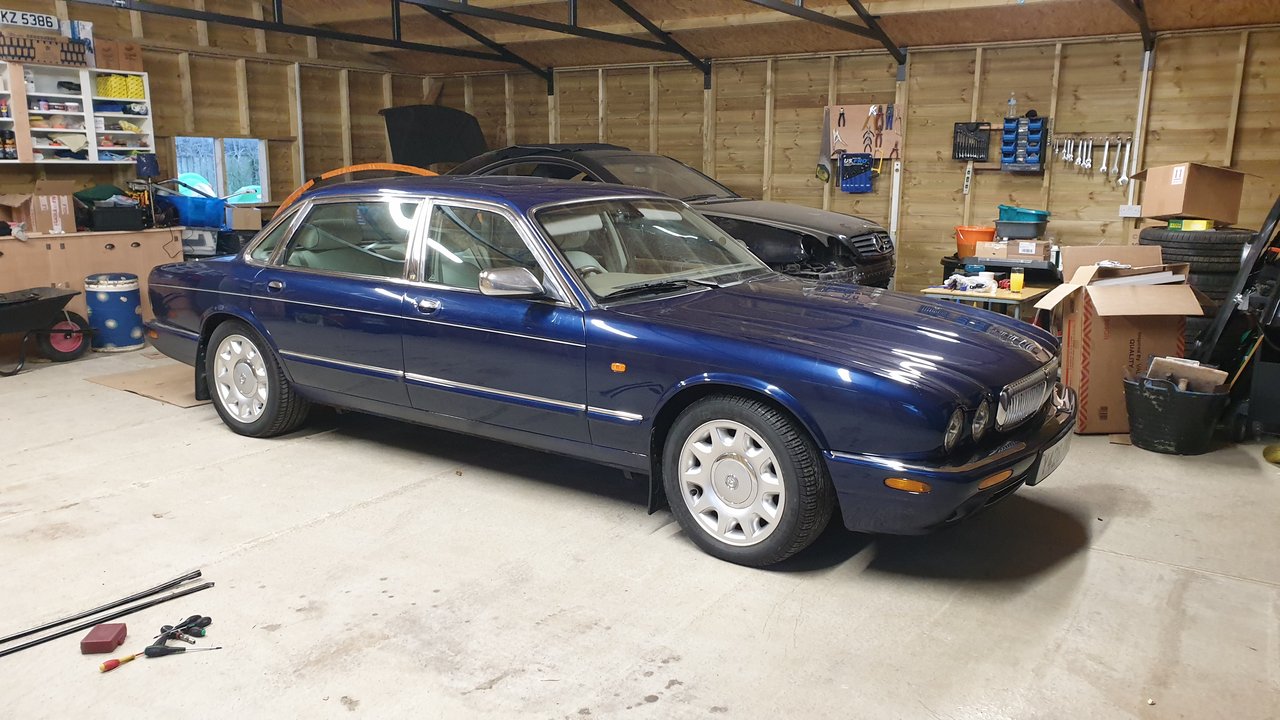
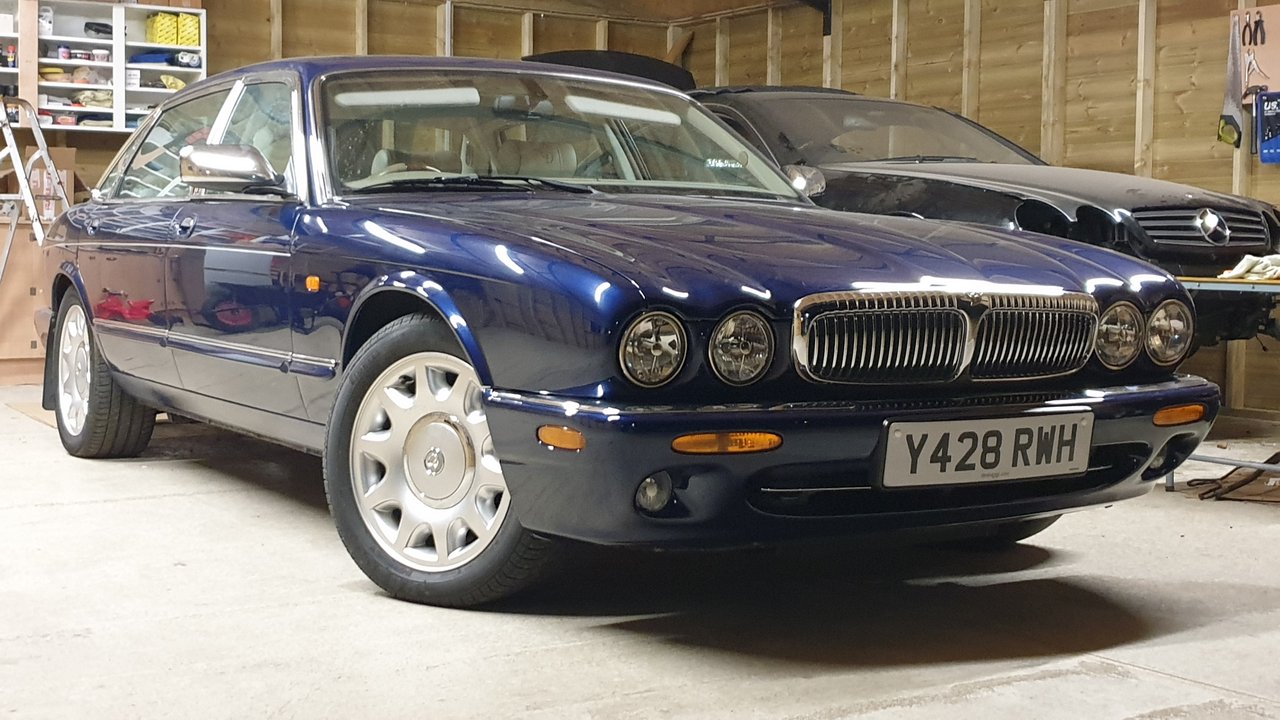
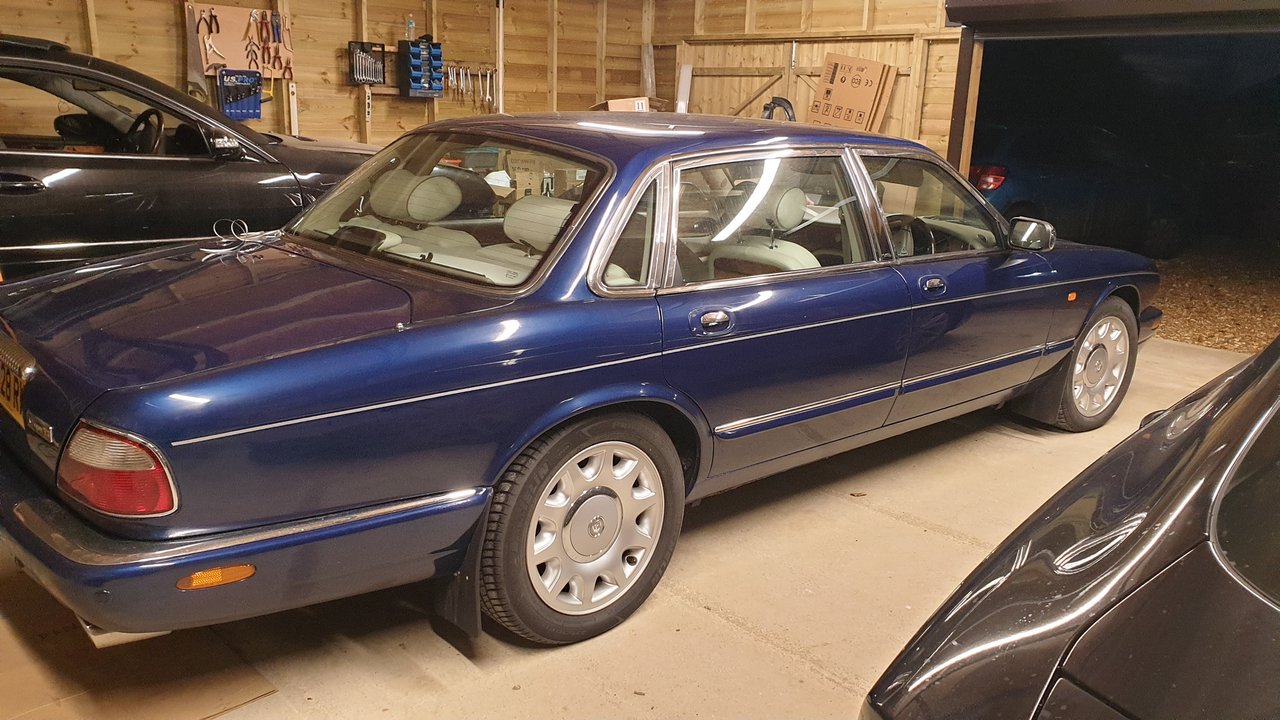
While I was in the garage I loved the way the car looked under the garage lights, so I took a few pictures.


I do feel sorry for the little fella, trapped in a small room; he plays with some toys and does some colouring, but in the end both Aston and my wife just want to go home...
The hospital is not really a good place for our other son, 2 year old Spencer, so after work I collected him from the hospital, took him home, and then got him to bed at around 7:30pm. This left me at a loose end...
Time to have a look in the garage!
Thanks to a helpful member on this forum, I had some nice tips about things to check. But the first thing that had occured to me was that electrical problems are often due to a poor quality battery. Therefore is seemed sensible to check this out first. I could not really pull the car apart, as I had to keep an eye on sleeping Spencer, but 10 minutes could not hurt.
I put a meter on the battery, and measured a pathetic 9.4VDC! This could certainly cause issues.
So the battery is on charge, and I shall check things again tomorrow.
While I was in the garage I loved the way the car looked under the garage lights, so I took a few pictures.
The following users liked this post:
neurojag (10-26-2022)
#116
10-26-2022, 07:28 AM
Veteran Member
Join Date: Mar 2022
Location: Edmonton, Alberta, Canada
Posts: 3,068
Received 2,708 Likes
on
871 Posts
The following users liked this post:
c16rkc (10-27-2022)
#117
10-26-2022, 10:28 AM
Veteran Member
So the pin stripe is a hand painted line unfortunately, what the paintshop could have done is give a local sign writer a call, and matching them a 1/10th litre base to add the stripe before they clear coated.
Leaves you with the other option, matching a close colour to the vinyl stripes you can buy at automotive paint supplier shops usually stock them or the usual online sites like ebay etc.
For a good result on the recharge, disconnect it and leave it for a moment then connect back up so the short term memory systems capacitor power is cleared, you start with a reset car from that point. Charging on the car doesn't give you that clean slate to figure your glitches out.
If boot doesn't come back on line...
Boot lid is a continuity check, is the V to the lights? If no, note the wiring colours and pull the right side hinge cover off to expose the loom, carpets might need to come and and split the harness wrap. locate your lights etc and check the wiring at the bend created - this is were the boot lid wiring work hardens over time and breaks, sometimes the break is obvious with wiring discolouration.
Last edited by Sean B; 10-26-2022 at 10:39 AM.
The following users liked this post:
c16rkc (10-27-2022)
#118
01-08-2023, 11:32 AM
A few overdue updates....
All bland things come to those who wait
After being a coward, and deciding I did not want to take any more of the Daimler apart, I dropped it off at AutoElectrical in Kings Lynn on Sunday 13th November, and they were given details of the three faults that appeared after the bodyshop had the car.
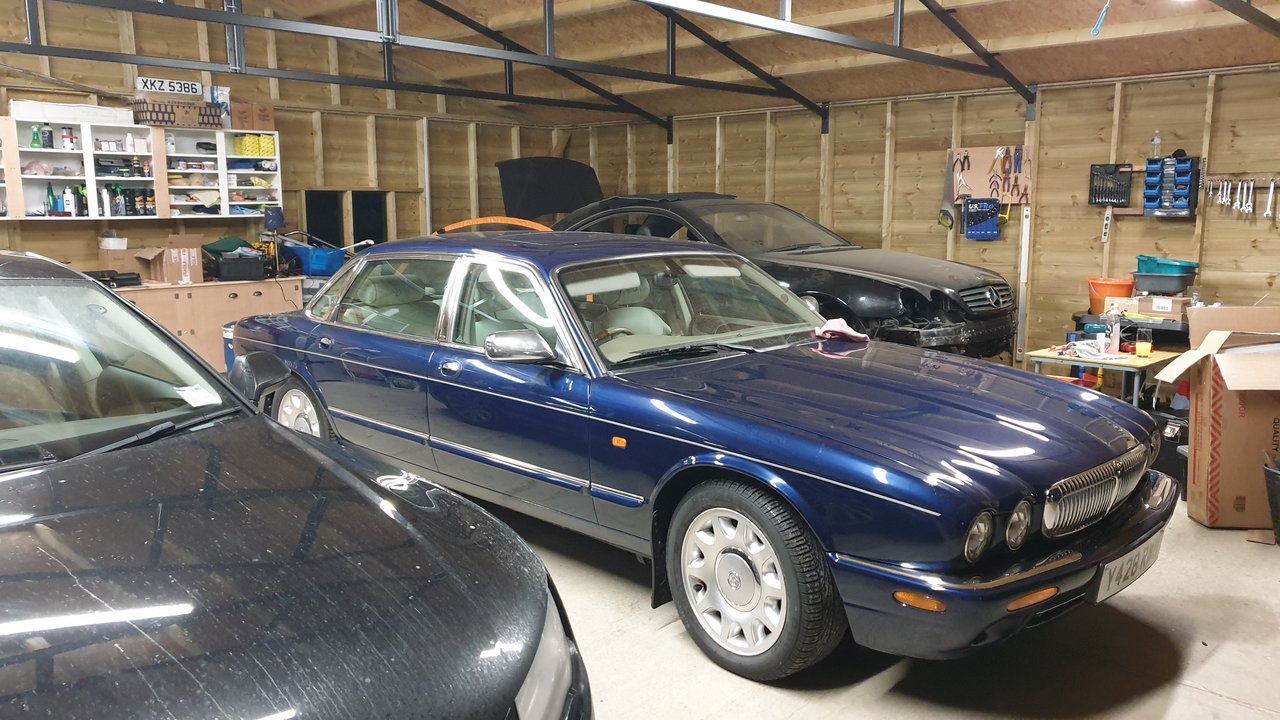
Would you believe it, no longer had the Daimler gone, but that crafty little Citroen stole it's space in the garage!!
On Thursday of the week that followed (17th Nov), they gave me the diagnosis:
* The front passenger indicator not working turned out to be a connector not seated correctly. An easy fix!
* The coolant level fault turned out to be that the sensor has stopped working. At around �30ish for a sensor, I am not going to worry. Another easy fix.
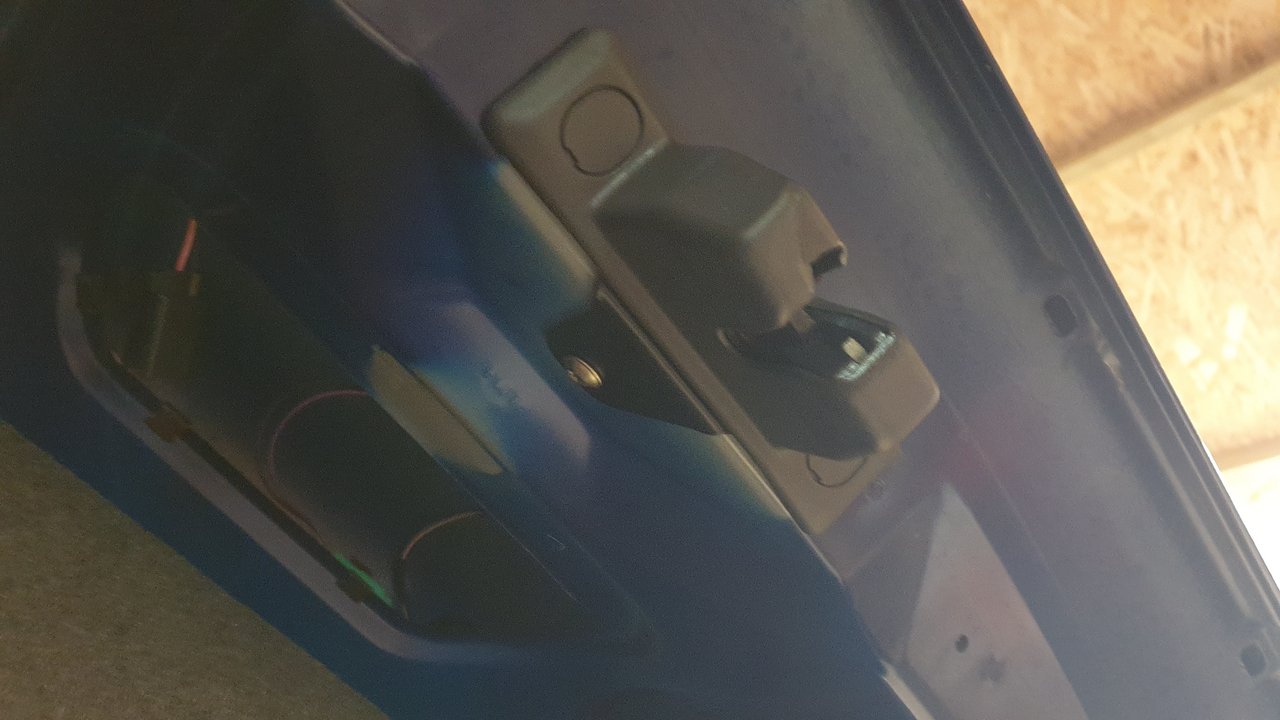
* The boot lock/opening fault issue has turned out to be a micro-switch. Jaguar no longer make the part, but I betting I can find a used one. Auto electrical are going to show me the part so I can source a used one and fit it myself.
I hoped it would not take too long; though they did say they needed to order the level sensor from Jaguar. But I did not hear anything until last Friday (25th November). I was advised that not only was the level sensor in the tank goosed, but that there was another sensor that formed part of the tank that was also gone. So I needed a whole new tank.... This was going to be another �130.
I had to seek approval from the board for the extra costs...

Approval was granted! - So I said go ahead.
All bland things come to those who wait
After being a coward, and deciding I did not want to take any more of the Daimler apart, I dropped it off at AutoElectrical in Kings Lynn on Sunday 13th November, and they were given details of the three faults that appeared after the bodyshop had the car.
Would you believe it, no longer had the Daimler gone, but that crafty little Citroen stole it's space in the garage!!
On Thursday of the week that followed (17th Nov), they gave me the diagnosis:
* The front passenger indicator not working turned out to be a connector not seated correctly. An easy fix!
* The coolant level fault turned out to be that the sensor has stopped working. At around �30ish for a sensor, I am not going to worry. Another easy fix.
* The boot lock/opening fault issue has turned out to be a micro-switch. Jaguar no longer make the part, but I betting I can find a used one. Auto electrical are going to show me the part so I can source a used one and fit it myself.
I hoped it would not take too long; though they did say they needed to order the level sensor from Jaguar. But I did not hear anything until last Friday (25th November). I was advised that not only was the level sensor in the tank goosed, but that there was another sensor that formed part of the tank that was also gone. So I needed a whole new tank.... This was going to be another �130.
I had to seek approval from the board for the extra costs...
Approval was granted! - So I said go ahead.
The following users liked this post:
Ken Cantor (01-08-2023)
#119
01-08-2023, 11:36 AM
I collected the Daimler shortly afterwards. It was all fixed with the exception of the boot lock, but I had ordered the replacement part having been shown what it was by the garage.
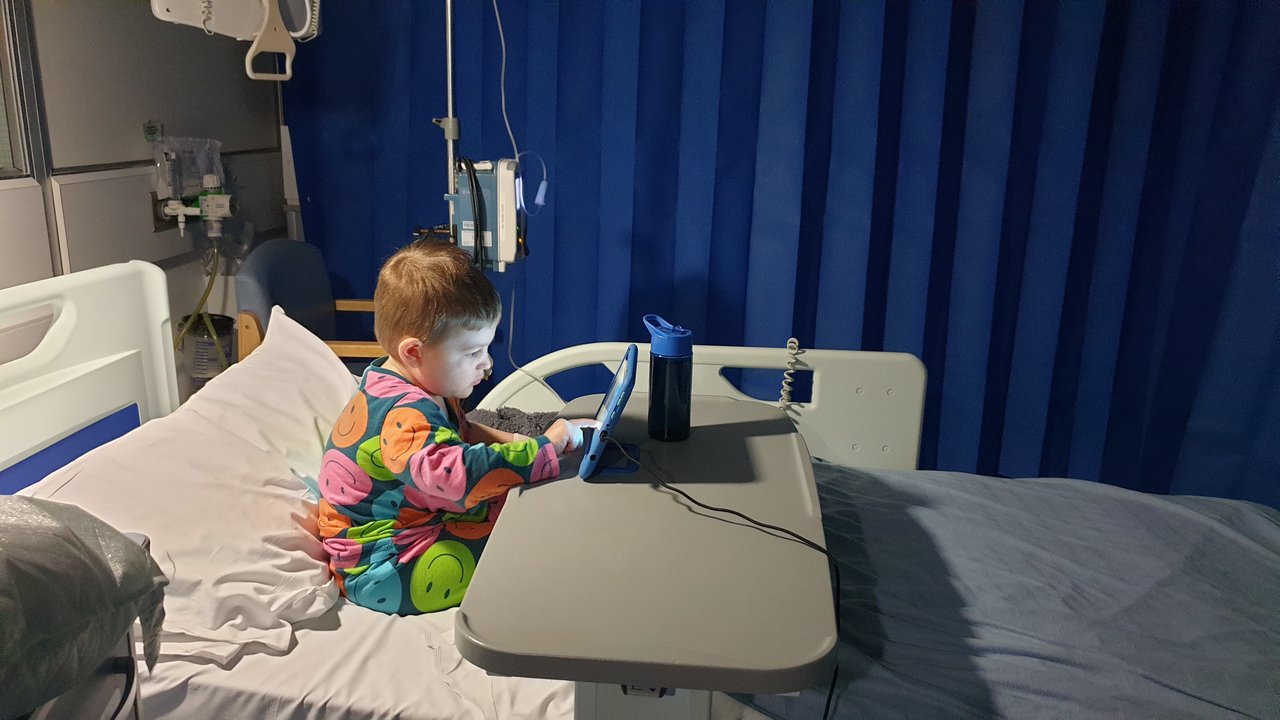
But while I was hoping to give the Daimler a super clean, Aston ended up in hospital, again... He is was fine in himself, just a bit quiet, had a cough and gravely voice, but we had to see out the visit.
Here he is glued to his pad that morning...

So the poor Daimler had to wait...
The garage had unplugged the "boot open" microswitch and its a surprise to see it not only clears the error, but also works perfectly too, so it seems the switch has no purpose other than to let you know if the boot is not closed properly.
I decided I'd replace that when it arrived in the post.
But while I was hoping to give the Daimler a super clean, Aston ended up in hospital, again... He is was fine in himself, just a bit quiet, had a cough and gravely voice, but we had to see out the visit.
Here he is glued to his pad that morning...
So the poor Daimler had to wait...
The garage had unplugged the "boot open" microswitch and its a surprise to see it not only clears the error, but also works perfectly too, so it seems the switch has no purpose other than to let you know if the boot is not closed properly.
I decided I'd replace that when it arrived in the post.
Last edited by c16rkc; 01-08-2023 at 11:39 AM.
#120
01-08-2023, 12:01 PM
The lead up to Christmas
The Daimler went in for its MOT in December, and I am please to say it passed. That night Aston had his Nativity at school, he's the sheep on the left with the black ears and black gloves.

When I looked at the MOT slip, I was surprised to see that even though I had all the bodywork mentioned in both the previous fail, and advisories, it now has ANOTHER bodywork advisory. They have noted both floor pans are rusty. The brake pipes also need doing, but I can get that booked in easy enough.
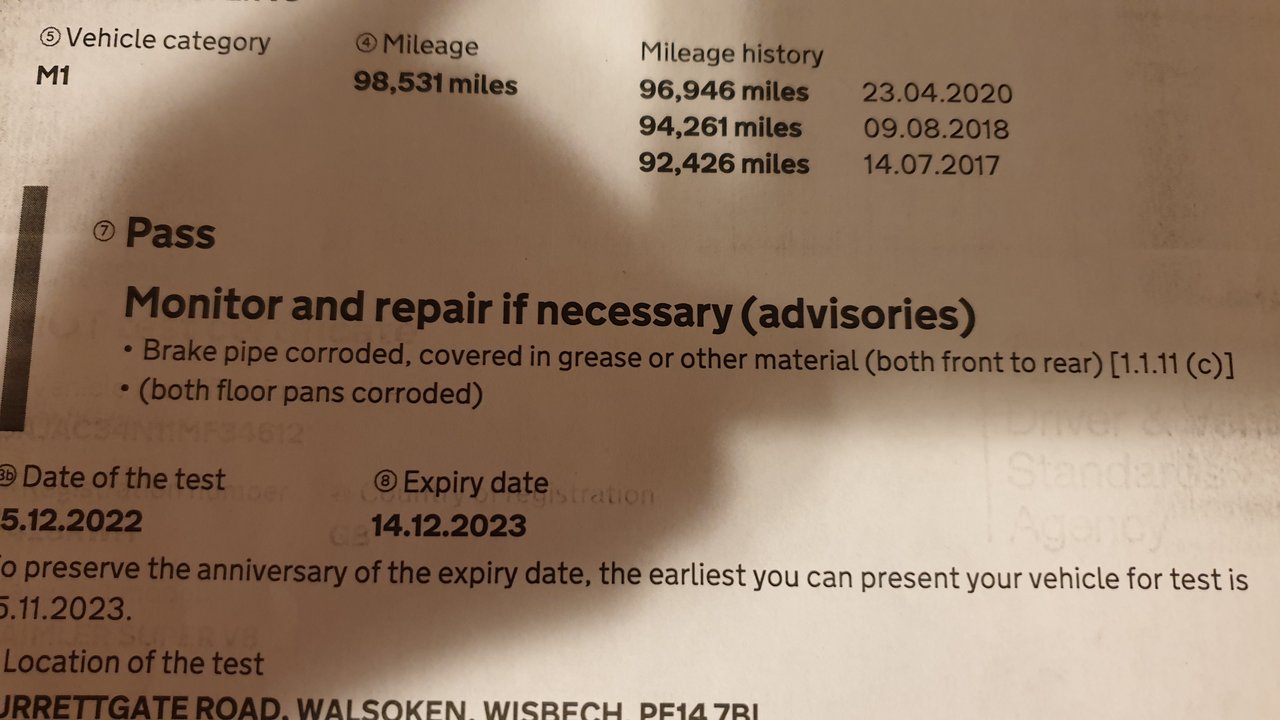
Frustrating because I wanted it sorted and so there was nothing else to do, and I told the body shop if anything needed doing let me know (after all it is surely cheaper to do it all at once). When I collected it they said the car was now really solid now and I'd not have to worry for years. It seems our MOT centre disagree ... never mind...
The following weekend, I got some time on the Daimler as Lindsey popped out for a couple of hours with the boys for hair cuts (those who have seen me know I have no need for hair cuts myself...).
First of all, I sorted the boot lock.
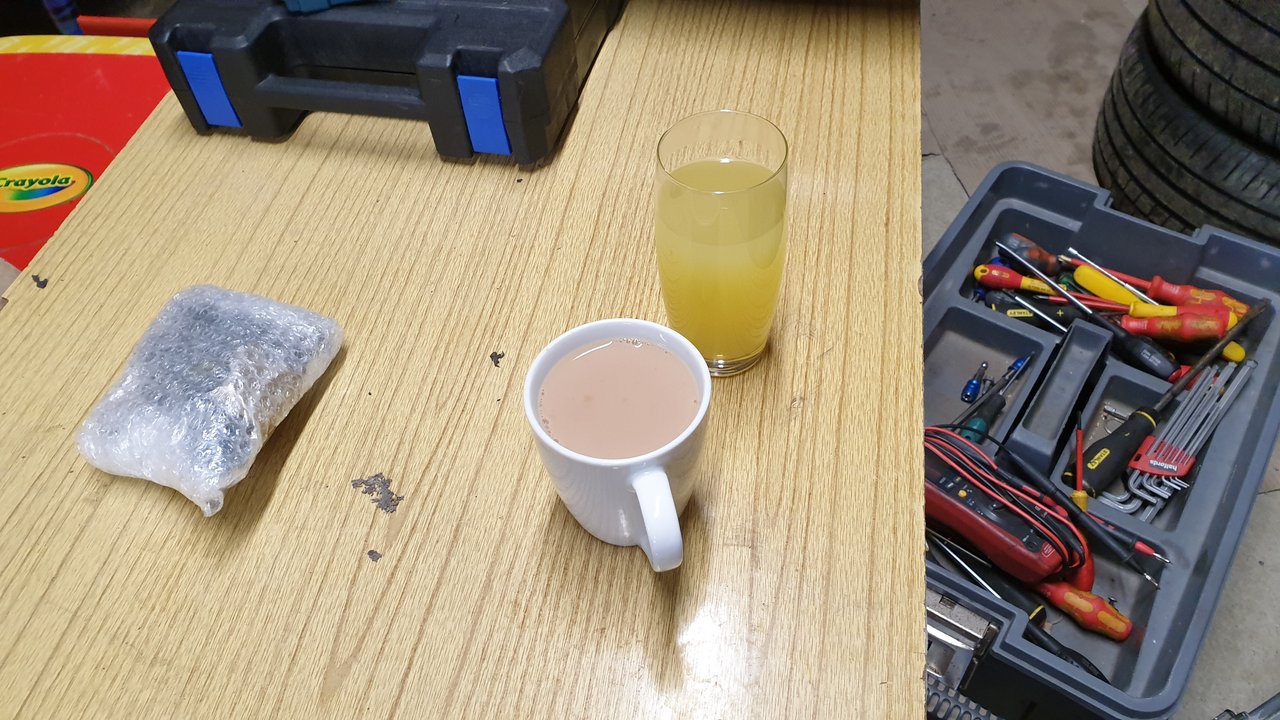
It was very cold, I was praising my lovely garage! Got myself a cold drink to keep me hydrated, but also a nice hot cup of tea.
The used replacement part had arrived from Ebay. Jaguar do not make the part anymore.
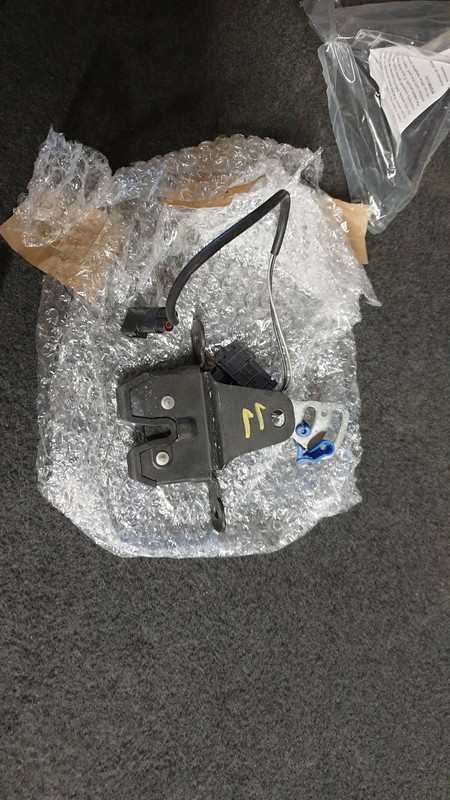
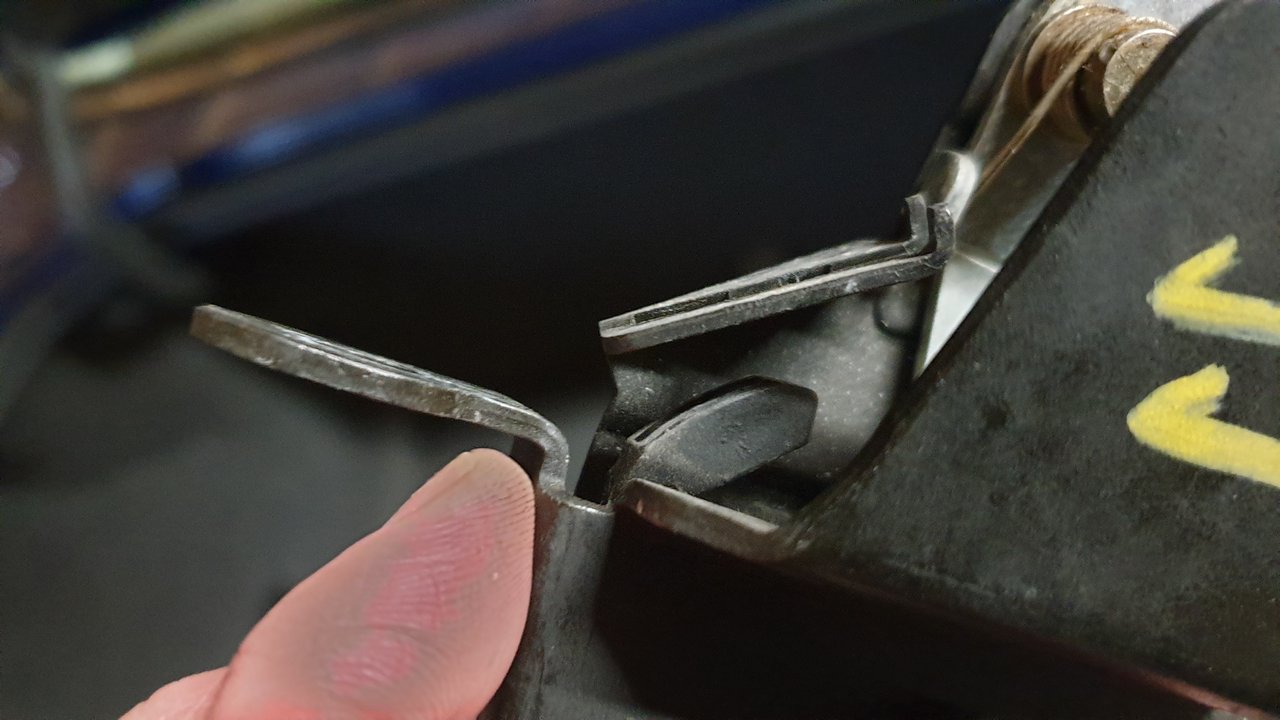
The electrical specialist had told me the microswitch was not working. But when I used my electrical multimeter to check it, all seemed fine. But then I compared the new/old boot latches and noticed a striker was broken in mine. Its this grey bit sticking up in the below.
So I swapped them over, put it all back together, and had one working bootlock again! Perfect!
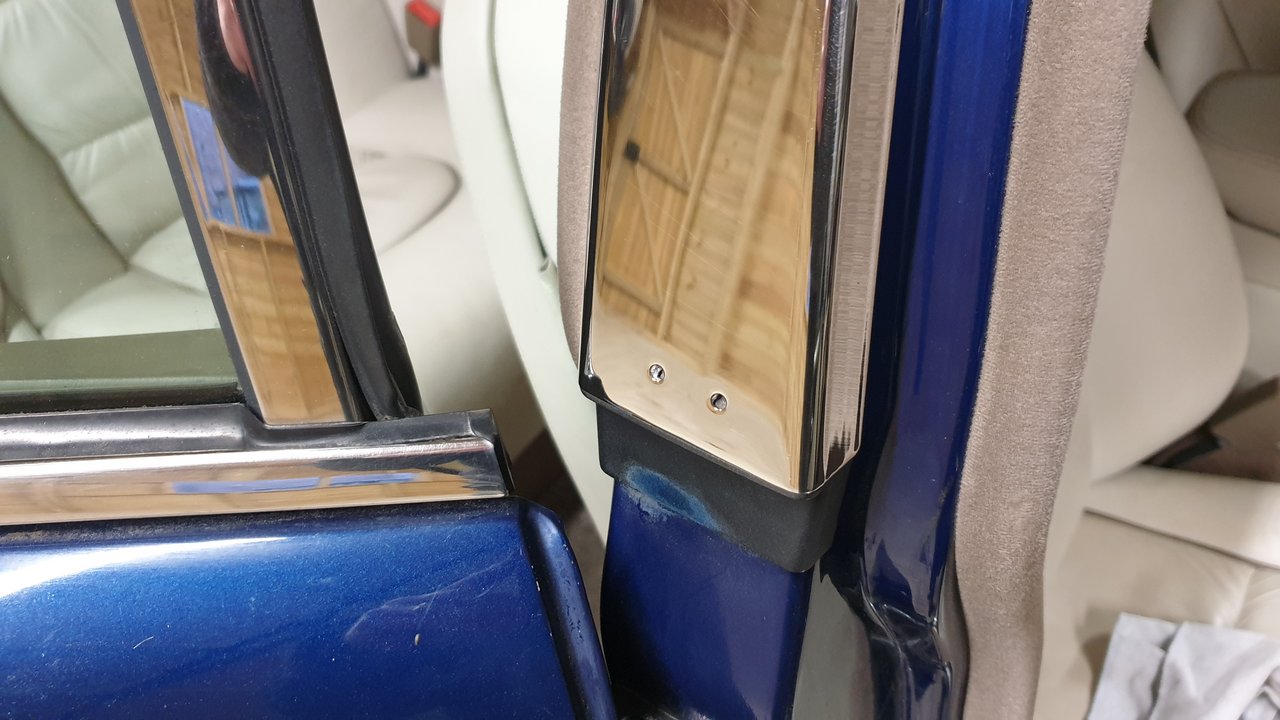
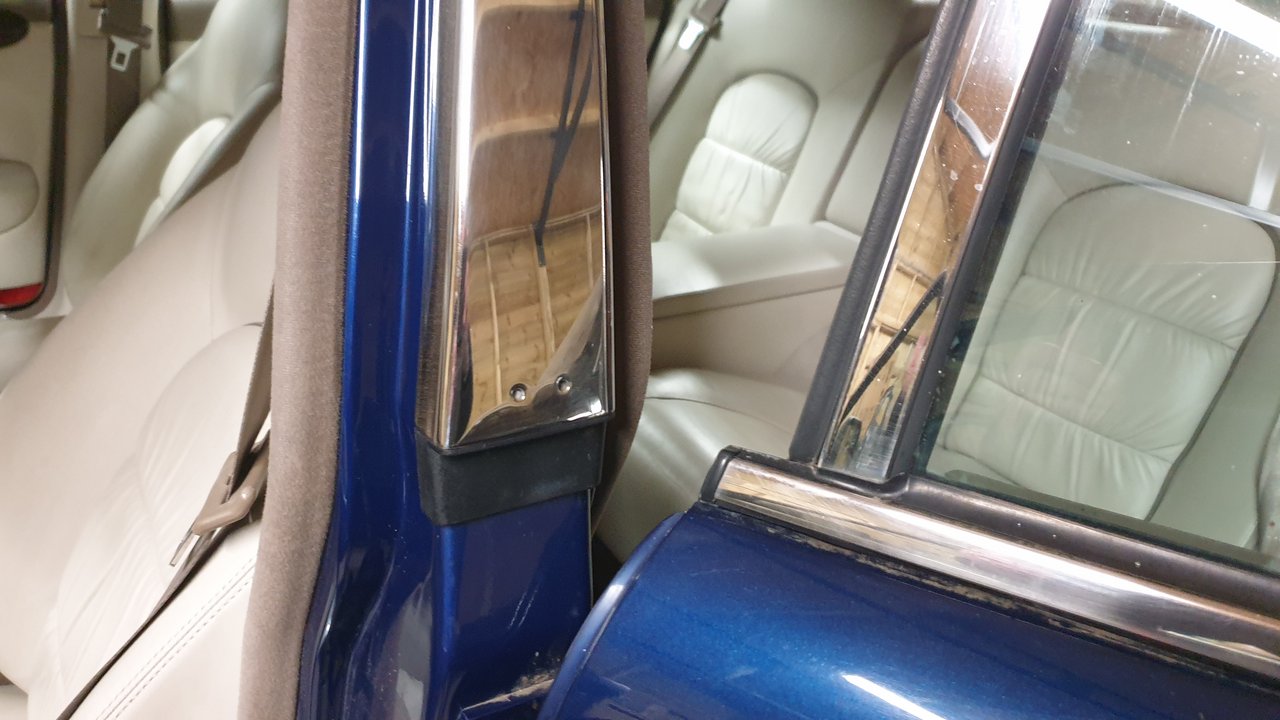
I then attended to the two front door/window chrome trims. Jaguar call this the waist trim. Mine were falling apart, particularly the drivers door one.
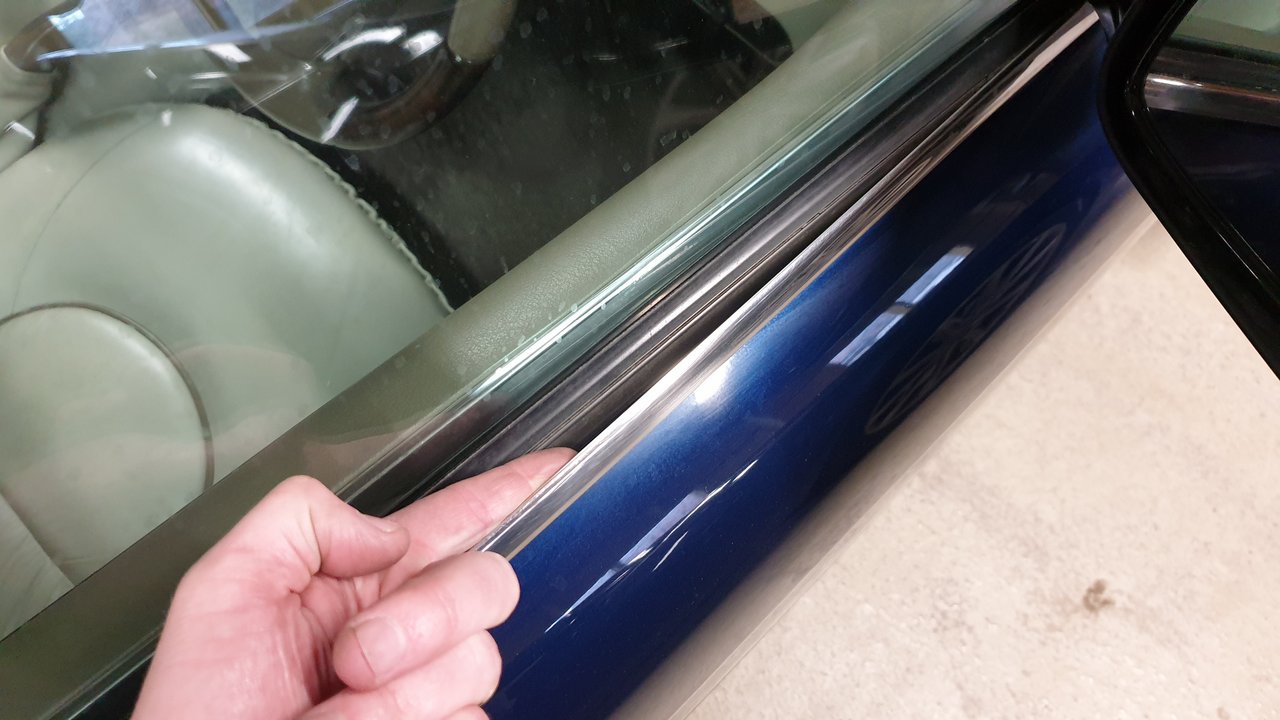
Need to take the door card off to do this properly without forcing or bending anything.
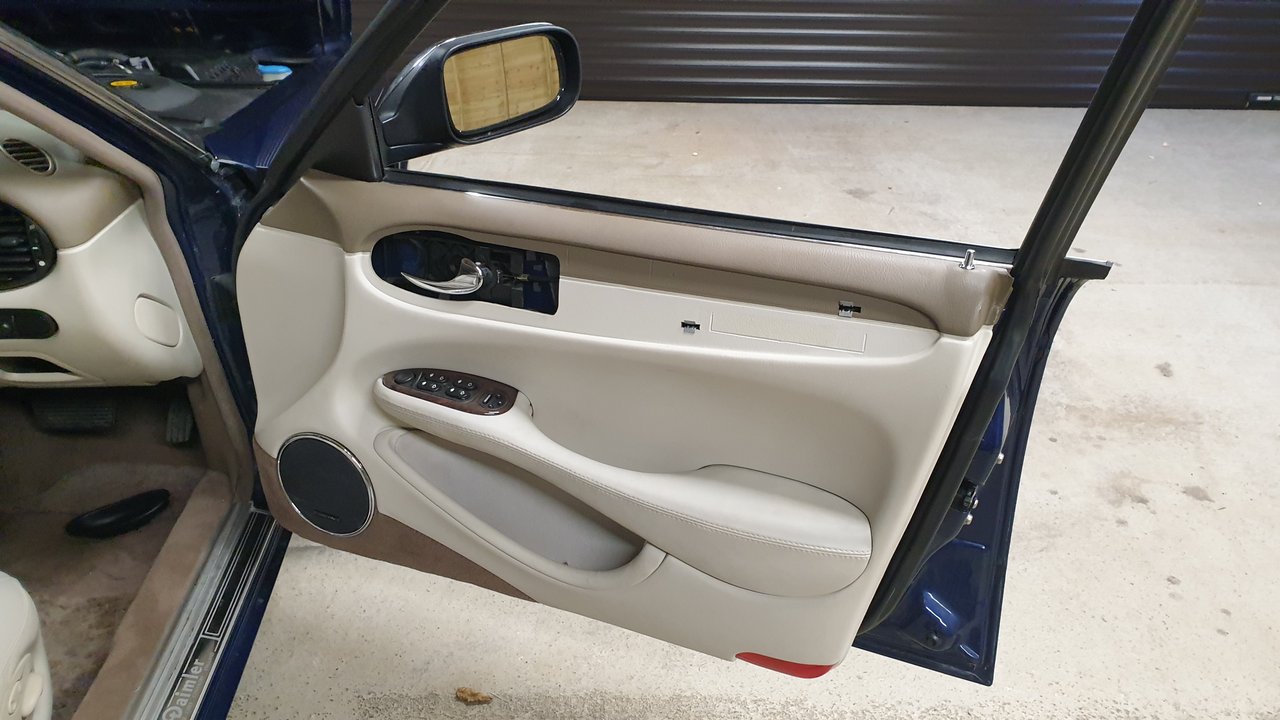
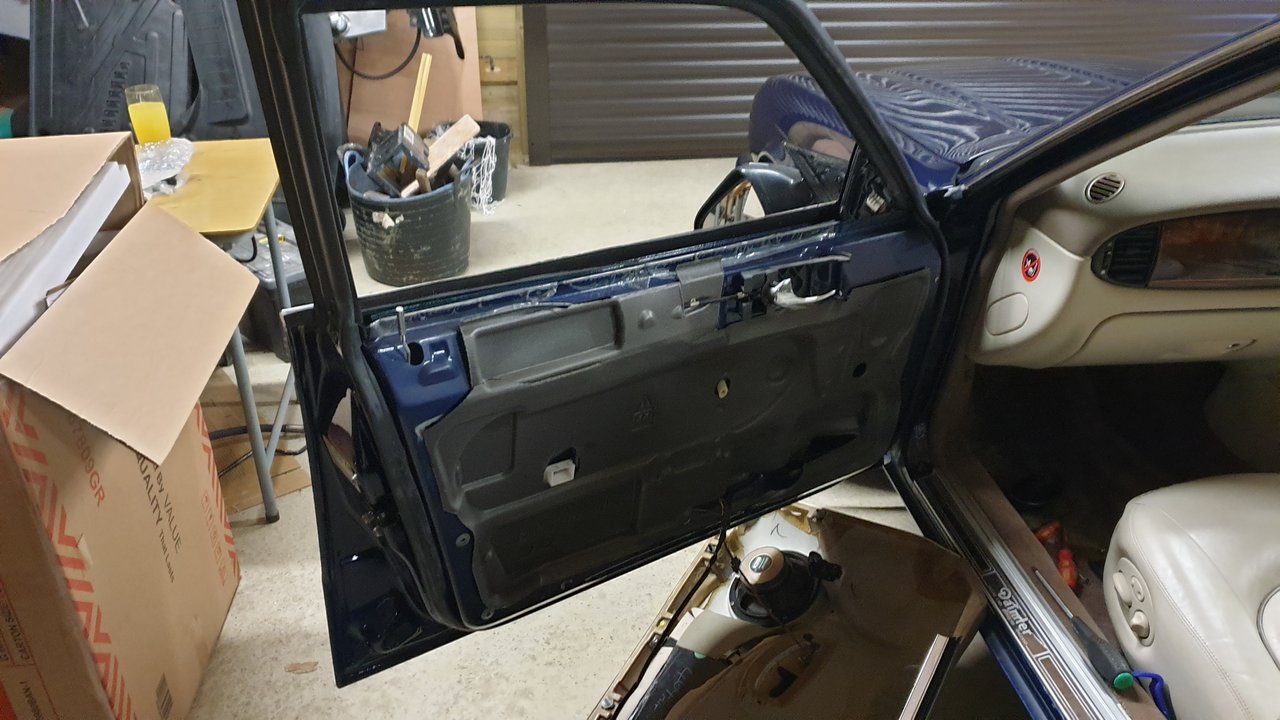
Then remove the mirror, and the chrome trim just pulls off.
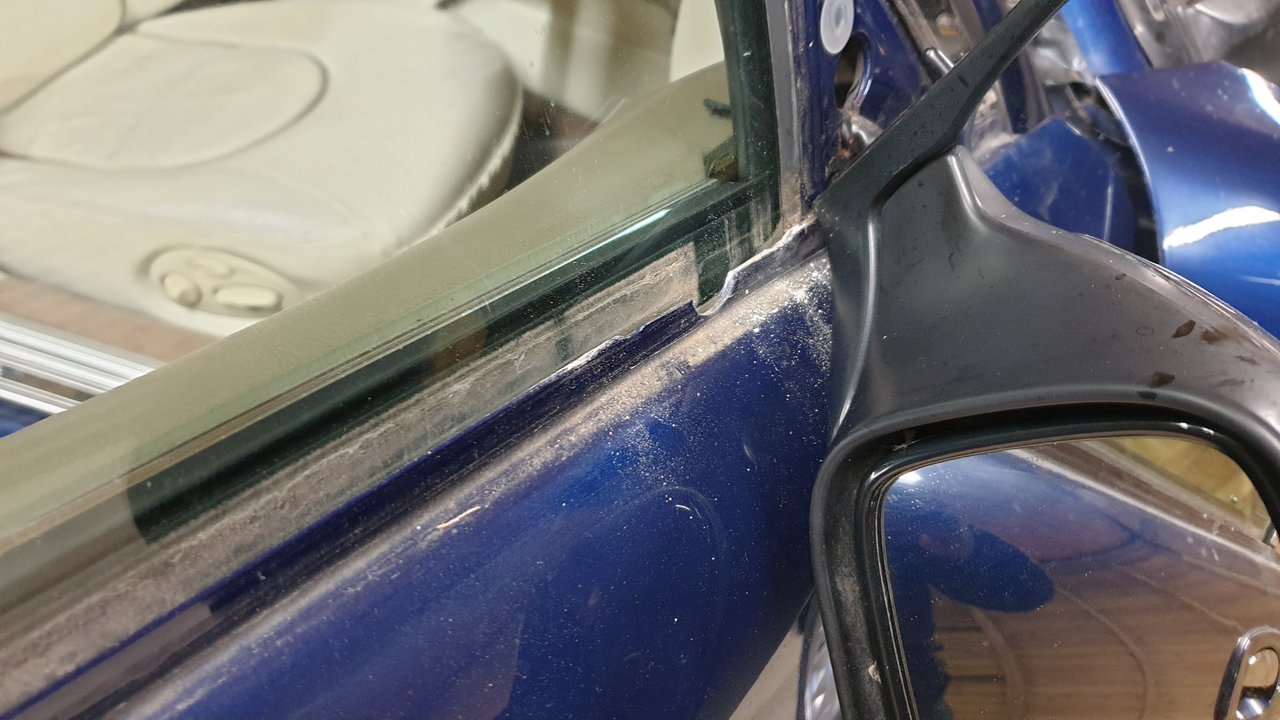
Gave it a good clean along this top edge while it was exposed.
New trims fitted to both front doors and looking much better.
The rears are not too bad, but perhaps could do with changing one day. Thankfully they pull off easily with no need to remove anything.
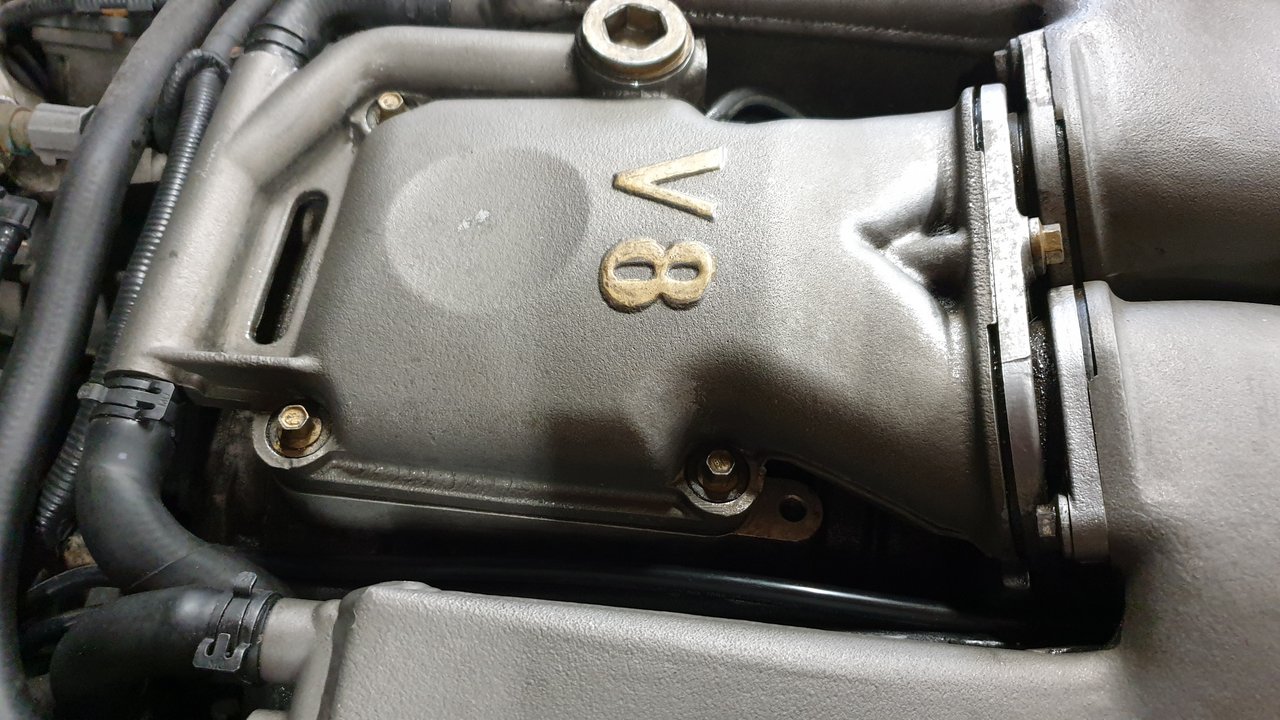
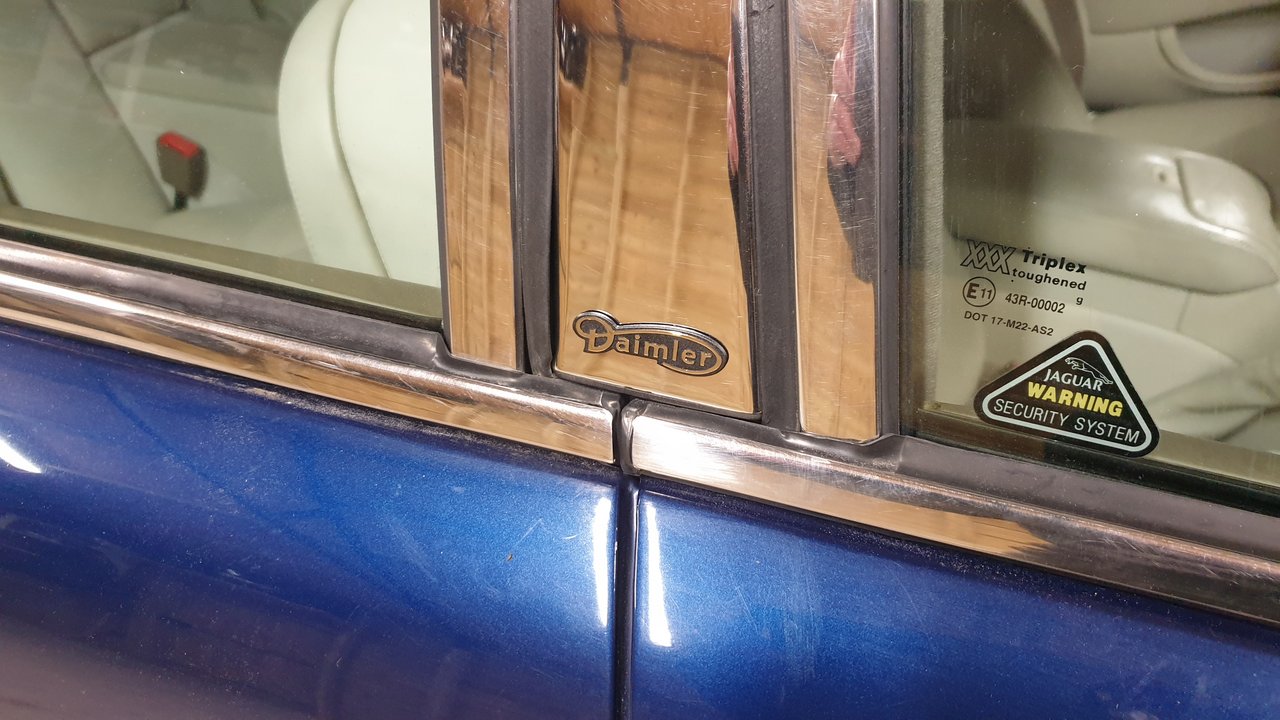
So then I turned to the pillar trim logos. On mine these are a "V8" logo. Notice mine are garishly painted bright gold by me in a cheap refirb a couple of years ago...
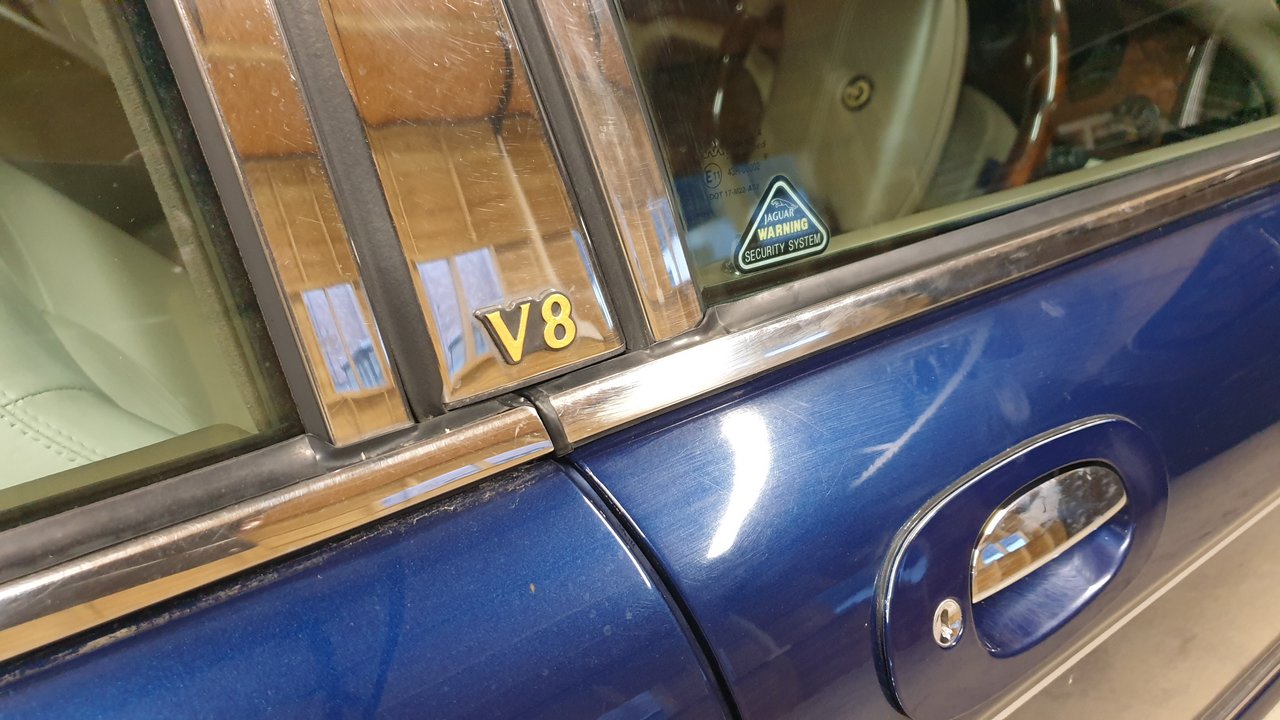
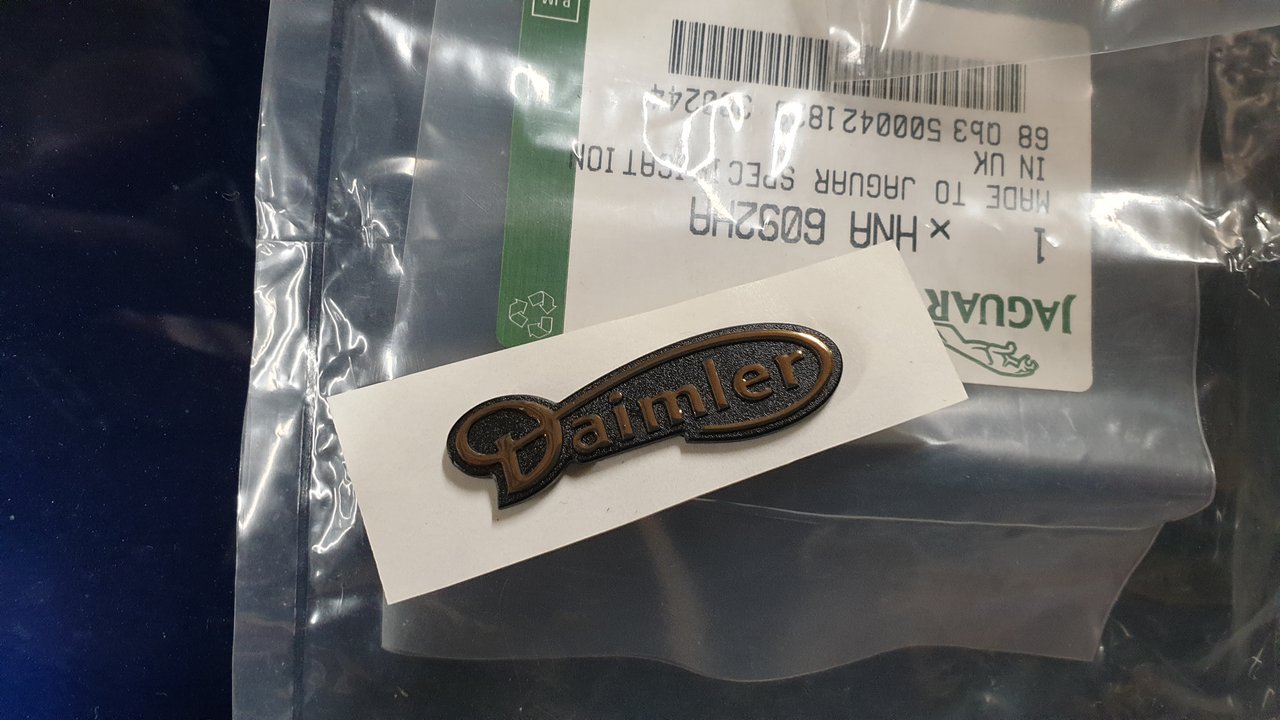
But early versions of the Daimler had "Daimler" logos which I prefer. To my surprise they are still available from Jaguar, so I ordered a nice brand new set.
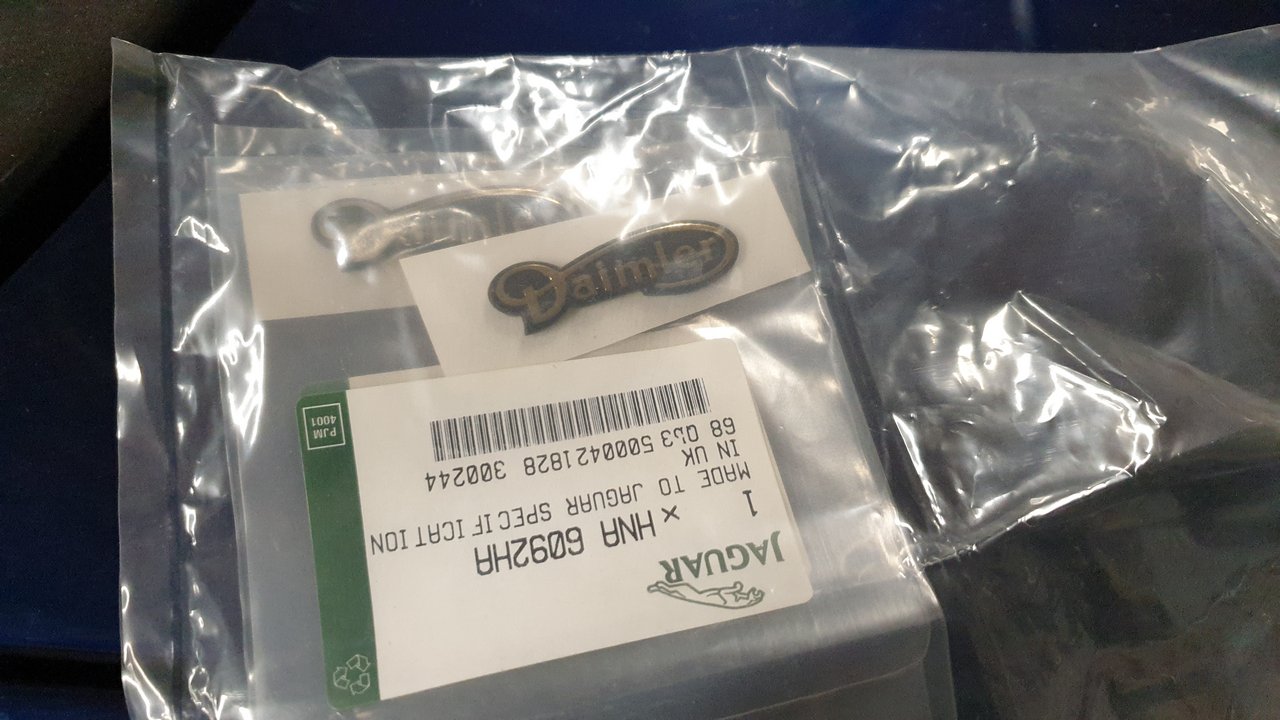
They come with the sticky pad seal, all ready for fitting.
Bit of residue when I removed the old.
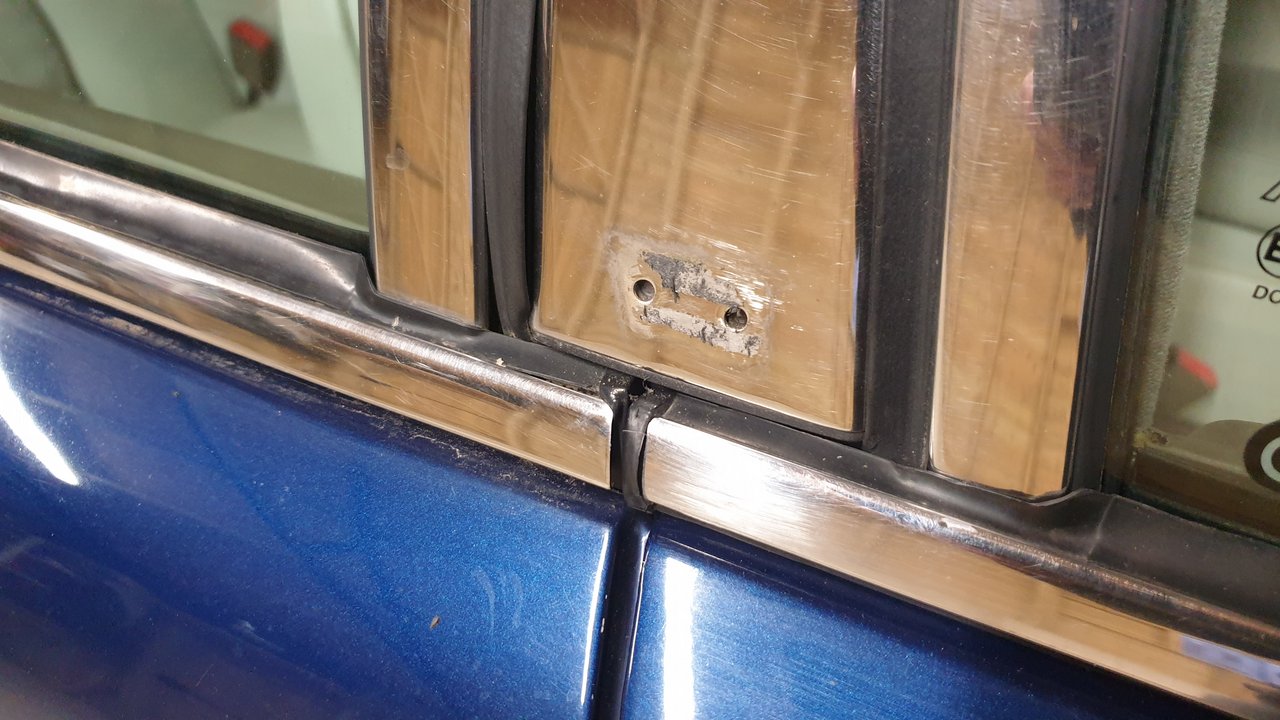
Easily cleaned up...
...and drivers side badge fitted.
Then on to the passenger side.
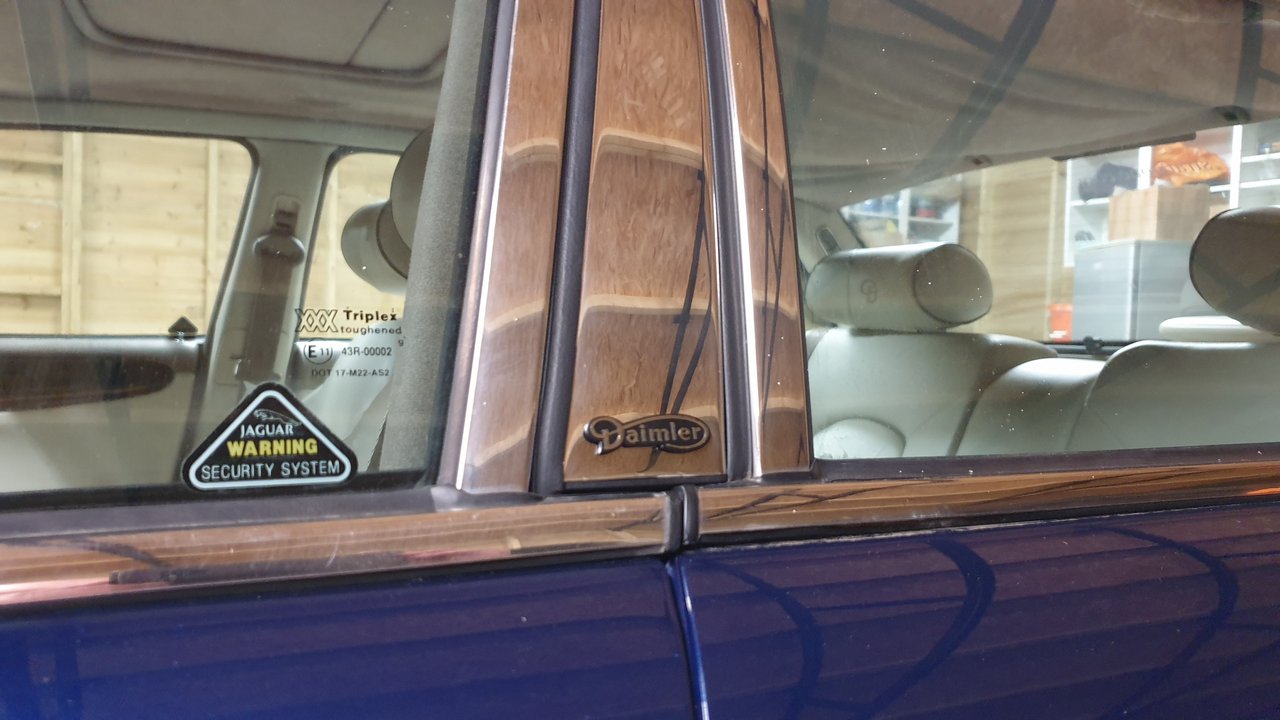
I prefer these Daimler ones, but I guess its personal taste. A future owner may scratch their head why this car has the older style badges fitted 🤣
Lastly I attended to the missing pinstripe on the two front wings where I'd had the spray work done.
I cleaned up the area with methylated spirits, then heated with a heat gun. Then I carefully stuck on the strips, cutting to length as I went. I stuck over the old stripes using an off the shelf 5mm vinyl silver stripe, then extended on to the front.
I know they are not the painted originals, but they will do for now and I think they look pretty good.
So now the car just needs a good clean and detail!
At the end of December, days before Christmas... little Aston spiked a fever at 2am, so we were in hospital again...
He had a few viruses on and off the few weeks before, and he did get fairly poorly at one point, but he was actually discharged from hospital the day before going back in, and we thought we were home free for a Christmas at home.
But then he got up crying at 2am, and he felt boiling hot so Lindsey checked him temp. It was 38.2. Protocol is that we have to take him in when ever he hits 38 or above... so there we were....
Doctors checked him and said he seemed fine, but we had to see if they let us go in time for Christmas or not.
Thank goodness we got out of hospital Christmas eve night... and we had a wonderful Christmas break!
The Daimler went in for its MOT in December, and I am please to say it passed. That night Aston had his Nativity at school, he's the sheep on the left with the black ears and black gloves.
When I looked at the MOT slip, I was surprised to see that even though I had all the bodywork mentioned in both the previous fail, and advisories, it now has ANOTHER bodywork advisory. They have noted both floor pans are rusty. The brake pipes also need doing, but I can get that booked in easy enough.
Frustrating because I wanted it sorted and so there was nothing else to do, and I told the body shop if anything needed doing let me know (after all it is surely cheaper to do it all at once). When I collected it they said the car was now really solid now and I'd not have to worry for years. It seems our MOT centre disagree
... never mind...The following weekend, I got some time on the Daimler as Lindsey popped out for a couple of hours with the boys for hair cuts (those who have seen me know I have no need for hair cuts myself...).
First of all, I sorted the boot lock.
It was very cold, I was praising my lovely garage! Got myself a cold drink to keep me hydrated, but also a nice hot cup of tea.
The used replacement part had arrived from Ebay. Jaguar do not make the part anymore.
The electrical specialist had told me the microswitch was not working. But when I used my electrical multimeter to check it, all seemed fine. But then I compared the new/old boot latches and noticed a striker was broken in mine. Its this grey bit sticking up in the below.
So I swapped them over, put it all back together, and had one working bootlock again! Perfect!
I then attended to the two front door/window chrome trims. Jaguar call this the waist trim. Mine were falling apart, particularly the drivers door one.
Need to take the door card off to do this properly without forcing or bending anything.
Then remove the mirror, and the chrome trim just pulls off.
Gave it a good clean along this top edge while it was exposed.
New trims fitted to both front doors and looking much better.
The rears are not too bad, but perhaps could do with changing one day. Thankfully they pull off easily with no need to remove anything.
So then I turned to the pillar trim logos. On mine these are a "V8" logo. Notice mine are garishly painted bright gold by me in a cheap refirb a couple of years ago...
But early versions of the Daimler had "Daimler" logos which I prefer. To my surprise they are still available from Jaguar, so I ordered a nice brand new set.
They come with the sticky pad seal, all ready for fitting.
Bit of residue when I removed the old.
Easily cleaned up...
...and drivers side badge fitted.
Then on to the passenger side.
I prefer these Daimler ones, but I guess its personal taste. A future owner may scratch their head why this car has the older style badges fitted 🤣
Lastly I attended to the missing pinstripe on the two front wings where I'd had the spray work done.
I cleaned up the area with methylated spirits, then heated with a heat gun. Then I carefully stuck on the strips, cutting to length as I went. I stuck over the old stripes using an off the shelf 5mm vinyl silver stripe, then extended on to the front.
I know they are not the painted originals, but they will do for now and I think they look pretty good.
So now the car just needs a good clean and detail!
At the end of December, days before Christmas... little Aston spiked a fever at 2am, so we were in hospital again...
He had a few viruses on and off the few weeks before, and he did get fairly poorly at one point, but he was actually discharged from hospital the day before going back in, and we thought we were home free for a Christmas at home.
But then he got up crying at 2am, and he felt boiling hot so Lindsey checked him temp. It was 38.2. Protocol is that we have to take him in when ever he hits 38 or above
... so there we were....Doctors checked him and said he seemed fine, but we had to see if they let us go in time for Christmas or not.
Thank goodness we got out of hospital Christmas eve night... and we had a wonderful Christmas break!
Last edited by c16rkc; 01-08-2023 at 12:04 PM.
The following 2 users liked this post by c16rkc:
Ken Cantor (01-08-2023),
sov211 (01-08-2023)