Catalyst removal - XJ8 3.2
#1
Hi all,
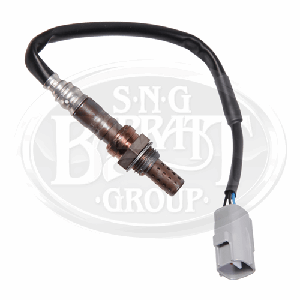
I have a busted oxygen sensor on my 2000 XJ8, the upper right one. Easiest to access, but completely stuck nonetheless. All my efforts only led me to damage the nut, making it pretty much impossible to remove now due to the lack of space.
I figured my best option would be to remove the catalyst and work on the O2 sensor on a bench. Unfortunately, 3 out of the 4 screws attaching the cat to the exhaust manifold broke instantly when trying to remove them (I should have started with the hardest to reach, wouldn't have tried the others after this one broke, since there is no way to access it with a powerdrill or any other tools).
I'm not sure how to move forward now. Should I try to cut the metal or something ? Sounds risky, not even sure I'd have enough space for that, and there may be leaks after putting it back...
Another option I am considering is connecting the upper left O2 sensor to the right connector, so that the ECM would use its information to adjust the fuel-air mix on the right side of the V... would probably not be perfect, but better than no information and adjustment at all ? or is it completely dumb and it would only have adverse effects ?
#2
I figured my best option would be to remove the catalyst and work on the O2 sensor on a bench. Unfortunately, 3 out of the 4 screws attaching the cat to the exhaust manifold broke instantly when trying to remove them (I should have started with the hardest to reach, wouldn't have tried the others after this one broke, since there is no way to access it with a powerdrill or any other tools). I'm not sure how to move forward now. Should I try to cut the metal or something ? Sounds risky, not even sure I'd have enough space for that, and there may be leaks after putting it back...
With the cat out, you can drill out the broken studs, helicoil (M8) the holes in the flange of the cat and install new studs and nuts. You will need the following parts (easily available):
Studs C2S9536
Nuts FN110041J or C2C38026
Gaskets EAZ2050
#4
Thanks for the reply. I can picture the procedure, however I don't quite understand why the catalyst would come down once the silencer is out of the way ? The nuts are broken, but the threaded parts are still in their holes and firmly attaching the cat to the manifold; as far as I can see.
Or I am missing something?
Or I am missing something?
#5
Thanks for the reply. I can picture the procedure, however I don't quite understand why the catalyst would come down once the silencer is out of the way ? The nuts are broken, but the threaded parts are still in their holes and firmly attaching the cat to the manifold; as far as I can see.
#7
Hi,
Quick update ; I managed to remove the catalyst --hardest part was to push the exhaust tubing enough so that the cat would come down. I can't lift the car much so it wasn't easy to work.
Once down, the busted o2 sensor came out in a few seconds, and I just had to wait for nearly two weeks to get the replacement studs before mouting the cat back.
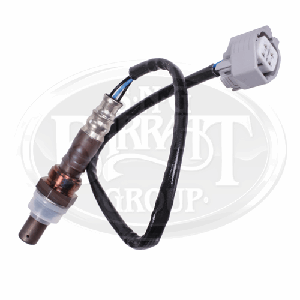
Interesting fact, the o2 sensor I pulled was a Denso... this isn't the original brand, I believe. So that sensor was already replaced, at least once. Another hint that the mileage has been tampered with, I guess...
Trending Topics
#8
#11
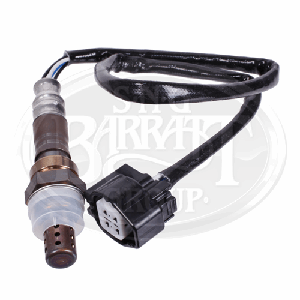
The one I pulled seems to be the second variant. There is still a serial number on it in fact, so if I find the time, I could try to get its manufacture date --however this isn't really an important piece of information anyway.
The more pressing issue I found is that after remounting everything, the error disappeared from the ECM, but the fuel efficiency plummeted, if I can say. Prior to the change, the car ran at roughly 13.5L/100km, which is 18 MPG or so. After mounting the new O2 sensor, it rocketed up to nearly 19L/100 km / 11+ MPG...in addition, the idle is somewhat irregular and the RPM increase very faintly -- it doesn't even reflect on the dashboard-- every few seconds (sounds like the car is breathing, kinda).
Yesterday I went for a test drive, and on the way back I unplugged the new sensor : gas consumption went back to normal, idle as well.
I'm unsure of the reason for this. The sensor does not seem to be defective, and properly mounted (no exhaust fumes leaking, all plugged back on...), so I'm thinking that perhaps I skipped an important step. Is it necessary to disconnect the battery / reset the ECU, for example ?
#12
#13
Well I've looked at the data from the OBD reader I own (icarsoft 930, which is quite ok), and the error code didn't come back (P0146 I think it was). I haven't checked yet the operating values of the sensor; I guess I should compare them with the other bank's sensor.
Not sure what you mean by "the OBD monitors - are they all set?" however. Is there something I need to do specifically ?
Not sure what you mean by "the OBD monitors - are they all set?" however. Is there something I need to do specifically ?
#14
Well I've looked at the data from the OBD reader I own (icarsoft 930, which is quite ok), and the error code didn't come back (P0146 I think it was). I haven't checked yet the operating values of the sensor; I guess I should compare them with the other bank's sensor.
Not sure what you mean by "the OBD monitors - are they all set?" however. Is there something I need to do specifically ?
Not sure what you mean by "the OBD monitors - are they all set?" however. Is there something I need to do specifically ?
#15
Ok, standby for the incoming facepalm:
I reconnected the sensor, turned the engine on while monitoring the fuel trims. The idle was irregular again, and the data for this sensor was oscillating between -15% and +25%, constantly, while the other sensors had steady values (at around -85%, which I'm not sure what to make of).
Disconnected the battery and waited for a while, reconnected the sensor and started the engine, same issue. Disconnected the sensor --without even shutting the engine down--, idle went back to normal instantly. Went to put some gas, engine running well, on the way back I put on the sport mode and floored it, yay.
Back home, lifted the bonnet and (yeah, the facepalm is right now) FUMES WERE COMING OUT FROM THE ENGINE BAY. From between the manifold and the cat, obviously. I clearly didn't put enough torque on the nuts... I suppose the leak was too small to be seen before hitting the gas, but present enought of to mess with the O2 sensor.
So, to tighten the nuts better, and without breaking the studs...
#16
Guys,
I'm a bit perplexed here... I've removed and refitted the catalyst three times now, using copper grease or an exhaust paste from Bardahl, and it keeps leaking. On the second attempt, it remained airtight for a little while -- and the sensor was working properly. After a few minutes, it started leaking again however, with the same symptoms (irregular idle, crazy fuel consumption).
Having broken some studs, next removal will require me to purchase new ones first, but I'm unsure of how to move forward here. Can you recommend a specific product or procedure for ensuring that it won't be leaking anymore, permanently ? Is it only about tightening more ?
#17
Having broken some studs, next removal will require me to purchase new ones first, but I'm unsure of how to move forward here. Can you recommend a specific product or procedure for ensuring that it won't be leaking anymore, permanently ? Is it only about tightening more ?
#18
Actually yes...I thought this might be the reason. I couldn't find genuine studs and nuts over here, except at crazy prices (like 4€ each), plus high delivery fee (extra douche points to the guy on eBay selling packs of THREE studs). So I got alternate pieces with same specs from Amazon. Bad idea, as it turns out...
And yes, I'm now painfully aware that with the extra studs I had to use, plus the grease and exhaust paste, I paid more than if I had bought the original things from the beginning
And yes, I'm now painfully aware that with the extra studs I had to use, plus the grease and exhaust paste, I paid more than if I had bought the original things from the beginning

#19
Ok so, final update hopefully!
Before ordering genuine studs and nuts, I figured I'd attempt one last time with those I had, plus some paste, Gun Gum or something. Seems to have worked, no more foul exhaust smell, regular idle, and normal consumption / fuel trim data.
I don't really see a difference in the consumption though, looks the same than when the O2 sensor was busted or unplugged, but well.
Fun fact though, on the package of this exhaust paste it was stated "permanent repair" and also "lubricant", which sounds a bit contradictory. Since the paste did become rock hard, I'm wondering whether I actually glued the cat to the manifold and will never be able to remove it again.
Anyway : onto the next issue now.
#20
Fun fact though, on the package of this exhaust paste it was stated "permanent repair" and also "lubricant", which sounds a bit contradictory. Since the paste did become rock hard, I'm wondering whether I actually glued the cat to the manifold and will never be able to remove it again.


