When you click on links to various merchants on this site and make a purchase, this can result in this site earning a commission. Affiliate programs and affiliations include, but are not limited to, the eBay Partner Network.
DIY guide: X308 air intake removal (new gaskets), injector cleaning
Disclaimer first: Don't hold me responsible if I give you ideas, which may lead to damage or injury...
X308, XJ8 / Sovereign, 1998/99, 3.2L, AJ27
So, while I was taking the engine apart to do a timing-chain change, I decided to also replace those 8 air-intake gaskets. I did that in the middle of all my other works on the engine, even though it was of no additional advantage, because this job at hand does not require release of ATF, oil or coolant, and does not require removal of cam-covers (all of the above were removed at this point, but as I pointed out: not required for this job). There is a slight possibility that it made things easier that the cam-covers were not there - it gave me a little bit more space.
I figured that I do that quickly in between - I would not have imagined how time-consuming that job could be...
And while I had the fuel rail in my hands anyway, I also cleaned the injectors.
General advise: Have several tubs (bowls) at hand and group the bolts, which you remove into several lots - best label the bowls. That helps a lot: You will know that you have not forgotten any bolts and you don't have to waste time looking for the right bolts, if you grouped them logically.
Let the journey begin: When doing something like that, take pictures all the time. Note that there are different throttle-bodies on different X308. I do not have that black plastic vacuum cylinder, and don't be confused by that white cylinder: It's just an old food container, which fits perfectly - making sure that no dirt falls into the throttle while I am working there.
So to remove the air intake I have to first remove the upper part of the throttle body. Do do that, you have to remove all kinds of hoses and connectors. I you forgot to take pictures, maybe my pictures here help you when trying to figure out later, what goes where...
I read frequently, that people did that job here, and all went fine, except that they broke a few plastic hoses... well, that's a problem, because, if you find those hoses at all, they are prohibitively expensive. I live in a warm climate - nevertheless, before touching a plastic-hose-connector (it's a squeeze to open mechanism) I always apply a little bit of heat with my heat gun, because old plastic is brittle, but if it is warm, it is less brittle.
Every connector has it's own secret of how to open it - I can't mention every connector, but this one I will: You find this principle also on the S-Type, where a loom connector connects to the front bumper - needs to be disconnected to remove the bumper from the car: The connector on the right, behind the hose: Before you can pull that plug, you need to slide the red "cover" back.
And this here is a good one: It drives many people nuts. I did a lot of internet research, and even those, who managed to open it, describe the process that badly and without pictures that you need a lot of fantasy to follow their drift: Use a flat screwdriver to push the "black plastic ring" (it is more than a ring, but that is all you can see) into the brass fitting, only then pull on the black hose (possibly better with an in and out movement).
You'll get there. But without seeing those pictures here, this would be a real thoughy.
Next: Removal of electrical connectors off the injectors: See my thumb: That silver clip need to be push inwards - that's not something, you would have expected - pulling came to mind first, but that was wrong.
But pushing with a thumb or finger is not really possible - I pushed the clip inwards with a screwdriver. Bit by bit - all 4 clips on each side.
And carefully remove the connectors.
Next I removed the clips, which connect the upper part of the injectors to the fuel rail by pulling all those 8 clips towards the intake... - not that that had much purpose at this stage, because the fuel rail did not want to disconnect from the injectors anyway...
Instead (very slowly) I pulled out one injector after another with the fuel line attached. I pulled it out of the air intake. Oh, and note that plastic tube in the middle...: This is P/N AJ81211. Don't damage it! At britishparts it costs 215 Pounds plus postage! ( I incidentally spotted it there.) Again: I use my heat-gun to avoid braking potentially brittle plastic.
That additional fuel line also wants to get disconnect from the fuel rail.
I thought that's worth a picture: After quite a bit of fuel escaped already (when disconnecting the fuel rail - and who knows, how much dirt left the fuel rail already with that fuel), I emptied the remaining fuel from the fuel rail into a clean container: All that dirt was in there. Makes me wonder, why the car drove at all... I would have expected that all that dirt blocks the injectors.
Well - disconnection the fuel lines (there are 2). Don't do it like that (I used an old antenna to make my own tool). It worked alright before on the S-Type fuel filter, but here I had a real fight on my hands. It is not worth the trouble: Order IN TIME, before you start, these special plastic clips cheap on the internet. But if you don't have them at hand, it does not help that they are cheap... - thus, I had to improvise...
Getting closer to removing the air intake.
...and closer...
...but not just yet: After removing heaps of pipes, hoses and connectors, there was still a very stubborn plastic-connector on a T-section of a plastic hose. Drove me nuts - I asked for advise here on the forum I received a quick answer:
Finally off! I cleaned the air intake out thoroughly with grease-remover and water pressure cleaner. Next I pre-dried it with air-pressure and let the sun do the rest.
As I planned to clean those dirty surfaces I made sure that I would not get any dirt into the air-"holes".
My initial approach of cleaning the injectors was to close those openings, which I did not want (e.g. with coins and heat-glue), then I put quite a bit of carby-cleaner (Carburetor-cleaner) into the rail, and while carefully applying air-pressure (via air gun) into the rail, I attached 12VDC to the injectors (one after another). At 6 of the 8 the spray-pattern looked alright. I was a bit worried about the other two, which where highest up, when positioning the rail on the ground... - maybe it was only that the carby-cleaner could not reach them that high up (gravity), anyway:
Anyway, I removed those 2 and applied the same principle (which I applied before to the complete rail) now to one injector at a time only (making the small hose to bigger hose connection air-tight with heat-glue... So: Applying 12VDC (or maybe even just 9VDC might suffice) to the injector and then pressing the spray-can. And hope for a nice spray pattern of the injector.
Alternatively, prefill the hose with carby-cleaner and apply carefully air-pressure with 12VDC connected.
It's shiny now! Better now!
And the air intake got its 8 new gaskets.
Word of warning: Think long and hard before attaching the upper throttle body! There are a lot of hoses, pipes and connectors, which want to be connected BEFORE you attach the upper half of the throttle body. It you don't keep that in mind, you will be quite busy detaching and attaching the upper half again and again.
You'll find all the required torque settings (e.g. air intake and throttle body) and torque-order via google - or better still: In the workshop manual.
After all this and after all the other repairs I did at the same time the X308 started up alright (after that expected short delay due to the fuel rail being empty to start with...).
PS: I intend to replace the upper and lower rubber seals of all the injectors as well. I have them here now, but when I re-assembled the fuel rail and everything, they had not arrived yet...
PS 2: See 3 threads below: I just fitted the upper and lower seals on those 8 injectors. (And I took pictures).
Last edited by Peter_of_Australia; 01-05-2023 at 05:57 AM.
Reason: added PS
Thank you - Dankeschoen.
This was actually only the last in my series of threads, which I had to do before doing the big one - the big thread: The timing chains - when I do that one (coming soon), I want to be able to link to all the other threads.
And that's 3 Jags done, 4 to go. One however, the 2005 S-Type is not too much work, and easier, as I have just done all that on the 2004 S-Type. And the reason, as to why we are not driving the 2005 S-Type anymore, is that it is too good to drive... - we bought it from another German here in Australia - this Jag was his "girlfriend" - his wife was not allowed to drive it - I think he only drove it to the garage for service - and he only sold it, because he knew he was about to leave "for a better place"... - and now we don't dare to drive it either...
As mentioned in my initial thread above, I still wanted to swap the seals (upper and lower) on those 8 injectors (which had arrived in the mail meanwhile)...:
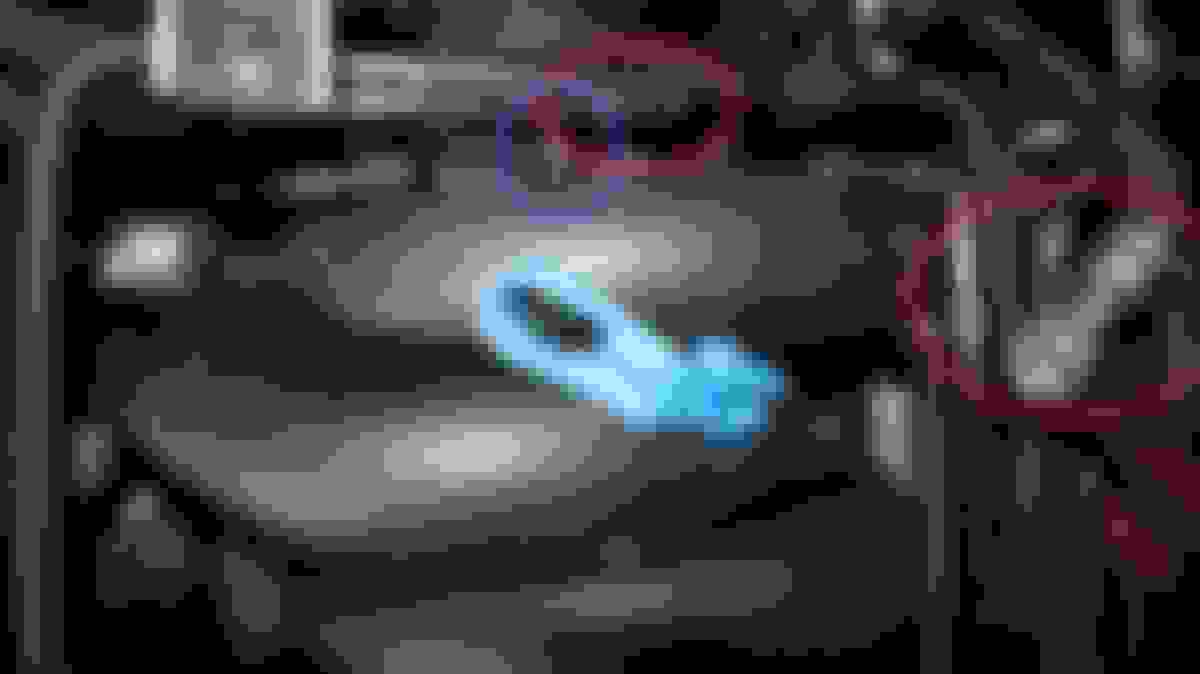
This means, removing the fuel rail from the air intake again. Meanwhile I also received the fuel line disconnector (light blue part) and I already disconnected one fuel line with it (the 2 ends are in the 2 red circles). And to free the fuel rail from the air intake, I also had to remove the bolt in the blue circle. This was really hard. Last time I had better access with the upper throttle body removed, but I did not want to remove it this time...
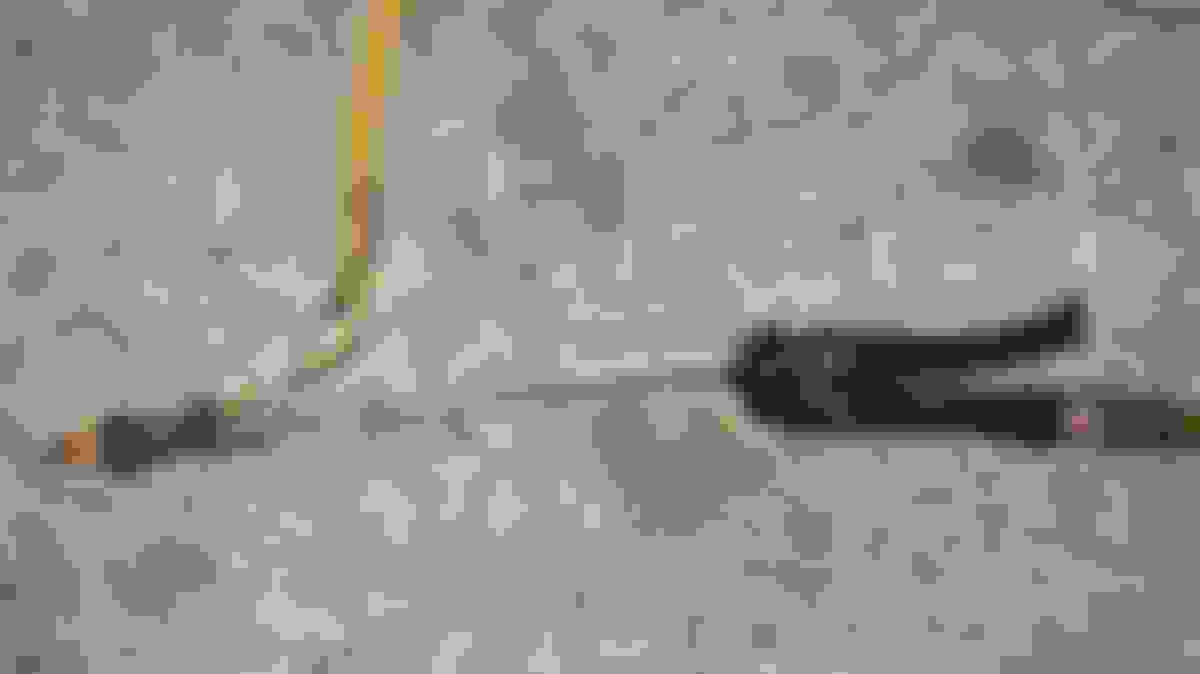
Also, the hex-head of that bolt was worn off or something - I assume it fitted an 8mm spanner once, but an 8mm spanner was too big now and a 7mm spanner too small, thus I had to sacrifice a 7mm spanner and transform it with a file into a 7.5mm spanner... That way I got it off. Also it was way too long - a real torture to get it off. I got myself a shorter M6x1mm bolt to suit a 10mm spanner (small picture right - shown on left is the old bolt).
So I pulled off the connectors again and pulled out the injectors again - I wiggled them out carefully.
But one injector just would not want to budge, so I removed instead the upper clip and pulled the rail off the injector - and only later pulled out the injector with great difficulty. Probably a bit to obvious to remind you not to loose any of those clips...
I intended to also remove the other fuel line. This one was already last time more difficult to remove - and today it was - despite the proper fuel-disconnect-tool - even more difficult, as with the upper throttle body in place, there was even less space. So I had to leave it connected and pull all the injectors off the rail with the rail not fully removed from the engine.
When I removed the injectors last time, I measured the OE gaskets and ordered accordingly. I found those on Aliexpress: Initially I measure on those thicker ones ID 8mm and CS 3.5mm. I ordered them already (material FKM) and then I spotted thatsomeone is offering similar seals for exactly that purpose "fuel injector repair seals" ID 7.8mm and CS 3.9mm (so my measurement was pretty spot on) - and I ordered 100 of those (AU$25). And the smaller seals I measured as OD 12mm and CS 2mm, and I ordered them in FKM (10 pcs for less then AU$4).
These are the OE injectors: Left with new upper and lower seals, right with old seals. I have not replaced the black middle/centre seal...
It was a bit though to fit the injectors into the fuel rail - I applied carefully a little bit of bearing-grease, so that it slips in better. So with none of the clips for the injectors gone missing, I fitted those clips first and then I carefully fitted the injectors back into the air intake - and mounted those 4 bolts on top of the rail again.
Then I started the engine, and it ran just fine.
Last edited by Peter_of_Australia; 01-05-2023 at 06:05 AM.
Yes, I restricted myself to short periods. I did it the "stone-age-way": By squeezing the second cable in for a brief time and pulling it again. If you don't mind the extra work-load, you could just as well add an inline push-switch.
And I forgot, if I did mention before: Polarity does not matter here: Those 2 contacts on the injector lead to a coil. This coil generates a magnetic field, which - regardless of it's polarity - will attract the magnet on the needle, which controls the valve. ( That coil-principle is similar to that in a solenoid).
 01-04-2023, 06:28 AM


 Better now!