When you click on links to various merchants on this site and make a purchase, this can result in this site earning a commission. Affiliate programs and affiliations include, but are not limited to, the eBay Partner Network.
Gopi's :HOW TO: AUX install (alpine premium) Complete instructions!
hey guys i tried to make an in-depth "how to" to install an AUX input cable for your phone or etc for jaguar XJRs and XJ8s with alpine premium sound or at least a CD changer in the trunk...this will have tons of pictures so prepare for a lot of scrolling! because a pictures are worth a thousand words...
okay first of all, do your research! read around other posts to gather your information and an idea about this job...and BE GENTLE! and TAKE YOUR TIME; you are working on a jaguar remember that!
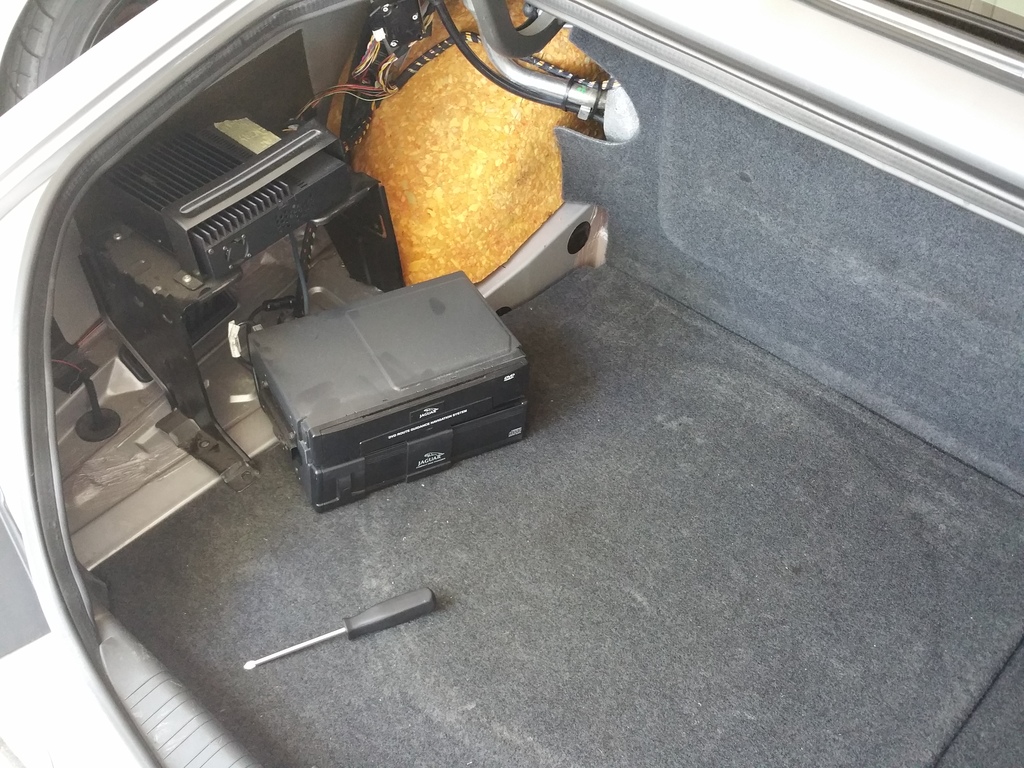
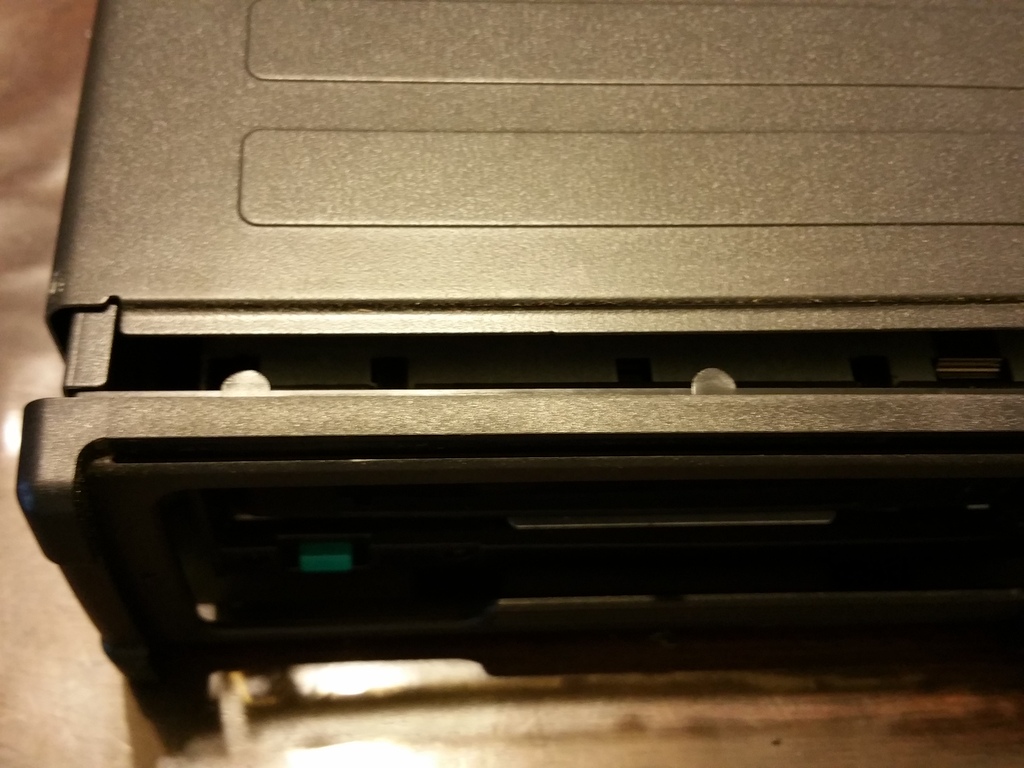
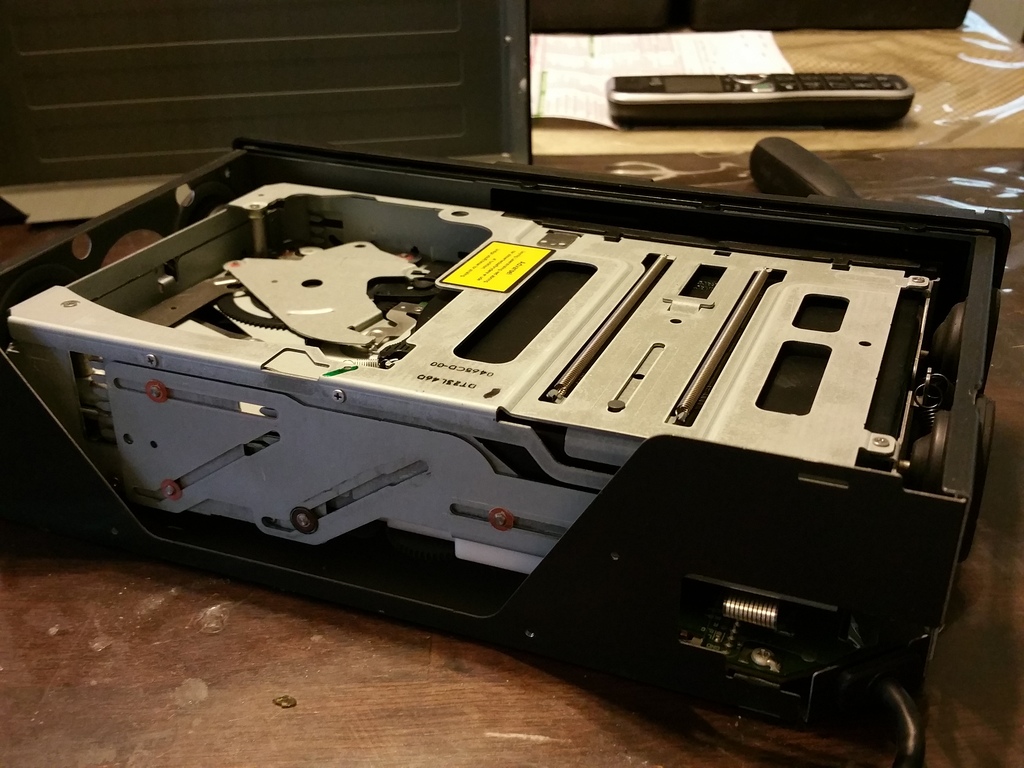
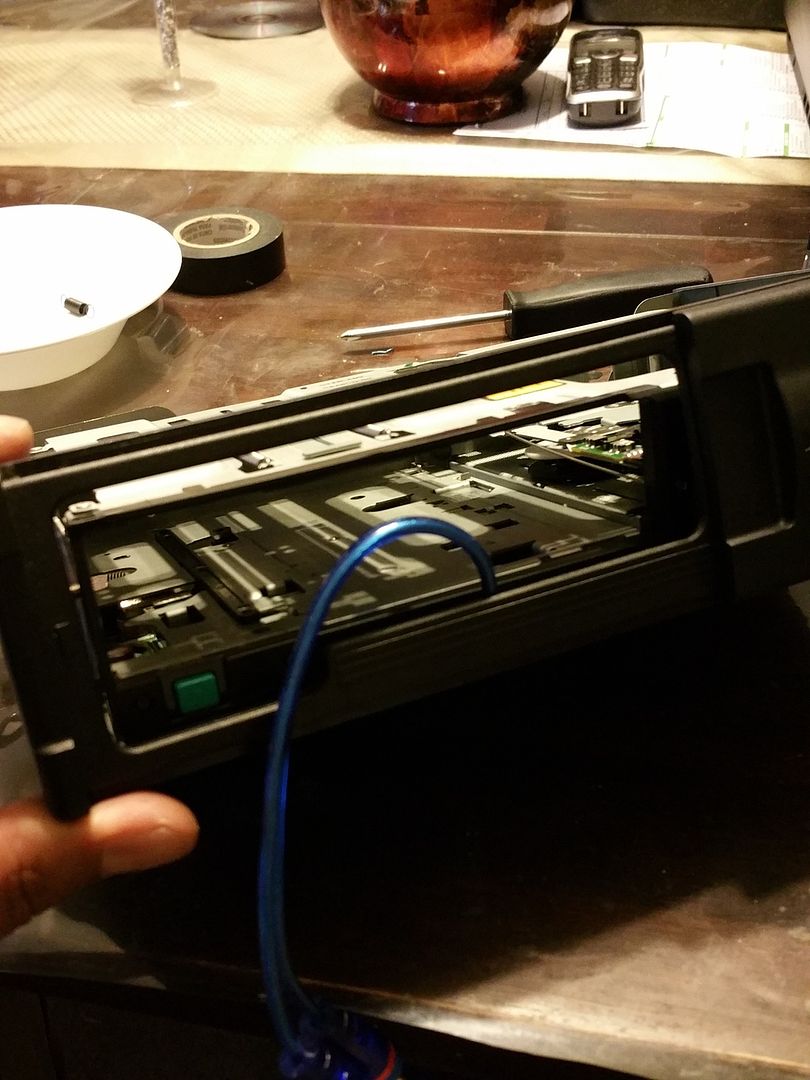
1) remove the panel in the trunk where your CD changer is located, once removed it will look like this...
2) loosen the 4 bolts holding the rack in place from the bottom...
this will allow you to remove the Ai-net cable attached to the CD changer..
3) the ai-net connection cable looks like this...just simply pull the cable to disconnect
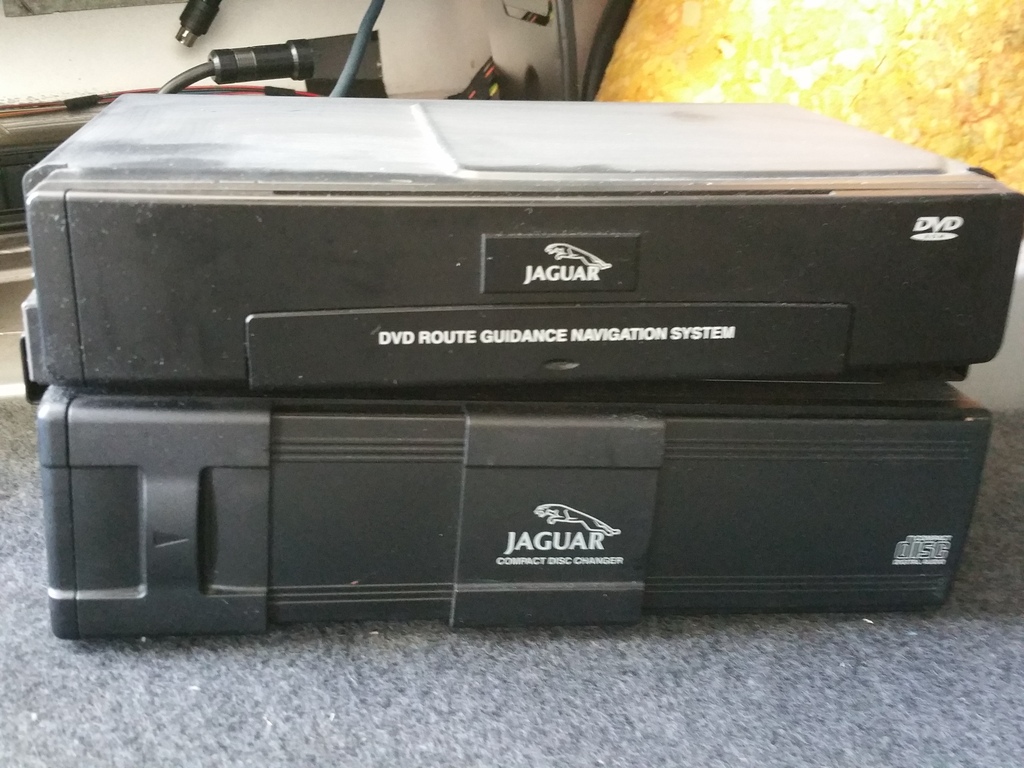
4) once pulled out of the rack the CD changer and Nav system are attached ...simply remove the CD changer screws (4 in total)
5)once removed and isolated from the nav unit, you can leave the wires attached to the navi and go ahead and take the CD changer to a place where it will become easier for you to work on
6)okay here are the i used ....RCA cables male to female (2 sets one shielded and one was not), RCA bare wires (Males), RCA to 3.5 jack (phone end)
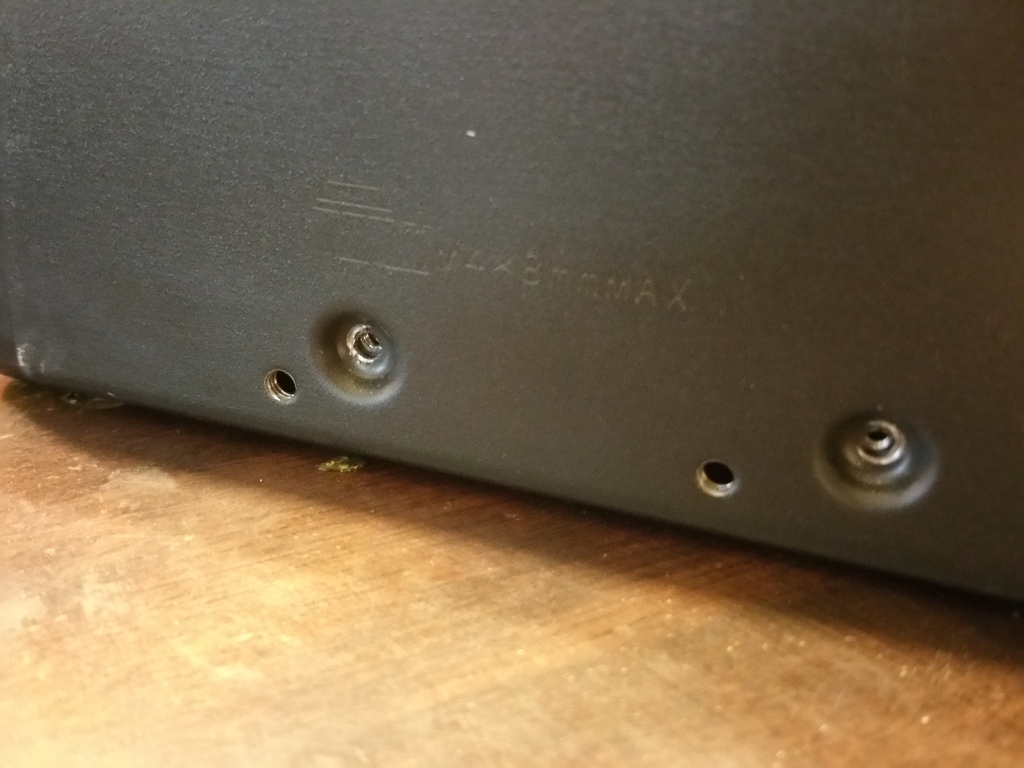
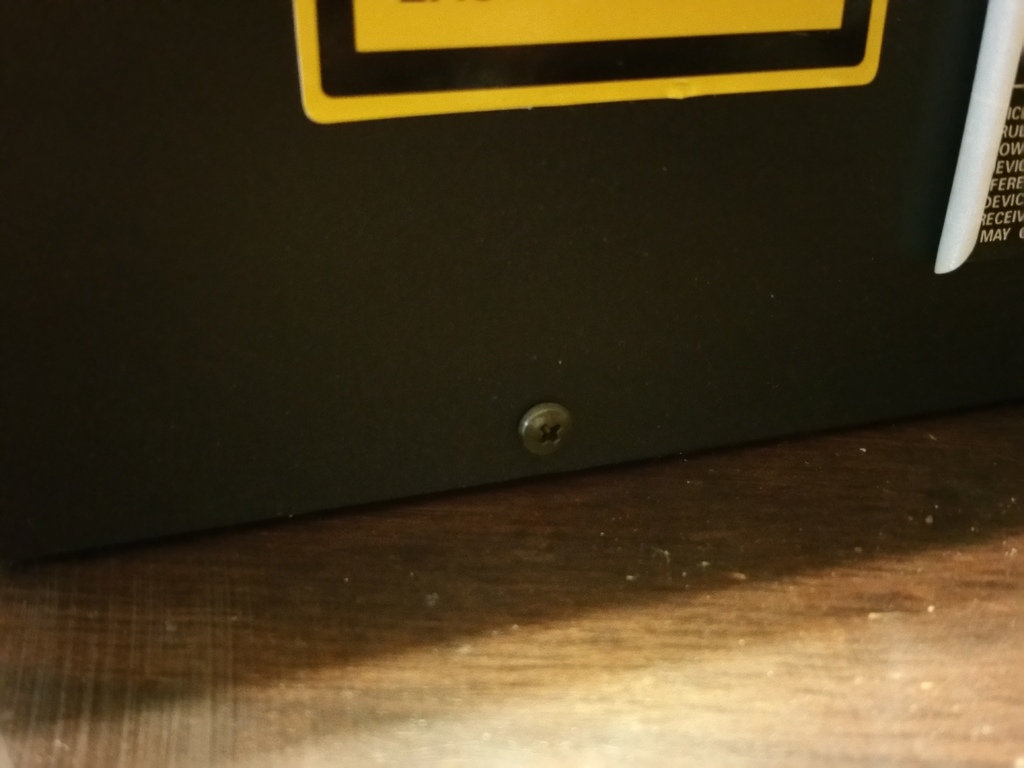
7)remove the cover from the CD changer...six screws holding the cover plate on...2 on each side and 2 in the rear.
The panel is attached with a lip like this ...to remove the panel pull it towards the back end of the CD changer...
*TIP* these black things are mounts that are flexible simply fiddle with them and push them into the body of the CD changer...
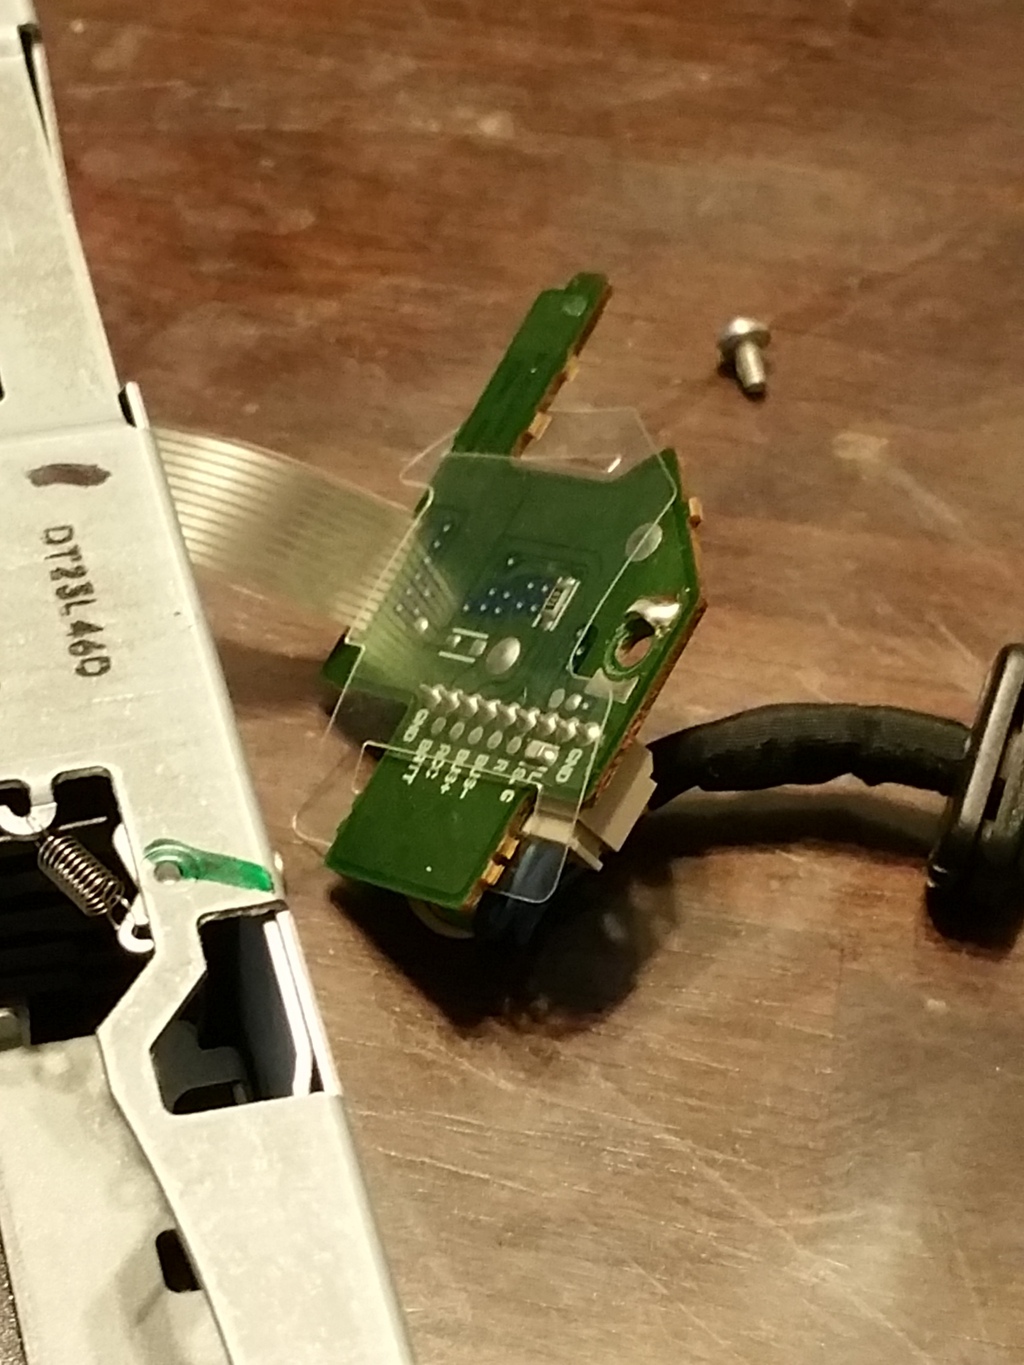
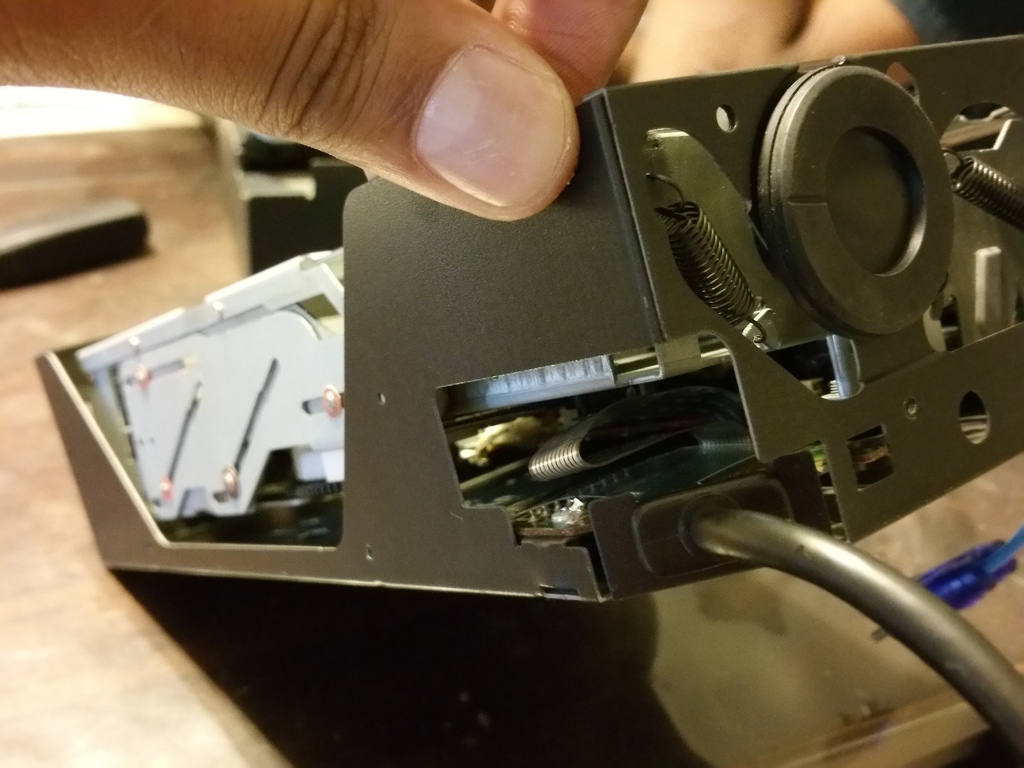
8) on the back end where the Ai-net cable attaches you should see a chip like this.....this is what we are trying to get to!
9)you will have to build some courage and bravery and start pulling out the springs that suspend the CD changer...to absorb shocks while driving...take a small electronic screw sets and use a flat head and pry each spring off...
10) you should be able to rotate the whole CD changer internals and expose the ai-net chip!
11) finally we reach the CHIP! see the screw that is soldered to the frame...BE EXTREMELY CAREFUL NOW...break the solder and untighten the screw use downward force and do not strip the screw.
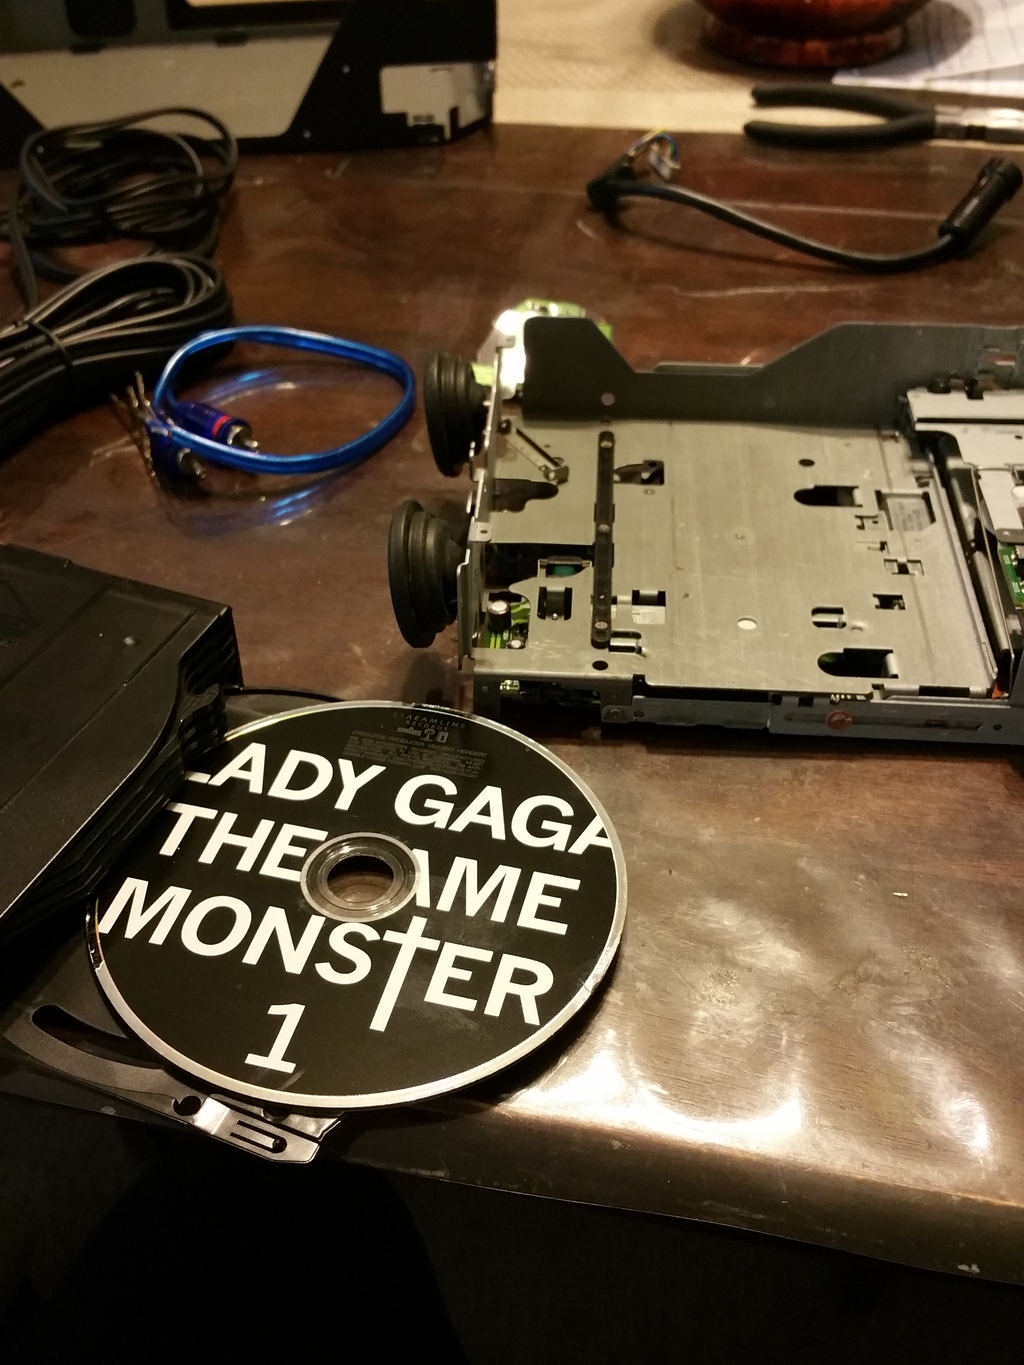
12)this step is for unlucky people who have their CD changer show an ERROR E1 or something close to like that...basically means CD is stuck
(i bought this car less than a month ago! without a working CD) so i had no idea what CDs were in there...
you will have to kinda be solo on this moment and disassemble the CD changer and fight it to pull the magazine out...i made sure i was able to get the magazine out because i did not want to reassemble everything only to find out it will not work because the error was still present...i did not want to open up my car twice for the same job.
13) NO WONDER WHY MY CD CHANGER COMMUTED SUICIDE LOOK WHAT CD WAS STUCK ....(no offense to the lady gaga fans out there just a joke)...bought this car from one owner who is 50+ i was surprised! loll
13.1) i knew i would break something in there...this flew out when i removed a spring and it shot out...it is okay tho because i did not plan on playing CDs again ever...as long as i had an AUX input which is much more valuable to me than a 6 CD changer.
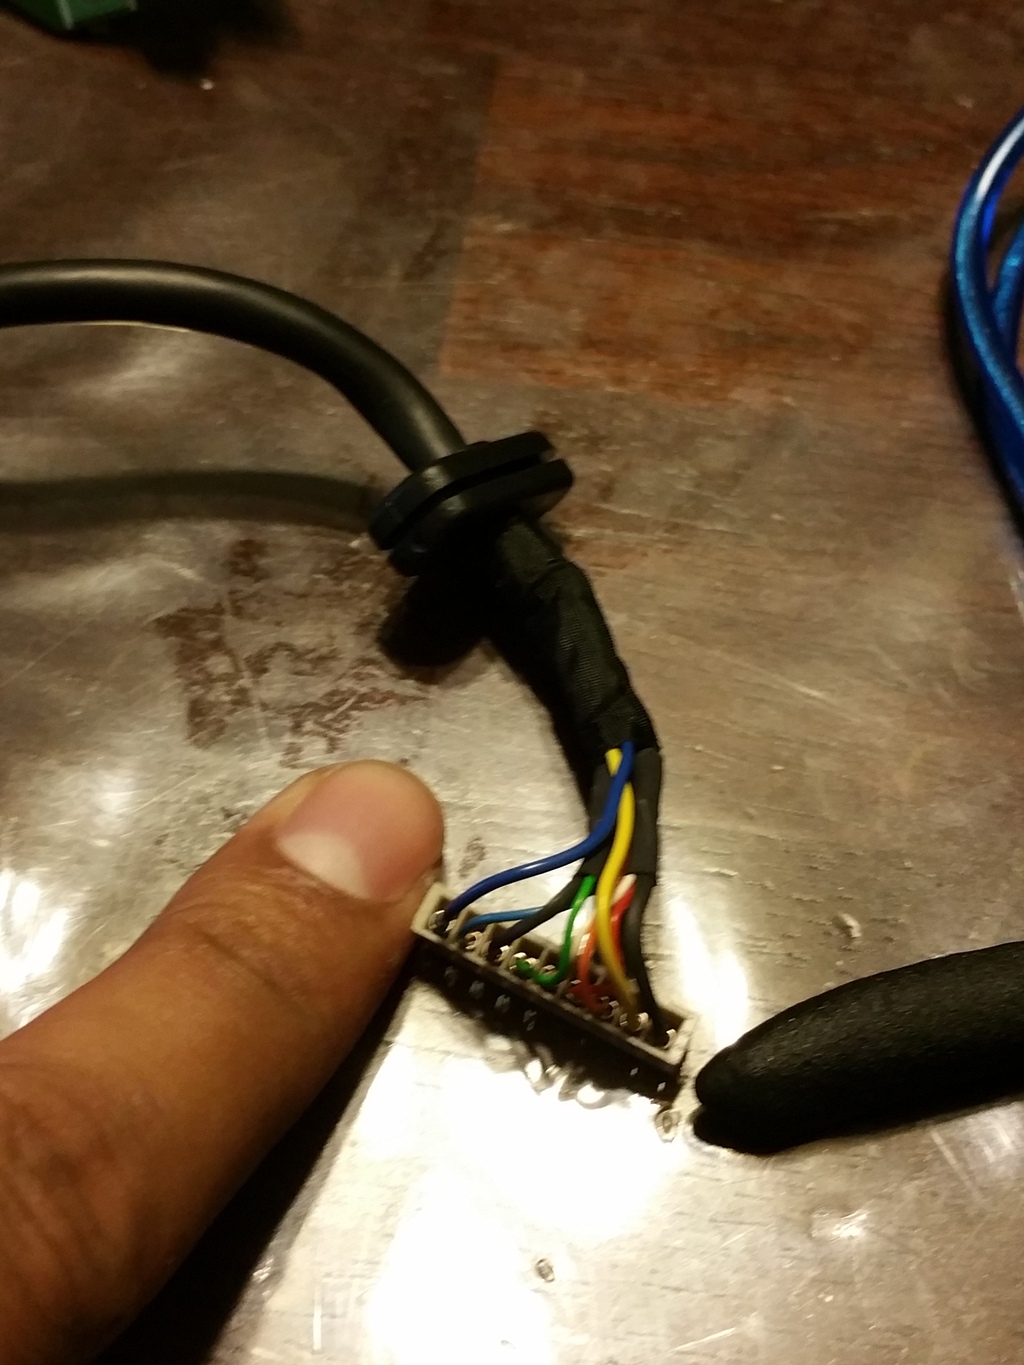
14) okay back to the ai-net chip! carefully disconnect the Ai-net port...and you will have this wire.... this is the wire were we do all our work!
*make sure you have a solder iron ready! going to need it!*
look how small the wires are...compared to my nail...so be extremely careful! yes another point in this job where taking your time pays off...
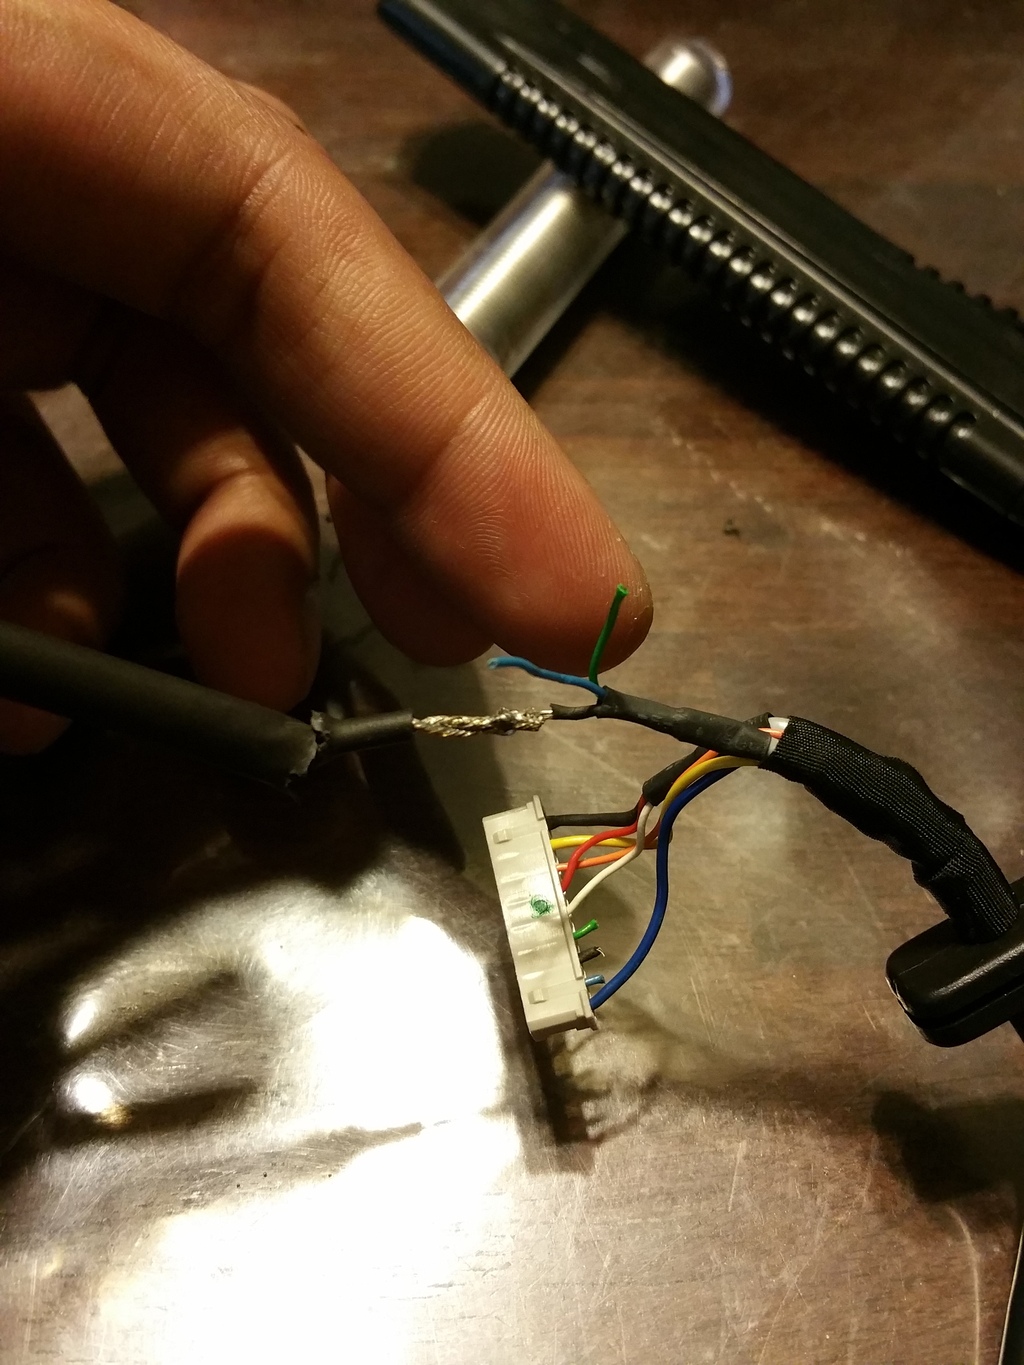
14.1) *THANKS TO JIM ROAL* cut wires blue black and green ....ports 2,3,and 4 starting from the blue wire side! double check this carefully! port 2 is blue(left signal); port 3 is black(ground wire); port 4 is green(right signal)! wires are extremely small so carefully solder and cut them! this is how i cut the smaller wires..
i connected RCA male bare cables to attach them.... you can cut RCA cables too...the exposed wire from the center is the wire that cares the signal and the one from the outer edge is the ground wire...combine the two grounds from each RCA to form one ground and you will also have two signal cables ...remember RED is Right and White is LEFT
carefully solder! i used a multimeter to make sure i had closed loops from the RCA cables and the newly soldered wires
tape up the wires with electrical tape and take a deep breath because now the hard steps are done with!
15) screw the ai-net chip back in place and then solder the screw back in place
16) i ran the RCA wires below the internal components of the CD changer
18)once the cd changer is back together...take it to your car and roughly install it to test the connections (this is where taking your time will pay off...if done correctly you can breath!)
i connected it to my phone and made sure i had a song playing...started the car ...switched to cd mode...*showed that there was not an magazine* but i herd music crisp and clear...moved the fade to left and right to check both channels! and all was well! so i re-racked the CD changer with the nav system and mounted the rack back in place....
19) running the RCA cables to the cab...this was super easy took about 10 mins max...
19.1) with a help from a partner i removed all the internal trunk panels exposing the right side of the trunk (looking at it form the rear) just like rack side...
19.2) feed the wire from inside the cab (right passenger rear because this is far away from the other wires on the left side of the car) its a tight fit so press frimly to ONE RCA connection at a time...then force the second one in as well...go back to the trunk and feel for the cables...and have the person in the cab feed you the cable while you carefully pull from the trunk...
mounted the panels back on with enough wire to reach the CD changer...
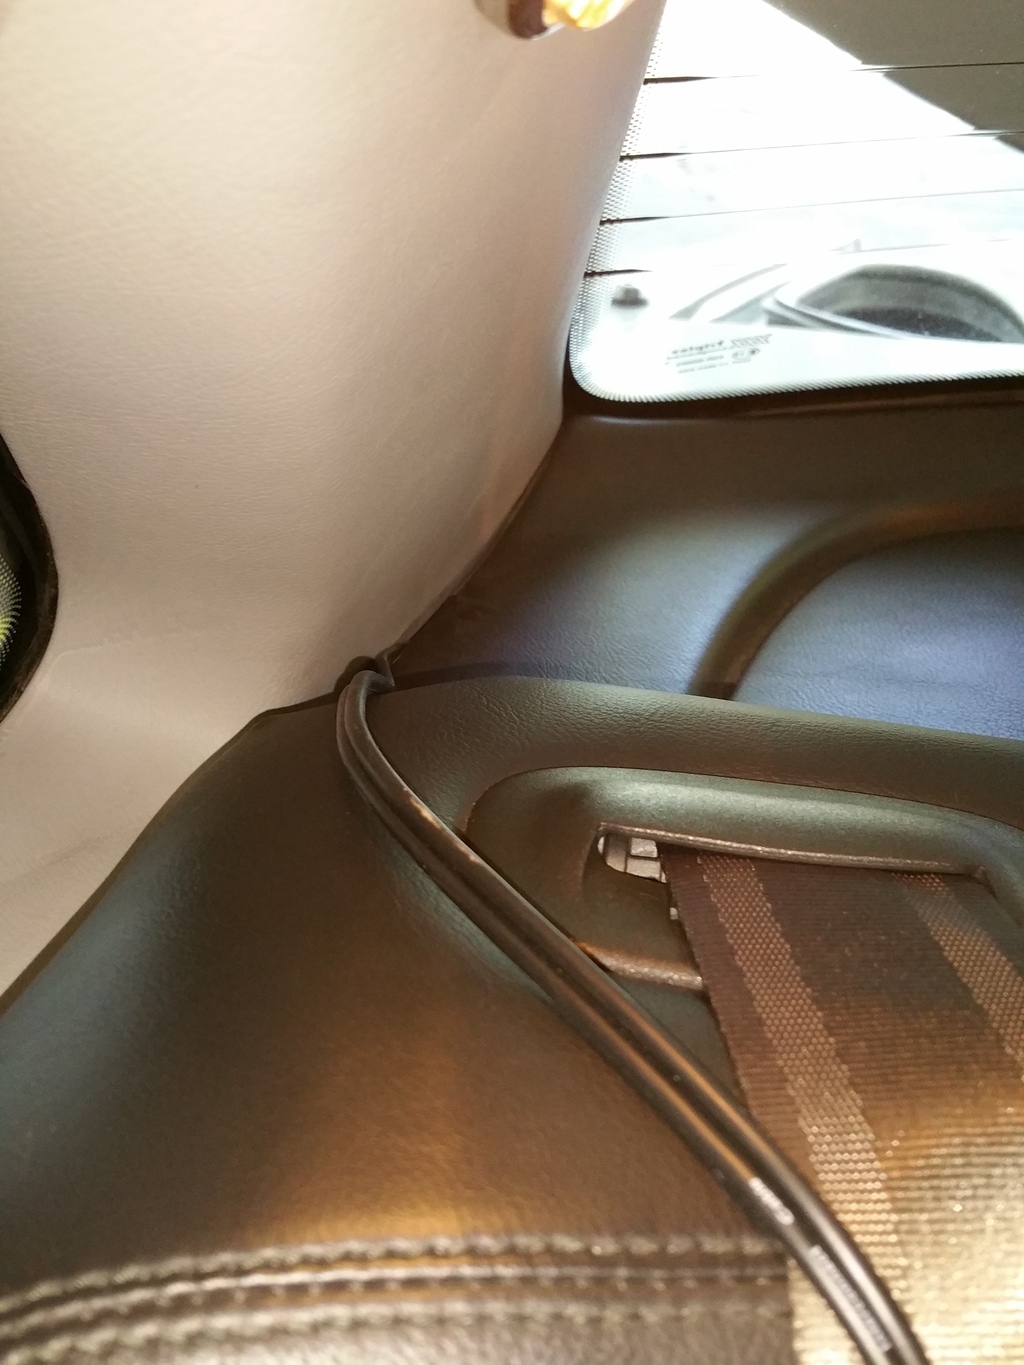
19.3) i tucked the wire to the edge of the seat.. from the right side...
wire was exposed for picture purposes ...
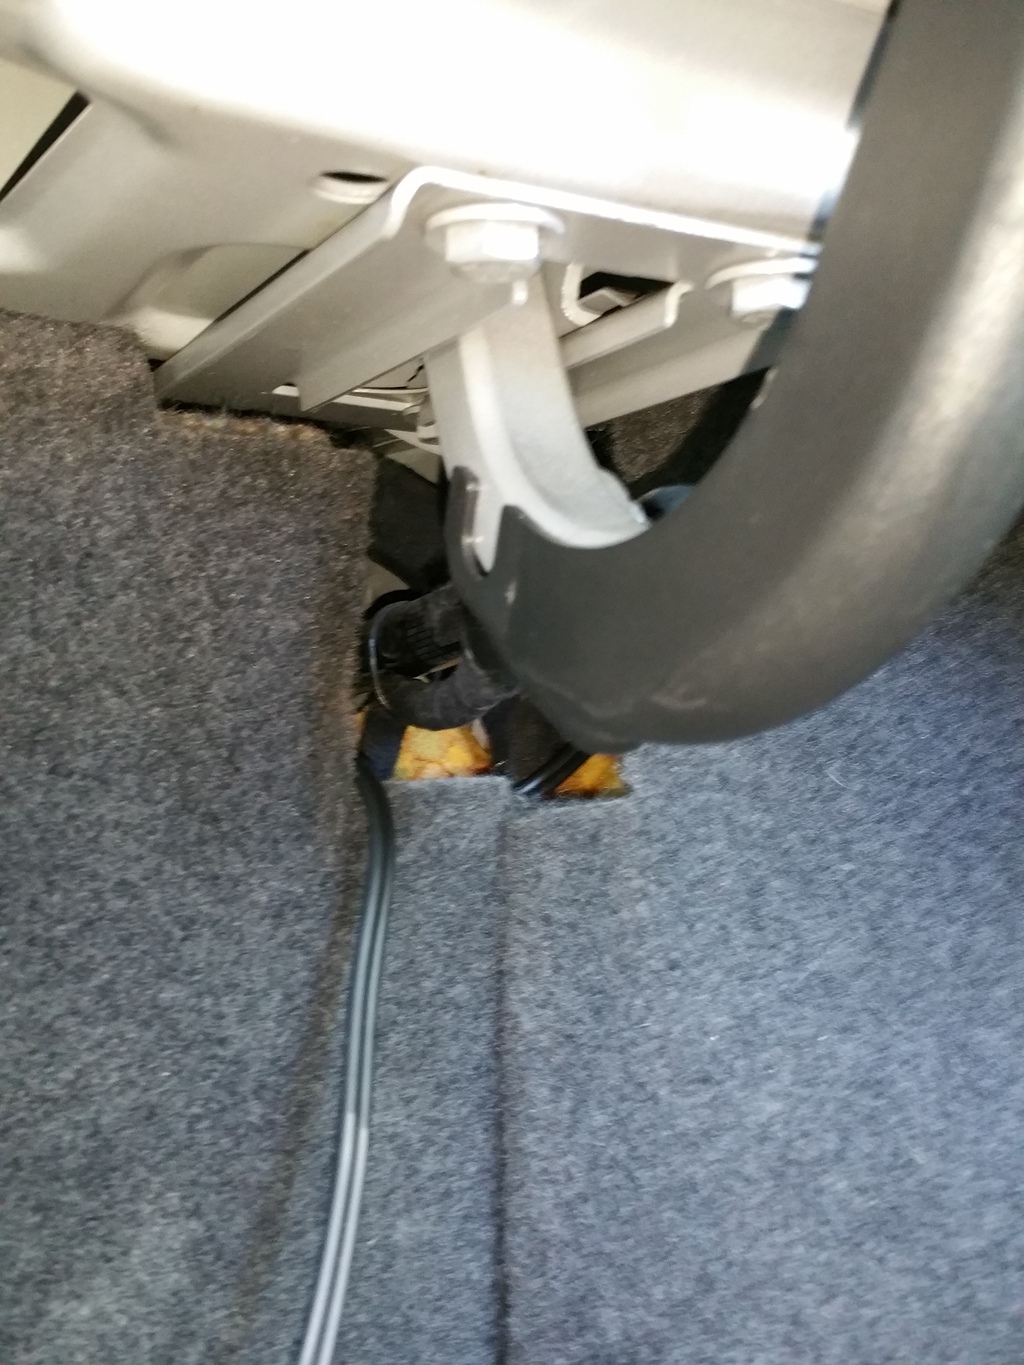
ran it from the edge of the seat...under the seat to the rear center counsel...
i left mine in the center...that way any four passengers including the driver can pass along the wire....we love music in my house and we hate sharing the names of songs...but we love surprising others with our music hahah
i connected the RCA to 3.5mm jack to the very end and left it exposed just incase it goes bad or something it can be easily swapped...i was going to go though the center counsel where the cup holders are..but i decided this was a better idea...easily swappable with less amount of work...
NOW YOU ARE DONE!! ENJOY YOUR NEW AUX IN YOUR JAG! i know its a lot of work but you saved a ton of money doing it yourself and made your care even more loveable!
total job time: 4-5 hours total cost: 60ish dollars bought a few extra things (multimeter, solder iron, electric tape, all the RCA wiring (online)....
side note: oh! and if you guys are wondering about the last few pictures in the trunk with the two RCA cable ends (CD changer and in cabin wire) both being male and thinking why???!
i had two sets of RCA cables ...one was shielded but had male connections on both ends(incorrect for my install)....the other one was not shielded but had female to male connection...which is correct for my install...
i opted to use the shielded set instead because to avoid any interference to the signal that would ruin the sound quality.
for me;its a simple adapter fix...RCA adapter (female to female)...about three dollars online.
but...if your cd changer input is male as well...try to find a RCA cable that is shielded with a female to male end...that is the correct wire to use without an adapter....because the RCA to 3.5mm jack is female as well.
bottom line!: plan out your RCA connections!!!
if your cd changer input is male...and your 3.5mm jack is female as well...you will need a RCA shielded with female to male connection.
if your cd changer input is female...and your 3.5mm jack is female....you will need a RCA shielded with male connections on both ends.
I'm thinking of following this very soon! I may actually go a step further and use a female 1/8" mounted in the console somewhere, to go with a traditional 1/8" - to 1/8" line-in cable that everyone seems to use these days. Looks good, and great write up!
I'm thinking of following this very soon! I may actually go a step further and use a female 1/8" mounted in the console somewhere, to go with a traditional 1/8" - to 1/8" line-in cable that everyone seems to use these days. Looks good, and great write up!
...since your jag is a 2003 you might want to look into it further...to see if your jag uses fiber optic for signal...im not 100% sure but i remember reading a few posts about a few owners finding out that their jag used fiber optic.
and nice a 1/8th set up would be legit! would be a clean install mounted in the dash!
I'm planning on something similar in the XK8 when I get around to it but was toying with the idea of using a male to female extension for the ai-net cable and chopping into that so there would be no need to open the unit and it could be put back to standard easily if needed.
I'm planning on something similar in the XK8 when I get around to it but was toying with the idea of using a male to female extension for the ai-net cable and chopping into that so there would be no need to open the unit and it could be put back to standard easily if needed.
Norri i read somewhere that the ai-net extension does not work if you are planing on completely removing the cd changer out of the circuit ... because the factory unit does a 'handshake' upon awake and if it does not recognize the cd player as 'jaguar' specific it will disable the CD function.
I wasn't going to take it out of circuit, just unplug the lead from the changer and plug in a short extension lead and chop the same cables that you have in the external extension instead of inside the unit and leave the others intact to do the handshaking.
I wasn't going to take it out of circuit, just unplug the lead from the changer and plug in a short extension lead and chop the same cables that you have in the external extension instead of inside the unit and leave the others intact to do the handshaking.
ohh understood! that would save a lot of time vs cutting it open...i could see your method working... i had to open mine anyways because of the stuck cd in the changer...not sure if the error would have stopped cd function. thats why i opened mine.
I have my CD changer out. Instead of physically opening up the changer could I splice the boot open and expose the wires connected to the chip and tap in from there.
Excellent post, very helpful and should work the same for the X300 series M-bus based changers as well once one figured out the correct left & right signal wires.
Glad to see that someone has verified this "splice in" technique works as I was considering the same at one point by just cutting into the CD cable and adding a switch so I could play CDs or an aux.
But while thinking about that I ran into something else that MIGHT work plug-and-play though, and l'm going to test it soon on my M-bus based CD changer even though it is made for Ai-Net as I think it just passes the CD controller signals and injects/switches the audio so it may work in either M-bus or Ai-Net with some adapter cables.
Alpine KCA-801B
Audio Input Adapter for Ai-Net System
I have my CD changer out. Instead of physically opening up the changer could I splice the boot open and expose the wires connected to the chip and tap in from there.
I'm thinking the same thing, couldn't you strip away the shielding on the wire leading out of the CD changer and tap into the same 3 wires? That would reduce job time to 20 minutes and minimize risk of damaging the CD changer.
total job time: 4-5 hours total cost: 60ish dollars bought a few extra things (multimeter, solder iron, electric tape, all the RCA wiring (online)....
side note: oh! and if you guys are wondering about the last few pictures in the trunk with the two RCA cable ends (CD changer and in cabin wire) both being male and thinking why???!
i had two sets of RCA cables ...one was shielded but had male connections on both ends(incorrect for my install)....the other one was not shielded but had female to male connection...which is correct for my install...
i opted to use the shielded set instead because to avoid any interference to the signal that would ruin the sound quality.
for me;its a simple adapter fix...RCA adapter (female to female)...about three dollars online.
but...if your cd changer input is male as well...try to find a RCA cable that is shielded with a female to male end...that is the correct wire to use without an adapter....because the RCA to 3.5mm jack is female as well.
bottom line!: plan out your RCA connections!!!
if your cd changer input is male...and your 3.5mm jack is female as well...you will need a RCA shielded with female to male connection.
if your cd changer input is female...and your 3.5mm jack is female....you will need a RCA shielded with male connections on both ends.
...confuse you yet? loll
Hi Gopi,
I just did the aux install and it works but I ran into a problem. How in the world did you ran the wire through the rear seat into the trunk?. Any pictures? Thanks
Hey i did include pictures about the wiring ill edit some to show where the wire went....first tuck from the interior to the trunk n have someone pull while the other feeds the wire until there is enough to go to the cd changer (i routed mine around the spare tire so it pops out near the cd changer.... also tuck from the opposite end of your gas cap (US car passenger side)
Squeeze through this gap RCA mouth through (easier if you go from interior to trunk)
Tucked it around the seat towards the center counsel
Gopi...thanks for posting pics, yeah I was trying to push through that gap but it seems there wasn't any gap, is it between the c pillar and the deck? Just to confirm bec when I was pushing the wire from there I can't do it but I'll try again.
I simply removed the back seat, its cumbersome, but easy...all of 6 bolts top and bottom cushion. Ran into the trunk from the drivers side below the rear deck there's a chase you can put a coat hanger through. Then bring the wires down to the little deck between the center council and rear seat, pop up that wood insert, it just sits in there, and you'll see a screw to remove it. Pull it up and you can run your wire under the carpet up into under your center council. To get under the center council without yanking it out. Just remove the 3 screws on the hinge of the armrest, then the 2 screws hold down the front attachment clip and the assembly pulls right out and you have lots of room for stuff. You can run your wiring all the way to the stereo through there.
I have my SIRIUS adapter in there (tucks in nice and tight), amp wiring, speaker wiring and both antennas for my GPS and SIRIUS. I have my GPS and SIRIUS antennas on my rear deck....I came down through the child seat adapter holes and ran them forward. I am running a Clarion system back to 2 amps and have both RCA's (2 runs) and 18/4 (2 runs) conductor run through this way all nice and clean.
Highorse, thanks for the info. But I got Gopi's method before I saw yours but your method of layout to the center console would be helpful. But just to ask, did you have to remove the bottom rear seat in running your wire from the trunk?
Highorse, thanks for the info. But I got Gopi's method before I saw yours but your method of layout to the center console would be helpful. But just to ask, did you have to remove the bottom rear seat in running your wire from the trunk?
Yes, I pulled the seat cushion out and just pulled the back cushion forward when ready to feed it to the trunk. If I were home (I travel for my contracting), I'd pull it out and show you. Perhaps when I get back I'll do that, it really doesn't take that long. The hardest part was getting the wire under that little 6" piece of carpet really. It and the sound dampening material are tight to the tunnel.
You may be interested in another thread I made about a hidden antenna... https://www.jaguarforums.com/forum/x...ve-one-103359/ just in case you get an itch later.
Last edited by Norri; 09-30-2016 at 08:01 PM.
Reason: fixed link
 06-17-2015, 01:55 AM


 i know its a lot of work but you saved a ton of money doing it yourself and made your care even more loveable!