My turn at a double-din radio install
#1
 09-28-2017, 10:06 AM

Greetings all. I have finally decided to upgrade my head unit so I figured I would share my progress with you all here.
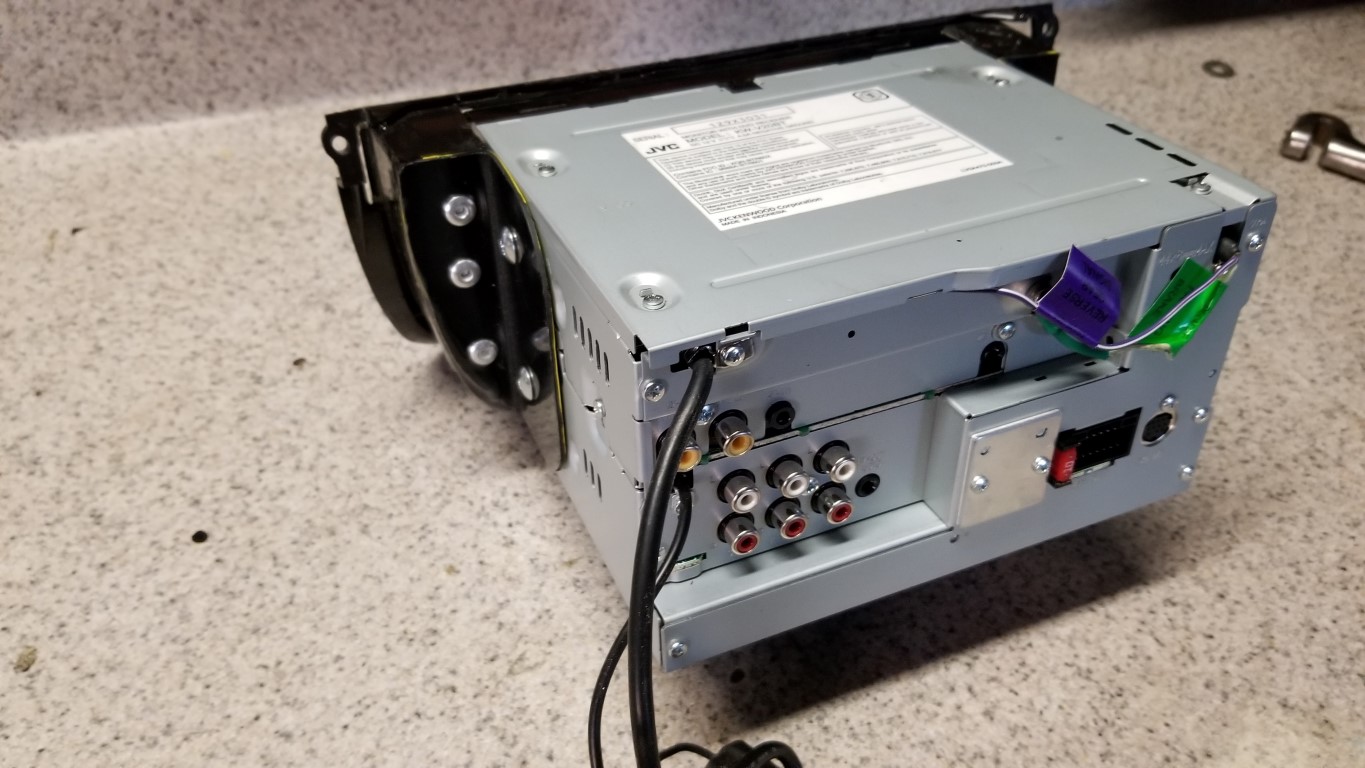
I started with a JVC double-din radio, model KW-V20BT, which fit all of my needs. I have the adapter for steering wheel controls and a backup camera to add as well.

And then set to disassembling it


My goal here was to remove all of the lettering, logos, and make it look a bit more stock

After sanding and painting with a light texture black, I reassembled the unit

I ordered a replacement non-working factory radio and surround for some parts. I disassembled that for the face to make trim pieces for the gap

and modified the surround

Then modified the old radio face to fit around the radio

New radio sitting in the surround

Modified face plate, which had to be cut down even further as gap filler

Next up was filling in the holes, modifying the filler pieces a bit further and refining.


a bit of primer and test fitting


That's where it stands for now, the rough build / mockup is done. Next I have to make a support structure for the radio, finishing the filler pieces and then painting them. After that the bench work is done and I will be moving onto the install.
I started with a JVC double-din radio, model KW-V20BT, which fit all of my needs. I have the adapter for steering wheel controls and a backup camera to add as well.
And then set to disassembling it
My goal here was to remove all of the lettering, logos, and make it look a bit more stock
After sanding and painting with a light texture black, I reassembled the unit
I ordered a replacement non-working factory radio and surround for some parts. I disassembled that for the face to make trim pieces for the gap
and modified the surround
Then modified the old radio face to fit around the radio
New radio sitting in the surround
Modified face plate, which had to be cut down even further as gap filler
Next up was filling in the holes, modifying the filler pieces a bit further and refining.
a bit of primer and test fitting
That's where it stands for now, the rough build / mockup is done. Next I have to make a support structure for the radio, finishing the filler pieces and then painting them. After that the bench work is done and I will be moving onto the install.
The following 7 users liked this post by Probesport:
Count Iblis (09-28-2017),
deancantrell (09-28-2017),
ericjansen (09-28-2017),
KidRock'n (09-28-2017),
Norri (09-28-2017),
and 2 others liked this post.
#2
09-28-2017, 02:13 PM
Veteran Member
 Kudos Ken!
#3
09-28-2017, 02:43 PM
Thanks Sean.
Yeah I will have some work to do in the tunnel, I will be making some brackets and doing a bit of trimming.
I will be painting the side fillers with the textured black I used on the radio, if I think it stands out, I'll just paint the surrounds and HVAC frame as well. This is still in the very rough stage, lots of filling, sanding, and finishing to be done before it get's near the car.
I haven't looked yet, but has anyone been able to come up with a aftermarket harness to plug into the stock wiring before I get to splicing?
Last edited by Probesport; 09-28-2017 at 02:46 PM.
#4
09-28-2017, 05:03 PM
Nice work!
Looks like there's a bit of a void in the bottom of the headunit body. If you cut the bottom off, or even just make a hole, and you might find it clears the airbag sensor without having to relocate it.
You could always look to lose the cd player too, to make the brains of the unit even smaller?
Looks like there's a bit of a void in the bottom of the headunit body. If you cut the bottom off, or even just make a hole, and you might find it clears the airbag sensor without having to relocate it.
You could always look to lose the cd player too, to make the brains of the unit even smaller?
#7
09-29-2017, 10:10 PM
Veteran Member
Trending Topics
#8
10-02-2017, 09:09 AM
Nice work!
Looks like there's a bit of a void in the bottom of the headunit body. If you cut the bottom off, or even just make a hole, and you might find it clears the airbag sensor without having to relocate it.
You could always look to lose the cd player too, to make the brains of the unit even smaller?
Looks like there's a bit of a void in the bottom of the headunit body. If you cut the bottom off, or even just make a hole, and you might find it clears the airbag sensor without having to relocate it.
You could always look to lose the cd player too, to make the brains of the unit even smaller?
Ok on with the show. I created the mounting tabs out of Gravoply (a fantastic versatile plastic).

They will be attached with epoxy and rivets to the stock radio surround

I mocked them in place using cleco's

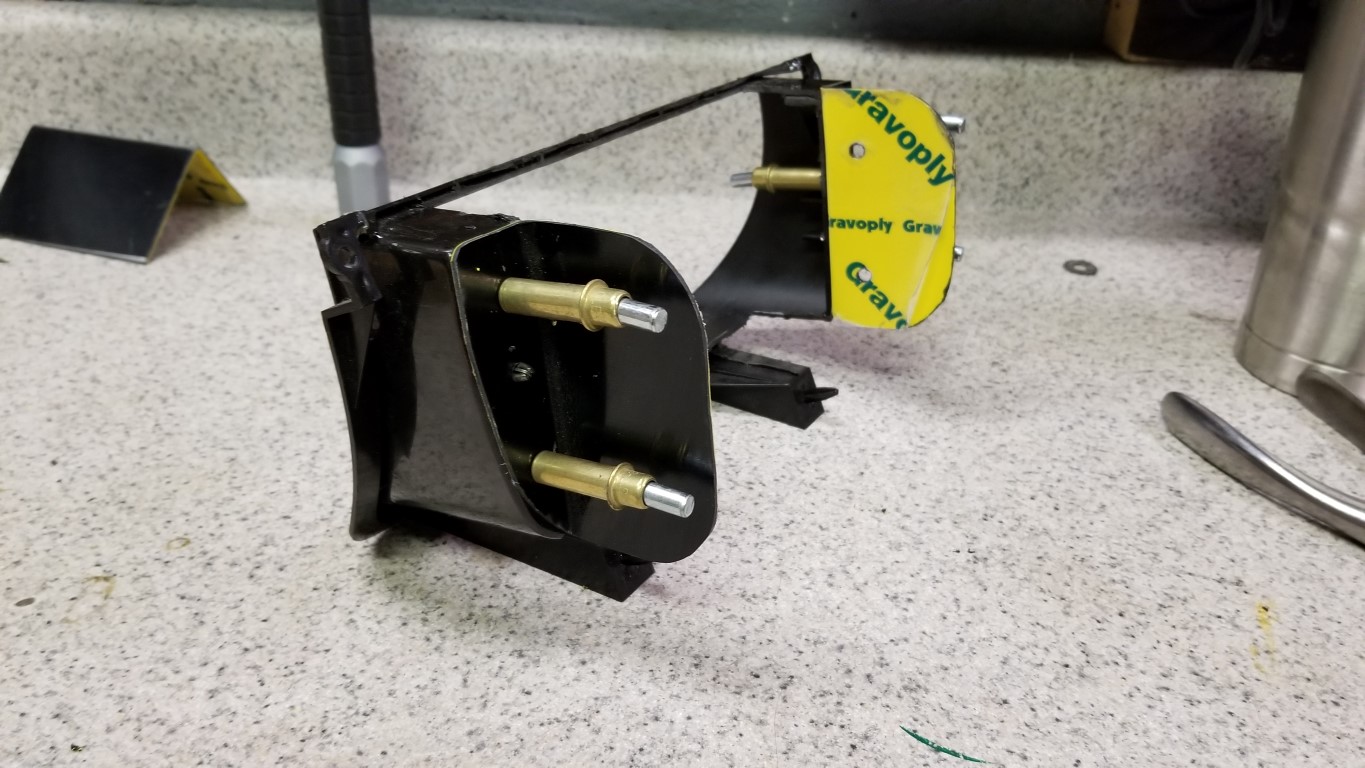
After test fitting the radio, I scuffed up the mating surfaces, put a layer of epoxy on and then installed the rivets


Now it's just being left to cure, however the mounts are already rock solid and this may be overkill but it supports the radio well. I will be making a lower support bracket to mount in the car as well, to catch the rear once I get to that point.
#9
10-04-2017, 12:14 PM
Minor update, radio is officially mounted now.


I have started to clean up the side trim pieces, I am going to match the lines of the radio and it's style to the filler pieces so it has a more transitional appearance versus just flat fillers.


My plan is to have the entire radio portion done this week and then move onto wiring and mounting.
I have started to clean up the side trim pieces, I am going to match the lines of the radio and it's style to the filler pieces so it has a more transitional appearance versus just flat fillers.
My plan is to have the entire radio portion done this week and then move onto wiring and mounting.
#10
10-04-2017, 03:48 PM
Loving the progress 
Have you done a test fit to see if it clears the metal bracket between the original radio and the AC controls, or will you be looking to modify that if it doesn't fit?
The reason I ask is that your unit looks quite 'level', and I'm wondering if it should be angled down a bit further?
Have you done a test fit to see if it clears the metal bracket between the original radio and the AC controls, or will you be looking to modify that if it doesn't fit?
The reason I ask is that your unit looks quite 'level', and I'm wondering if it should be angled down a bit further?
Last edited by grandell; 10-04-2017 at 03:51 PM.
#11
10-05-2017, 02:55 AM
Veteran Member
Loving the progress
Have you done a test fit to see if it clears the metal bracket between the original radio and the AC controls, or will you be looking to modify that if it doesn't fit?
The reason I ask is that your unit looks quite 'level', and I'm wondering if it should be angled down a bit further?
Have you done a test fit to see if it clears the metal bracket between the original radio and the AC controls, or will you be looking to modify that if it doesn't fit?
The reason I ask is that your unit looks quite 'level', and I'm wondering if it should be angled down a bit further?
Cheers,
#12
10-05-2017, 03:36 AM
Veteran Member
I always thought that these 2-Din monsters did not fit in the existing X308 opening without structural cuts and/or tunnel major modifications. Although this radio is only a 6.1" display it still appears to be a similar overall volume/mass size unit as the 7" display double din units. I'm also surprised that the radio sits vertical standing up and it actually fits without inclining it at an angle. It must be a smaller 2-din unit compared to the popular standard 7" display double din units.
The one I installed on my XJR is a single din body unit with a 2-din face/7" display that fits extremely tight and at quite an angle, which is fine because it places it straight to my face. But, just looking at the picture is impossible to imagine a full double din body behind that 7" display fitting in that tight tunnel. No way. But my single din body fits in there in a similar manner as the OEM single din radio body fits. It works fine and the install was a cinch with only some minor trimming around the opening.
Cheers,
#14
10-09-2017, 07:17 AM
Thanks for the replies. The radio is not going to clear, no double din with a CD depth will clear. There are a few full digital ones that will, like the Parrot head unit, but I want the car to clear any double din in the future so I will be doing some cutting and welding to make everything mount the way I want it to. This is a standard 2 din size, there has been a bit of creative modification done the surround to make it appear to fit. There is a reason that I had to do all of that trimming on the factory radio surround.
Note that the radio I chose has a face that is slightly inset on the sides. The face actually butts up to the existing radio trim and a portion of it actually sits flush or behind the trim giving the illusion that the entire radio has come through. You can see the radio face and how it steps inward in the first 2 pics.
I am working on making it look like its supposed to be there first, then I will modify the car to make it fit. I don't really care for the heavily angled or protruding styles that I've seen, so just making my own substructure has always been part of the plan. I'm a car builder by nature so the modification to the tunnel area is the easiest part of the whole ordeal for me. I will be removing the bulk of the existing structure behind the radio and then fabricate a new one.
Last edited by Probesport; 10-09-2017 at 07:25 AM.
The following users liked this post:
grandell (10-09-2017)
#16
10-09-2017, 10:04 PM
Veteran Member
#17
10-10-2017, 10:00 AM