
New XJR Owner
#21
 12-11-2013, 02:18 PM


Veteran Member
#23
12-12-2013, 10:33 AM
Senior Member
3M makes a carbon fiber wrap that you can cover your existing wood with. One of the forum members has done that on his XJR, and it looks great! It's not custom fit, though, so you'll have to do some fitting and cutting...

#25
12-29-2013, 06:42 PM
I haven't had much chance to play, done more planning than anything, I now know how I want the front bumper, wings/fenders to look, the side sill covers I have sussed, still thinking about the rear.......
I have decided to use F Type wing vents, they have a good shape to them that picks up the swage line nicely, I need to space the wheels out a little more so I can get enough clearance at the back on full lock, left hand down is not a problem but right hand is a bit too close for my liking
I will run a LED string behind the vents to act as my side repeater, once I get the spacing right on the wheel I can make the arch extenders to fit and give me the right clearances, I will then mould the whole wing
The following users liked this post:
XJRChad (12-30-2013)
#27
02-24-2014, 02:37 PM
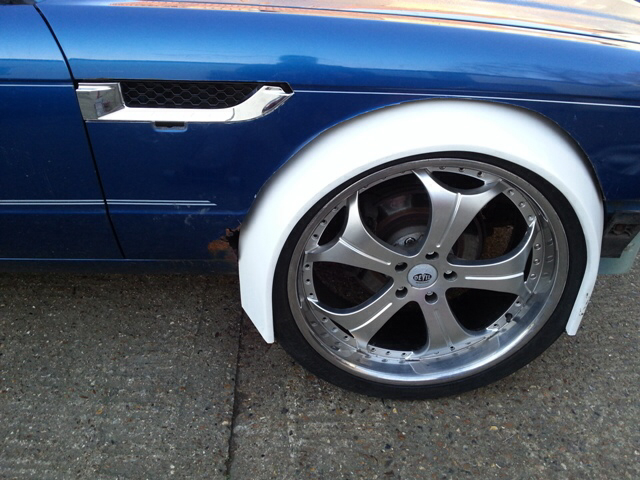
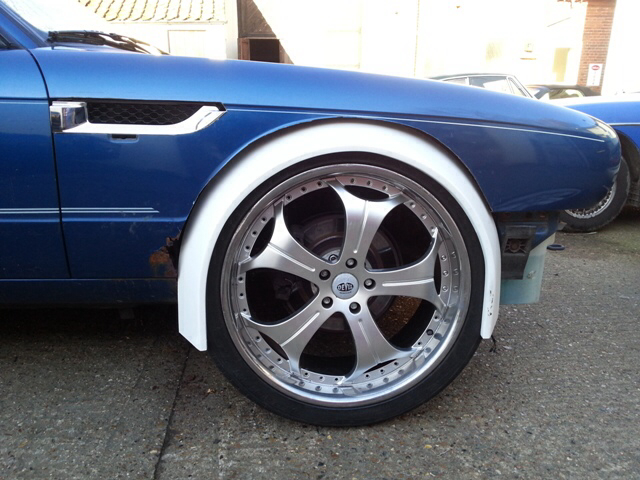
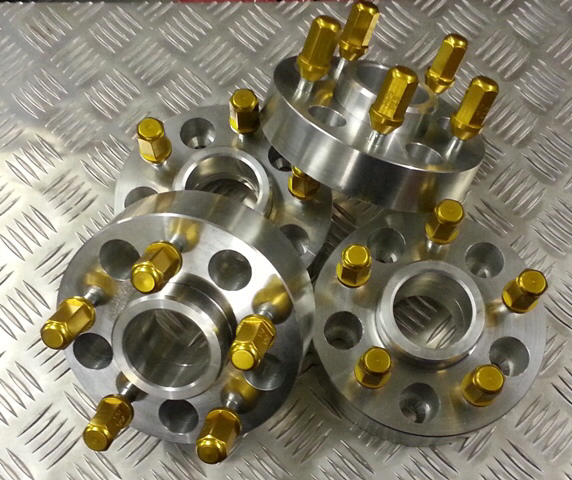
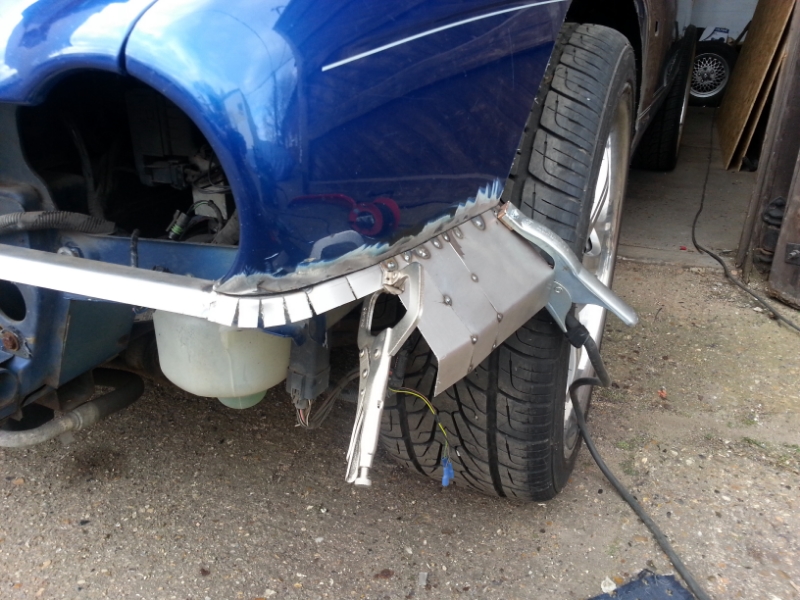
To help the excessive size of the wheels fit meant I had to space them out, this also gives me a good idea on how I want the arches to be and gives me better clearance to the chassis. Moving the steering from lock to lock I can now determine exactly what metal needs to be removed or reshaped, so I came up with these bad boys with titanium wheel nuts 
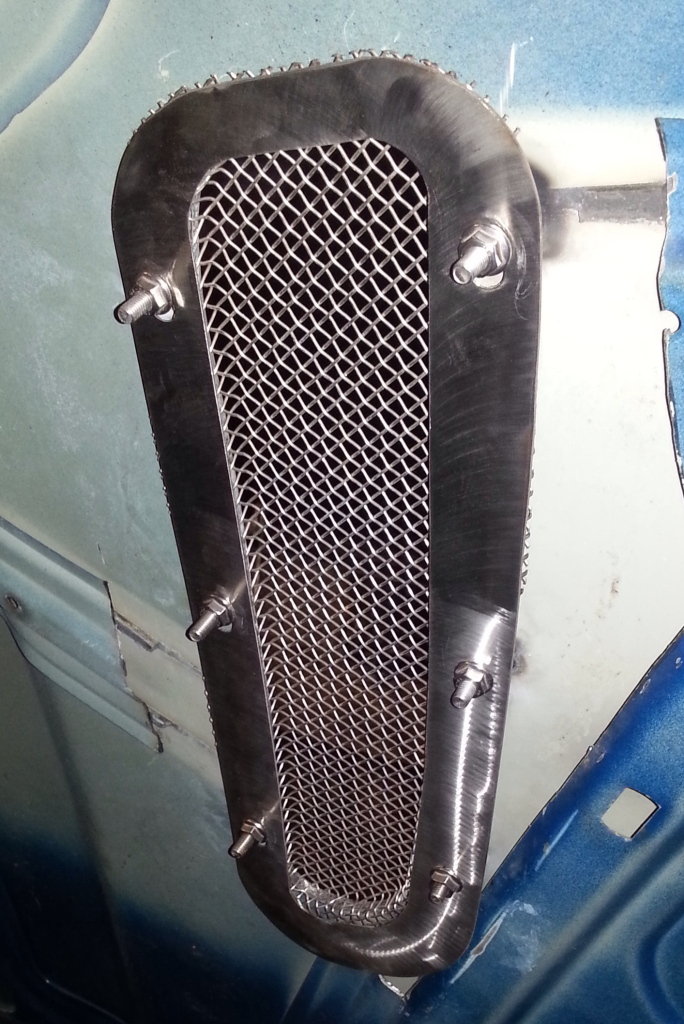
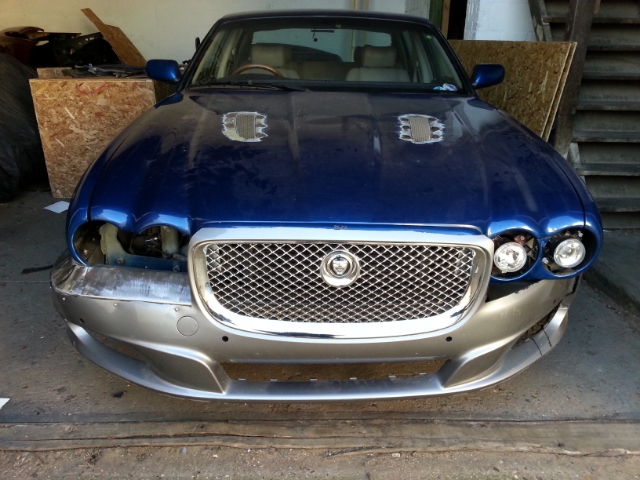
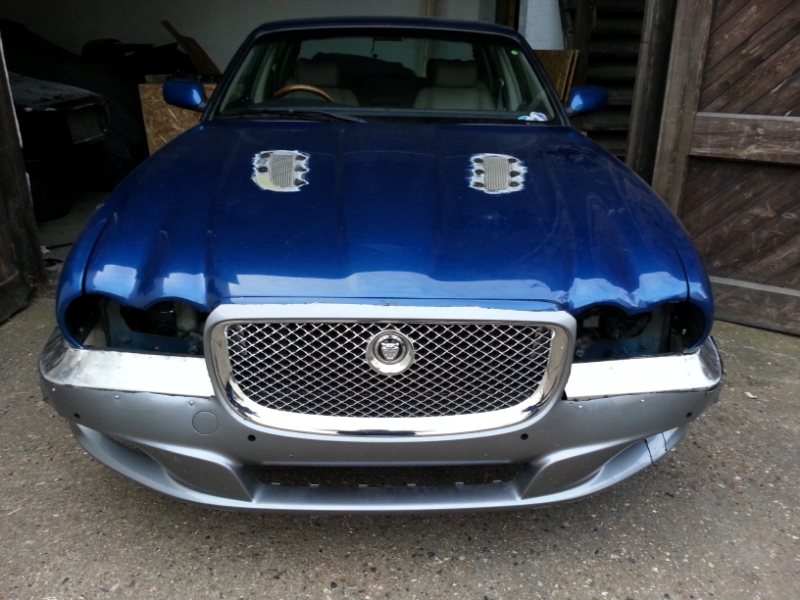
I also cut some bonnet/hood vents, they are not in the position I liked but in the position that makes them more functional. They are Aston DB9 vents, I had the tooling made from another job so thought I might as well use them, I would of liked them much further back but all this would of done is create a water feature on the engine/bulkhead covers, where I have put them is above the manifolds so in theory the low pressure going over the bonnet should help draw the heat out...... So basically I cut a hole

This I then peened the metal over to put the strength back, I did have to cut some of the reinforcing away at the back but nothing to worry about I will do something with this before I paint, I welded in some bolts which hold the vents in place from underneath with a strengthening plate all made in stainless
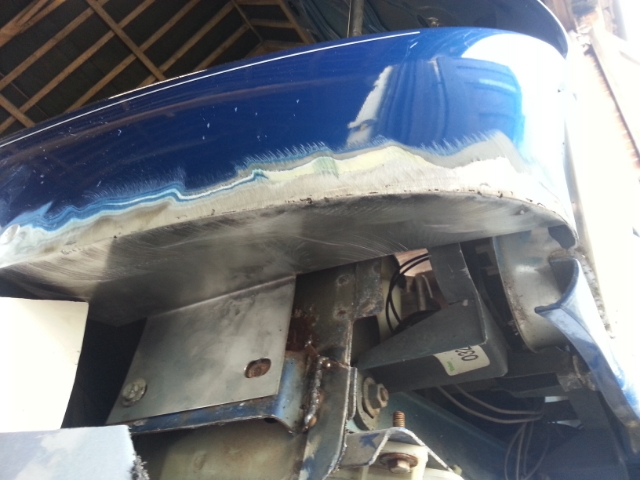
I have also started reshaping the bumper, I have trimmed it back to expose the lights and the top where the hood meets, to get this shape I cut the top off my old grille and will bond this to the new bumper and blend. I also wanted projector style headlights so I can fit HIDs, however the later XJ items are mahoosive money and like hens teeth secondhand so I have come up with my own idea, they fit to the original bracket and have adjusters, they are much smaller so i have room to fit halo rings, one of these will be amber/orange to act as my indicator, the other will be a DRL, I will machine some bezels up out of brass and get them chrome plated
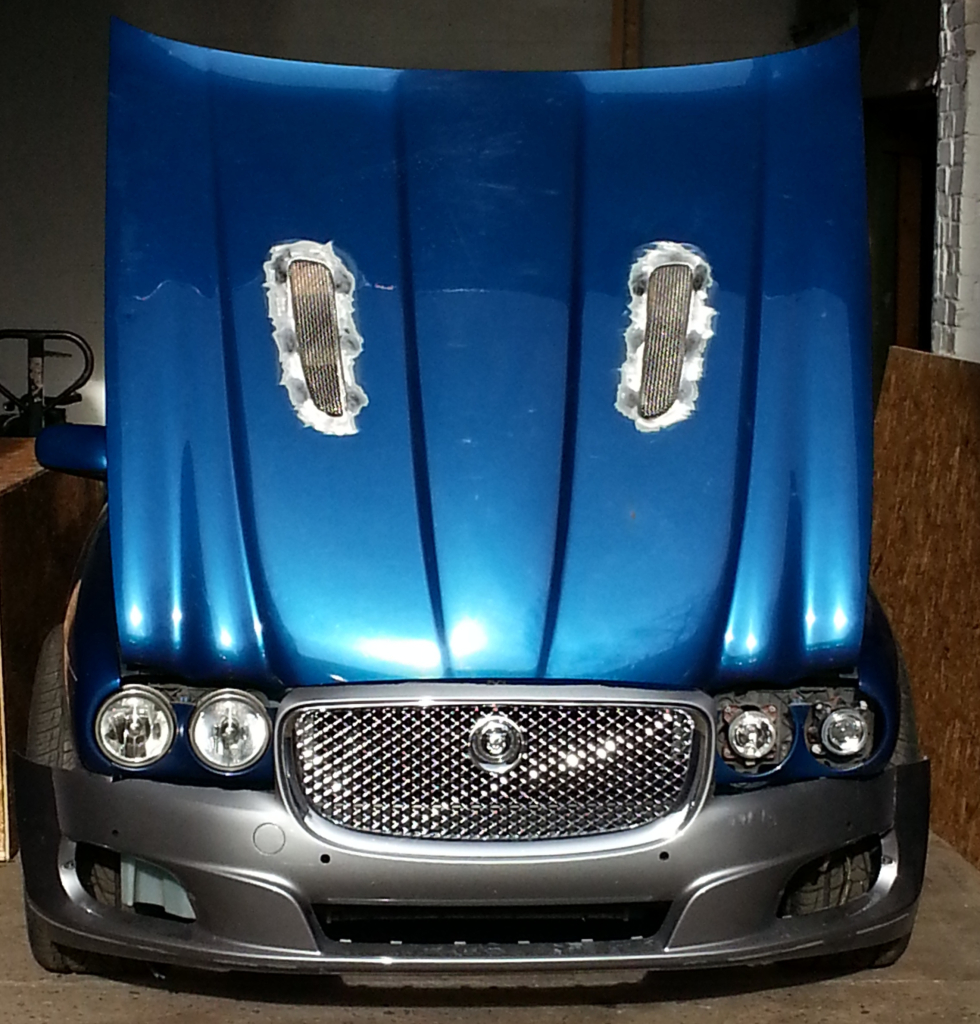
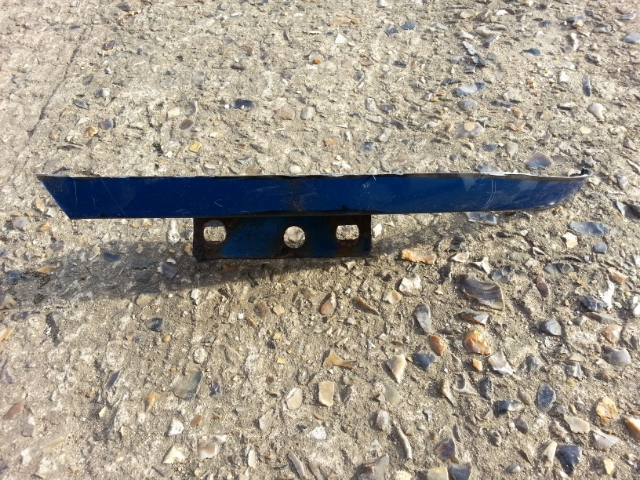
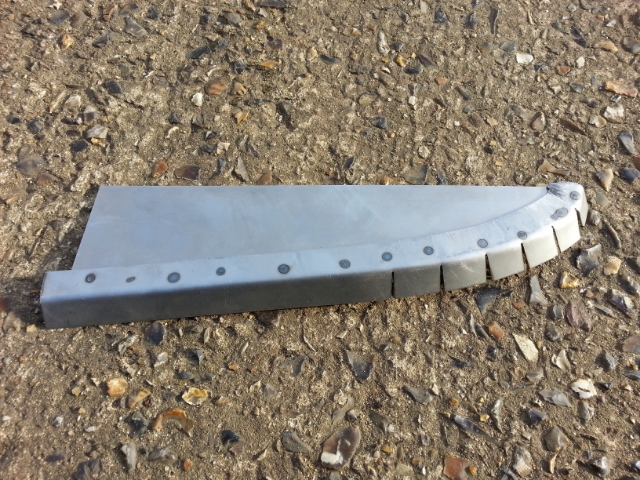
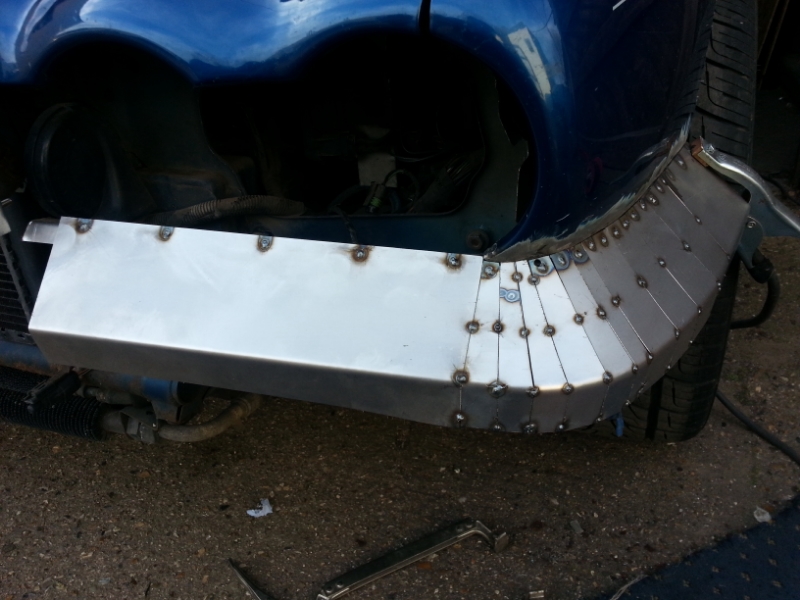
I have started making the side skirts as well, when I remove the sills to add the 4 x 2 box section these skirts will act as covers, I am still unsure what to do for a rear bumper, I will come up with something
I also cut some bonnet/hood vents, they are not in the position I liked but in the position that makes them more functional. They are Aston DB9 vents, I had the tooling made from another job so thought I might as well use them, I would of liked them much further back but all this would of done is create a water feature on the engine/bulkhead covers, where I have put them is above the manifolds so in theory the low pressure going over the bonnet should help draw the heat out...... So basically I cut a hole
This I then peened the metal over to put the strength back, I did have to cut some of the reinforcing away at the back but nothing to worry about I will do something with this before I paint, I welded in some bolts which hold the vents in place from underneath with a strengthening plate all made in stainless
I have also started reshaping the bumper, I have trimmed it back to expose the lights and the top where the hood meets, to get this shape I cut the top off my old grille and will bond this to the new bumper and blend. I also wanted projector style headlights so I can fit HIDs, however the later XJ items are mahoosive money and like hens teeth secondhand so I have come up with my own idea, they fit to the original bracket and have adjusters, they are much smaller so i have room to fit halo rings, one of these will be amber/orange to act as my indicator, the other will be a DRL, I will machine some bezels up out of brass and get them chrome plated
I have started making the side skirts as well, when I remove the sills to add the 4 x 2 box section these skirts will act as covers, I am still unsure what to do for a rear bumper, I will come up with something
#33
02-25-2014, 02:07 PM
Had a quick look at the brakes, they are just standard items with 320mm discs, going to fit some Brembos but with a twist, due to the enormity of the wheels (I keep going on about the size of these wheels but they make 20s look small!) I want bigger discs to fill the void looking inside the wheel, but then again I do not want to pay silly money either.
So I have decided to use Alcon discs from the XKRS and Portfolio (X150), these are a 400mm disc and 36mm thick, I can get a pair for just over �100 ($150) these mean not only do I have to make a bracket for the extra disc size, space out the caliper for the extra disc thickness and space the rotor out from the hub and redrill the PCD, then everything should fit......... Sounds easy don't it
So I have decided to use Alcon discs from the XKRS and Portfolio (X150), these are a 400mm disc and 36mm thick, I can get a pair for just over �100 ($150) these mean not only do I have to make a bracket for the extra disc size, space out the caliper for the extra disc thickness and space the rotor out from the hub and redrill the PCD, then everything should fit......... Sounds easy don't it
#34
03-15-2014, 05:04 PM
I wanted to make a start on the front bumper which meant getting a rough position of the wheel arch, I have also been looking at X350 pics, I wanted/needed to do something similar just obviously more exaggerated. The surrounds around the headlights on the X350 are part of the bumper and angle slightly upwards towards the lights from the bumper edge. I also noticed the wing/fender joins the bumper higher up the wing, this meant the bottom of the wing needs to be trimmed and remade with a longer bracket to reattach to the body....
So I made a cut
I then remade this section and welded it back on, if you look towards the lights you can see the light surrounds and how much it is altered by
The next part was to make what will be the top of the bumper edge, this was then bolted to the new section of the wing
I then extended the section that went under the lights, from this frame work I started adding sections of steel creating and angled shape to mimic the shape of the wheel arch extension (I did have pics as I was doing this but my phone had a brain fart and I lost a few)
I then attacked it with hammers and an angle grinder

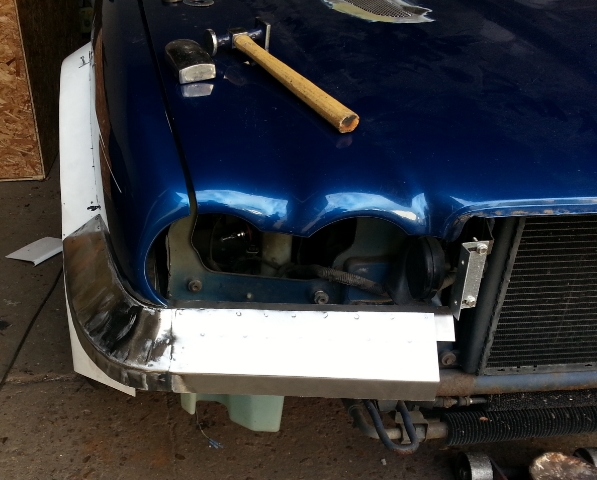
I then refitted the bumper, trimmed it a bit more, put a few slits in to allow me to bend and shape it in places it did not want to go....
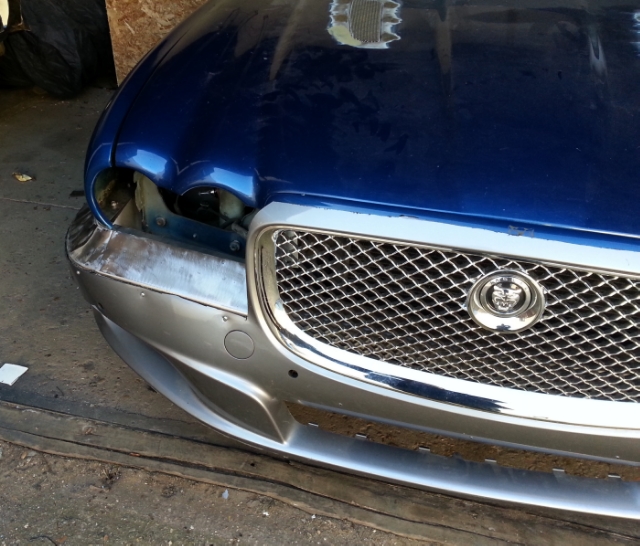
I am not happy with the aperture on the lower right (or left as you are staring at it), I will probably cut this and make it smaller, I don't like the way it goes around the bend, looks like it is drooping. Originally I was hoping to keep this aperture as is so I could use the Jaguar grilles/chrome bar, life is full of tragedies and this ain't one!
I have the other side to do and match, I will have to form around the lights, these will be cut and shaped, I will roll some 6" tube and cut the sections I need.
I reckon it will look pretty good once done
So I made a cut
I then remade this section and welded it back on, if you look towards the lights you can see the light surrounds and how much it is altered by
The next part was to make what will be the top of the bumper edge, this was then bolted to the new section of the wing
I then extended the section that went under the lights, from this frame work I started adding sections of steel creating and angled shape to mimic the shape of the wheel arch extension (I did have pics as I was doing this but my phone had a brain fart and I lost a few)
I then attacked it with hammers and an angle grinder
I then refitted the bumper, trimmed it a bit more, put a few slits in to allow me to bend and shape it in places it did not want to go....
I am not happy with the aperture on the lower right (or left as you are staring at it), I will probably cut this and make it smaller, I don't like the way it goes around the bend, looks like it is drooping. Originally I was hoping to keep this aperture as is so I could use the Jaguar grilles/chrome bar, life is full of tragedies and this ain't one!
I have the other side to do and match, I will have to form around the lights, these will be cut and shaped, I will roll some 6" tube and cut the sections I need.
I reckon it will look pretty good once done
Last edited by XKRacer; 03-15-2014 at 05:08 PM.
#37
03-17-2014, 04:26 PM

Veteran Member
#38
03-17-2014, 04:30 PM


Join Date: Feb 2014
Location: Crossroads of America
Posts: 19,614
Received 13,302 Likes
on
6,578 Posts
#39
03-17-2014, 04:34 PM
#40
03-17-2014, 08:10 PM
Veteran Member
Aw, come on now. I am impressed by your obvious craftsmanship skills, but I really do not like the new jag styling as much as I like the "natural X-308"! I will admit the front end of my XFR is the strongest design element- the rest of the car looks like a bunch of the others. That said, there is a variant of the Ford Focus and one of the Hyundais that look like it from the front!