Radio Bulb Replacement?
#1
#4
#5
Maybe they're the same as the ones used in the J-gate illumination then. Something like these? 2 X Chicago Miniature Lighting-8097-Lamp, Incandescent, Bi Pin, 12V | eBay
#7
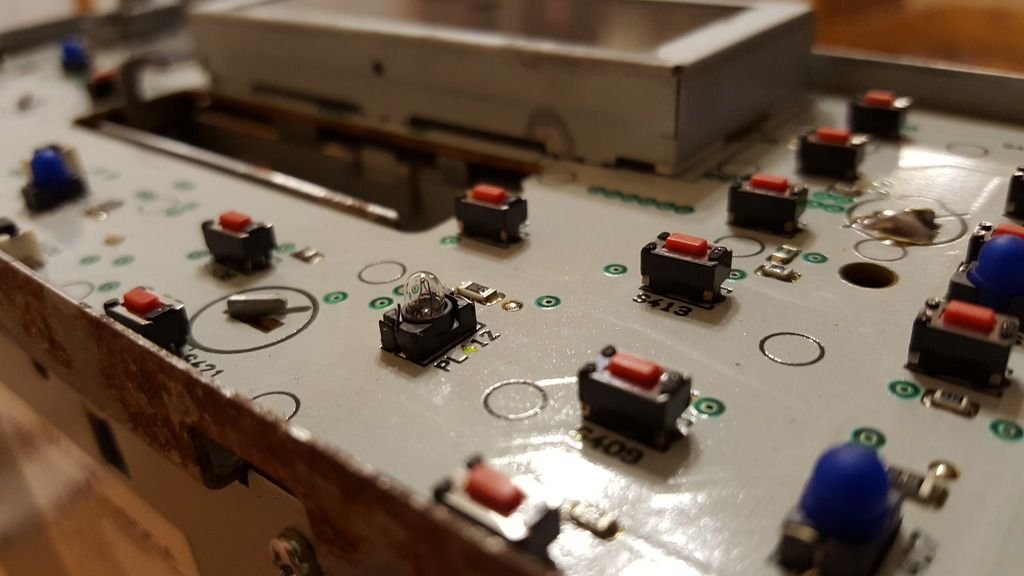
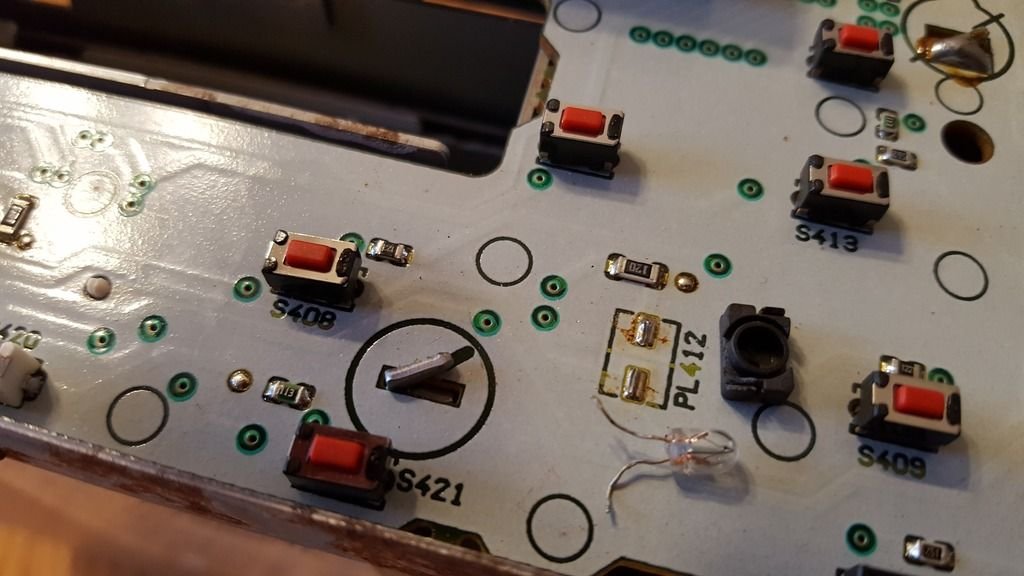
That does not look like a good time. And surface mount as well, bleh... Maybe it's a T1 or T1 1/4 or whatever size bulb with loose leads, with the leads just wrapped around that black bulb holder? If it's SMD, there would need to be some way to "untwist" the base in order to gain access to the solder point
Trending Topics
#9
#10
Thanks for the info and pictures. I'm surprised this hasn't come up, as I read all of this excitement of LED'ing everything..but then when it doesn't match the radio, it looks sort of half-'you-know-what'... i'm might poke around and see if I can find something.
Either way, this LED project seems like quite a bit of work to get around buying Jag bulbs with little blue covers on them for $10 a pop when they die.
Pete
Either way, this LED project seems like quite a bit of work to get around buying Jag bulbs with little blue covers on them for $10 a pop when they die.
Pete
#11
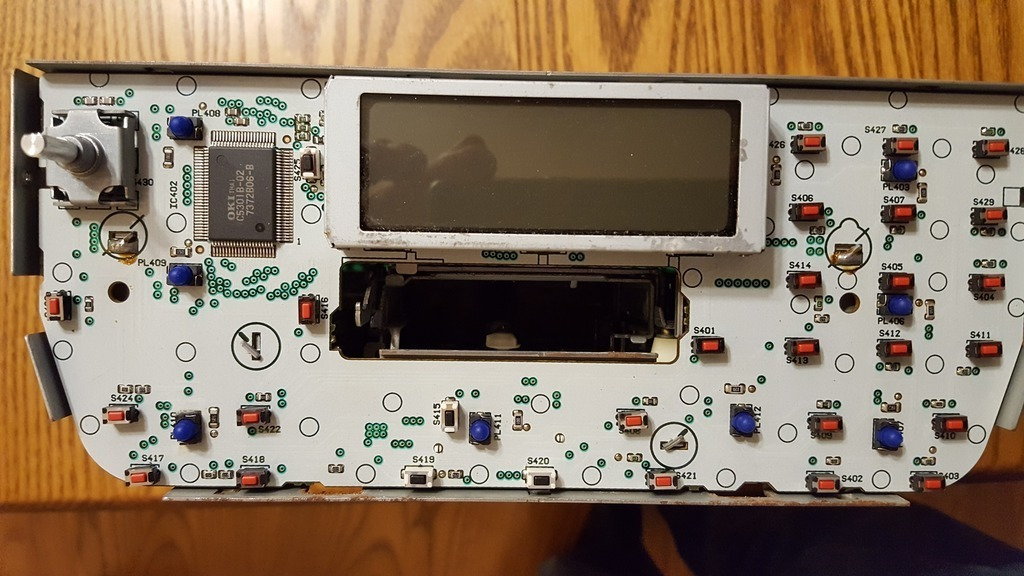
Quick update - I ended up replacing all the radio bulbs with the bulbs from T3 LED's. Basically you can get these a dime a dozen on ebay, and had a ton of green ones left over from a prior purchase, so I thought I'd give it a shot. Basically unwound the LEDs from their base, and then mounted the legs on the surface mount pads, as low to the circuit board as possible, but leaving just a slight gap.
This isn't for the feint of heart or for folks that don't have pretty good solder skills. To get the original surface mount bulbs off, I basically heated up one pad and wiggled the bulb base with pliers, and that was usually enough to free it from both sides of the surface mount pad. Most survived, a couple did not.
I then hooked up the radio and measured the voltage on the pads. Typically the left-right mounted bulbs had the positive on the left pad, negative on the right pad. For the top/bottom mounted bulbs, the positive was on the top pad, negative on the bottom. To verify, you can get one bulb wired up, and plug the radio into the car and validate you get one bulb lit. Then, you can use a DC power supply and touch the leads to the pads when the radio is out of the car, just to 'check your work' along the way, so you dont wire everything backwards or miss one.
The backlight for the radio display is a bit tricky. You have to remove the screws (believe there are two side ones and then two right by the cassette tray when you take the top cover off the radio. Then, you have to desolder (i used a solder sucker device) the four tabs on the front of the radio circuit board, and bend the tabs back, so the circuit board can be removed from the metal securing tray. Then... desolder the tabs that hold the metal frame around the radio display screen, bend those back, and remove the plastic housing.
This will expose a fairly delicate display screen glass (don't touch it or mess with it, because you don't want to get done with this and see fingerprints on it. Underneath the 'glass' and ribbon cable, is a big white block that comes right out when the glass is moved out of the way. Underneath the block, on the sides, is four more of those surface mount bulbs, one in each corner, to give the radio the backlit display. I used the same bulbs, replacing it the same way, and it worked great. Only tip on this part, is that I believe the top two bulbs are in reverse polarity (the positive is on the bottom pad, not the top). You should verify this before you wrap up, just so you don't get all of this stuff together and find out LEDs aren't coming on.
Some notes:
It seems like the radio lights are really getting a max of around 6-7volts DC, not 12v...less when they get dimmed. My LEDs from ebay seemed fine with that, so it seemed to work ok.
The dimming works, but as you might have noticed if you've done other LED upgrades to any internal bulbs, the LEDs are much brighter than your normal incandescent bulbs. Thus, before you go haywire with an internal LED project, you might really want to rethink this whole extravaganza. It's a bit bright when it's done, and you can dim it, but then all your non-LED stuff is almost too dark, to get a suitable dimming level on the radio/AC countrols/etc.
I replaced the bulbs the same way on the sport mode and cruise control switch, J gate, and AC bulbs. The only notes to keep in mind is that while green bulbs work fine for most, the blue&red AC hot/cold buttons really need a white bulb behind it, otherwise it comes out looking dark blue and dark nothing. Putting white in makes it look normal. On the J gate, replacing the two bulbs with LEDs works fine, but they tend to drown out the RED in the gear selector...starts to look more green/red combo, instead of solid red, except when it's in park.
Most of all, the 'use the T3 bulb LEDs' were handy for me, and matched what I used in the climate control sections, but I'm not sure if it's really the ideal way to go for the normal DIY project. The problem is the leads on the bottom of the T3 LED circuitboards are very fragile. I'm not sure what robot put these on originally, but if you don't do a good job soldering, and you heat the lead up for too long, they come off the back of the LED, and then you have to be really good at soldering, to get it back on track. There's probably a better surface mount LED housing that's more appropriate.
I'll try to post a copule pics of the finished project. Overall I think it's ok... will probably need to boost the dash bulbs a bit, just to compensate for the dimming difference, but I like it better now, compared to when it had this dim AC control look. The radio display was always dim to me as well...and now it looks much easier to read.
Pete
The following users liked this post:
paulZ (12-16-2018)


